
Features of the Recording App
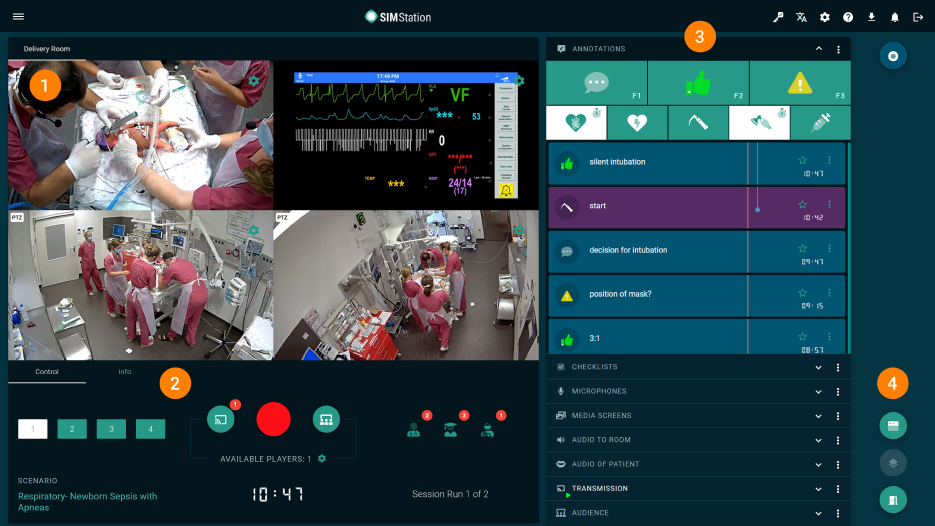
- Video Pane
- Control Pane
- Tool Pane
- App Menu Pane
1. Video Pane
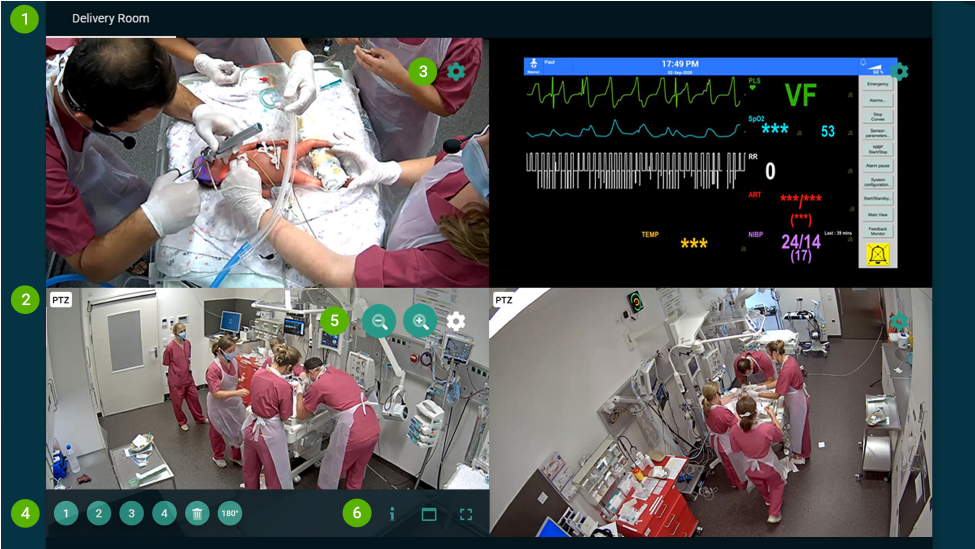
- Room Tabs
During a recording, you can switch between rooms that you have previously selected for your simulation in the event wizard. For better orientation, each change is automatically marked with a corresponding annotation. - PTZ Indicator
This camera has PTZ (Pan-Tilt-Zoom) functionality and can be controlled via the SIMStation Control Software. Click with the mouse on the point in the video that should be in the center of the image – the PTZ IP camera then aligns itself accordingly. - Camera Settings
Opens an overlay dialog box for settings of the respective camera. - Camera Settings: Position Memory
Four configurable memory slots for camera positions and zoom factor. The configuration is done via the SIMStation Stage Designer. - Camera Settings: Zoom Factor
Press and hold the respective magnifying glass button to zoom in or out. - Video Settings
Camera info, cinema mode, full screen mode.
2. Control Pane
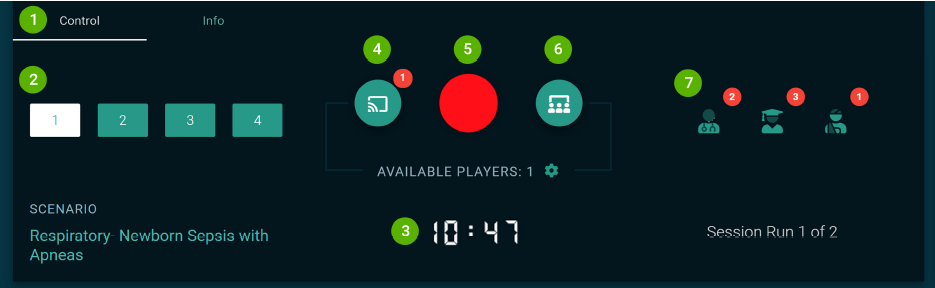
- Control/Info Tabs
Switching between the control panel and event information. - Room Layouts
In the SIMStation Stage Designer, you can define four different camera arrangements per room (i.e., how many and which cameras are displayed in which form) as room layouts and switch between these layouts at any time – even during recording. - Time Code
Recording duration – displayed in minutes and seconds. - Transmission
Starts a live transmission to the selected transmission rooms. When a recording is started, this function is automatically activated! - Recording Button
Starts and stops a recording. - Audience Messenger
Here you can transmit the scenario’s Clinical Vignette or live-entered information for the audience at the transmission room. - Simulation Participants
Lists all assigned trainers (facilitators), trainees (learners), and standardized patients to your simulation.
3. Tool Pane
All the tools for your simulation are available in this pane, grouped thematically and functionally in expandable and collapsible tool panels. Depending on your needs, these tool panels can also be hidden or shown (via the 3-point menu).
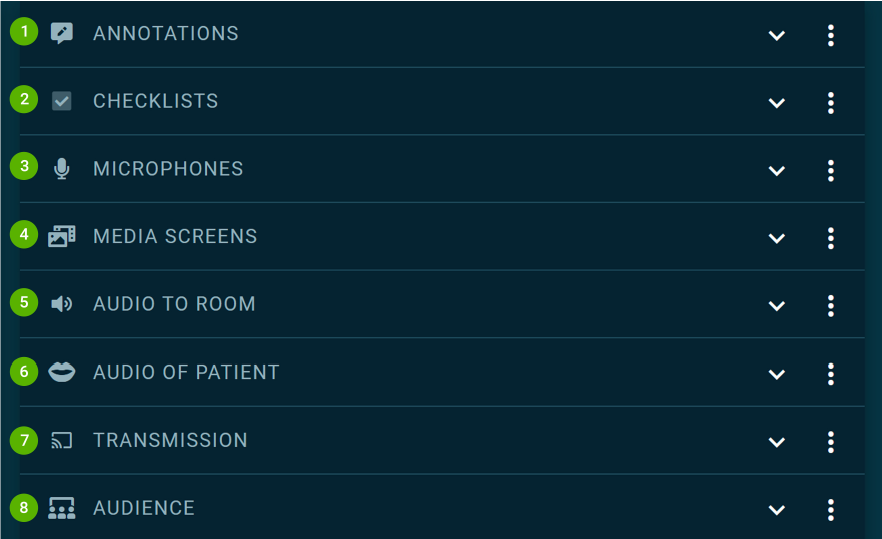
- ANNOTATIONS
Annotating simulation events in real-time. - CHECKLISTS
Integrated checklists for the simulation. - MICROPHONES
Real-time control over microphones in the simulation room. - MEDIA SCREENS
Control of multimedia content for transmission to the media screens integrated in the simulation room. - AUDIO TO ROOM: Public Acoustics
Control of ambient sounds to be played into the simulation room (uploaded audio files) and control of announcements from the control room to the simulation room (via control microphone); transmission to a loudspeaker in the simulation room. - AUDIO OF PATIENT: Patient Acoustics
Control of patient sounds to be played into the simulation room (uploaded audio files) and control of the simulated patient voice from the control room to the simulation room (via the control microphone); transmission to a loudspeaker near the patient in the simulation room. - TRANSMISSION
Real-time control of live transmission. - AUDIENCE
Control of different text formats (e.g., Clinical Vignette, scenario info, etc.) for transmission into the transmission room.