Secure Printing
Temple University HP network printers support PIN printing with Quotas. This feature allows for your print jobs to be stored on the printer as if it is an electronic file cabinet. Nothing will be printed until you request the job from the printer's control panel and input the PIN. Use this storage for forms and other common or shared documents.
Please note that this function will have to be set for each printer you wish to print from. Each printer saves it's own printer preferences.
Follow the guides below on how to enable this feature:
Windows Users
One Time Printing
|
1. Go to the document you wish to print and click Print or CTRL + P.
|
|
|
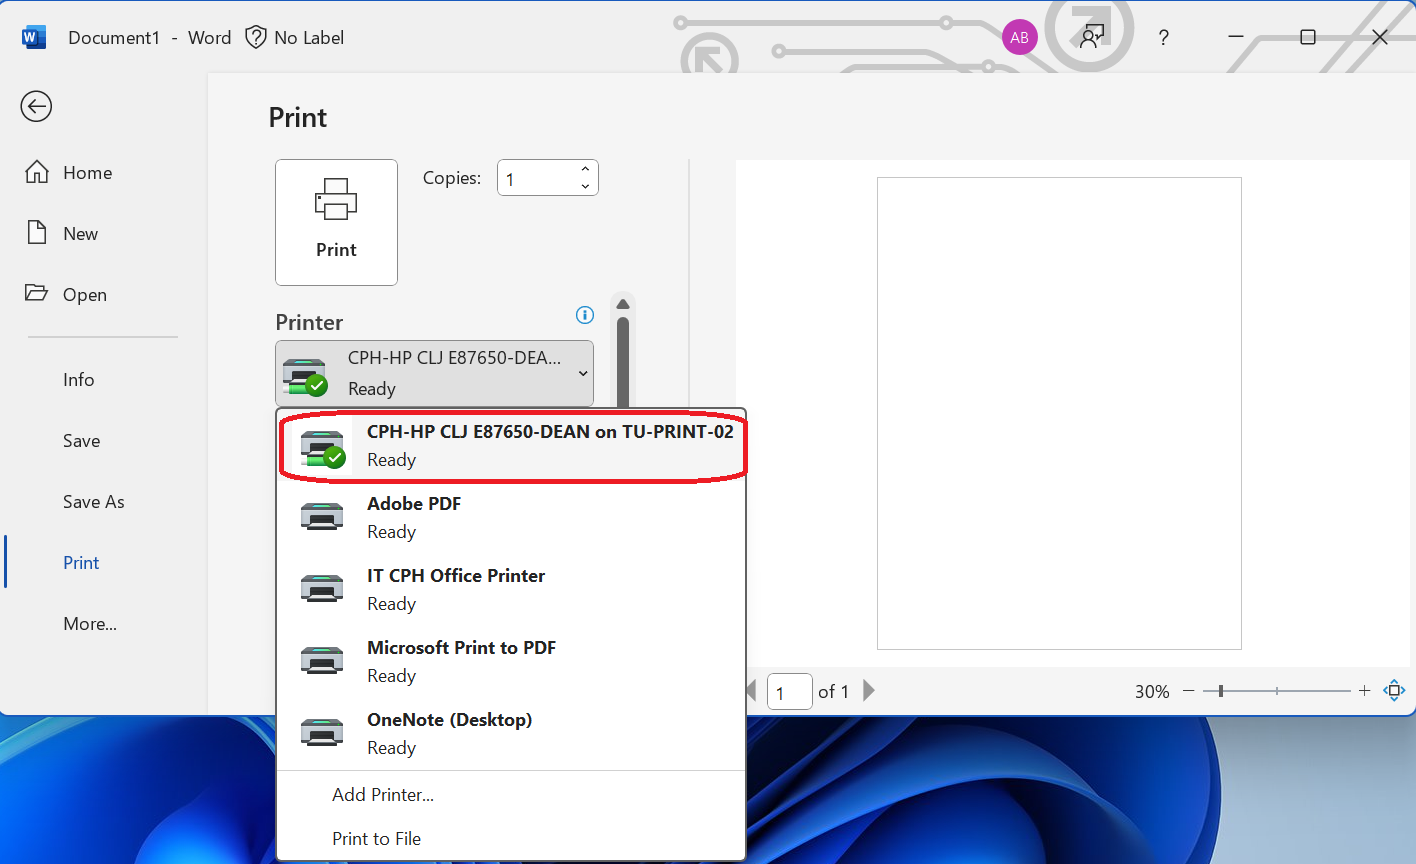
2. Select the name of the shared office printer.
|
 |
| 3. Click Printing preferences. | 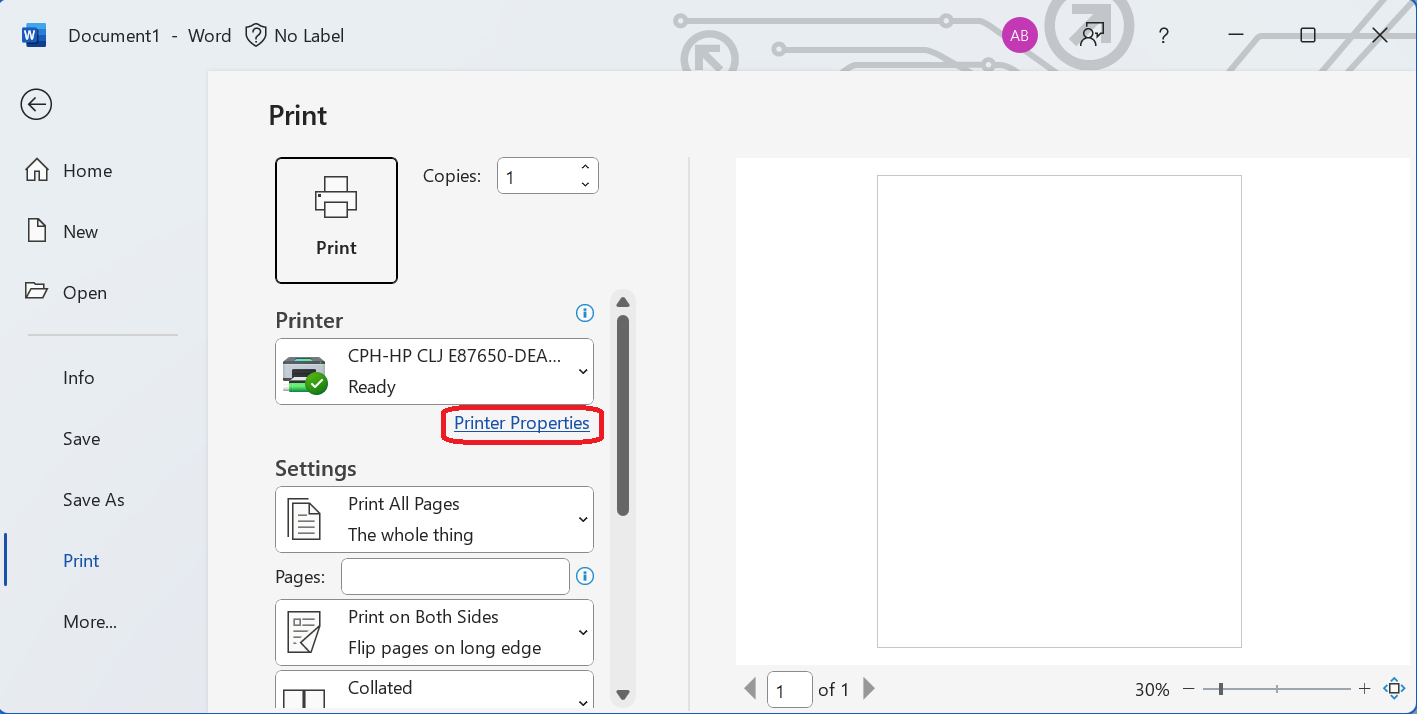 |
| 4. Click the Job Storage tab. | 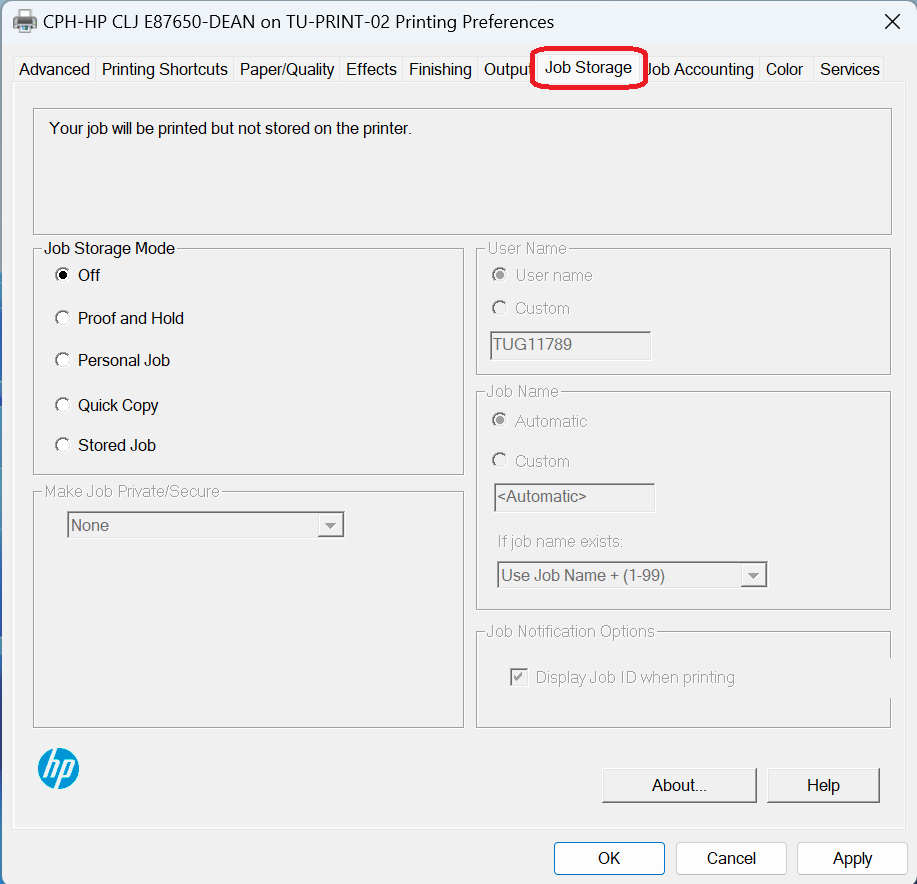 |
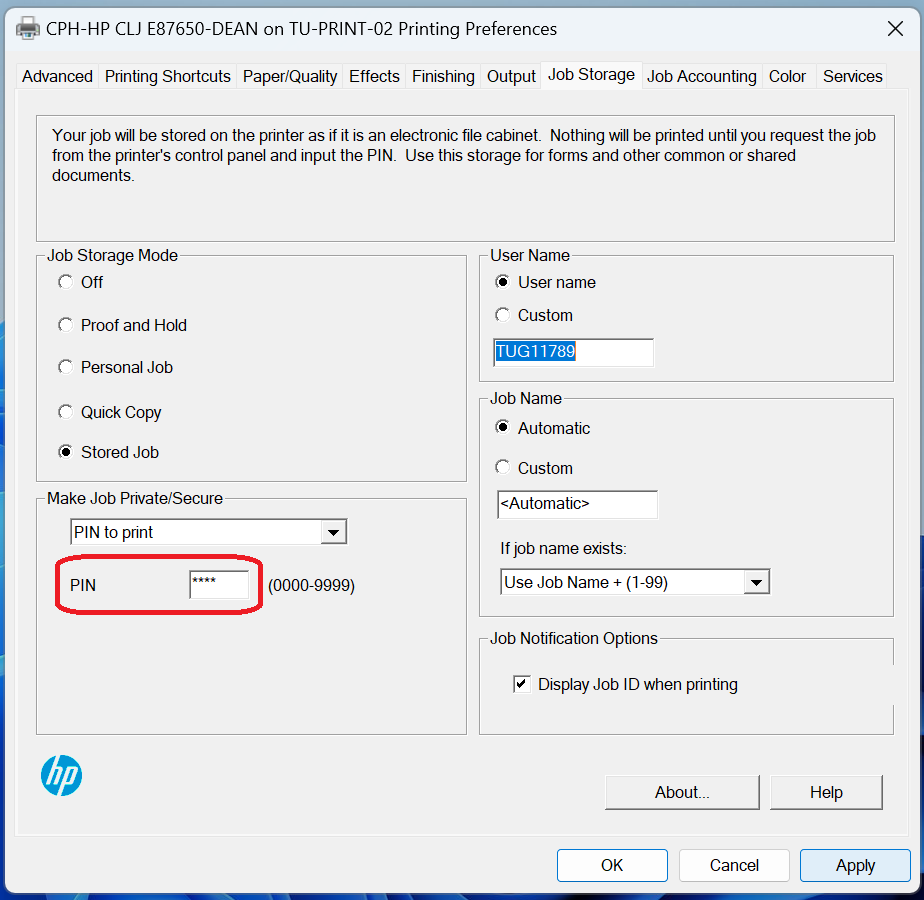
| 5. Select Stored Job under Job Storage Mode. | 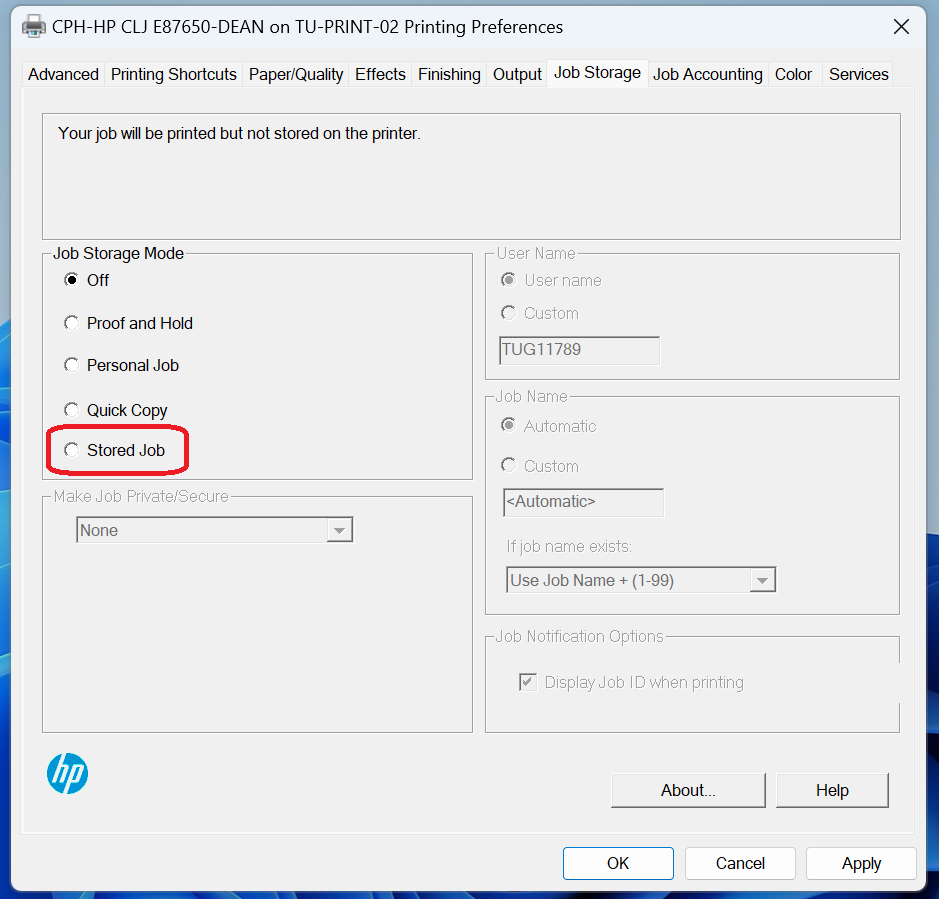 |
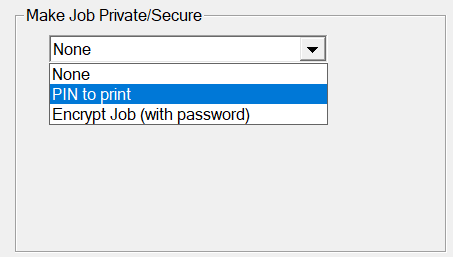
| 6. Select from the dropdown menu in Make Job Private/Secure. | 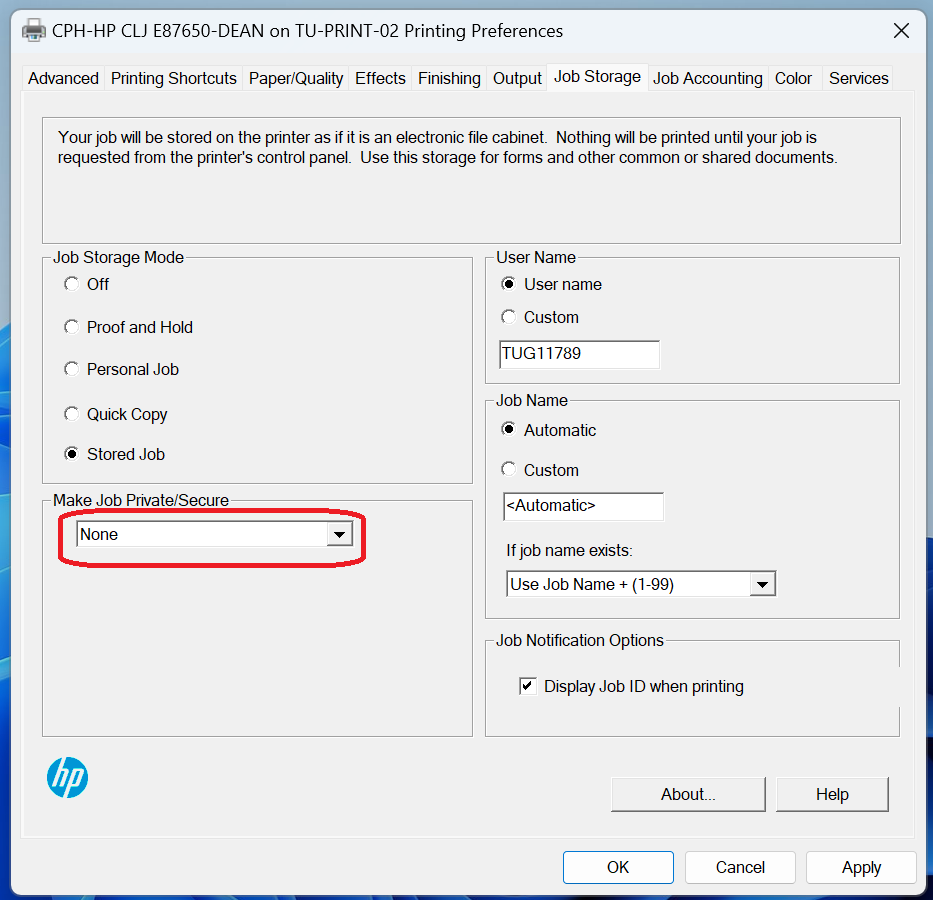 |
|
7. Select PIN to print.
Add a pin that is easy to remember. |
|
|
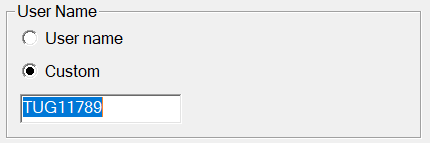
8. Under the User Name, verify it is the name you want. This name will be used for the folder created on the printer.
If you wish to change the name, select Custom and add the name you would like. |
 |
| 9. Click Apply, then OK. | 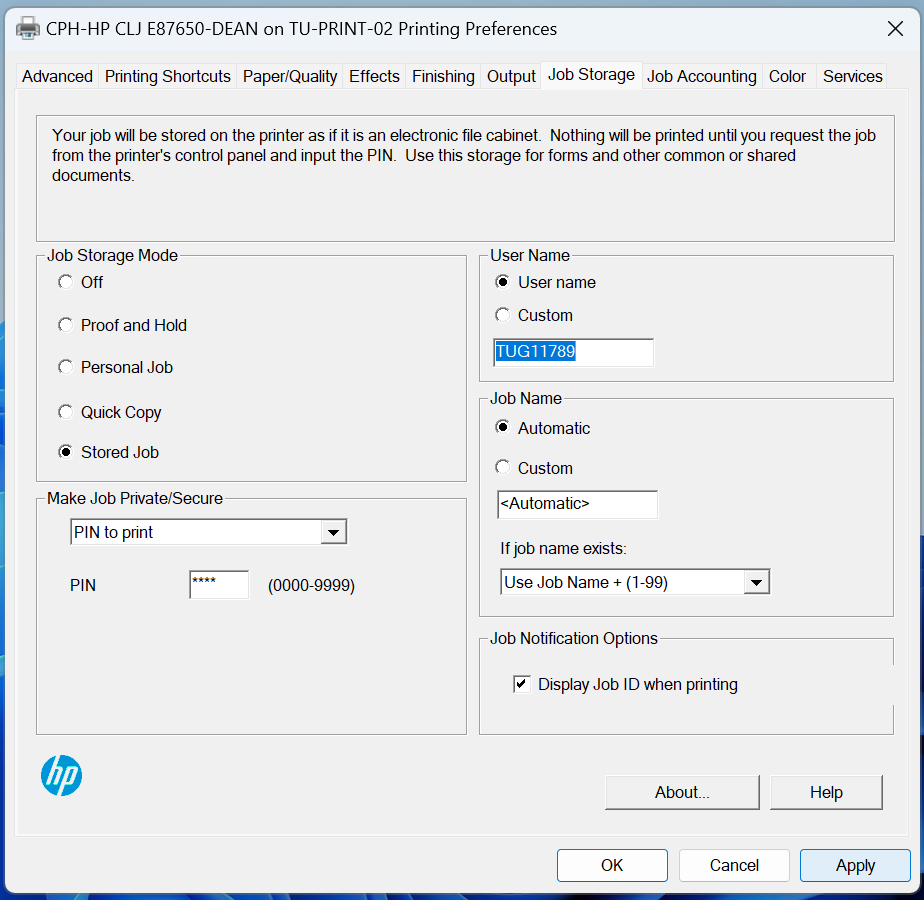 |
|
10. Go to document you wish to print and select print. Please note a window will pop up when printing. You can click the checkbox In the future, do not show this information. This window is a notification of how your print job will be saved. |
|

Printing for All Applications
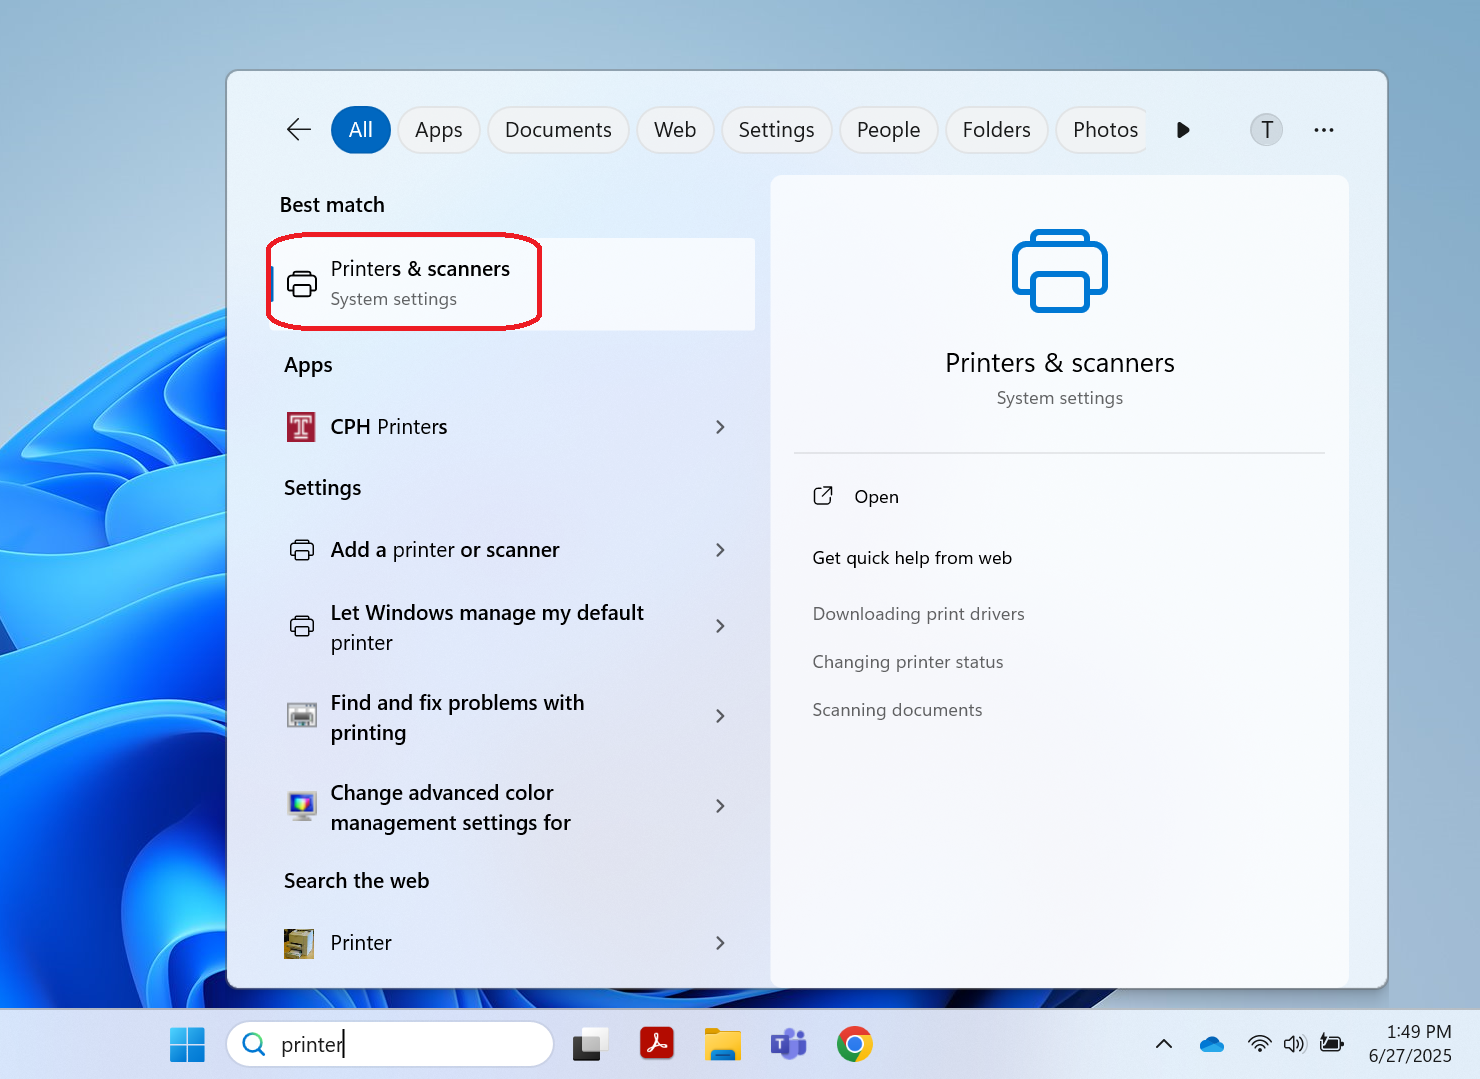
| 1. Select the Start icon or search for print in the search bar |  |
|
2. Click Printer & Scanners.
|
 |
| 3. Click the name of shared office printer. | 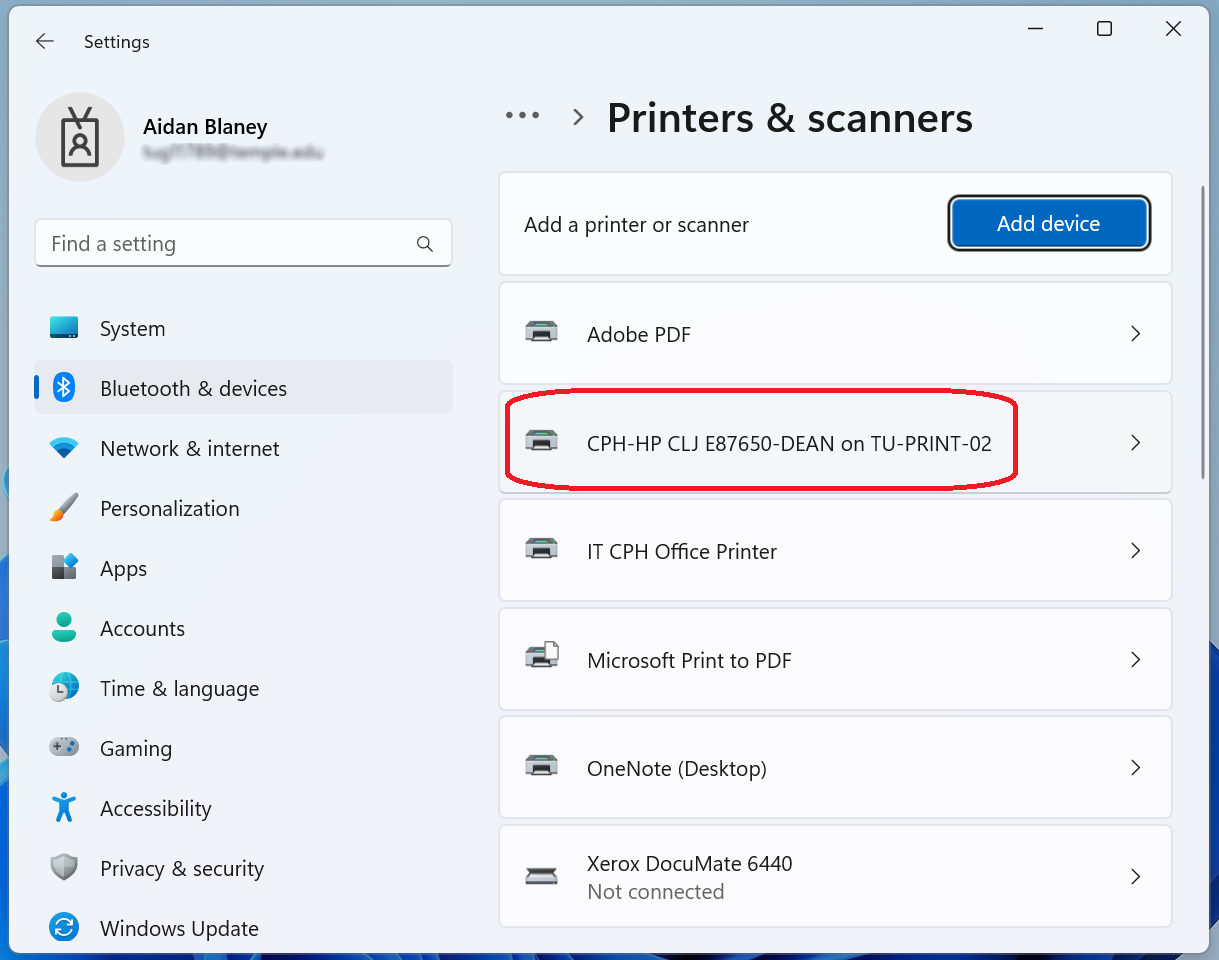 |
| 4. Click Printing preferences. |  |
| 5. Click the Job Storage tab. | |
| 6. Select Stored Job under Job Storage Mode. | |
| 7. Select from the dropdown menu in Make Job Private/Secure. | |
|
8. Select PIN to print.
Add a pin that is easy to remember. |
|
|
9. Under the User Name, verify it is the name you want. This name will be used for the folder created on the printer.
If you wish to change the name, select Custom and add the name you would like. |
|
| 10. Click Apply, then OK. | |
|
11. Go to document you wish to print and select print. Please note a window will pop up when printing. You can click the checkbox In the future, do not show this information. This window is a notification of how your print job will be saved. |
|
Mac Users
For all printing, please verify you have the printer downloaded:
- Go to the Self Service application.
- Scroll through the list of applications and select install under the shared office printer you wish to print from.
One Time Printing
|
1. Go to the document you wish to print and click Print or ⌘ + P or command + P.
|
|
|
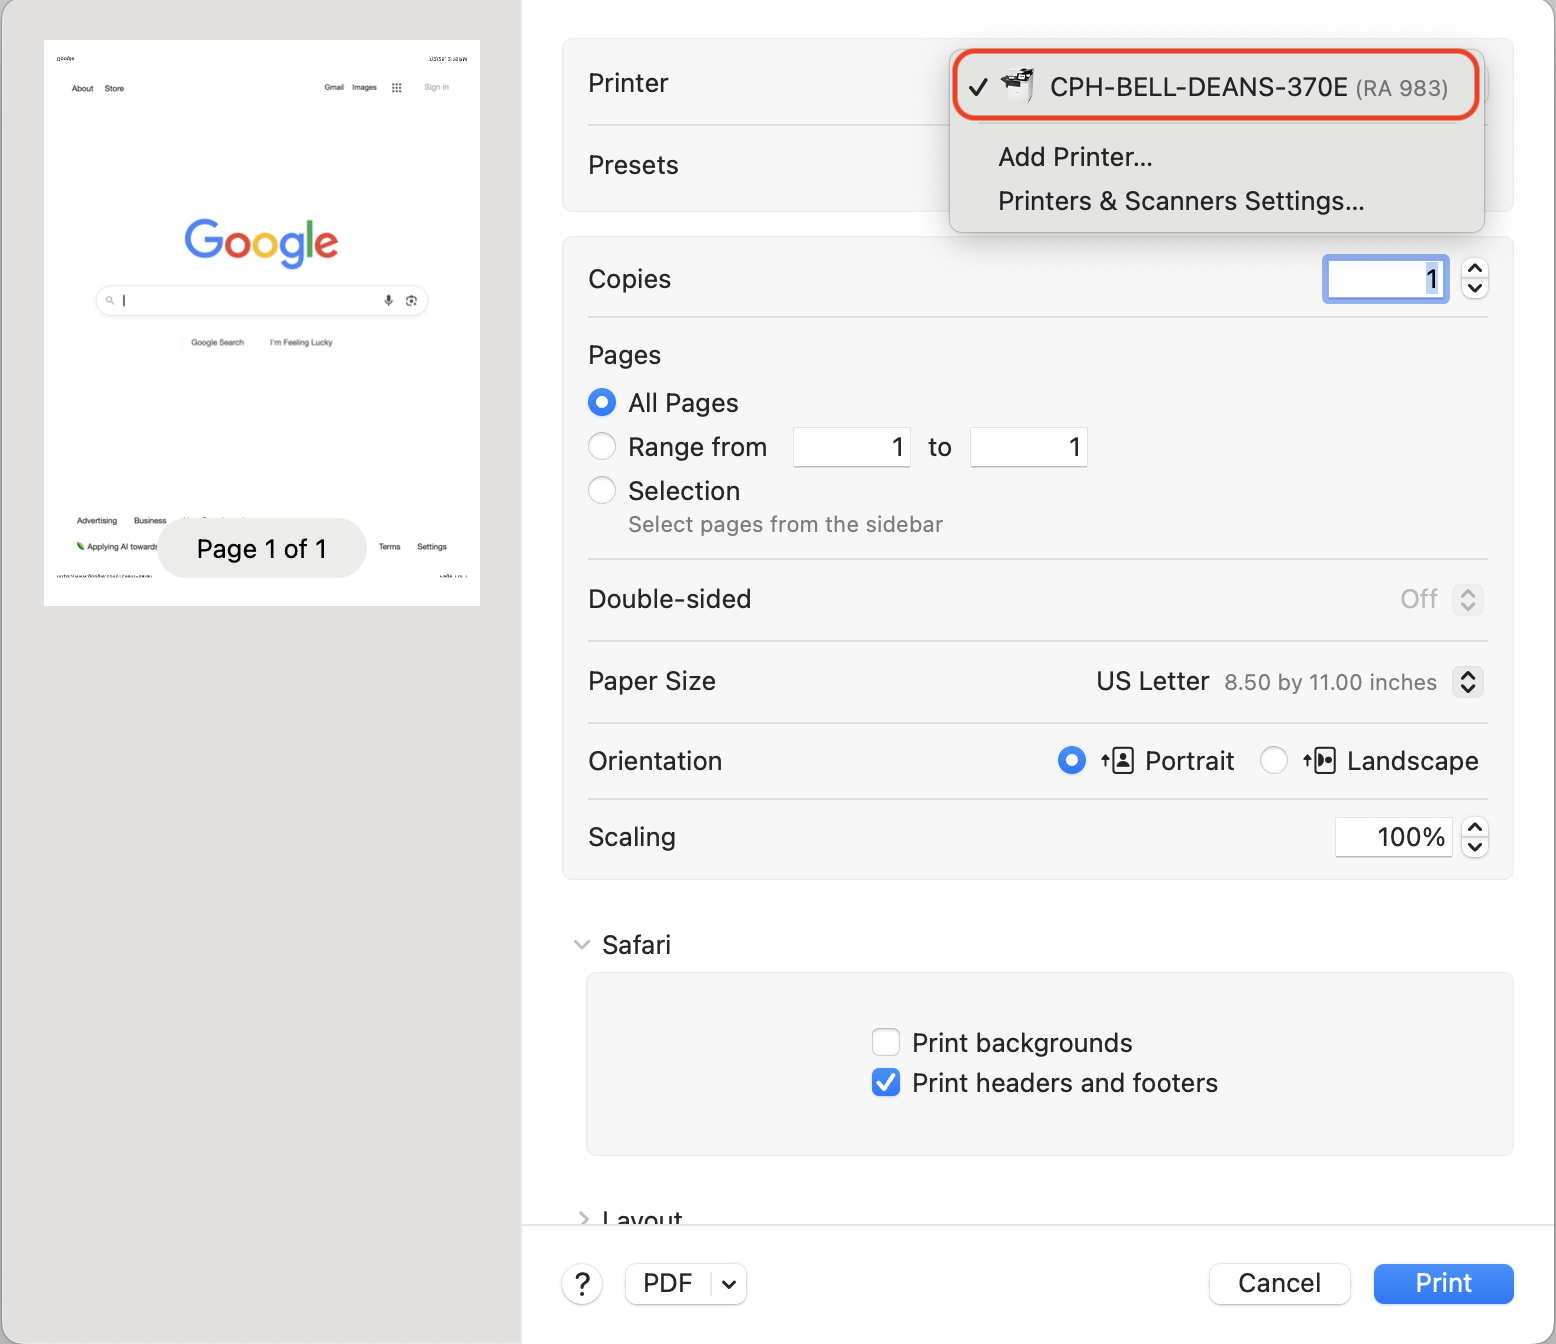
2. Click the printer dropdown menu and select the name of the shared office printer.
|
 |
|
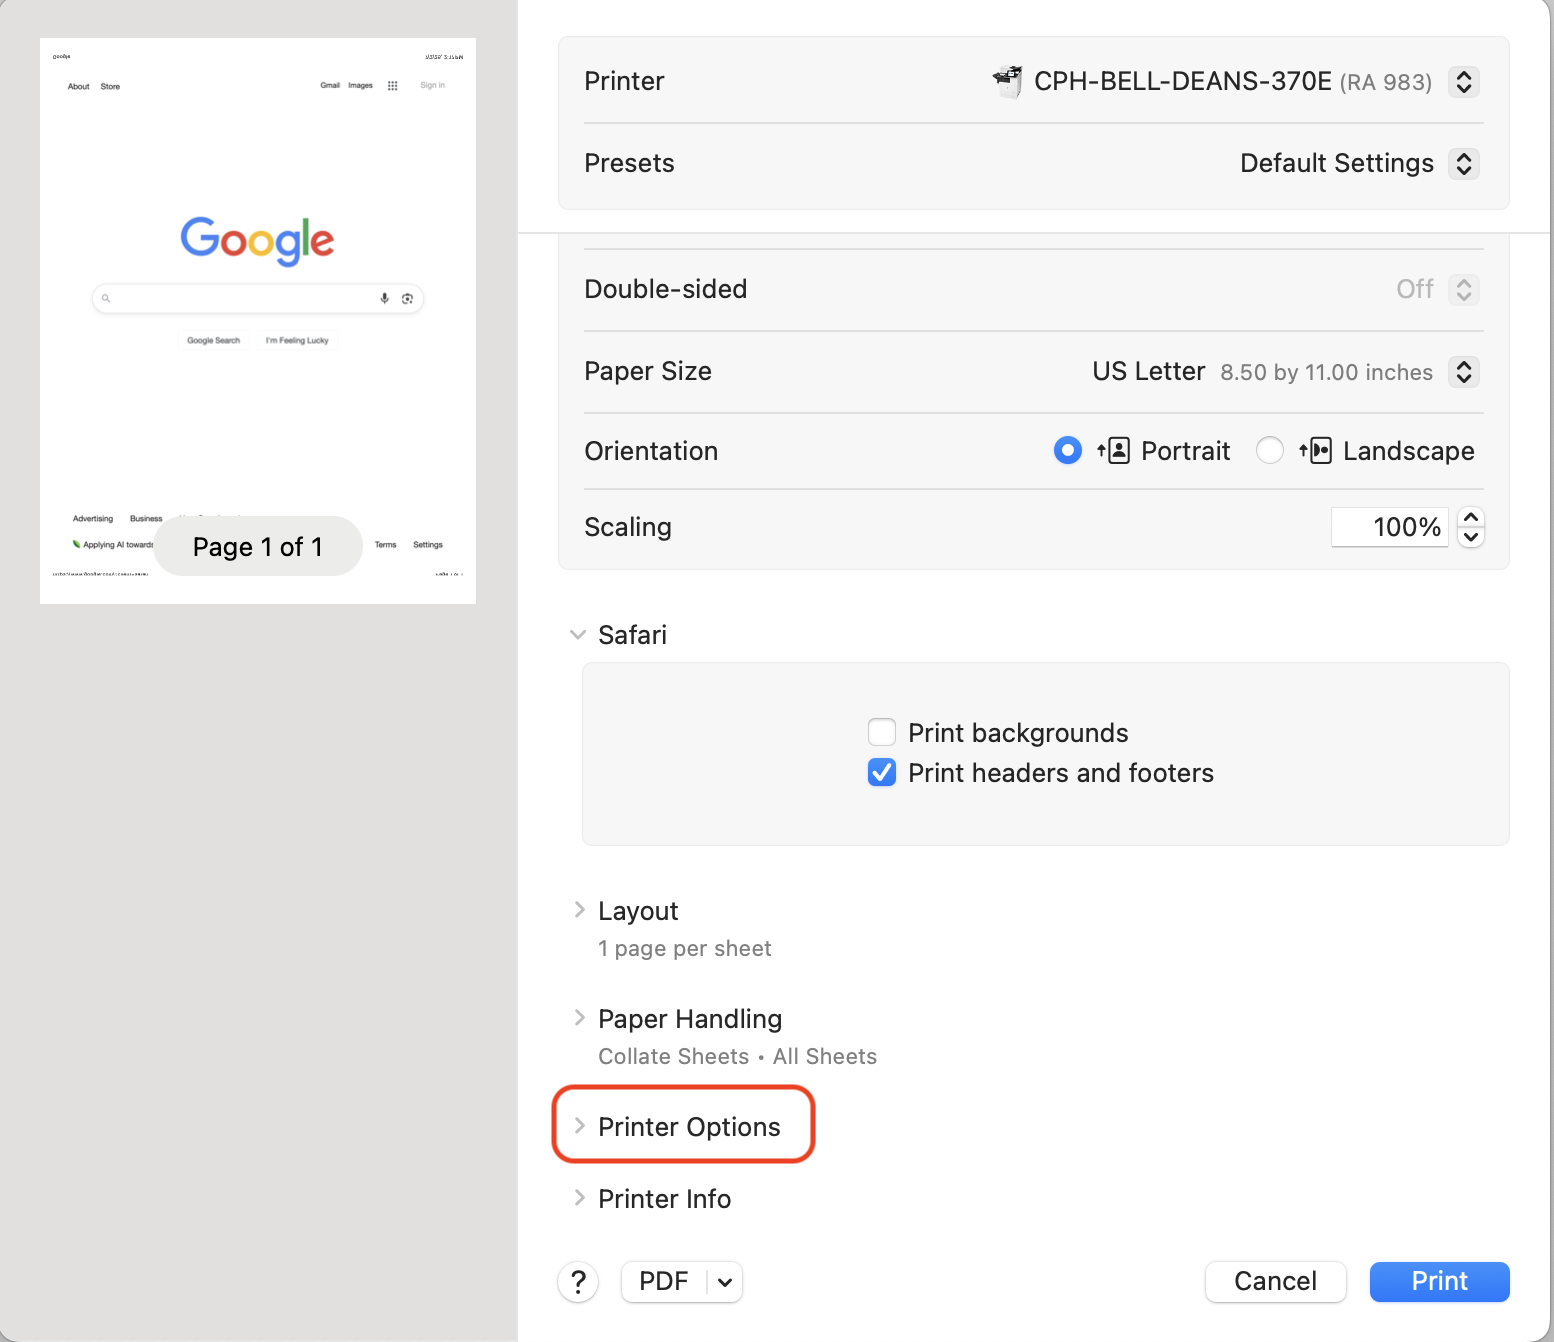
3. Scroll down and open the dropdown menu for Printer Options.
|
 |
|
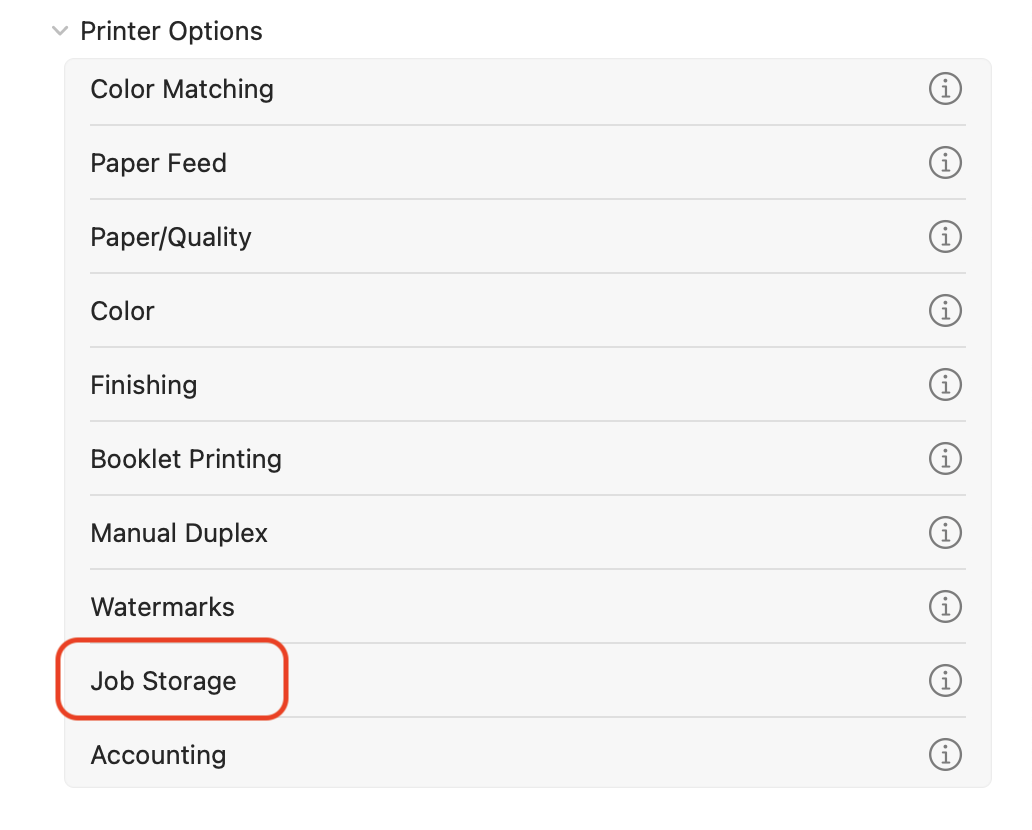
4. Click Job Storage.
|
 |
|
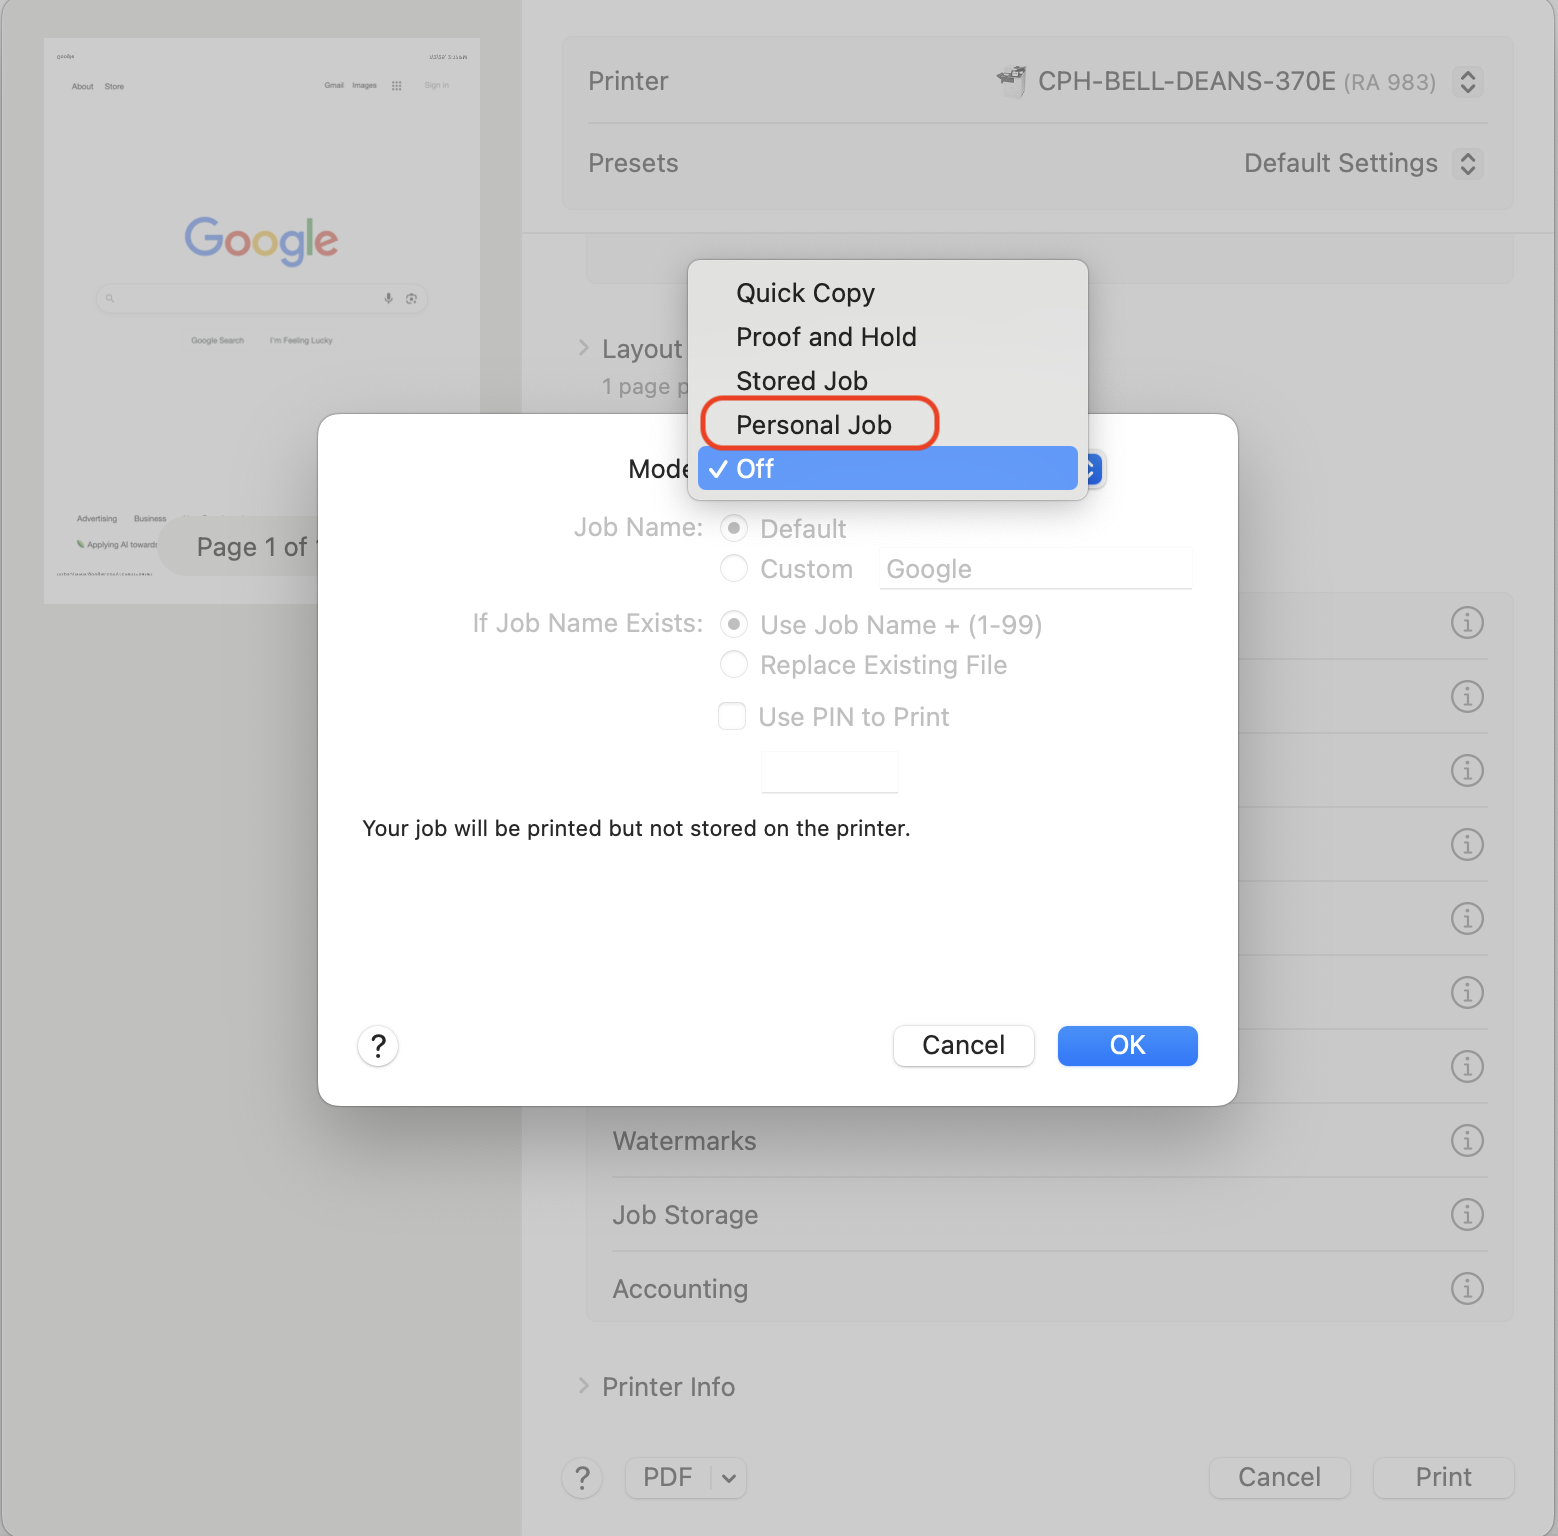
5. Select the Mode dropdown menu and click Personal Job.
|
 |
|
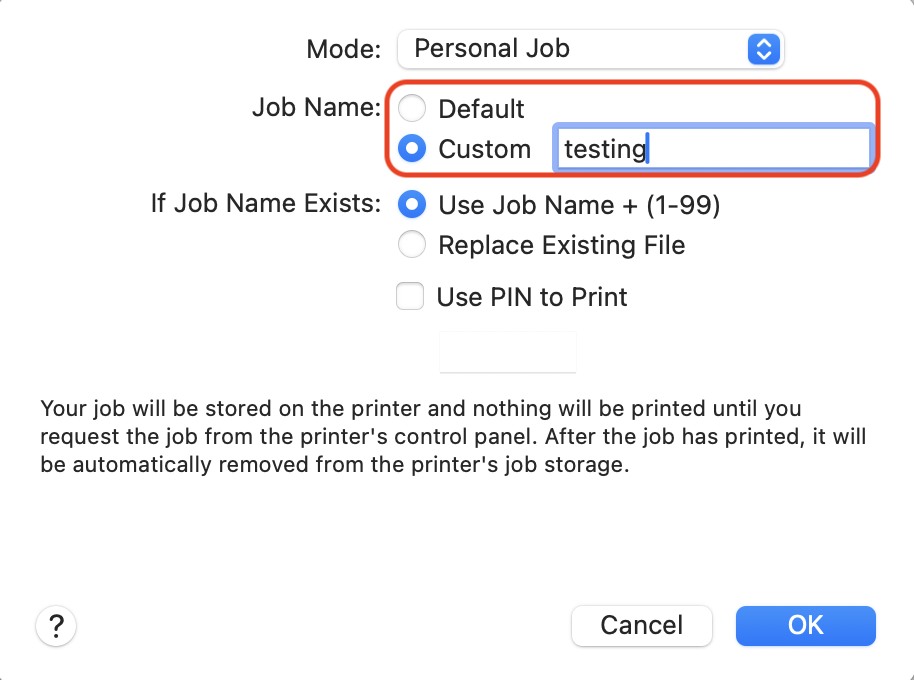
6. Under Job Name, verify the name of the file or update the name by selecting Custom.
|
|
|
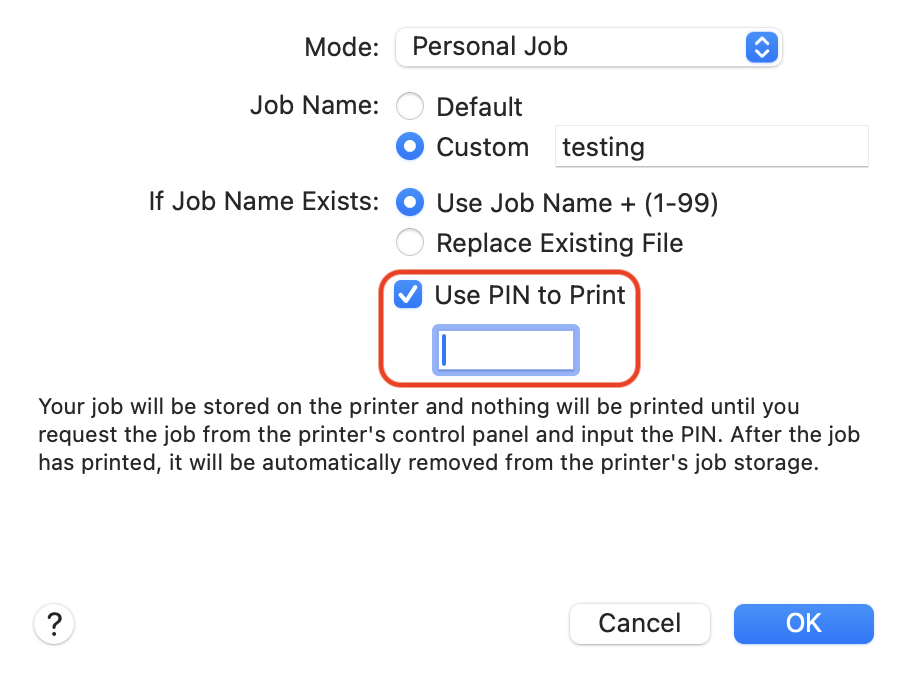
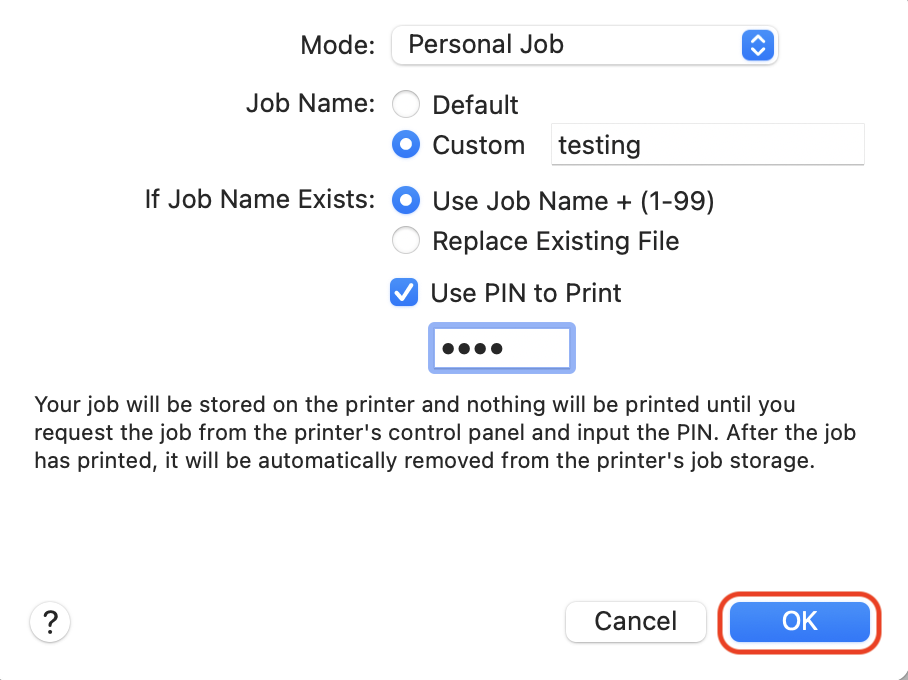
7. Check the box next to Use PIN to print.
Add a pin that is easy for you to remember.
|
|
|
8. Click OK.
|
|
|
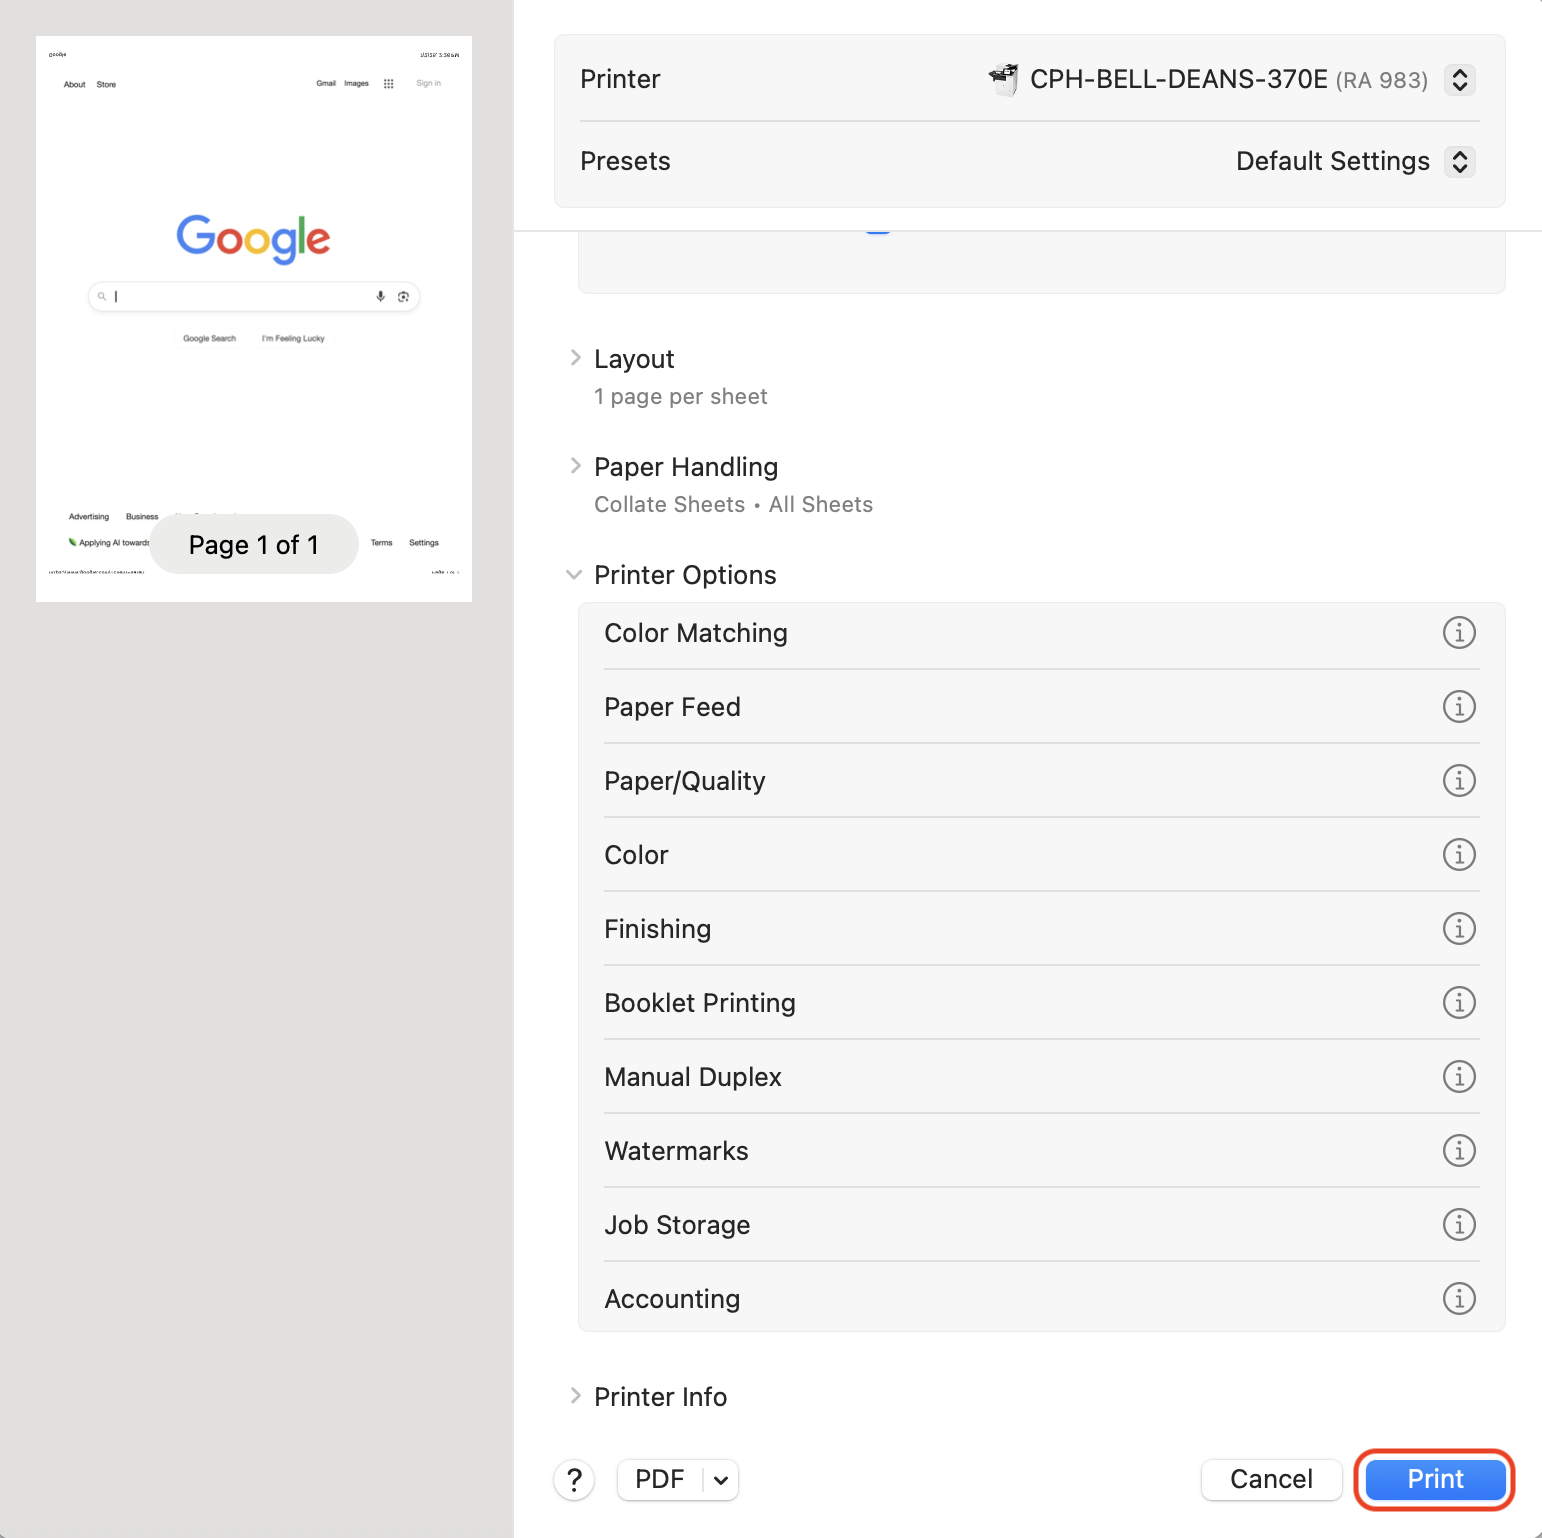
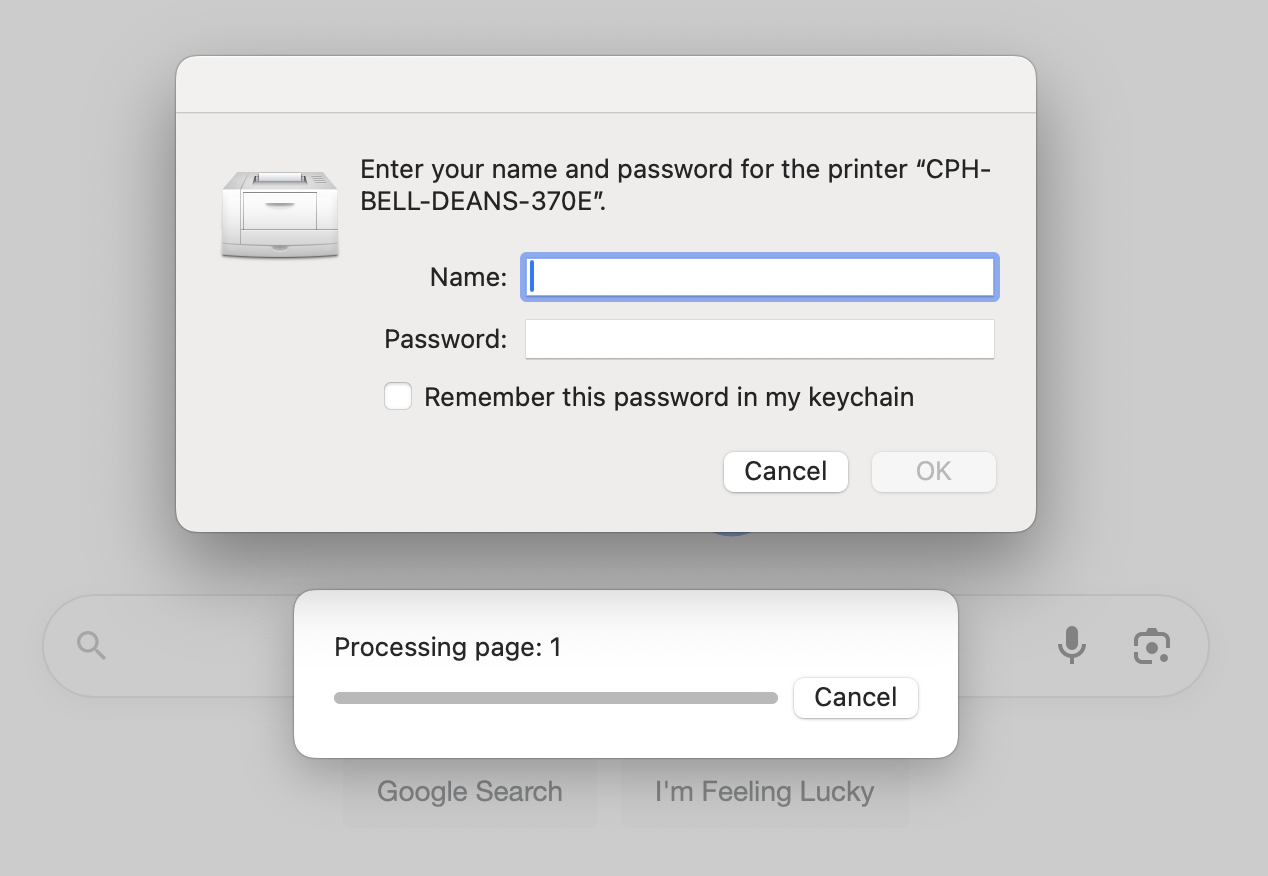
9. Click Print.
Please note a window will pop up prompting you to enter your name and password.
|
|
|
10. Enter your accessnet username and password.
|
|
|
11. Click OK.
Now you can go to your shared office printer.
|
All Printing Jobs
Please note that this option creates a preset that will have to be selected each time you print. It will not default to that preset.
|
1. Go to the document you wish to print and click Print or ⌘ + P or command + P.
|
|
|
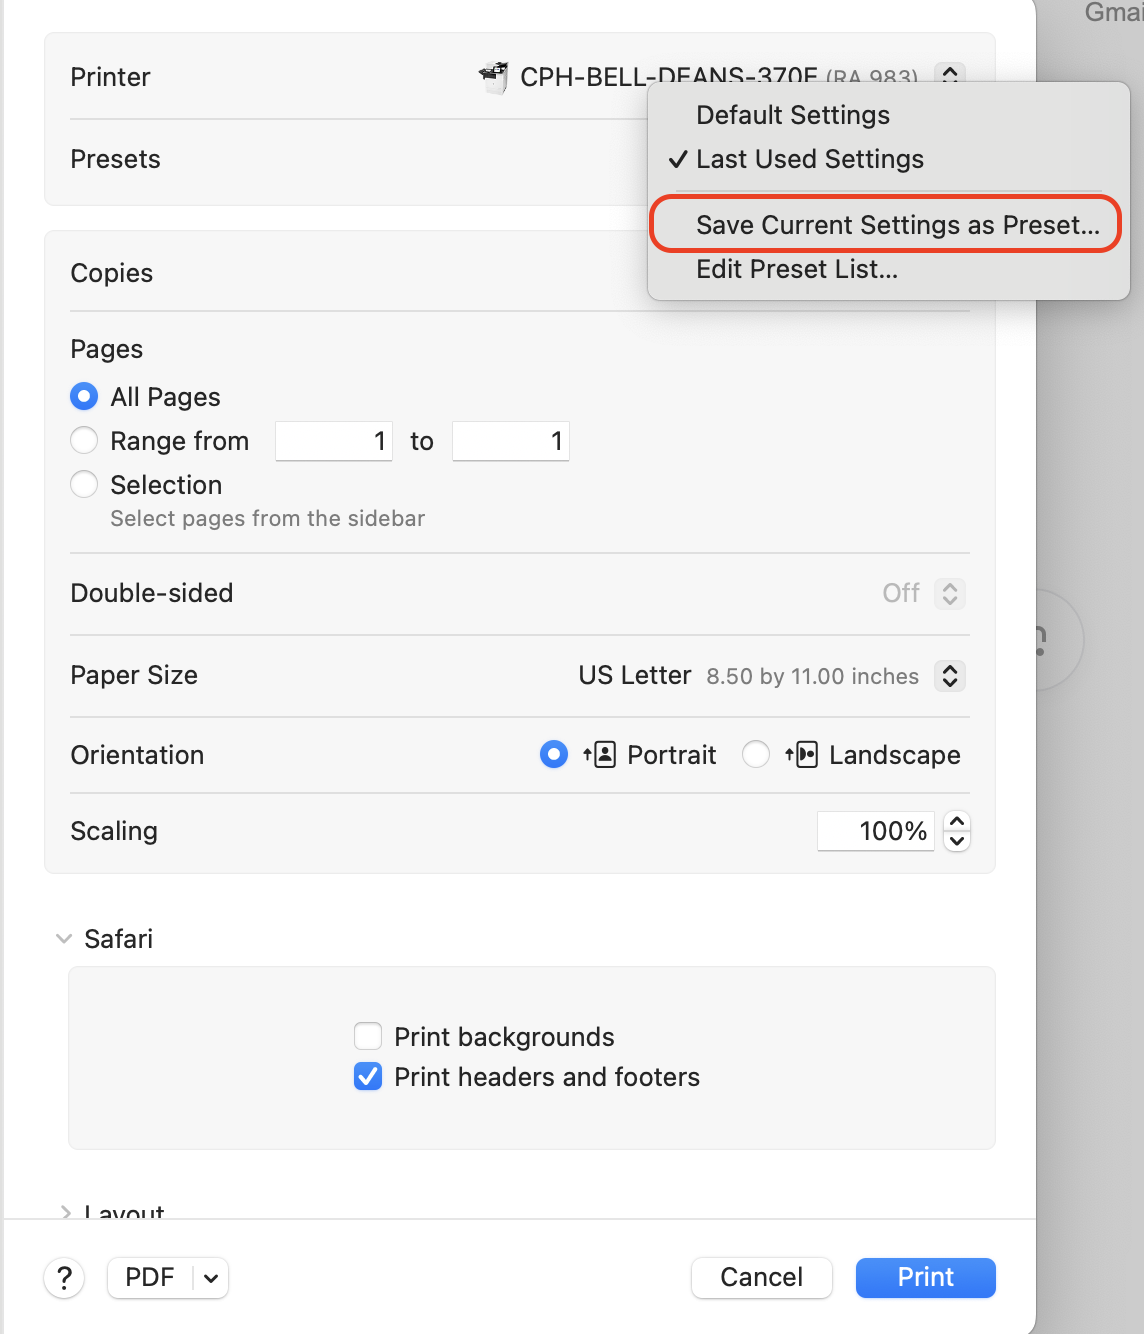
2. Click the Printer dropdown menu and select the name of shared office printer.
|
|
|
3. Click the Presets dropdown menu and select Save Current Settings as Preset.
|
|
|
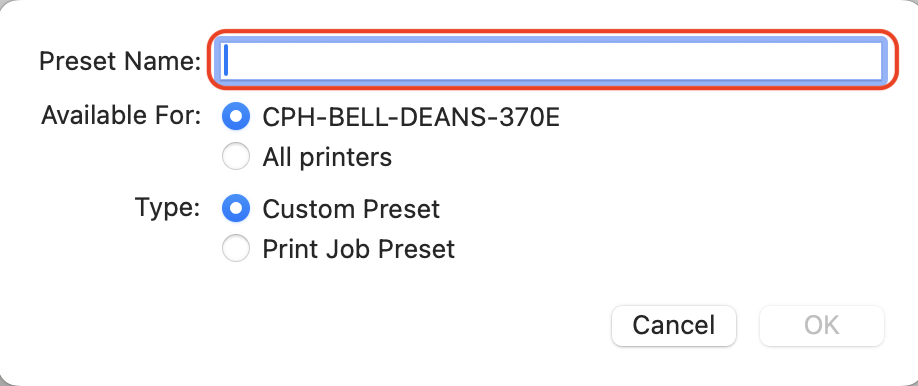
4. Enter a Preset Name.
|
 |
|
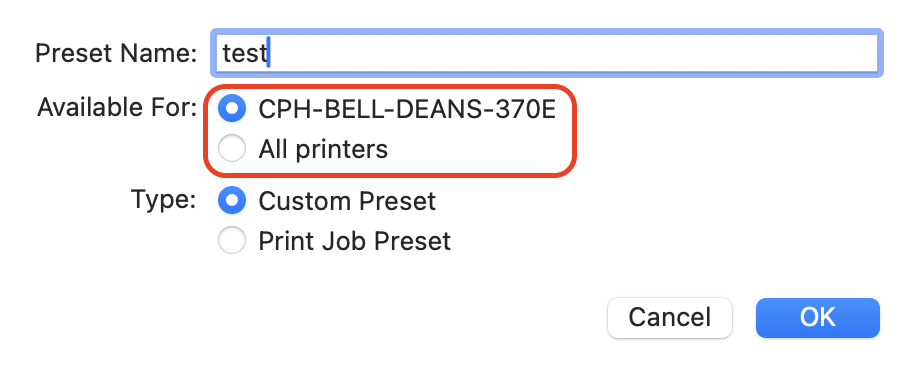
5. Select the printer name or All printers.
|
 |
|
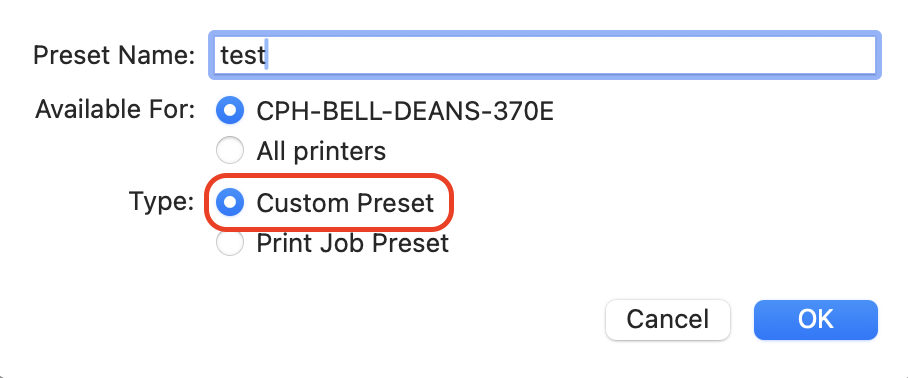
6. Select Custom Preset.
|
 |
|
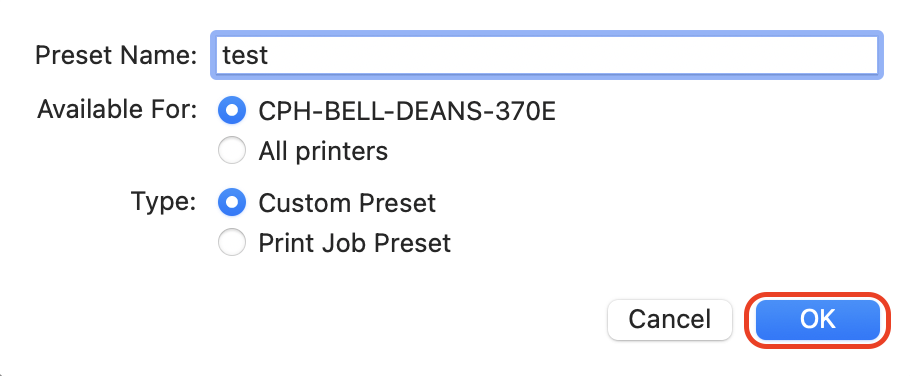
7. Click OK.
|
 |
|
8. Scroll down and open the dropdown menu for Printer Options.
|
|
|
9. Click Job Storage.
|
|
|
10. Select the Mode dropdown menu and click Personal Job.
|
|
|
11. Under Job Name, verify the name of the file or update the name by selecting Custom.
|
 |
|
12. Check the box next to Use PIN to print.
Add a pin that is easy for you to remember.
|
 |
|
13. Click OK.
|
 |
|
14. Click Print.
Please note a window will pop up prompting you to enter your name and password.
|
 |
|
15. Enter your accessnet username and password.
You can check Remember this password in my keychain for future access.
|
 |
|
16. Click OK.
Now you can go to your shared office printer.
|
After printing the file you want from your device:
|
1. Go to the shared office printer in your department’s common area.
|
|
| 2. Press on the printer monitor and select Print. | 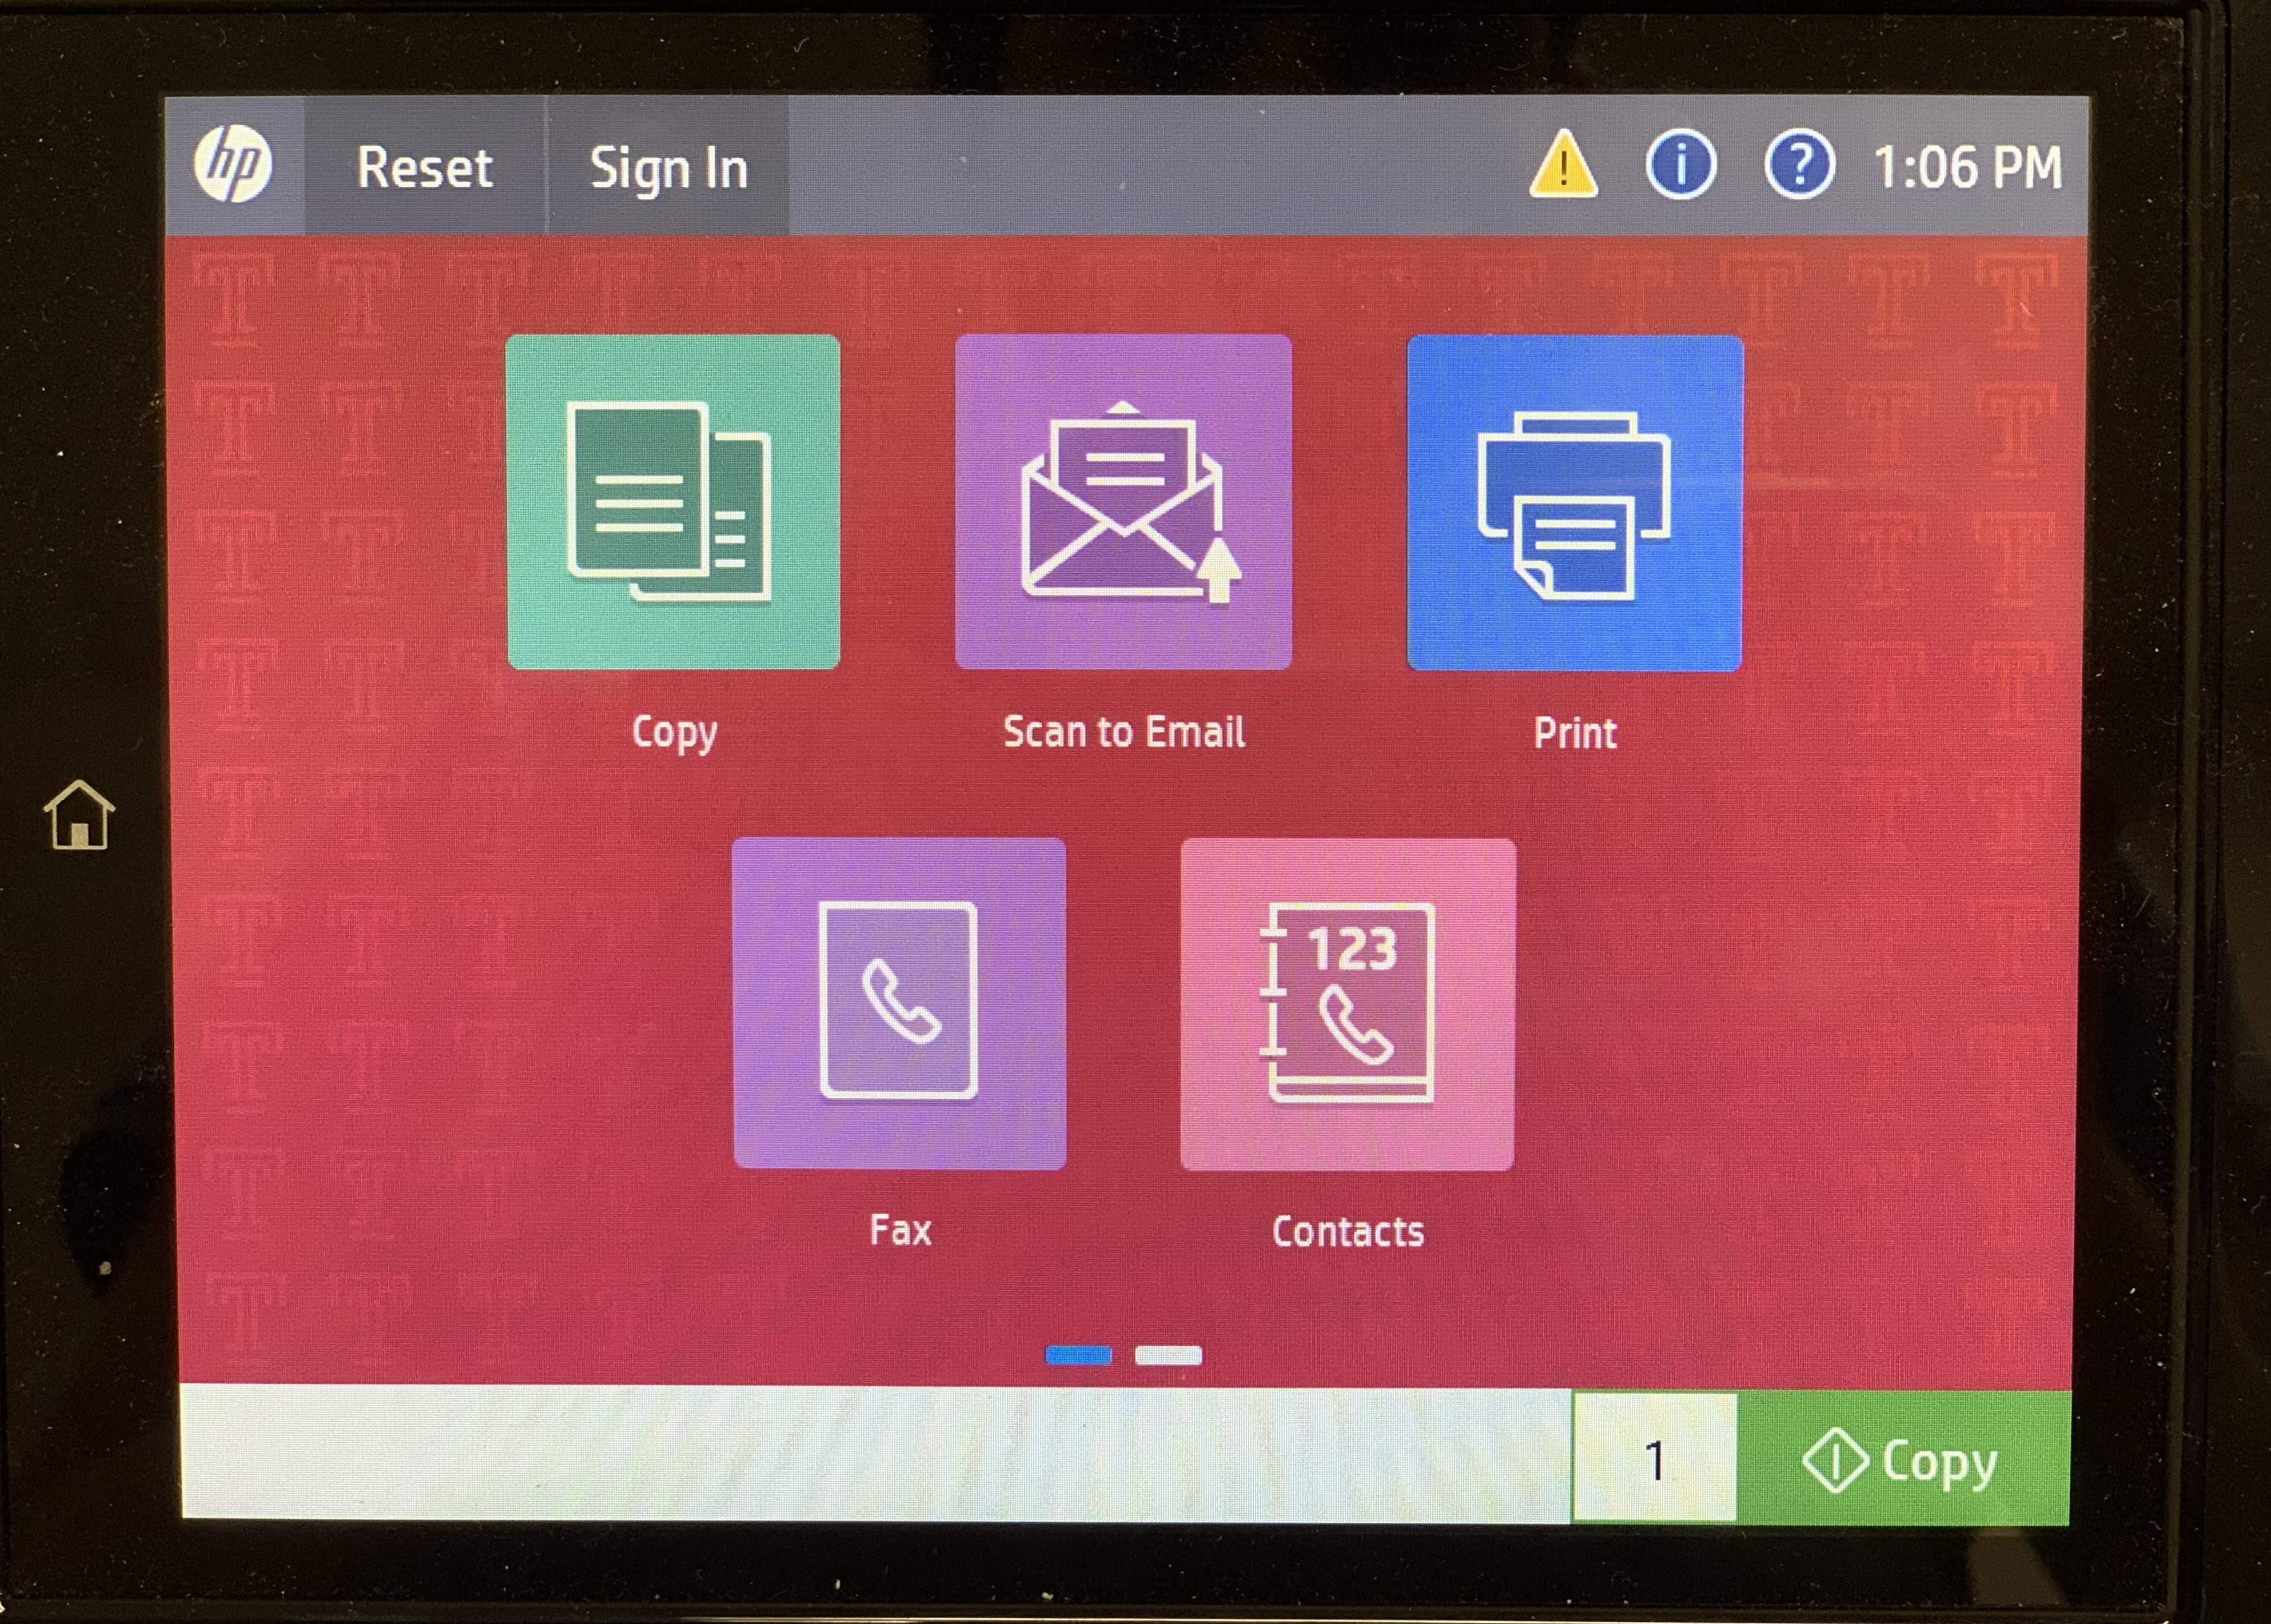 |
|
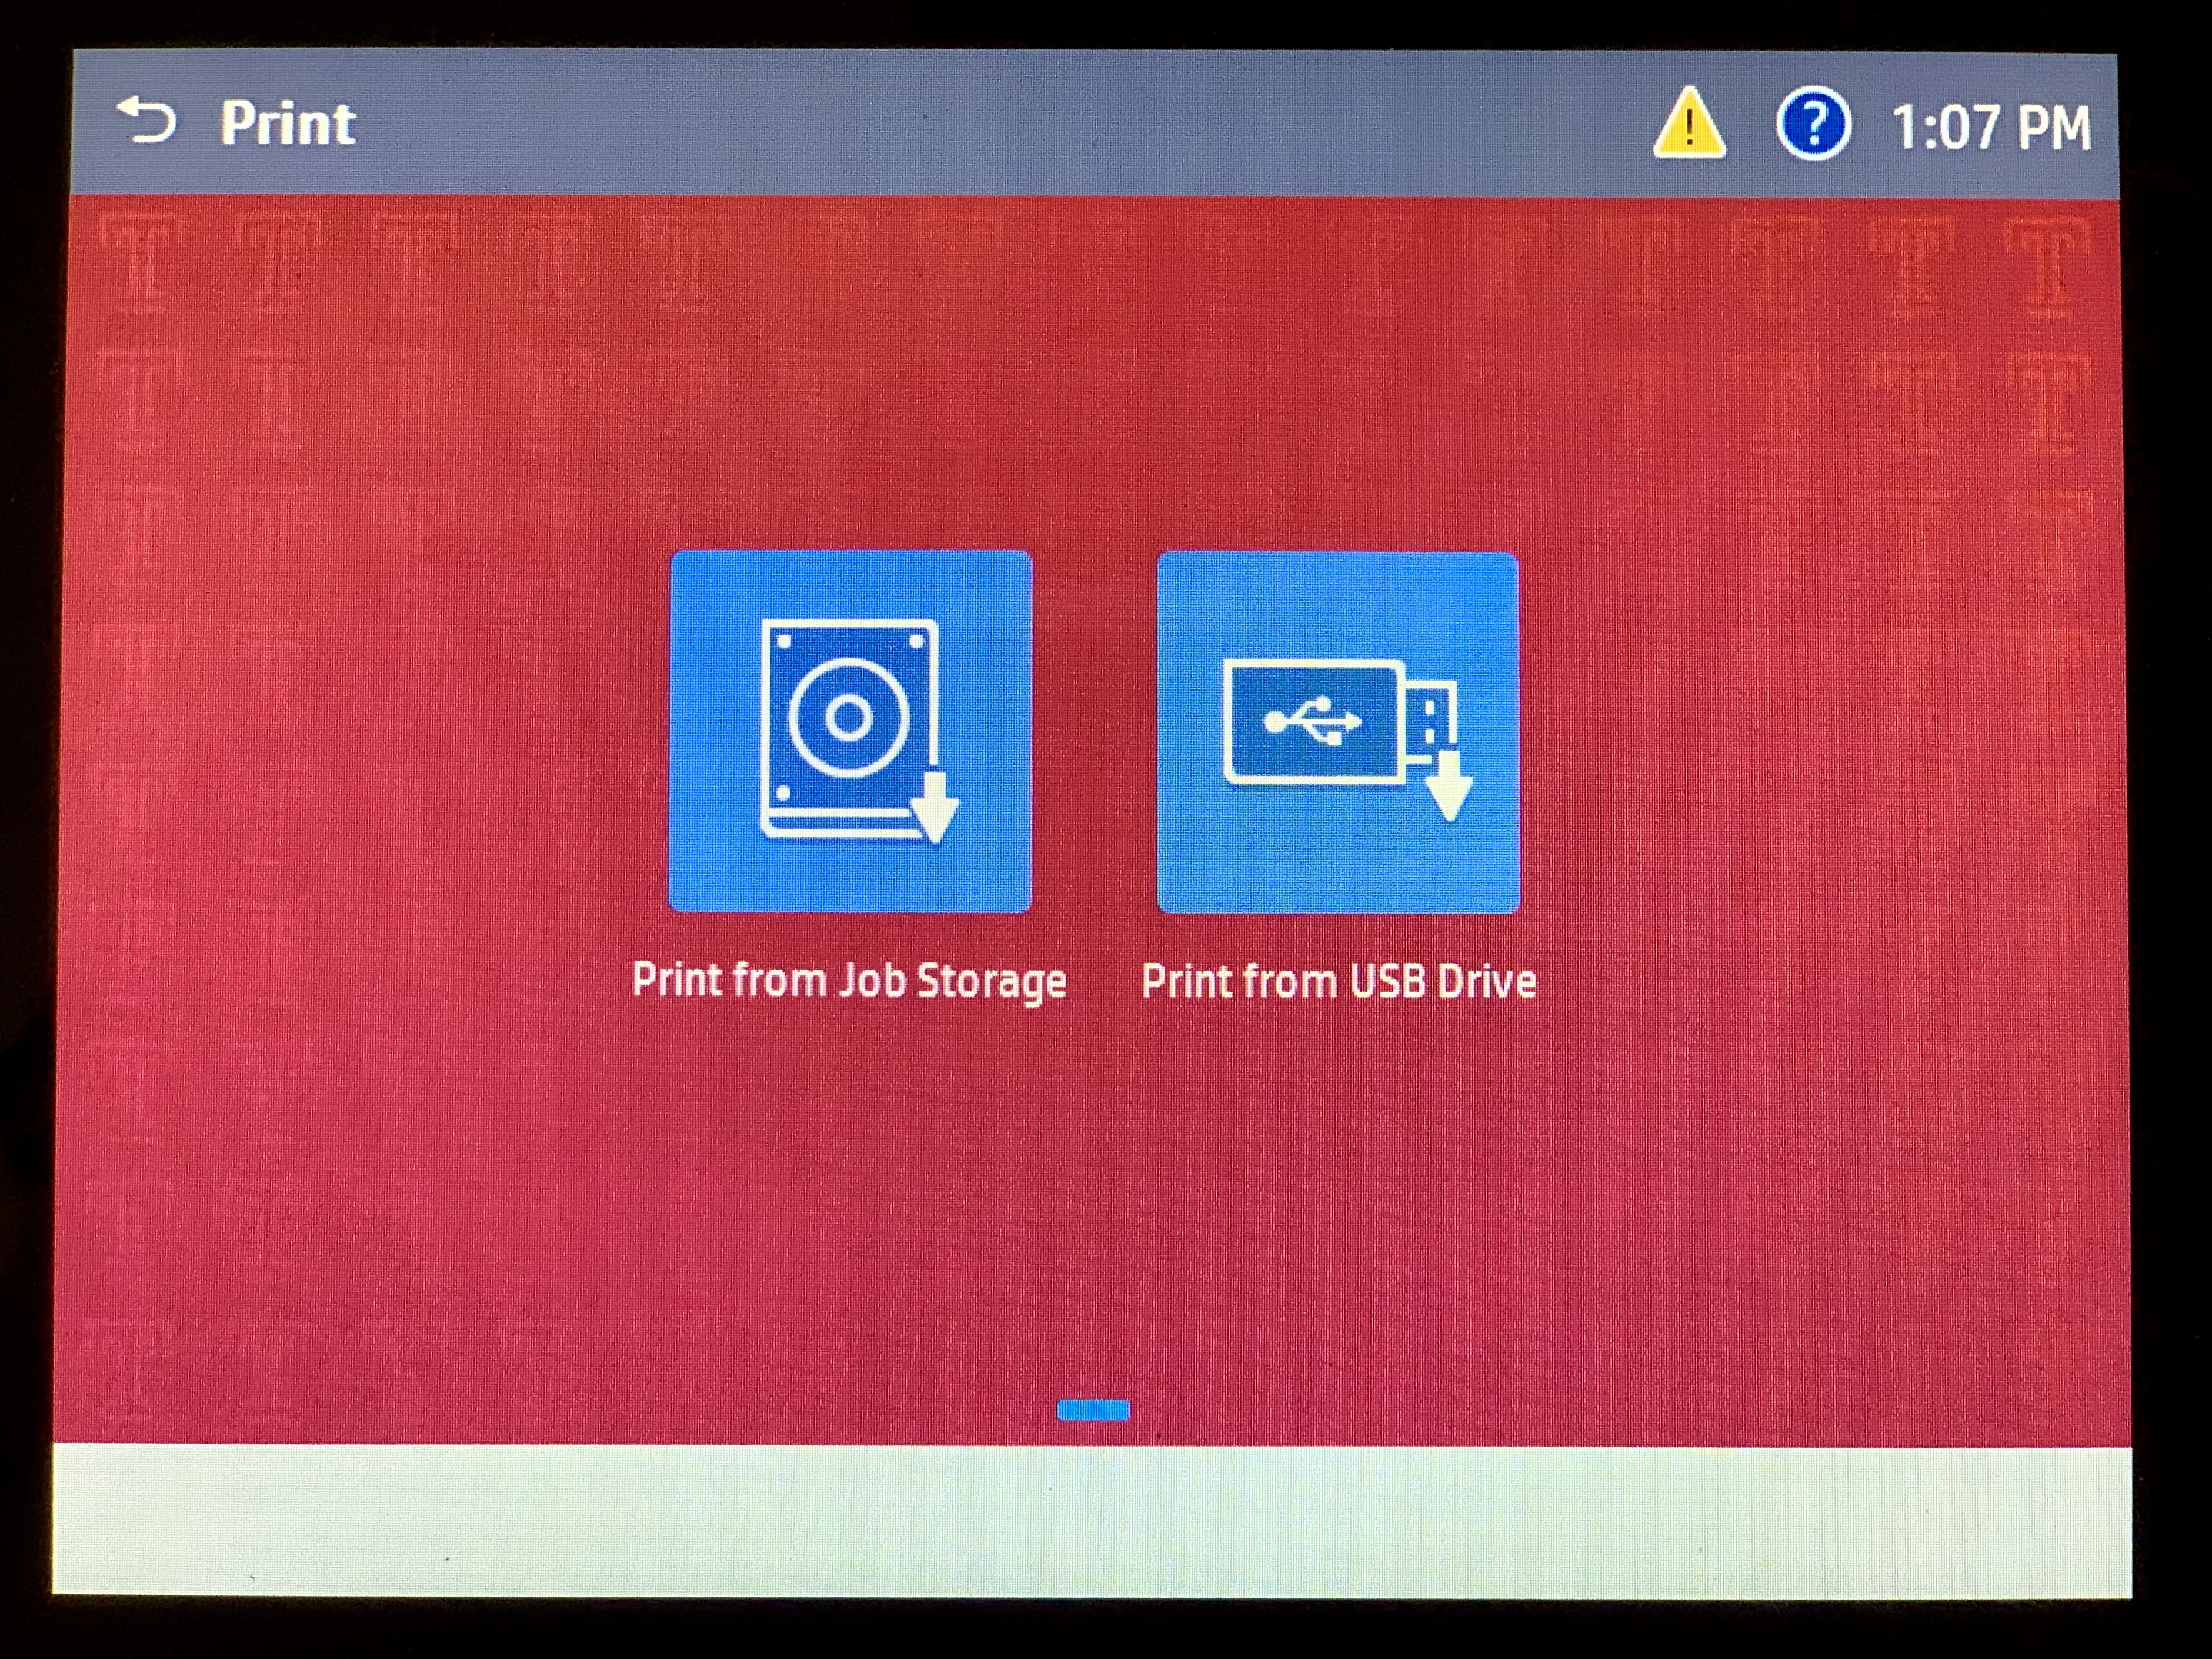
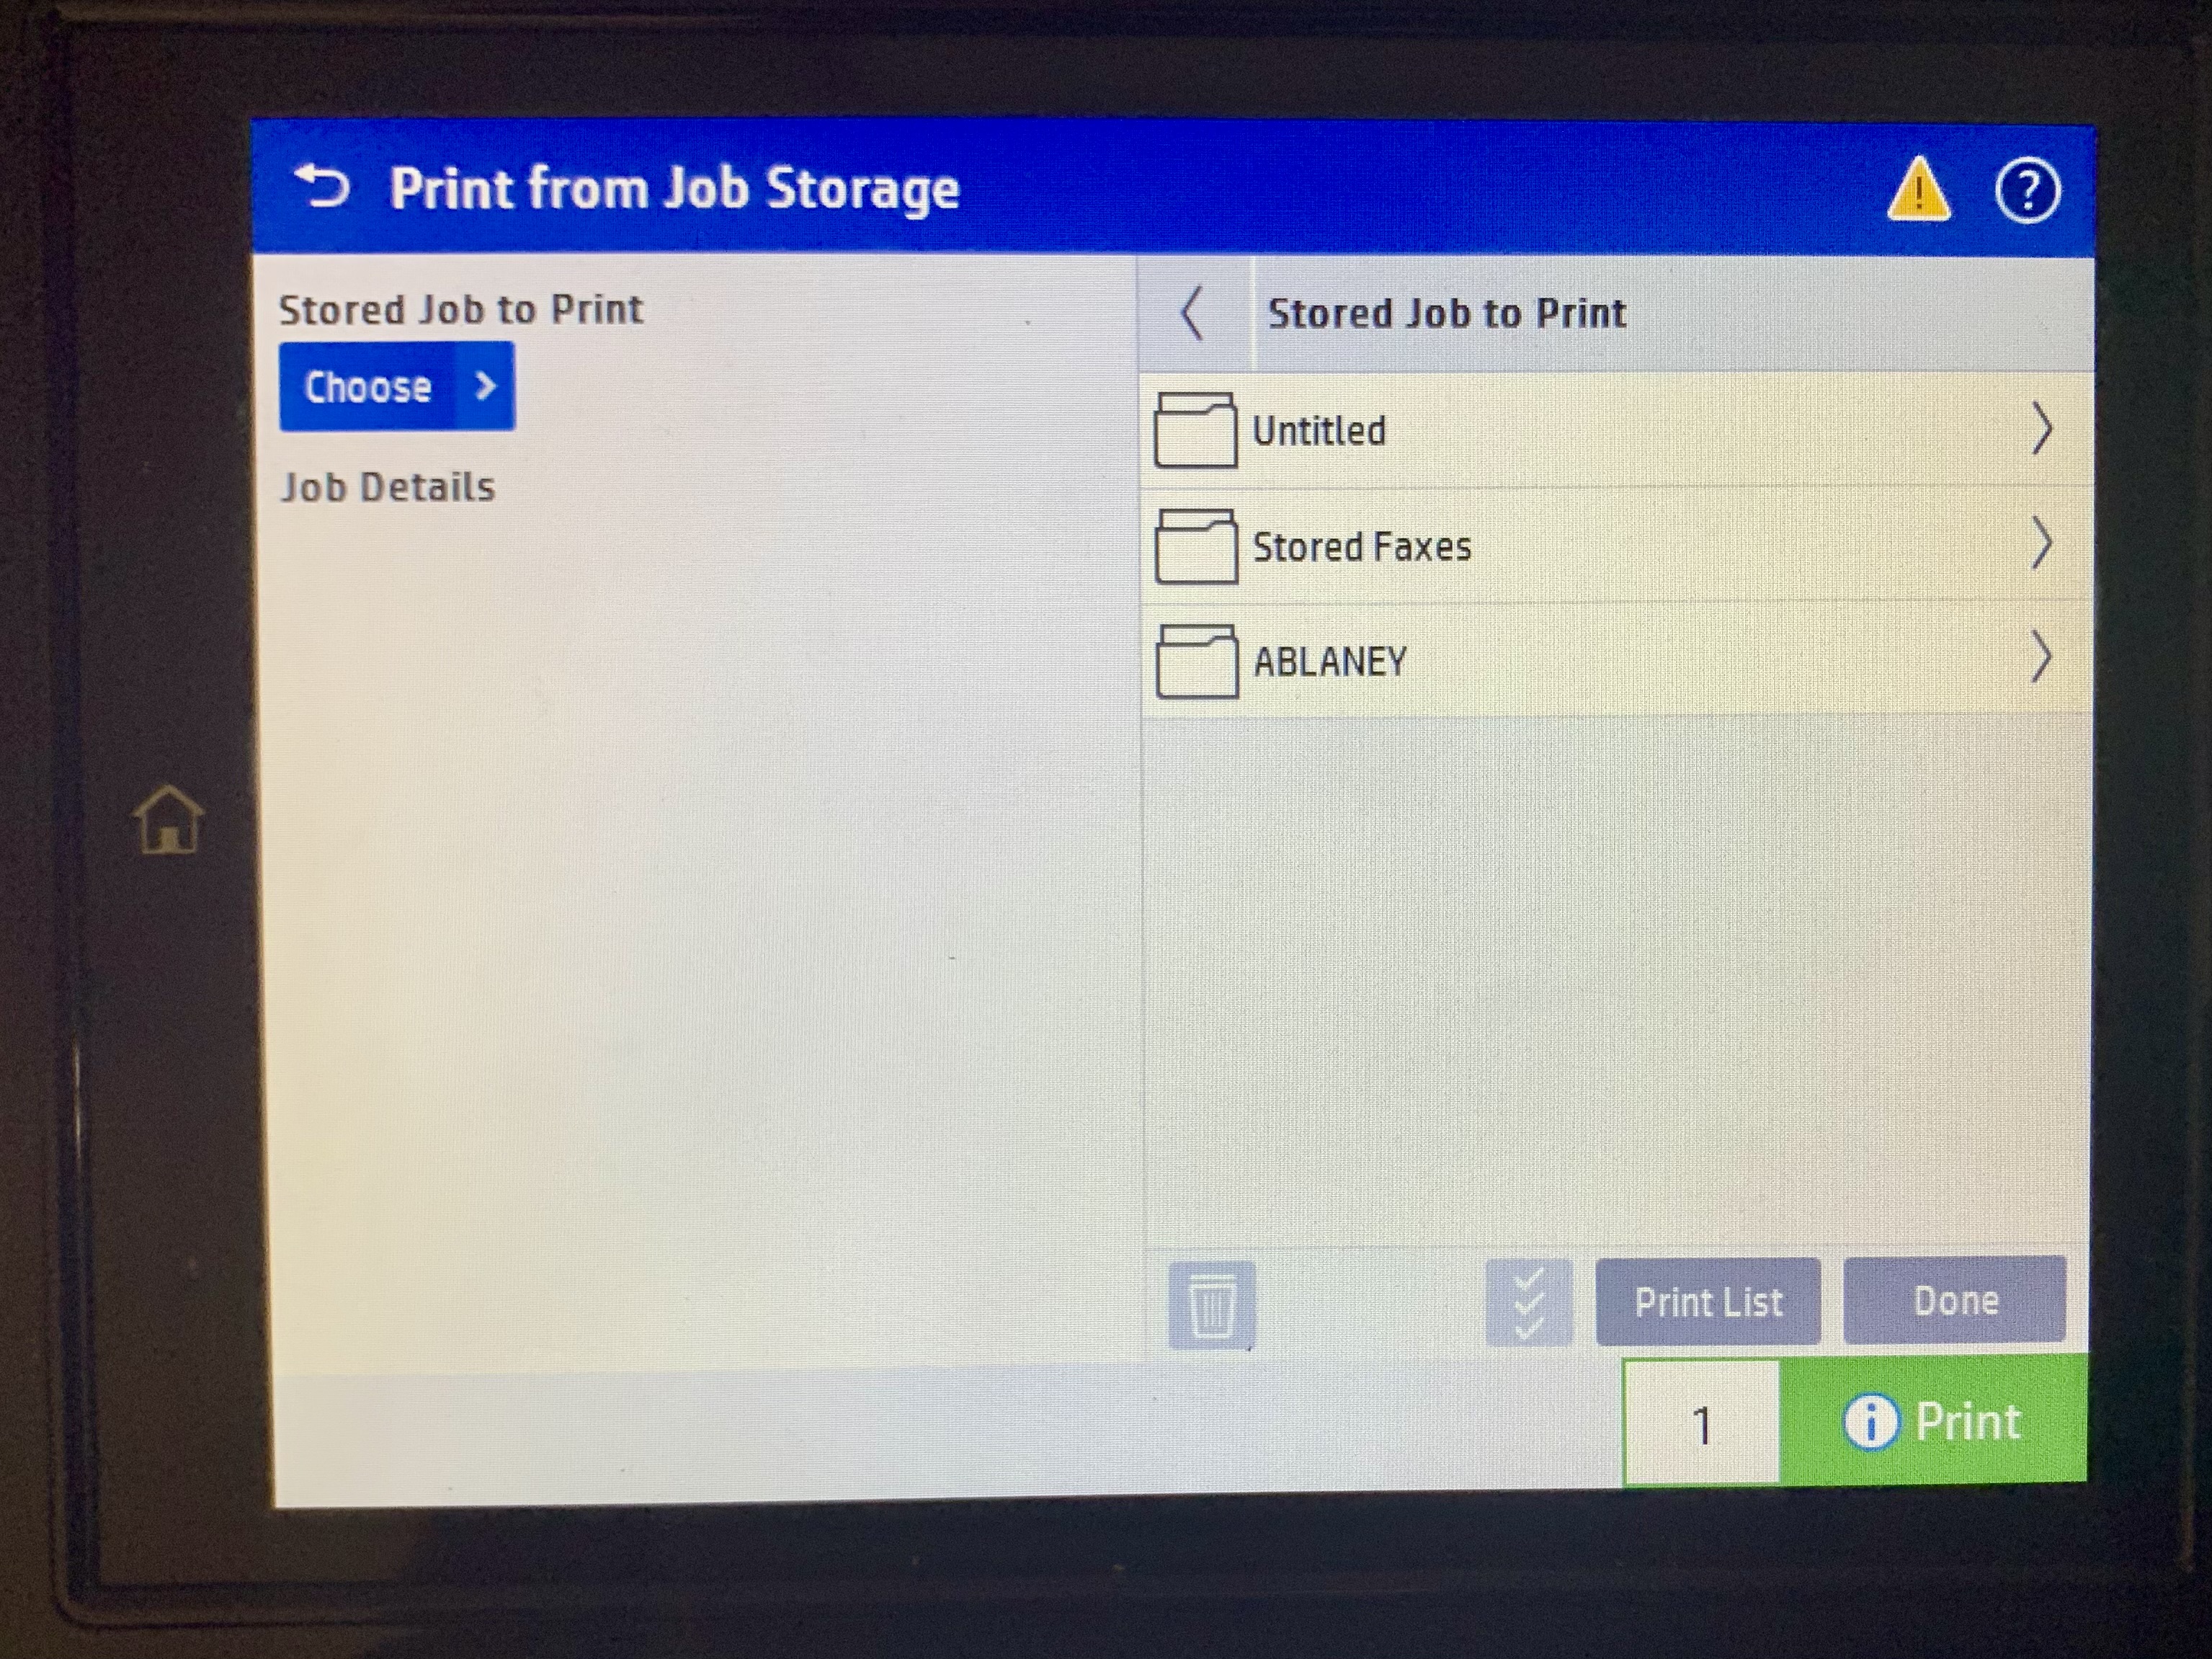
3. Press Print from Job Storage.
|
 |
|
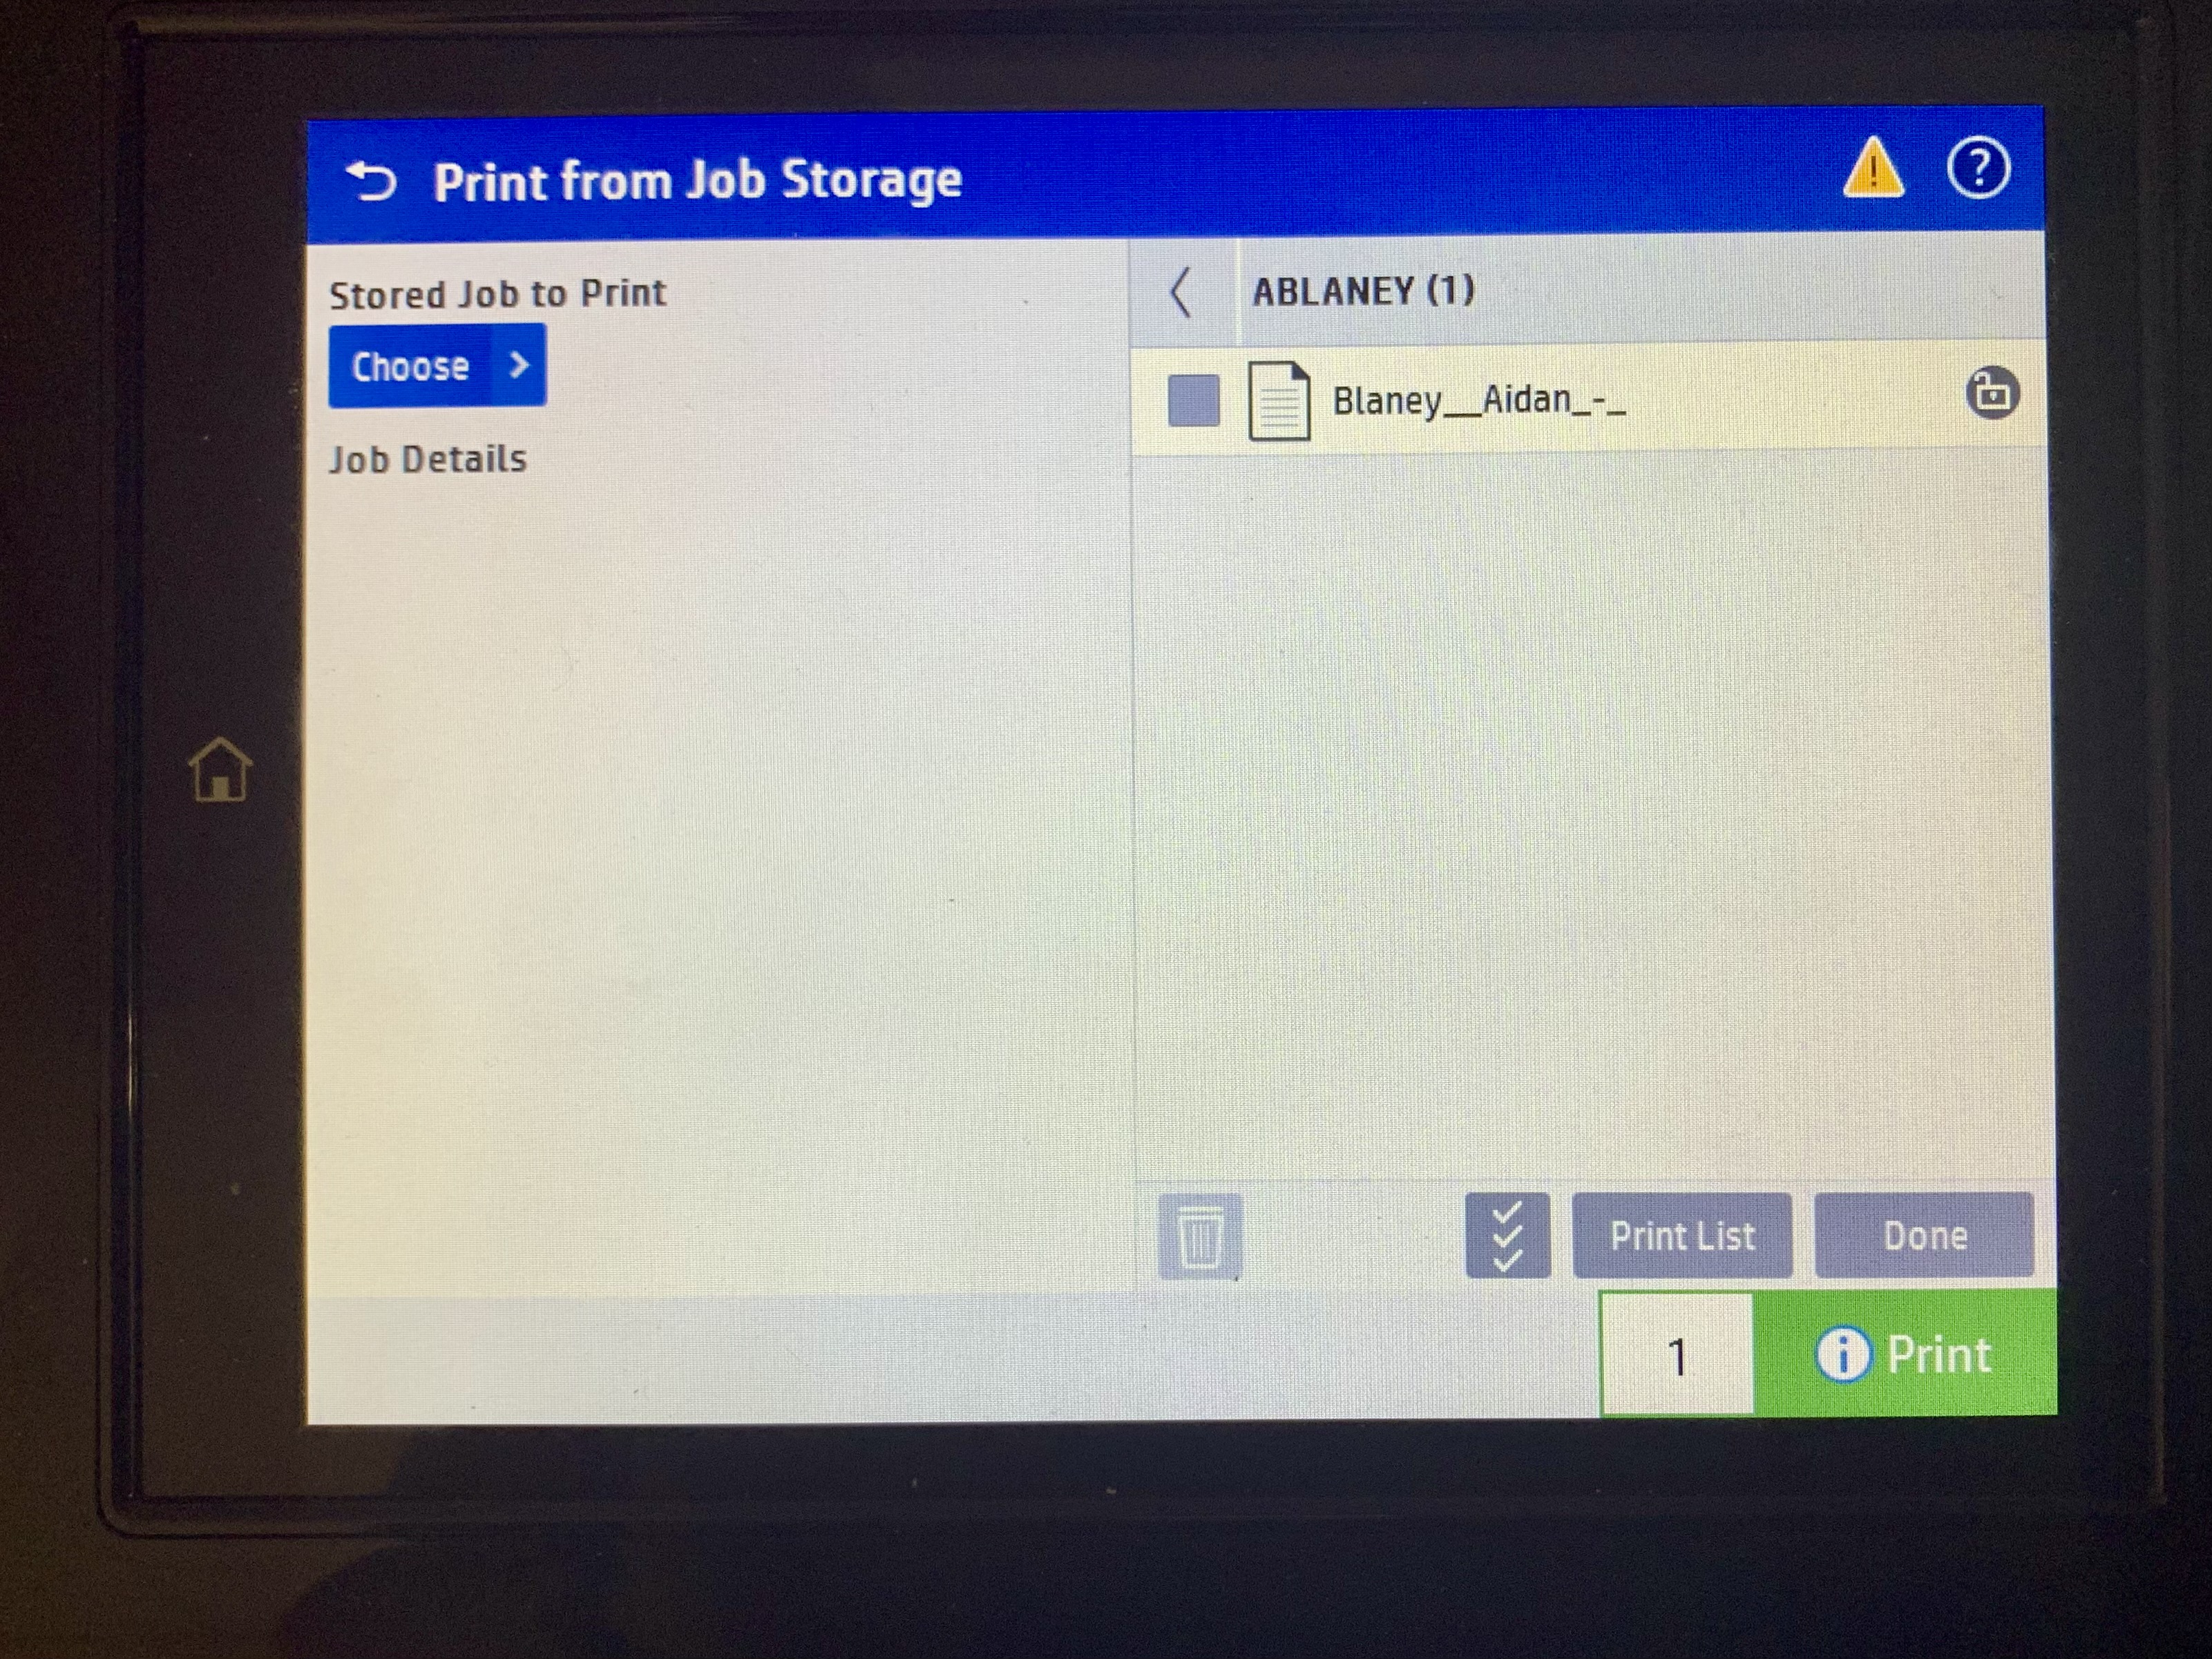
4. Press the folder icon with your designated name or accessnet name.
This name was set when you set up the stored print job function.
|
 |
| 5. Press Unlock Print Jobs. | 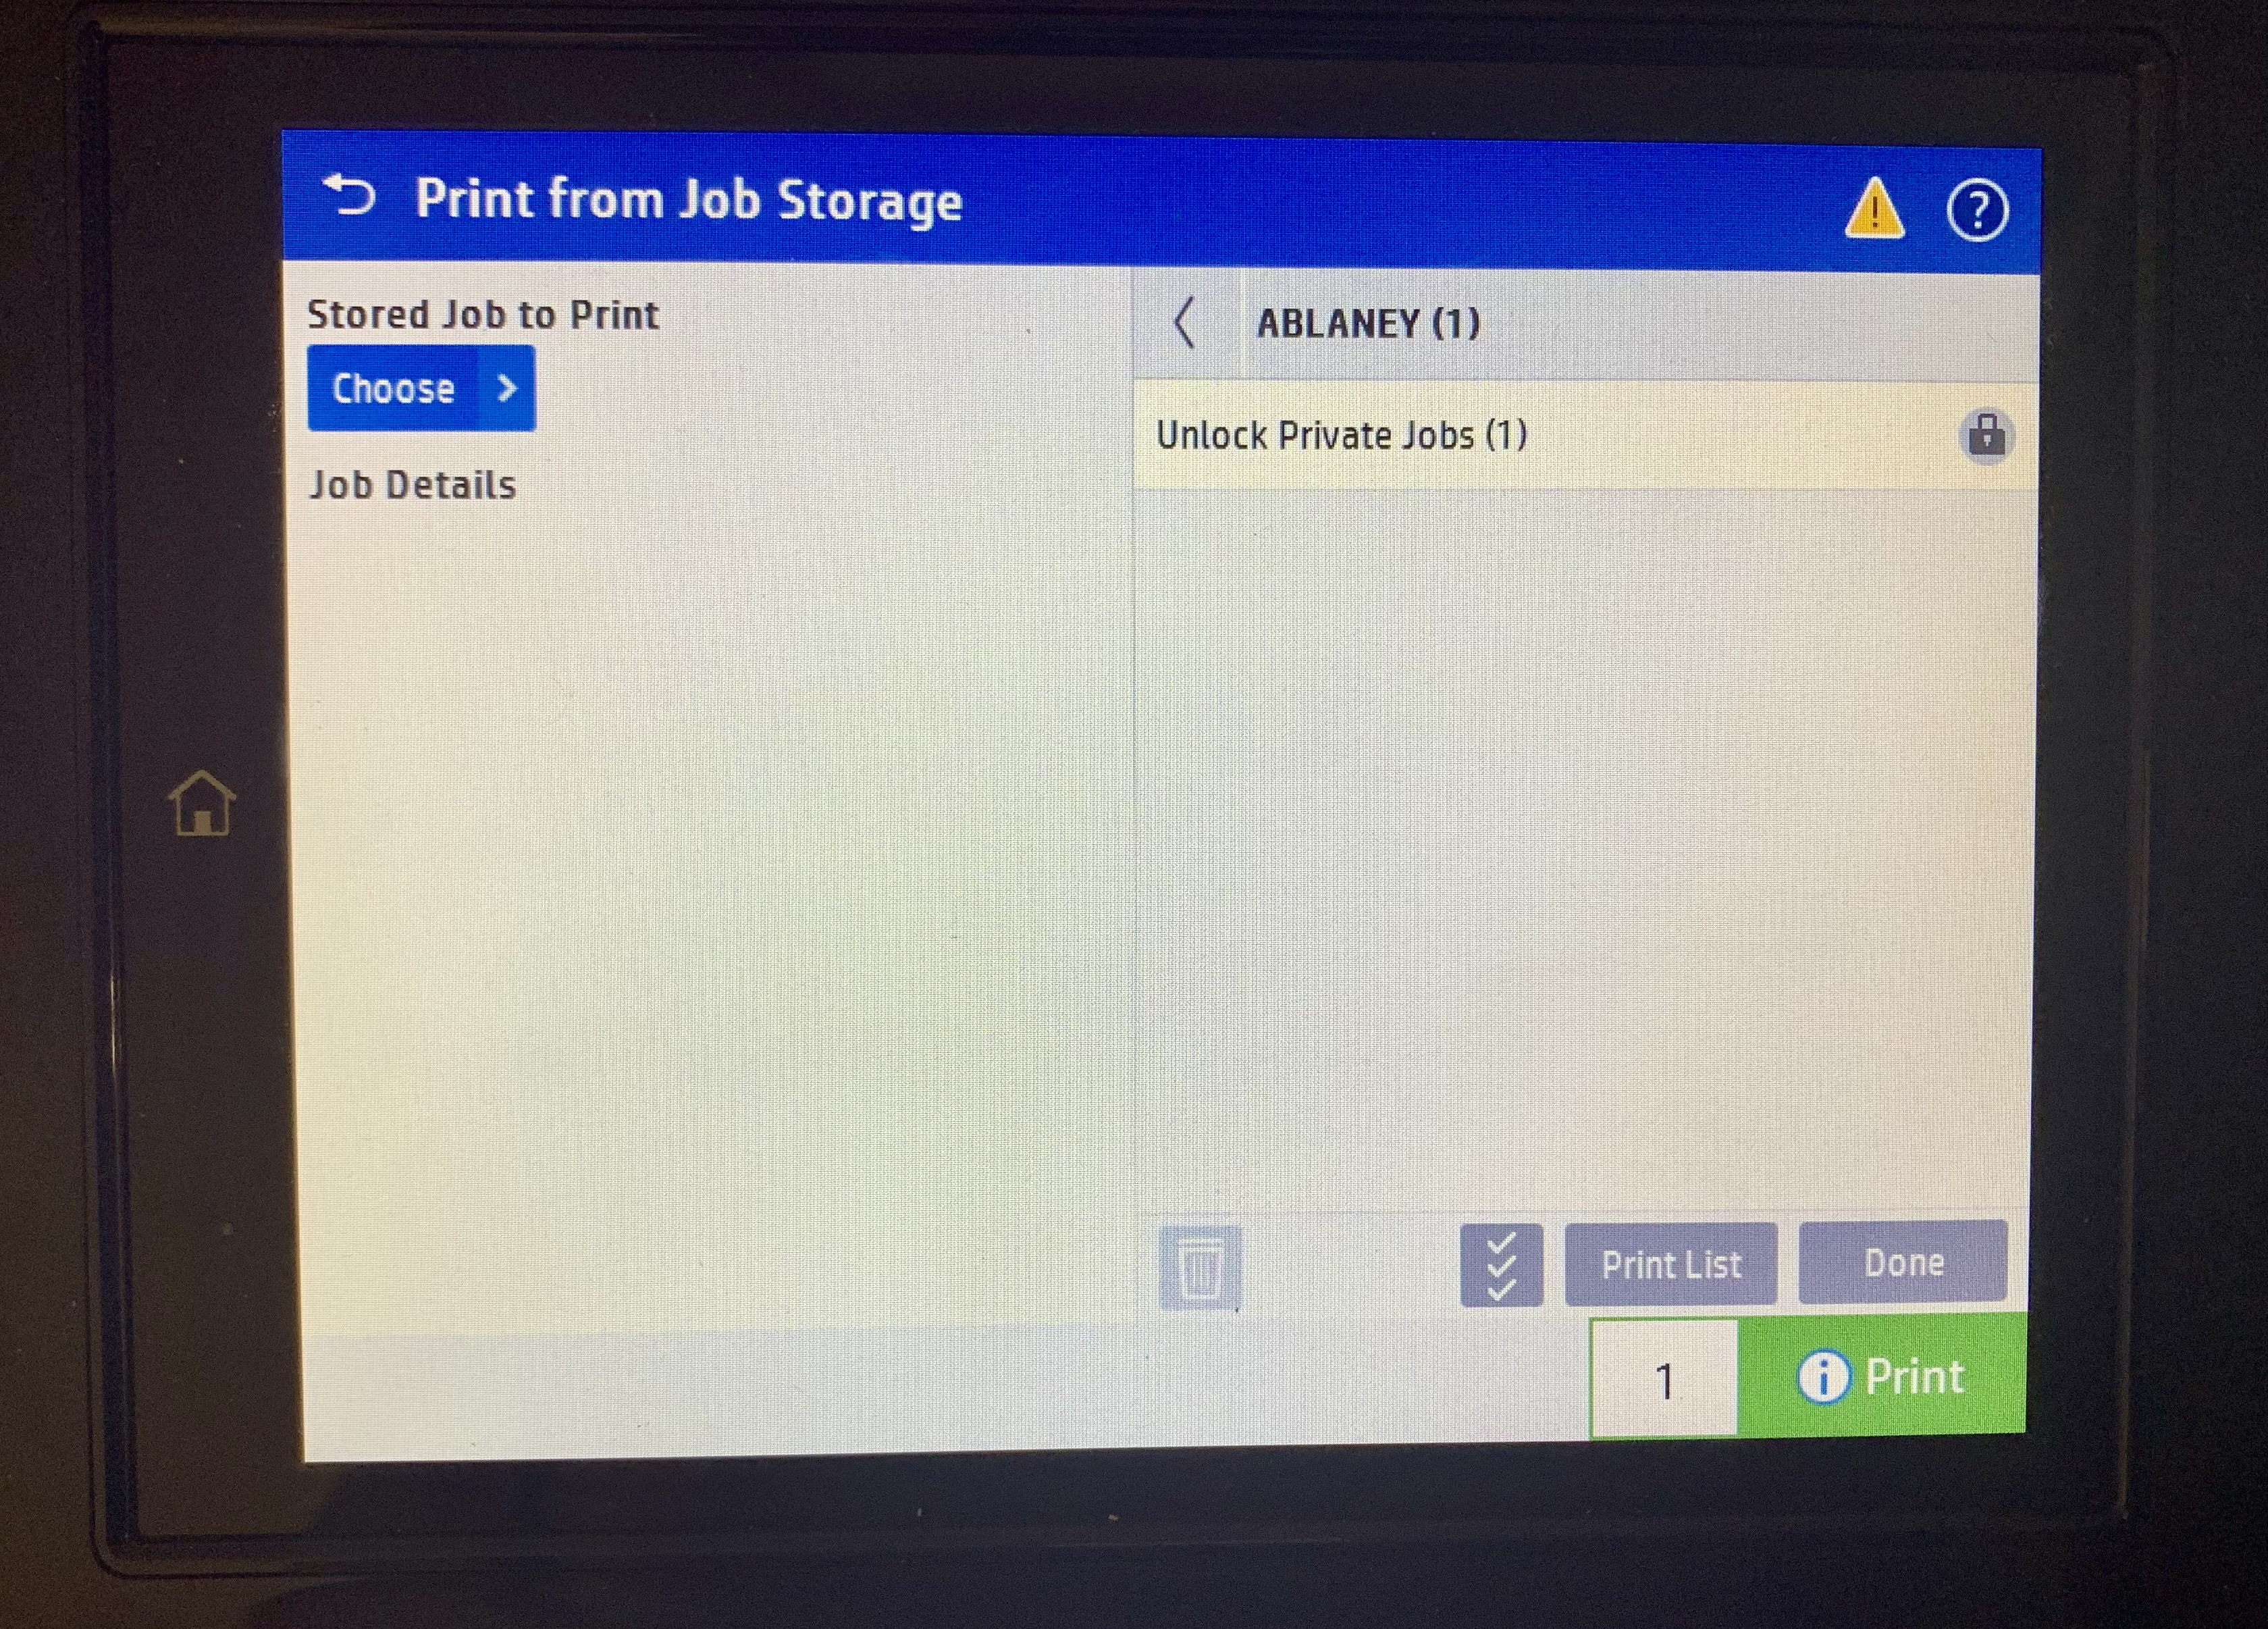 |
| 6. Enter the password you set when setting up the job storage within the print settings. | 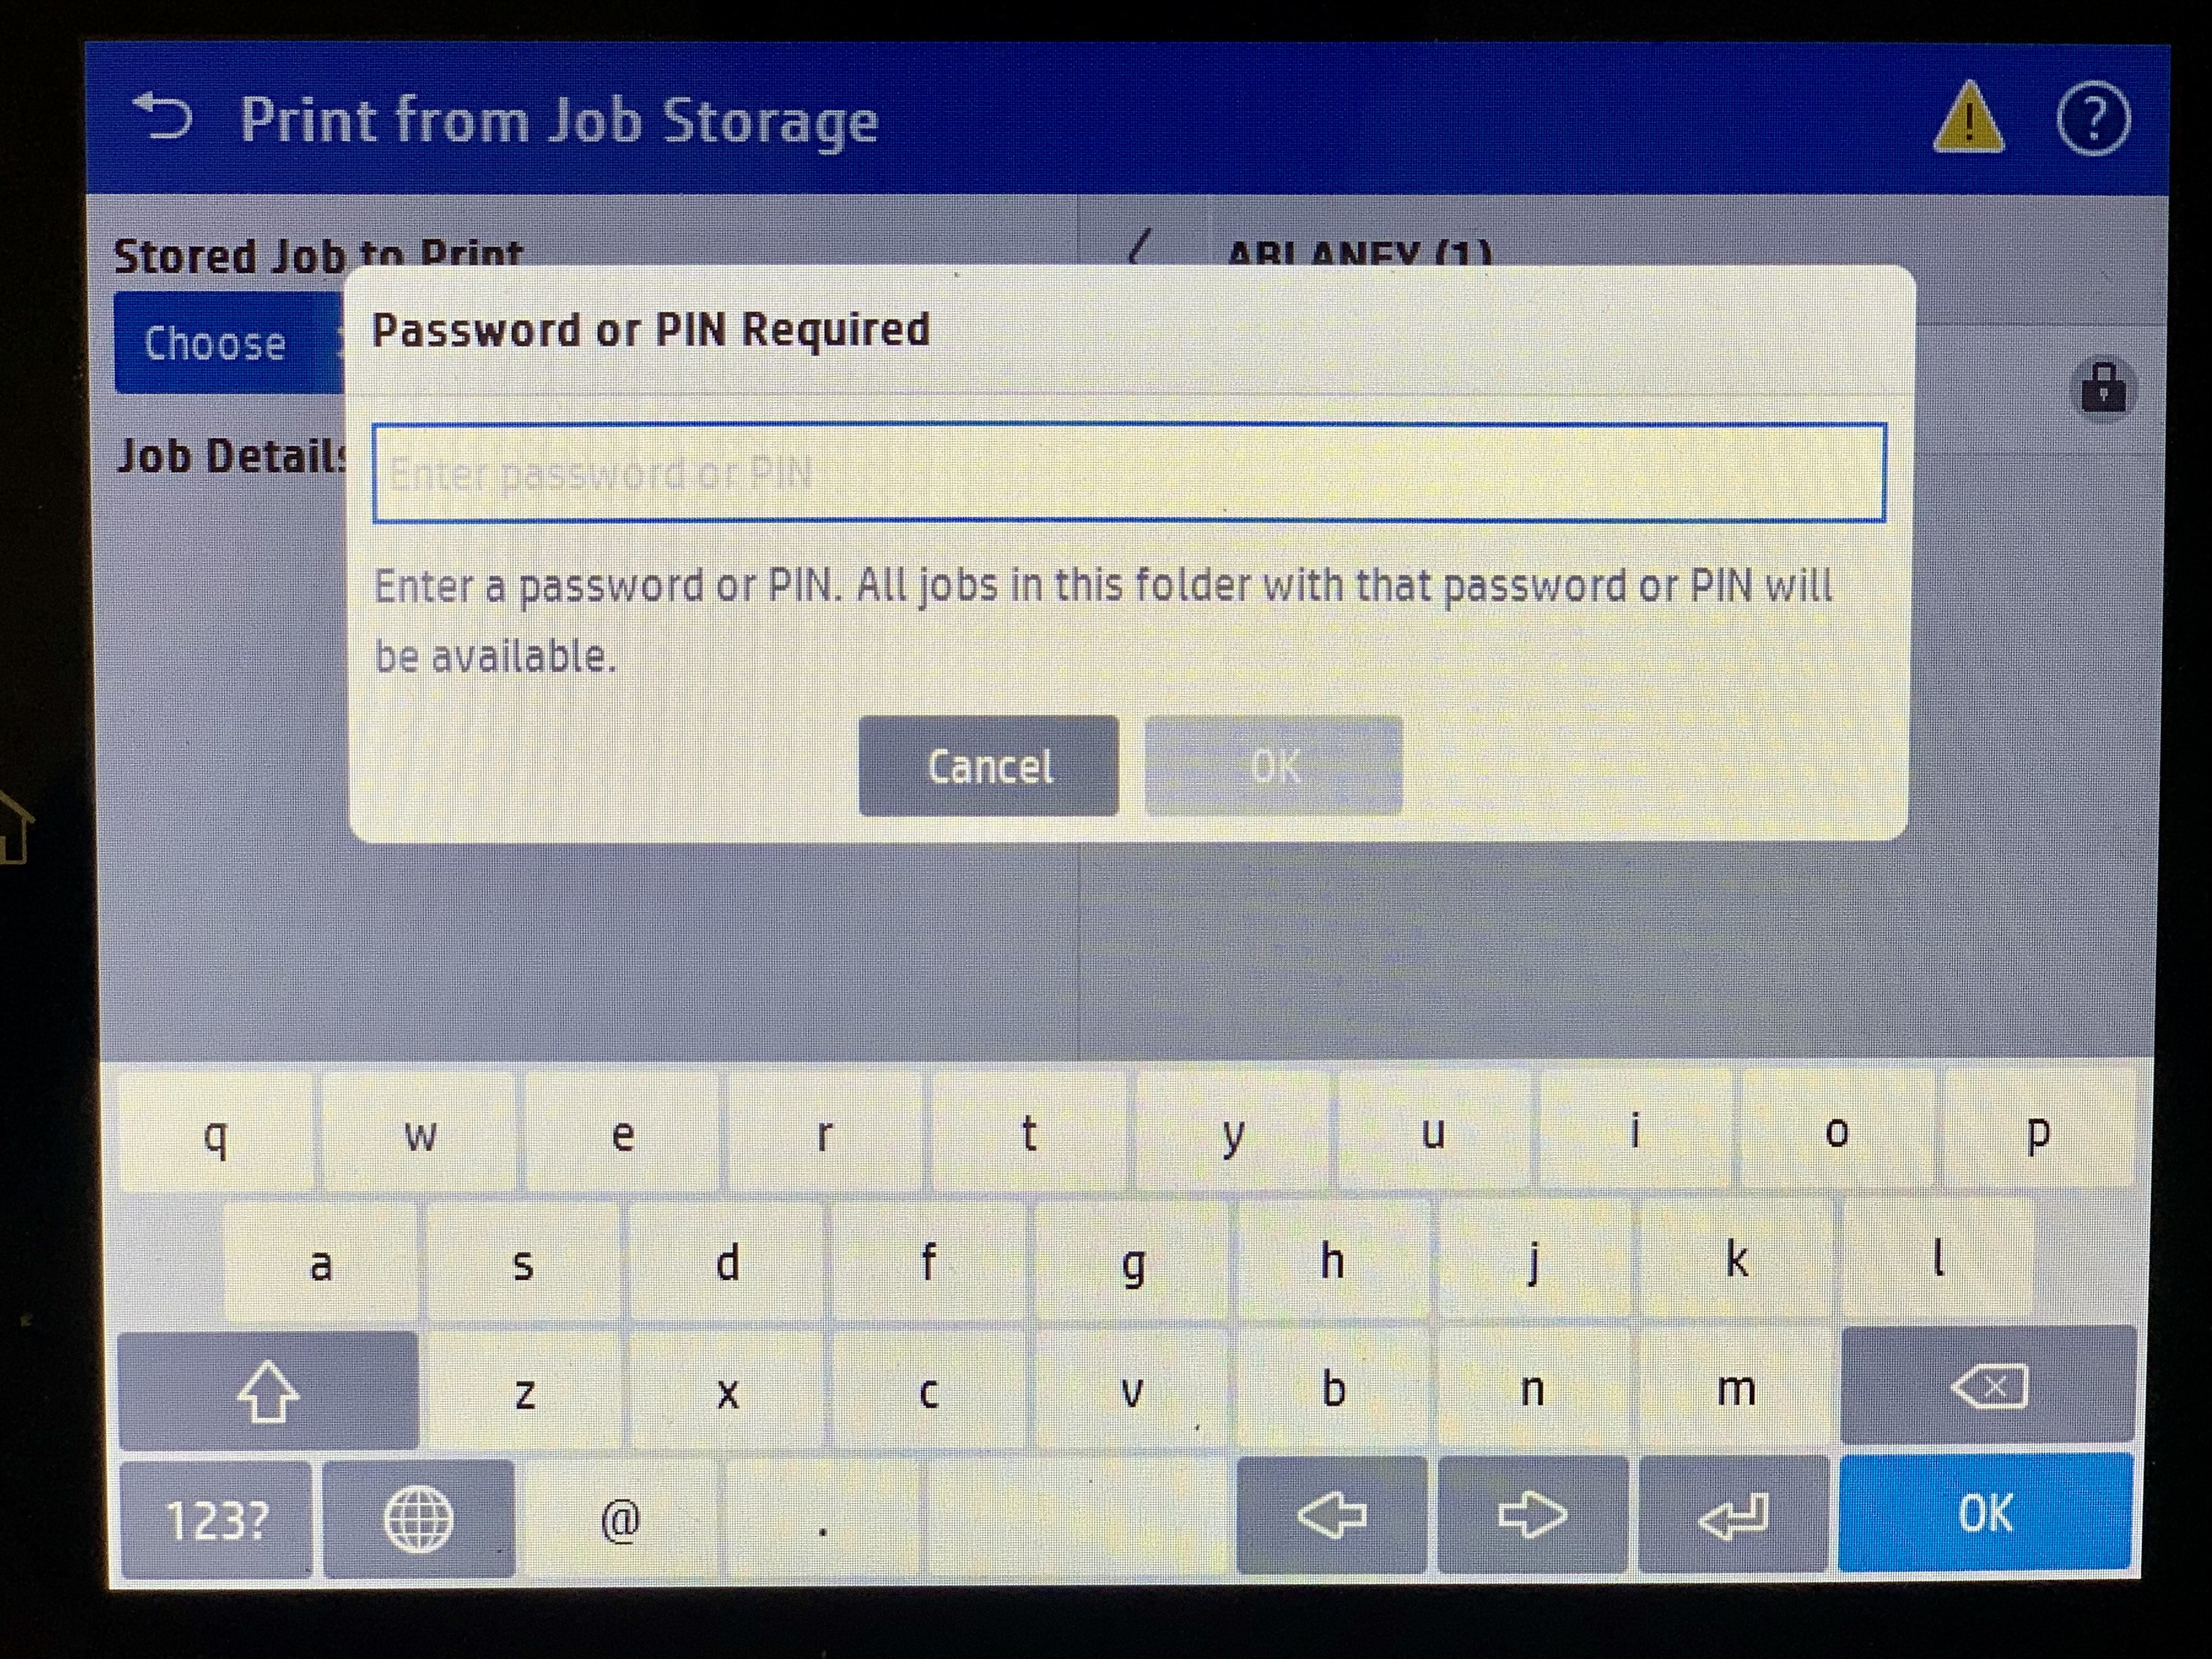 |
| 7. Press OK. | 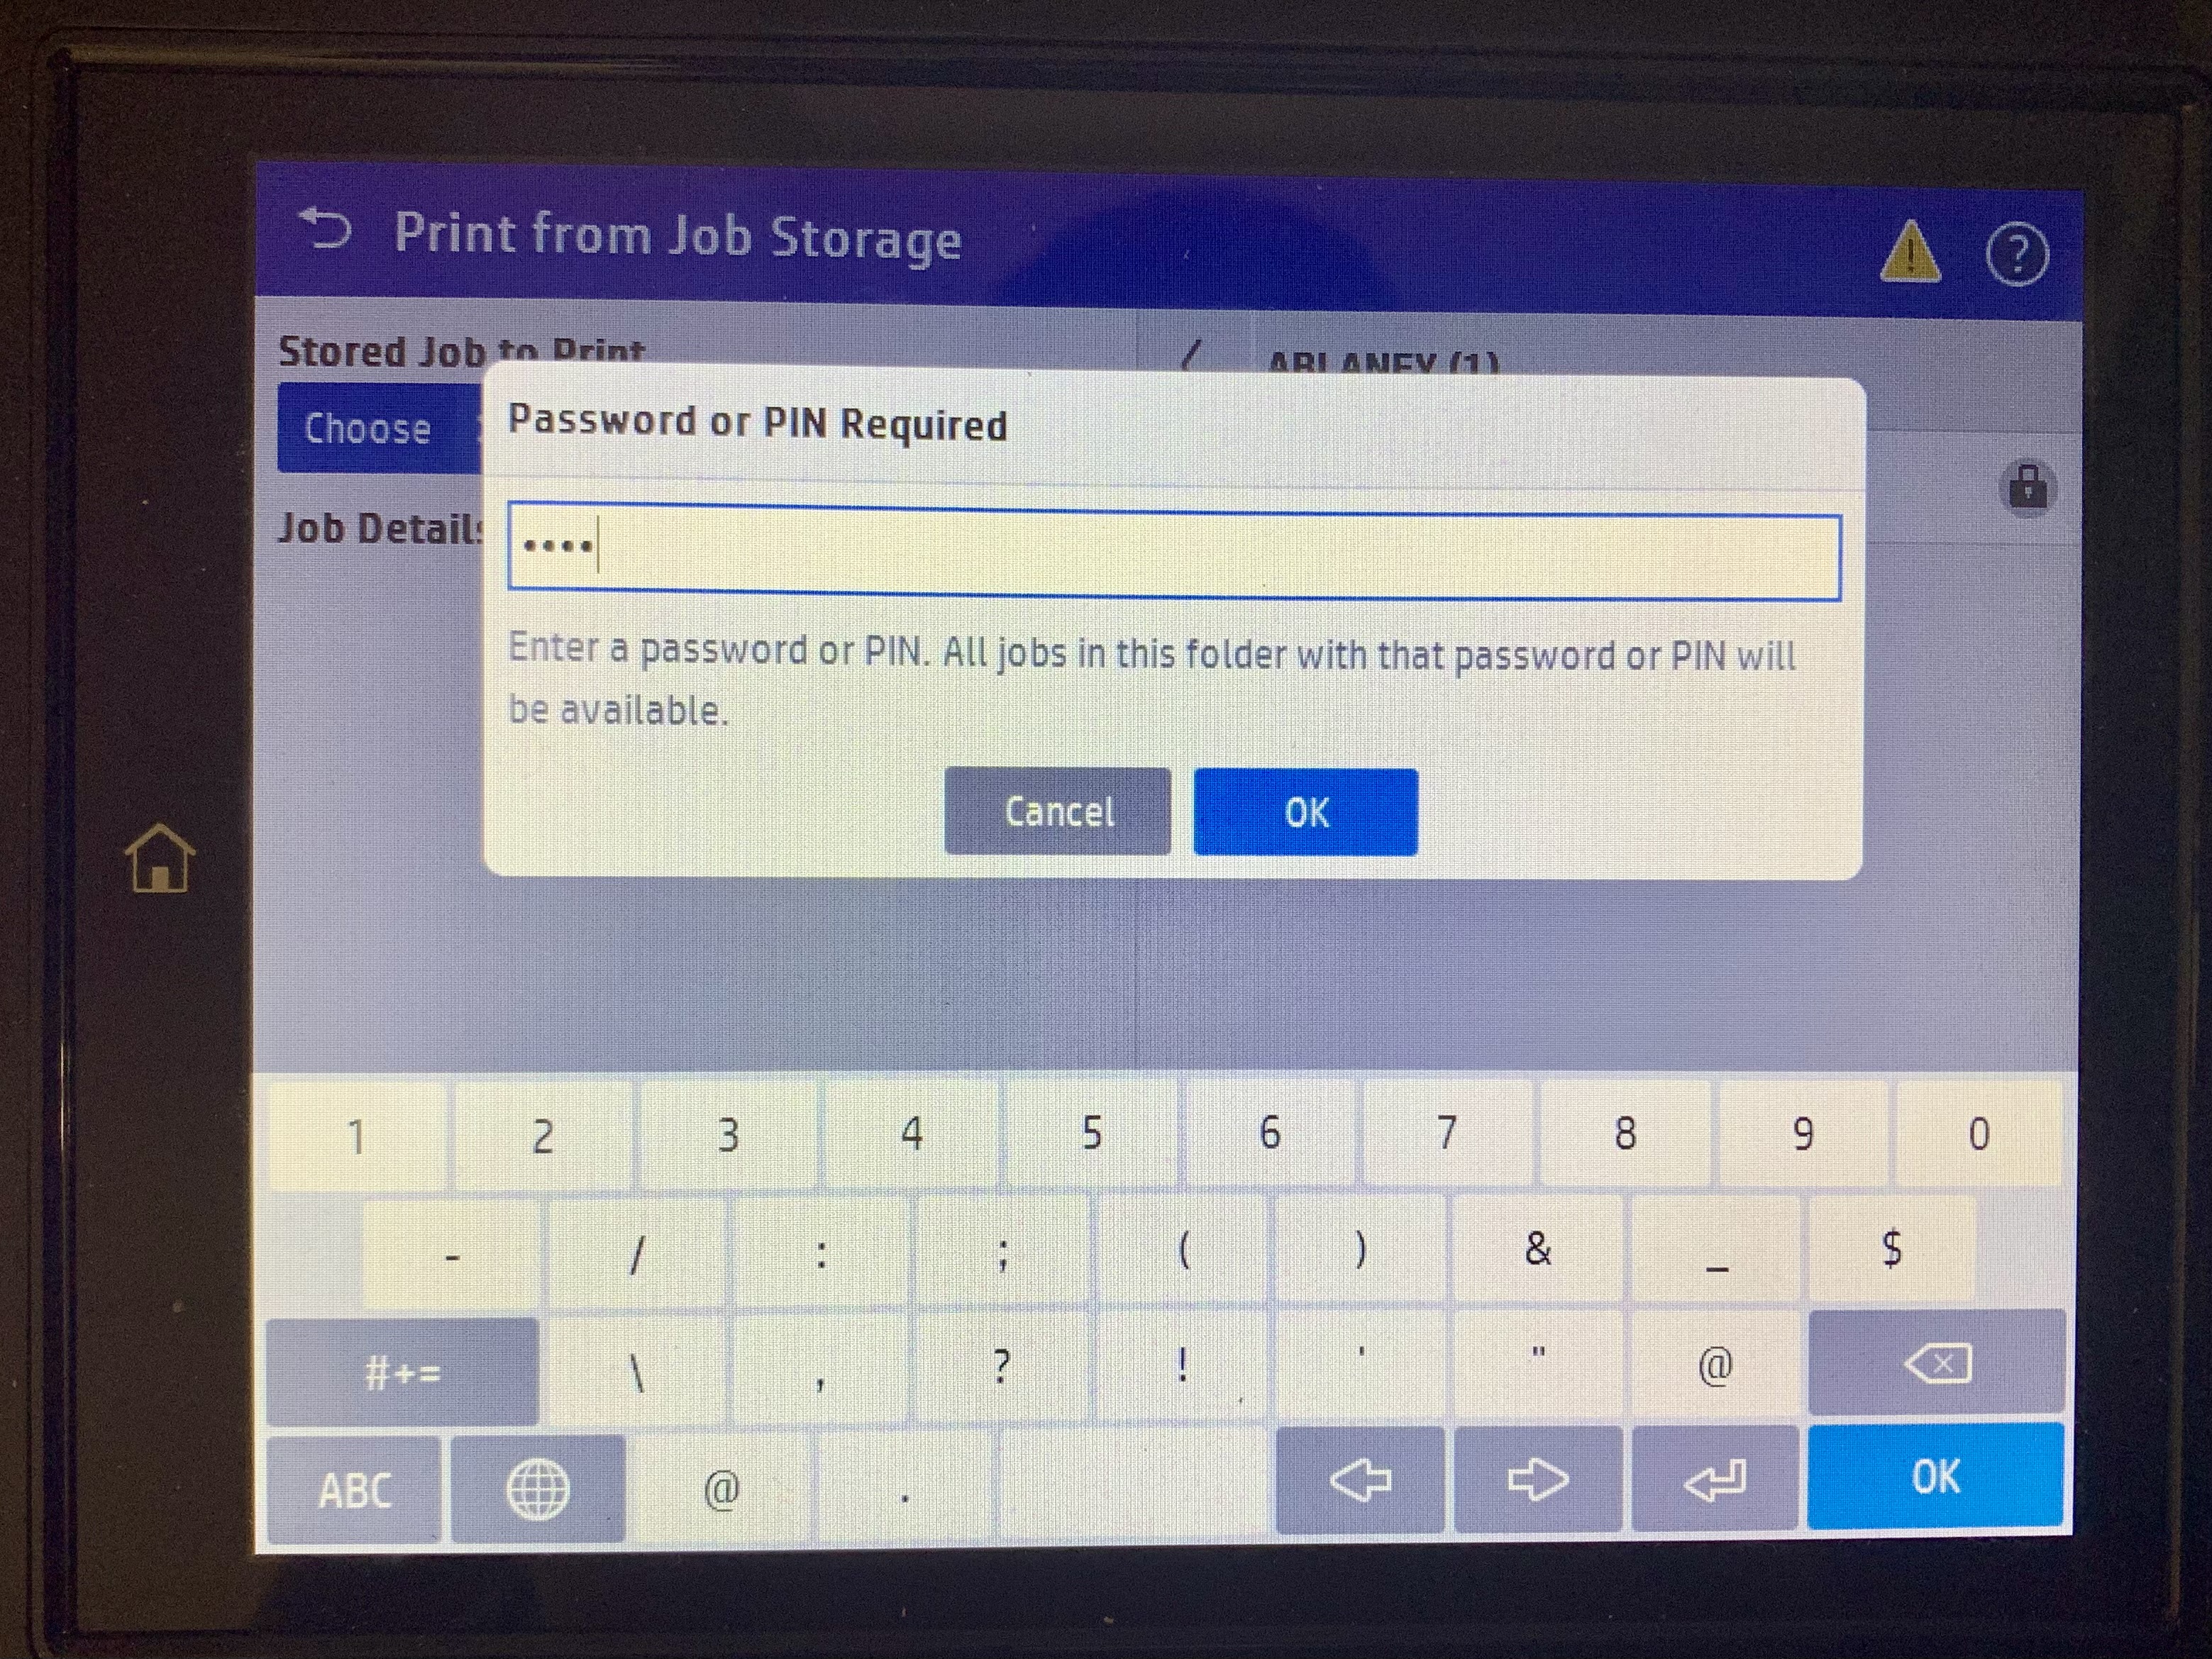 |
|
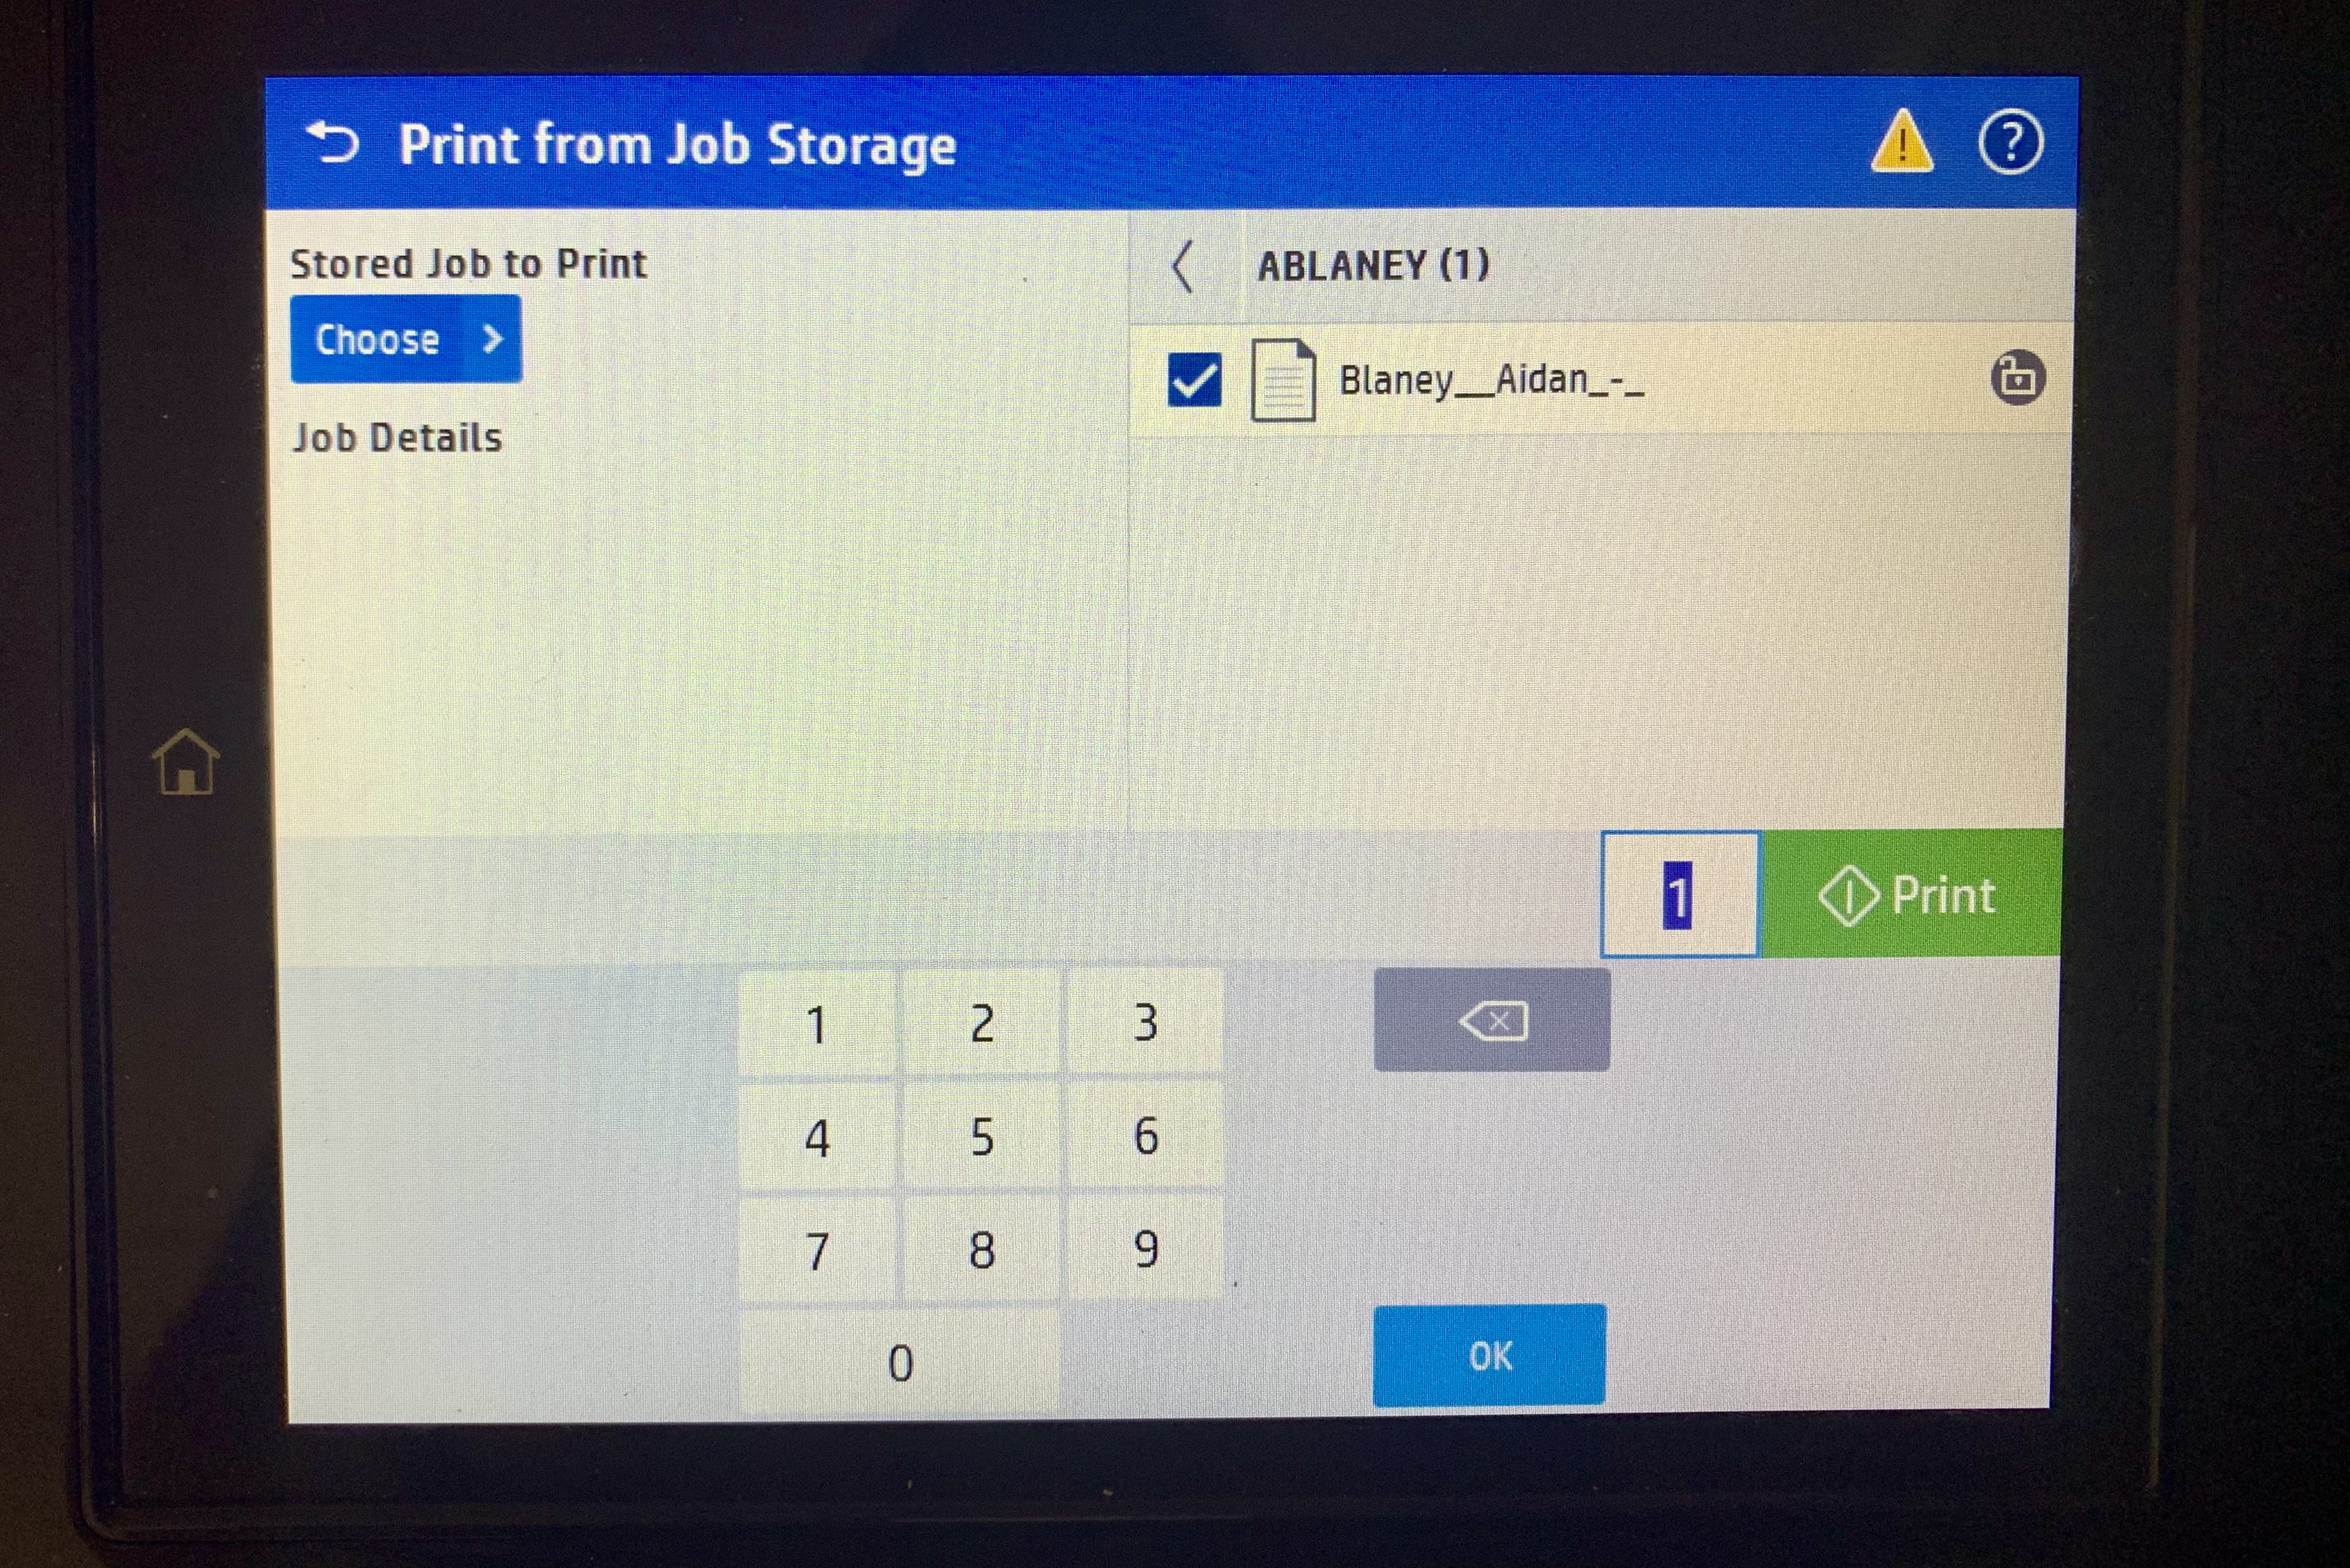
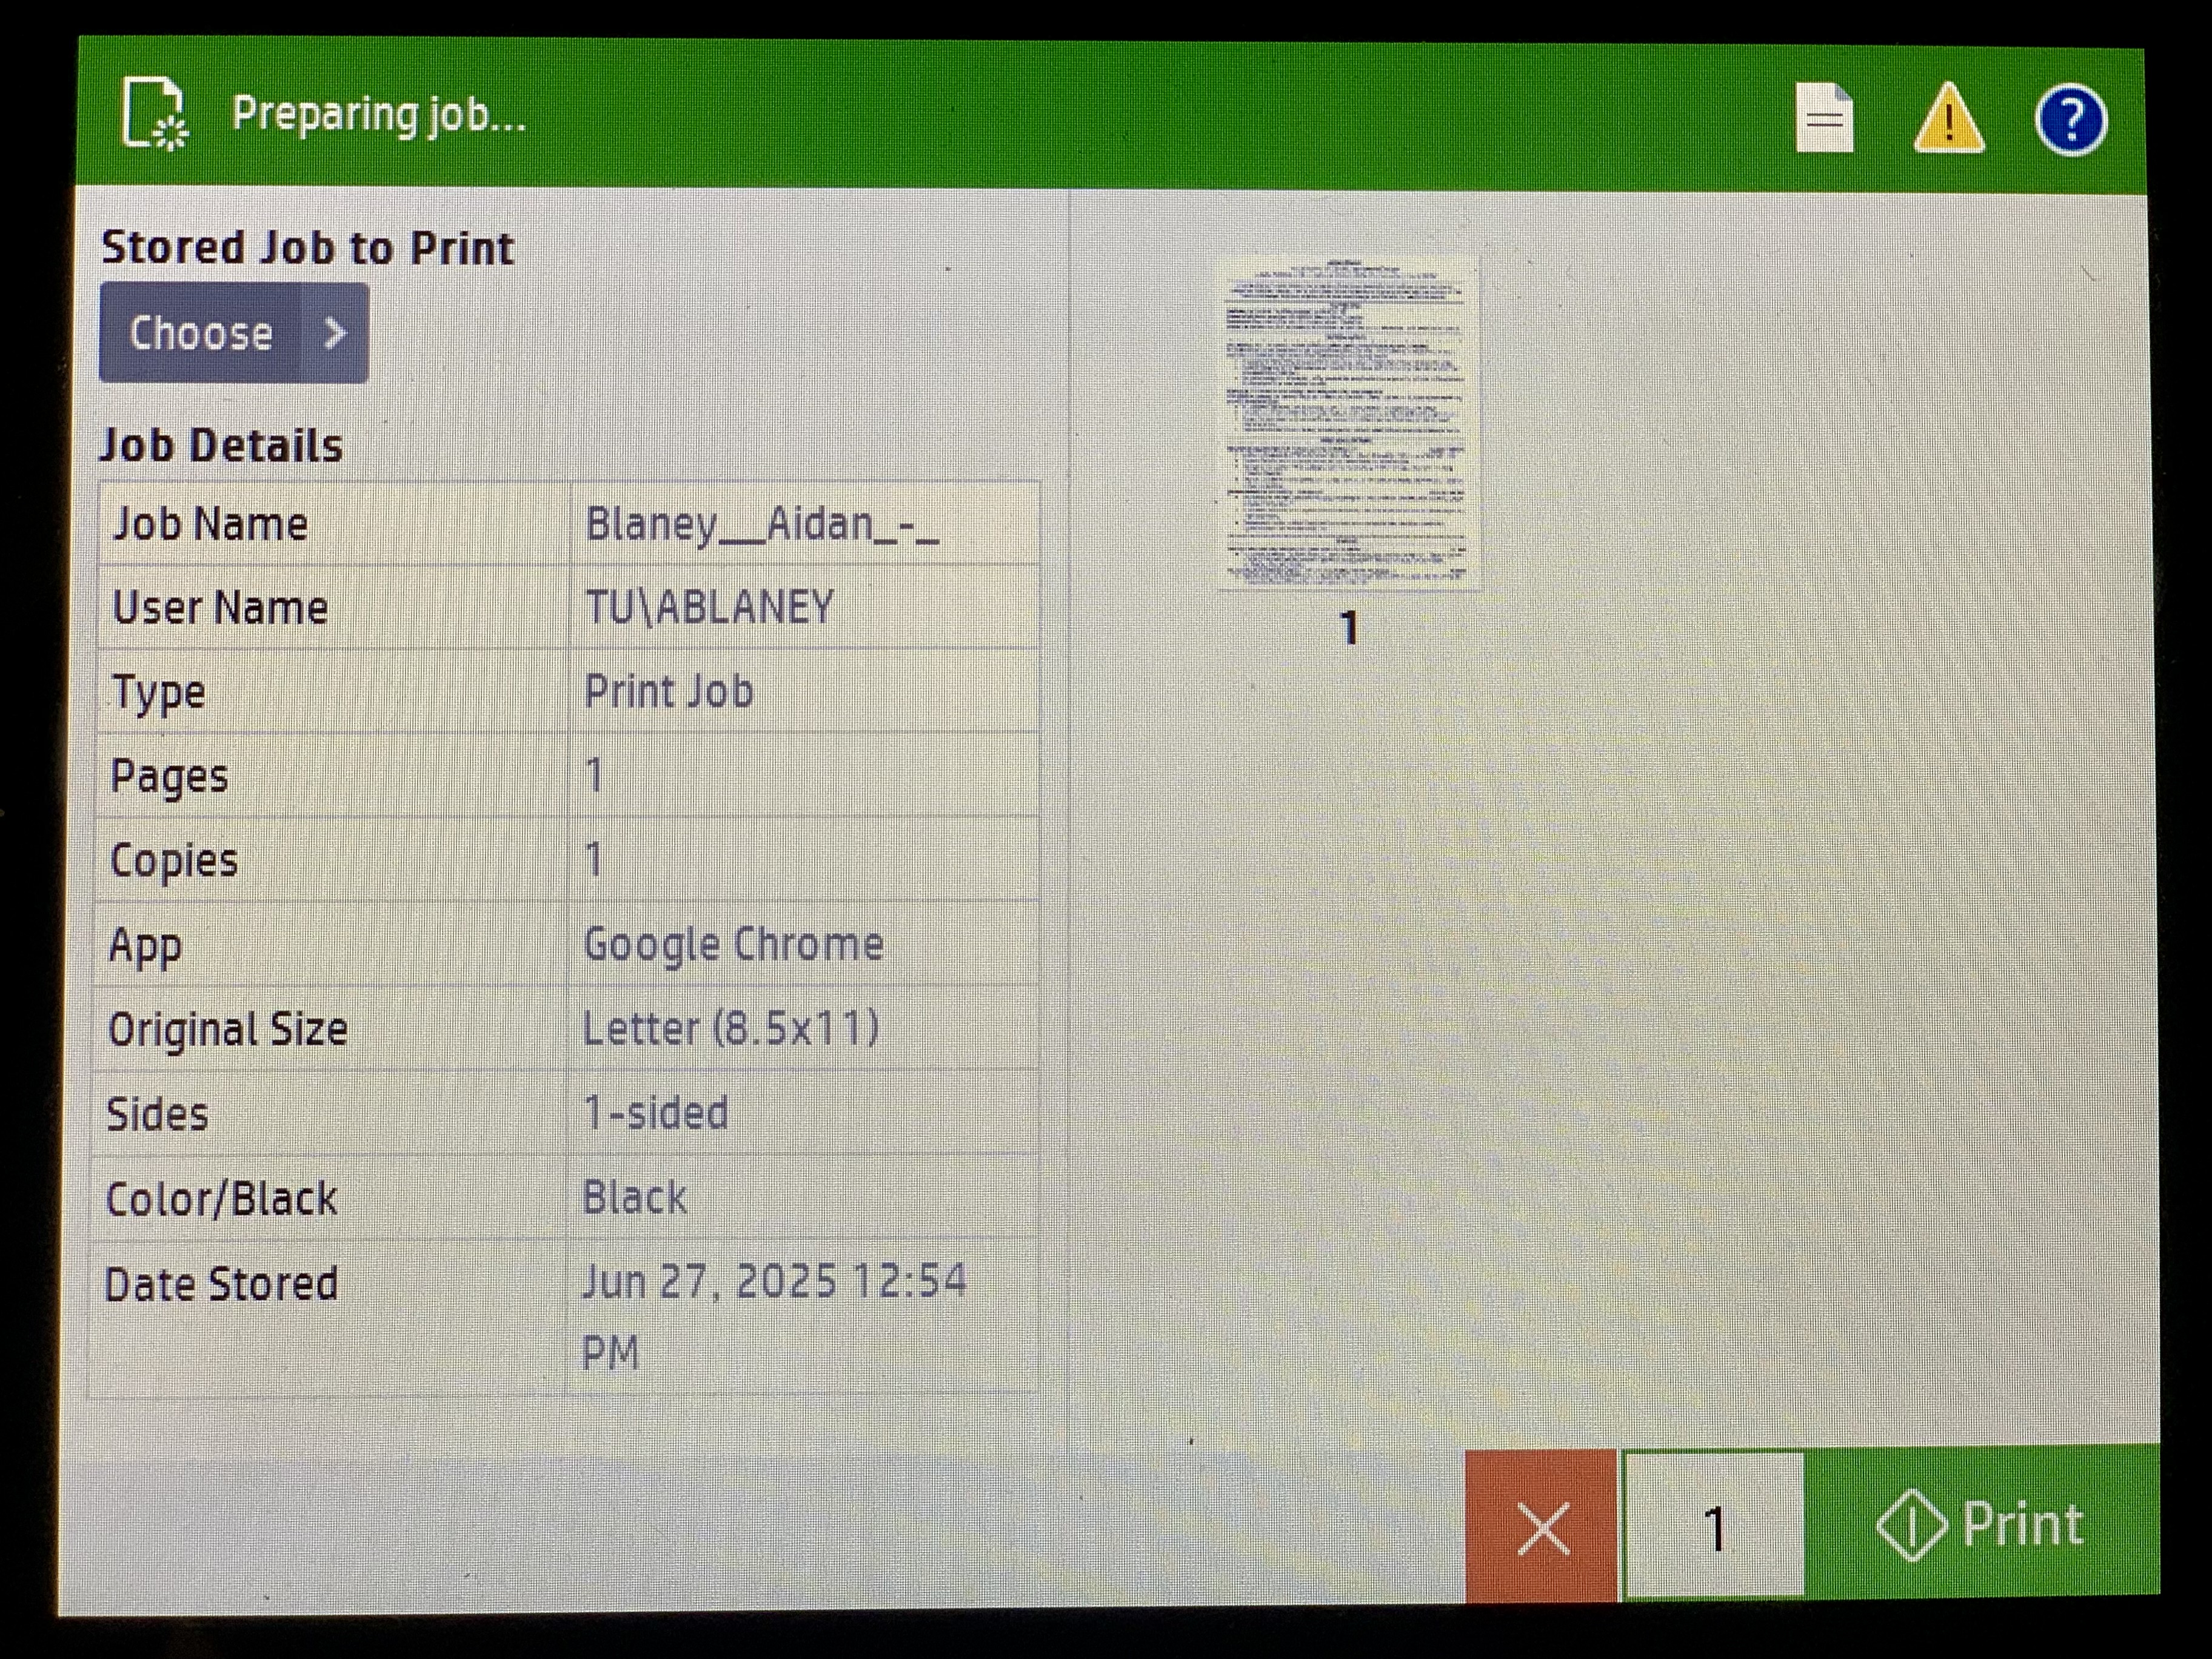
8. Press the checkbox next to the print job you want to print.
If you wish to print more than one copy, press the 1 next to the green print button to add more copies. |
|
| 9. Press the green Print button. |
 |
|
10. The boarder will turn green and your job will now print.
|
 |