VMWare Installation for Mac Users
|
1. Go to: https://support.broadcom.com/group/ecx/downloads and register for a free account.
|
|
|
2. Once that’s completed, download VMWare Fusion: https://support.broadcom.com/group/ecx/productdownloads?subfamily=VMware%20Fusion&freeDownloads=true
|
|
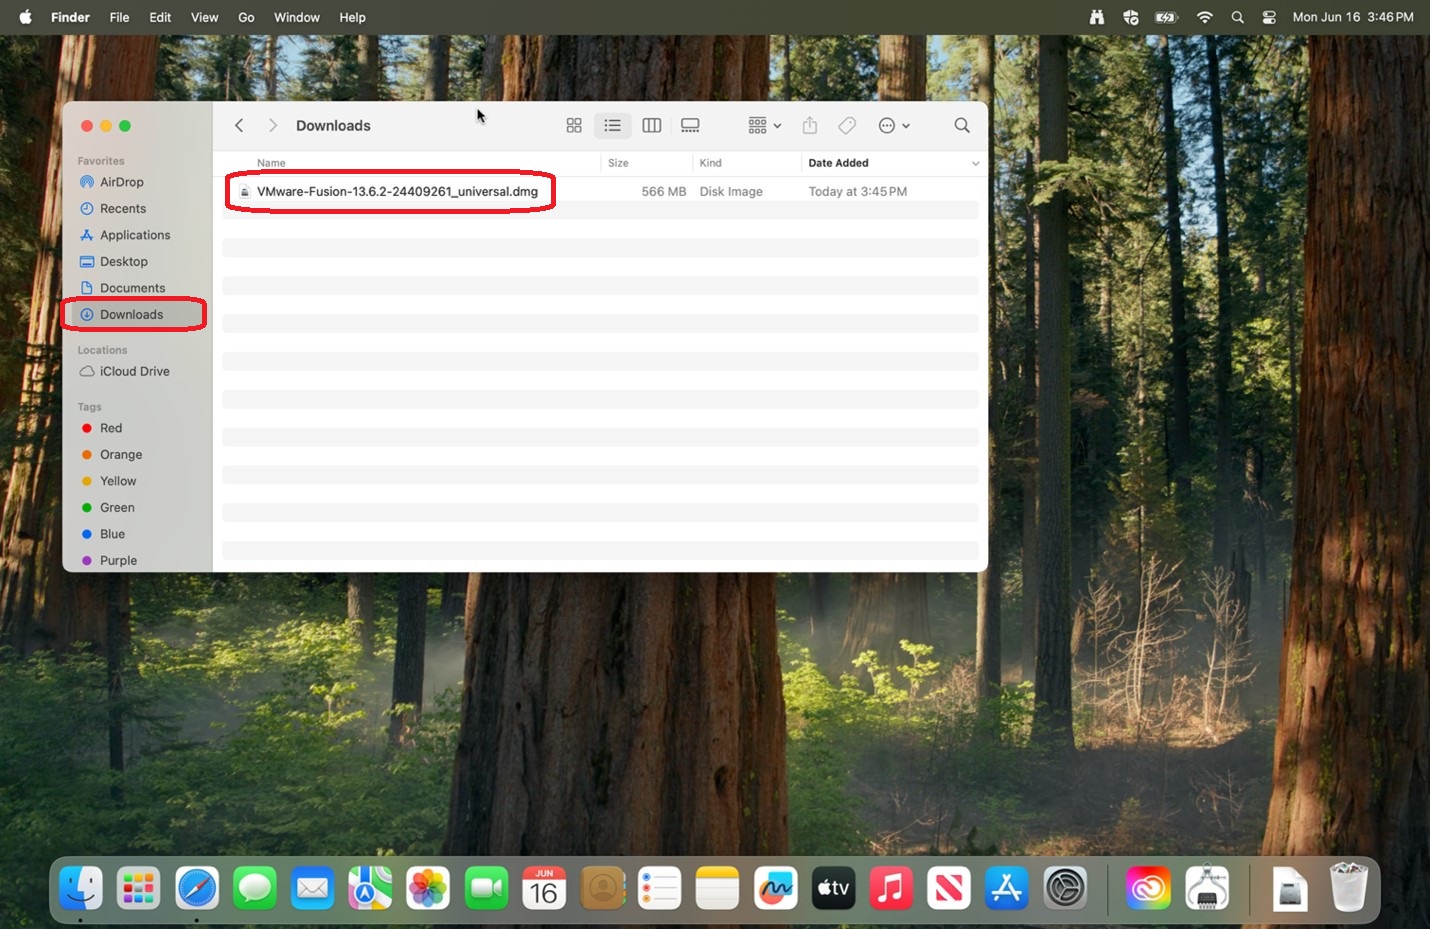
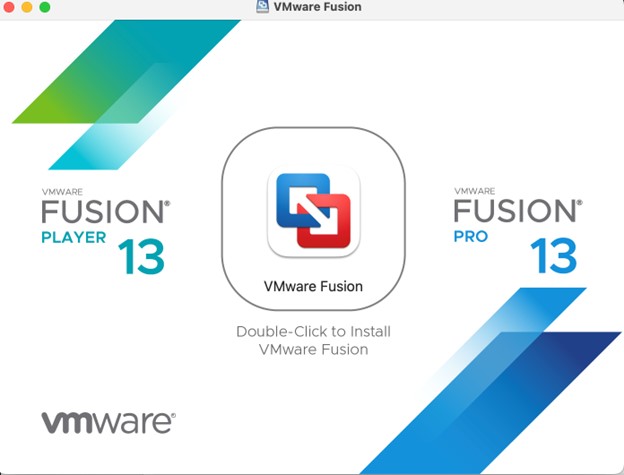
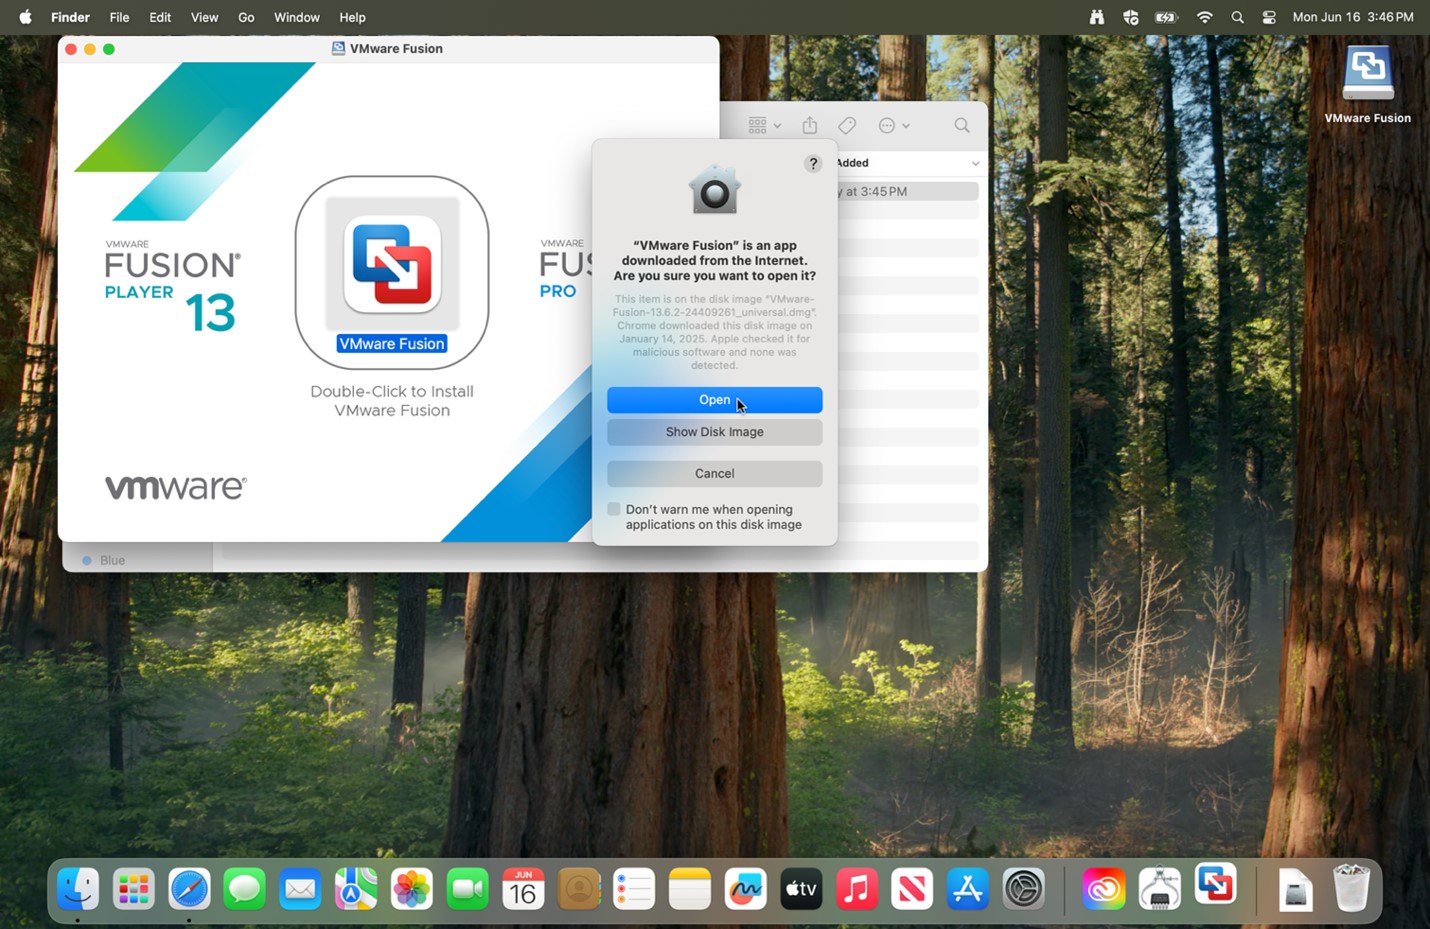
| 3. Open the folder that you downloaded the installer to. Double click the installer from where you downloaded to. |
|
| 4. Select Get Windows from Microsoft. | 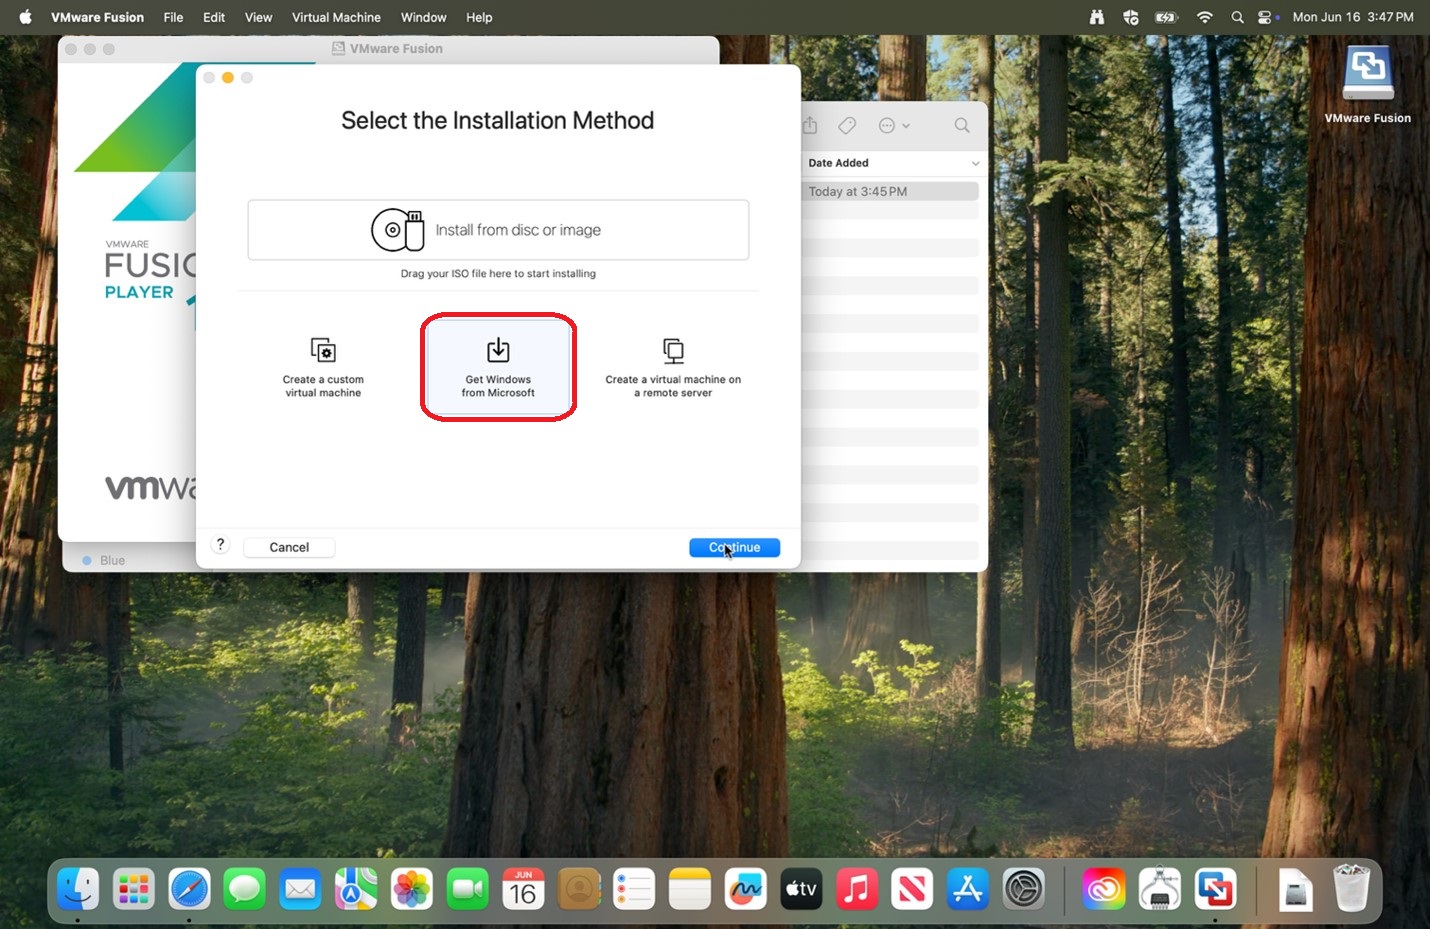 |
|
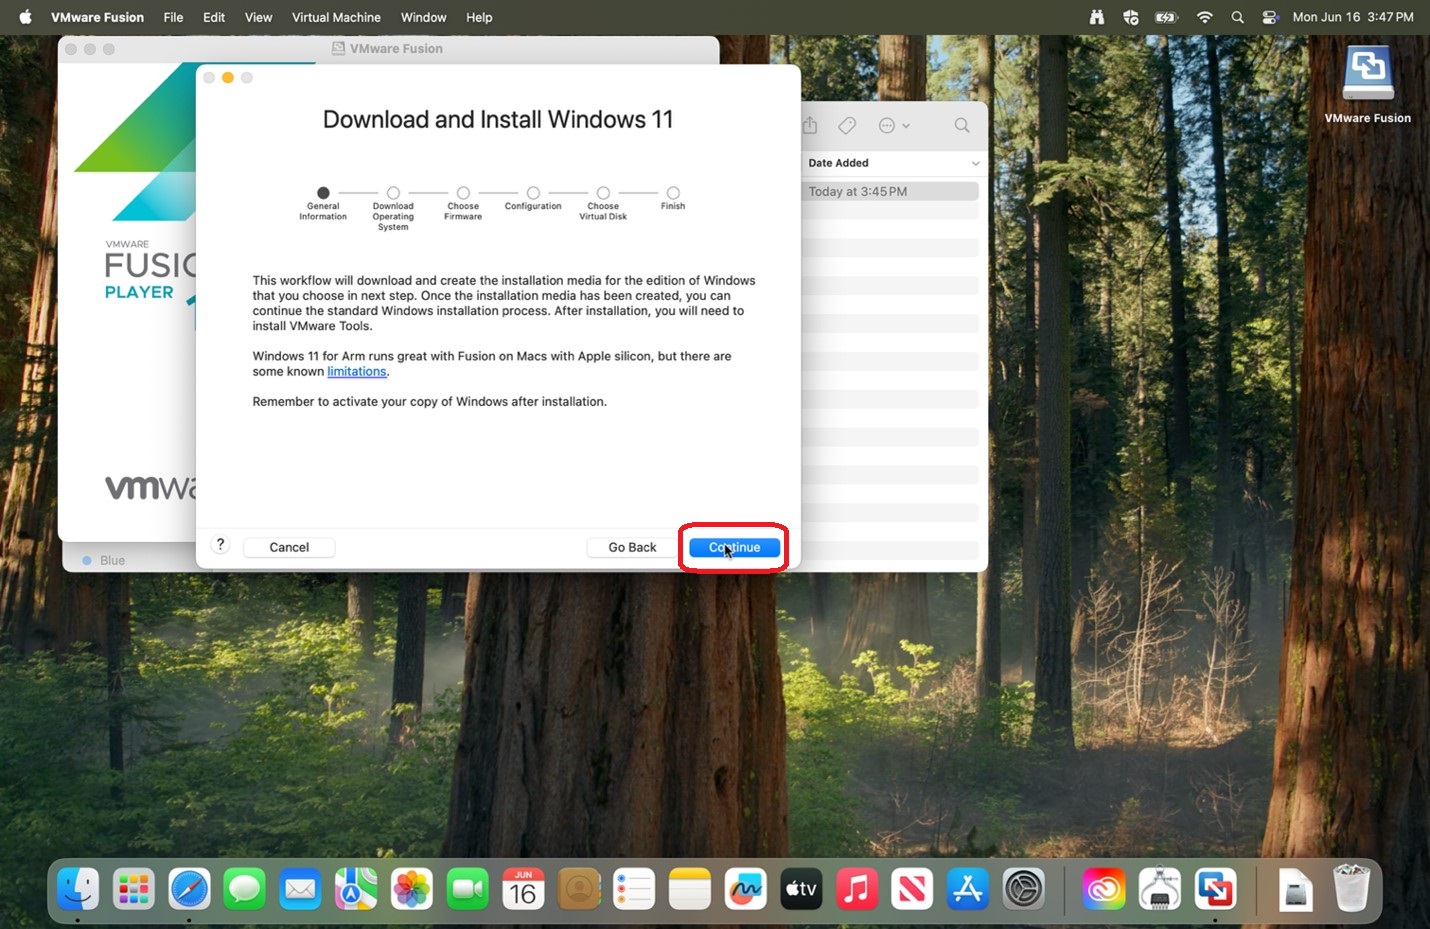
5. Click Continue.
|
 |
|
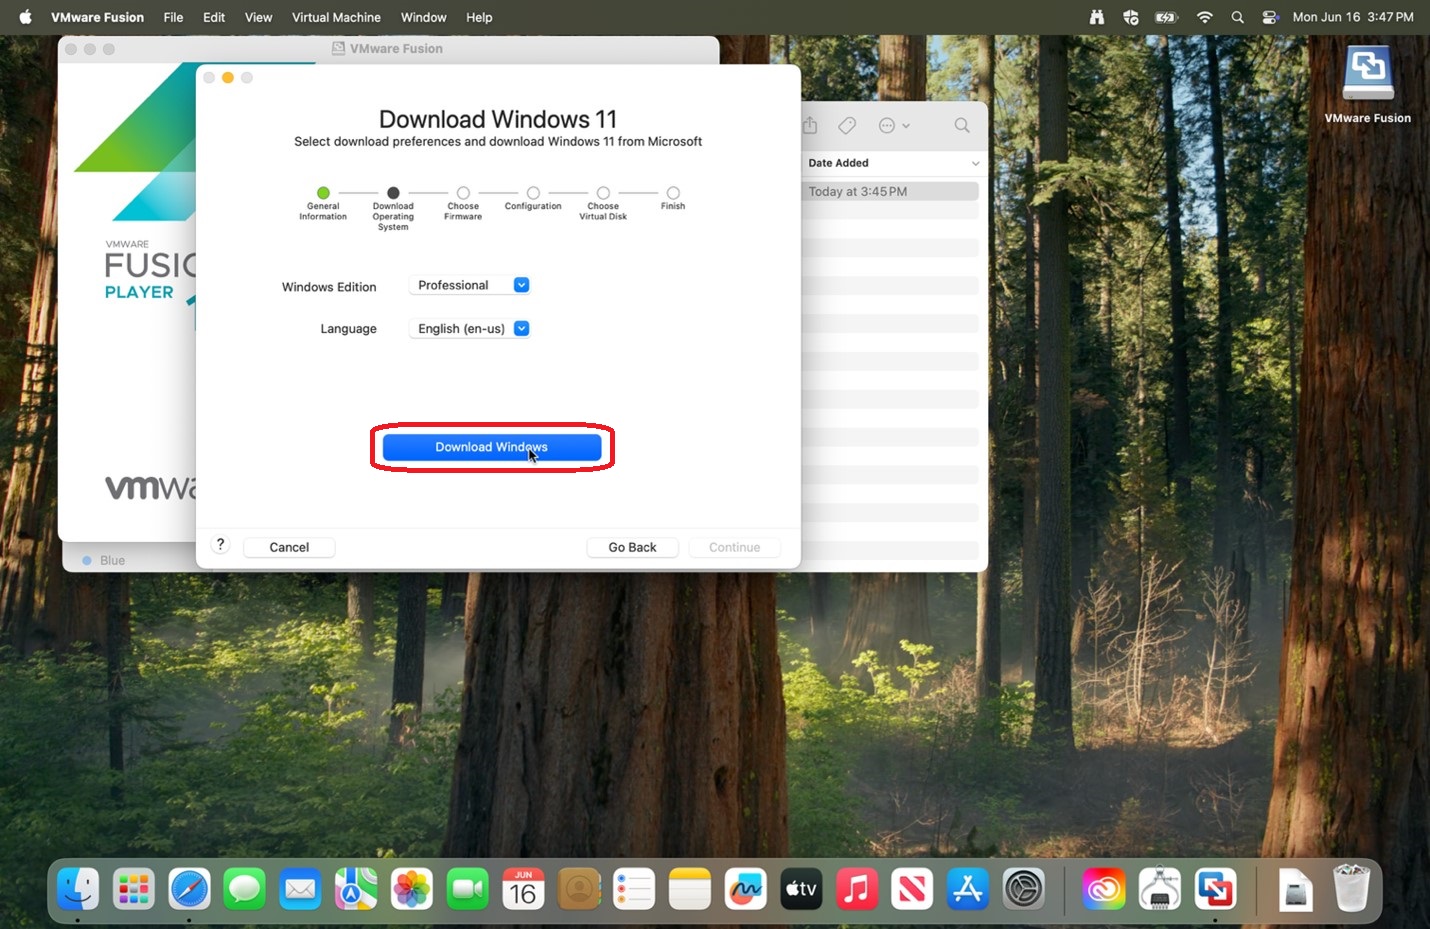
6. Verify Windows Edition: Professional is selected and click Download Windows.
|
 |
|
7. After finishing downloading Windows 11, click Continue.
|
 |
|
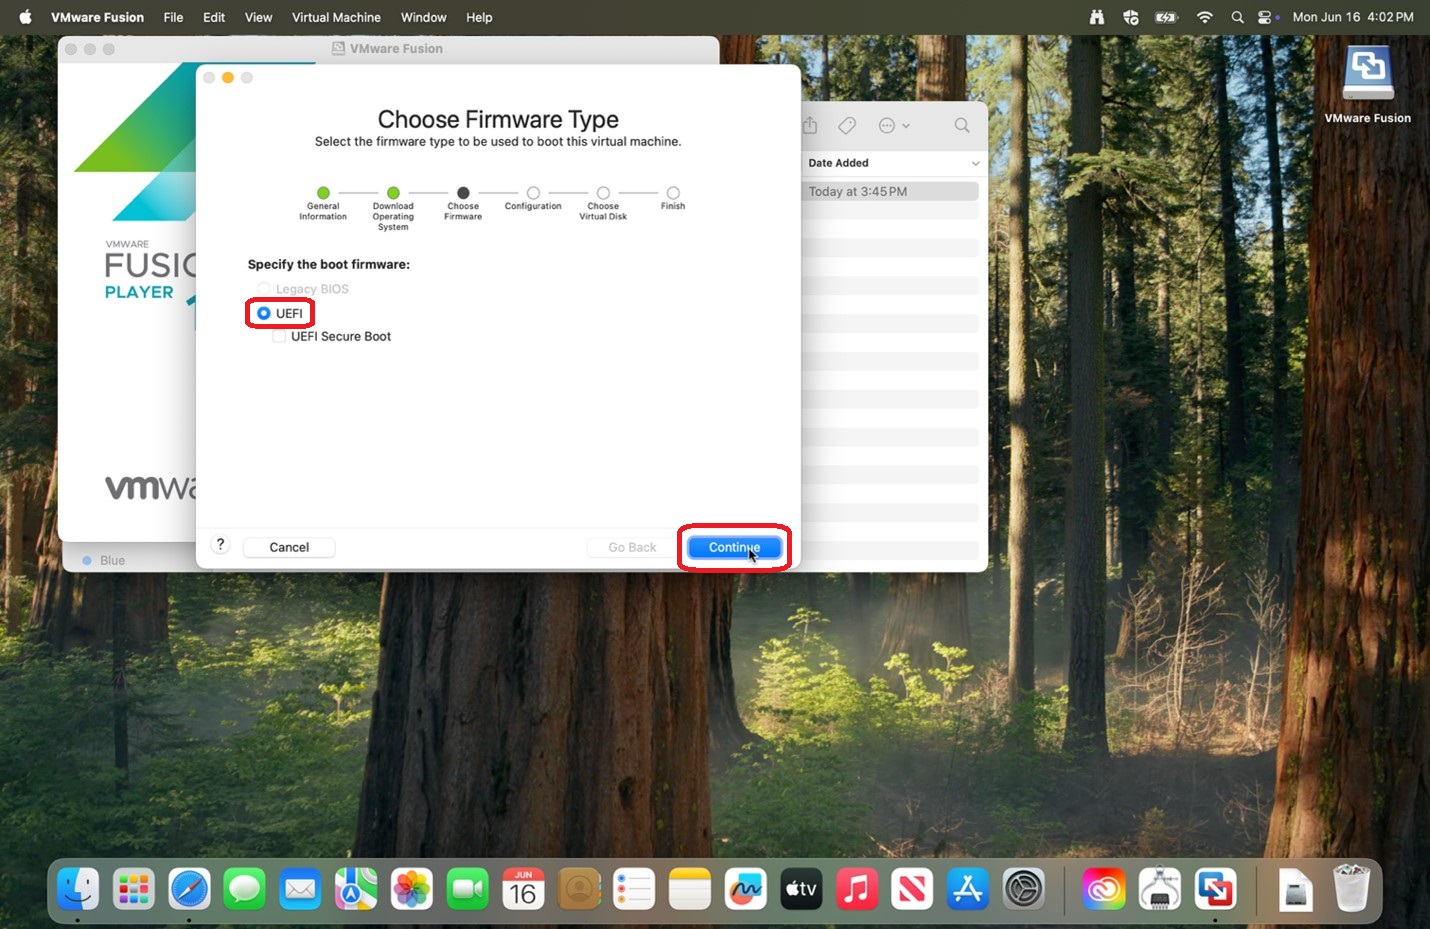
8. Verify UEFI is selected and click Continue.
|
 |
|
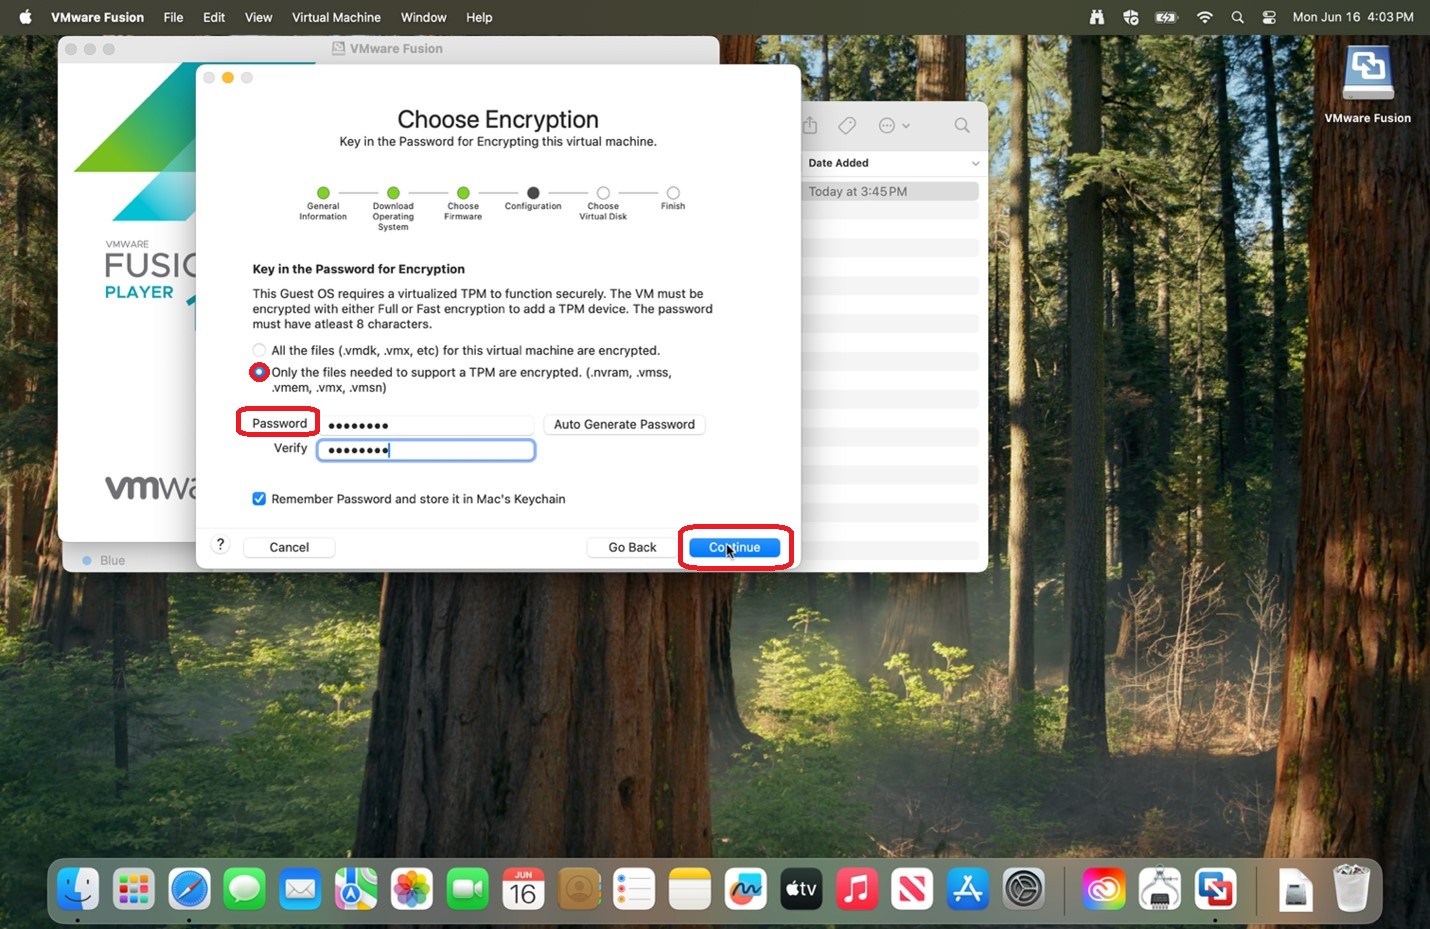
9. Verify Only the files needed to support a TPM are encrypted is selected, enter a password of your choosing, and click Continue.
Please save the entered password in a secure location for if you should need it in the future.
|
 |
|
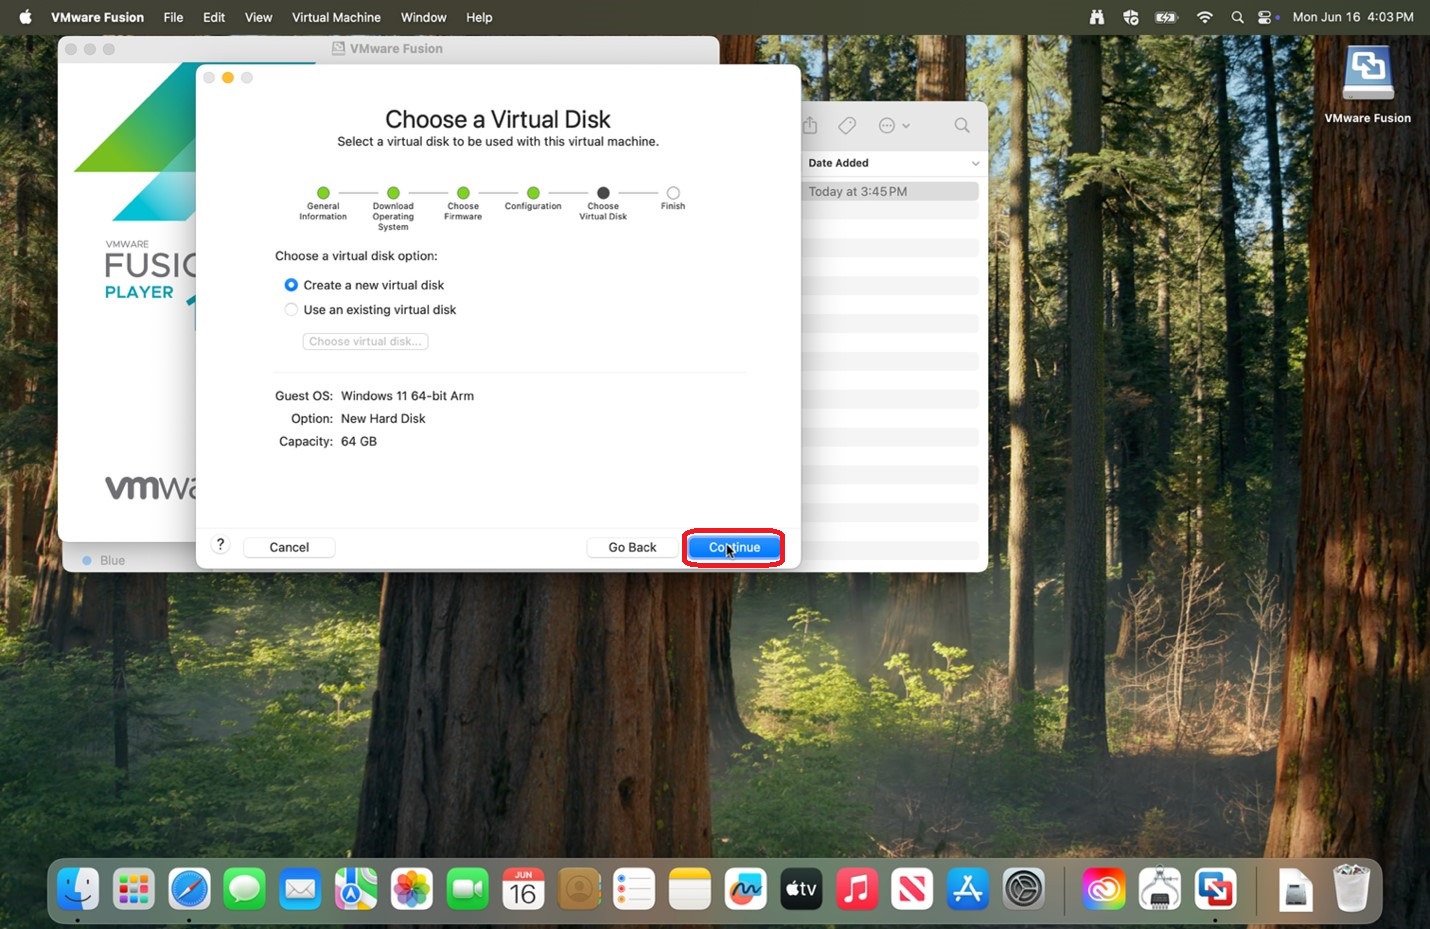
10. Verify Create a new virtual disk is selected and click Continue.
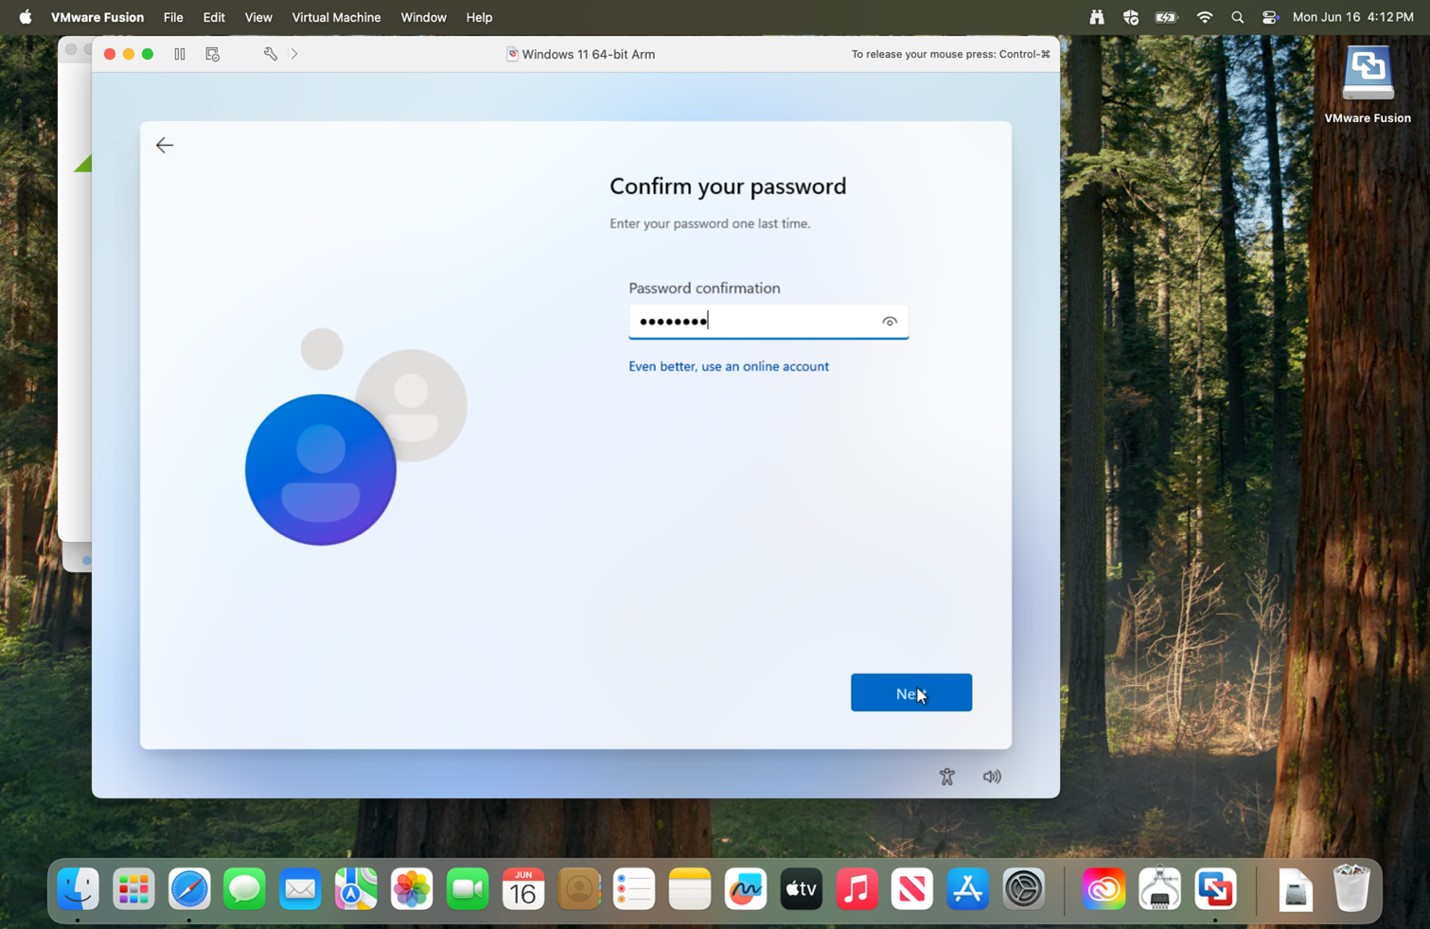
|
 |
|
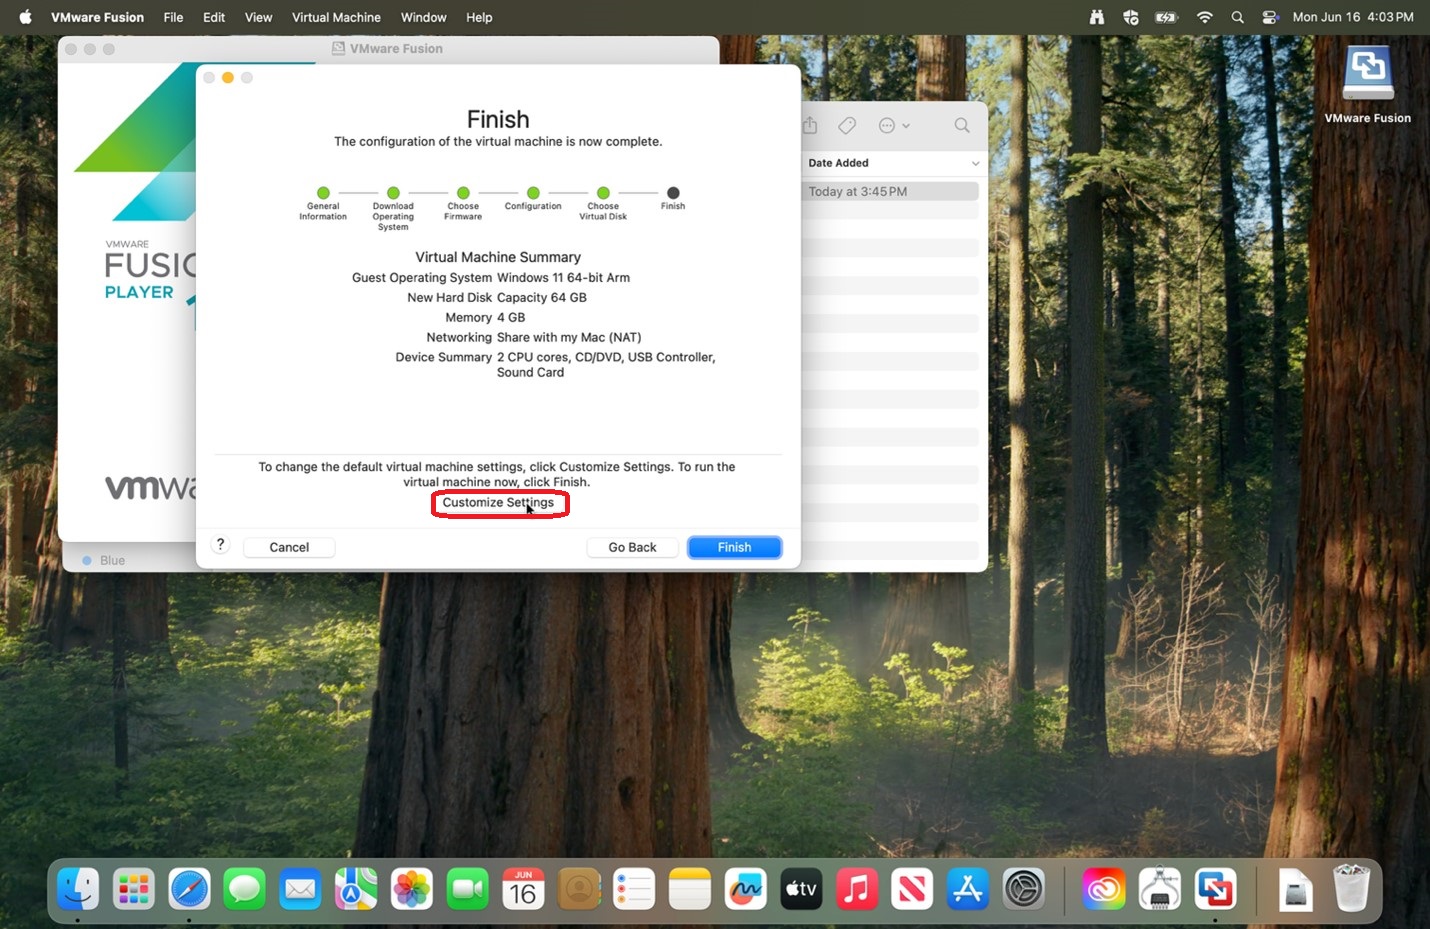
11. Click Customize Settings.
|
 |
|
12. Click Save.
|
 |
|
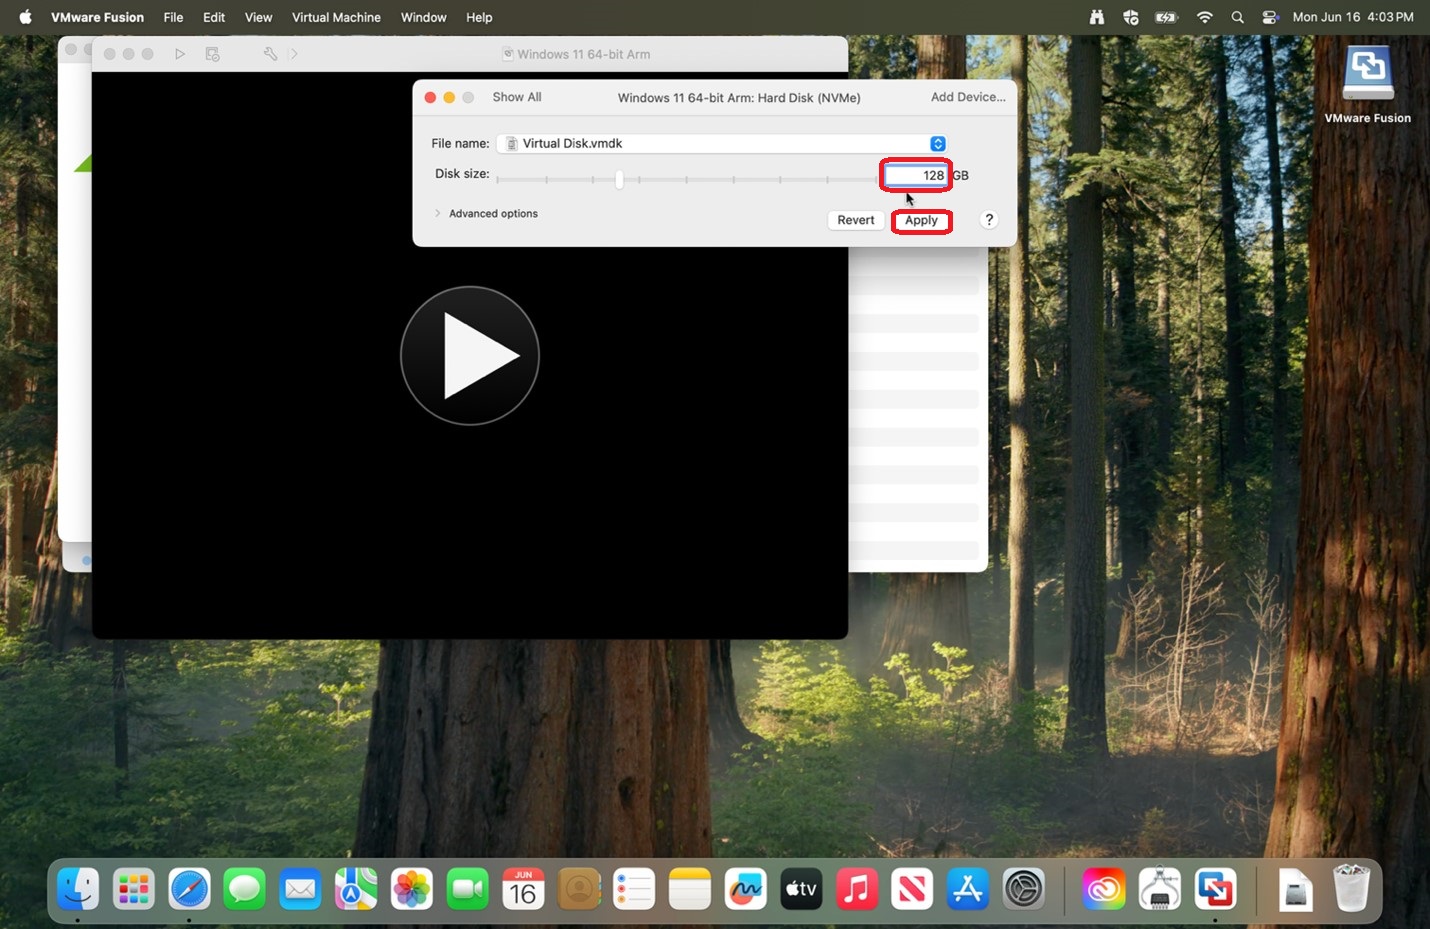
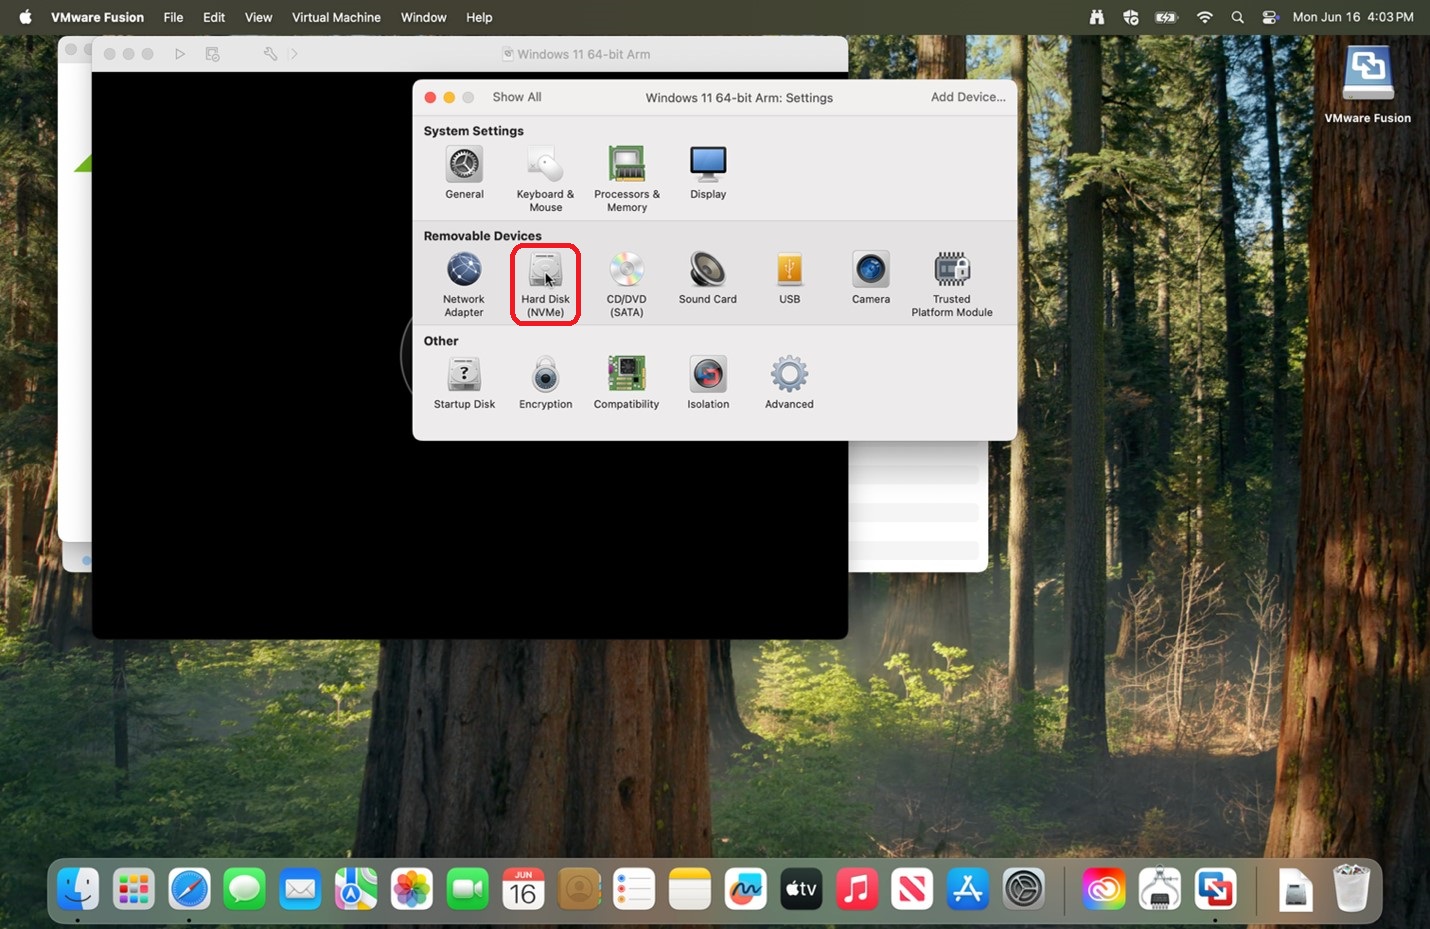
13. Click on the Hard Disk (NVMe) within the Windows 11 64-bit Arm: Settings window.
This window may have been placed behind the newly black window.
|
 |
|
14. Change the Disk size to 128 GB and click Apply, then close that window.
Do not worry about not having enough space on your computer as this will not use all that space, but rather makes it available.
|
|
| 15. Go to the black screen and click on the play button, then click on that general area a few times to startup. | 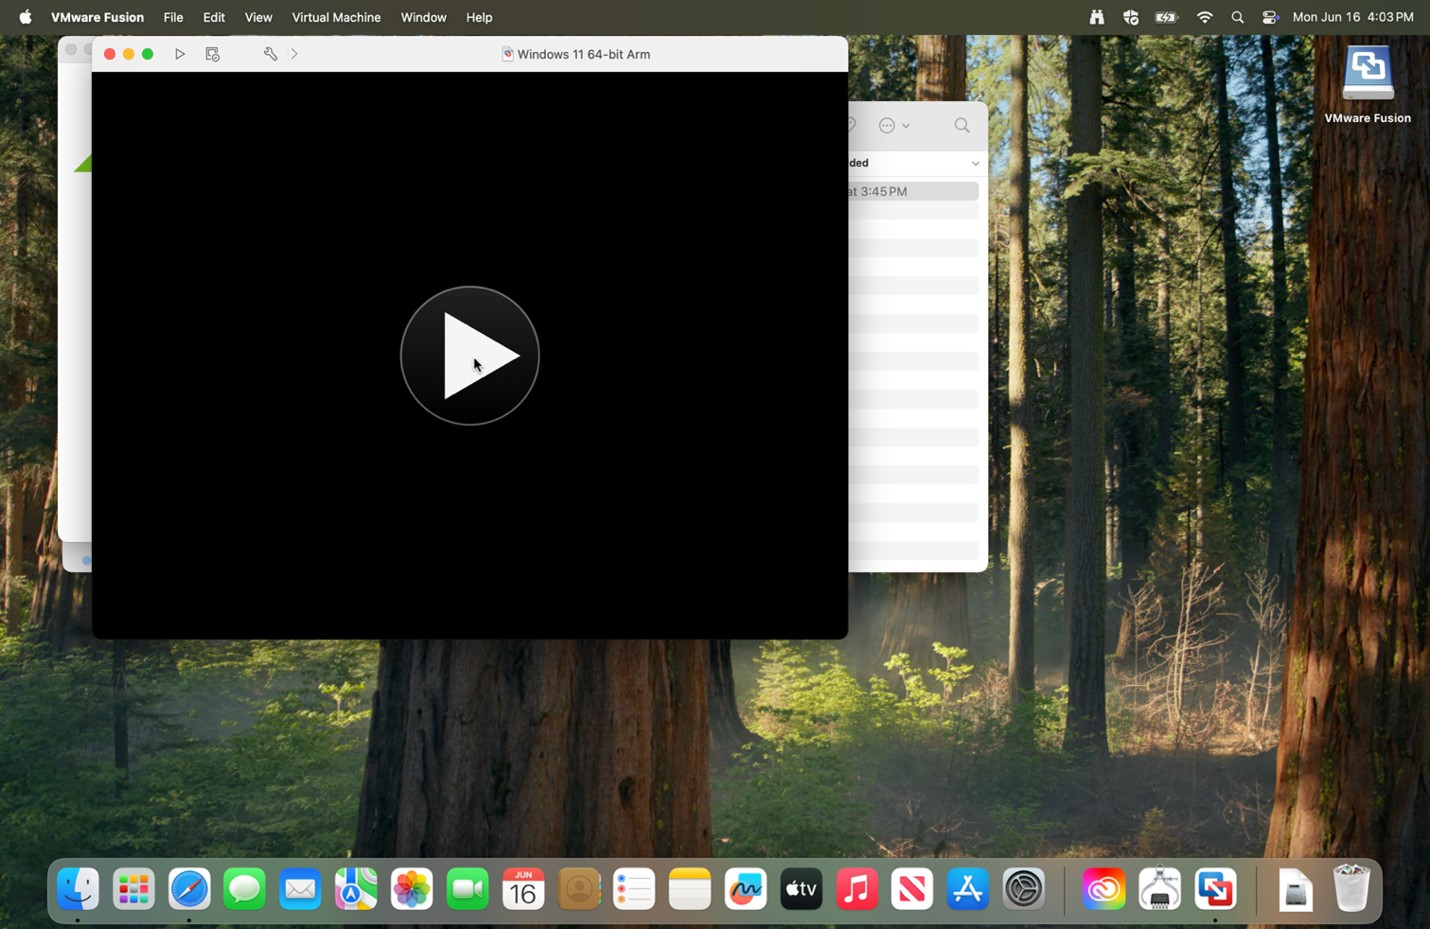 |
|
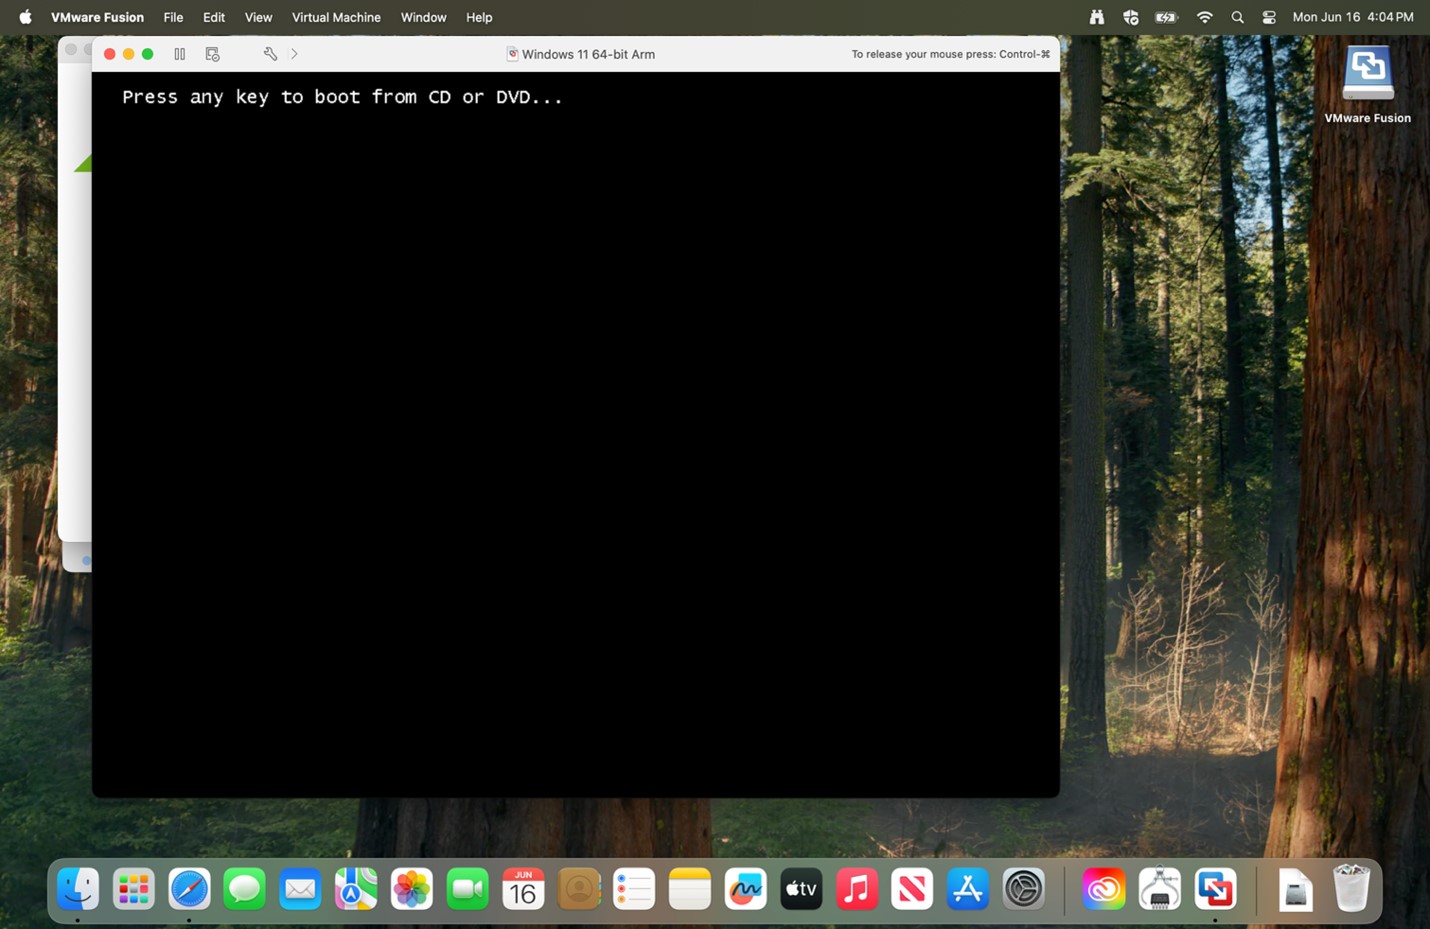
16. Press any key to startup the installer.
|
 |
|
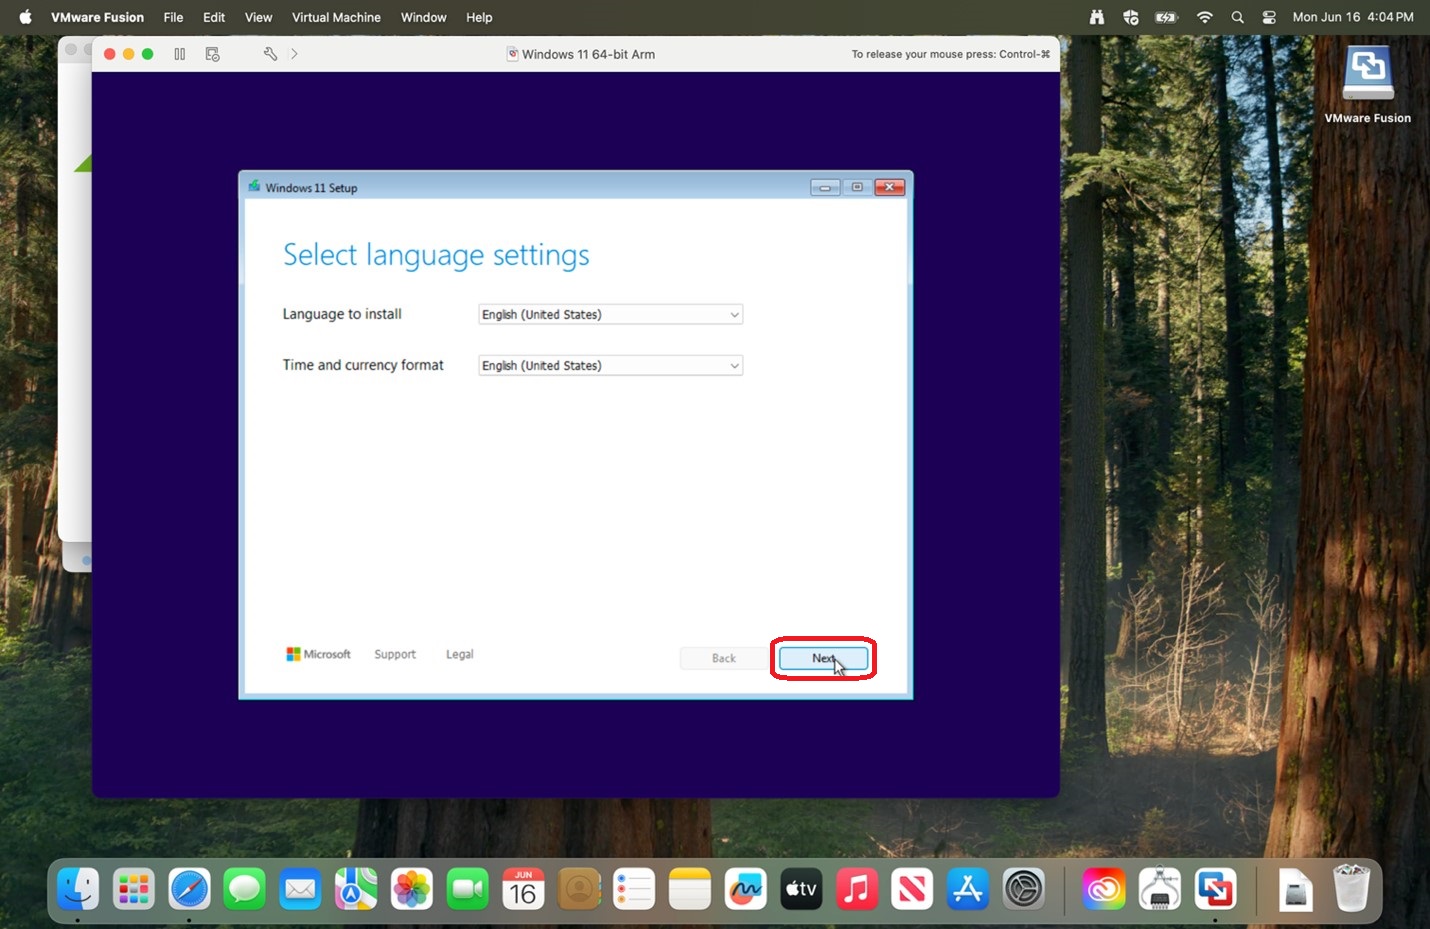
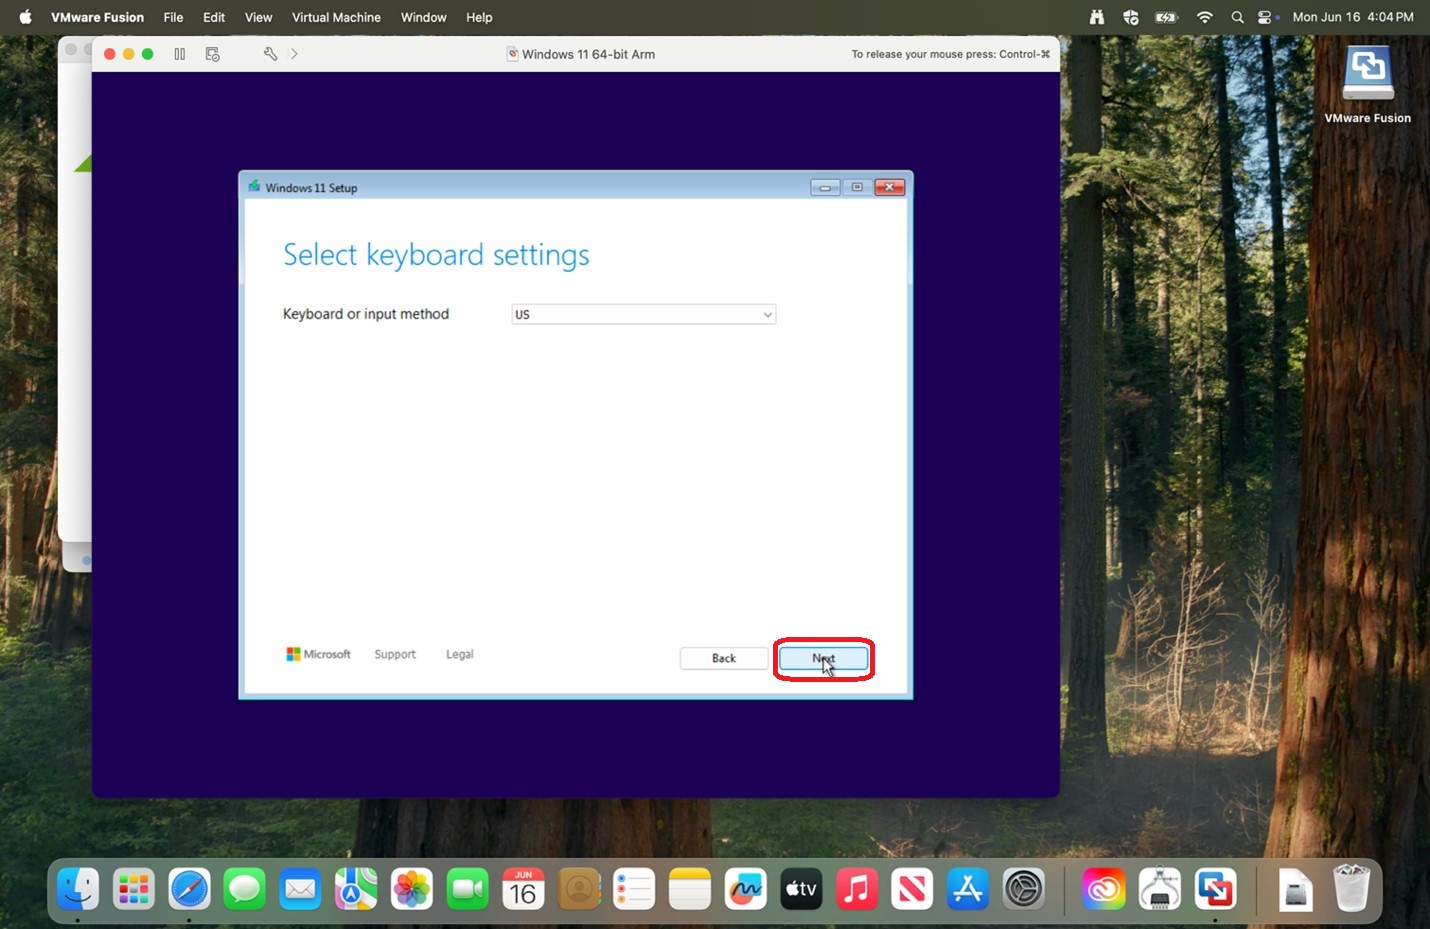
17. After loading, click Next.
|
 |
|
18. Click Next.
|
 |
|
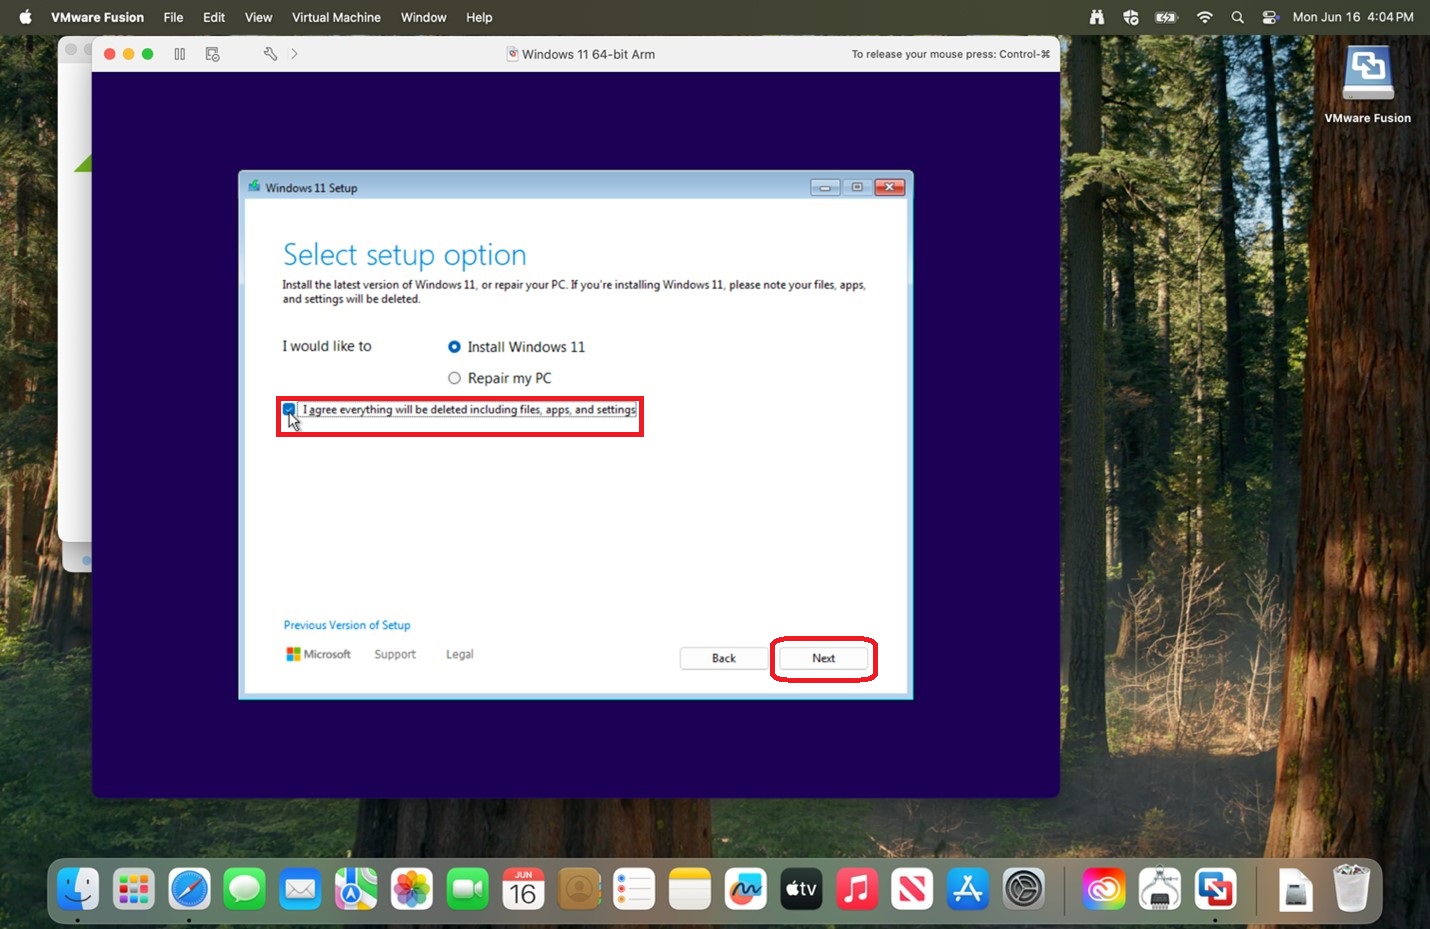
19. Check off the box next to I agree everything will be deleted including files, apps, and settings and click Next.
|
 |
|
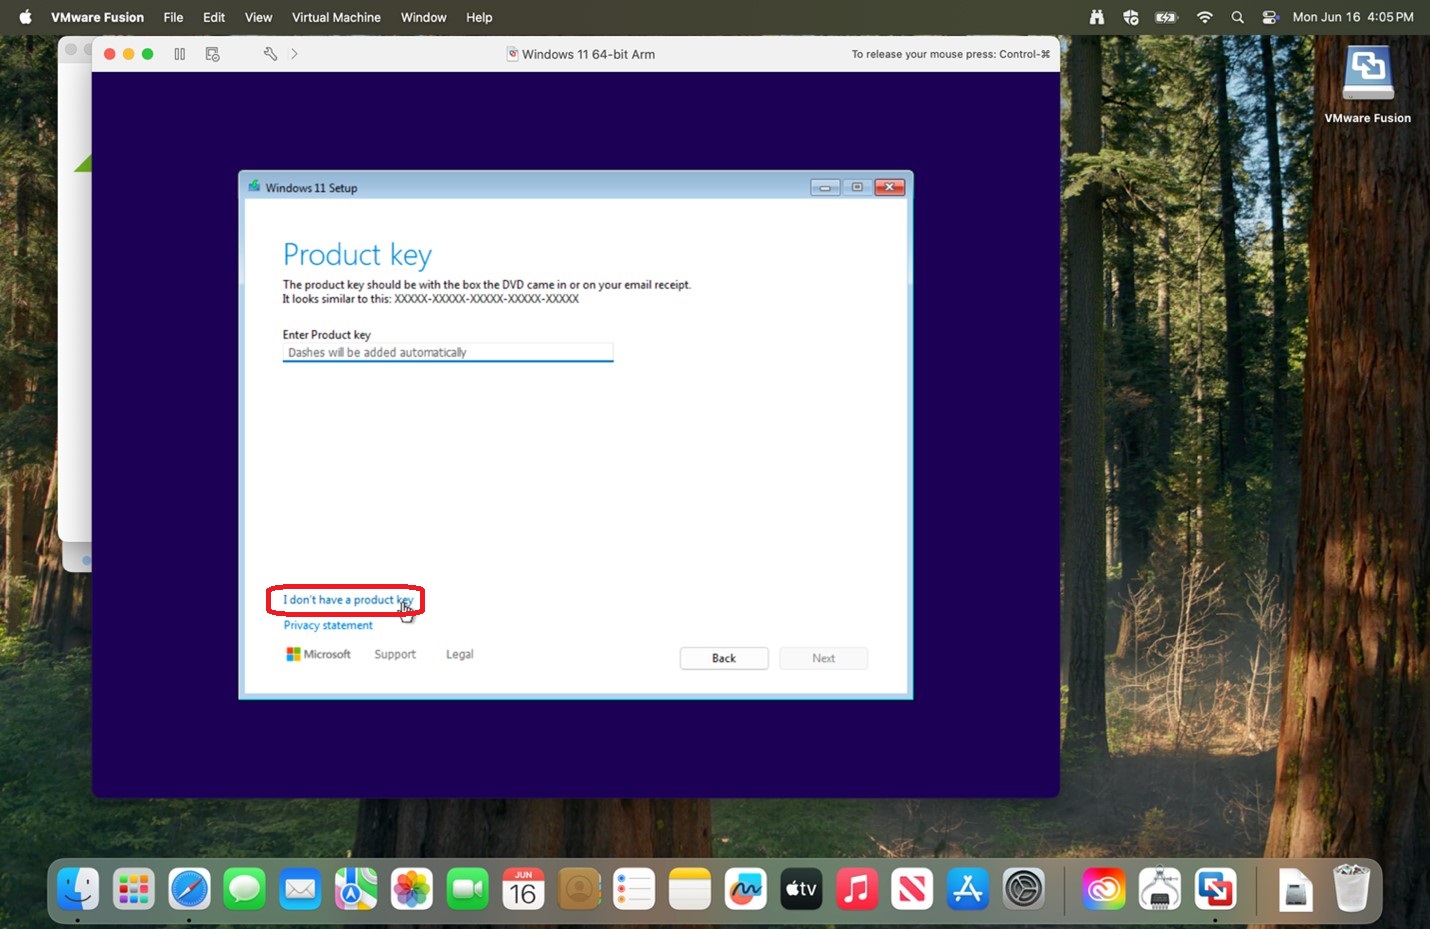
20. Select I don't have a product key.
|
 |
|
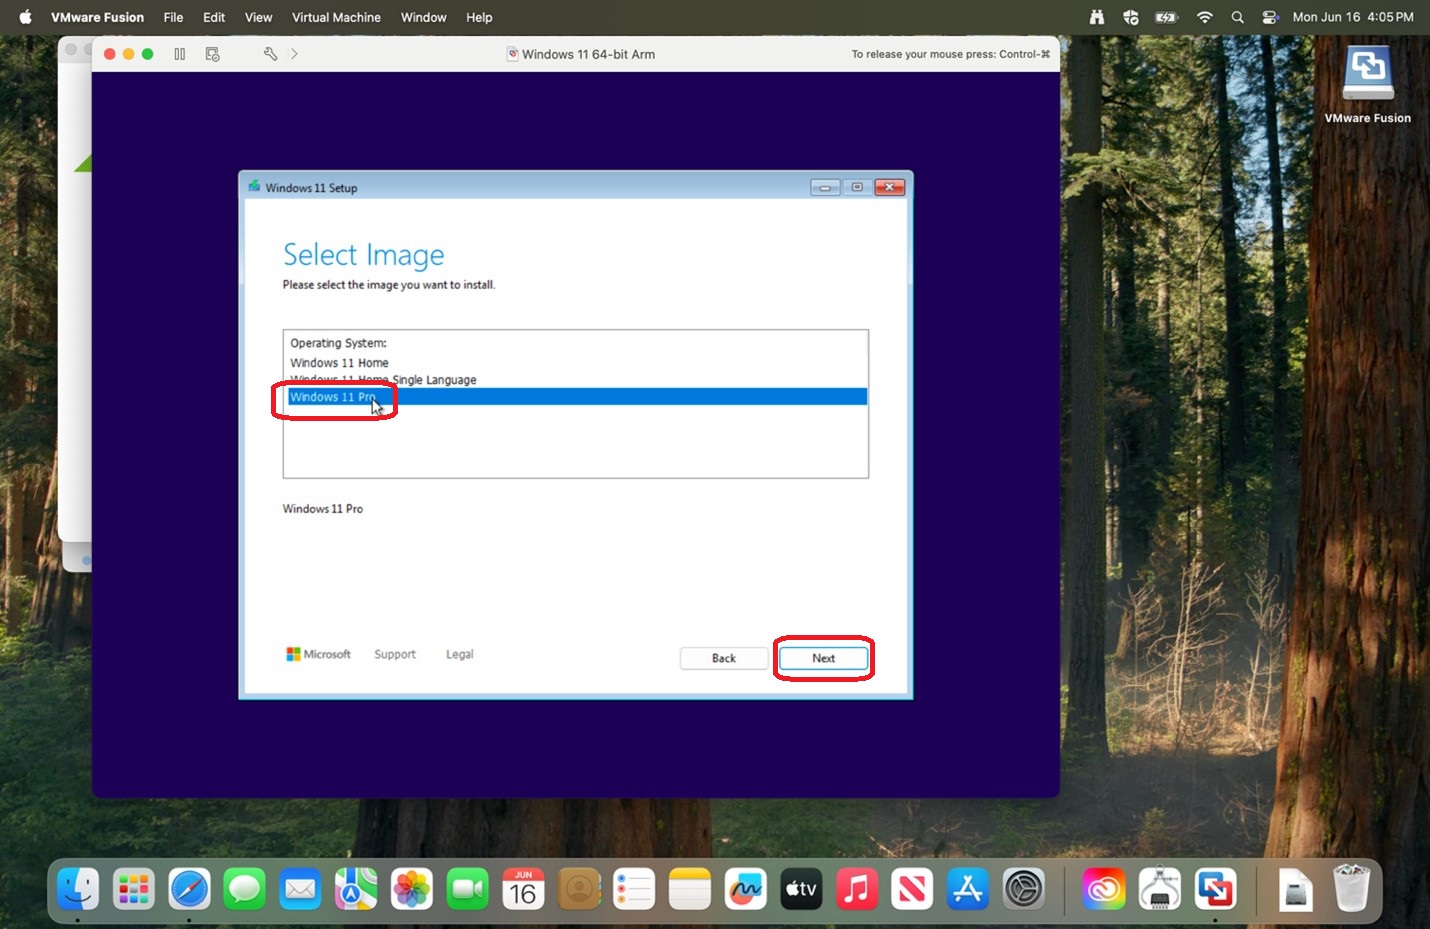
21. Select Windows 11 Pro and click Next.
|
 |
|
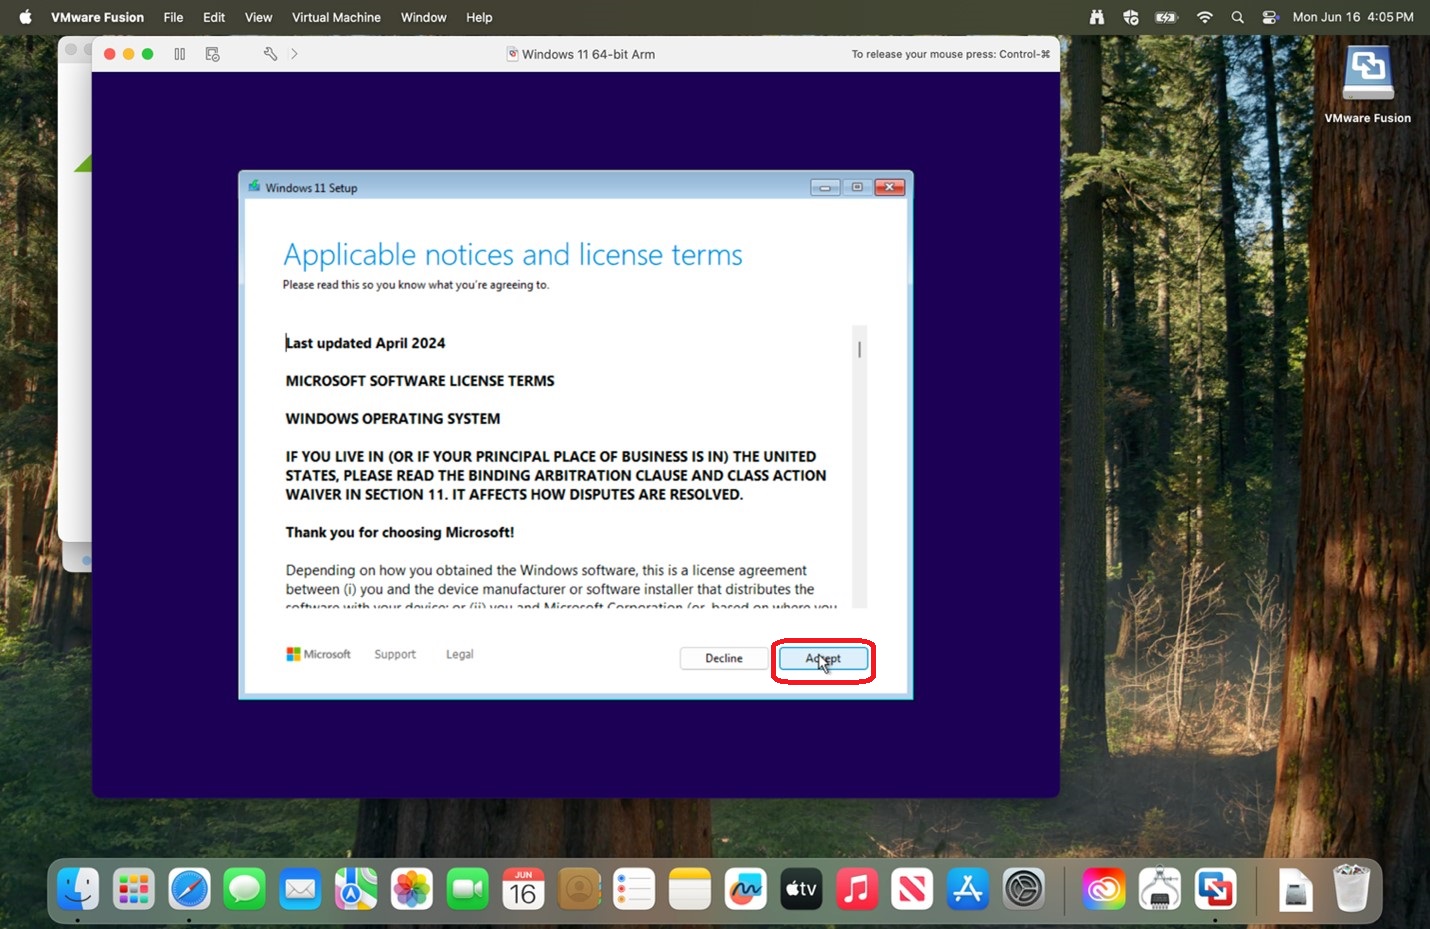
22. Click Accept.
|
 |
|
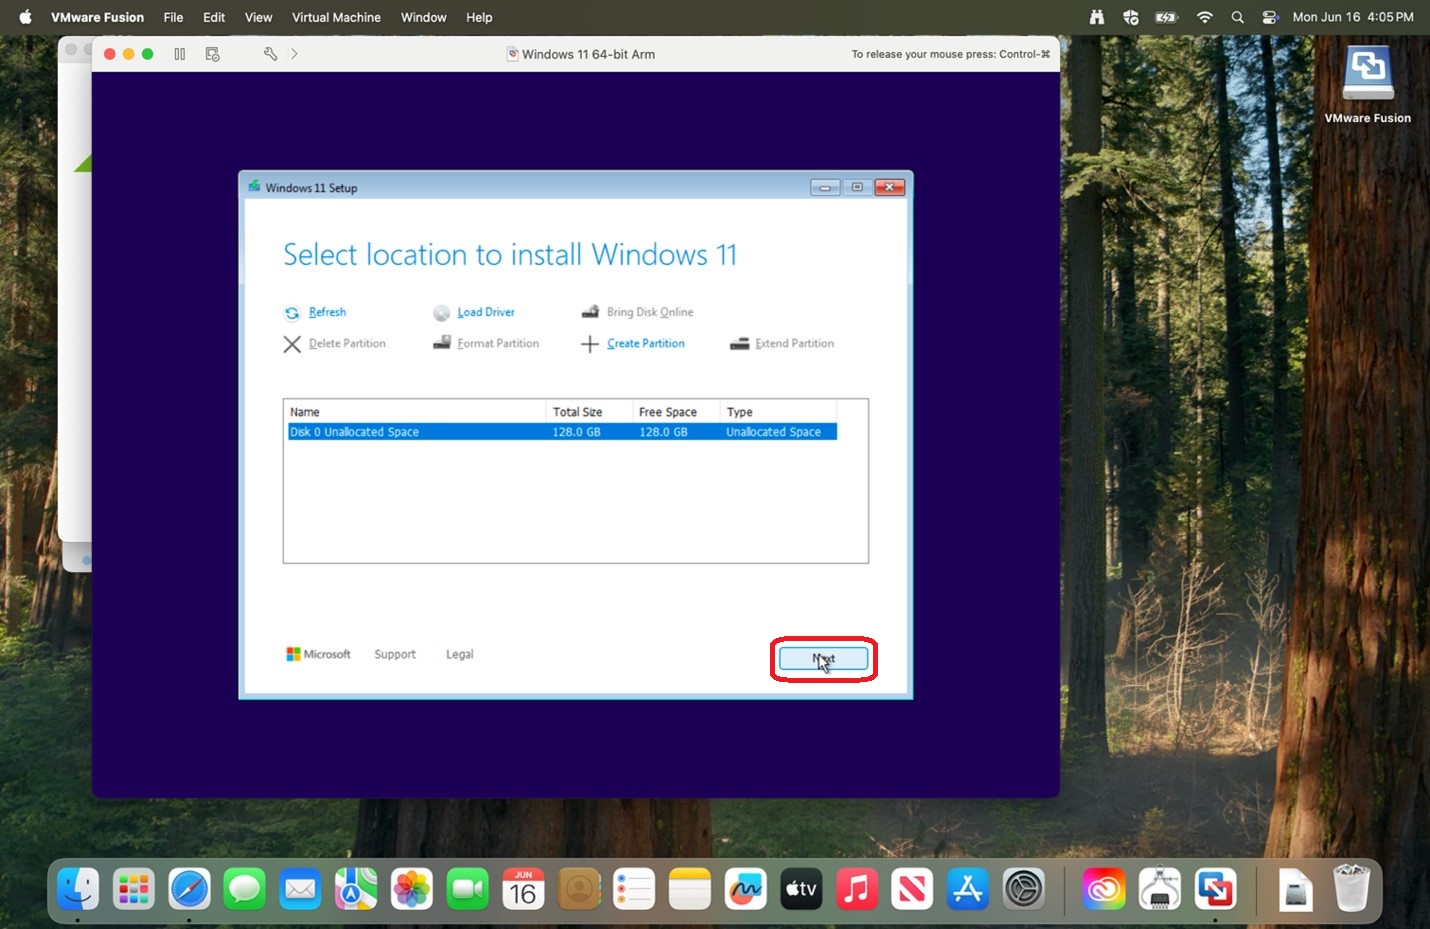
23. Click Next.
|
 |
|
24. Click Install.
|
 |
|
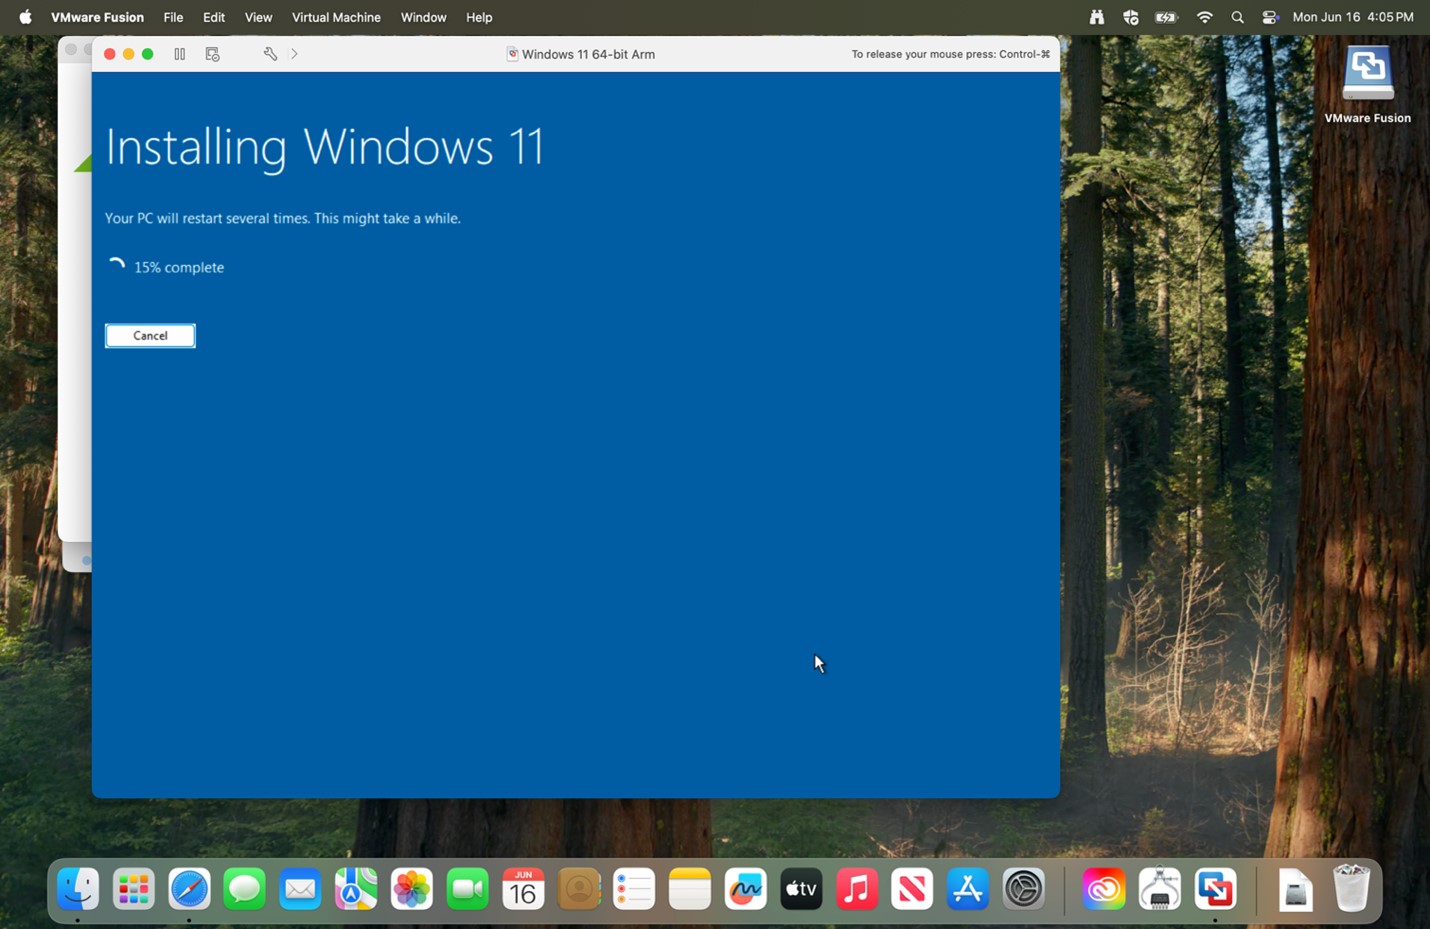
25. Allow time for the install to progress.
|
 |
|
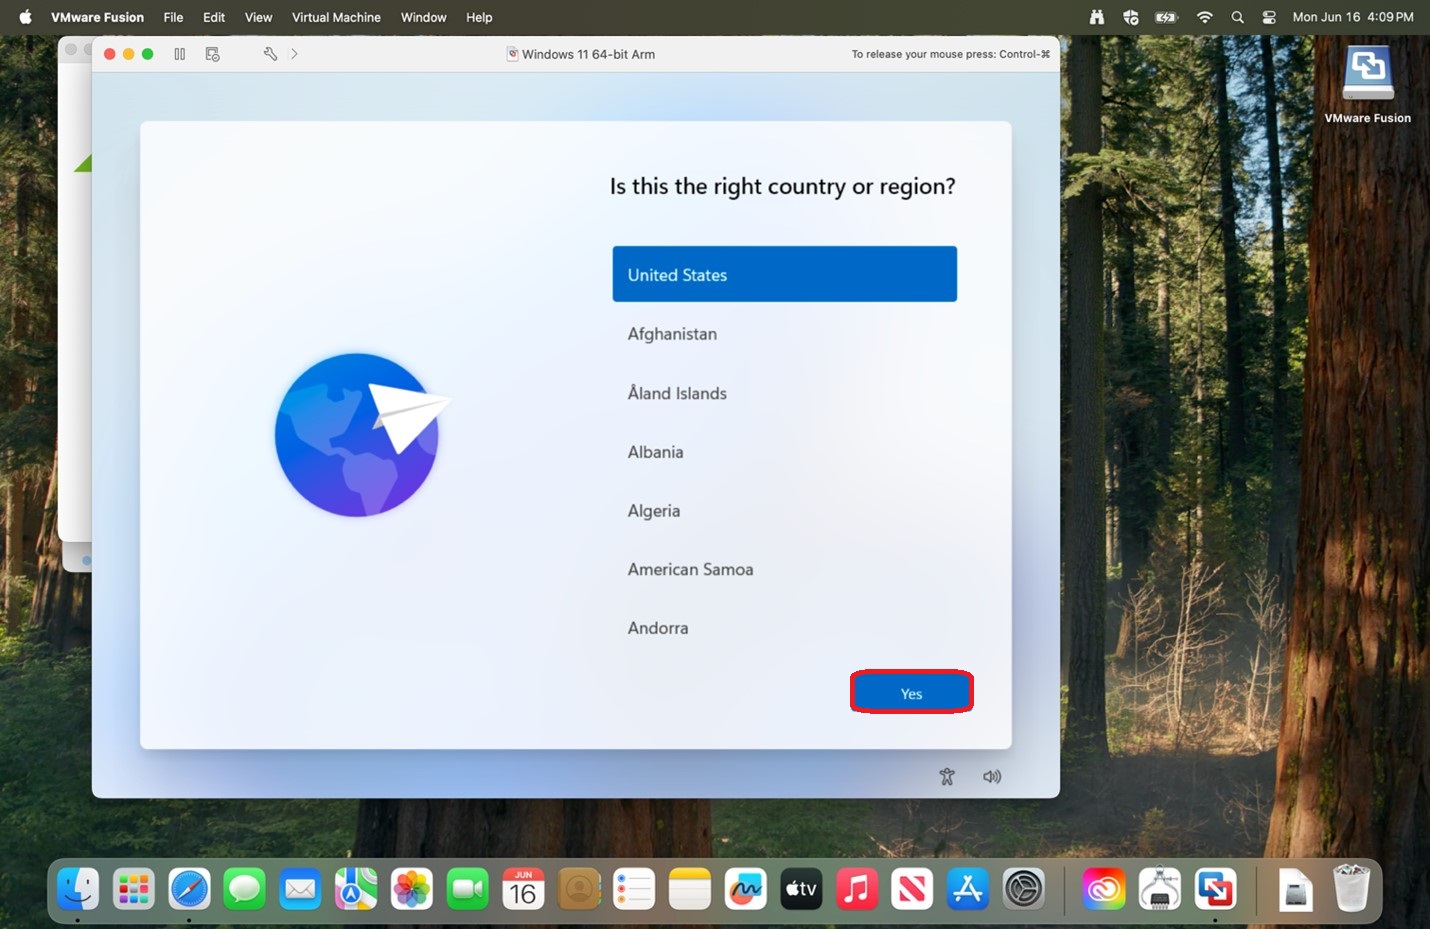
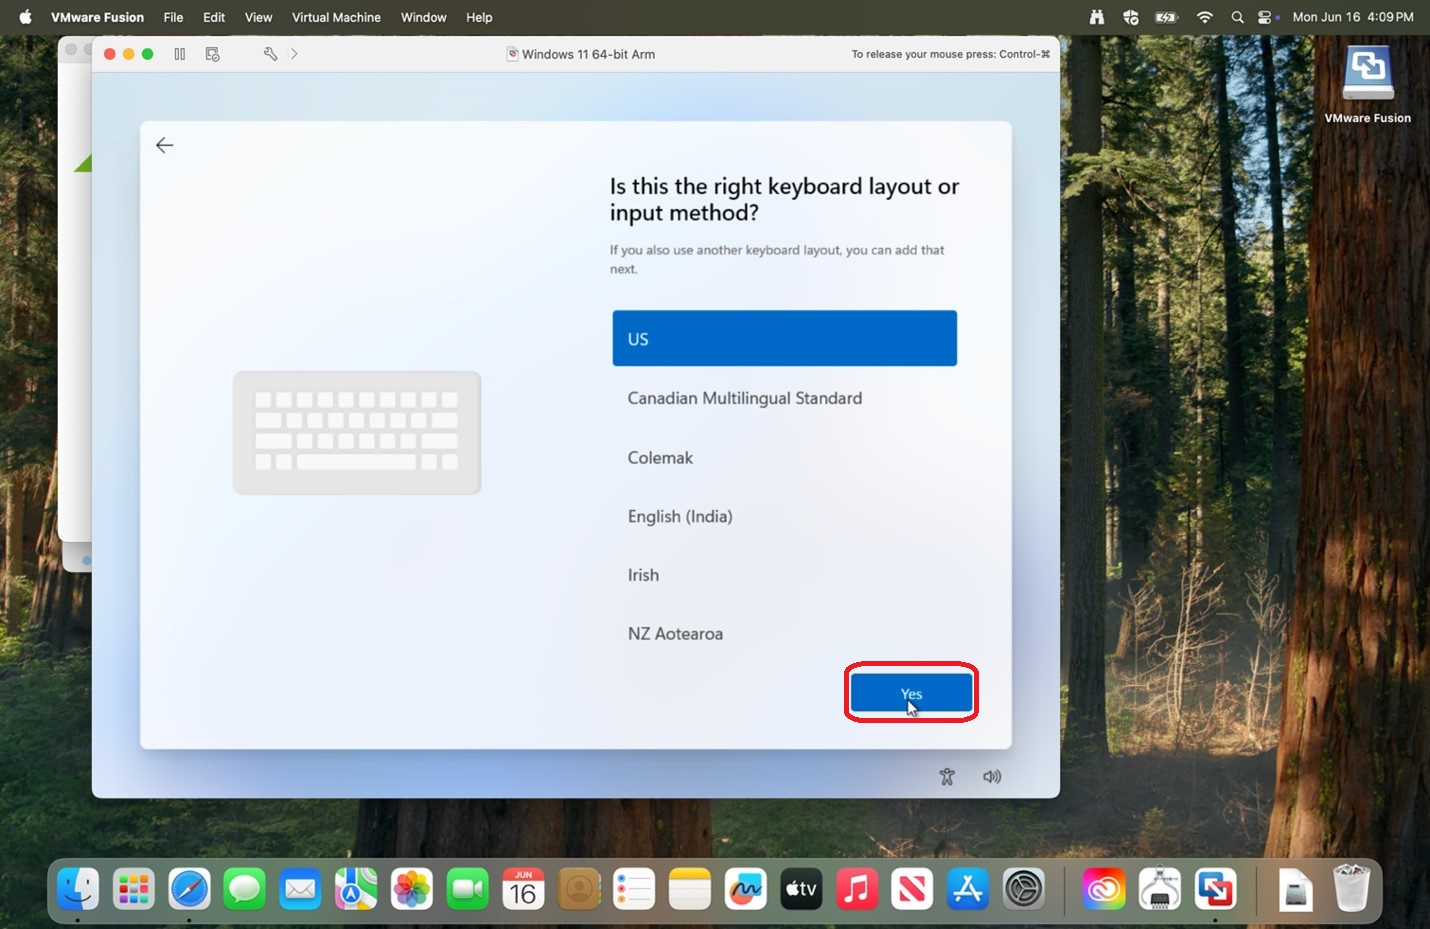
26. Verify the country and Click Yes.
|
 |
|
27. Click Yes.
|
 |
|
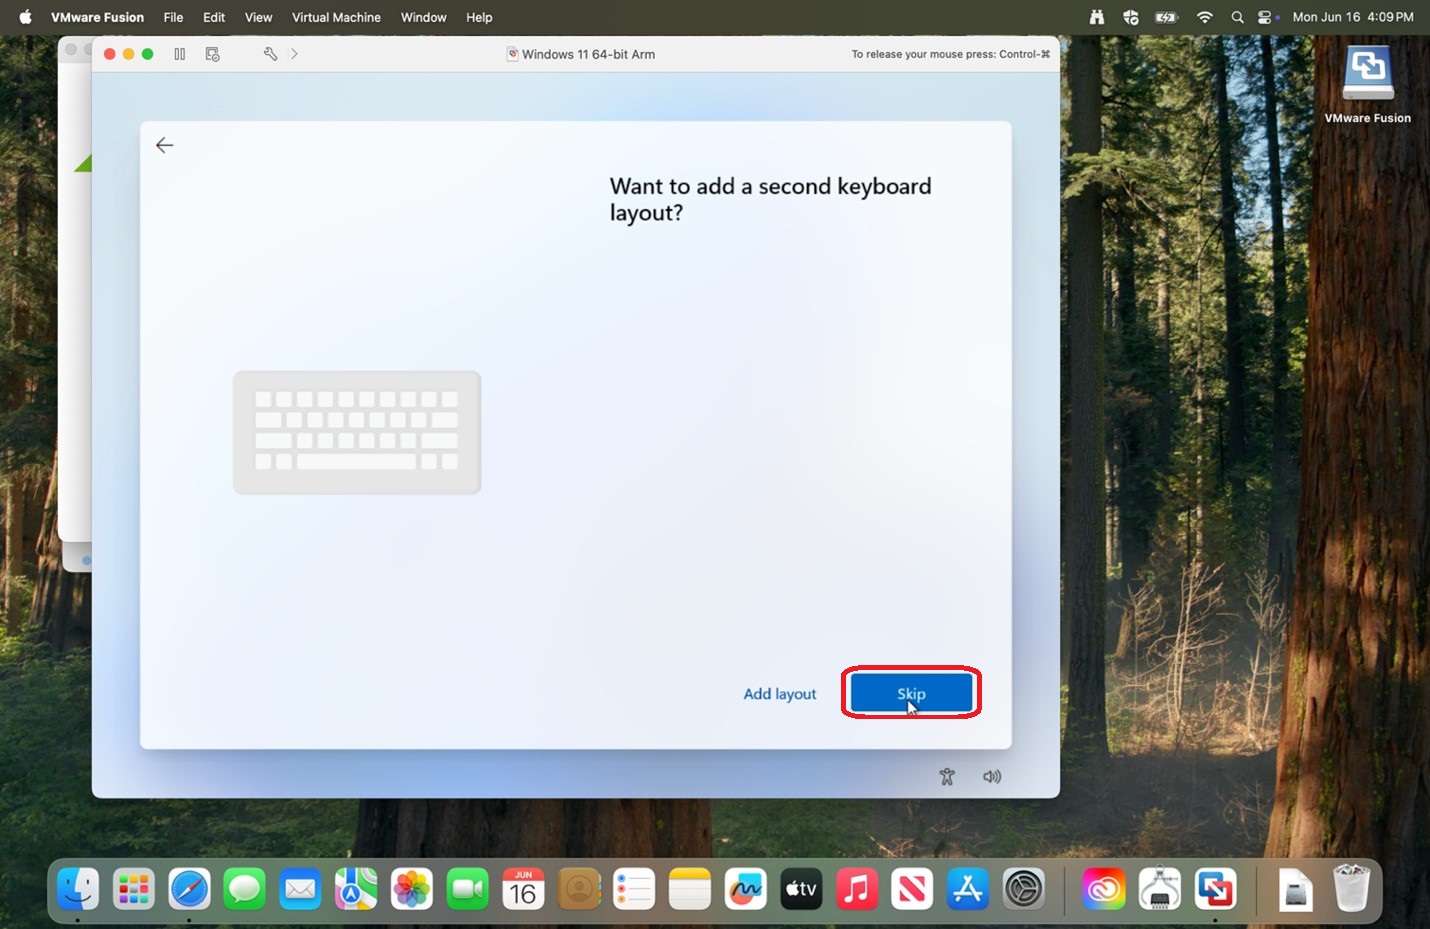
28. Click Skip.
There may be some loading as there is a check for Windows updates.
|
 |
|
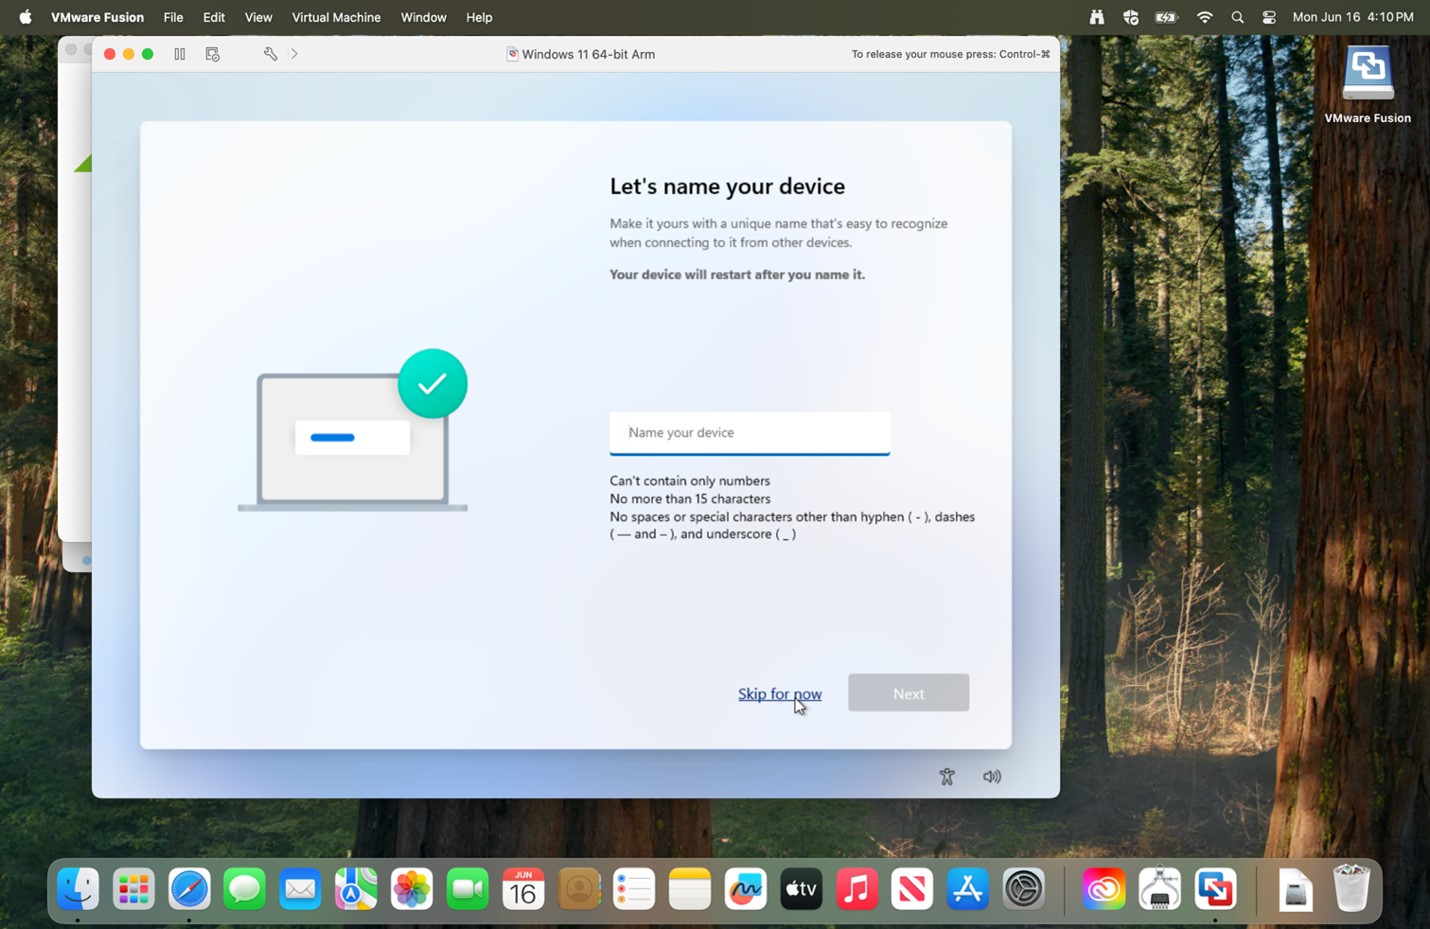
29. Click Skip for now.
|
 |
|
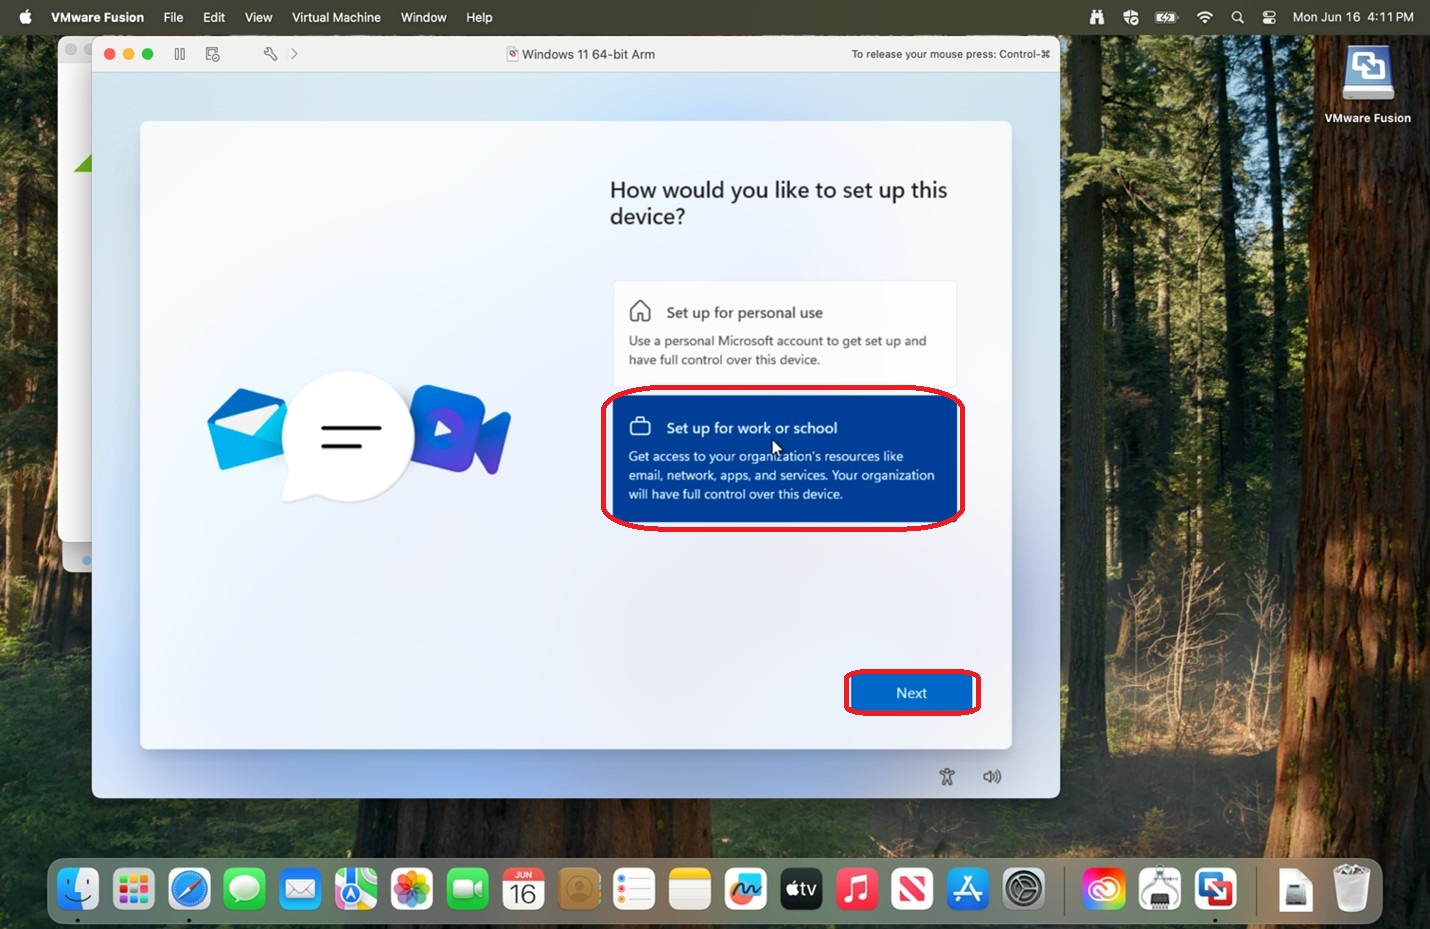
30. Select Set up for work or school and click Next.
|
 |
|
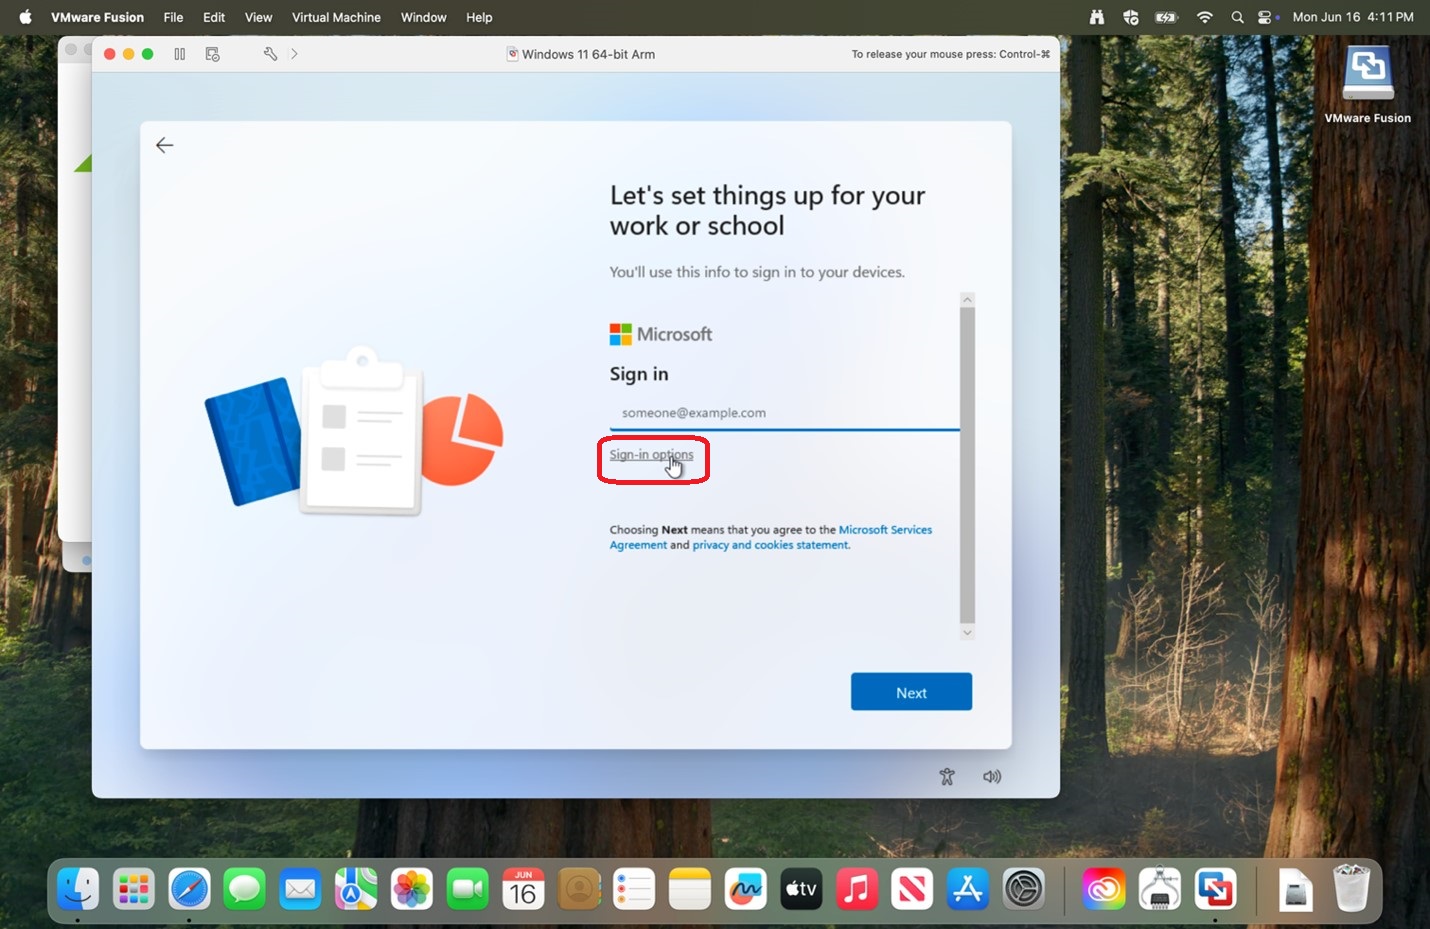
31. Click Sign-in options.
|
 |
|
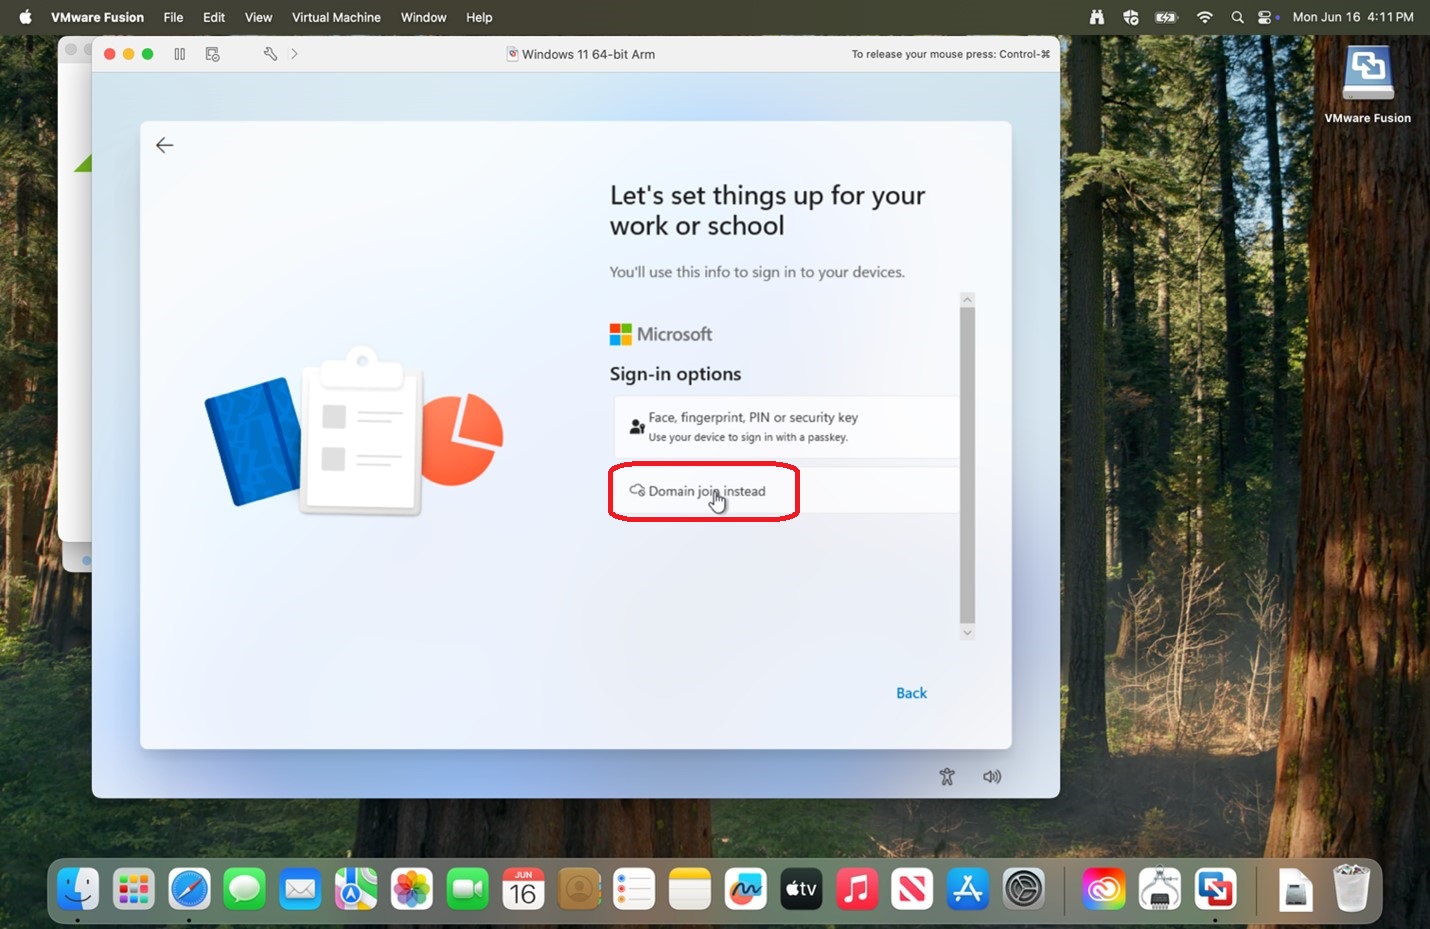
32. Click Domain join instead.
|
 |
|
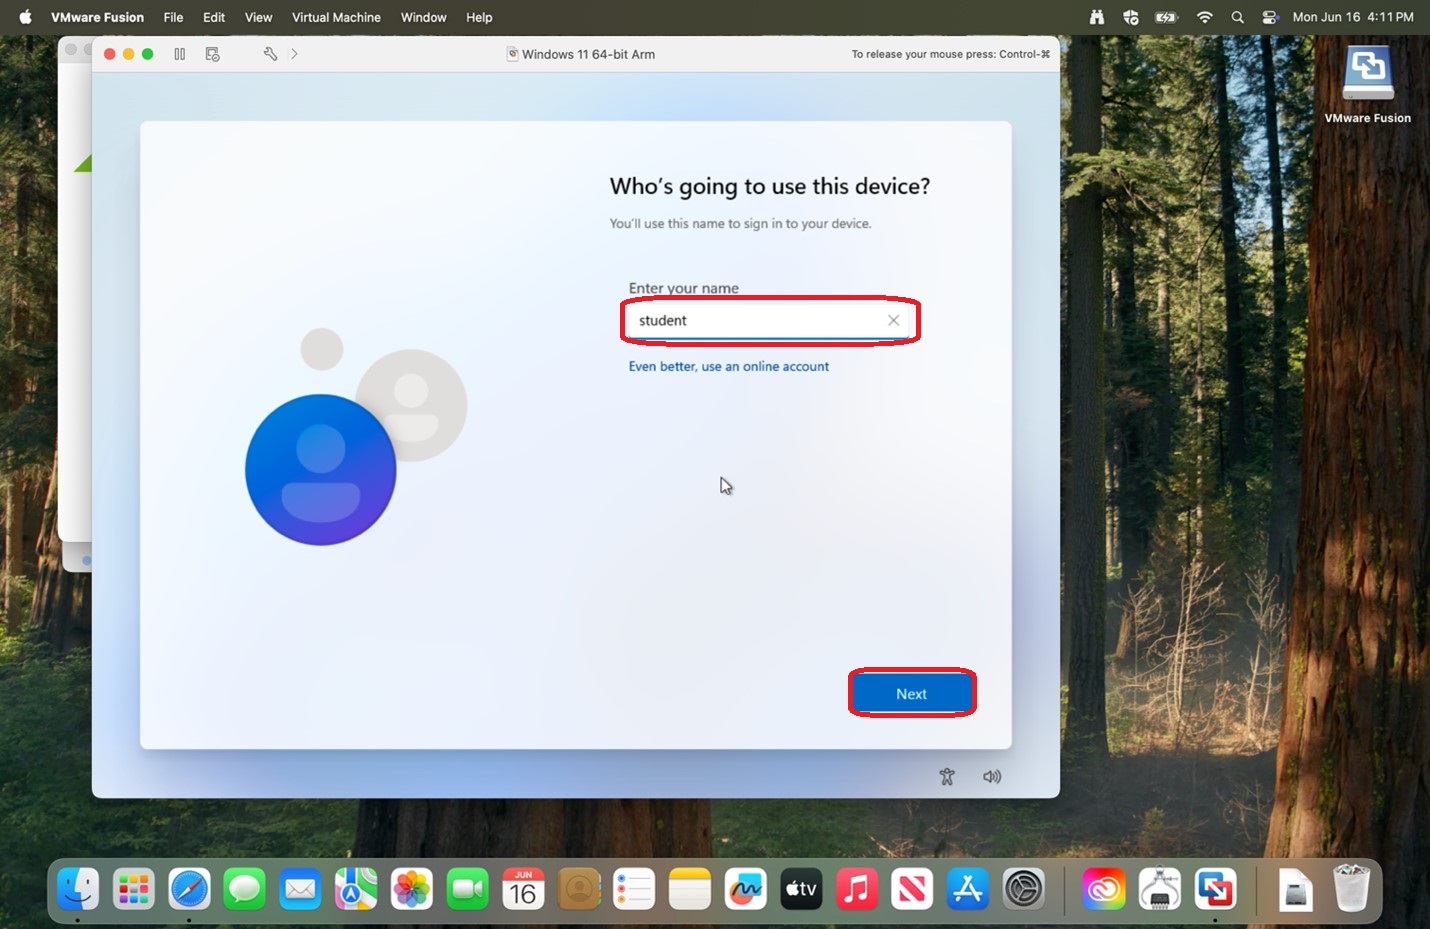
33. Enter your name and click Next.
|
 |
|
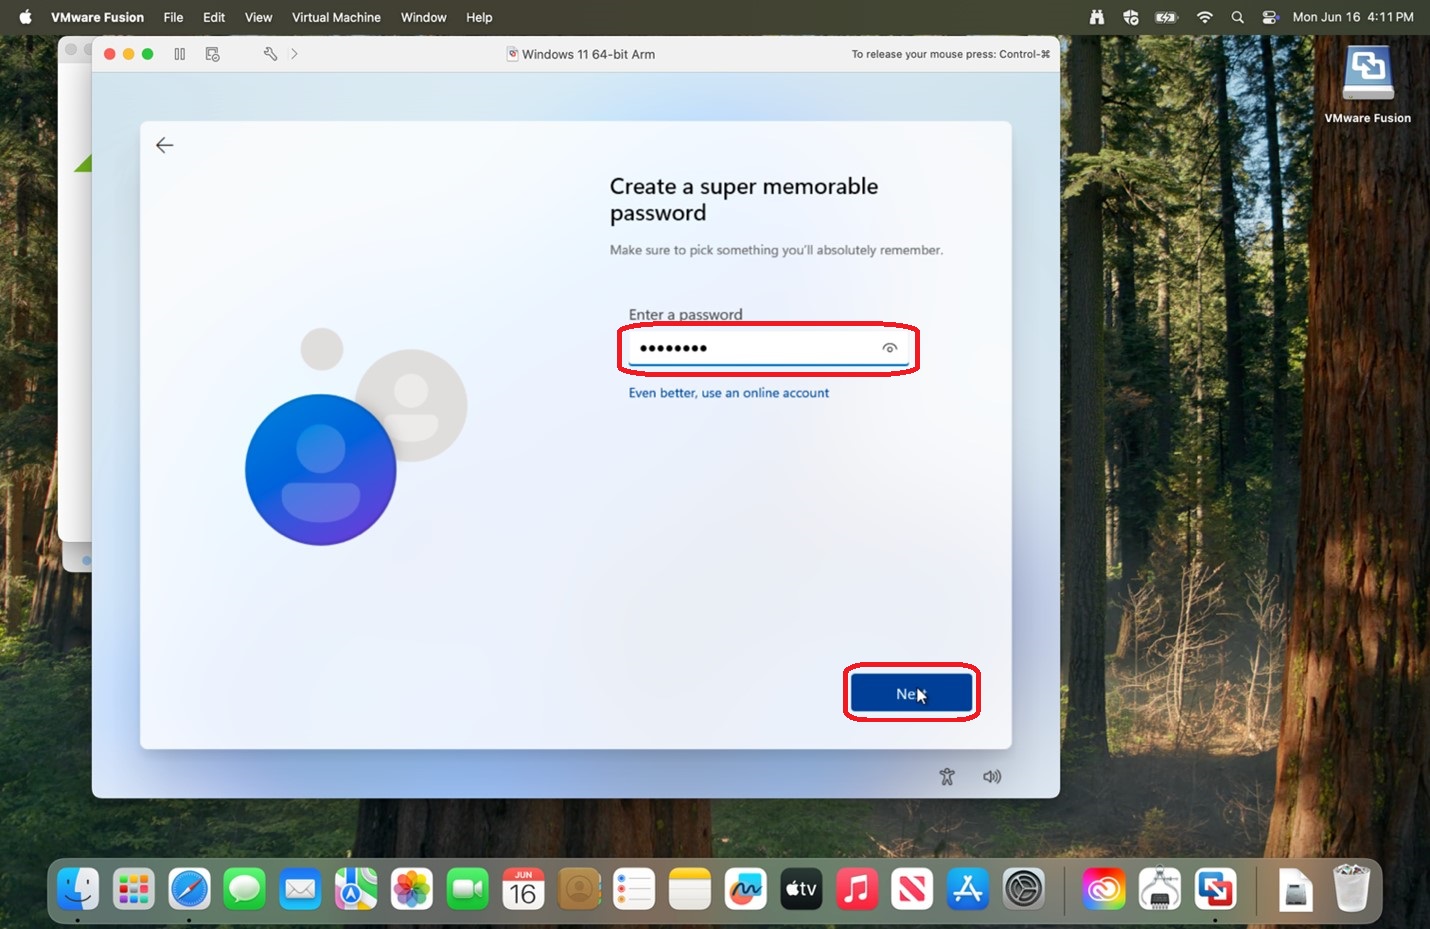
34. Enter a password and click Next.
Please save the entered password in a secure location for if you should need it in the future.
|
 |
|
35. Re-enter the password and click Next.
|
 |
|
36. Select your 3 security questions and answers for password recovery and click Next.
|
|
|
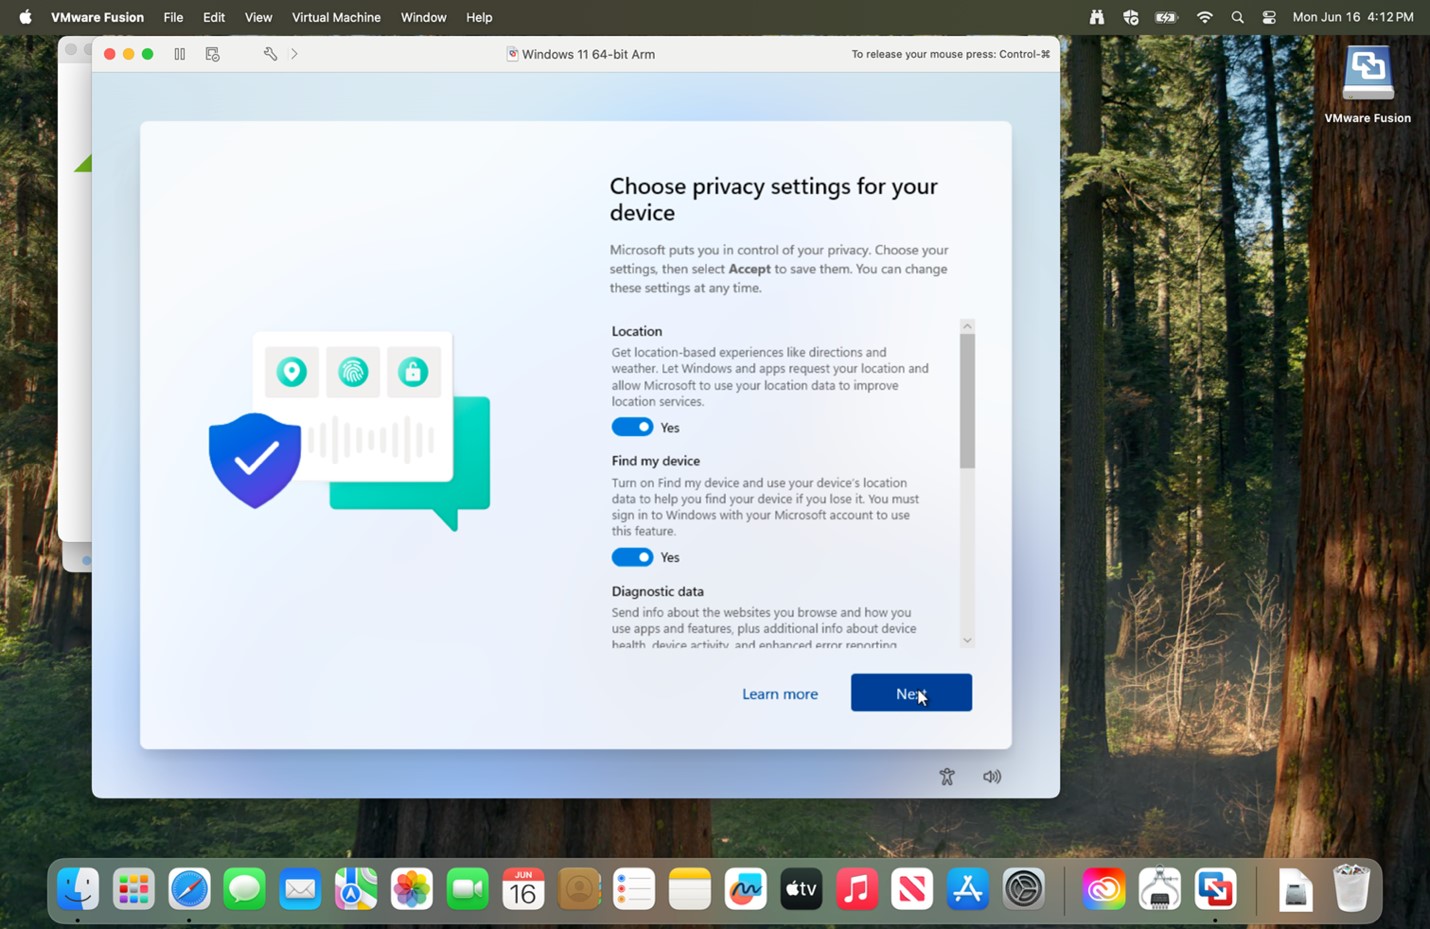
37. Verify the privacy options you would like and click Next.
|
|
|
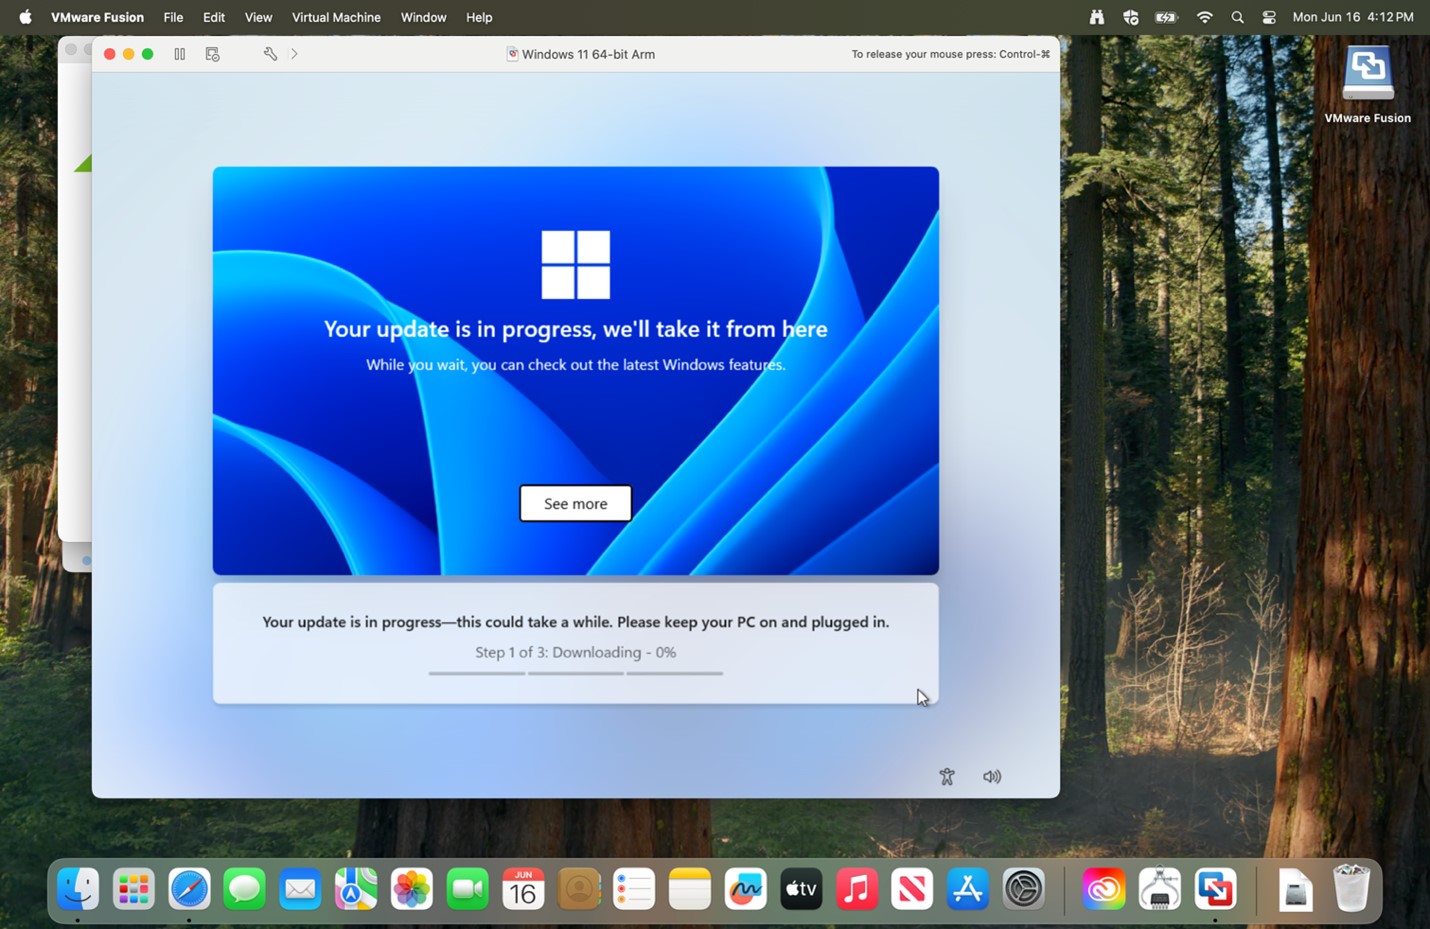
38. Allow time for updates to download.
|
 |
|
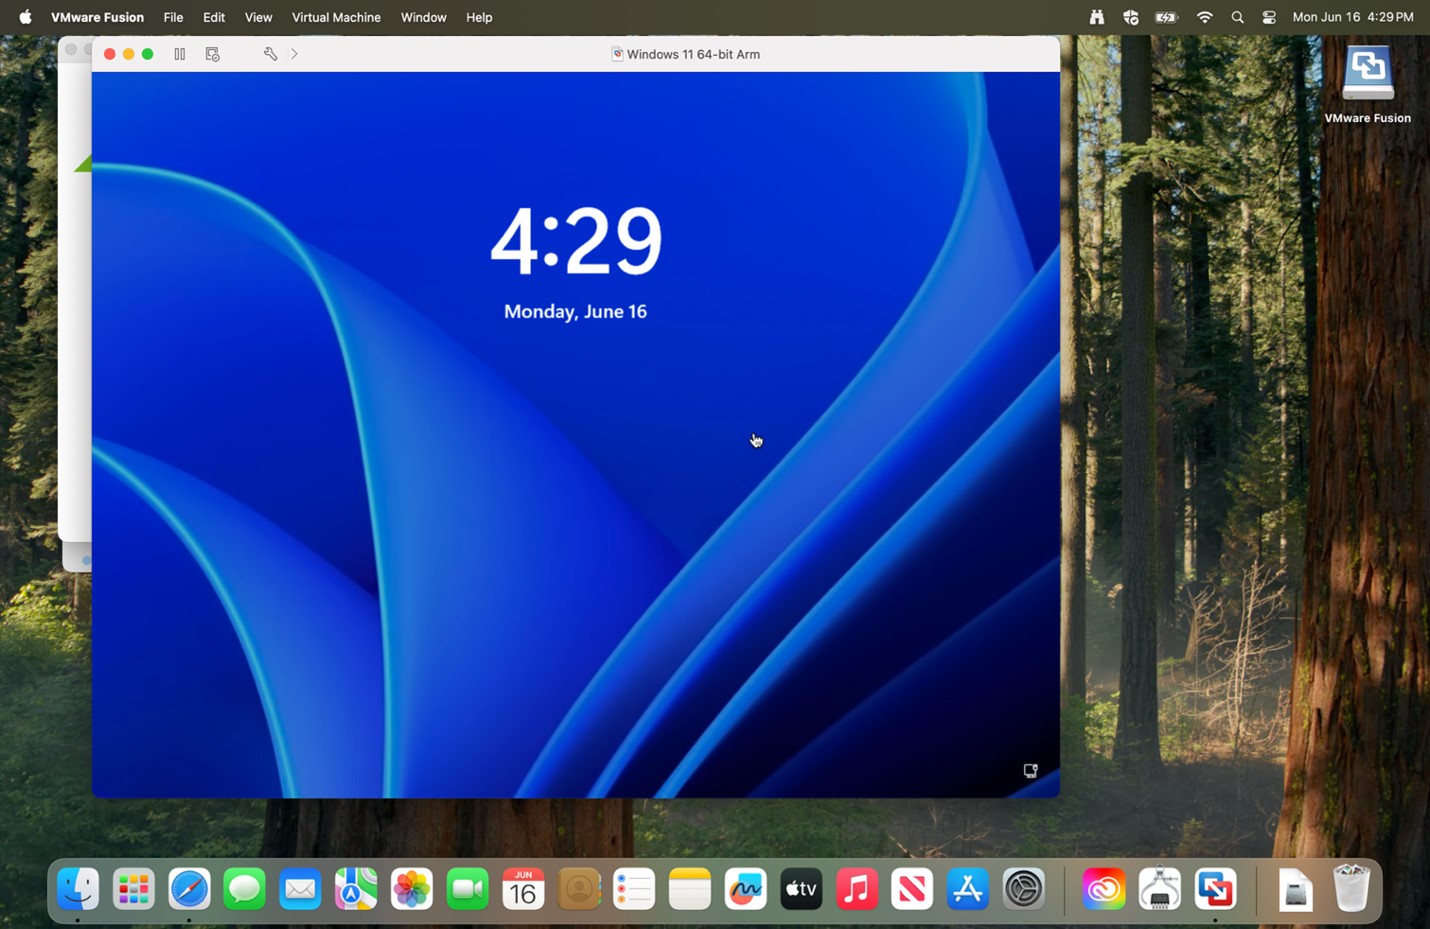
39. Click the screen and enter the password for your login.
|
 |