SAS Installation
If your class requires you to use SAS, a Windows machine is the required configuration. Please see the documented Laptop Requirements.
For Mac users: SAS can only be installed on Windows operating systems. Do not attempt to follow these instructions on a Mac unless you are running Windows through a virtual machine. If you are using a Mac, refer to the instructions below for guidance on installation of SAS for Mac.
Follow the step-by-step instructions exactly as they are presented below. Do not skip any steps in the process.
Note for those who have installed SAS from a previous semester and only need to update the license file: Please complete the first step Downloading the SAS license file and then skip to Updating the License File.
Downloading the SAS Installer
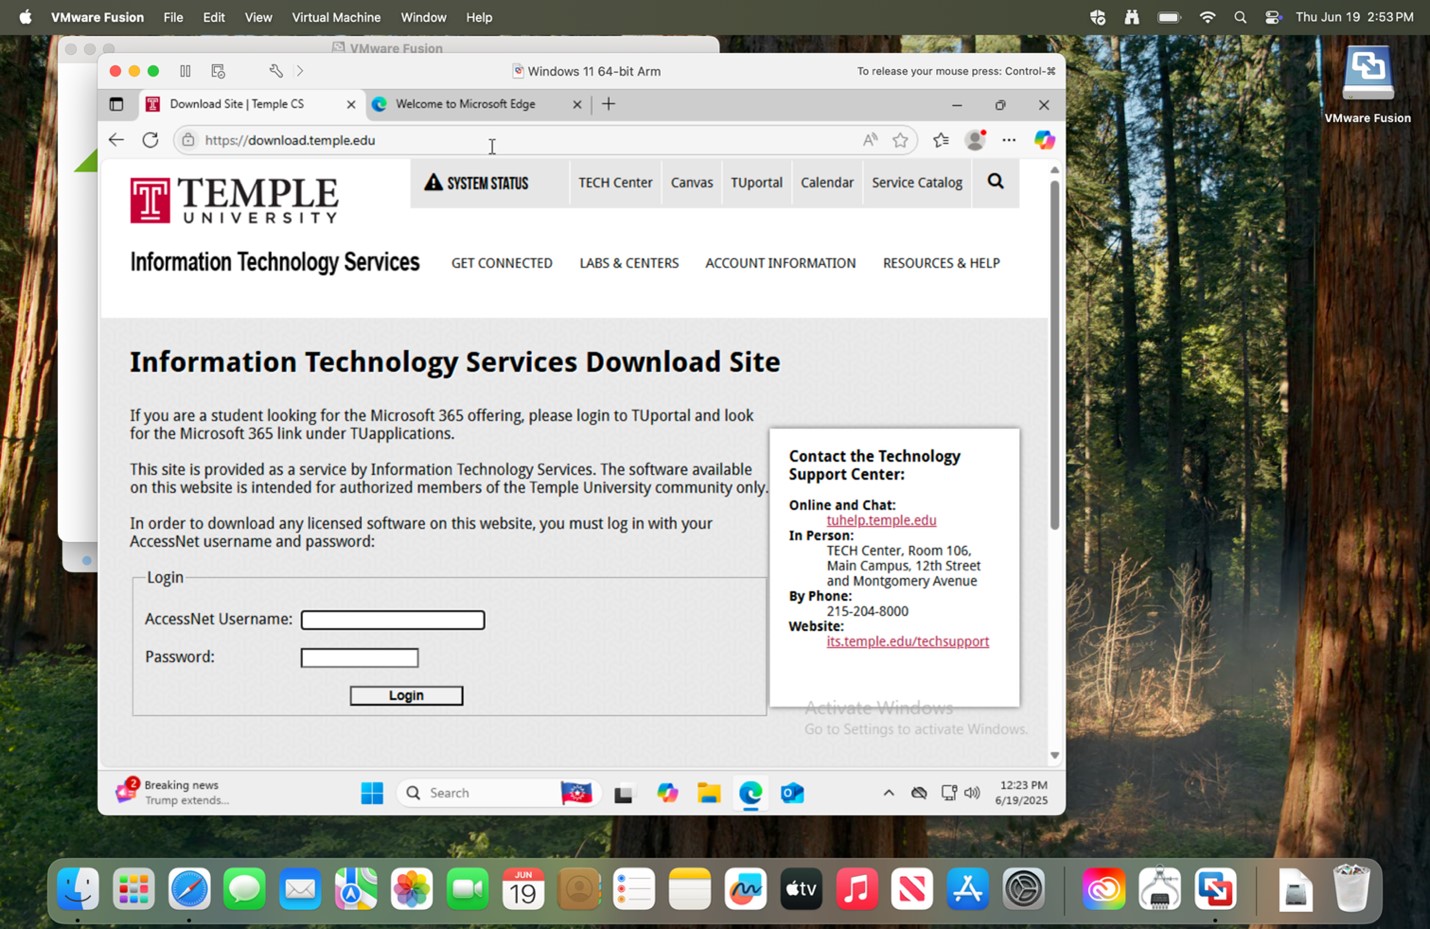
- Visit https://download.temple.edu and login with your Temple credentials.
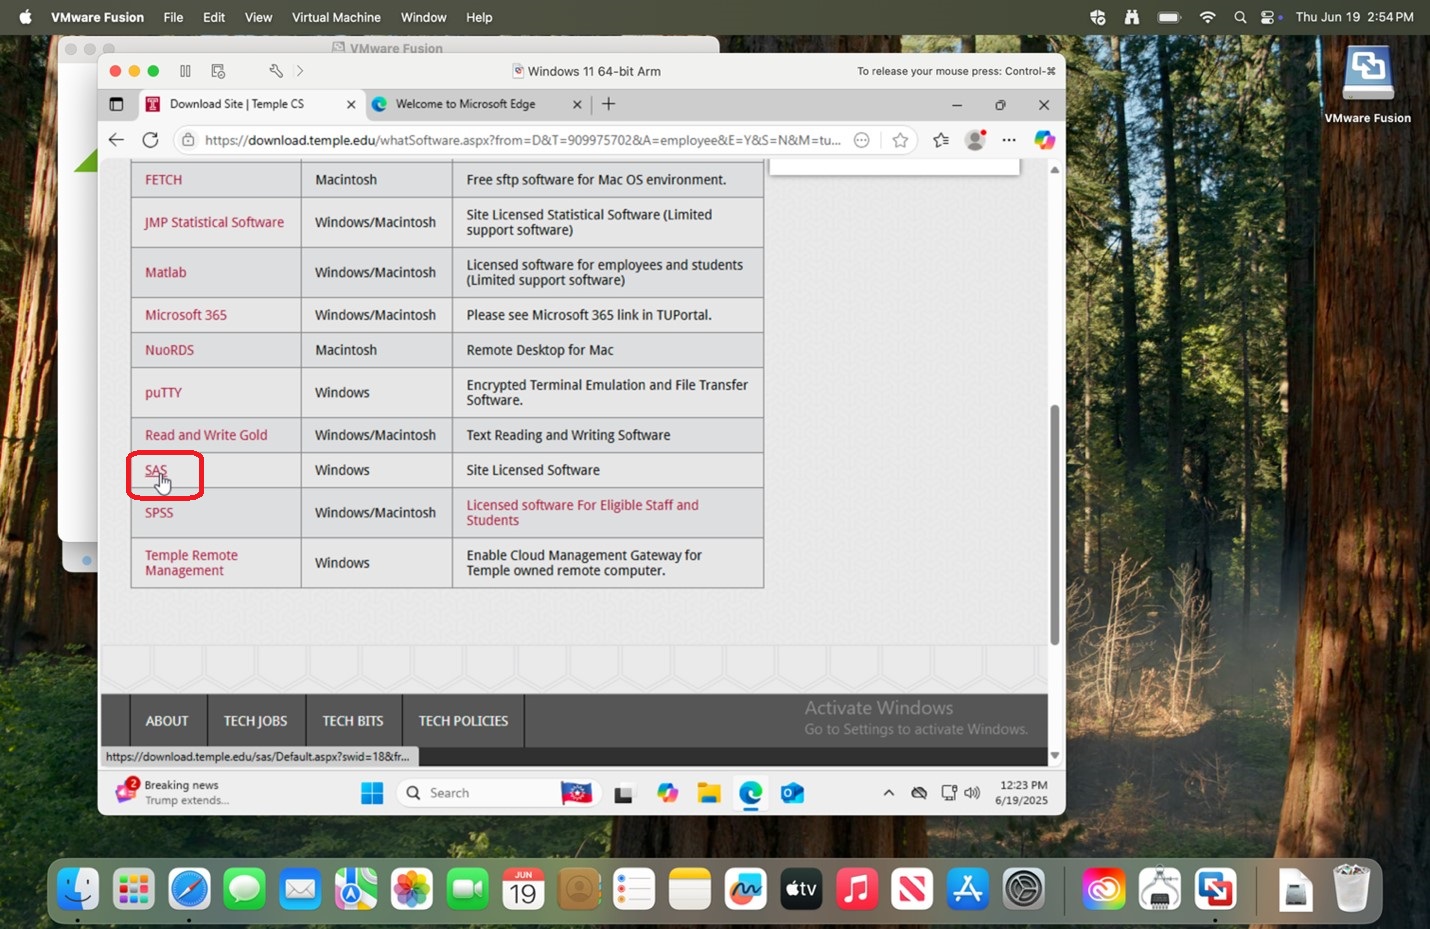
- Find "SAS" listed among the list of available downloads.
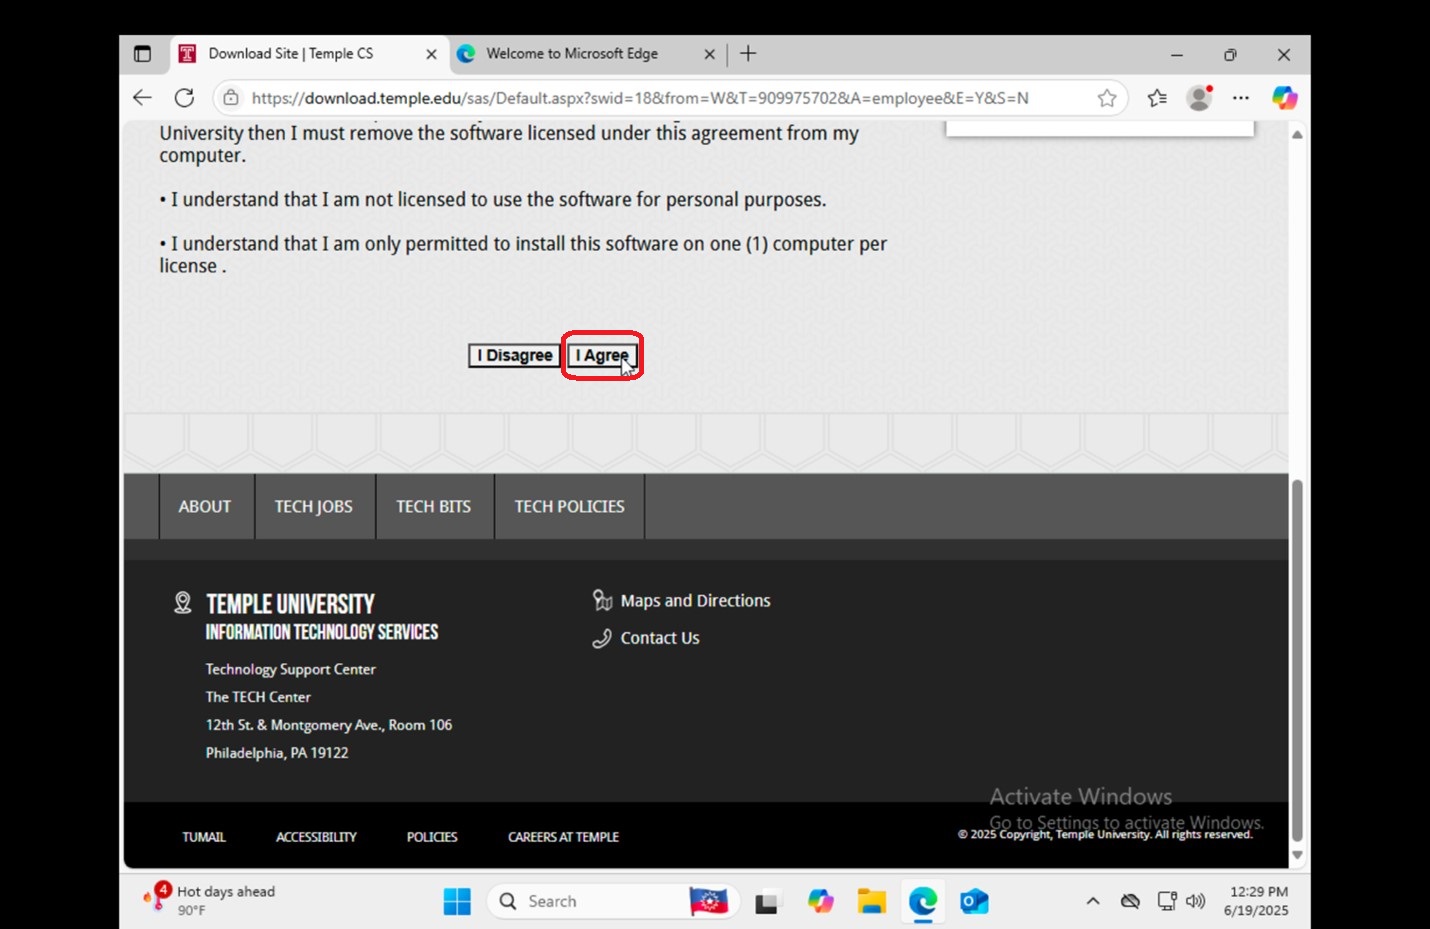
- On the SAS license agreement page, select "I Agree".
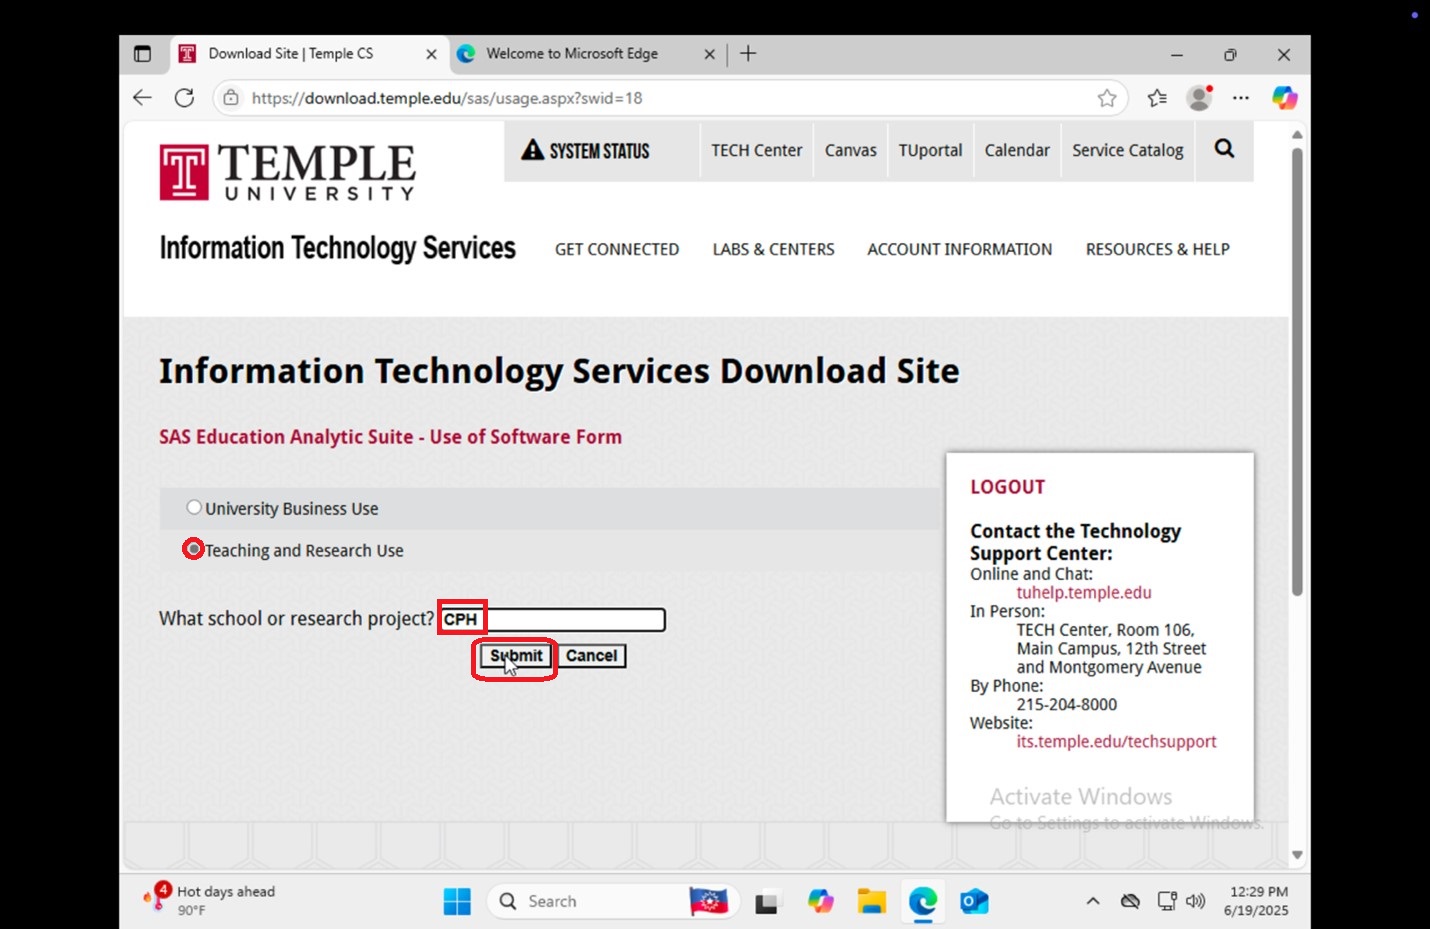
- On the SAS Education Analytic Suite - Use of Software Form, select "Teaching and Research Use". Then enter "CPH".
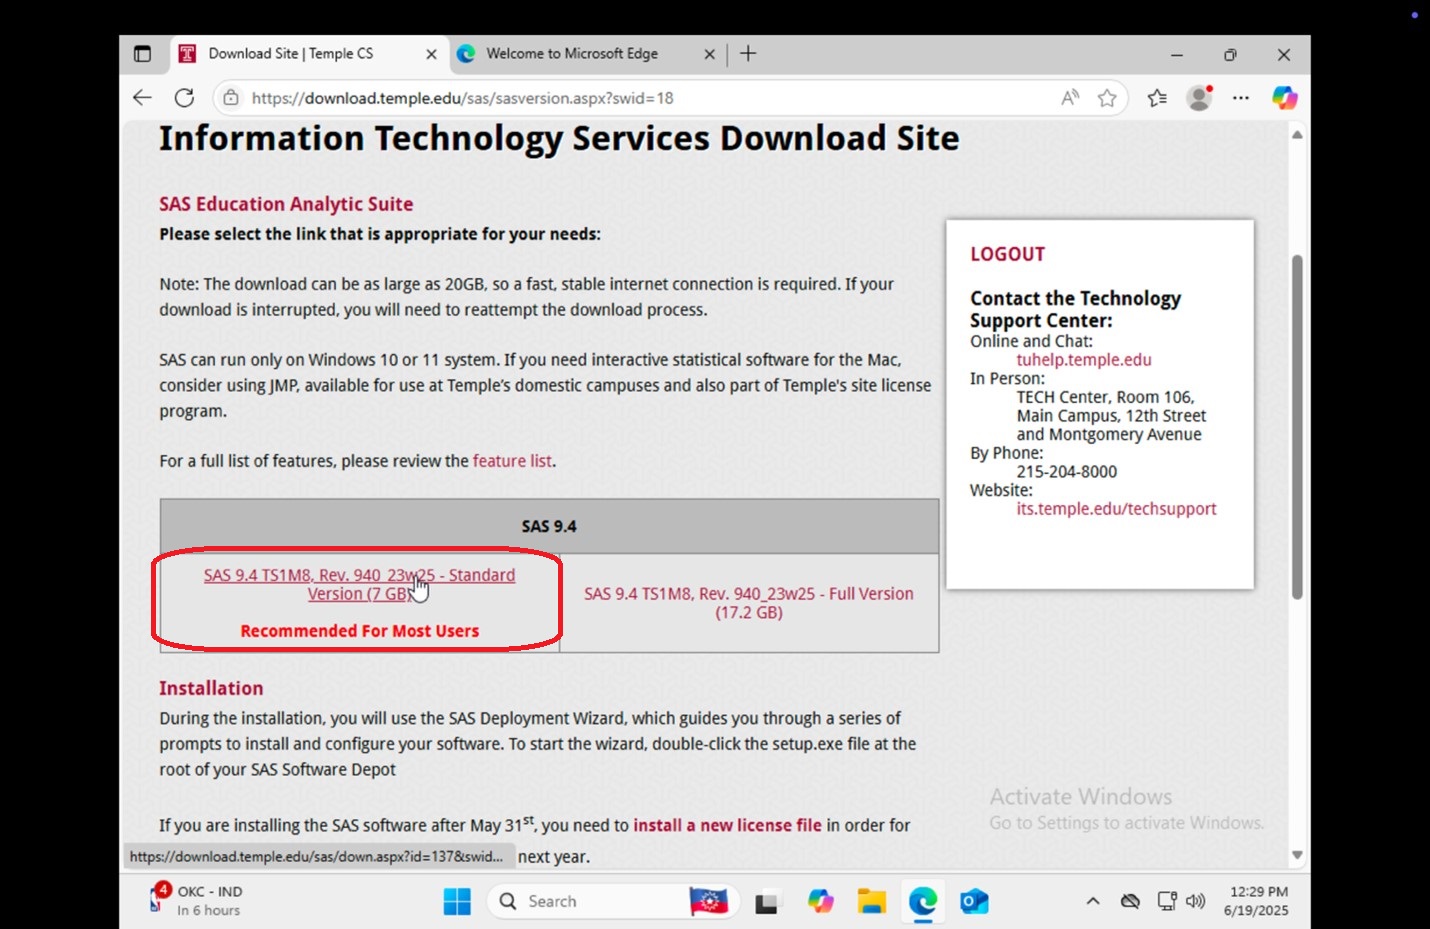
- If you need the SAS installer, on the center of the page, click "SAS 9.4 TS1M8, Rev. 940_23w25 - Standard Version (7 GB)" to download the SAS installer. As this is a fairly large download, it may take several minutes to an hour to complete the download.
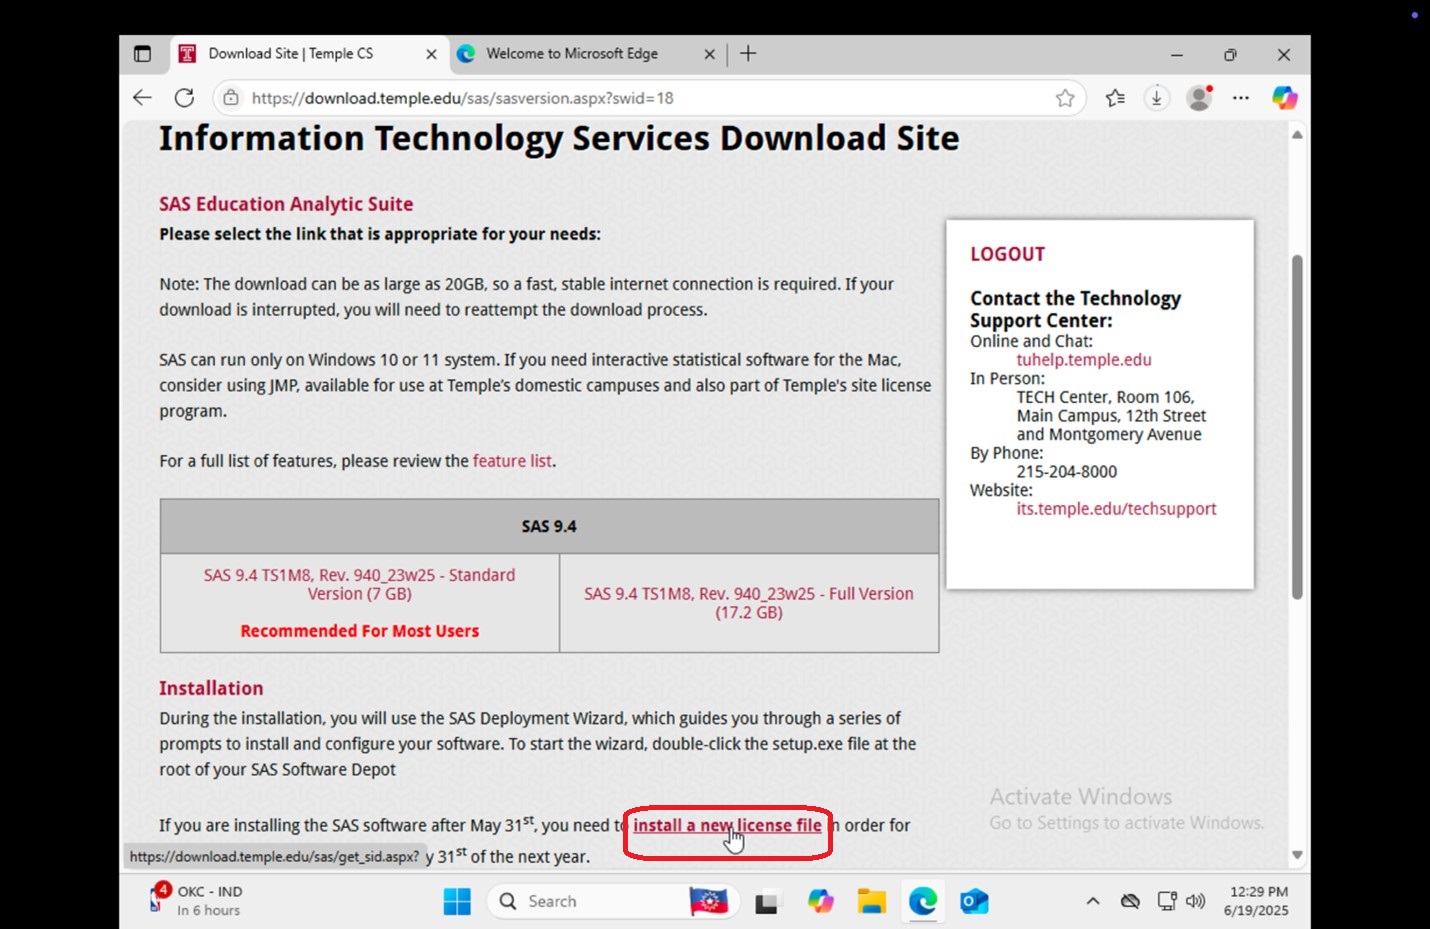
- If you need the SAS license file, follow the link at the bottom of the page that says "install a new license file" and follow the instructions listed on the Download site.
- Congrats! You can now proceed with the instructions for installing.
Downloading the SAS License file
|
1. Go to download.temple.edu and login using your accessnet username and password.
|
 |
|
2. Scroll down and select SAS.
|
|
|
3. Click I Agree.
|
 |
|
4. Select Teaching and Research Use, enter CPH, and click Submit.
|
 |
|
5. Click SAS 9.4 Recommended for Most Users.
|
 |
|
6. While it is downloading, click install a new license file.
|
 |
|
5. If you already have SAS installed, proceed to Updating the License File (for those who already have SAS 9.4 installed)
|
Installing SAS
|
1. If you had any trouble downloading the installer in the previous set of instructions, please contact or visit the Temple University Help Desk.
|
 |
|
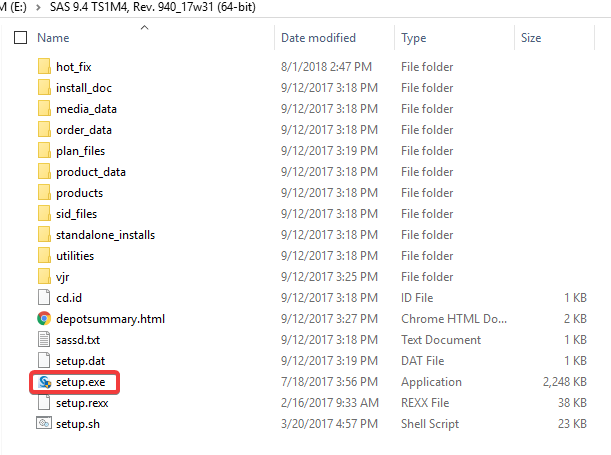
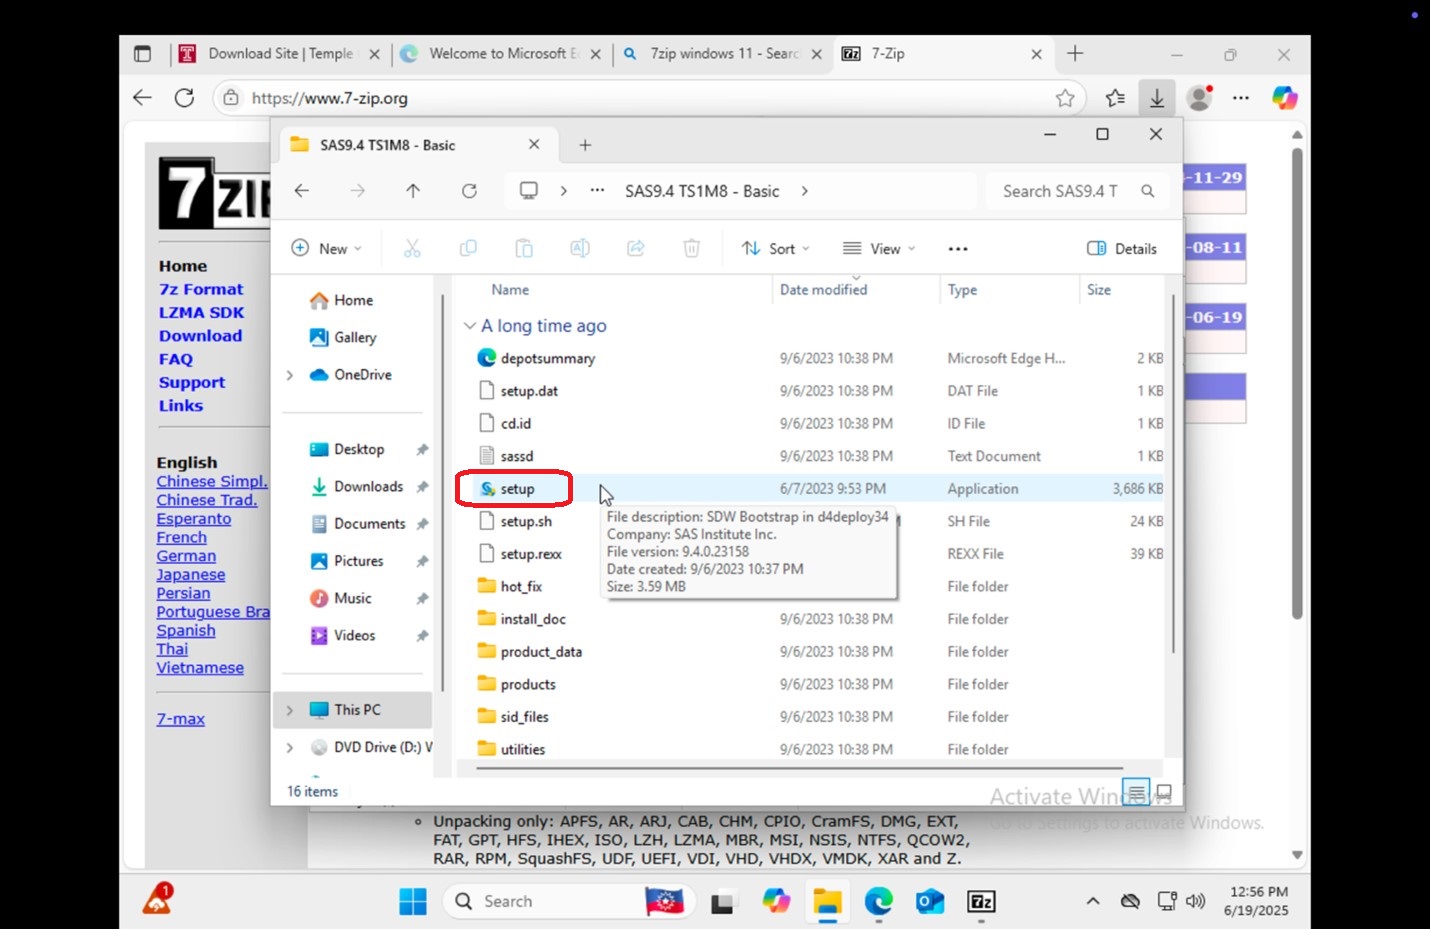
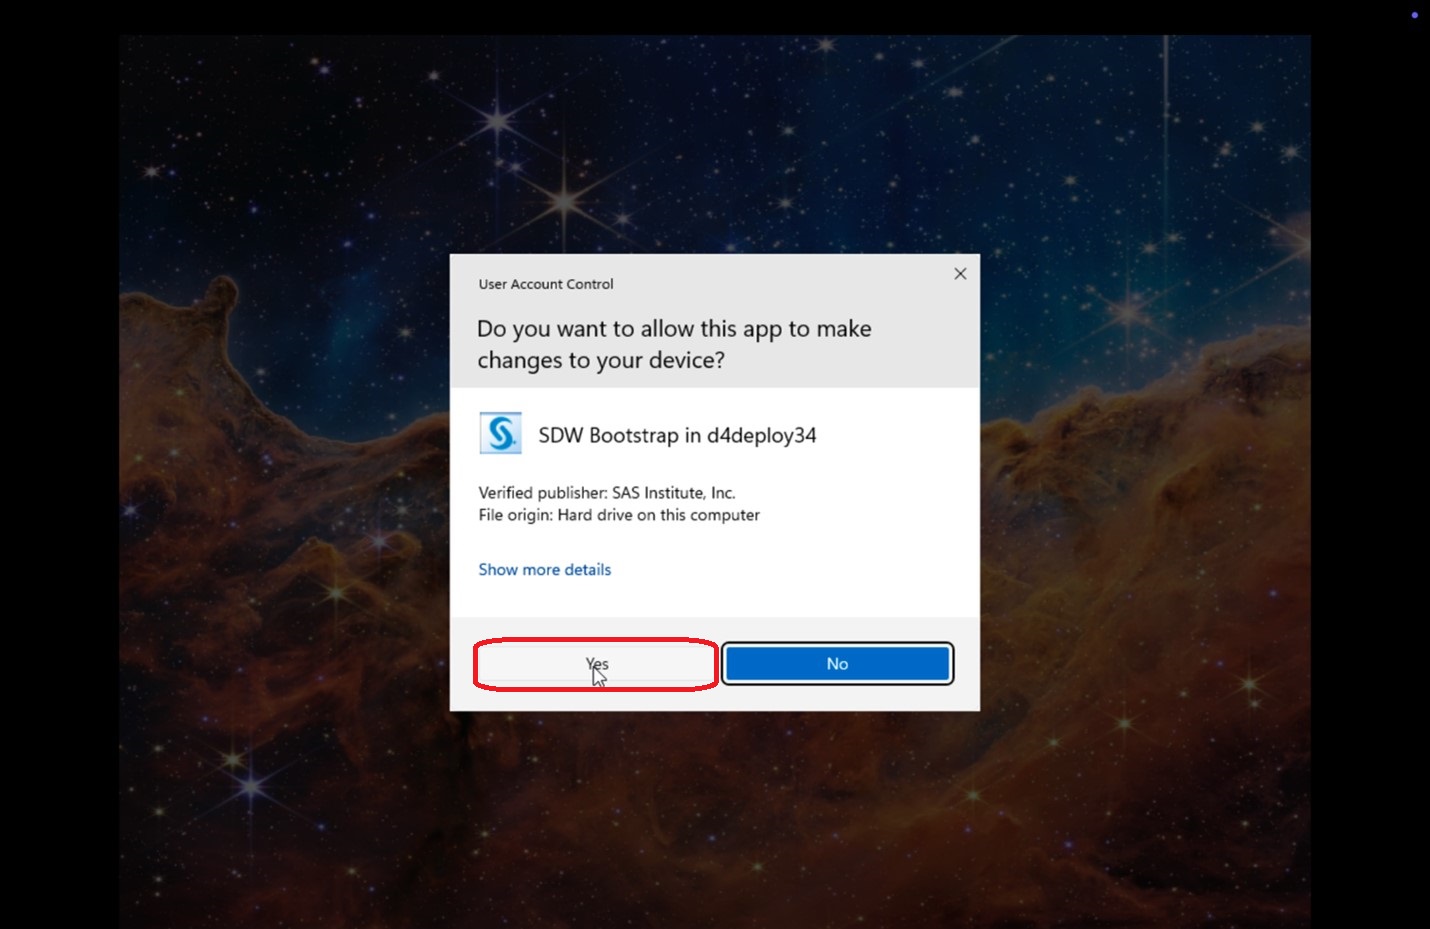
2. Double click on the setup icon to launch it. Note on some systems, this may be listed as either "setup.exe" or "setup". You may be asked to consent. Please click Yes.
|
|
|
3. The SAS installer may take a few minutes to launch.
|
 |
|
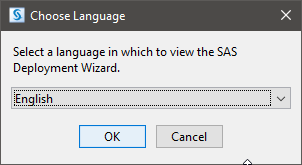
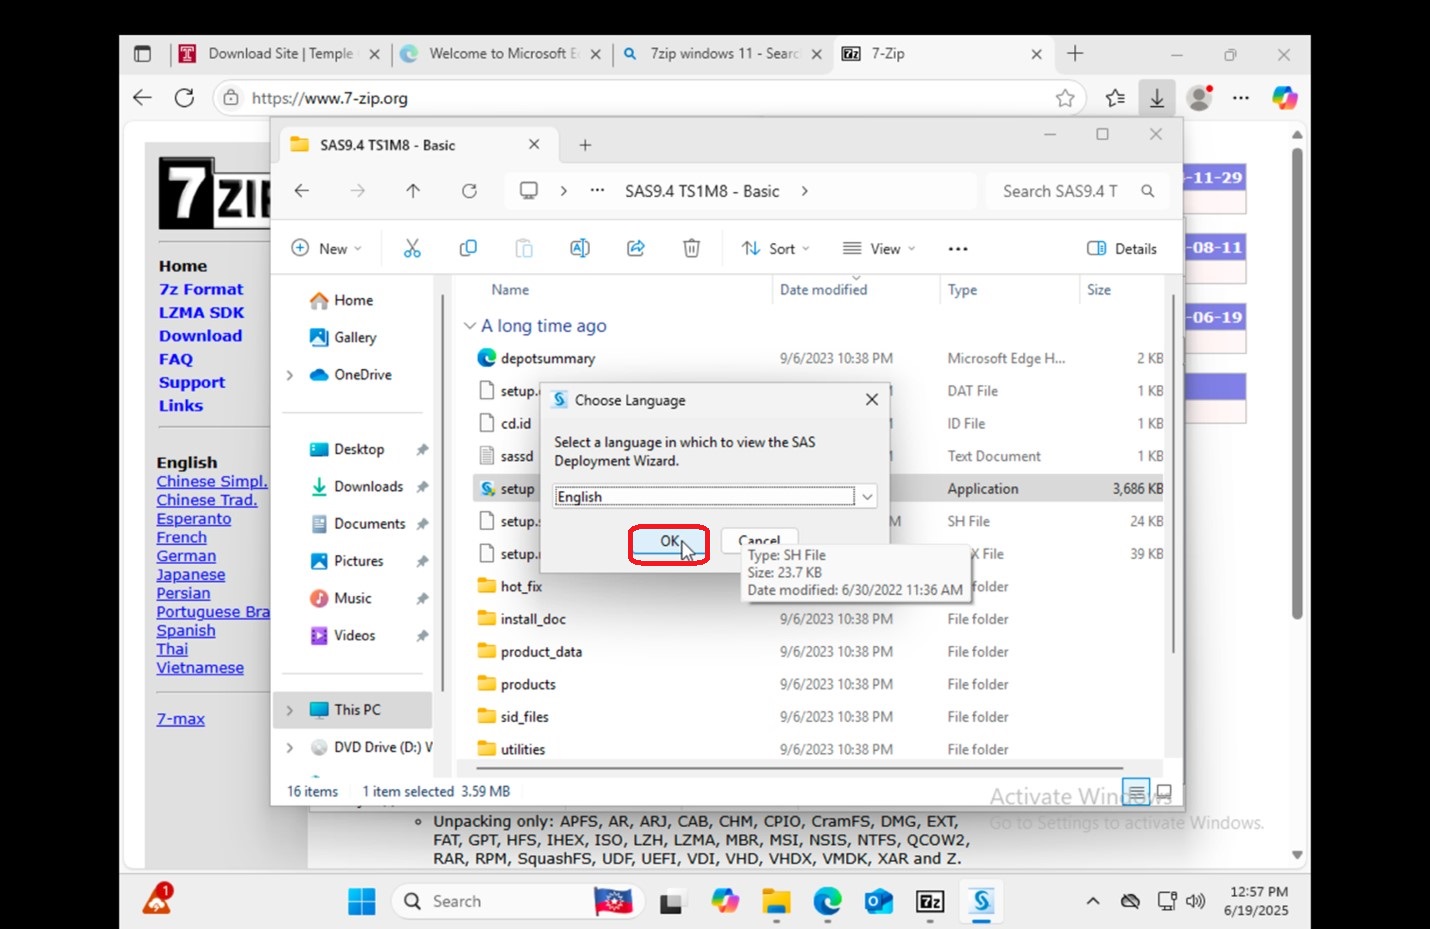
4. Once SAS's installer initialized, you will be asked to choose your language. Select English.
|
 |
|
5. It may take a few more moments before you can proceed.
|
 |
|
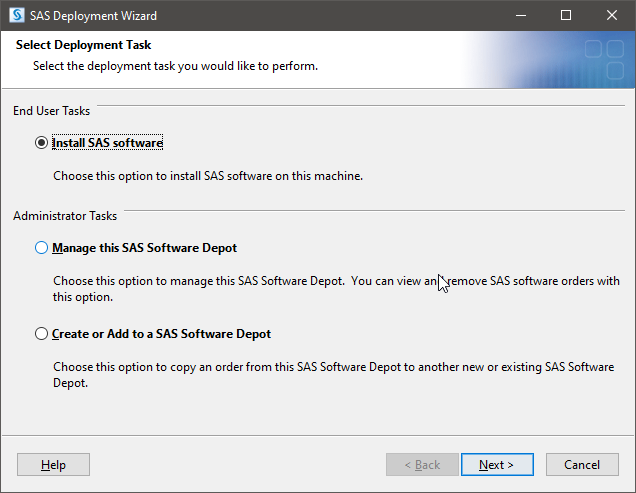
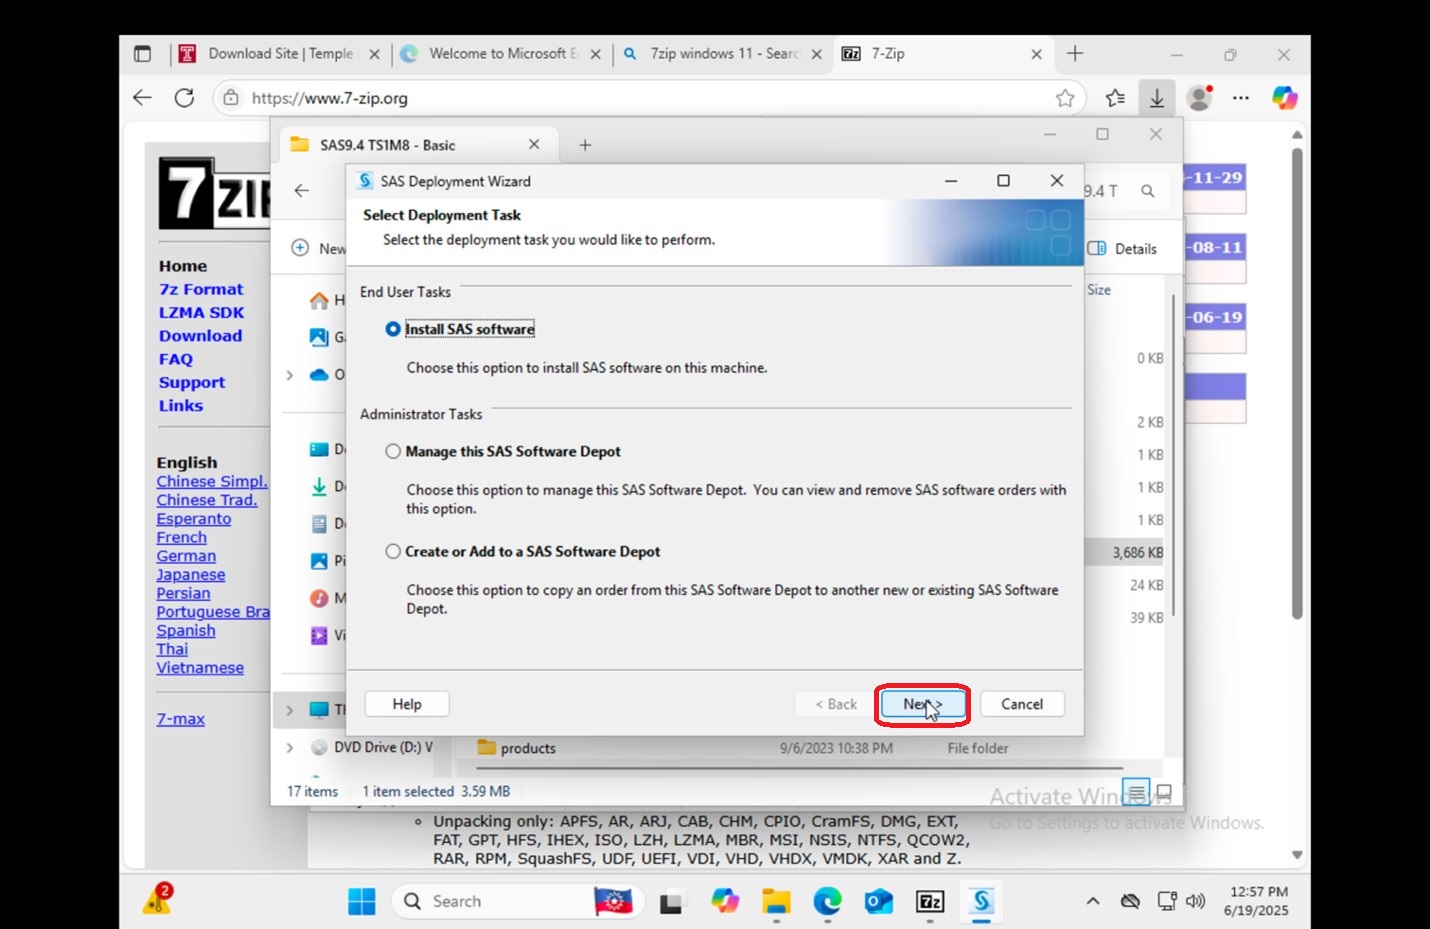
6. When the SAS Deployment Wizard has opened, check Install SAS Software, and click Next.
|
 |
|
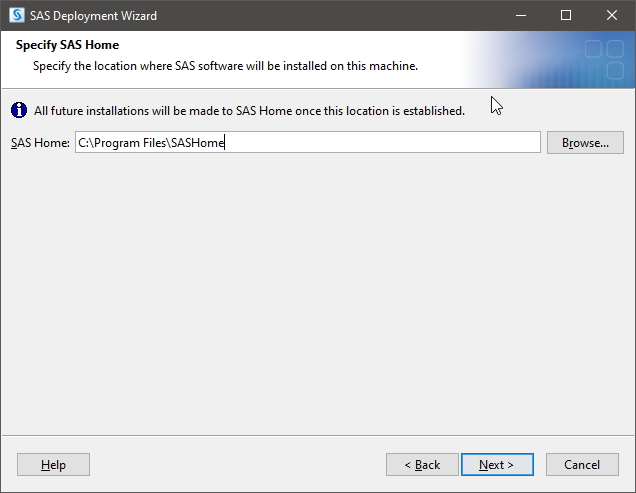
7. You will be prompted to enter a SAS Home. You can leave this as the default: C:\Program Files\SASHome. Click Next.
|
 |
|
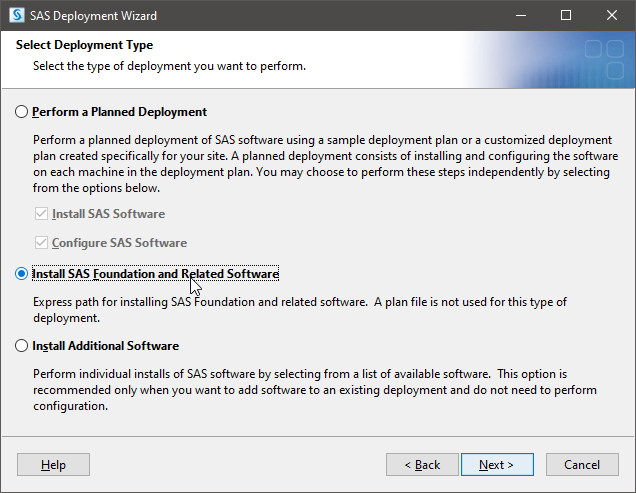
8. If prompted for a Deployment Type, select Install SAS Foundation and Related Software, and click Next. This step may not be applicable to all installations of SAS 9.4
|
 |
|
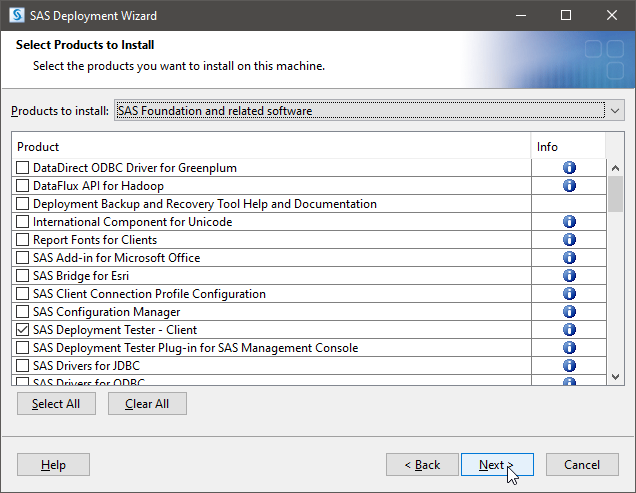
9. You will also be asked to select which products you want to install. You can leave this as the default, and click Next.
|
 |
|
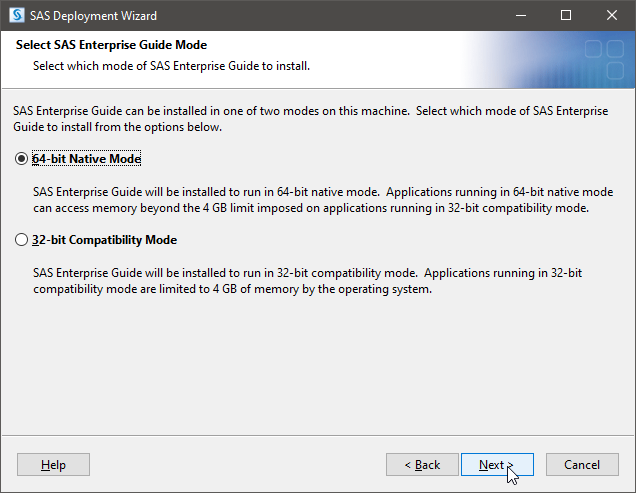
10. If prompted for the Enterprise Guide mode, select 64-bit Native Mode, and click Next. This step may not be applicable to all installations of SAS 9.4
|
 |
|
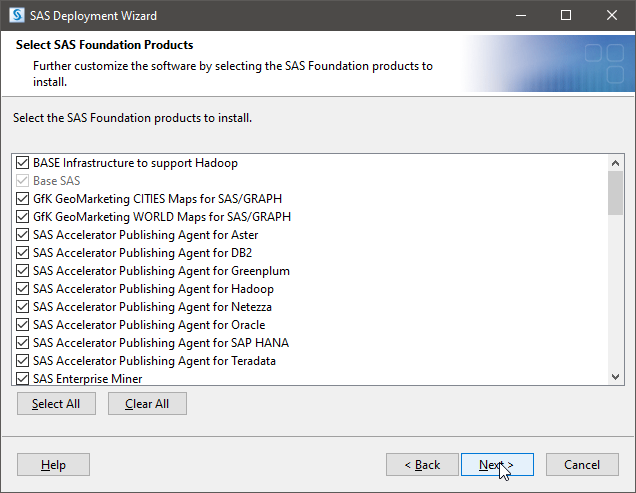
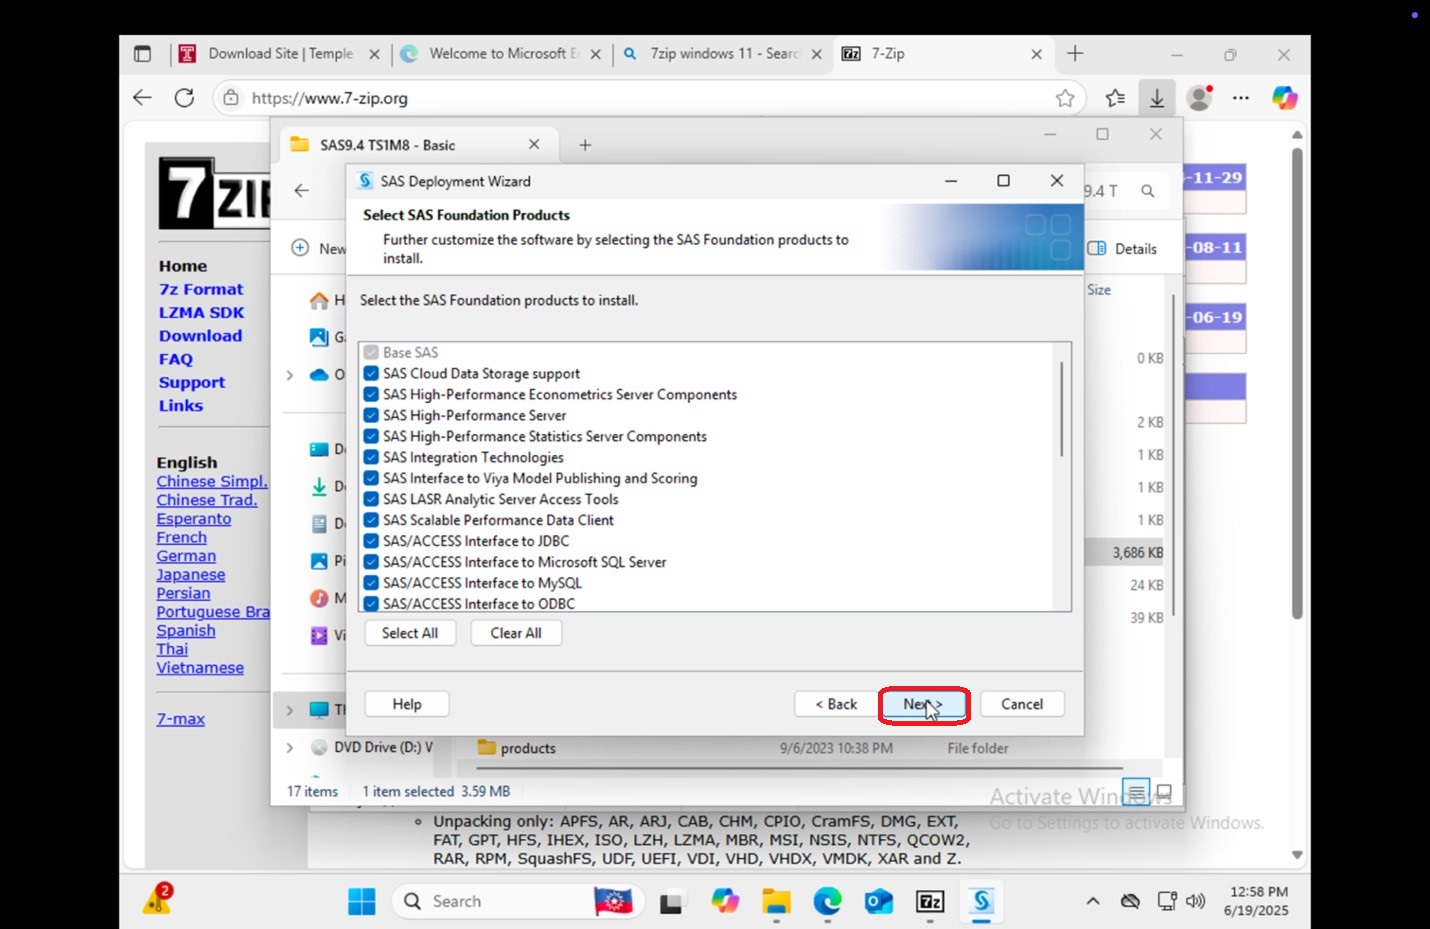
11. You will be prompted again to select which products. Leave it as the default, and click Next.
|
 |
|
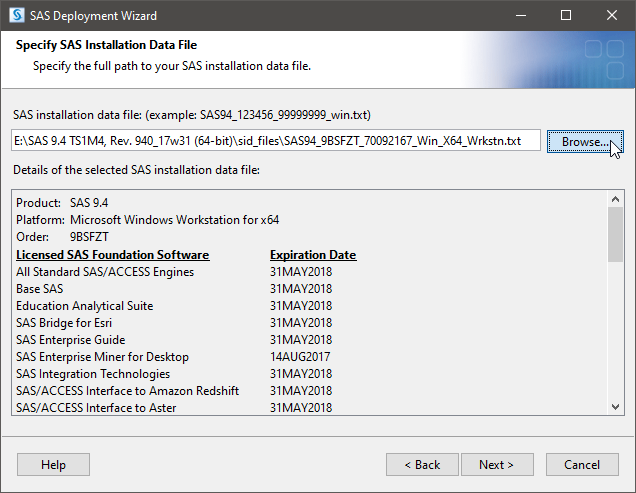
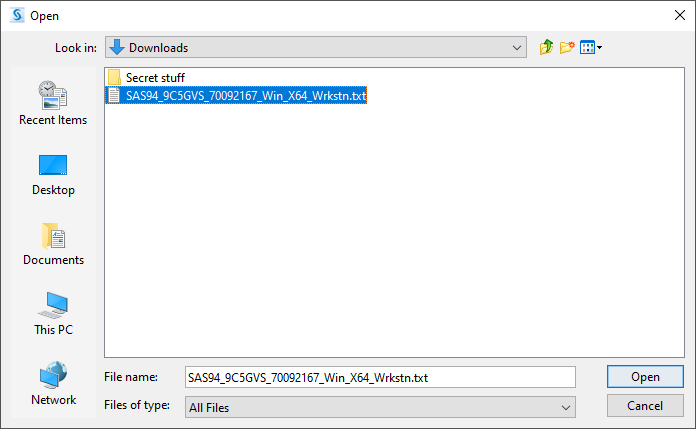
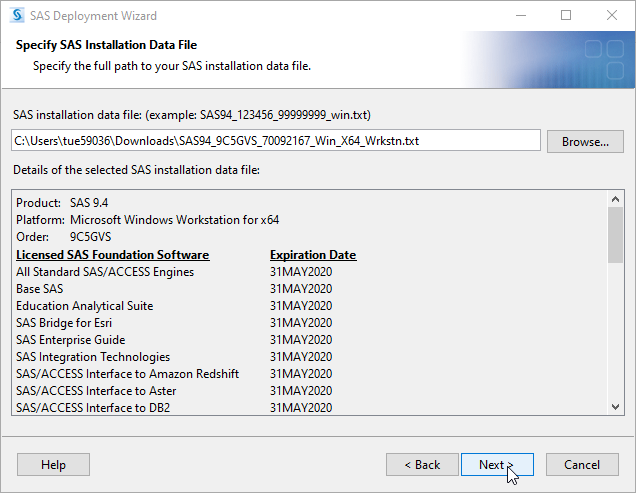
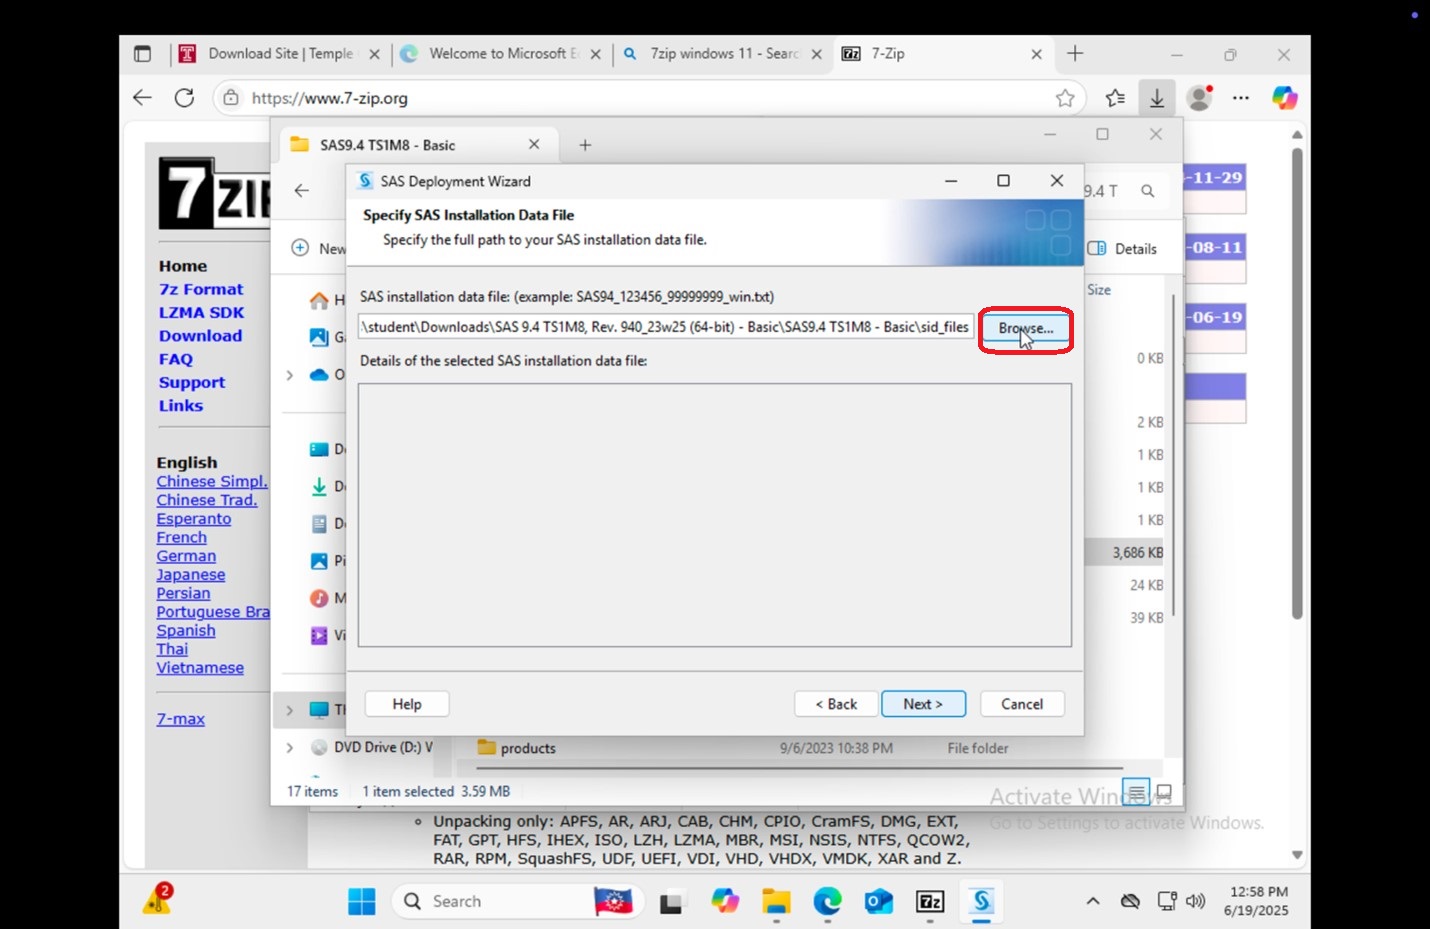
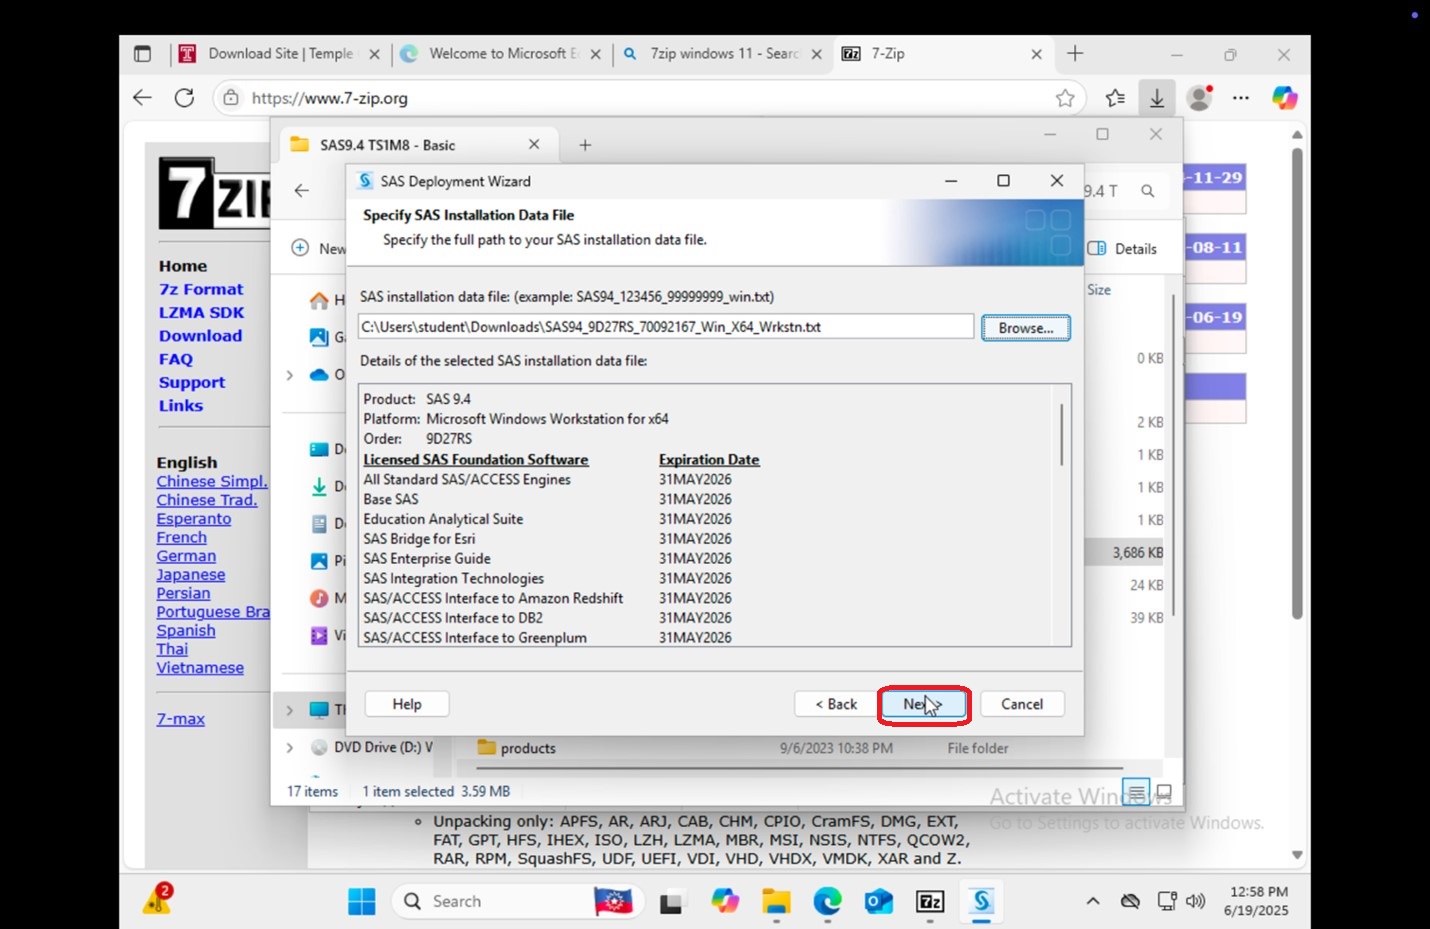
12. DO NOT SKIP THIS STEP! You will then be asked to provide your SAS installation data file. This is your licensing file. Click Browse, and navigate to where you saved the license file. Steps for default download location are detailed below.
|
 |
|
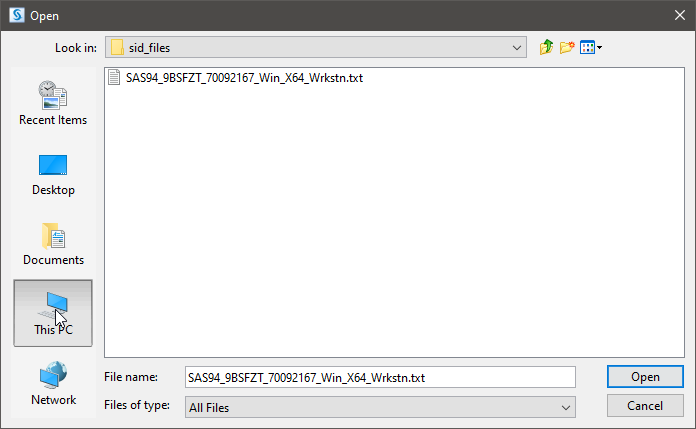
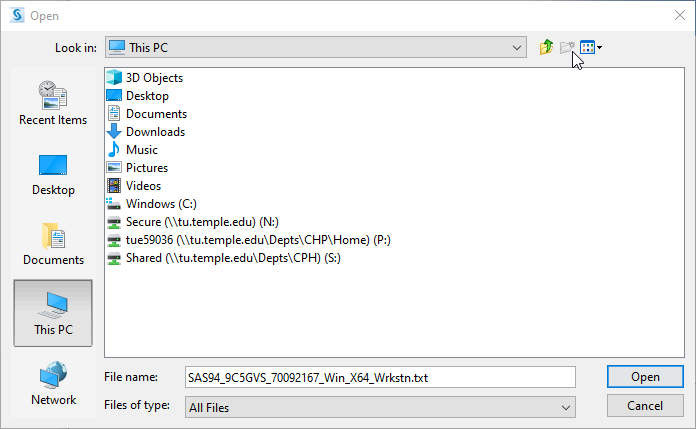
13. On the left side of the file prompt, click "This PC".
|
 |
|
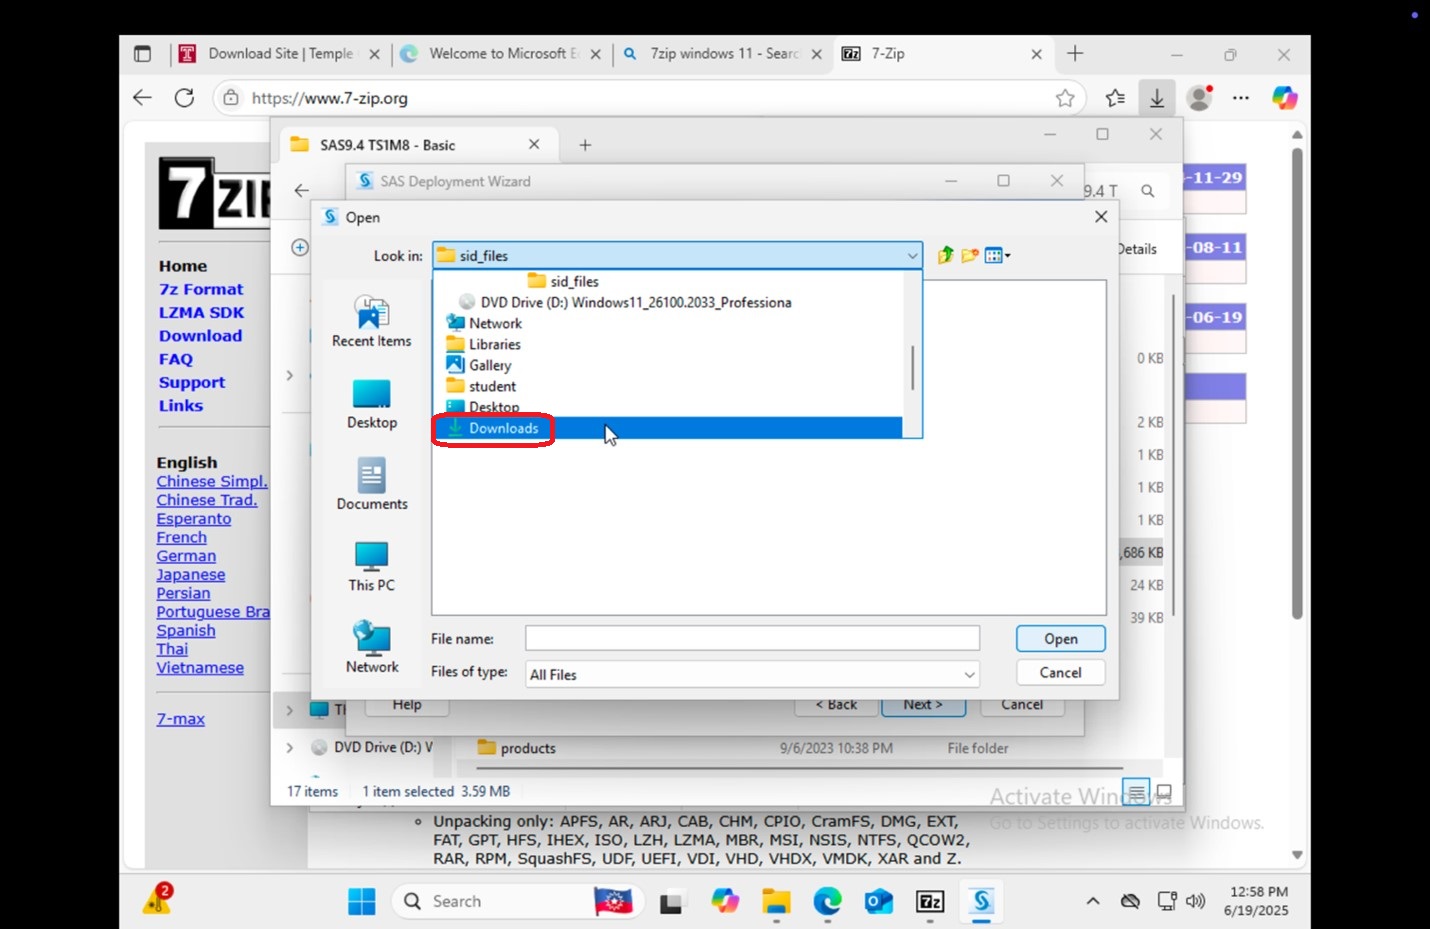
14. You will see various folders, click "Downloads".
|
 |
|
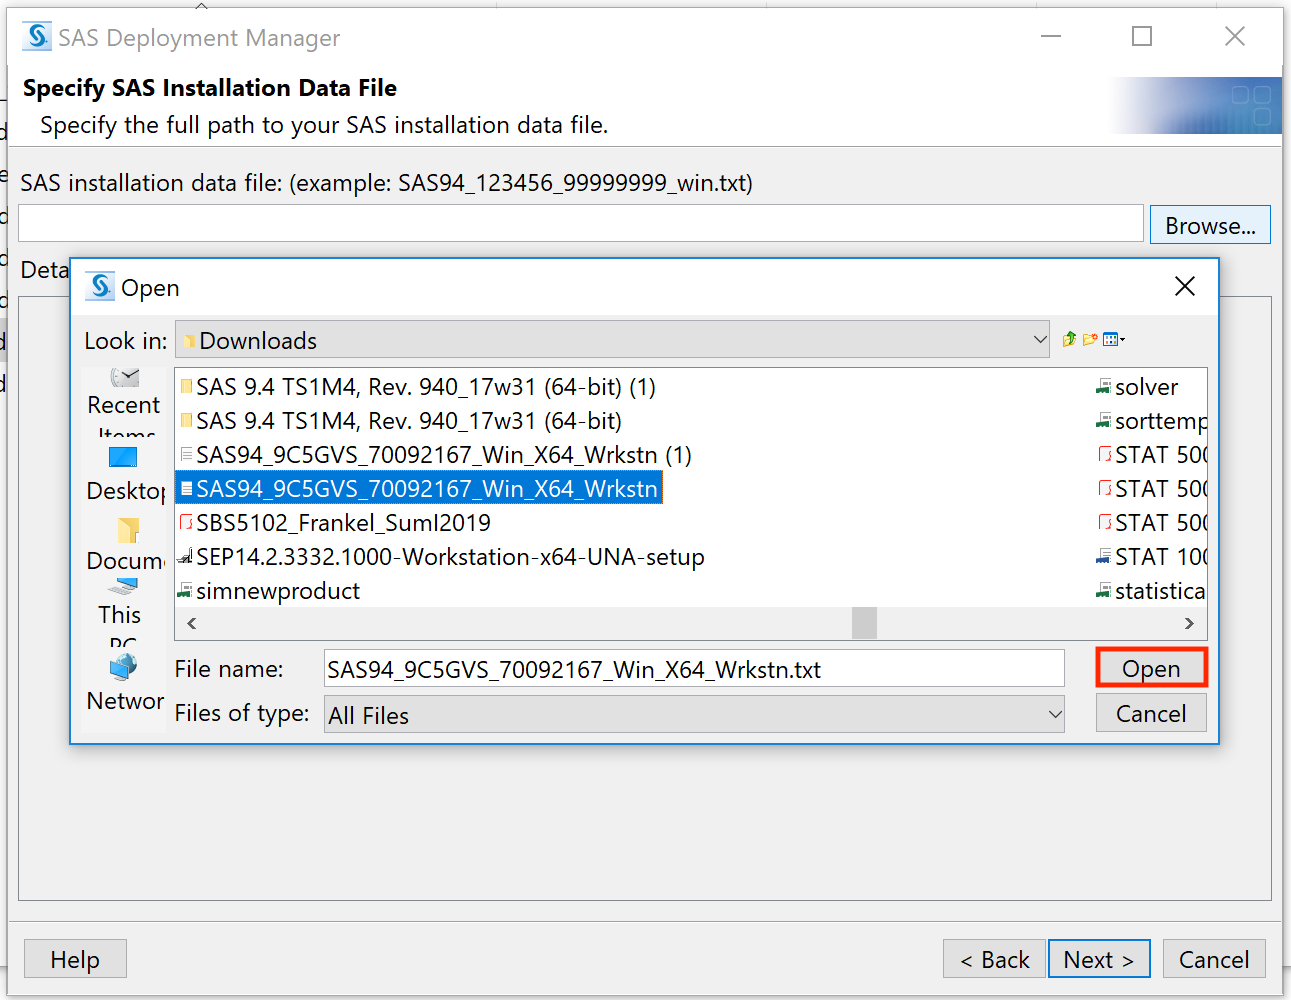
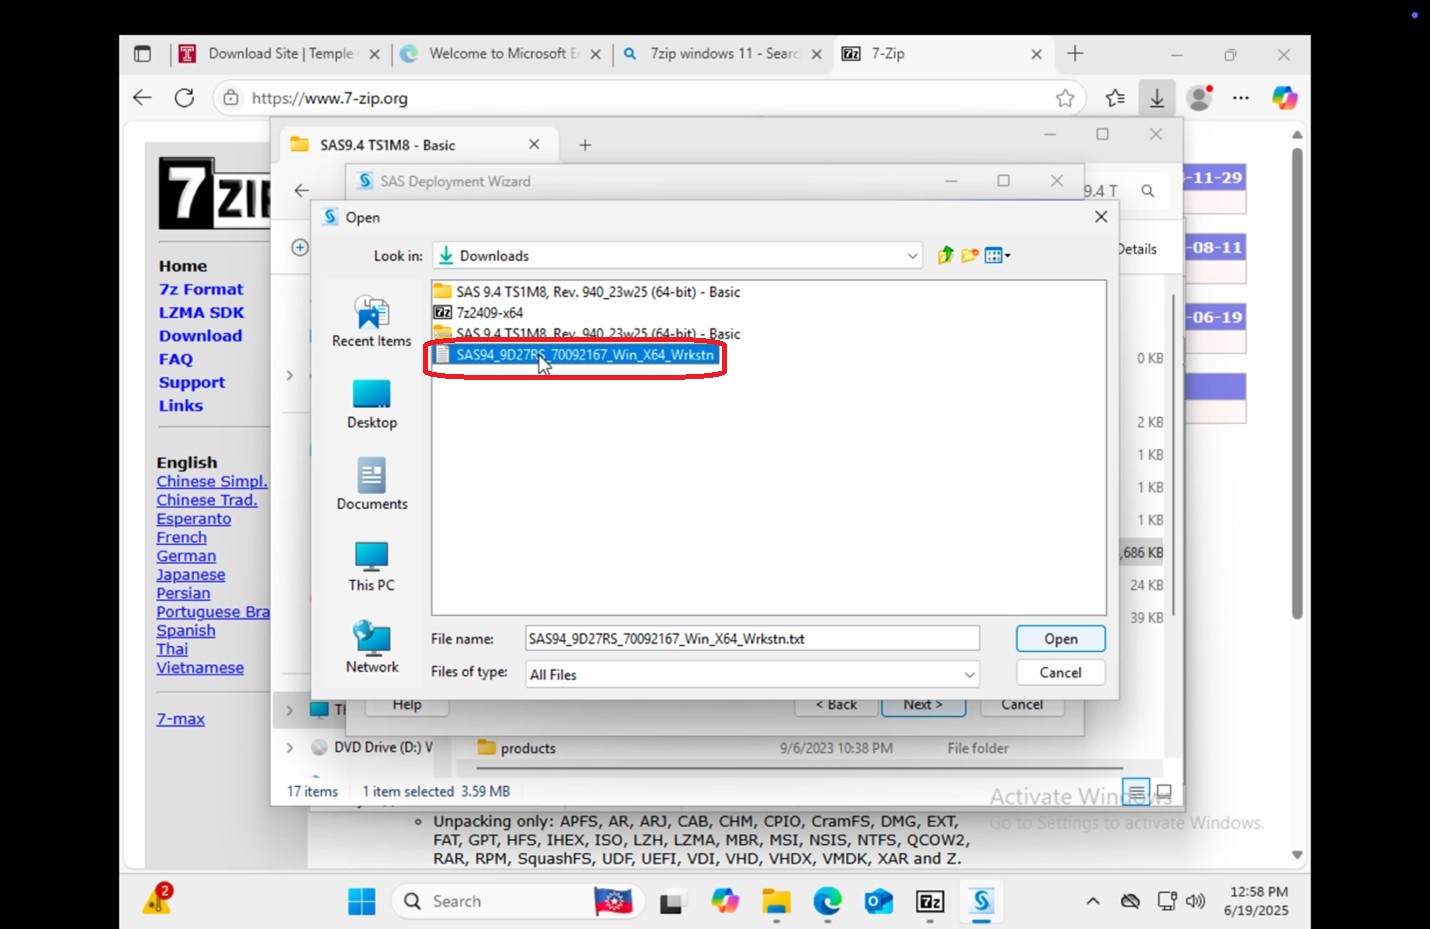
15. In your "Downloads" folder, you should now be able to find the license file you downloaded previously. Find "SAS94_9CWL9Y_70092167_Win_X64_Wrkstn.txt" and click "Open".
|
 |
|
16. Once the file is selected, you can proceed with the installation by clicking "Next".
|
 |
|
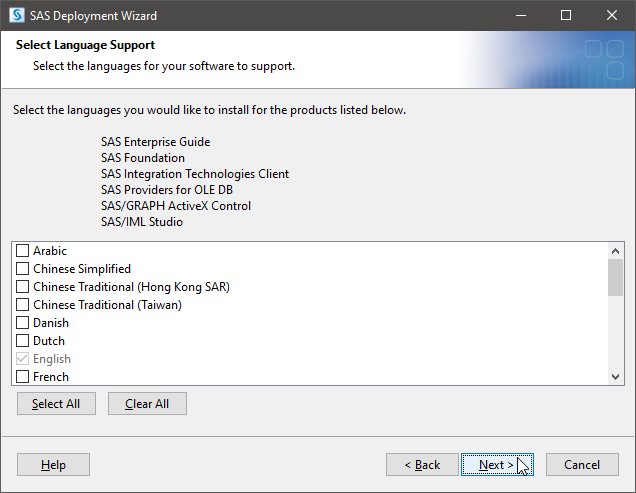
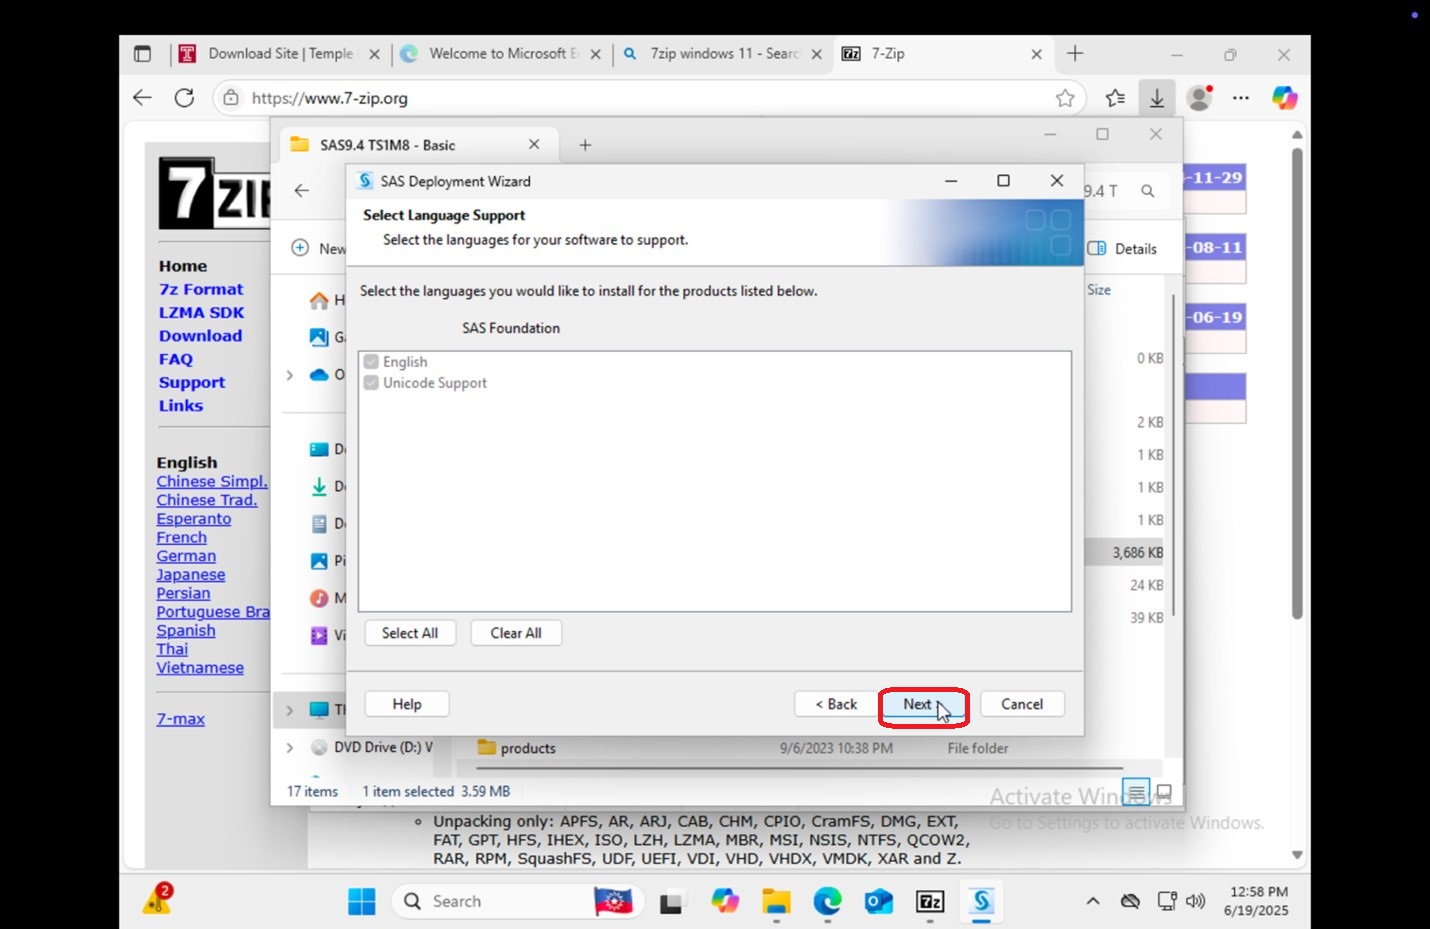
17. Next, it will ask you which languages you want to install. Click "Clear All" and then click "Next".
|
 |
|
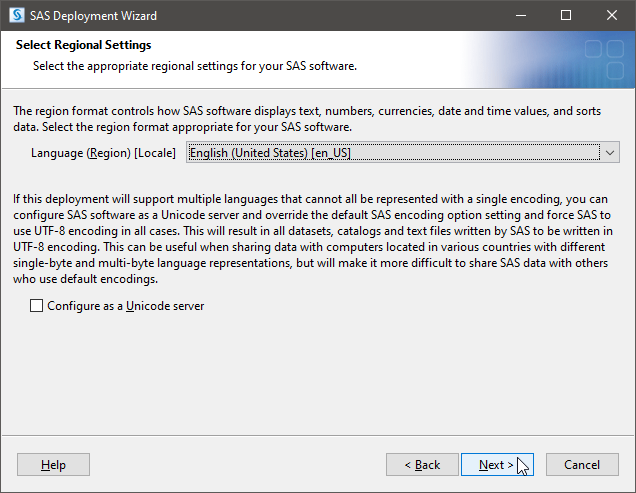
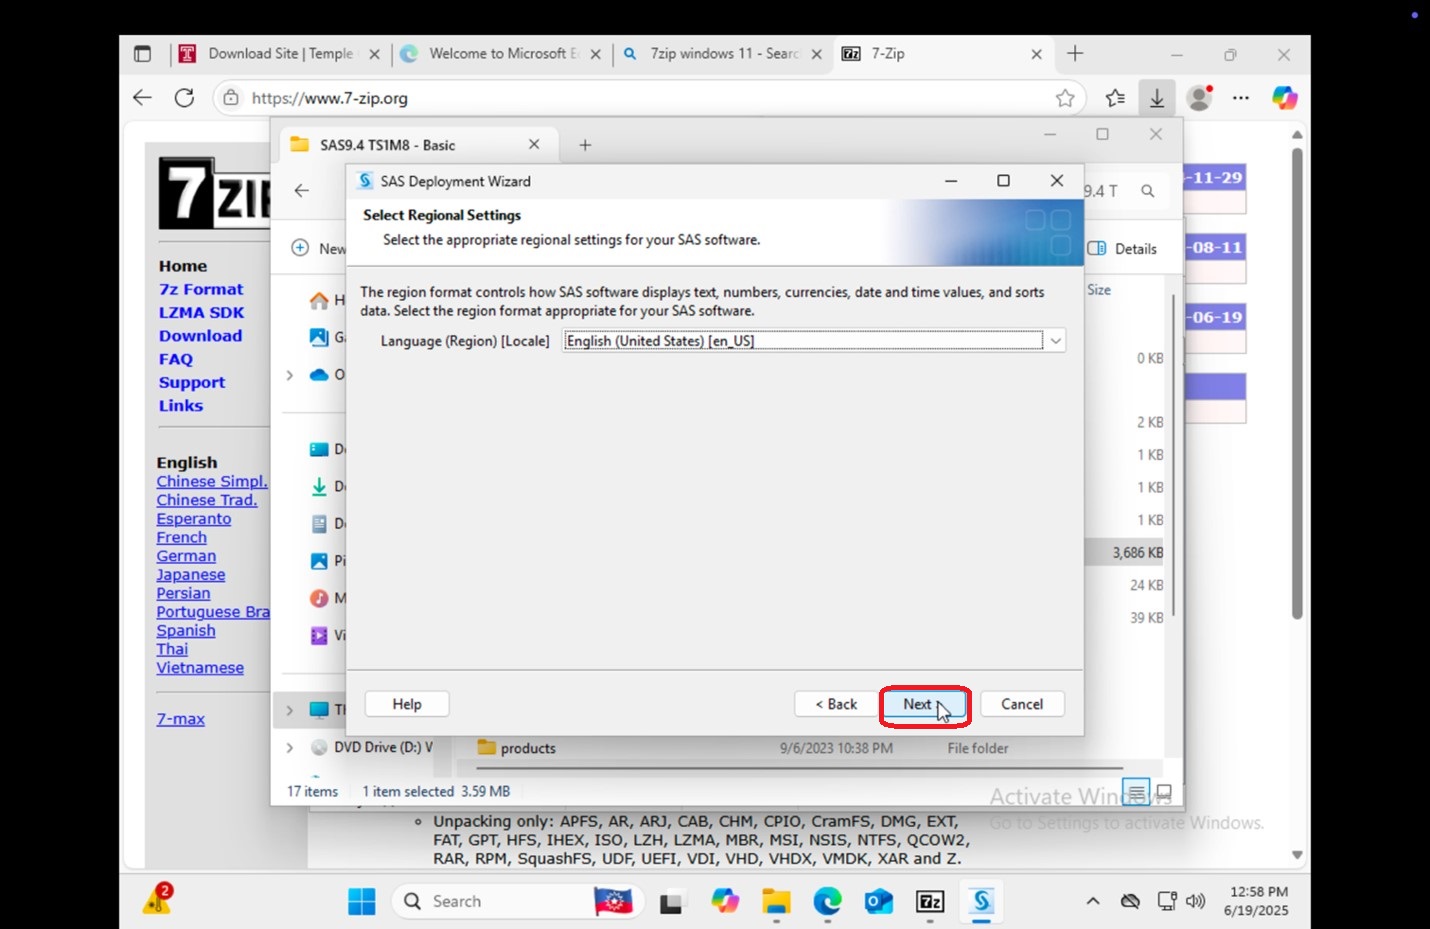
18. Now you'll be asked for Regional Settings. Leave the default and click "Next".
|
 |
|
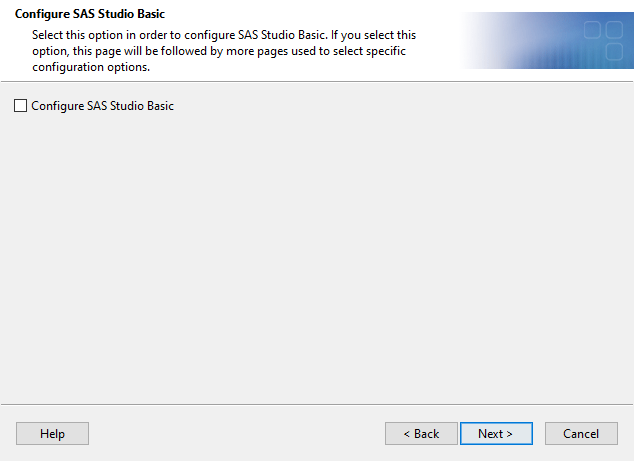
19. You may be prompted to select an option for SAS Studio Basic. You can uncheck the Configure SAS Studio Basic option. This step may not be applicable to all installations of SAS 9.4
|
 |
|
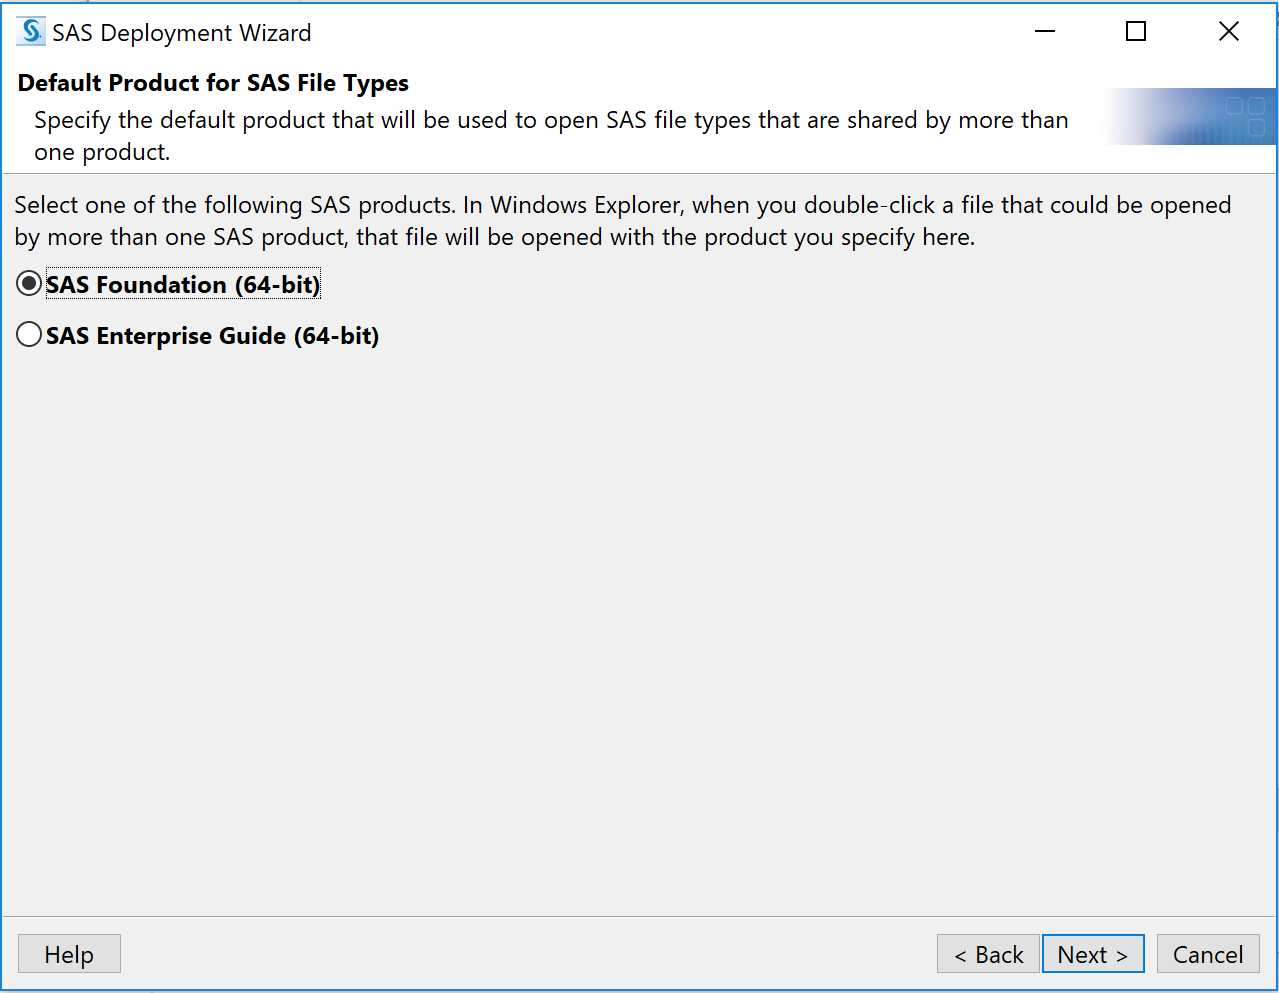
20. Next, you may be prompted to select the Default Product for SAS File Types. Leave it as default "SAS Foundation (64-bit)." Click "Next."
This step may not be applicable to all installations of SAS 9.4
|
 |
|
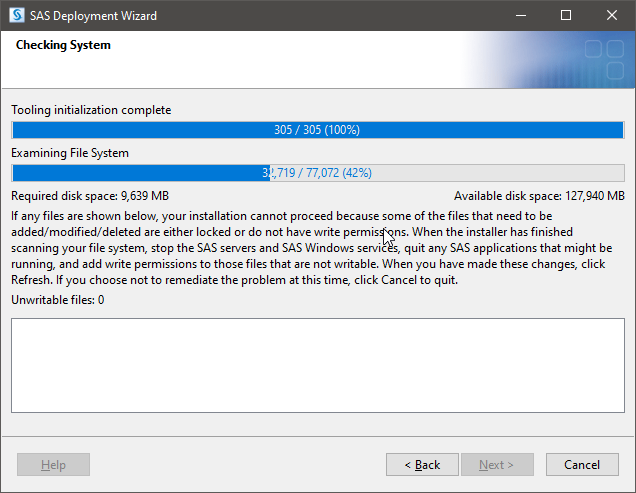
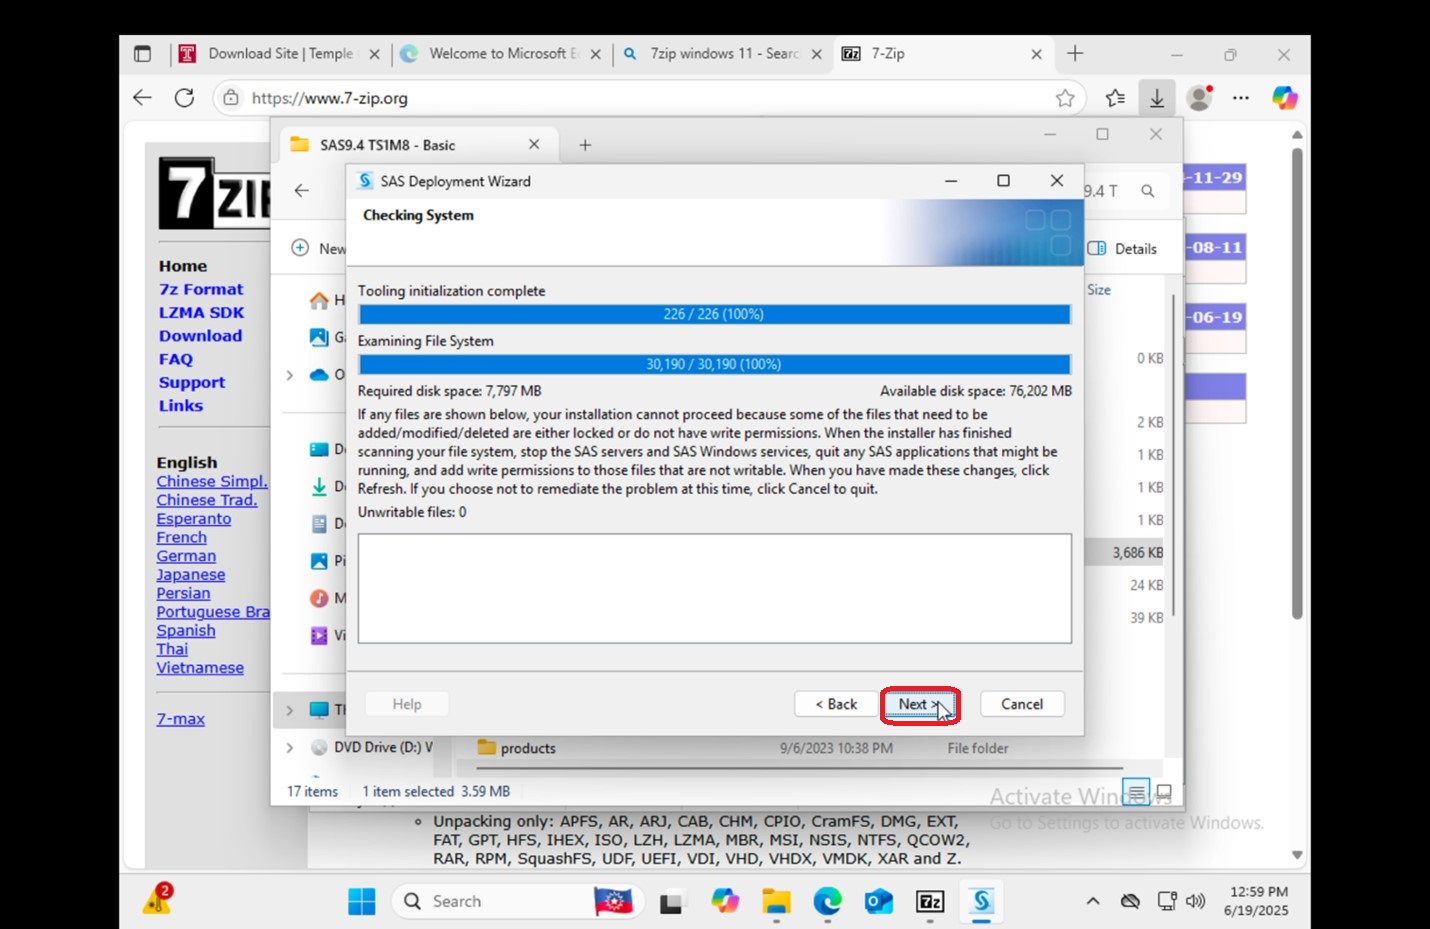
21. SAS will now run a system check. This may take a while. Once it's done, you'll be able to click "Next".
|
 |
|
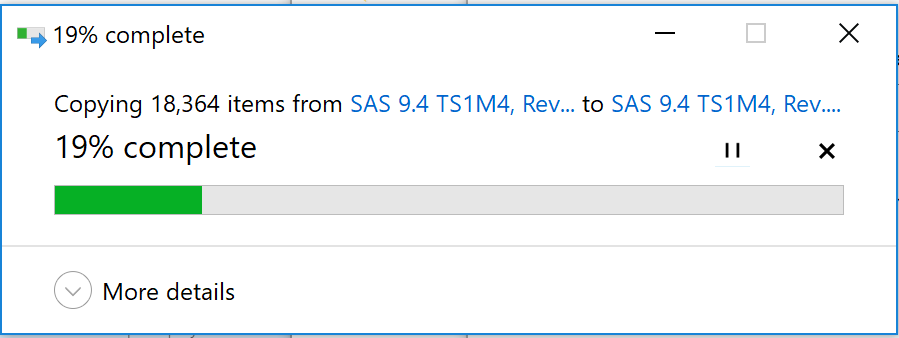
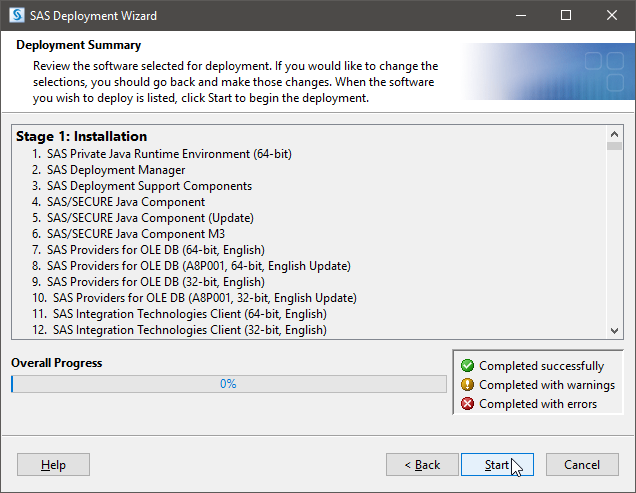
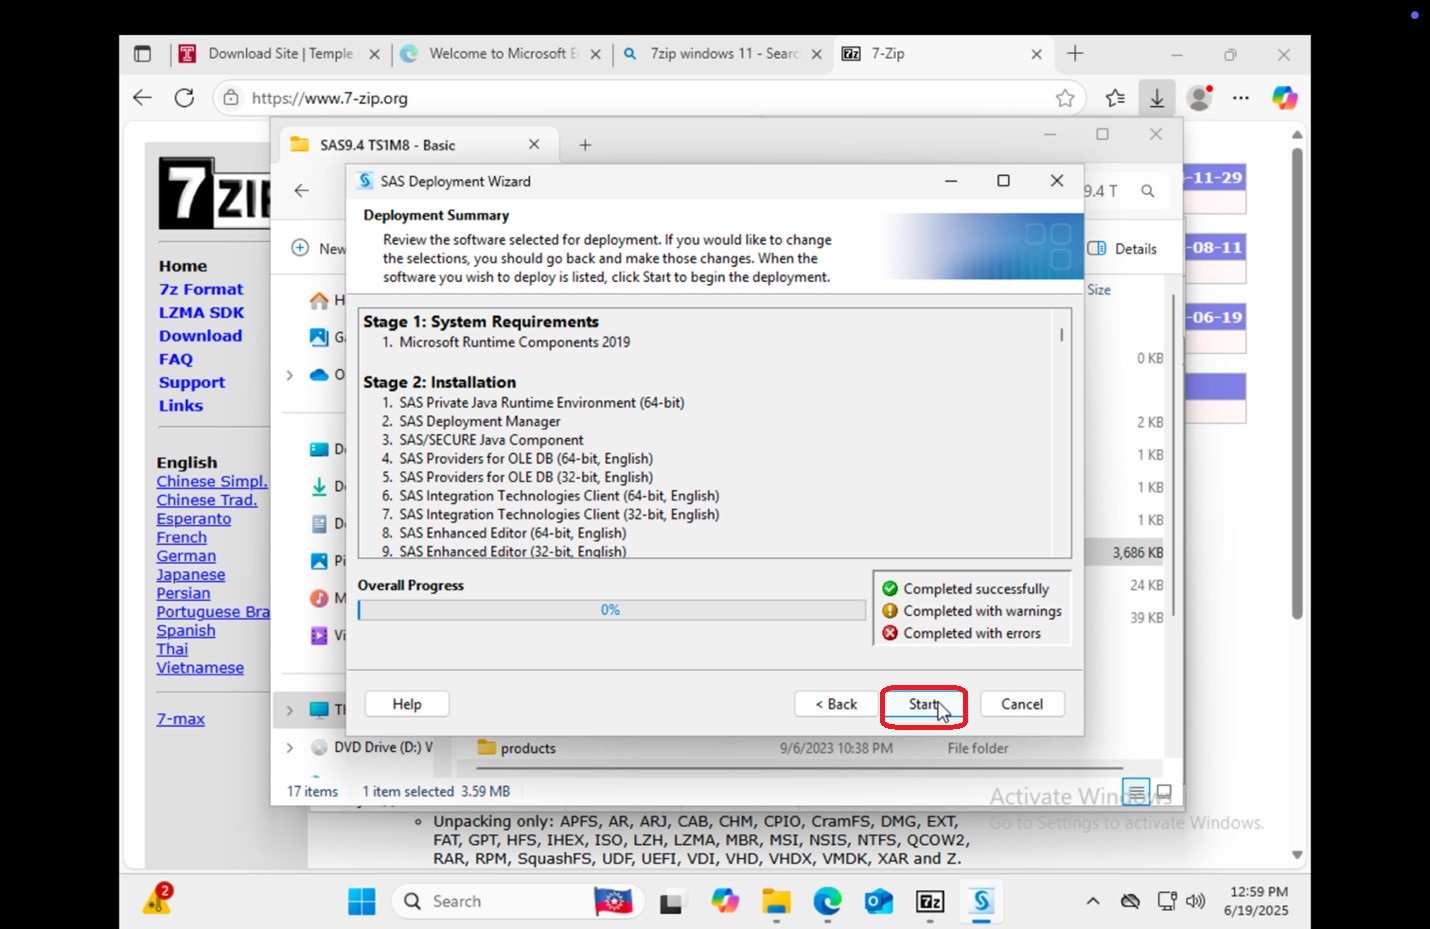
22. Now we're at the actual installation part. Click Start. This installer may take a while - anywhere from 20 minutes to an hour. I hope you packed a snack.
|
 |
|
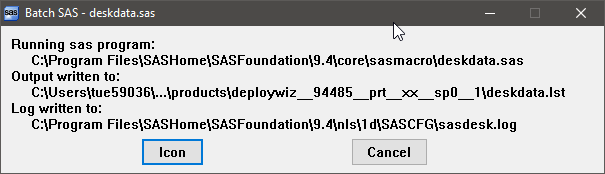
23. While it's installing, you might see popups like these. Do not touch them, they'll go away on their own.
|
 |
|
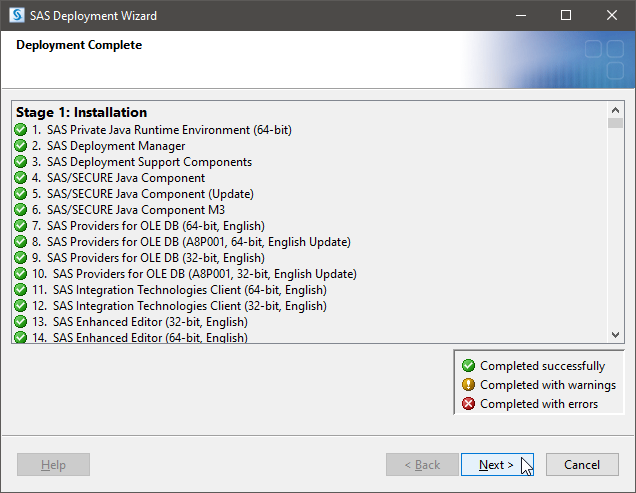
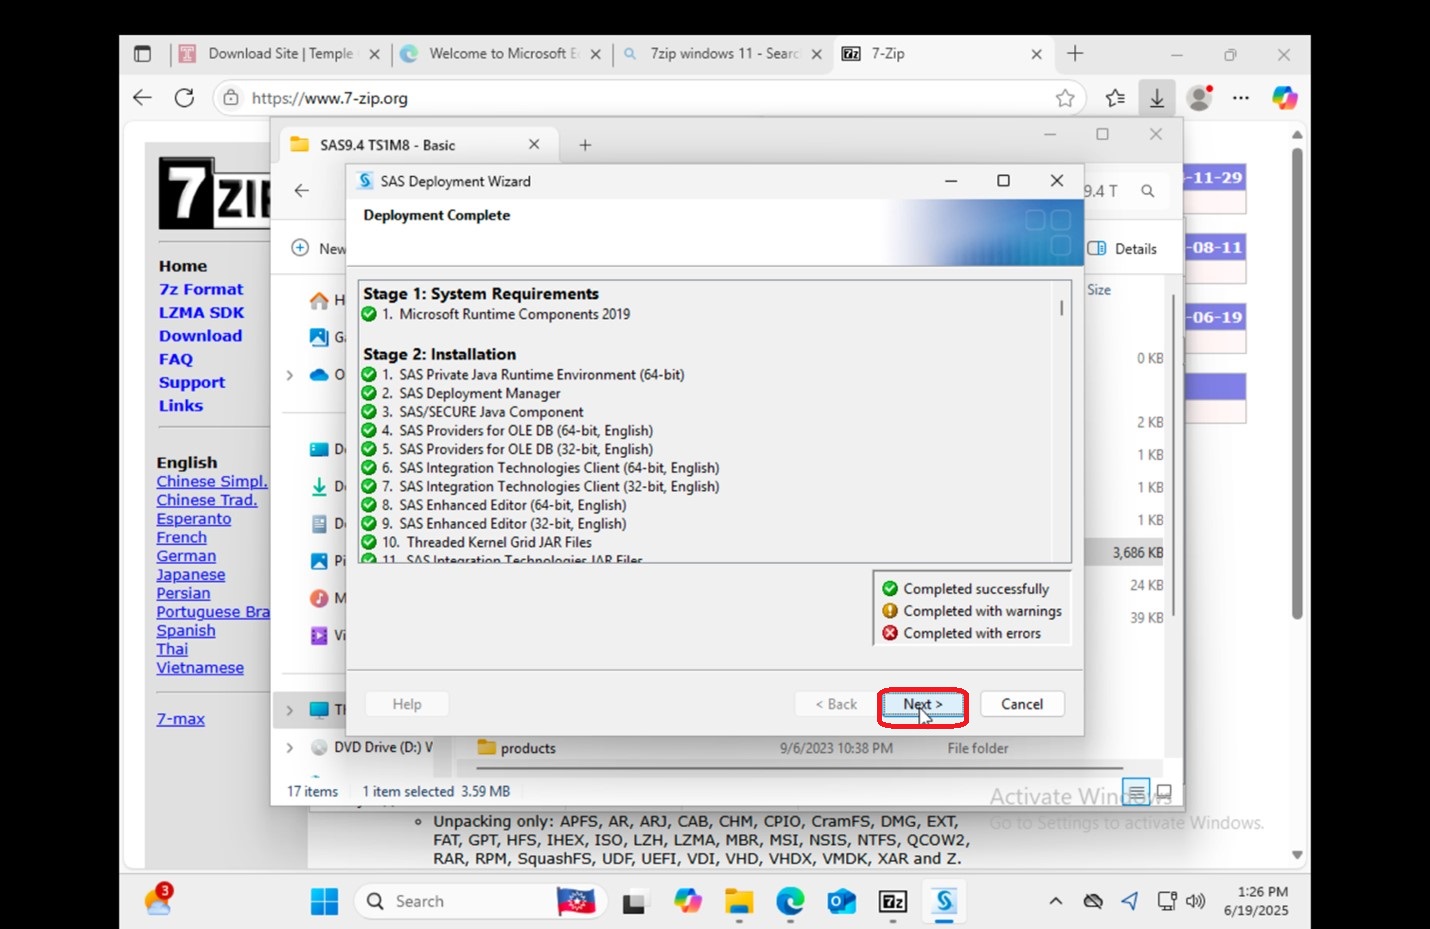
24. Once you wake up from your nap, SAS should be installed. You can confirm that everything completed successfully by scrolling through the list. Click Next.
|
 |
|
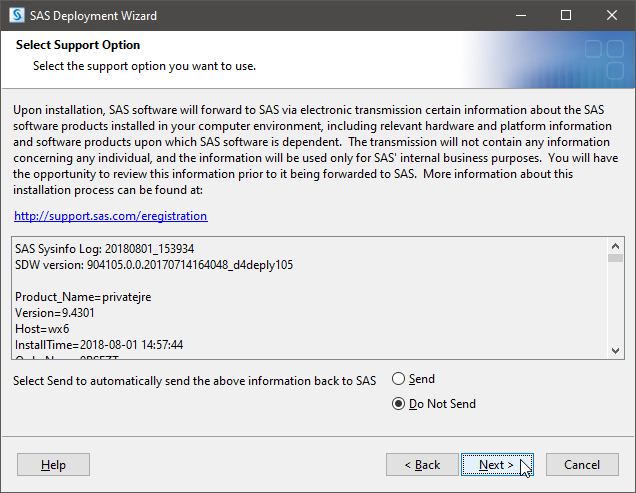
25. You will be asked about support options. Make sure "Do Not Send" is checked and then proceed to click Next.
|
 |
|
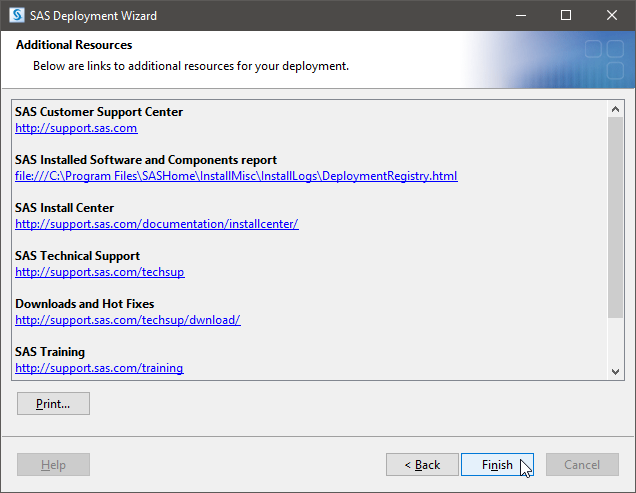
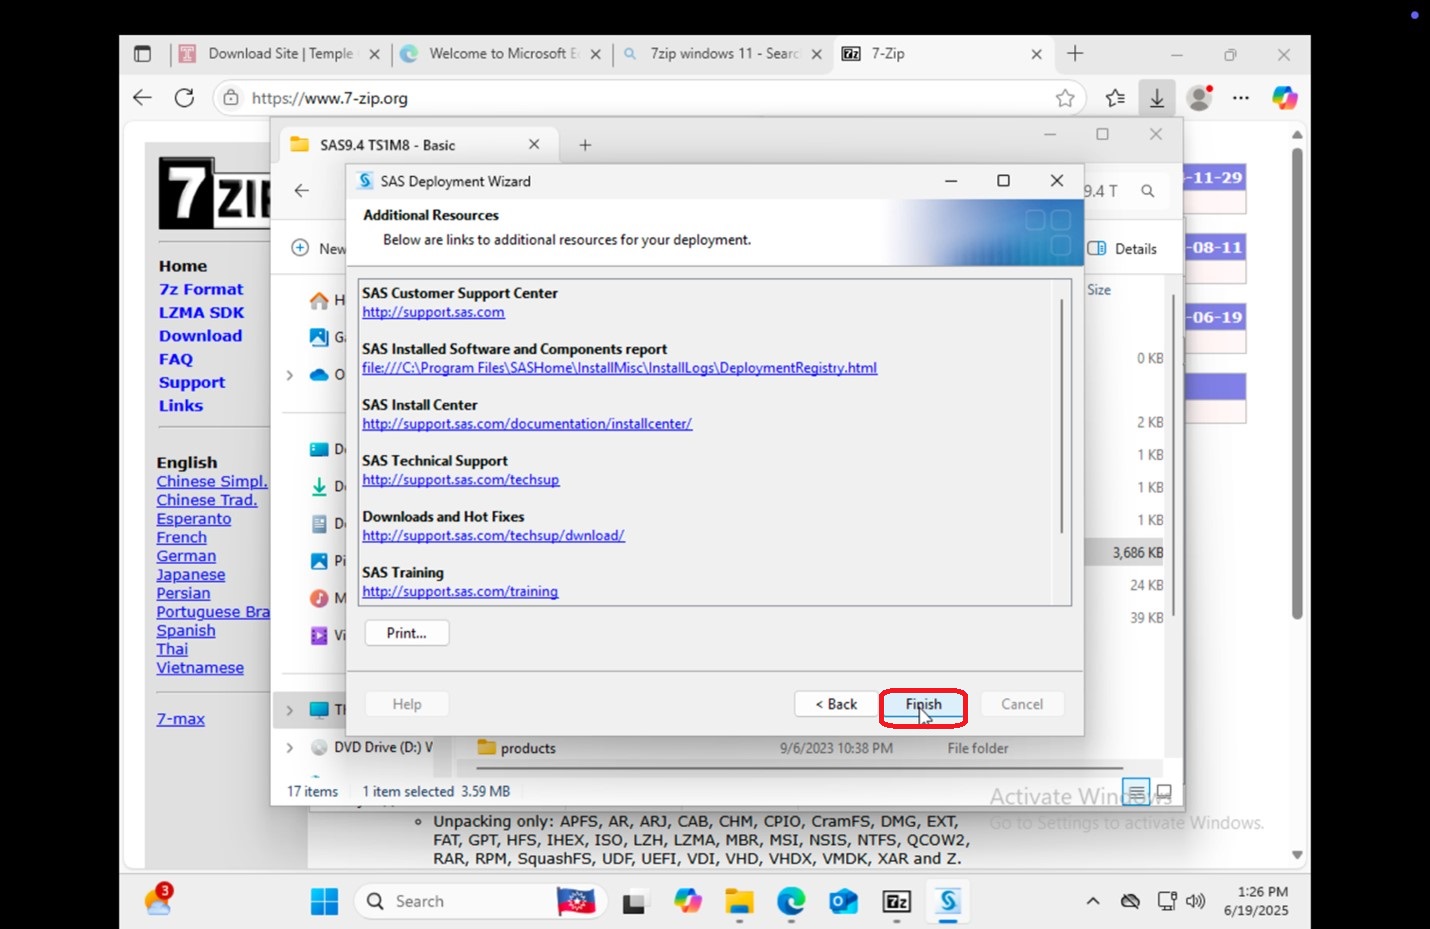
26. Click Finish and note the links to various tutorials and useful information regarding SAS.
|
 |
Updating the License File (for those who already have SAS 9.4 installed)
|
1. Before you begin, follow the steps in the first section: Downloading the SAS License File
|
|
|
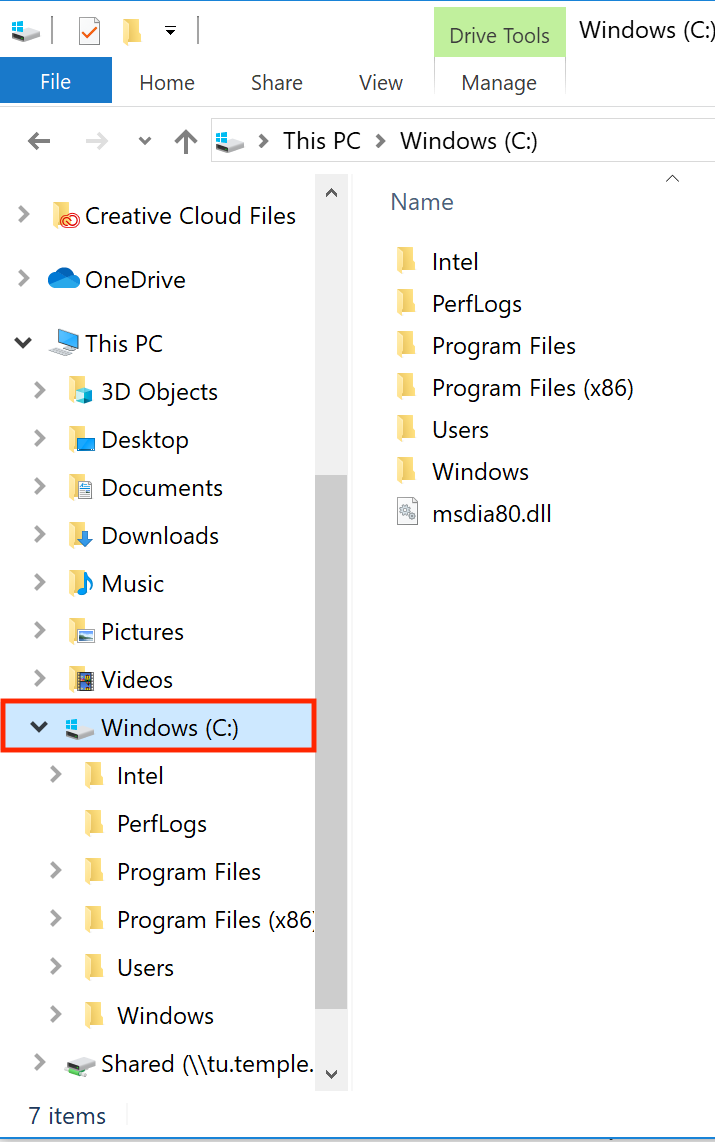
2. Open the file explorer and click on Windows (C:)
|
 |
|
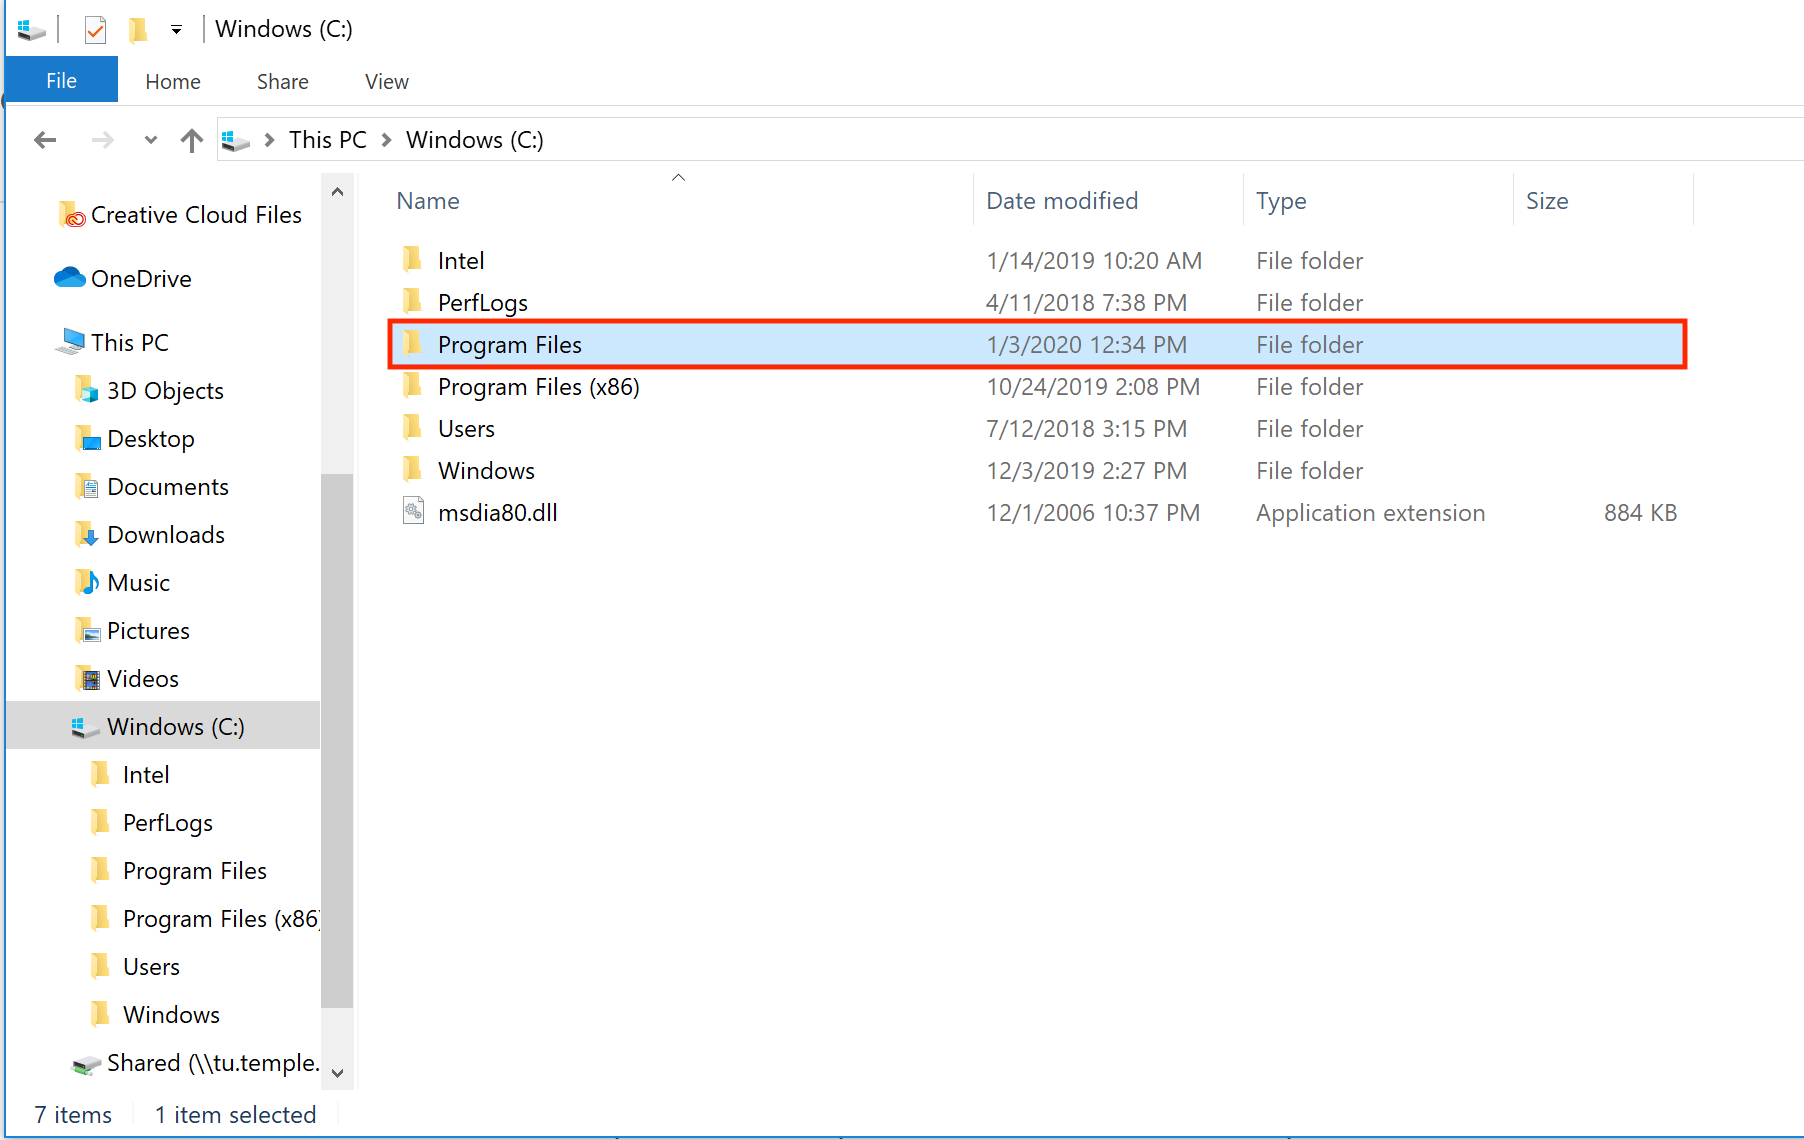
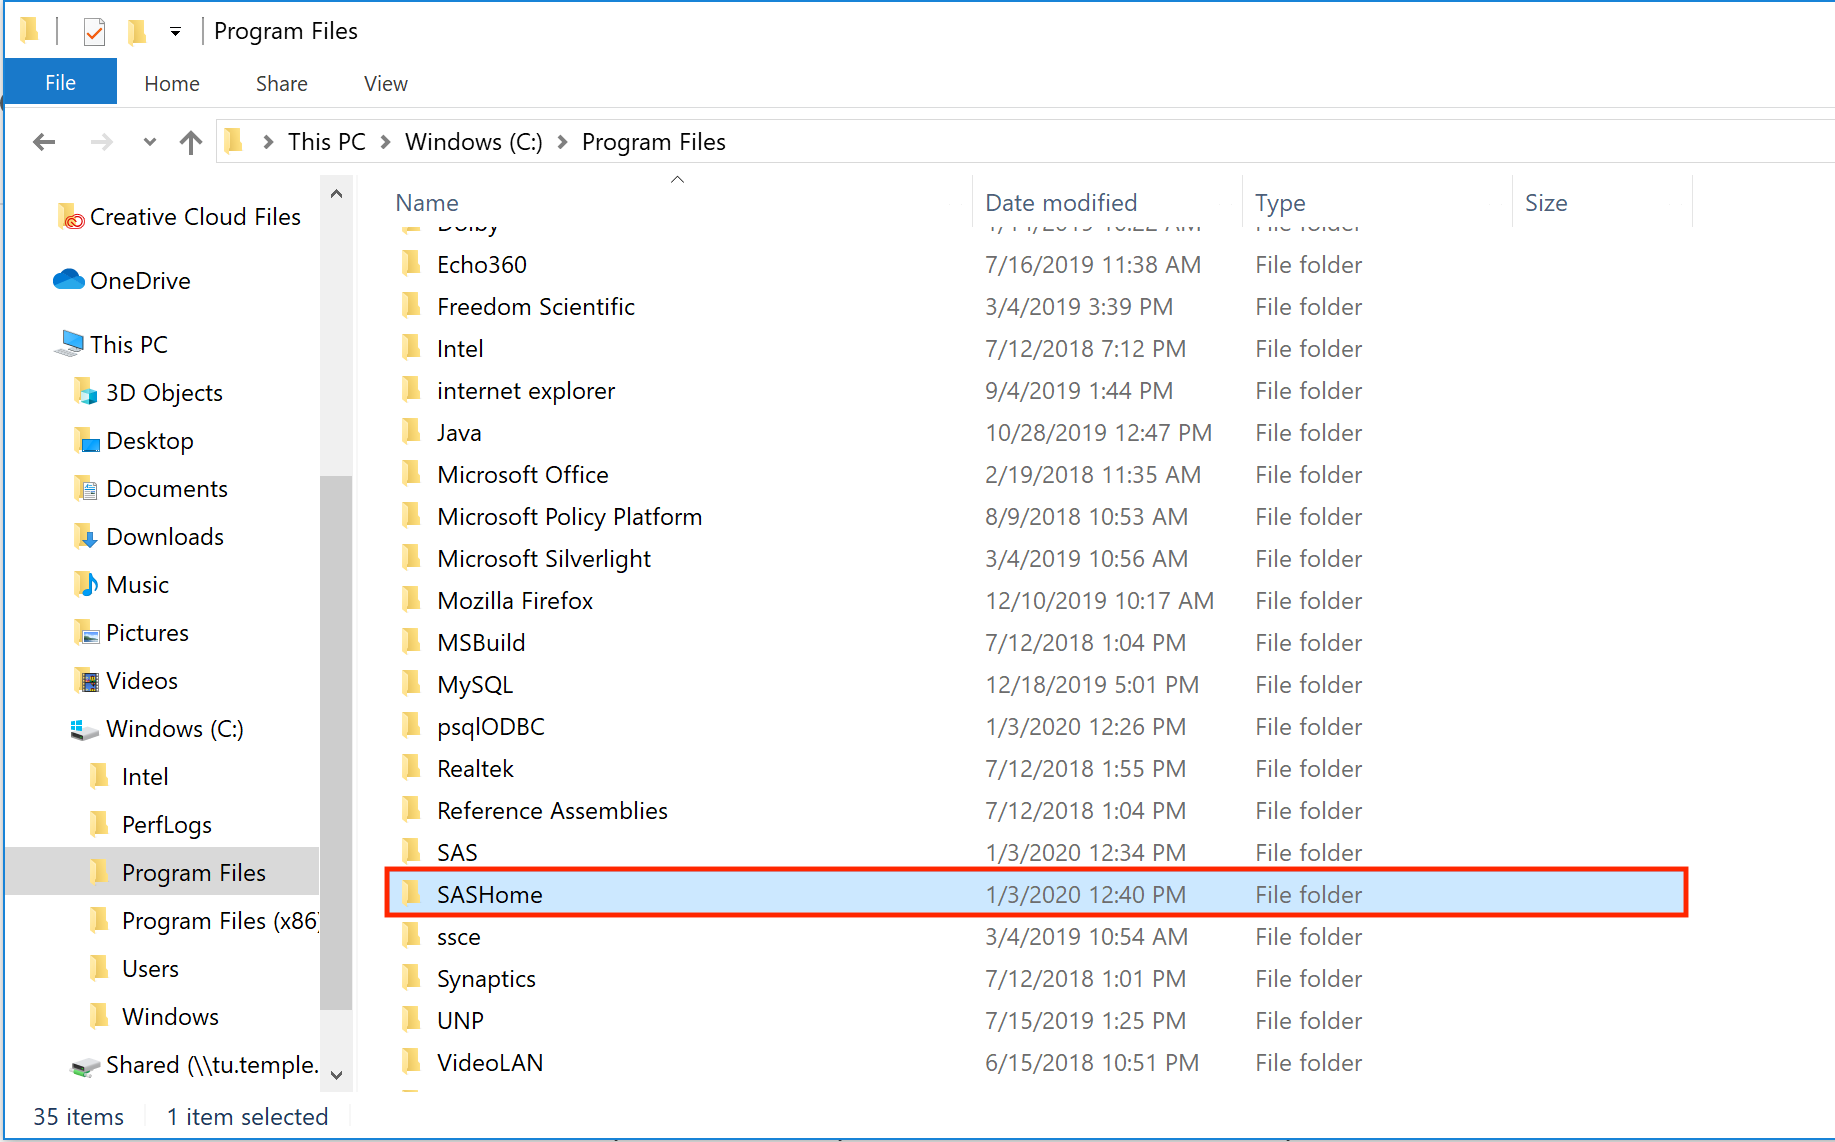
3. Double-click on the folder called Program Files
|
 |
|
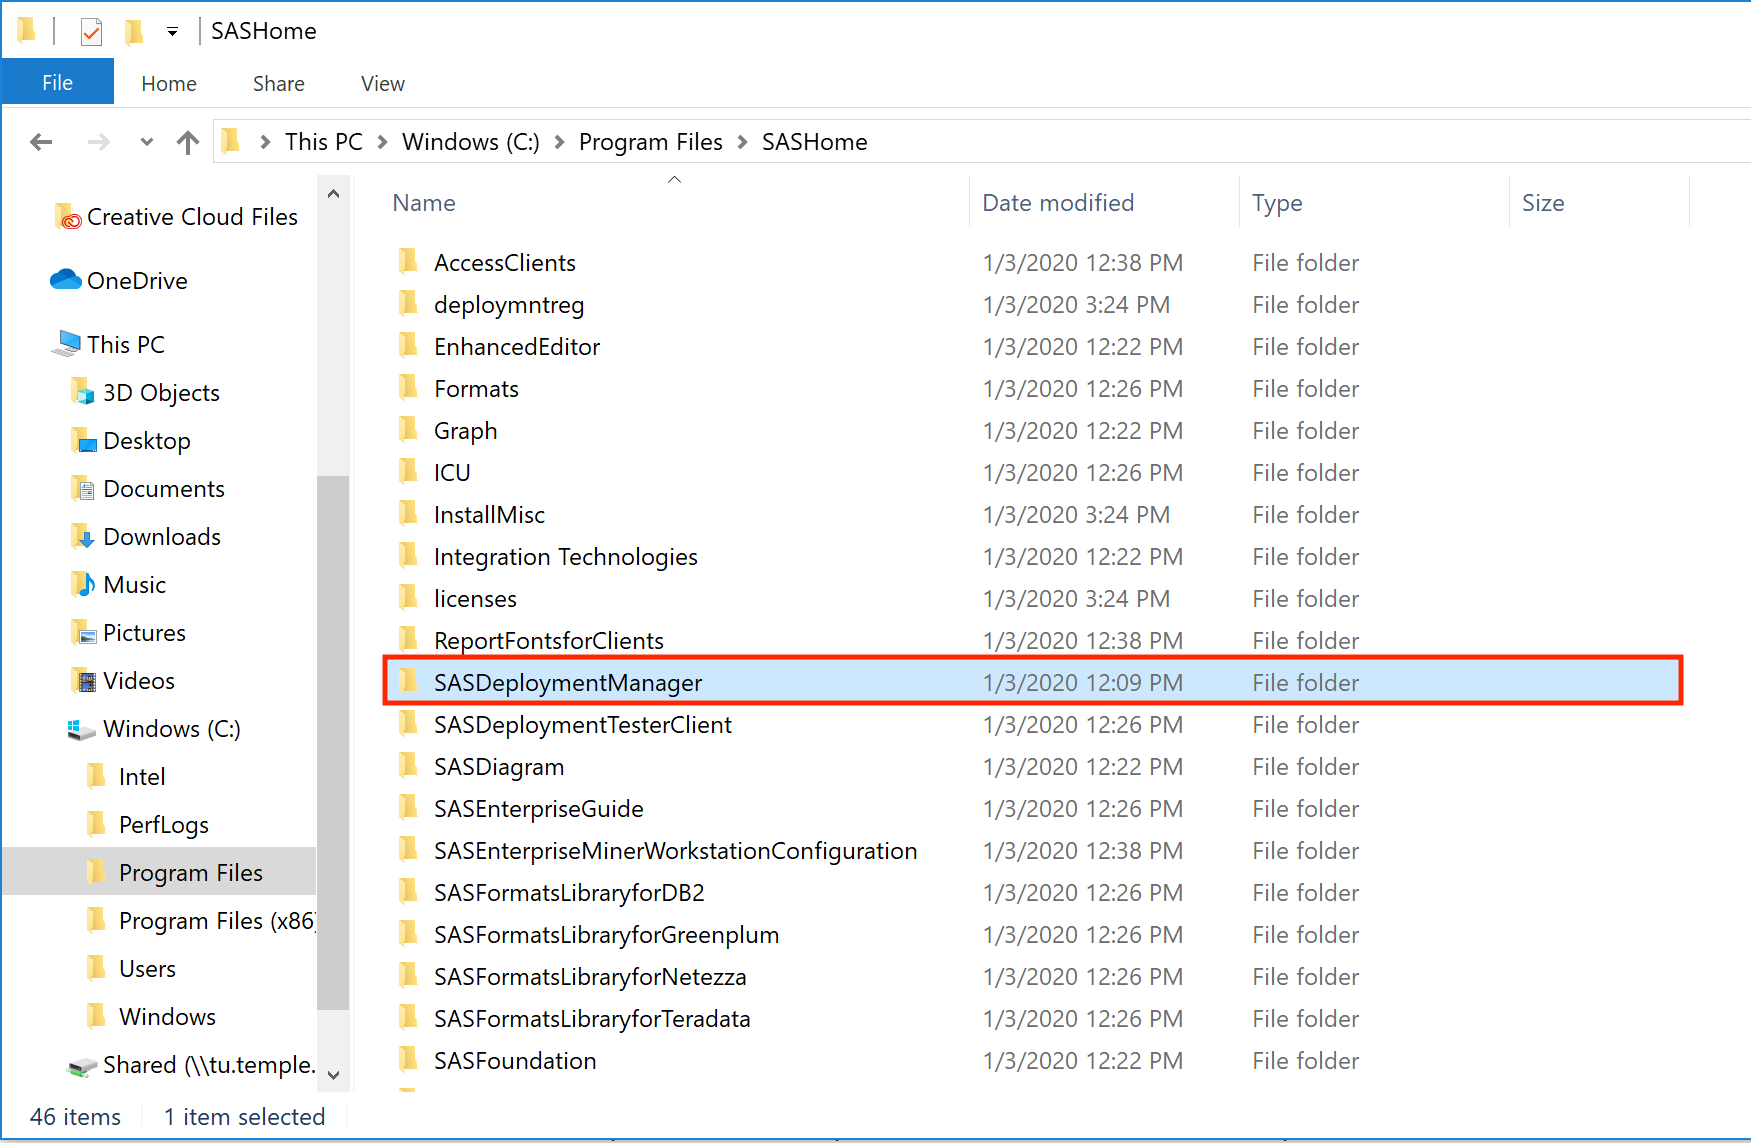
4. Double-click on the folder called SASHome
|
 |
|
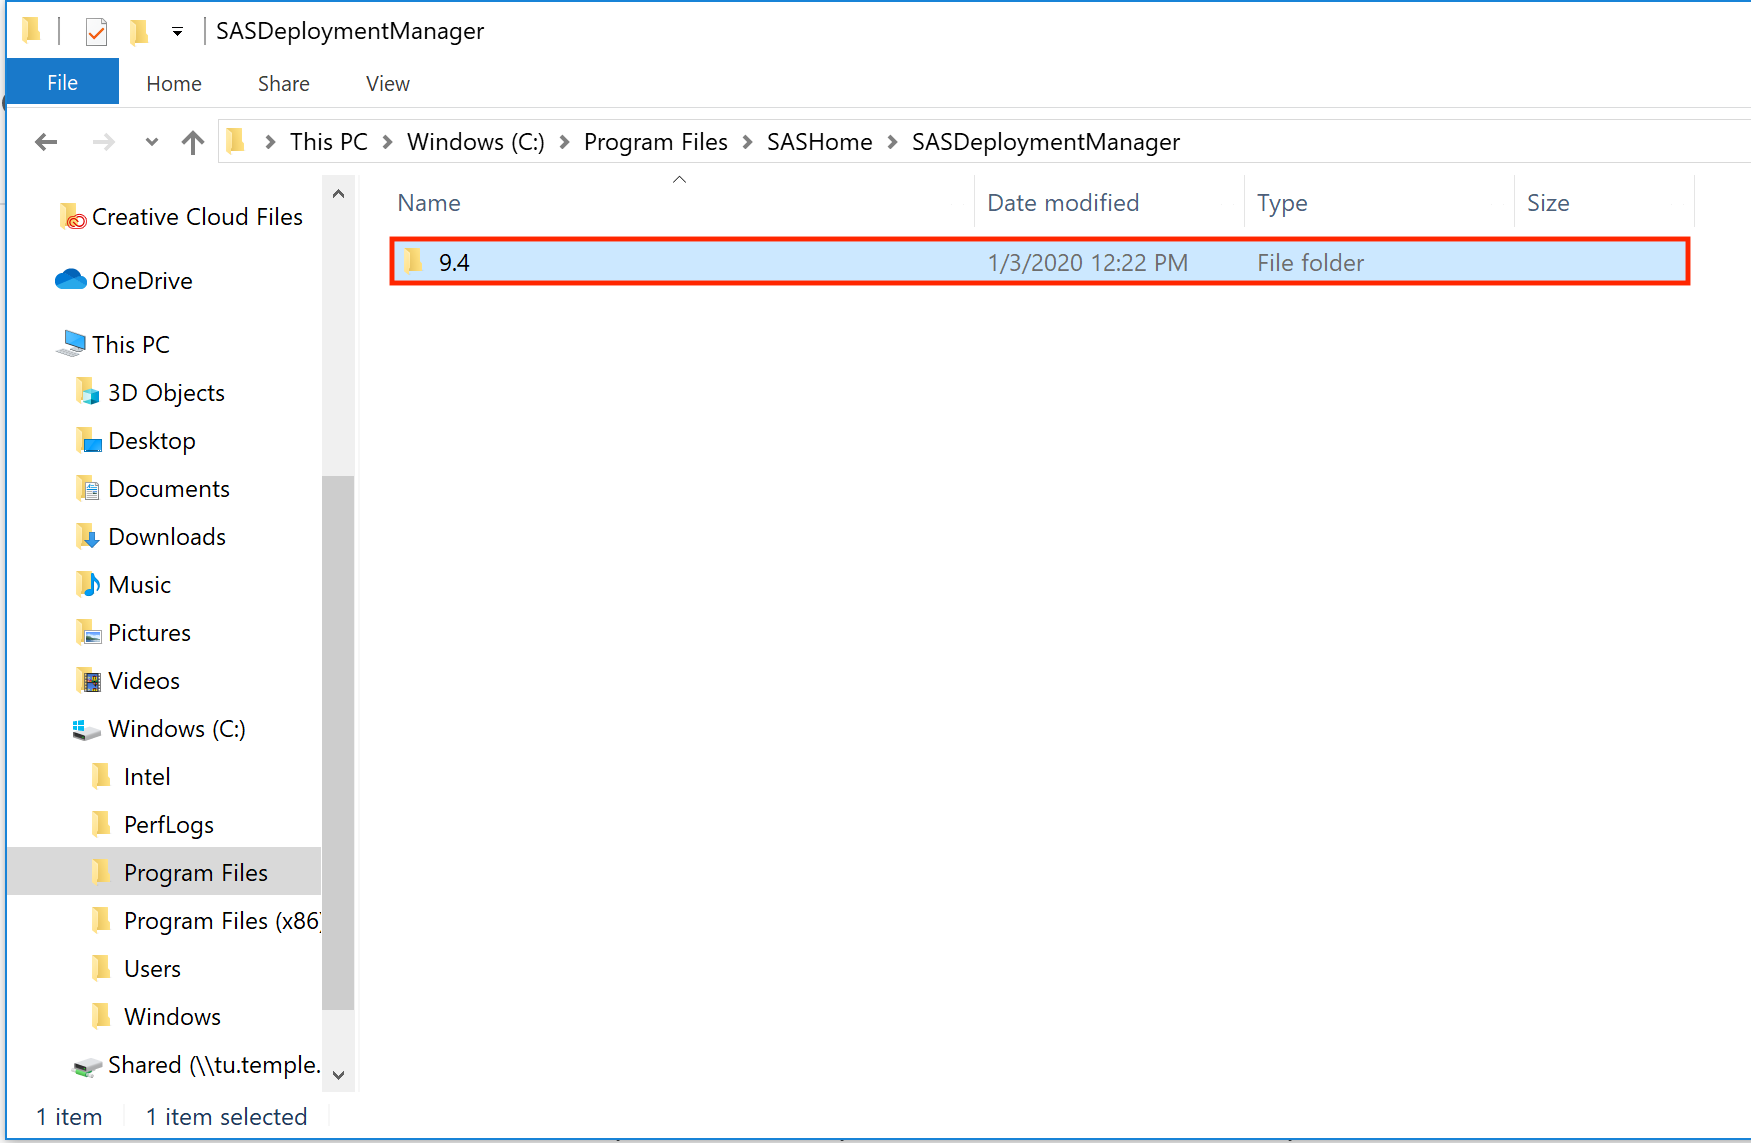
5. Locate the folder called SASDeploymentManager and double-click on it.
|
 |
|
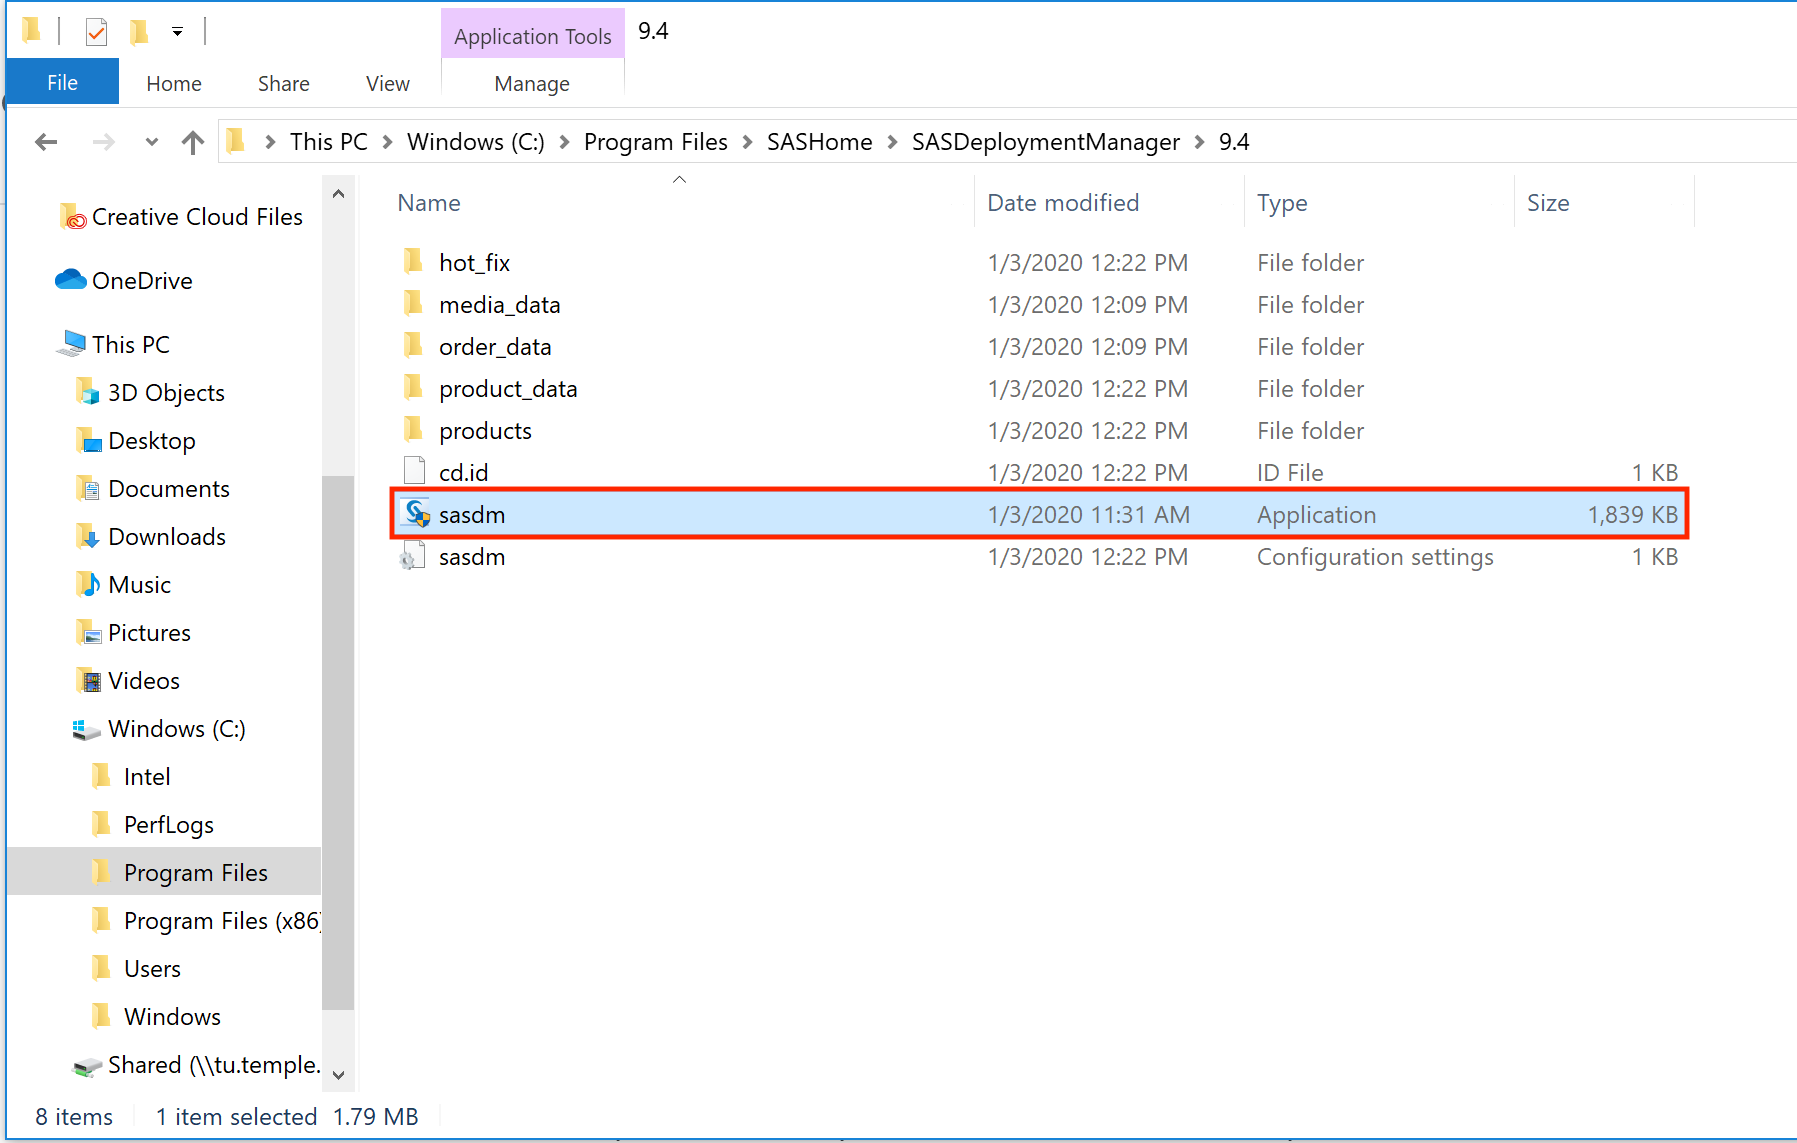
6. Double-click on the folder called 9.4
|
 |
|
7. Double-click on sasdm
|
 |
|
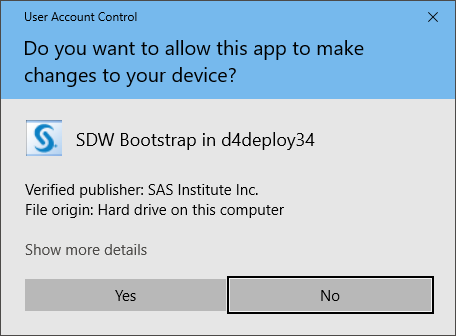
8. When asked "Do you want to allow this app to make changes to your device"?, click Yes.
|
|
|
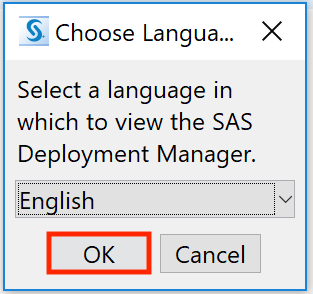
9. Keep English selected for the language and click Ok.
|
 |
| 10. Keep Renew SAS Software selected and click Next. | 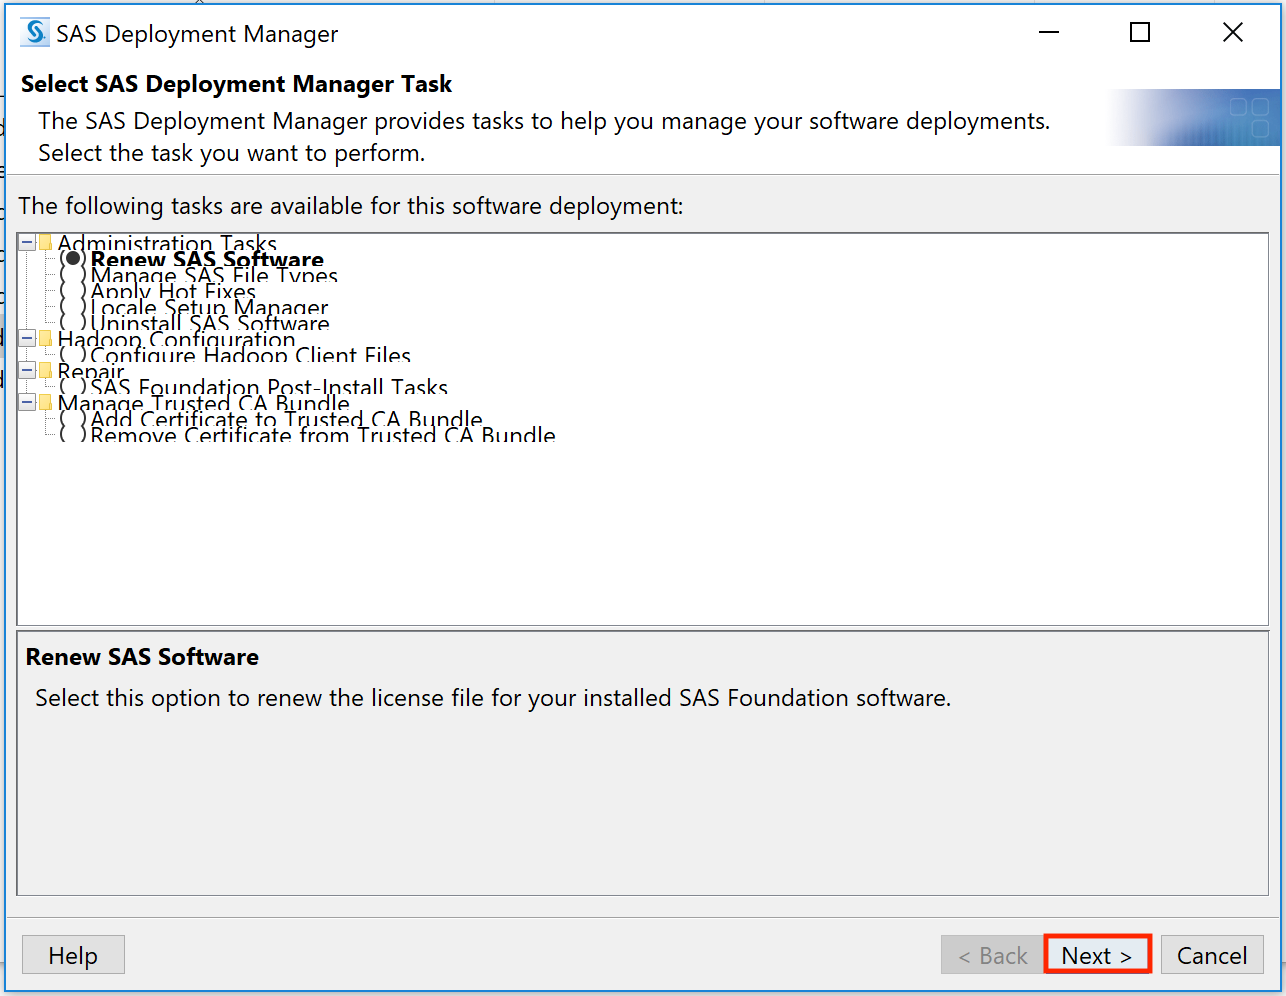 |
|
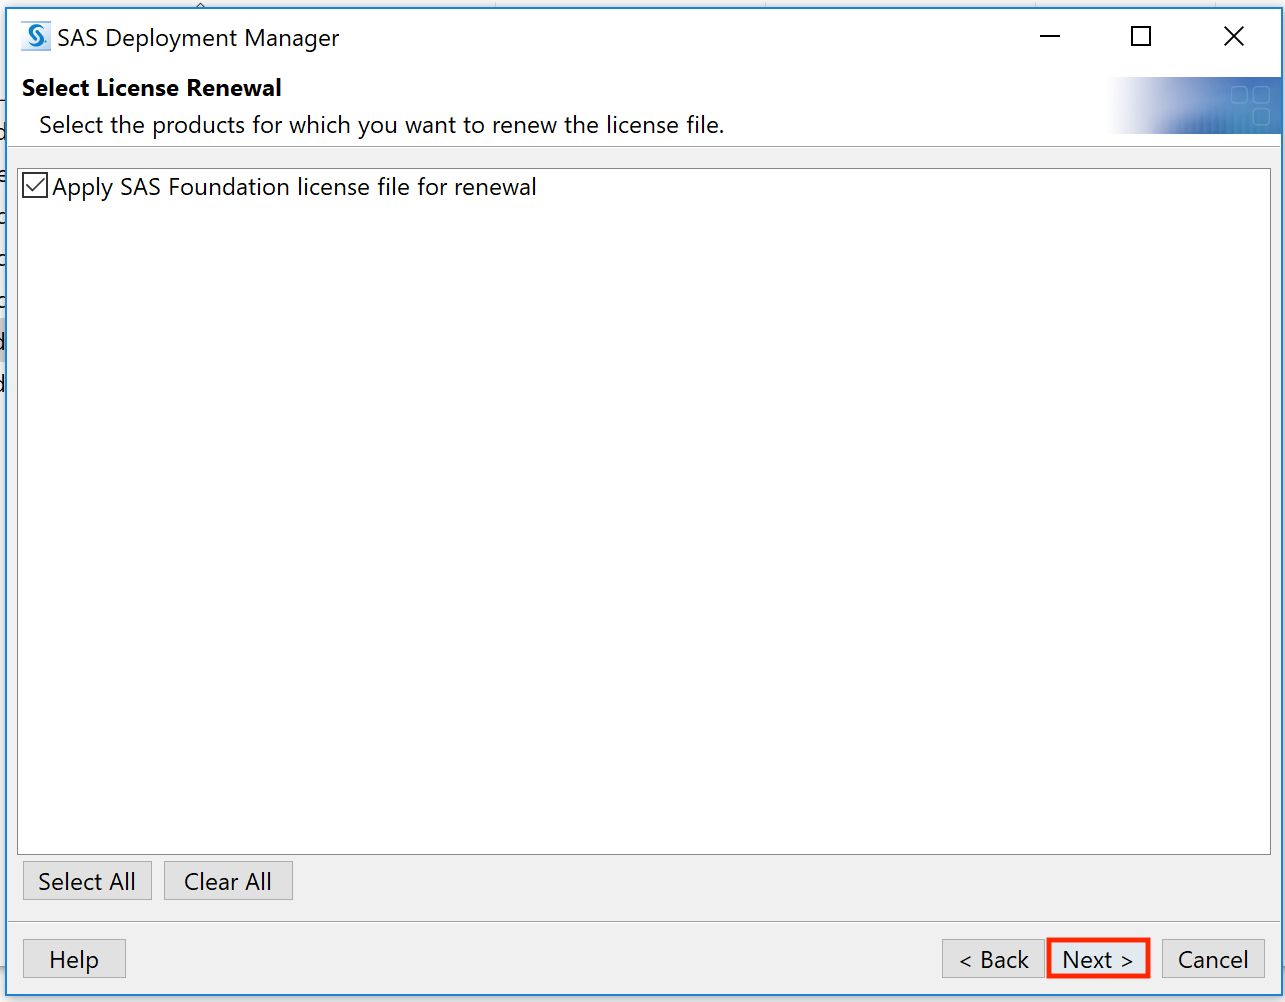
11. Keep Apply SAS Foundation License File for Renewal selected and click Next.
|
 |
|
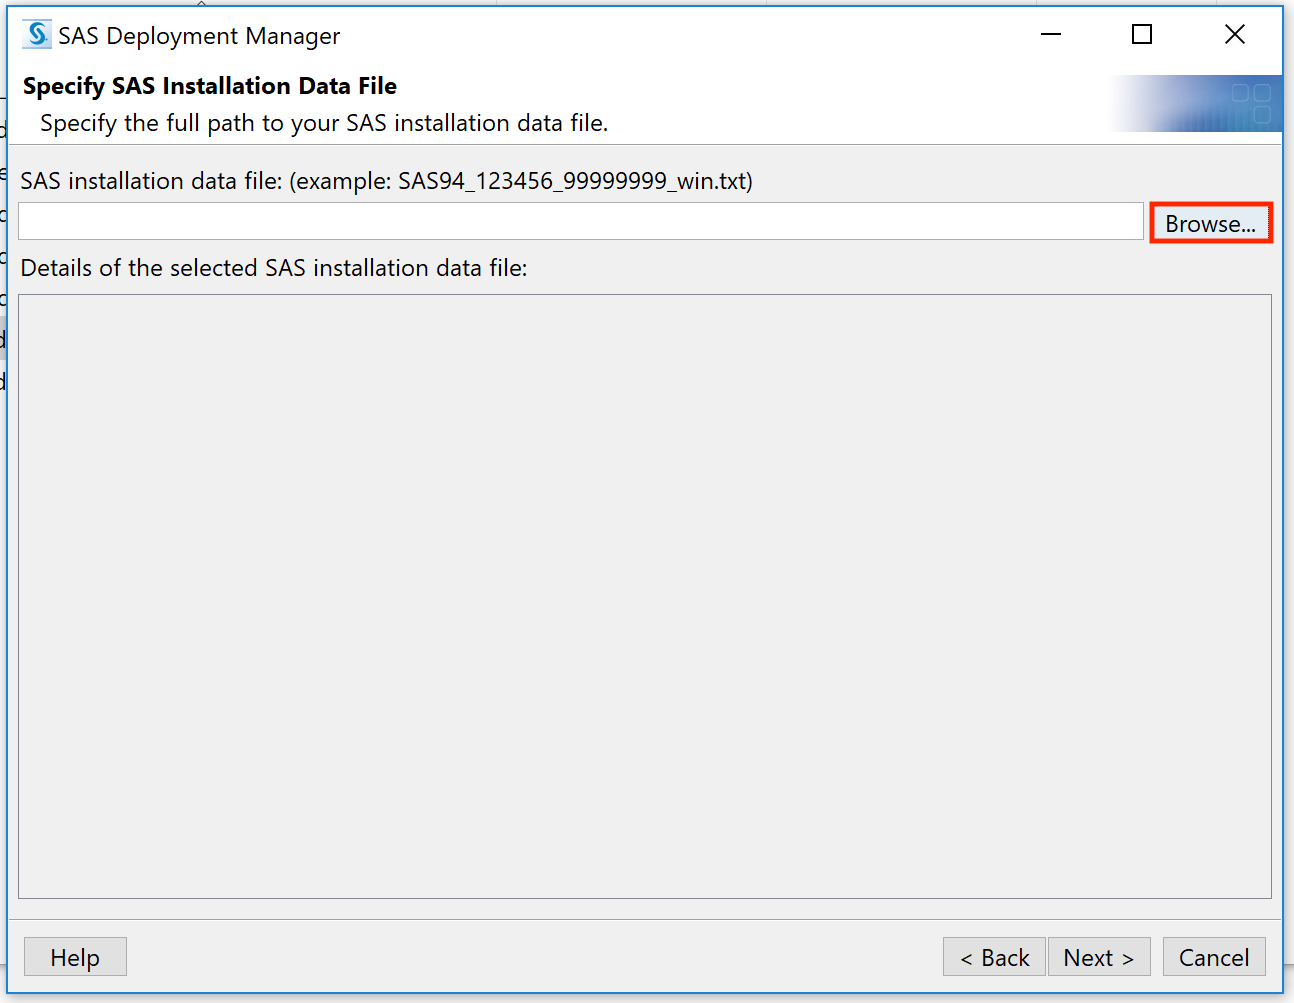
12. Click Browse and locate where you saved the license file from the first set of instructions
|
 |
|
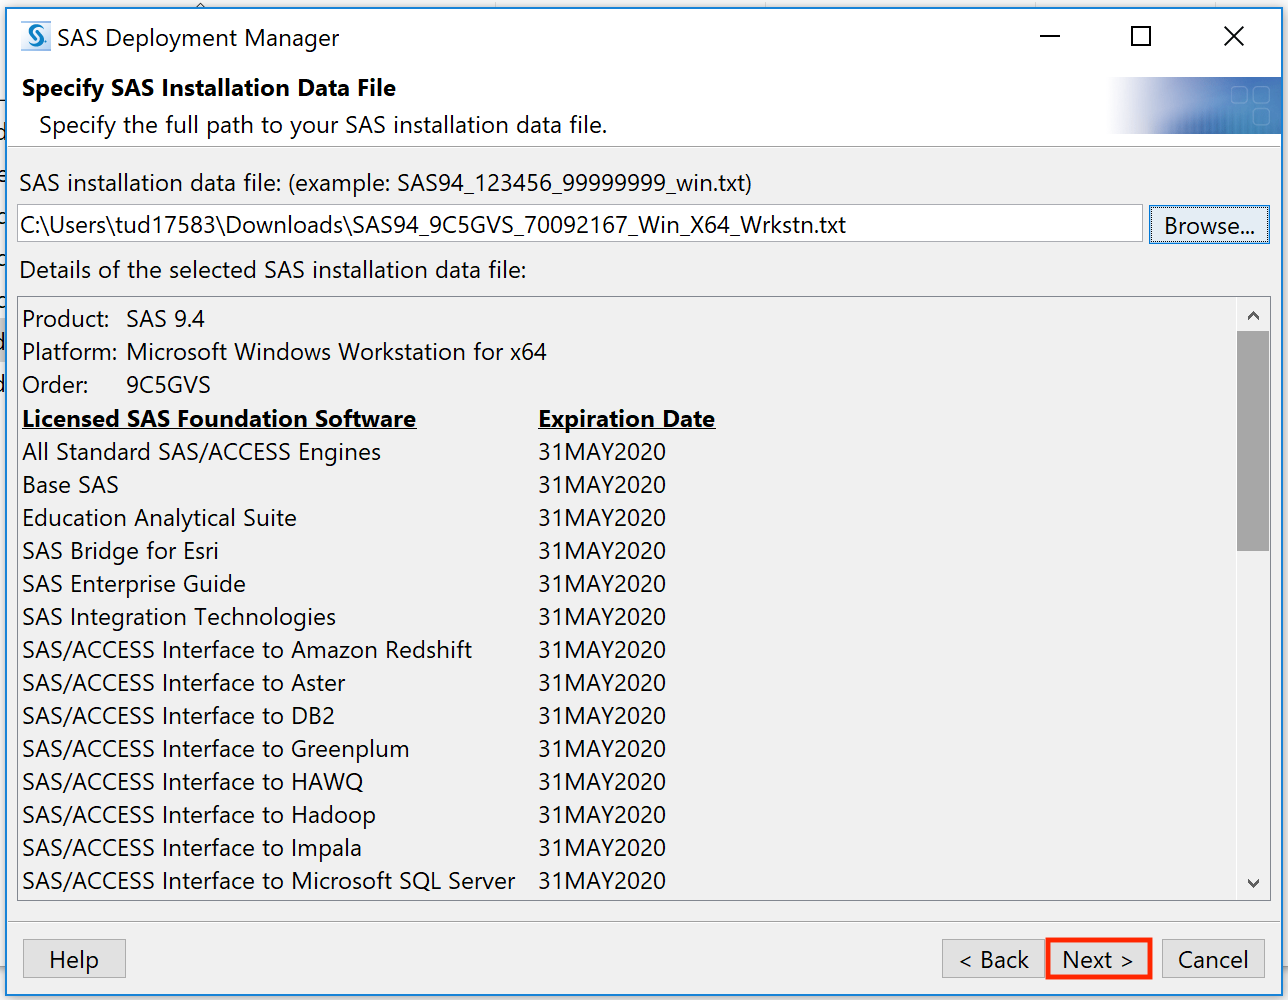
13. Select the license file and click Open. Then click Next.
|
 |
|
14. Click Next.
|
 |
|
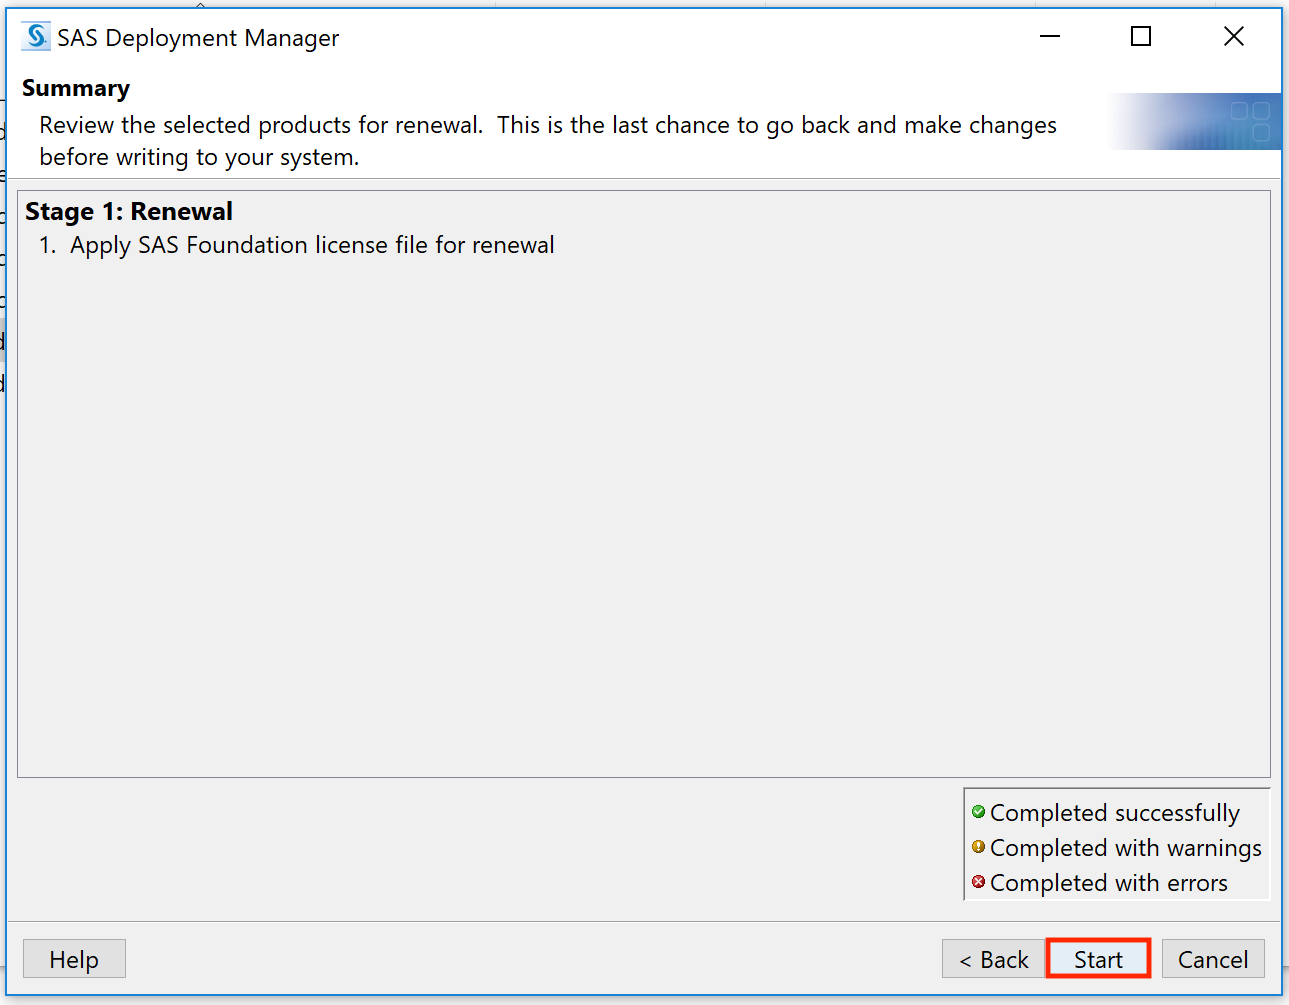
15. Click Start.
|
 |
|
16. Click Next.
|
 |
|
17. Click Finish.
|
 |
SAS on Apple Silcon Macs
The following video is a step-by-step guide for downloading SAS to your Apple Silicon Mac. For any questions or concerns, please email cphhelp@temple.edu or submit a IT help ticket and we can get your system updated.
Please note you can either watch the video above for the download process after completion of steps 1-3 or you can follow the step by step guides below.
|
1. Go to: https://support.broadcom.com/group/ecx/downloads and register for a free account.
|
|
|
2. Once that’s completed, download VMWare Fusion: https://support.broadcom.com/group/ecx/productdownloads?subfamily=VMware%20Fusion&freeDownloads=true
|
|
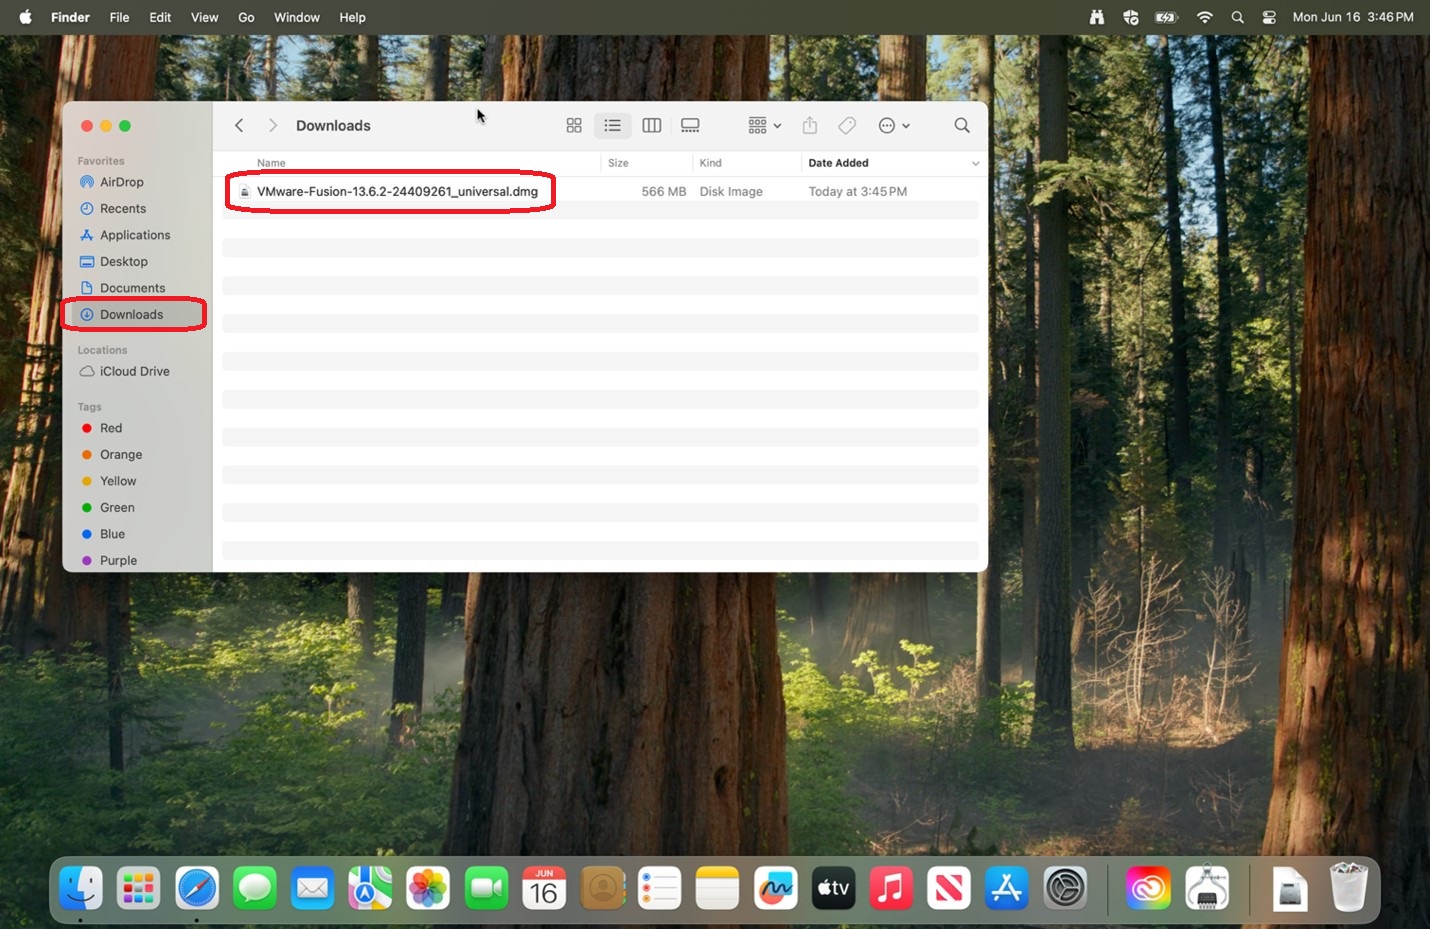
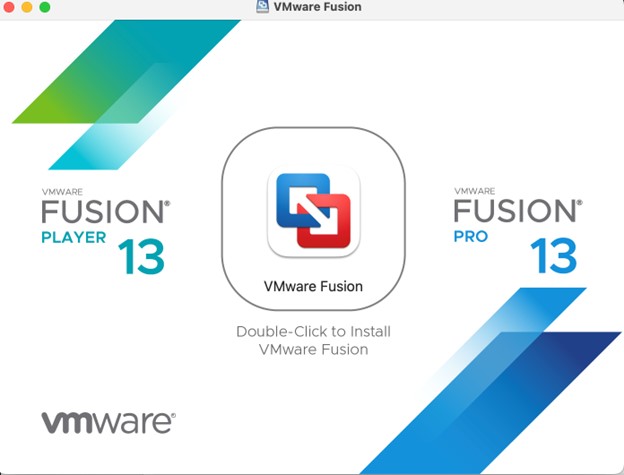
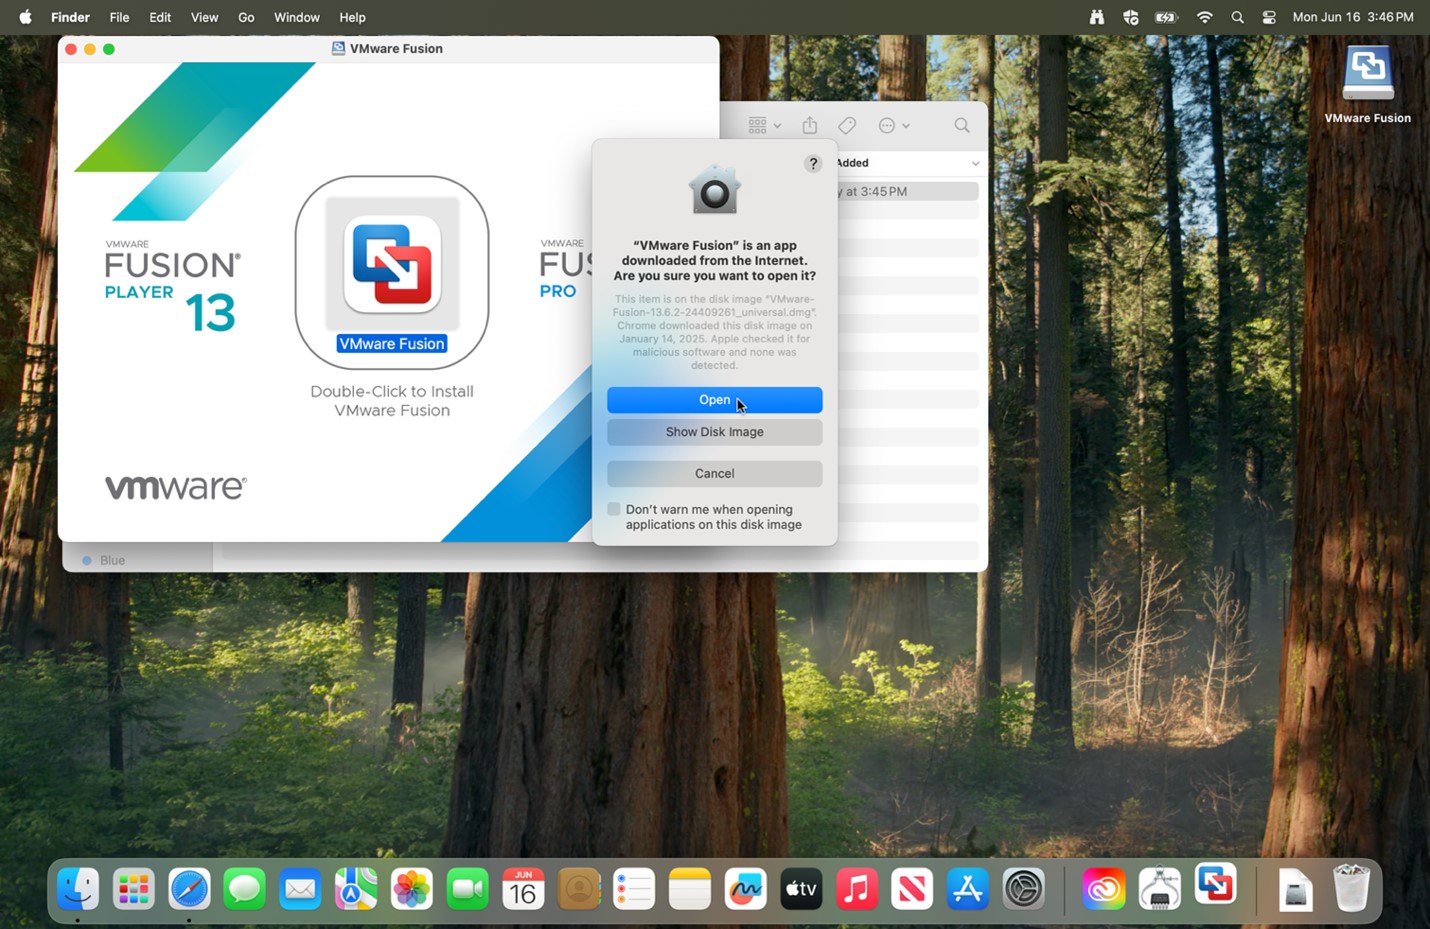
| 3. Open the folder that you downloaded the installer to. Double click the installer from where you downloaded to. |
|
| 4. Select Get Windows from Microsoft. | 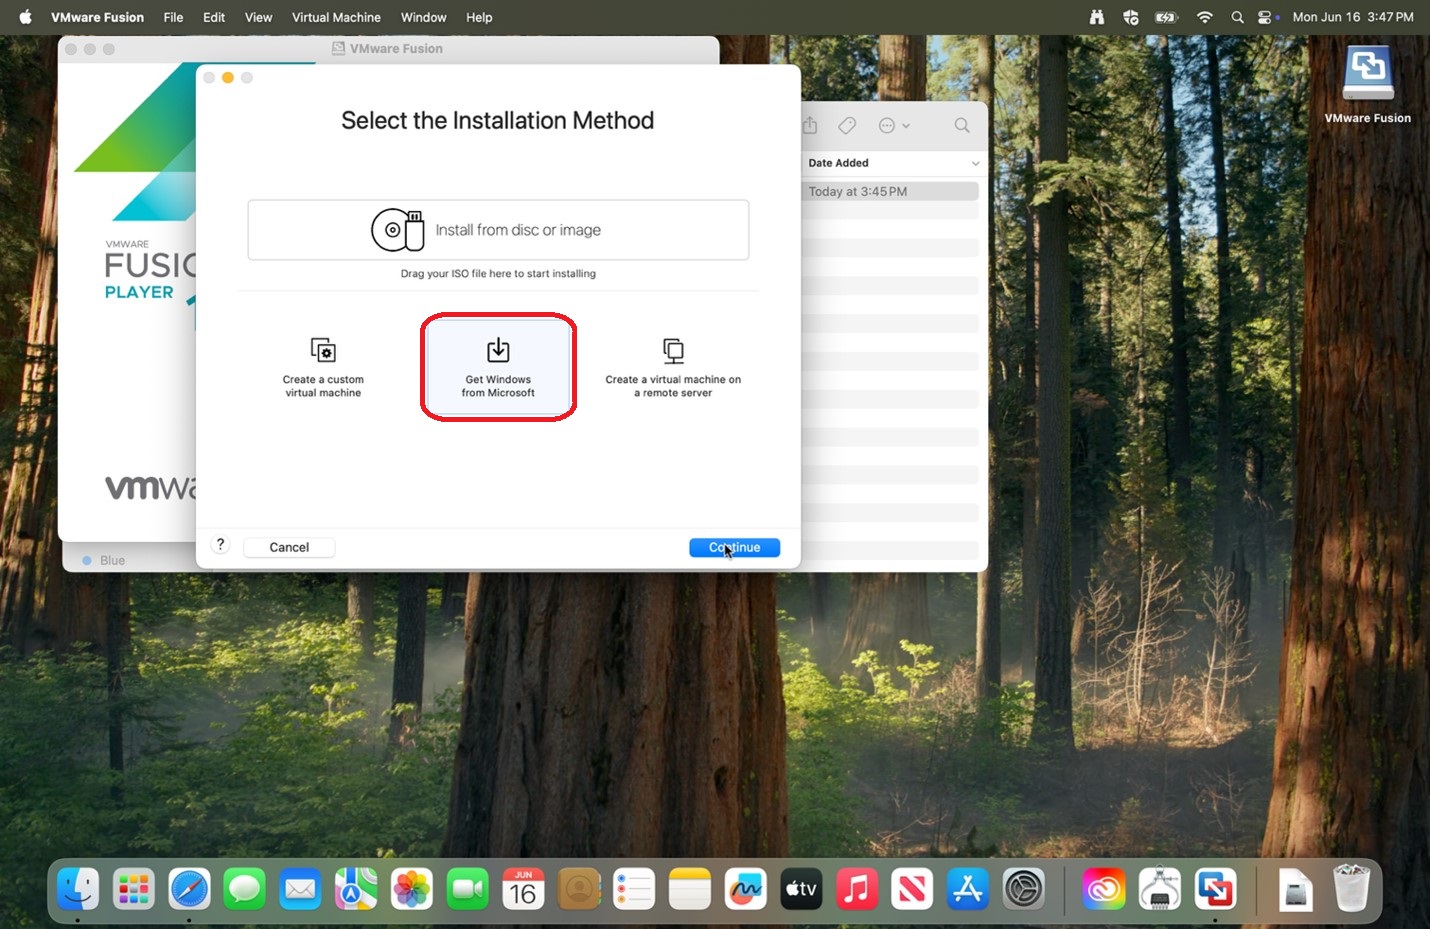 |
|
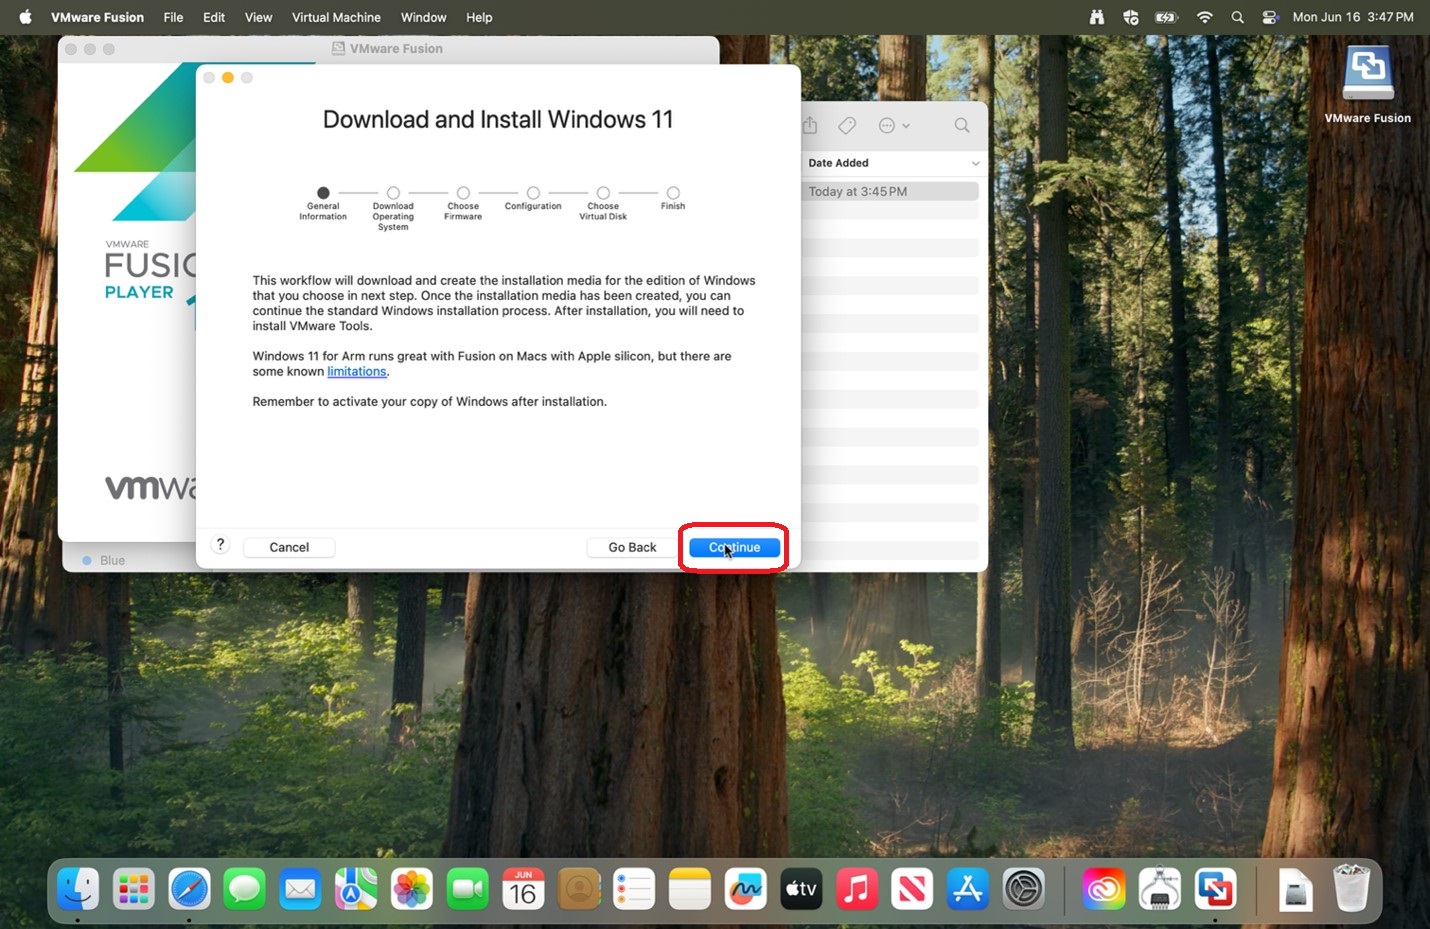
5. Click Continue.
|
 |
|
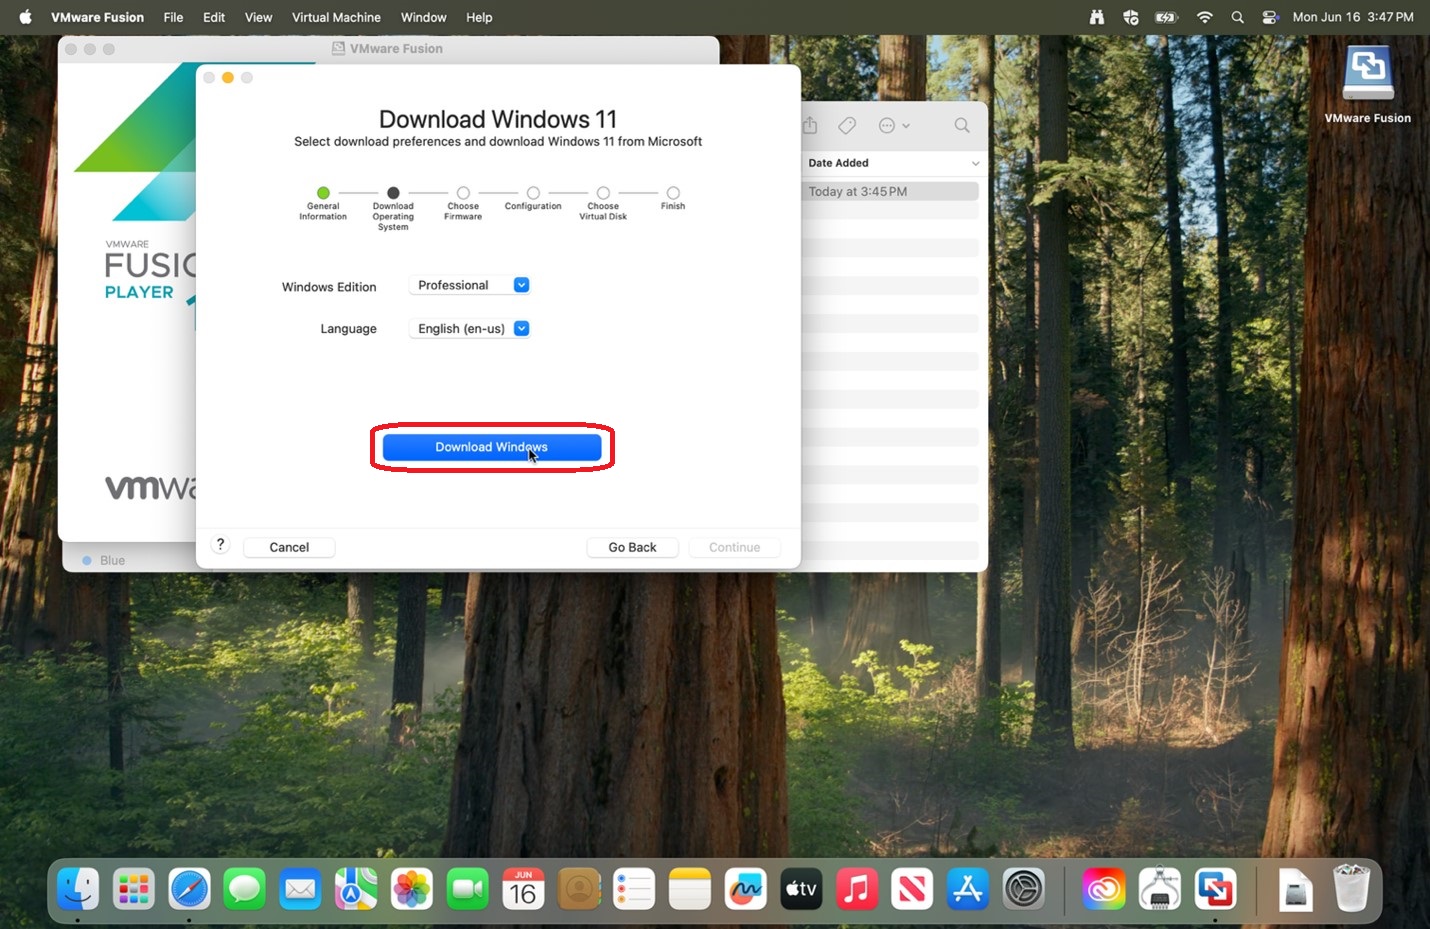
6. Verify Windows Edition: Professional is selected and click Download Windows.
|
 |
|
7. After finishing downloading Windows 11, click Continue.
|
 |
|
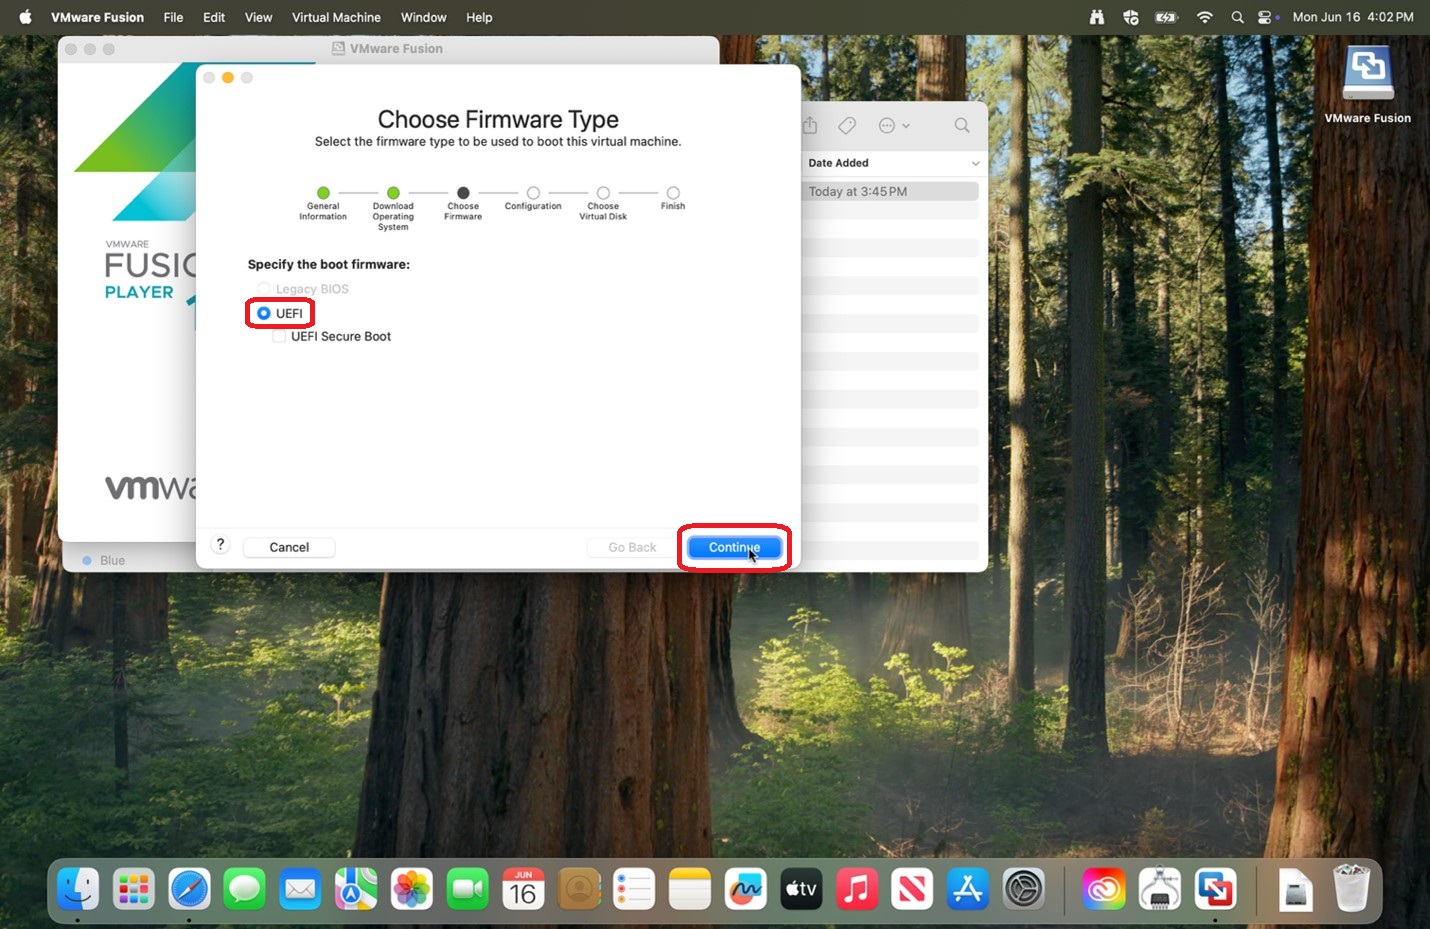
8. Verify UEFI is selected and click Continue.
|
 |
|
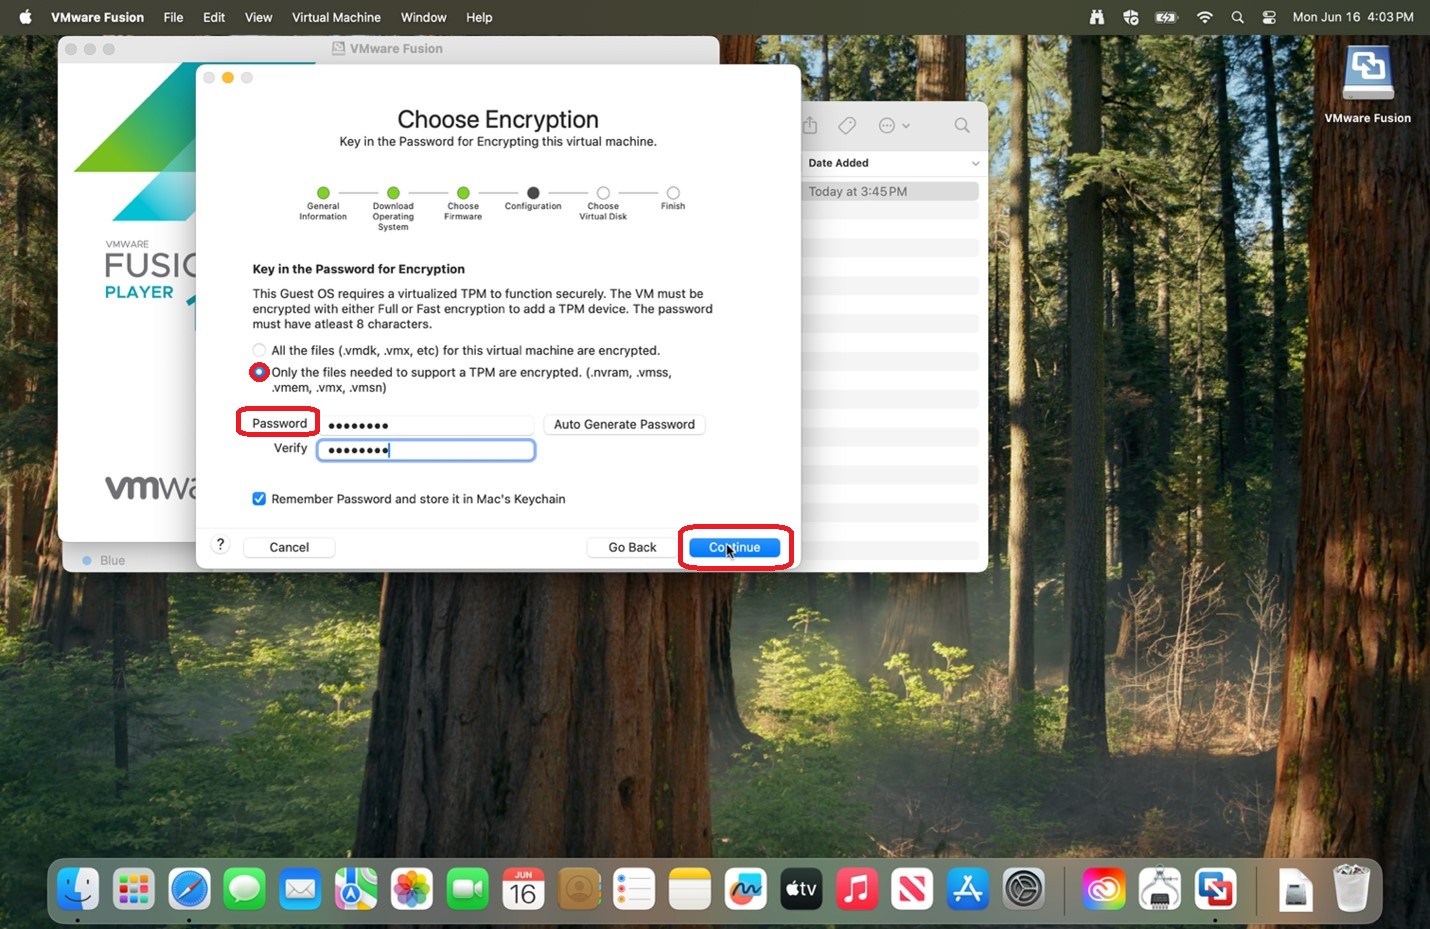
9. Verify Only the files needed to support a TPM are encrypted is selected, enter a password of your choosing, and click Continue.
Please save the entered password in a secure location for if you should need it in the future.
|
 |
|
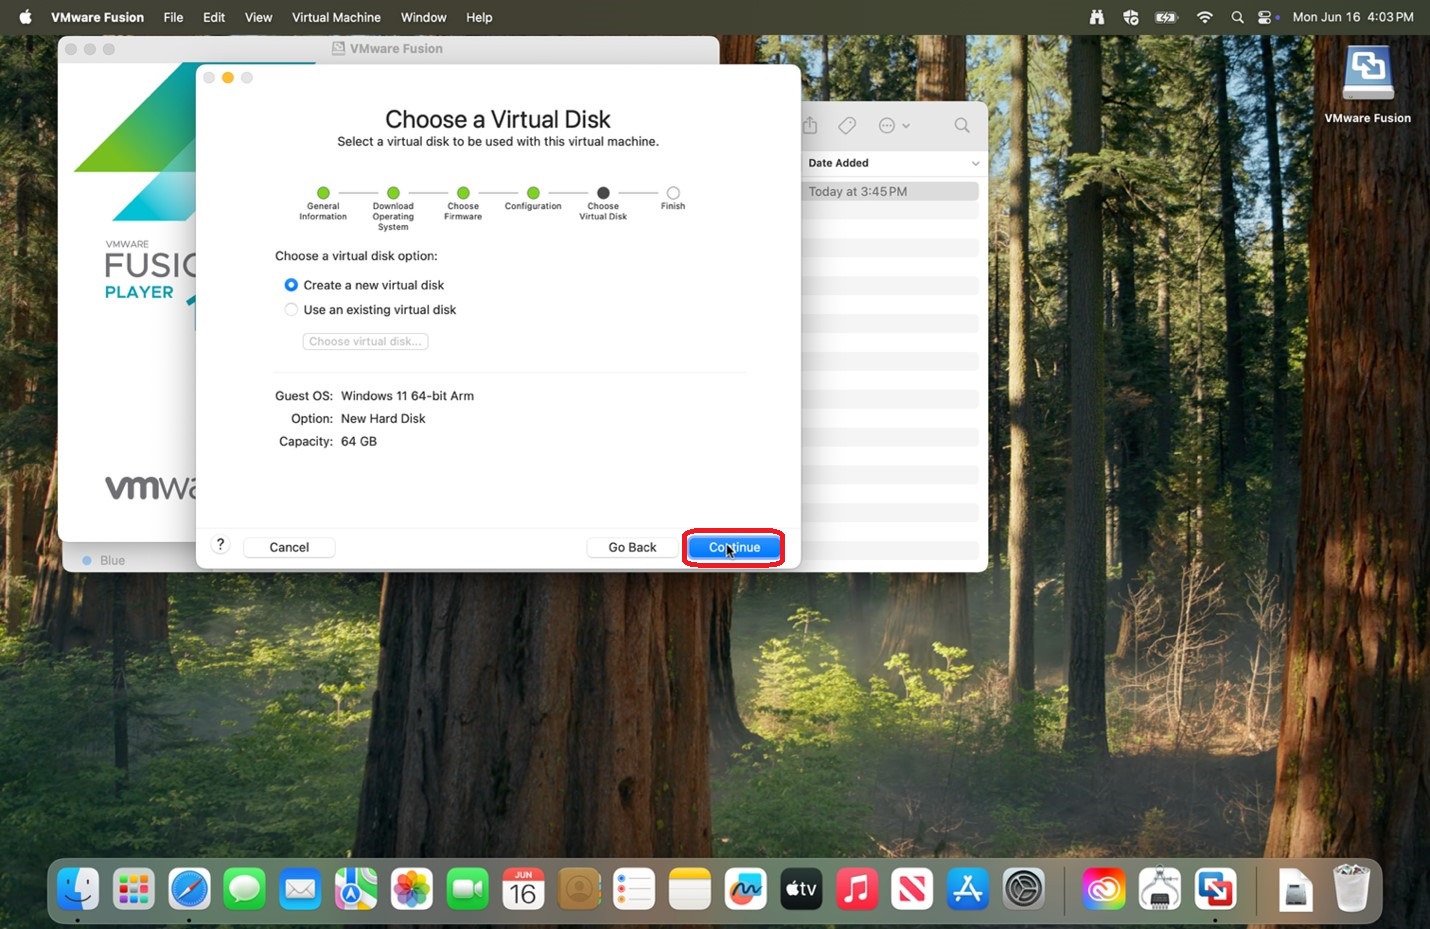
10. Verify Create a new virtual disk is selected and click Continue.
|
 |
|
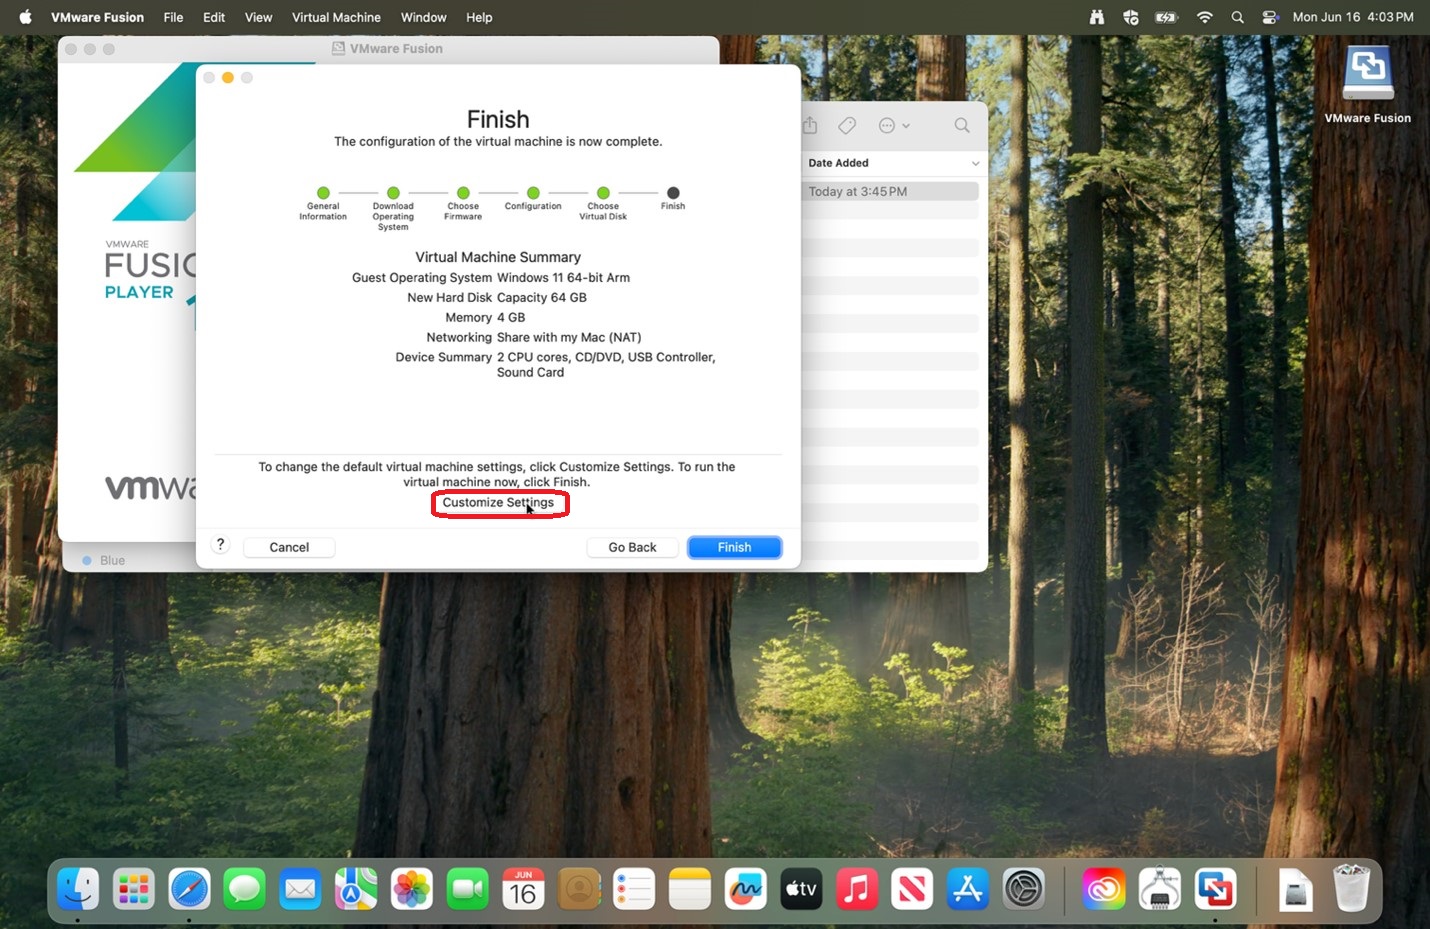
11. Click Customize Settings.
|
 |
|
12. Click Save.
|
 |
|
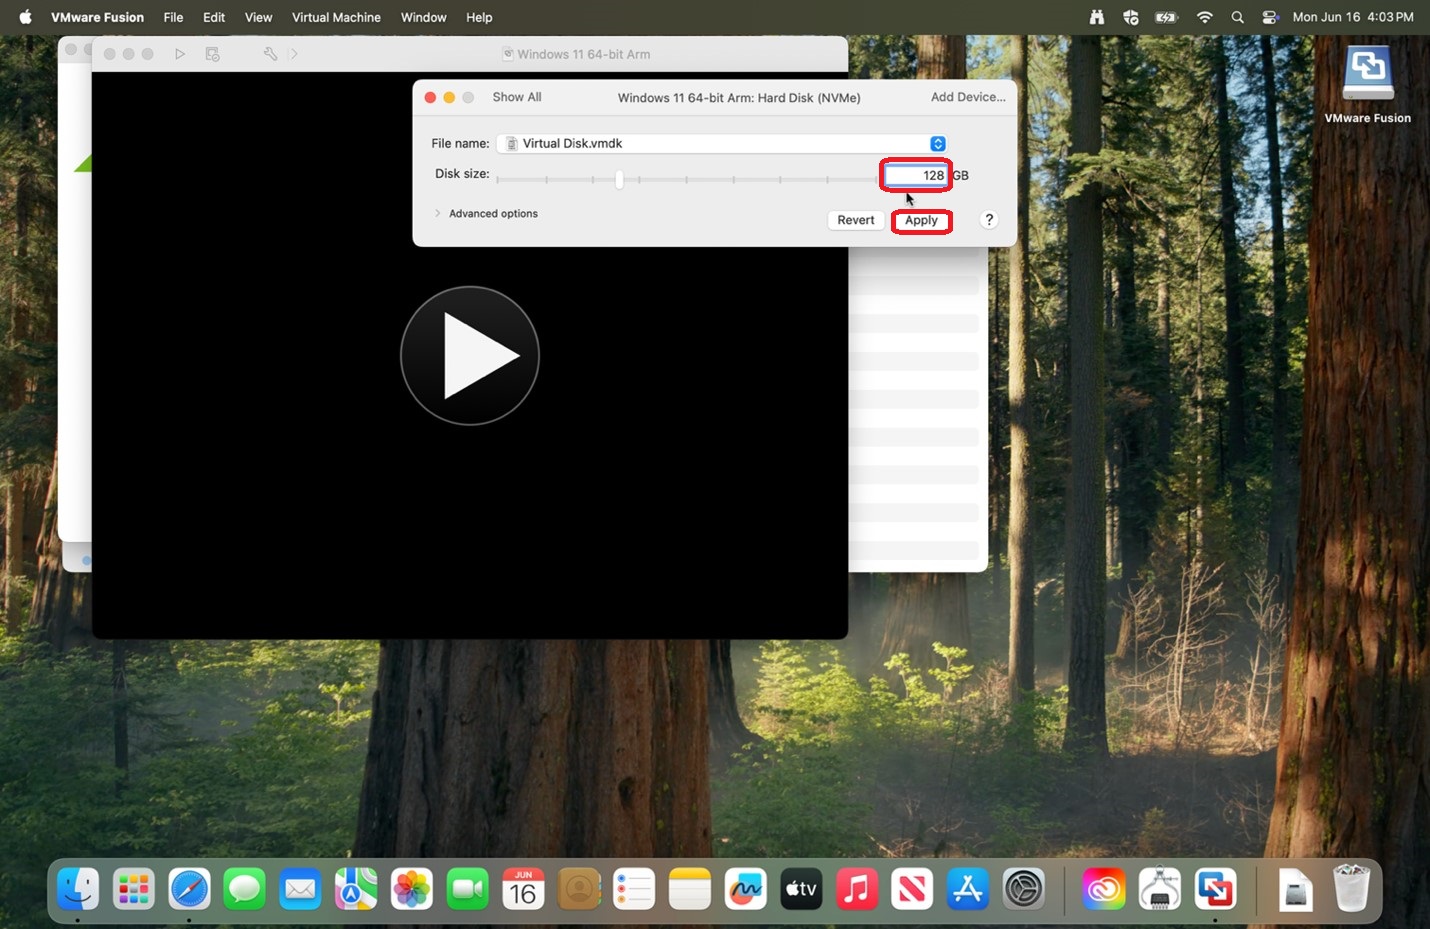
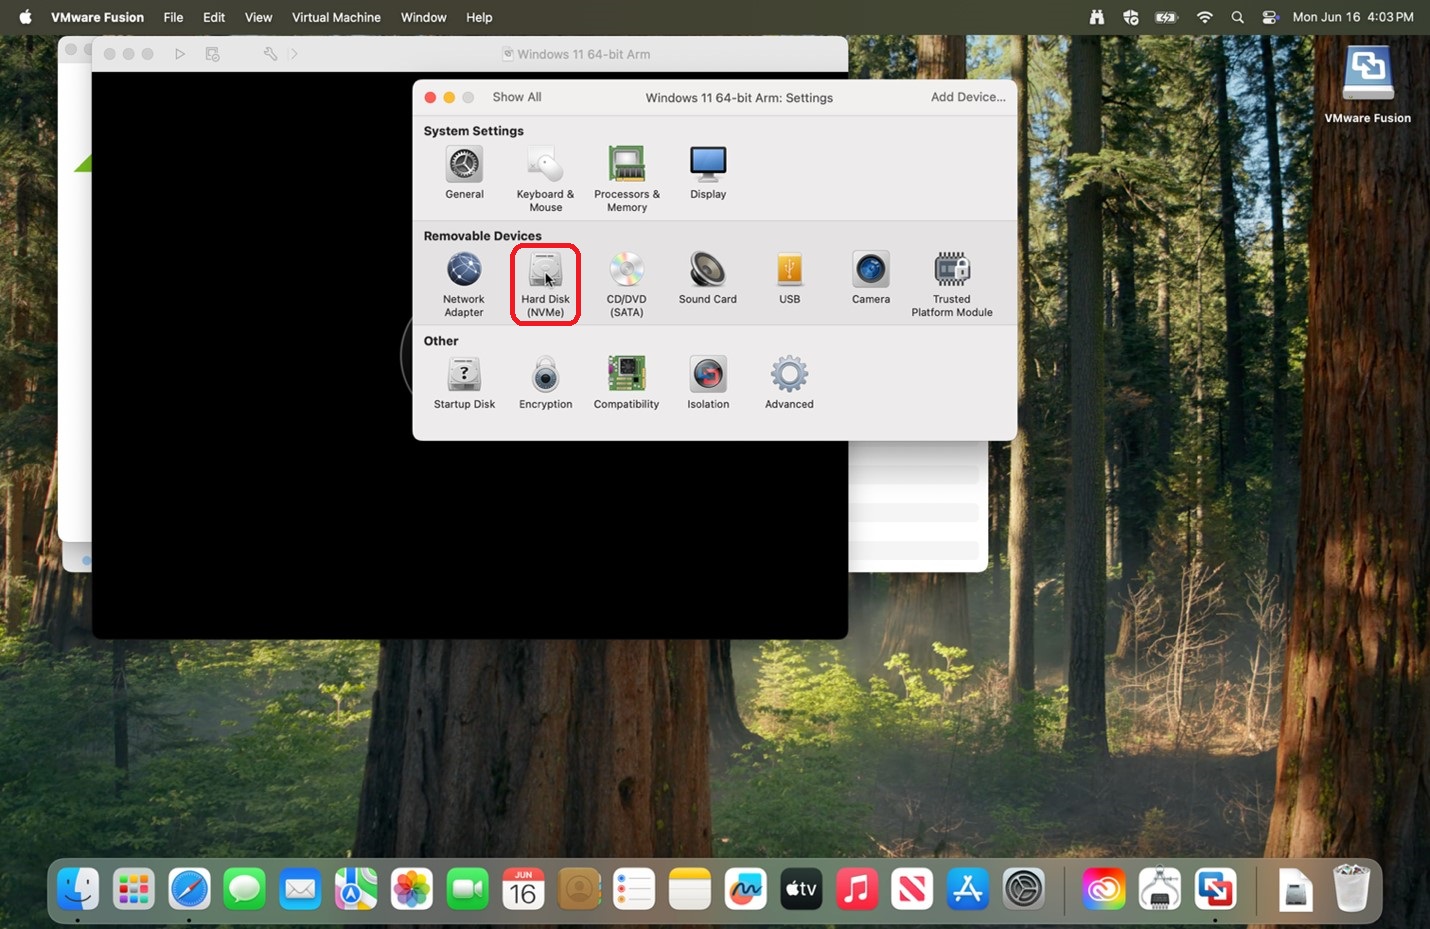
13. Click on the Hard Disk (NVMe) within the Windows 11 64-bit Arm: Settings window.
This window may have been placed behind the newly black window.
|
 |
|
14. Change the Disk size to 128 GB and click Apply, then close that window.
Do not worry about not having enough space on your computer as this will not use all that space, but rather makes it available.
|
|
| 15. Go to the black screen and click on the play button, then click on that general area a few times to startup. | 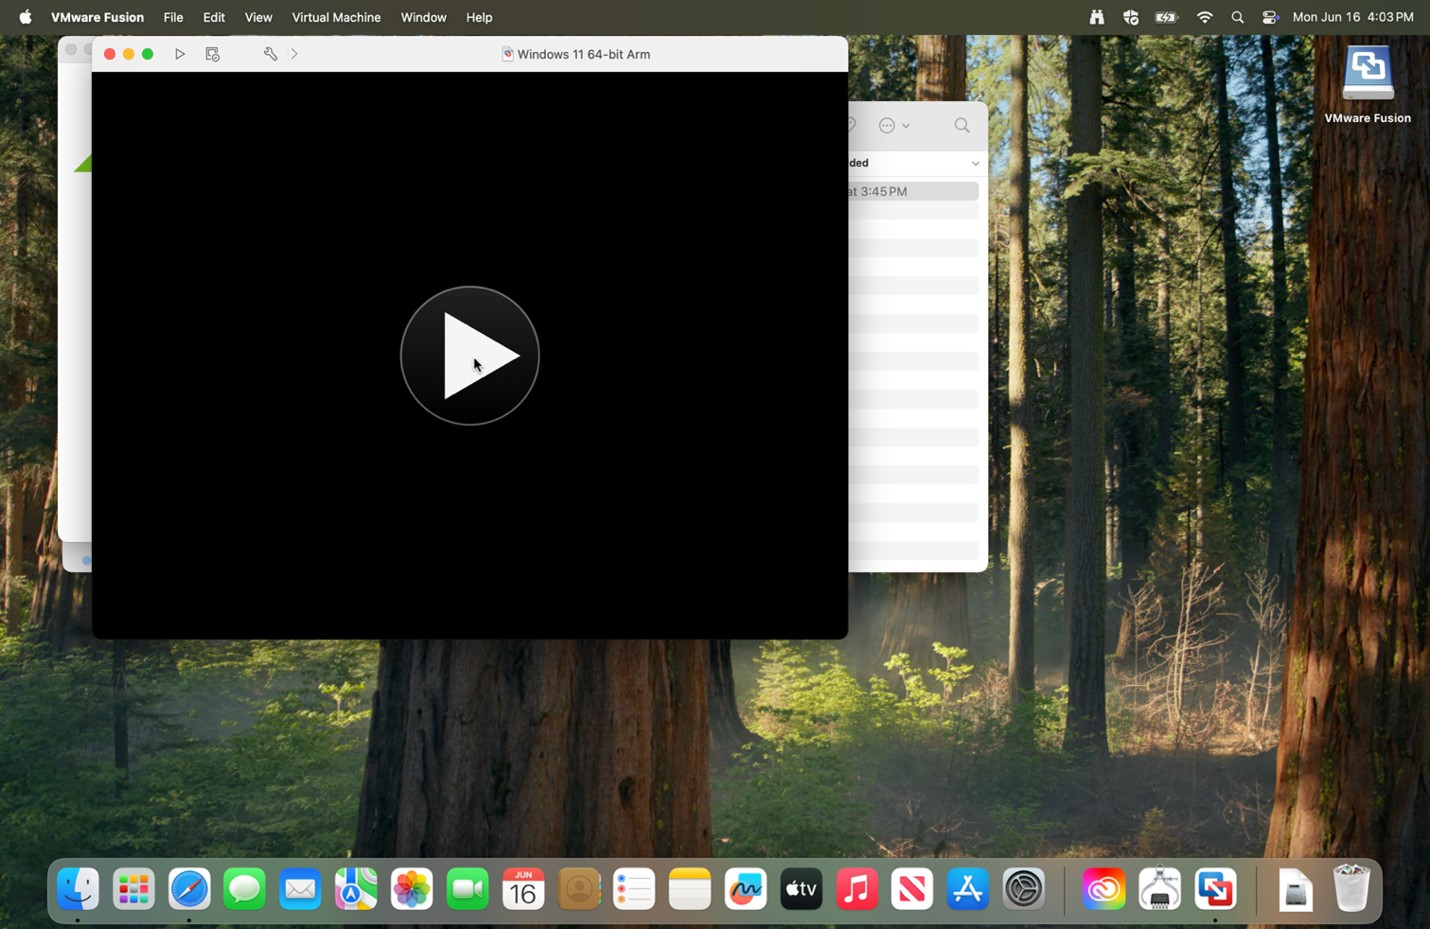 |
|
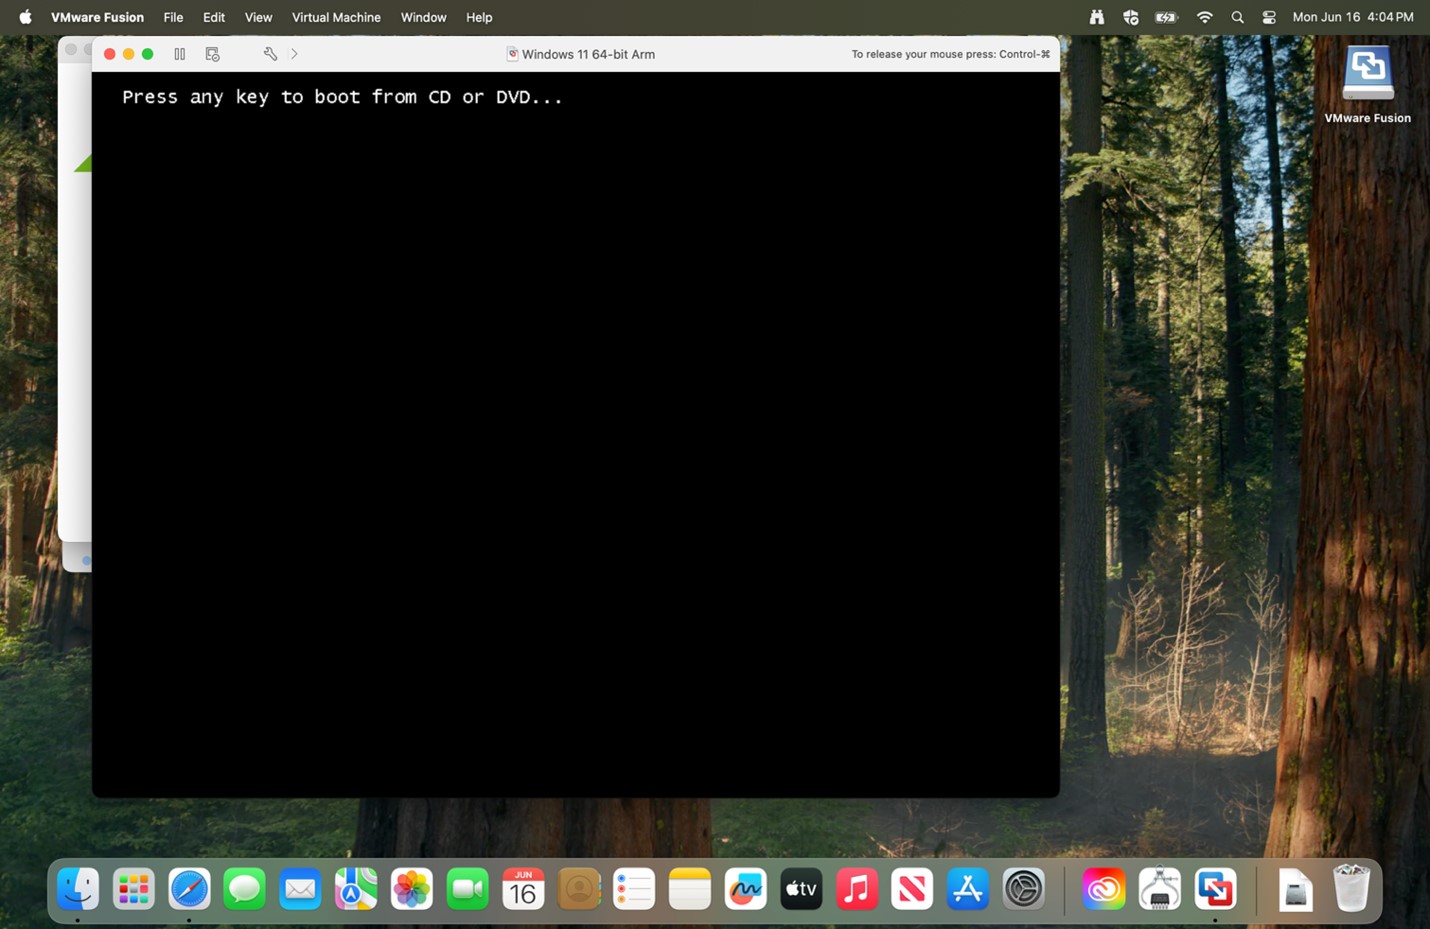
16. Press any key to startup the installer.
|
 |
|
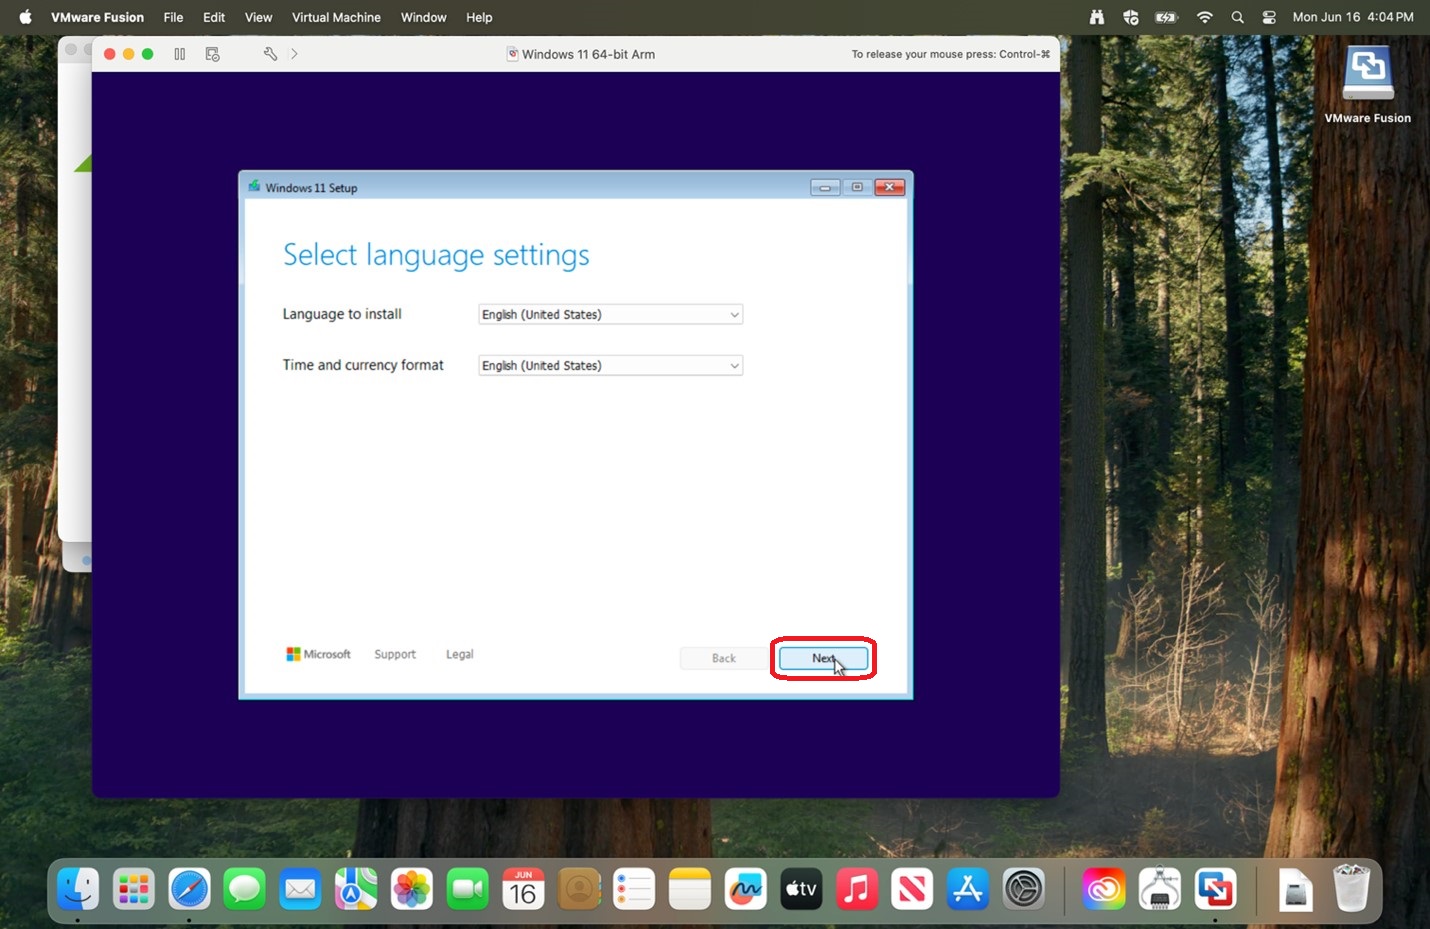
17. After loading, click Next.
|
 |
|
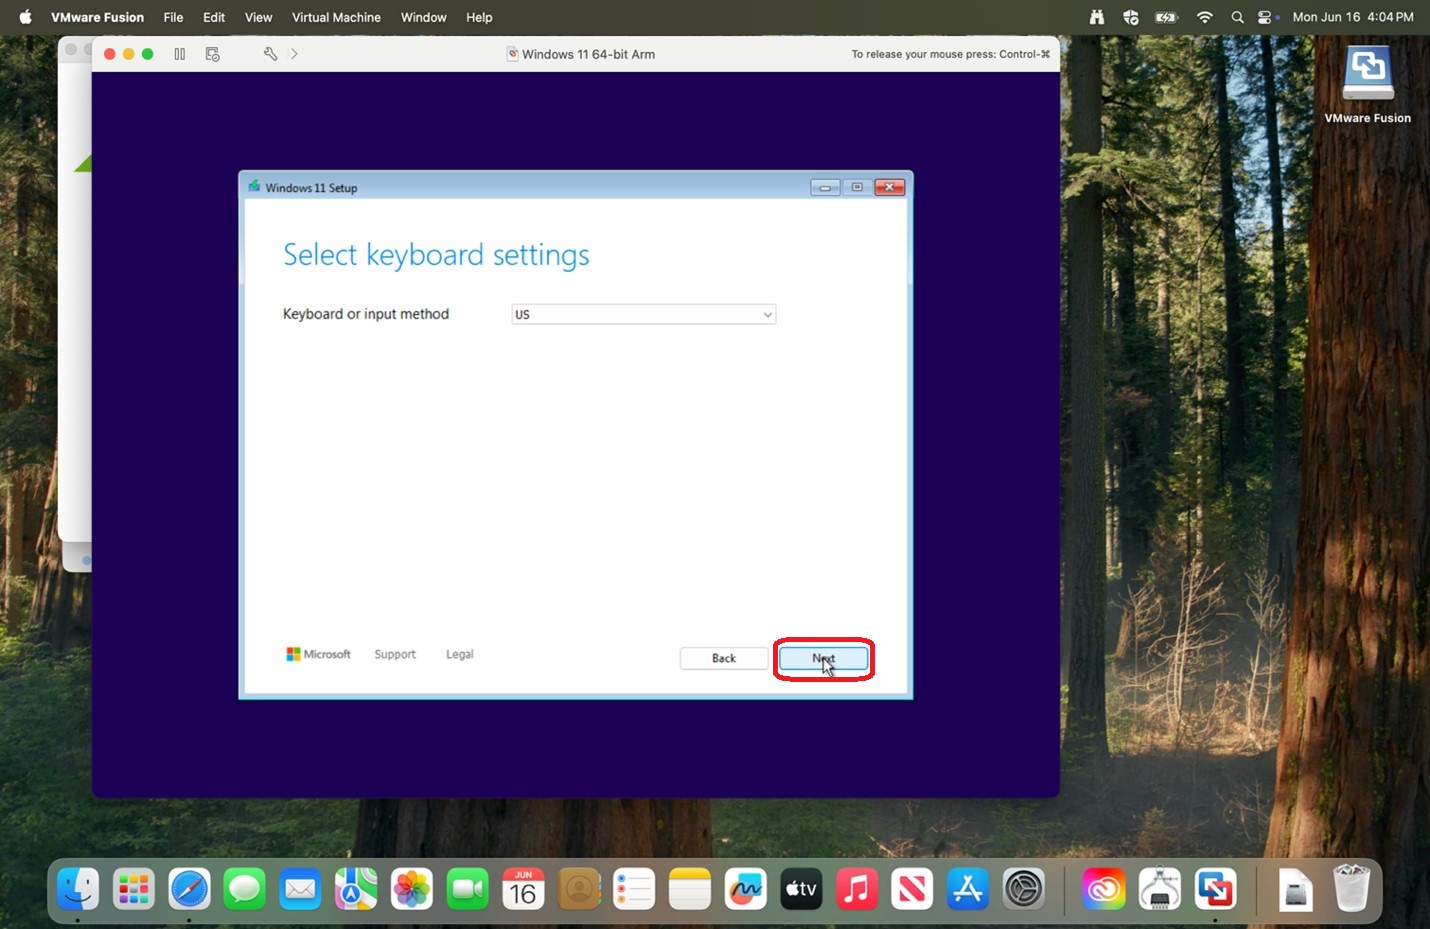
18. Click Next.
|
 |
|
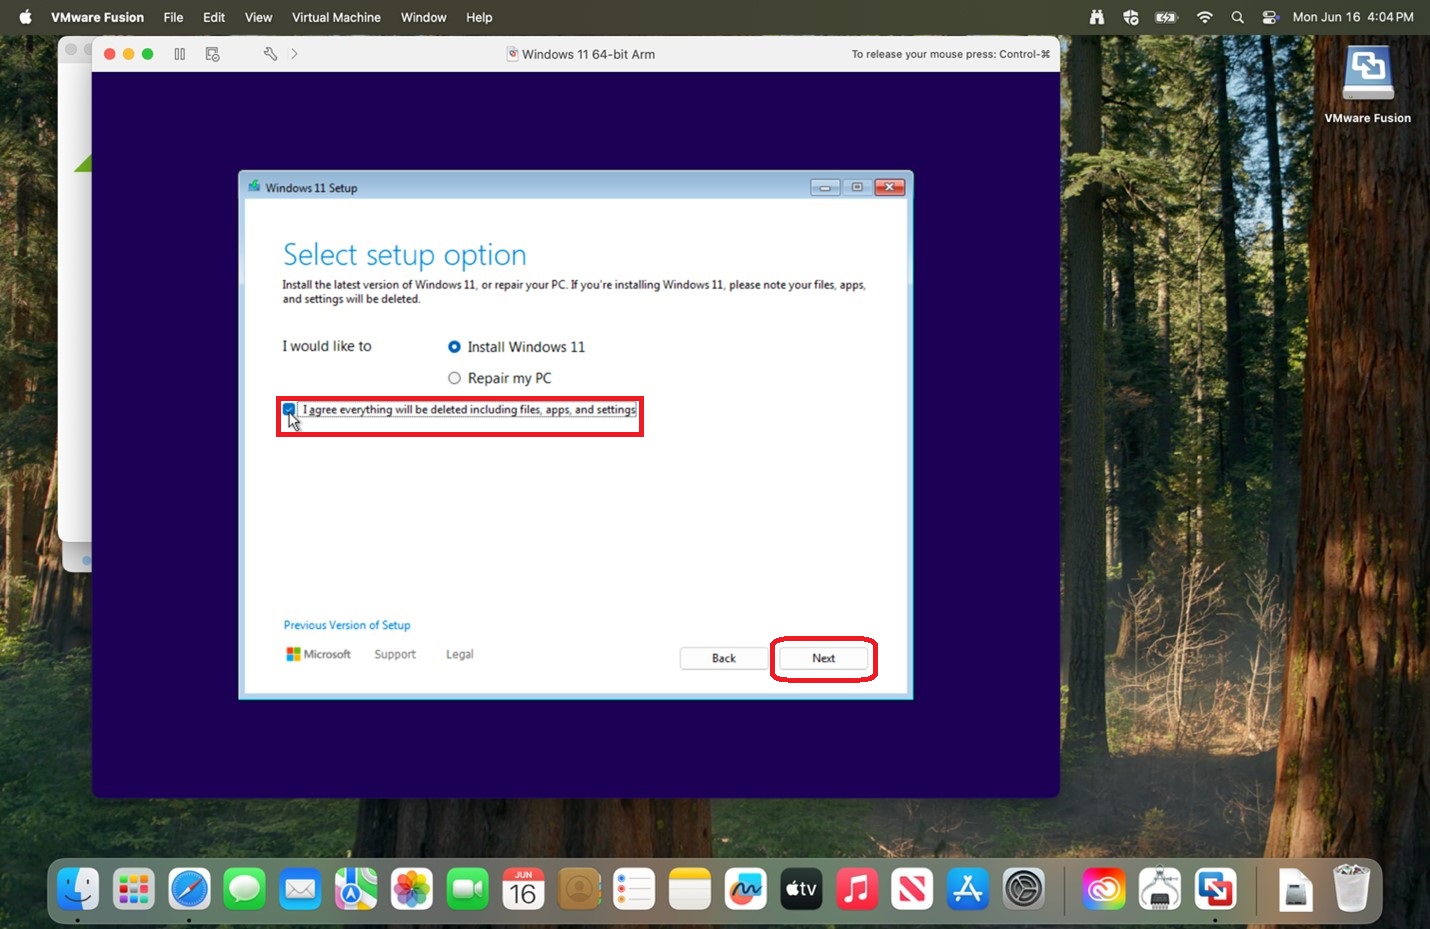
19. Check off the box next to I agree everything will be deleted including files, apps, and settings and click Next.
|
 |
|
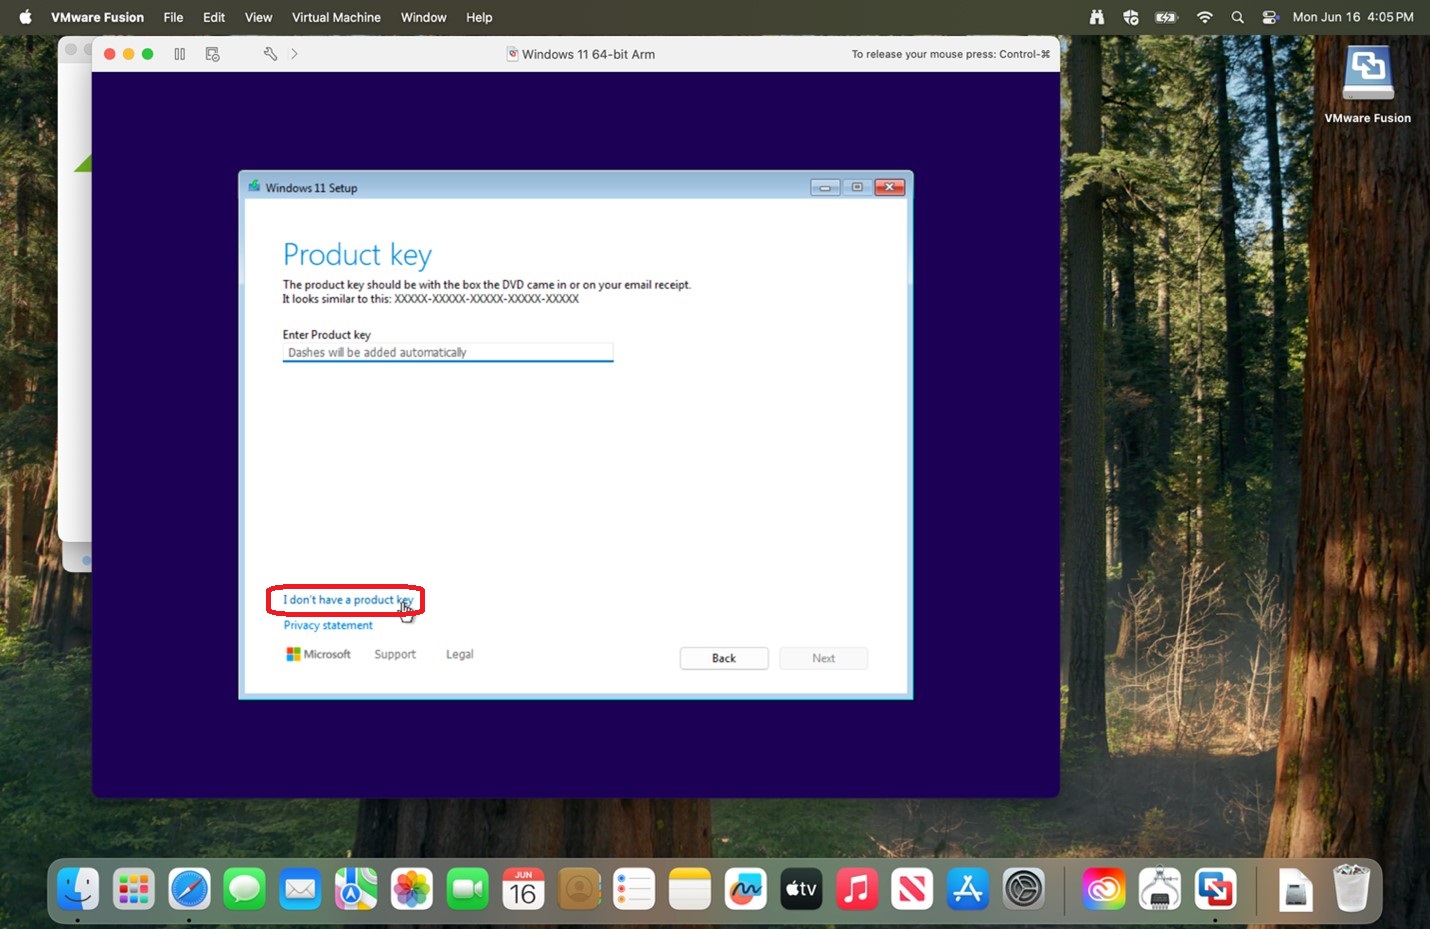
20. Select I don't have a product key.
|
 |
|
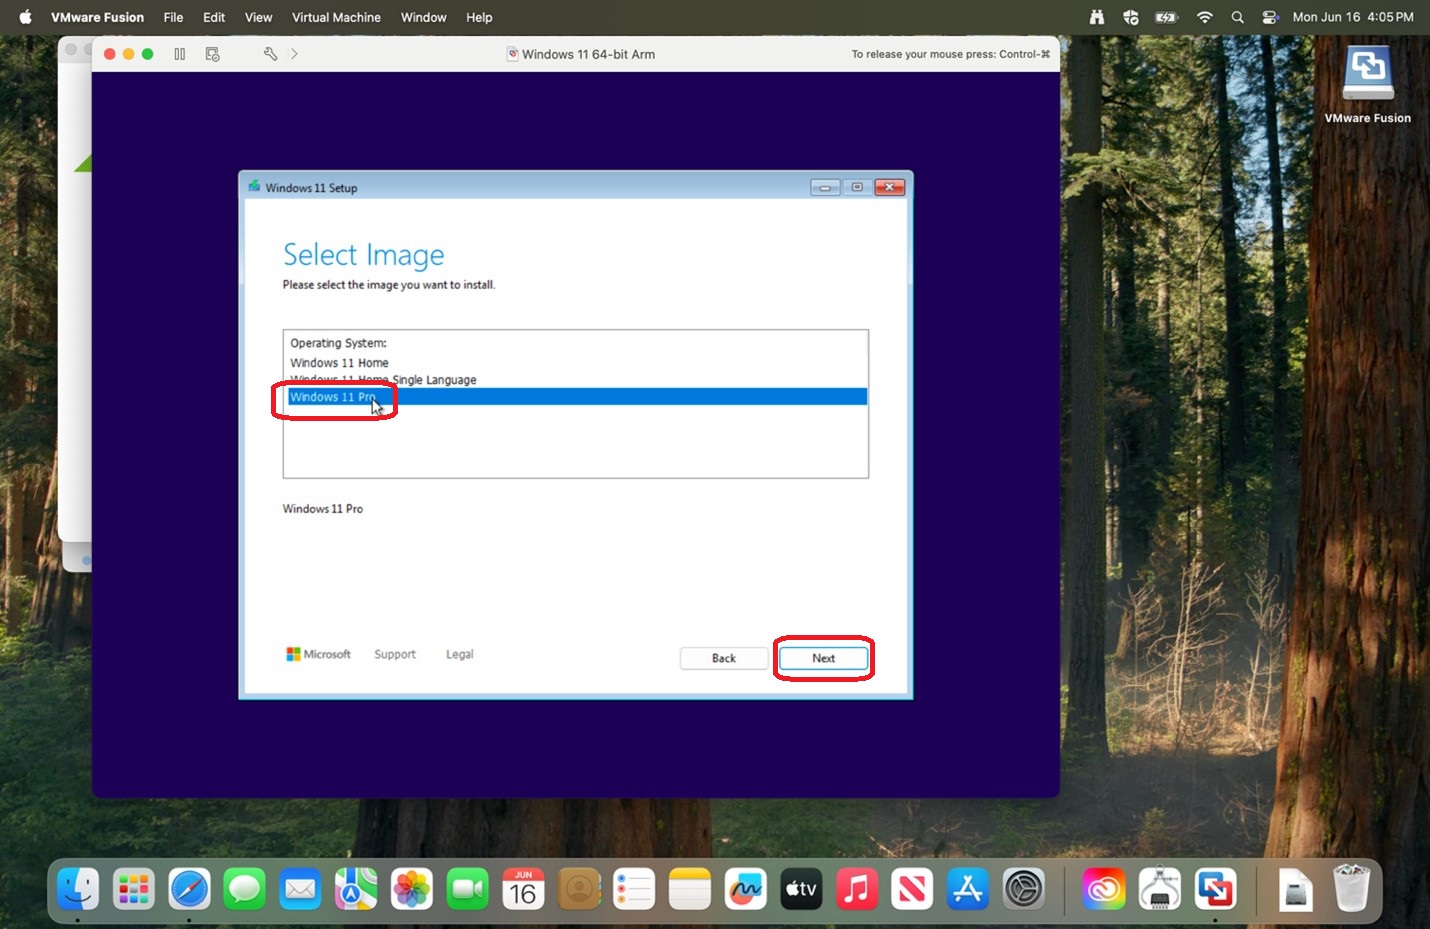
21. Select Windows 11 Pro and click Next.
|
 |
|
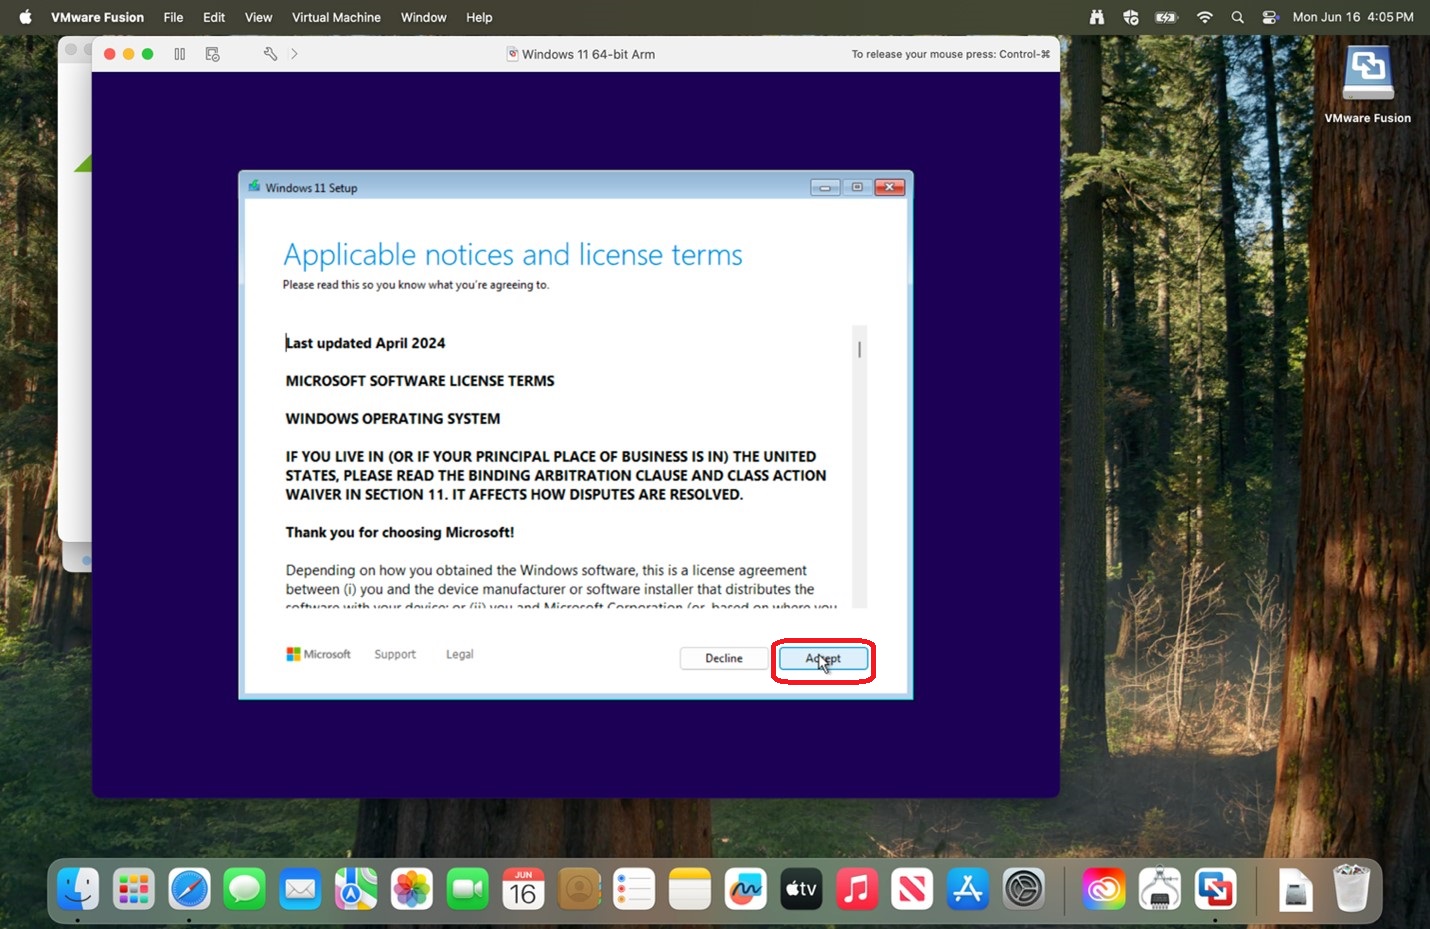
22. Click Accept.
|
 |
|
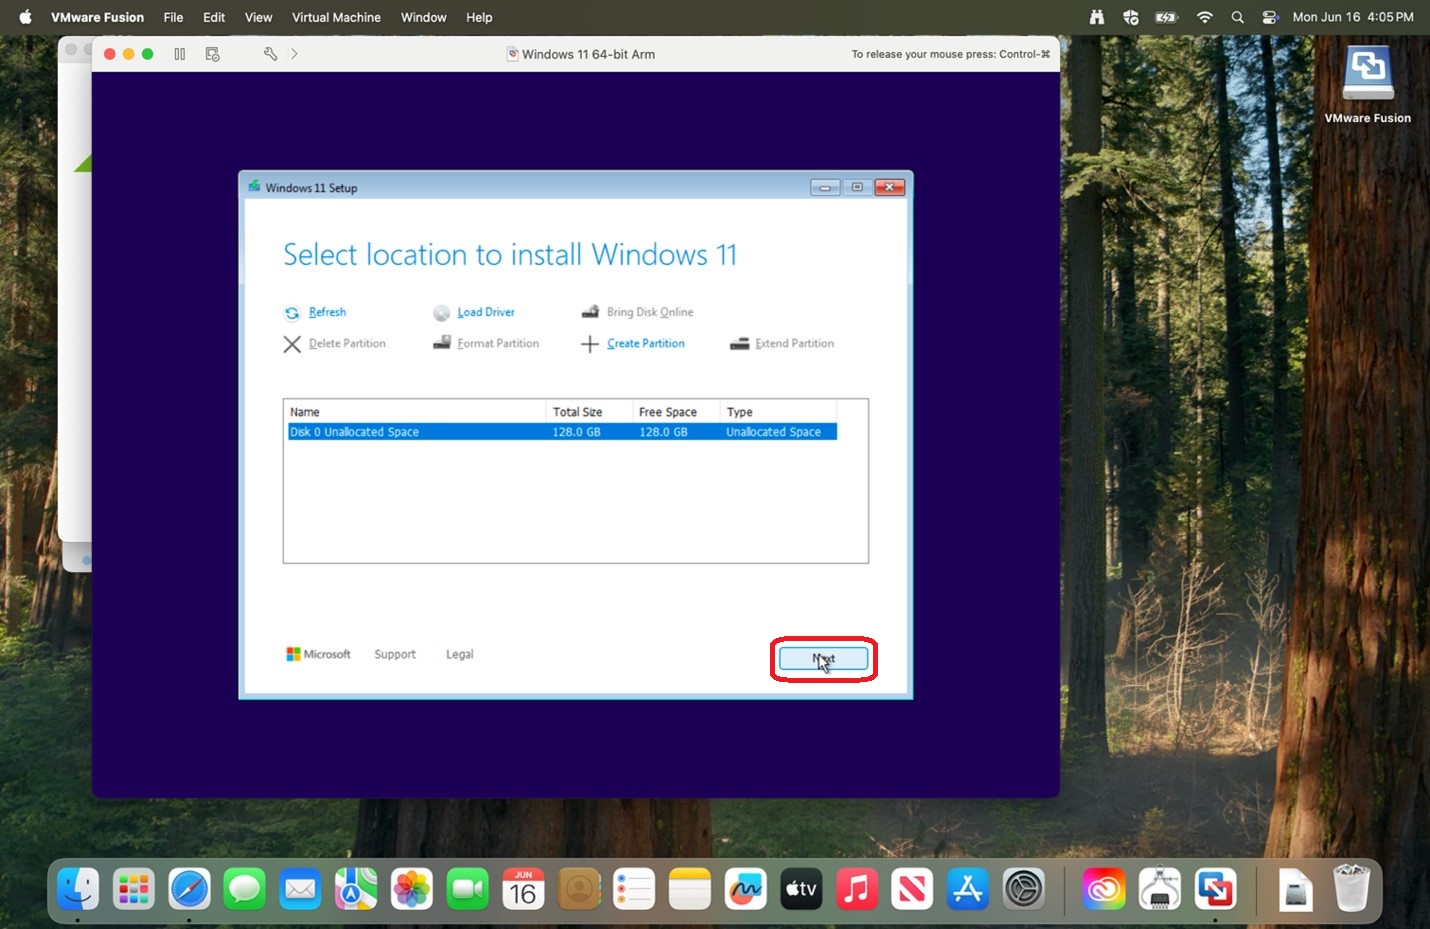
23. Click Next.
|
 |
|
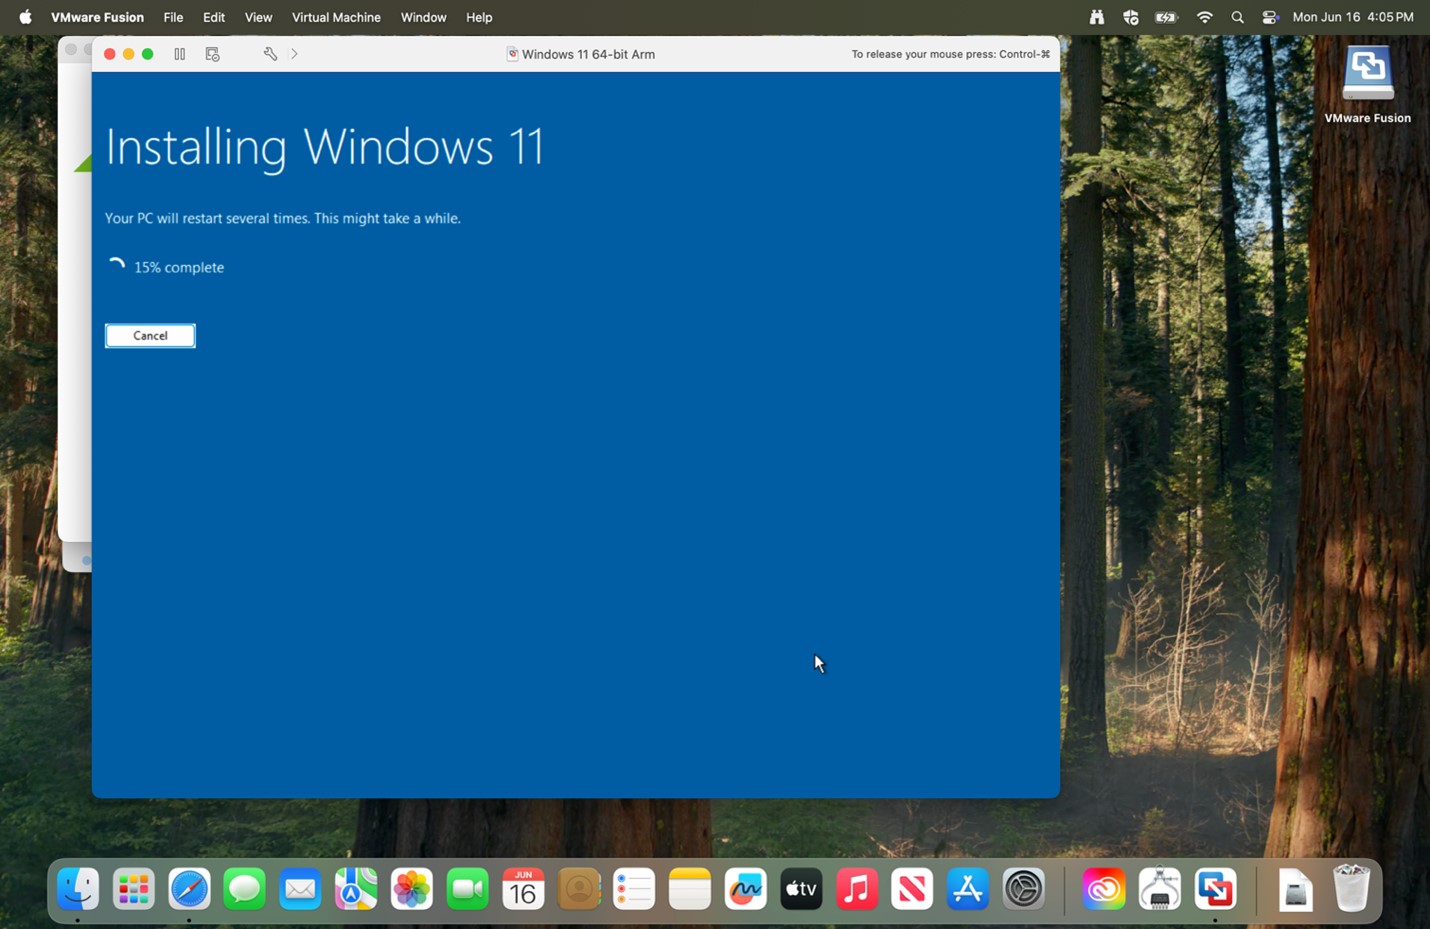
24. Click Install.
|
 |
|
25. Allow time for the install to progress.
|
 |
|
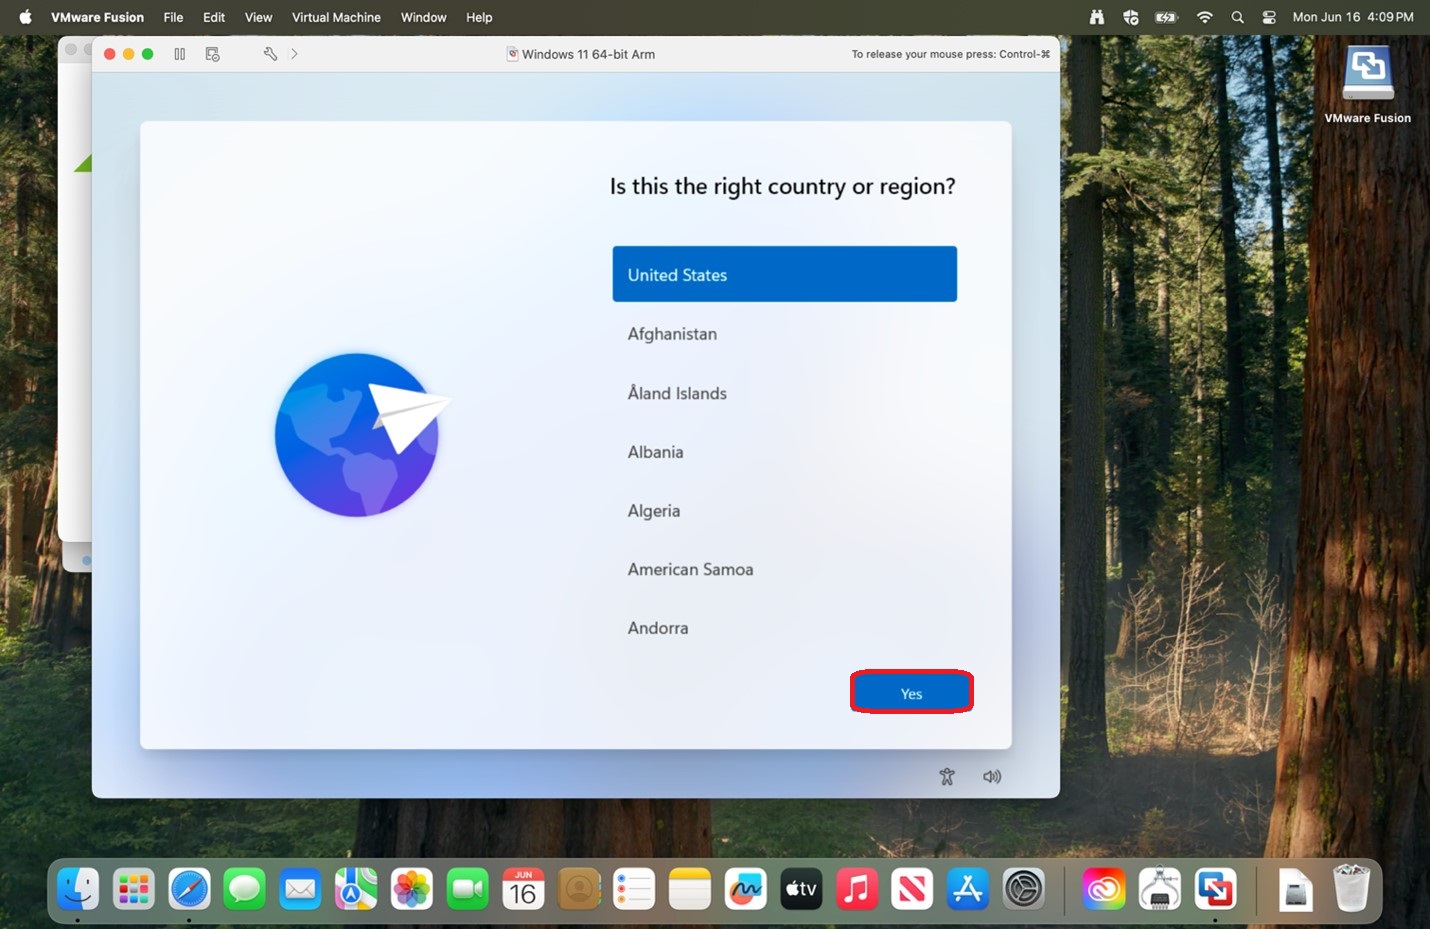
26. Verify the country and Click Yes.
|
 |
|
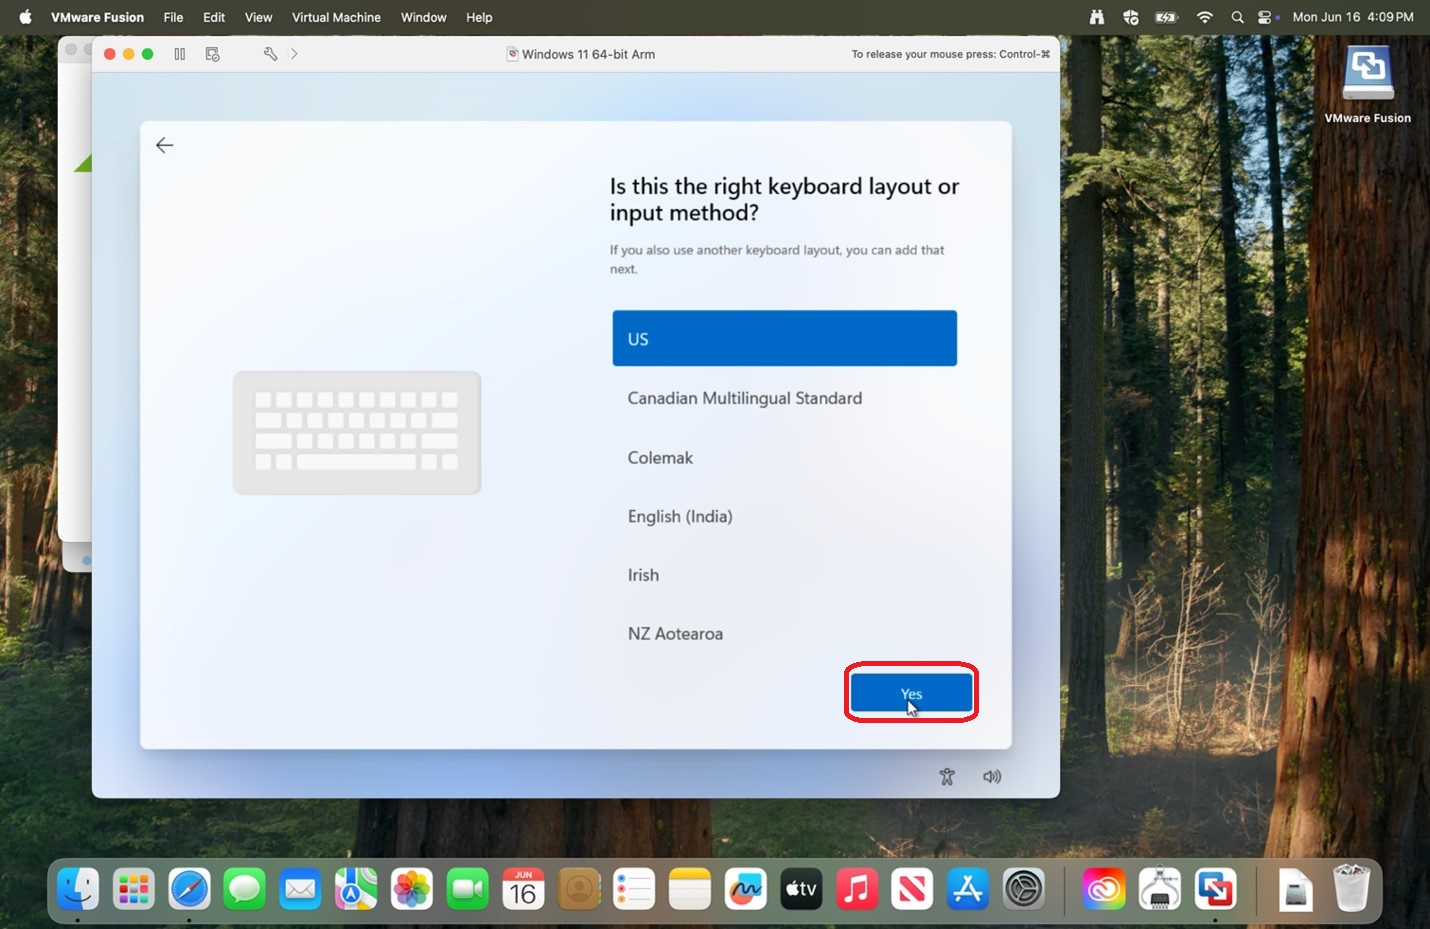
27. Click Yes.
|
 |
|
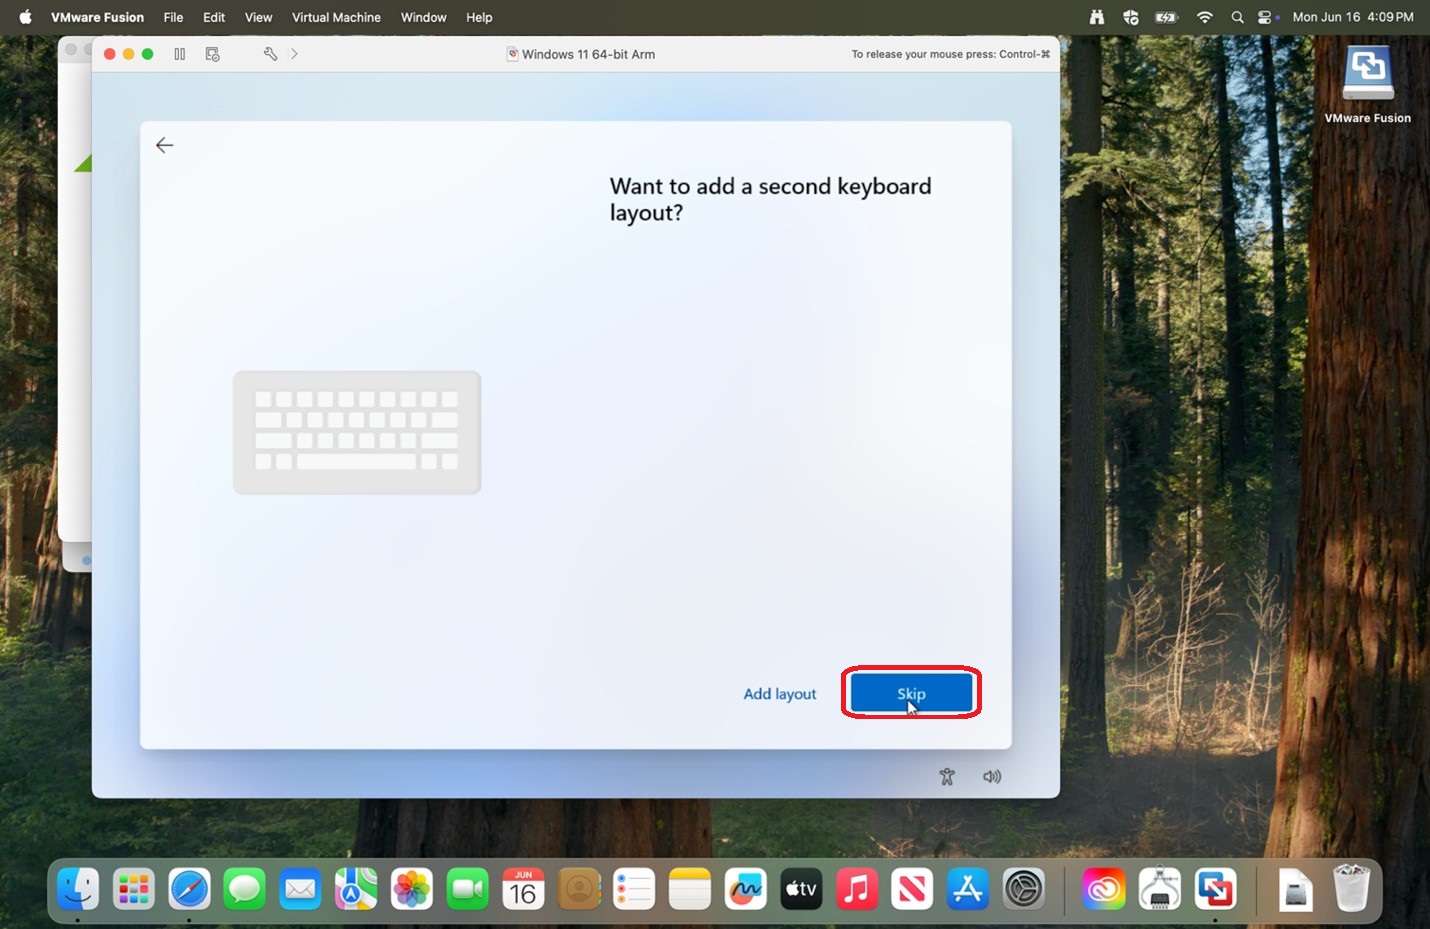
28. Click Skip.
There may be some loading as there is a check for Windows updates.
|
 |
|
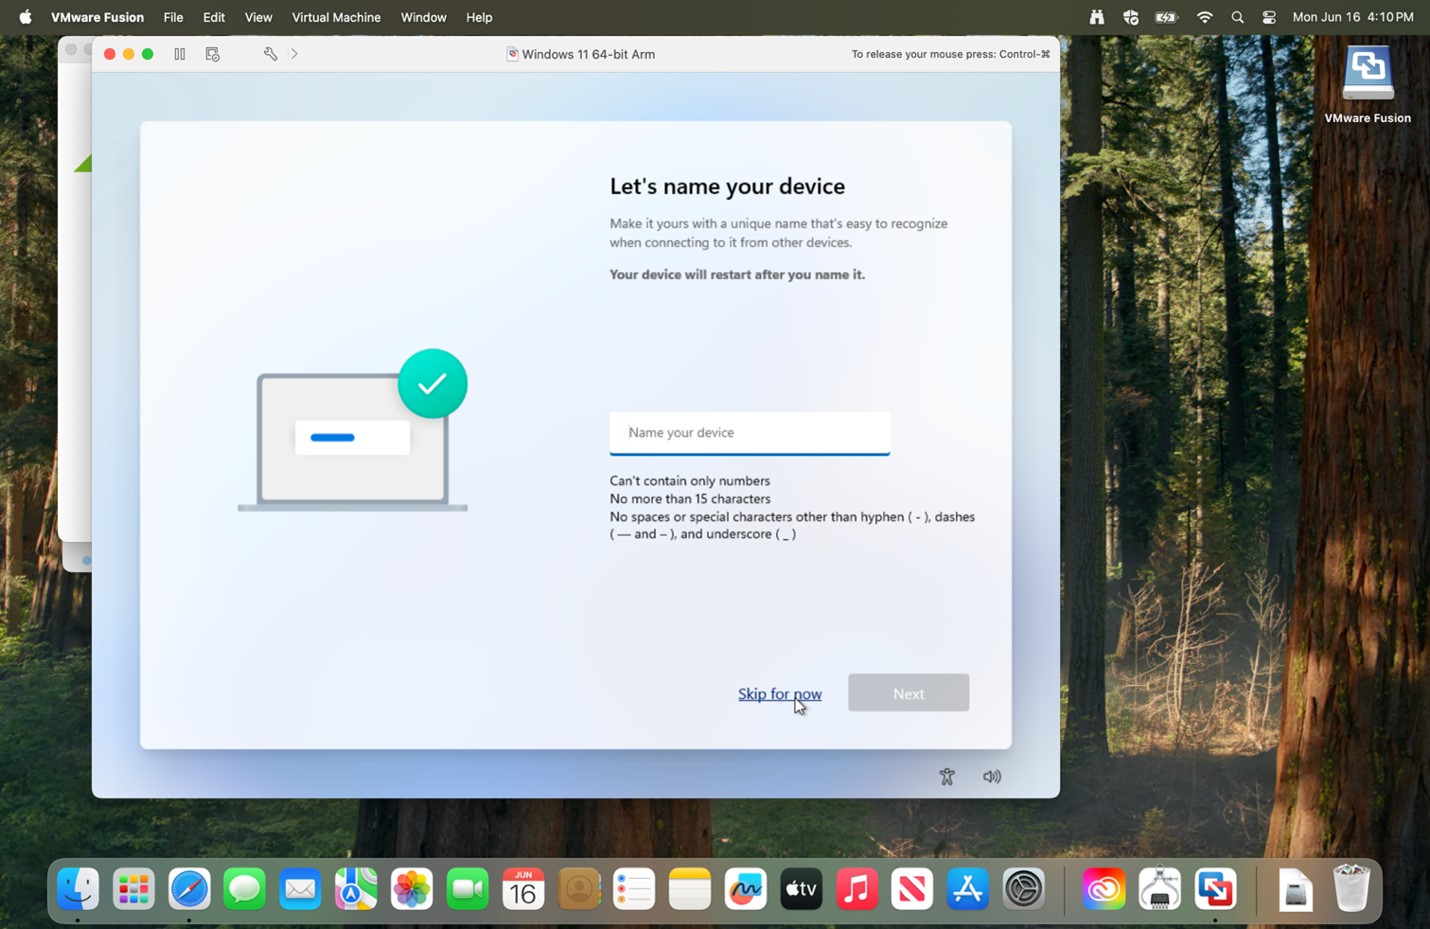
29. Click Skip for now.
|
 |
|
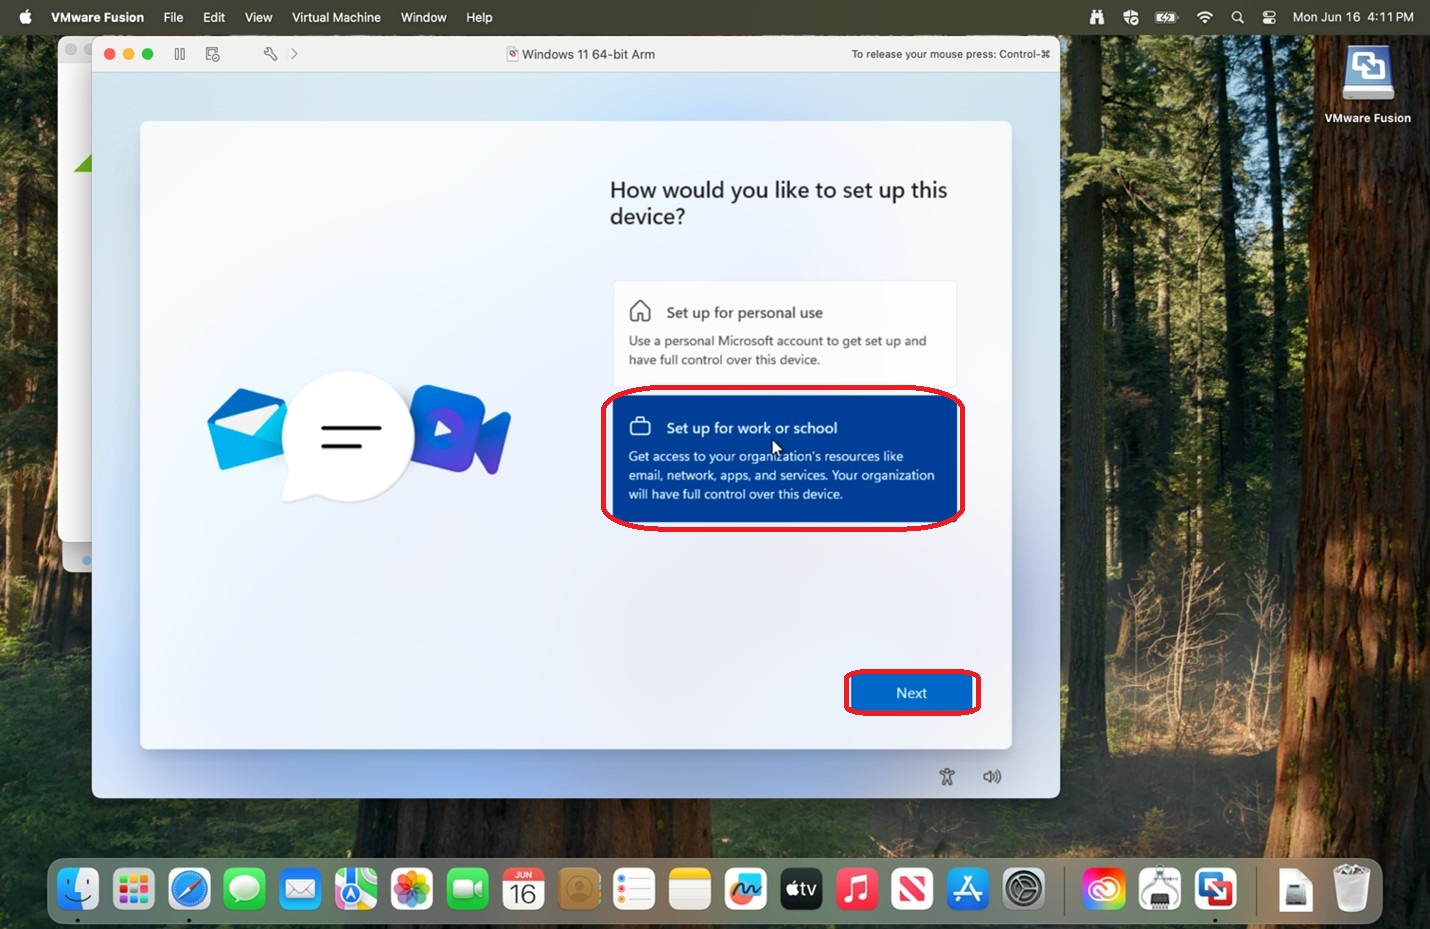
30. Select Set up for work or school and click Next.
|
 |
|
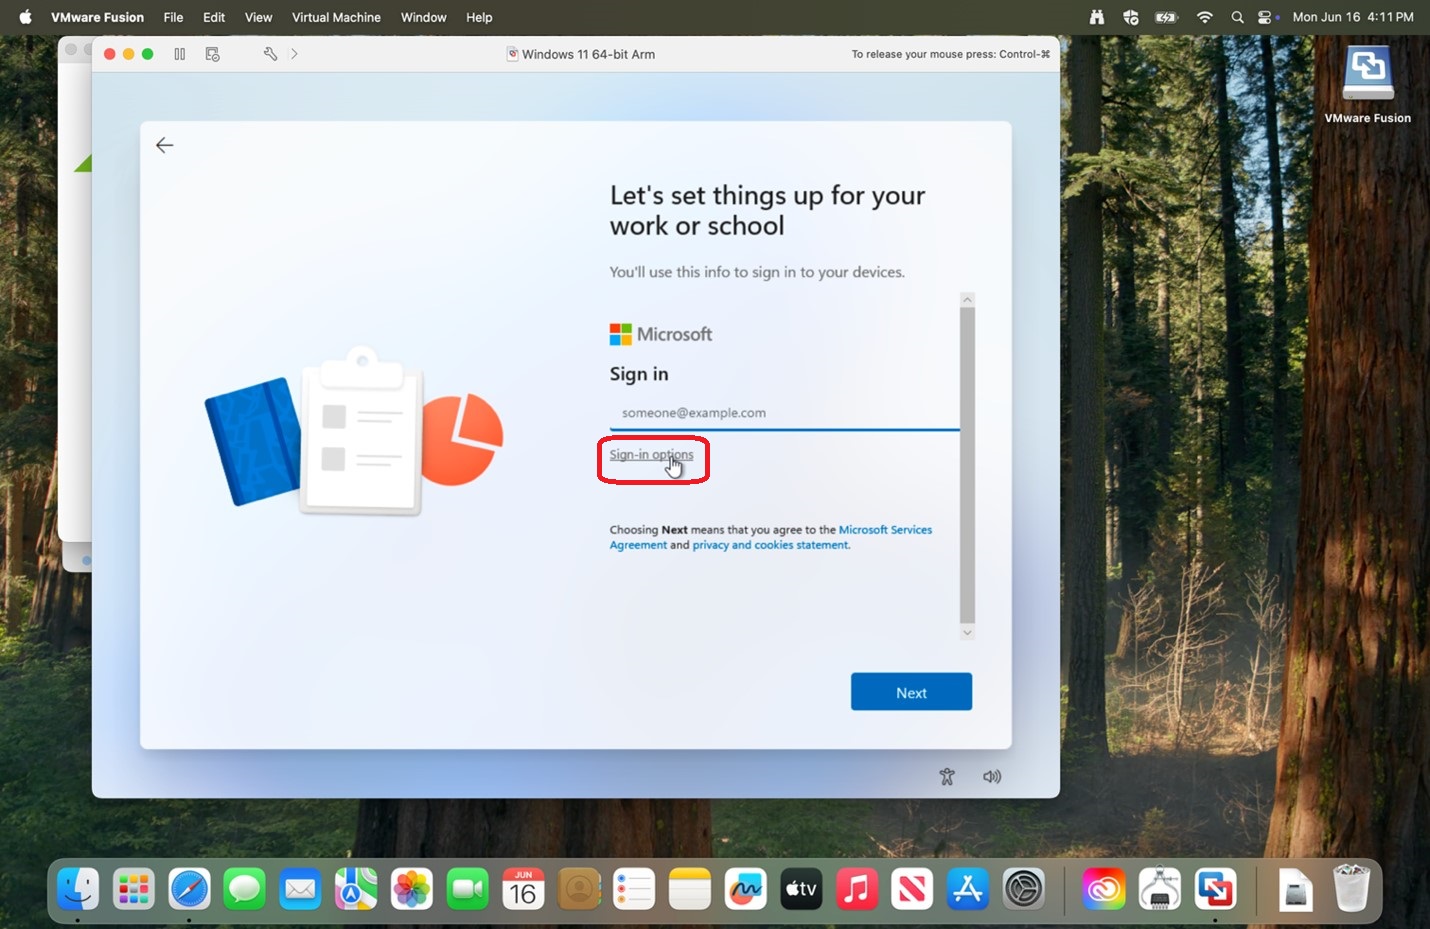
31. Click Sign-in options.
|
 |
|
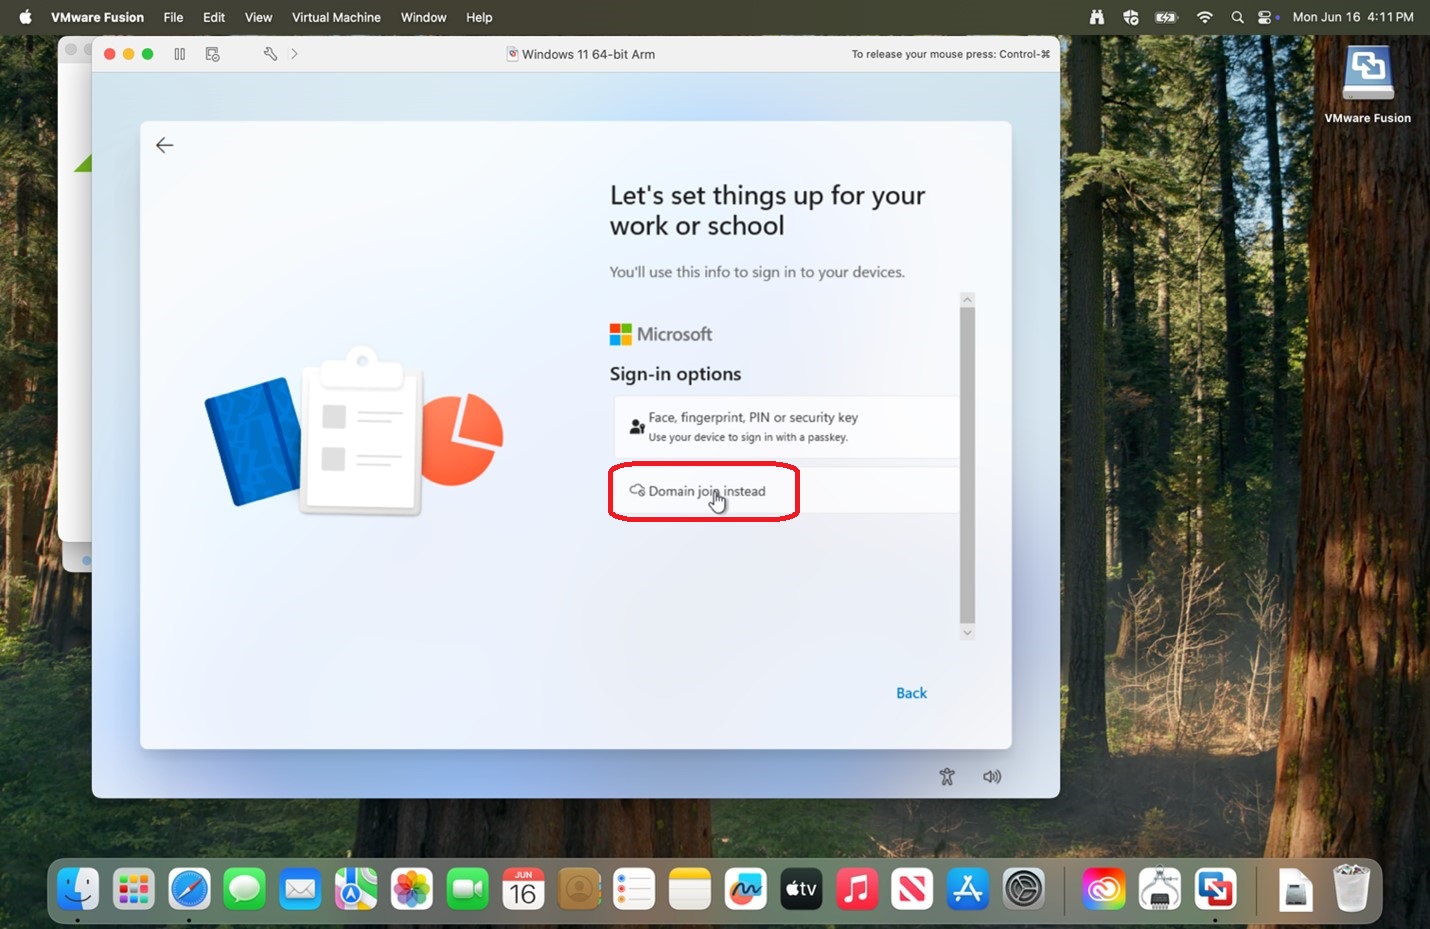
32. Click Domain join instead.
|
 |
|
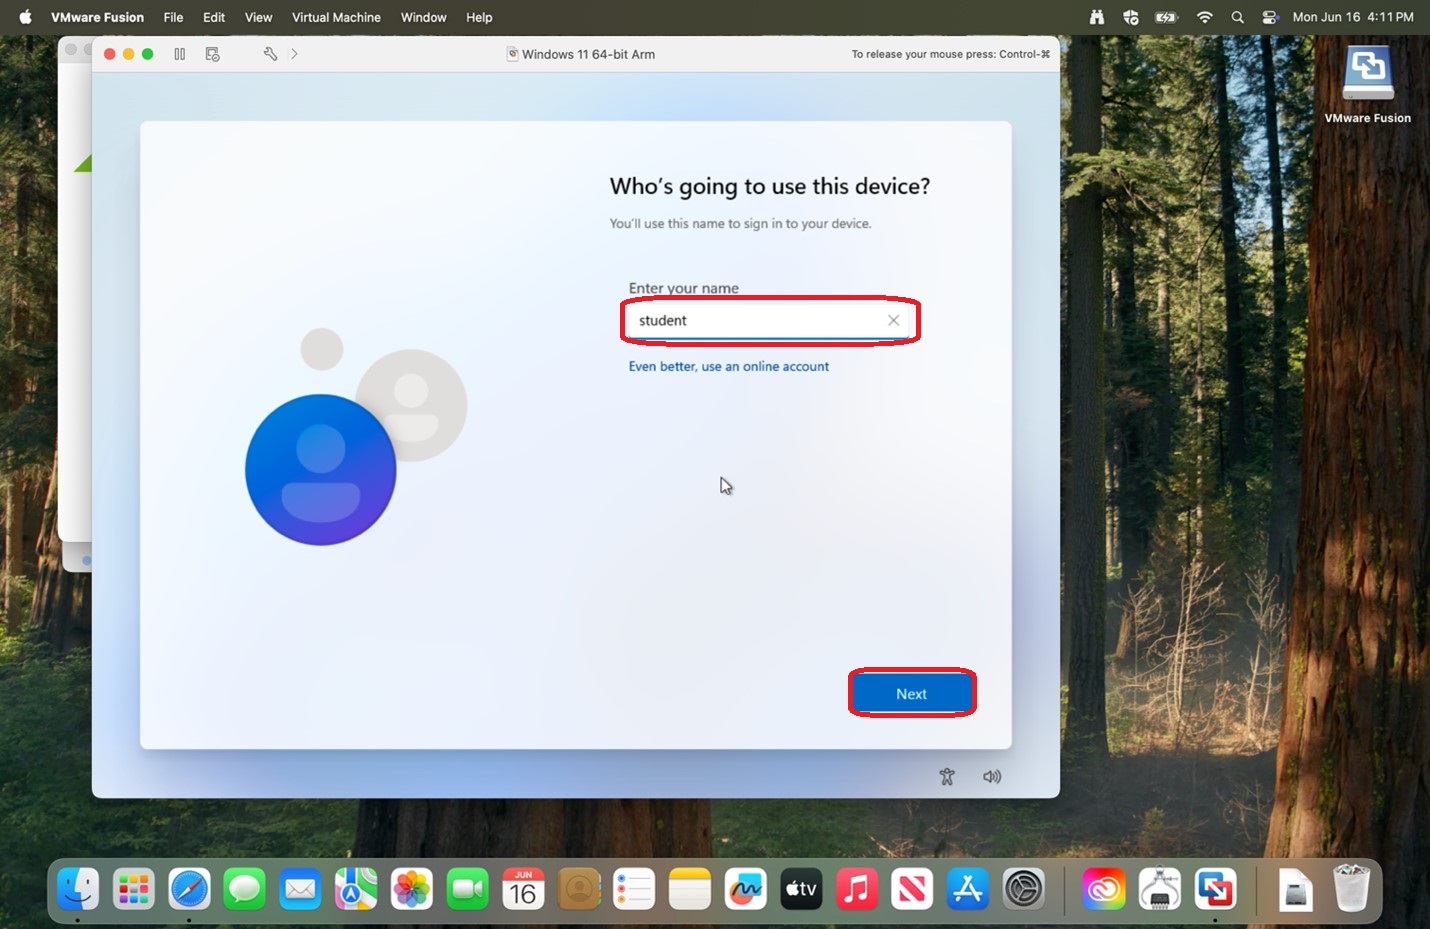
33. Enter your name and click Next.
|
 |
|
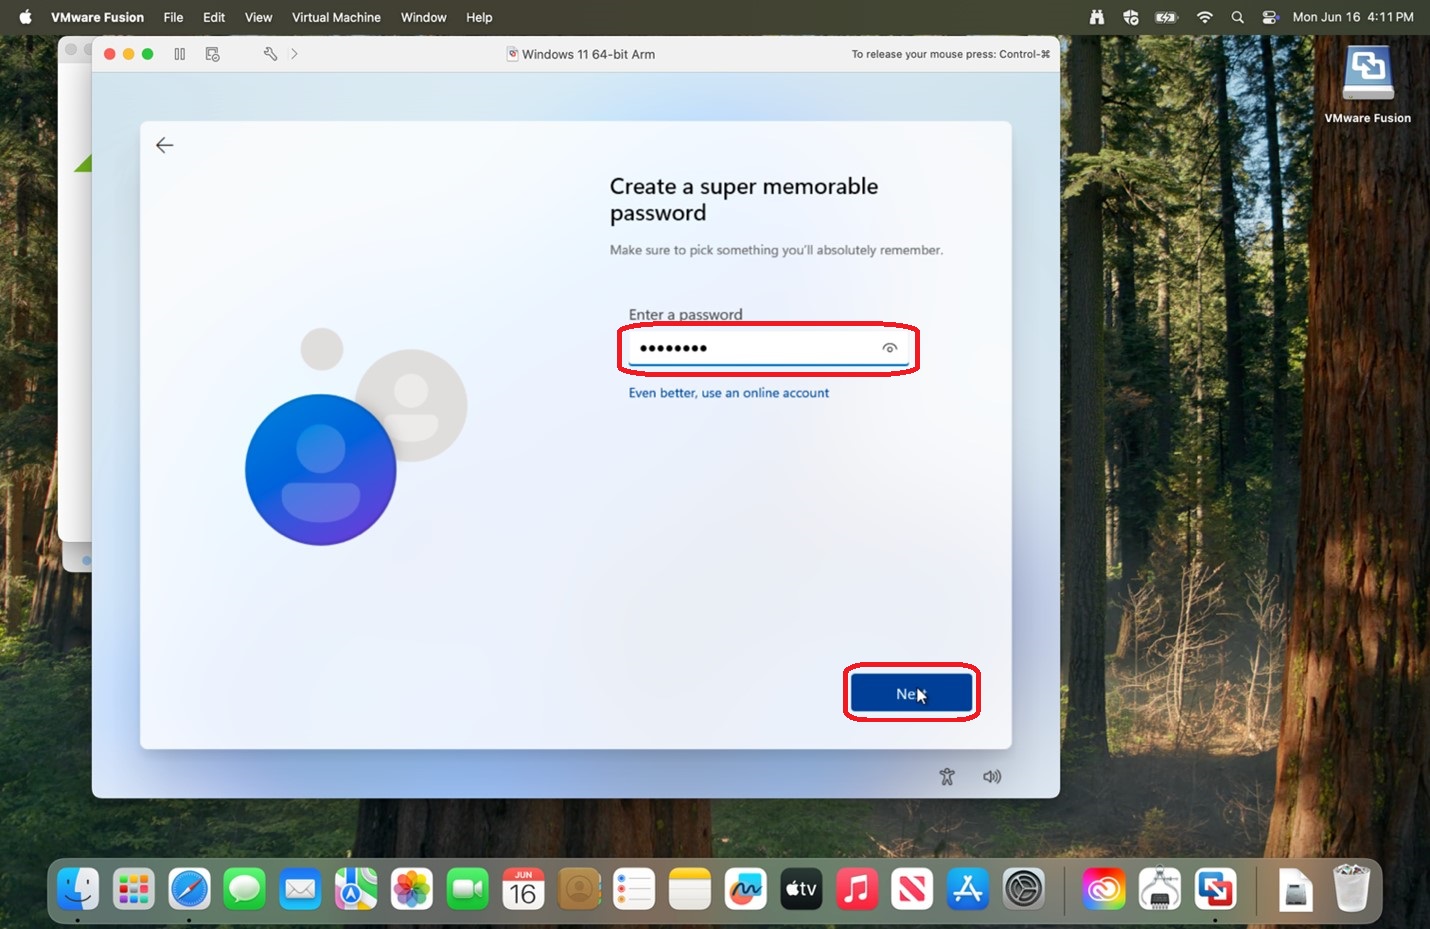
34. Enter a password and click Next.
Please save the entered password in a secure location for if you should need it in the future.
|
 |
|
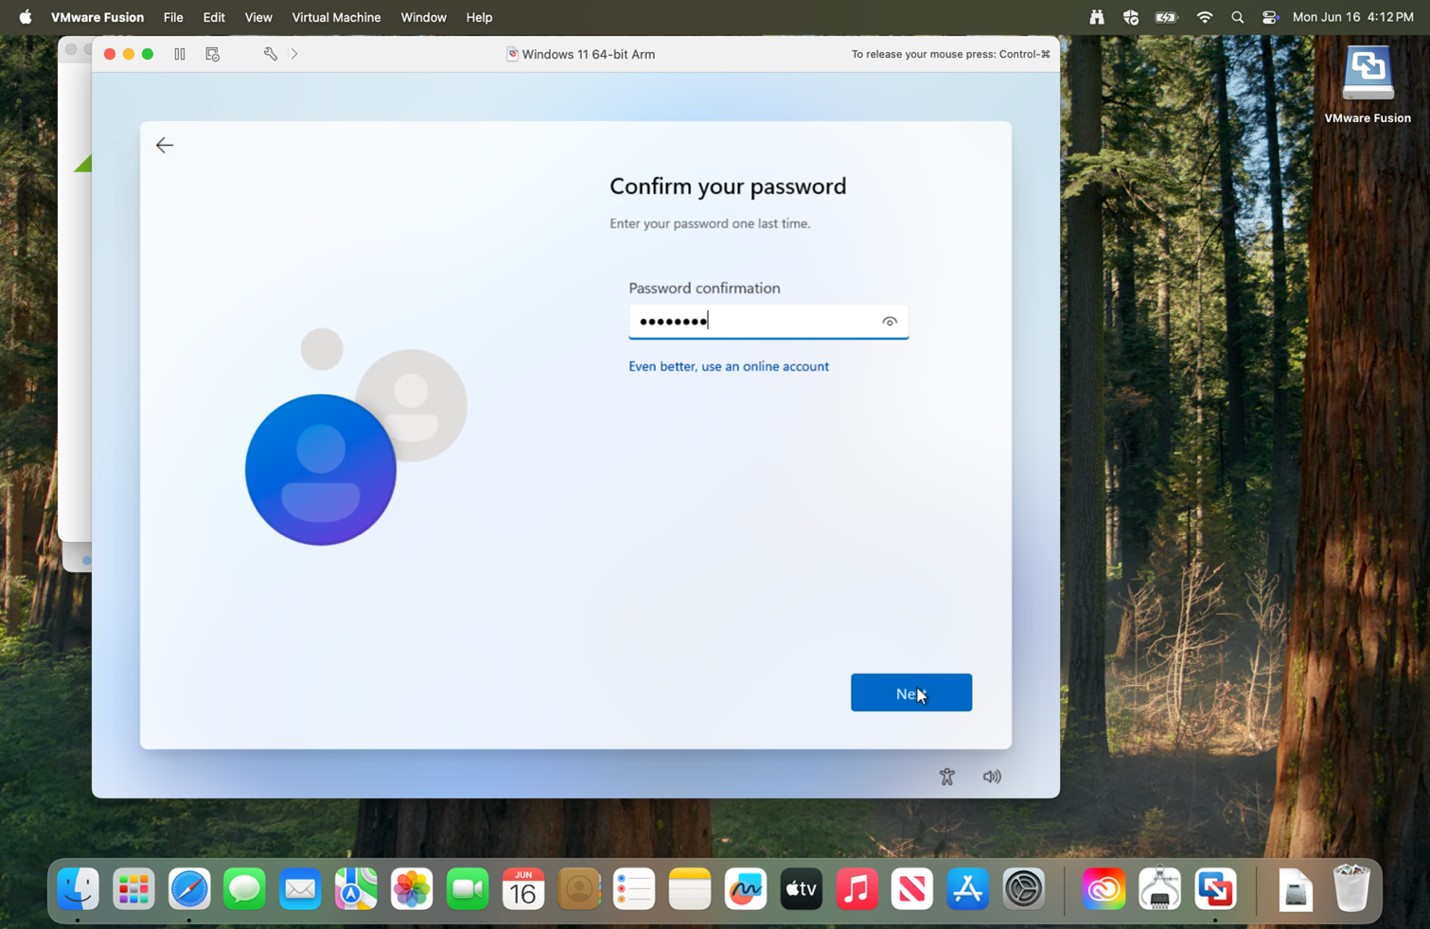
35. Re-enter the password and click Next.
|
 |
|
36. Select your 3 security questions and answers for password recovery and click Next.
|
|
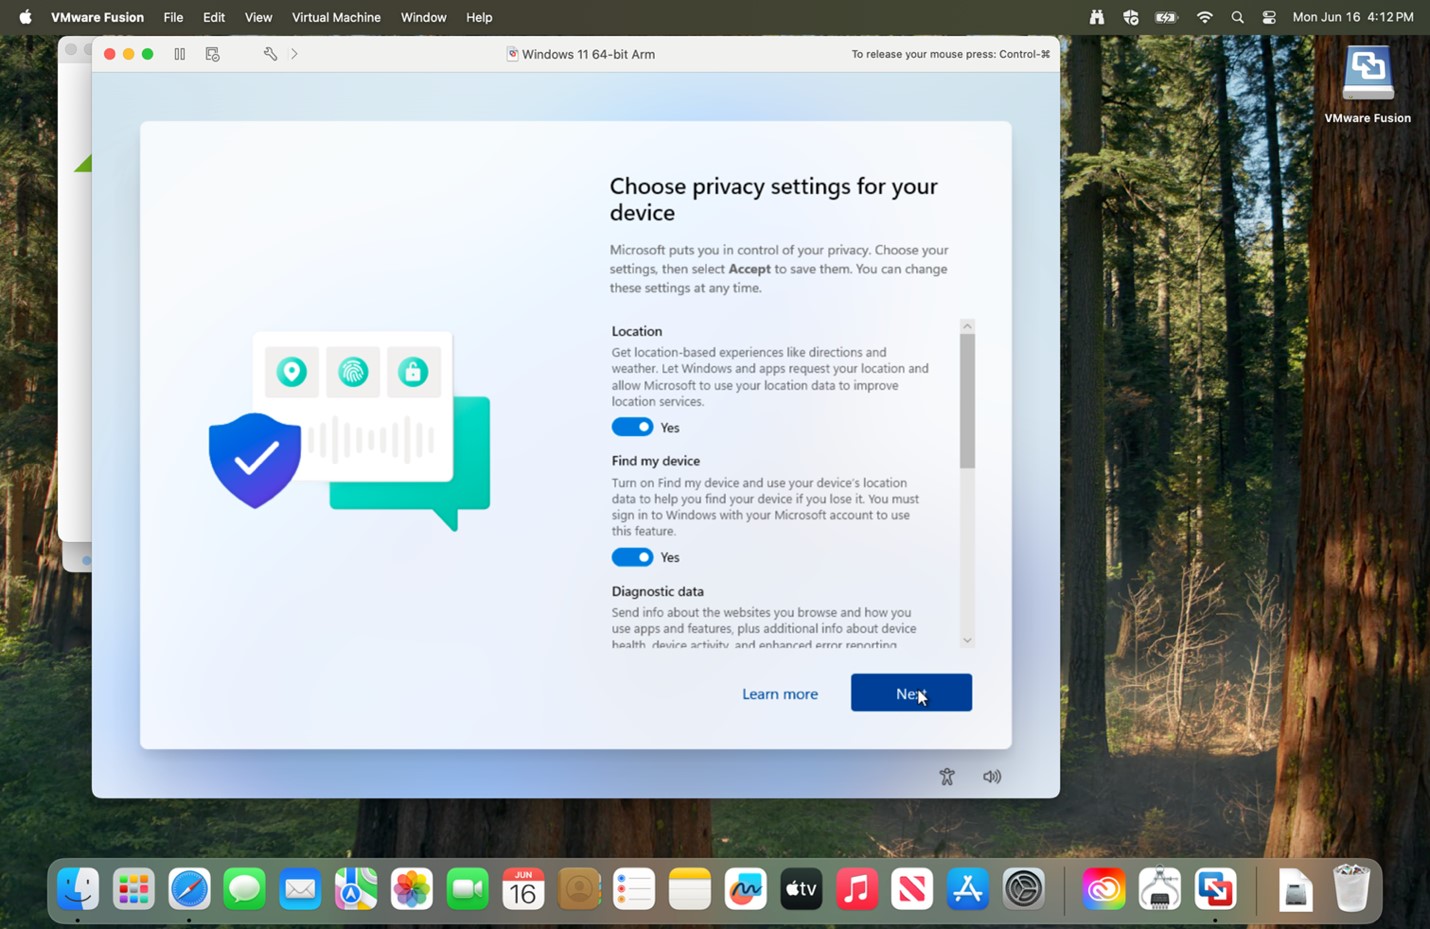
|
37. Verify the privacy options you would like and click Next.
|
|
|
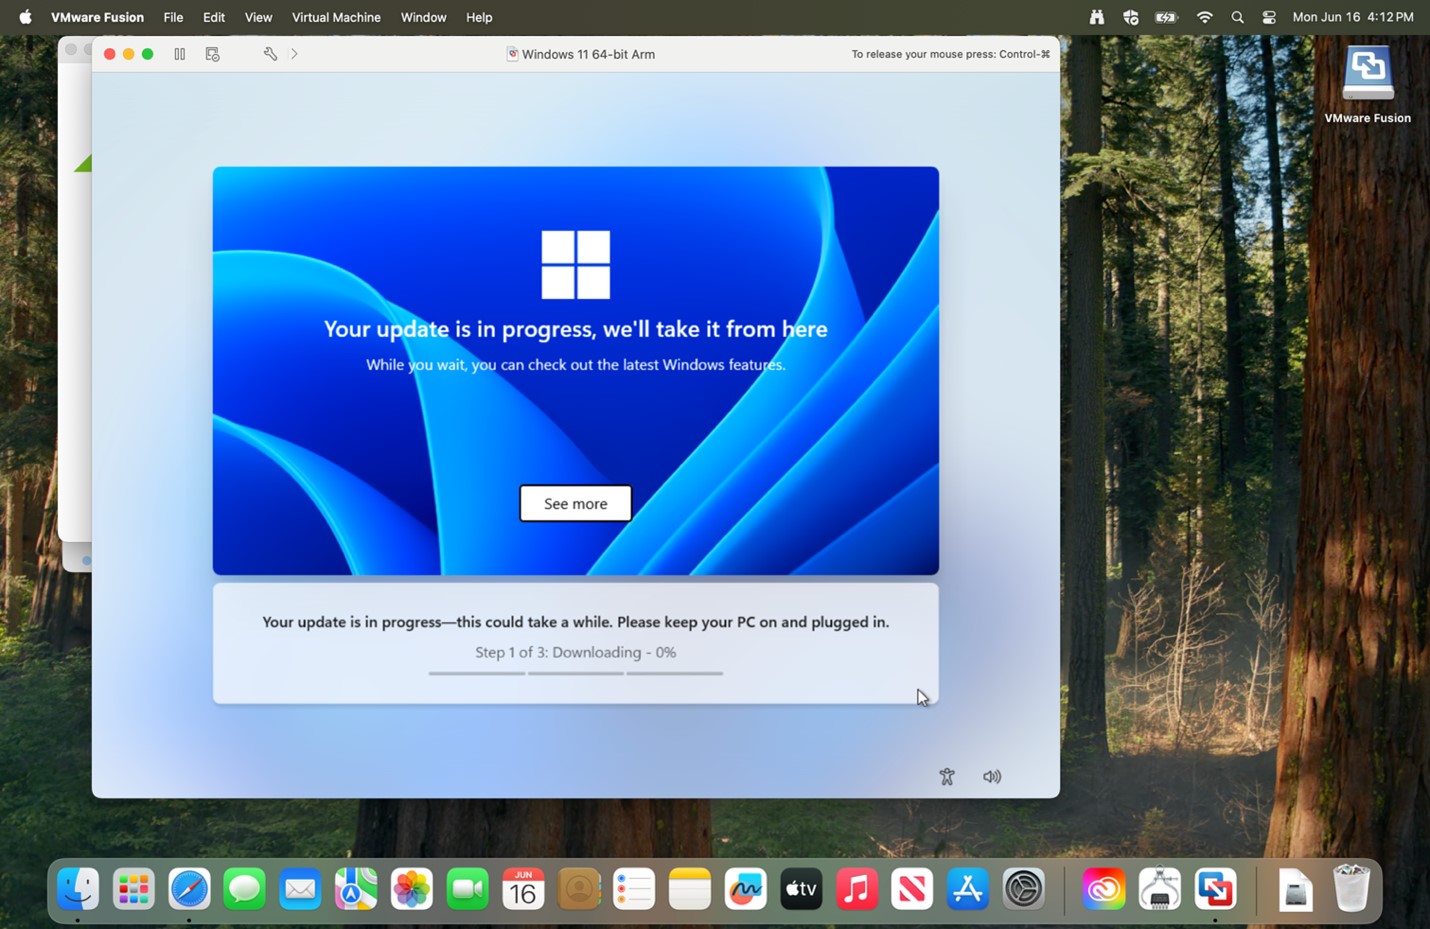
38. Allow time for updates to download.
|
 |
|
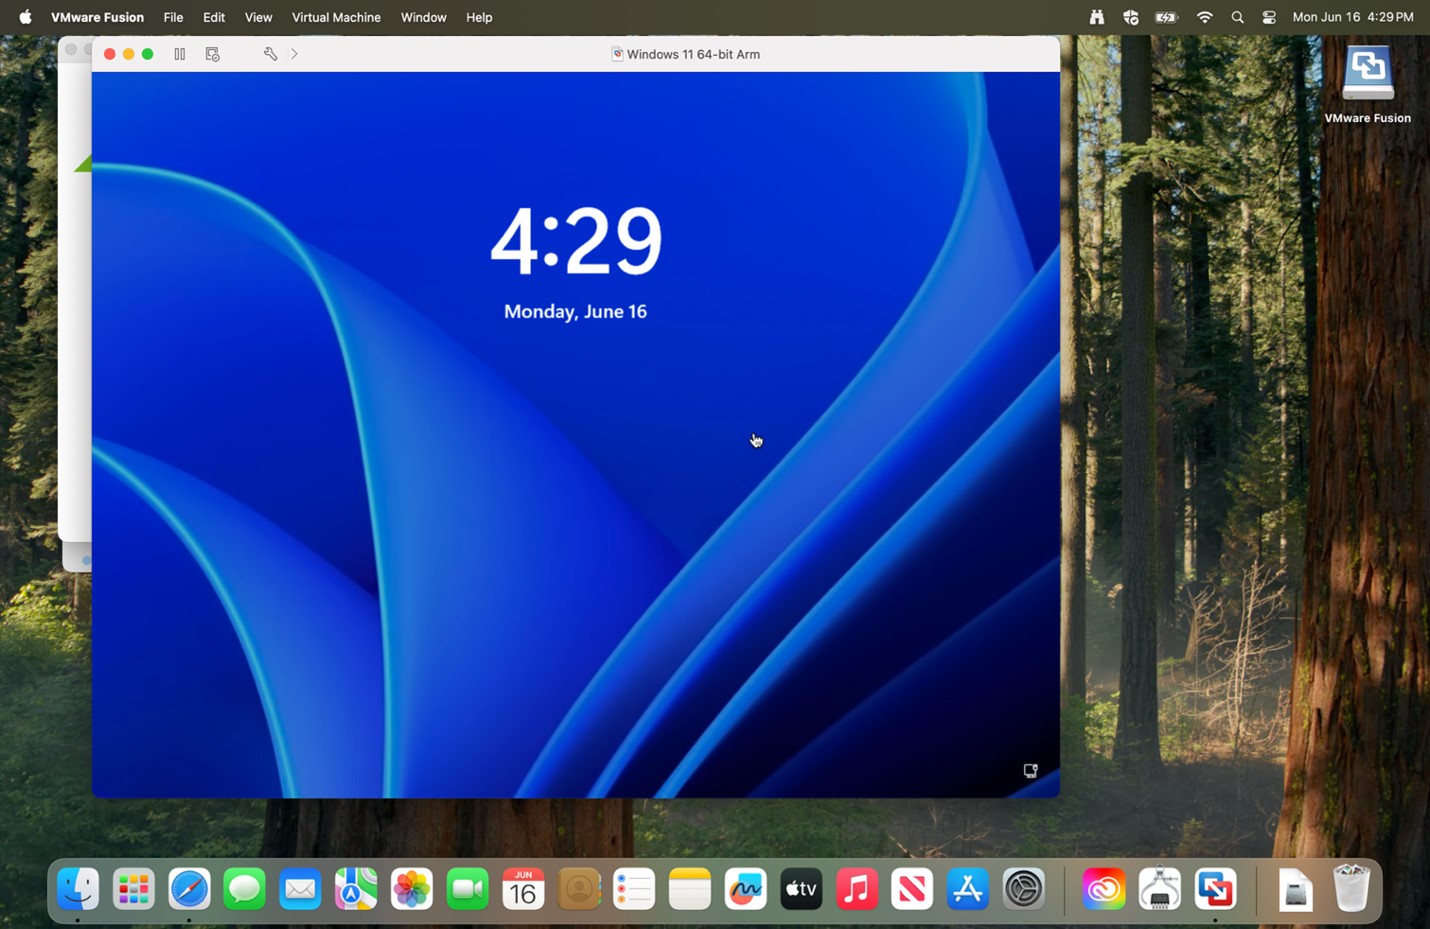
39. Click the screen and enter the password for your login.
|
 |
|
40. Go to your taskbar and select Edge or setting and select Edge.
|
 |
|
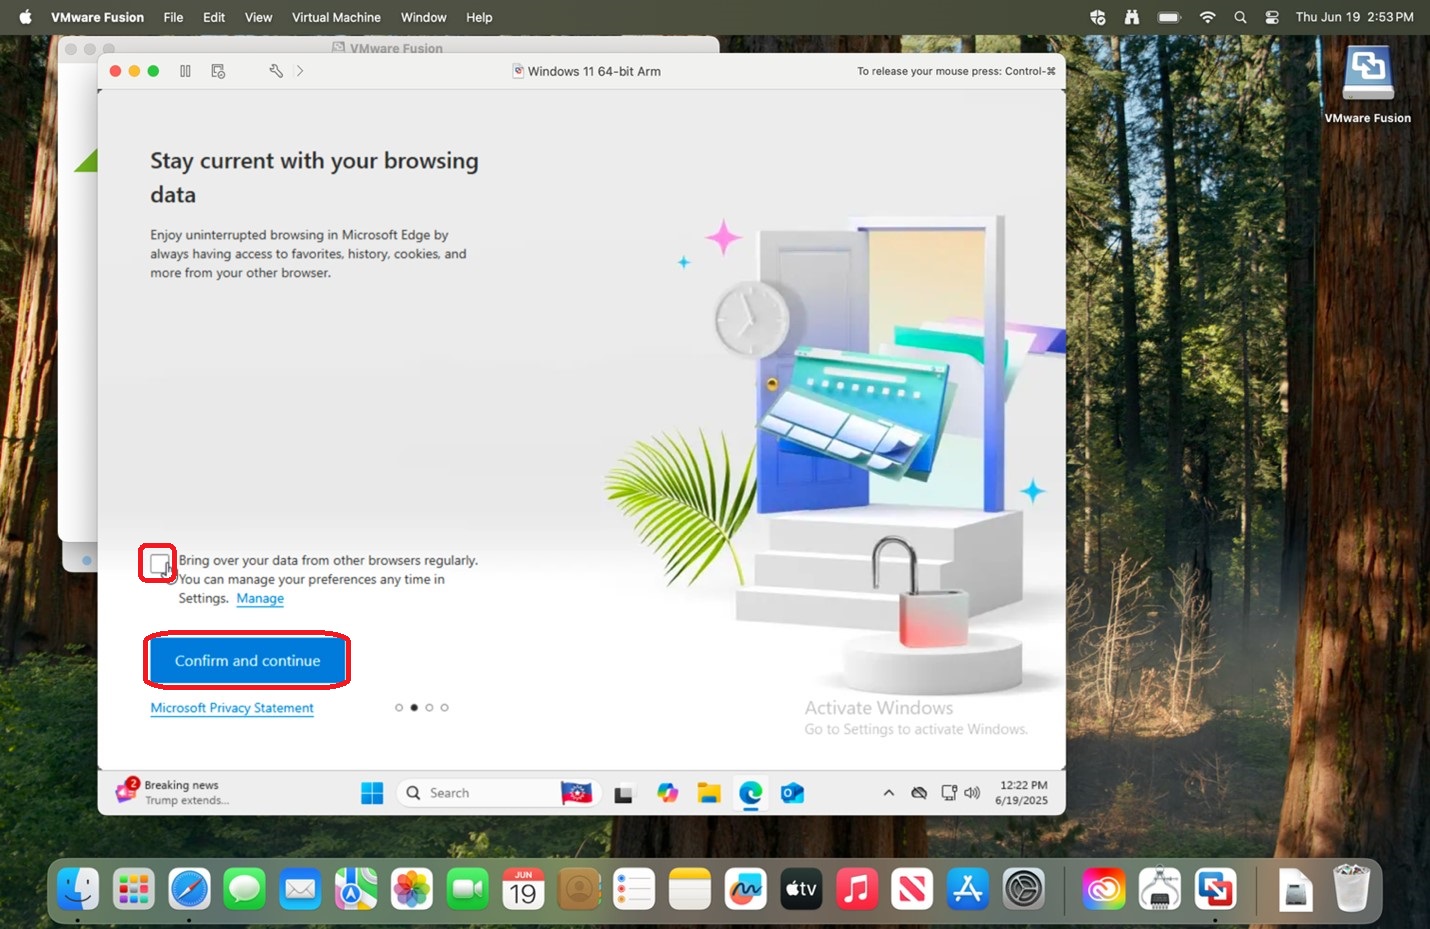
41. Click Start without your data and uncheck Bring over your data and click Confirm and continue.
|
 |
|
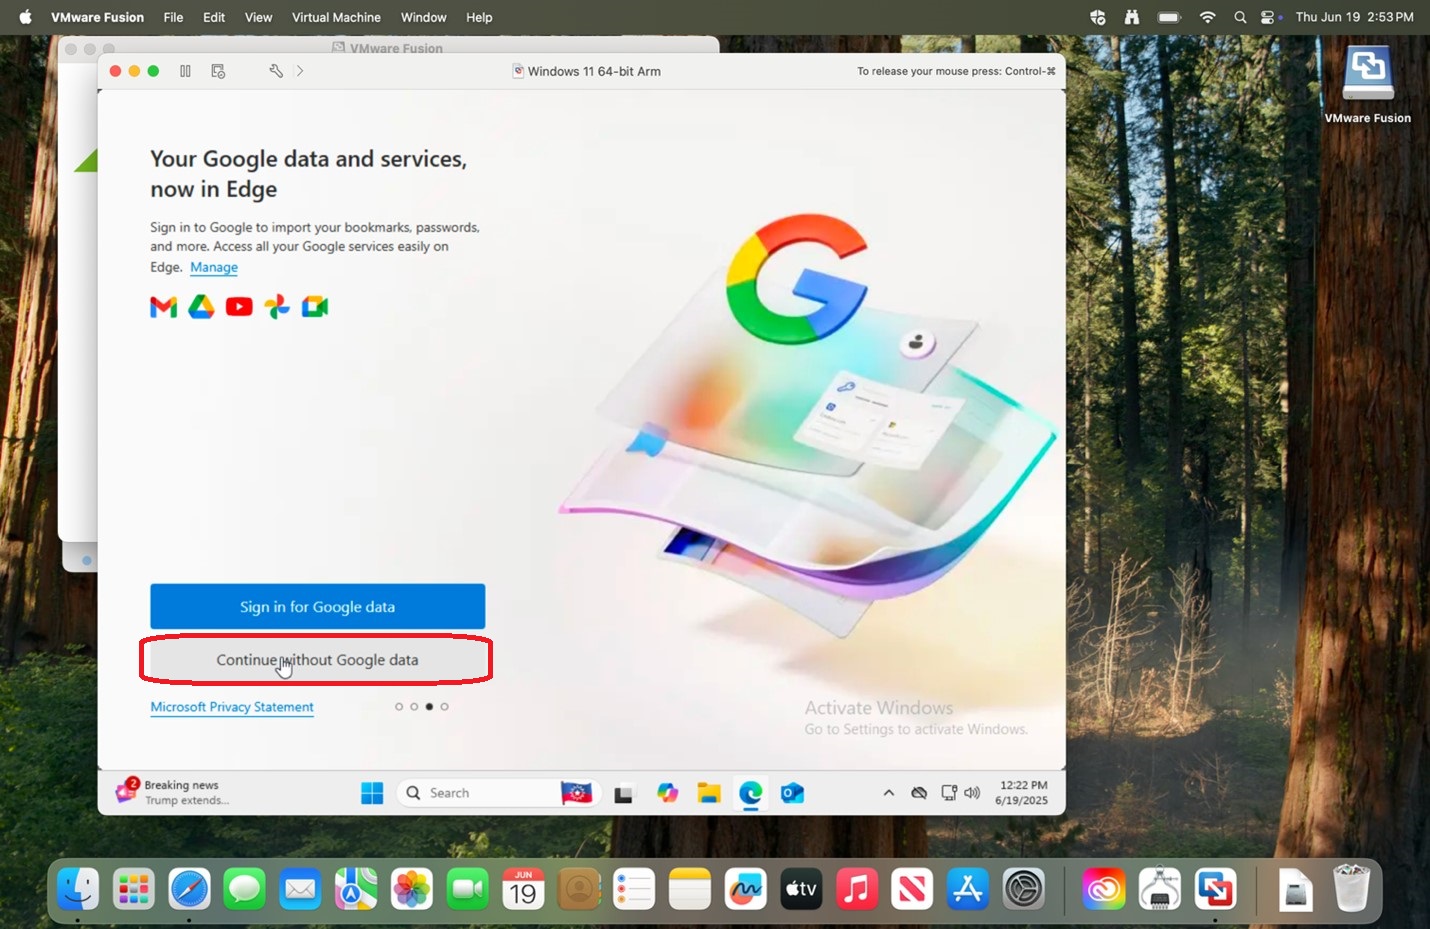
41. Click Continue without Google data.
|
 |
|
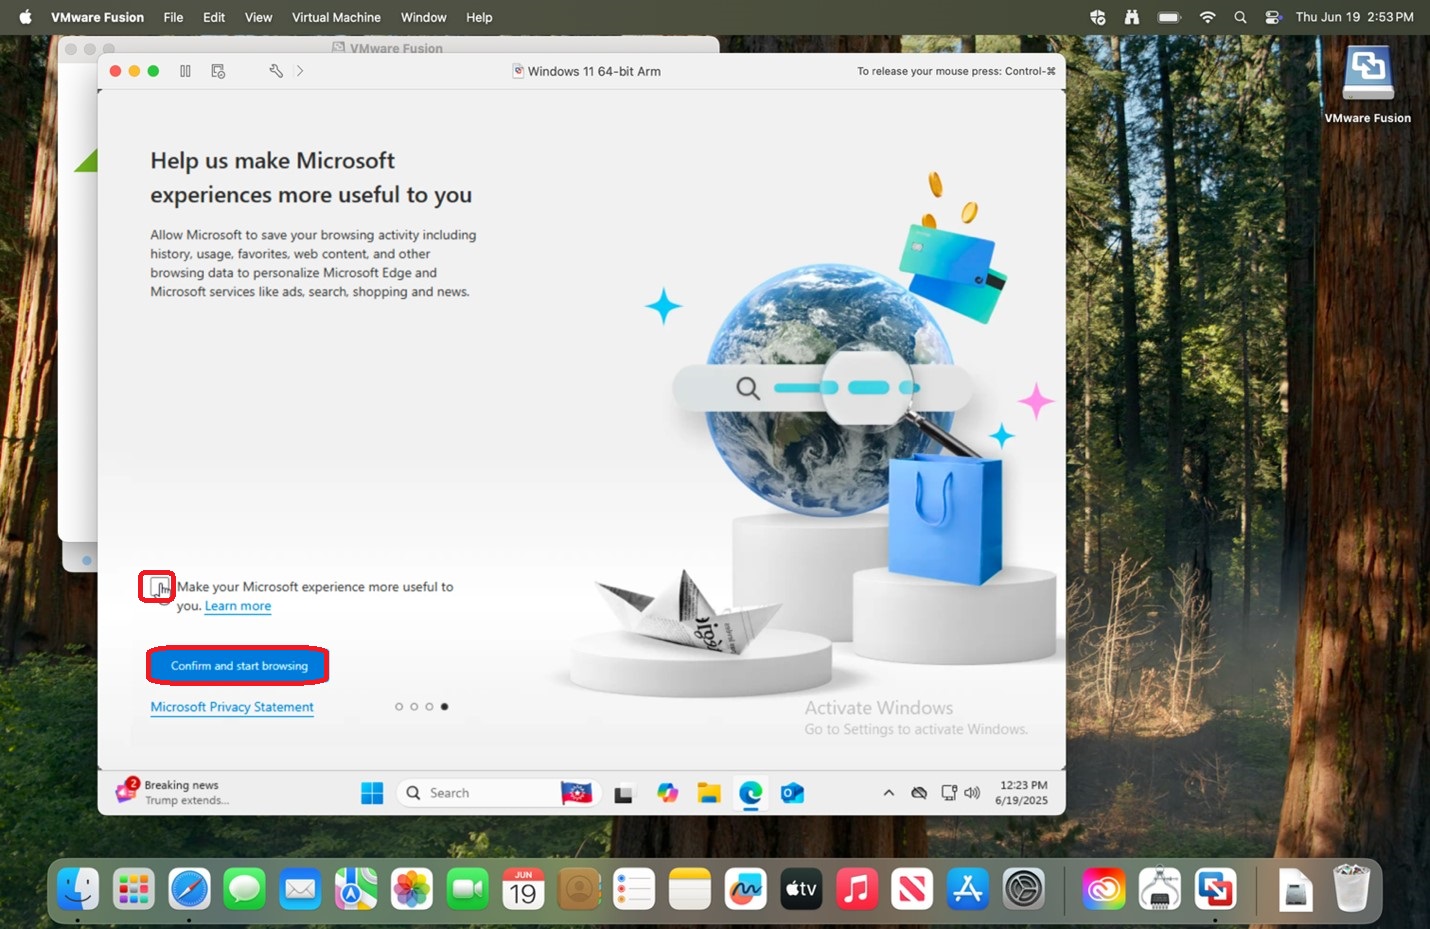
42. Uncheck Make your Microsoft experience more useful to you and click Confirm and start browsing.
|
 |
|
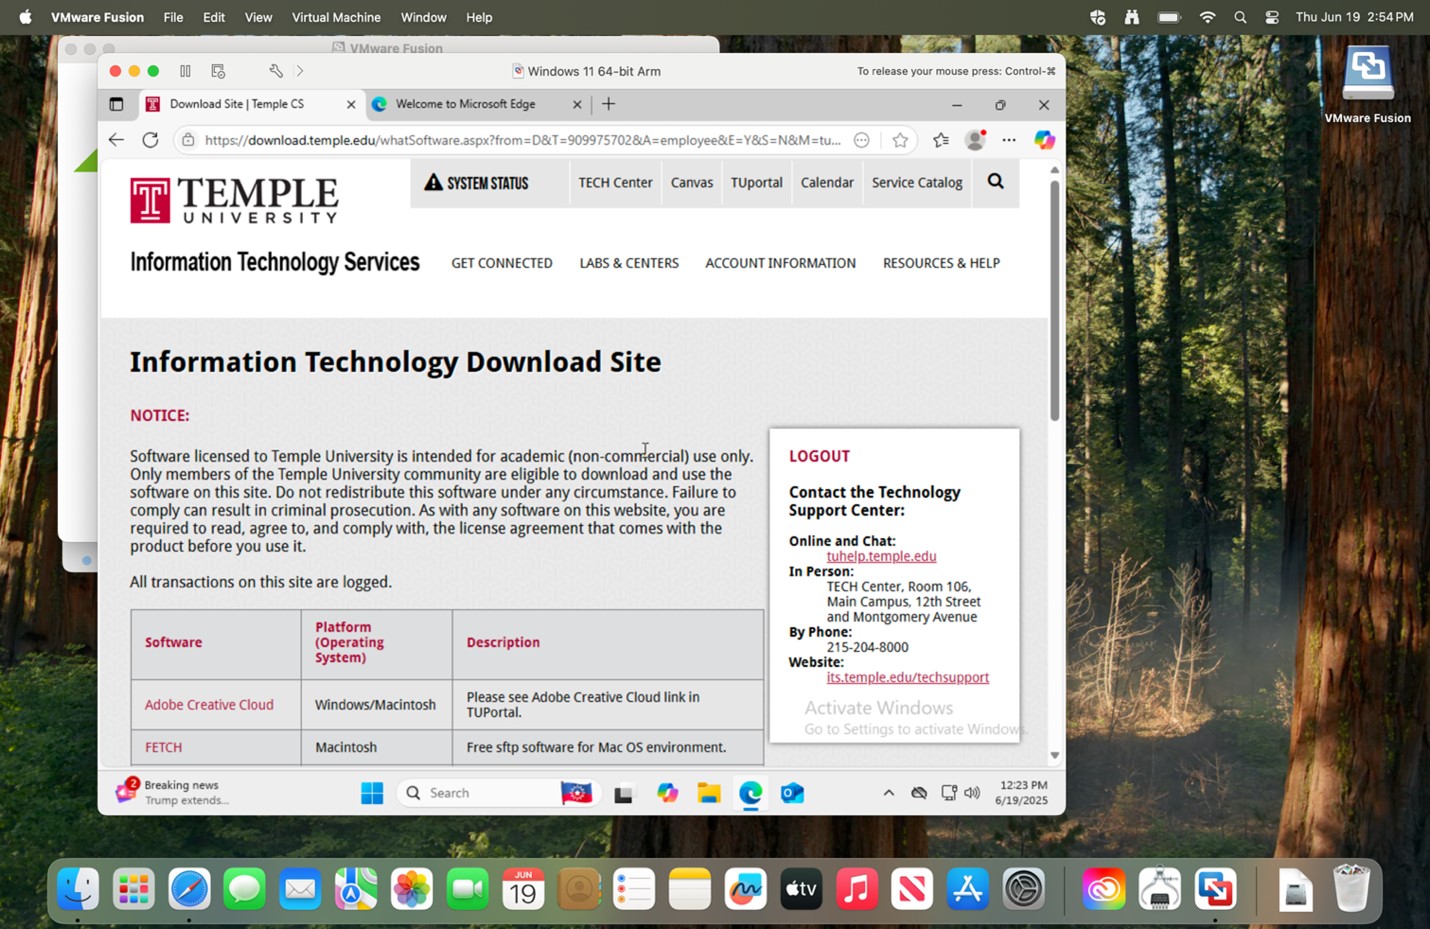
43. Go to download.temple.edu and login using your accessnet username and password.
|
|
|
44. Scroll down and select SAS.
|
|
|
45. Click I Agree.
|
|
|
46. Select Teaching and Research Use, enter CPH, and click Submit.
|
|
|
47. Click SAS 9.4 Recommended for Most Users.
|
|
|
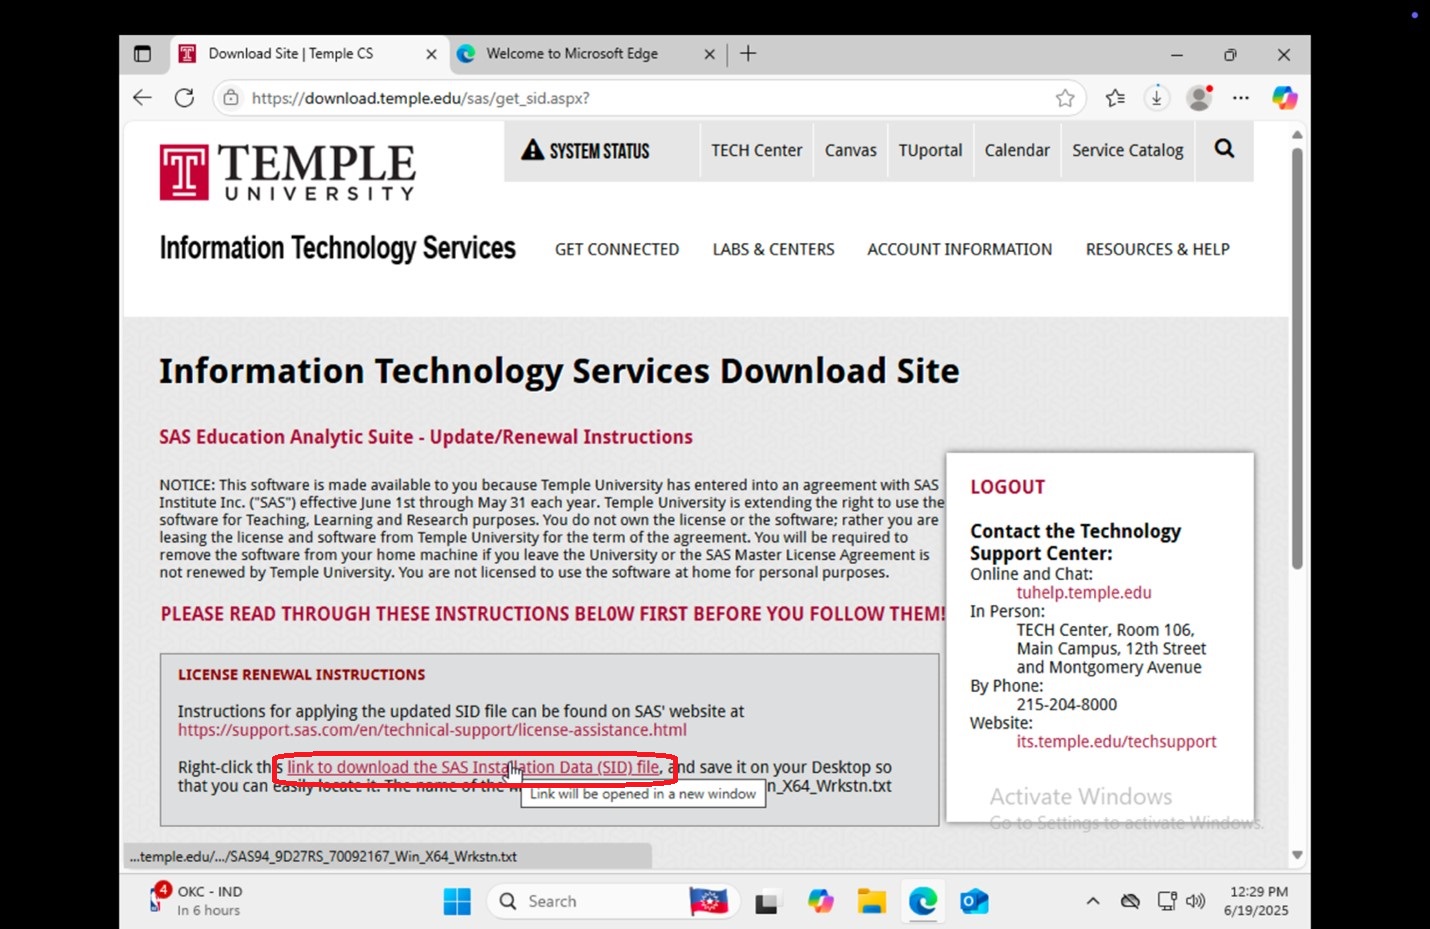
48. While it is downloading, click install a new license file.
|
|
|
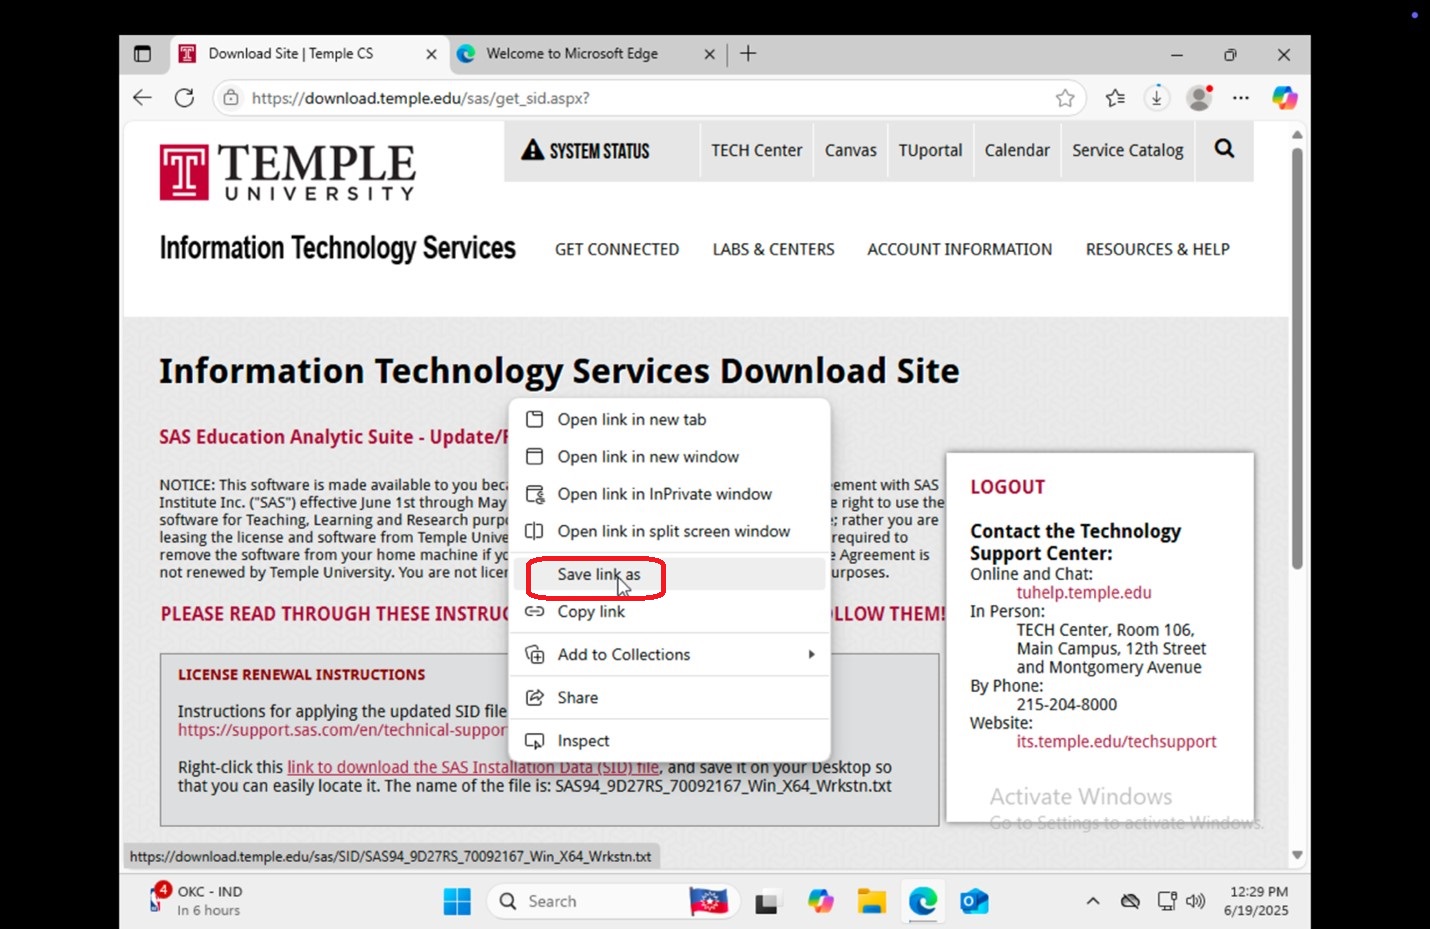
49. Right click or CTRL click link to download the SAS Installation Data (SID) file.
|
|
|
50. Select Save link as.
|
 |
|
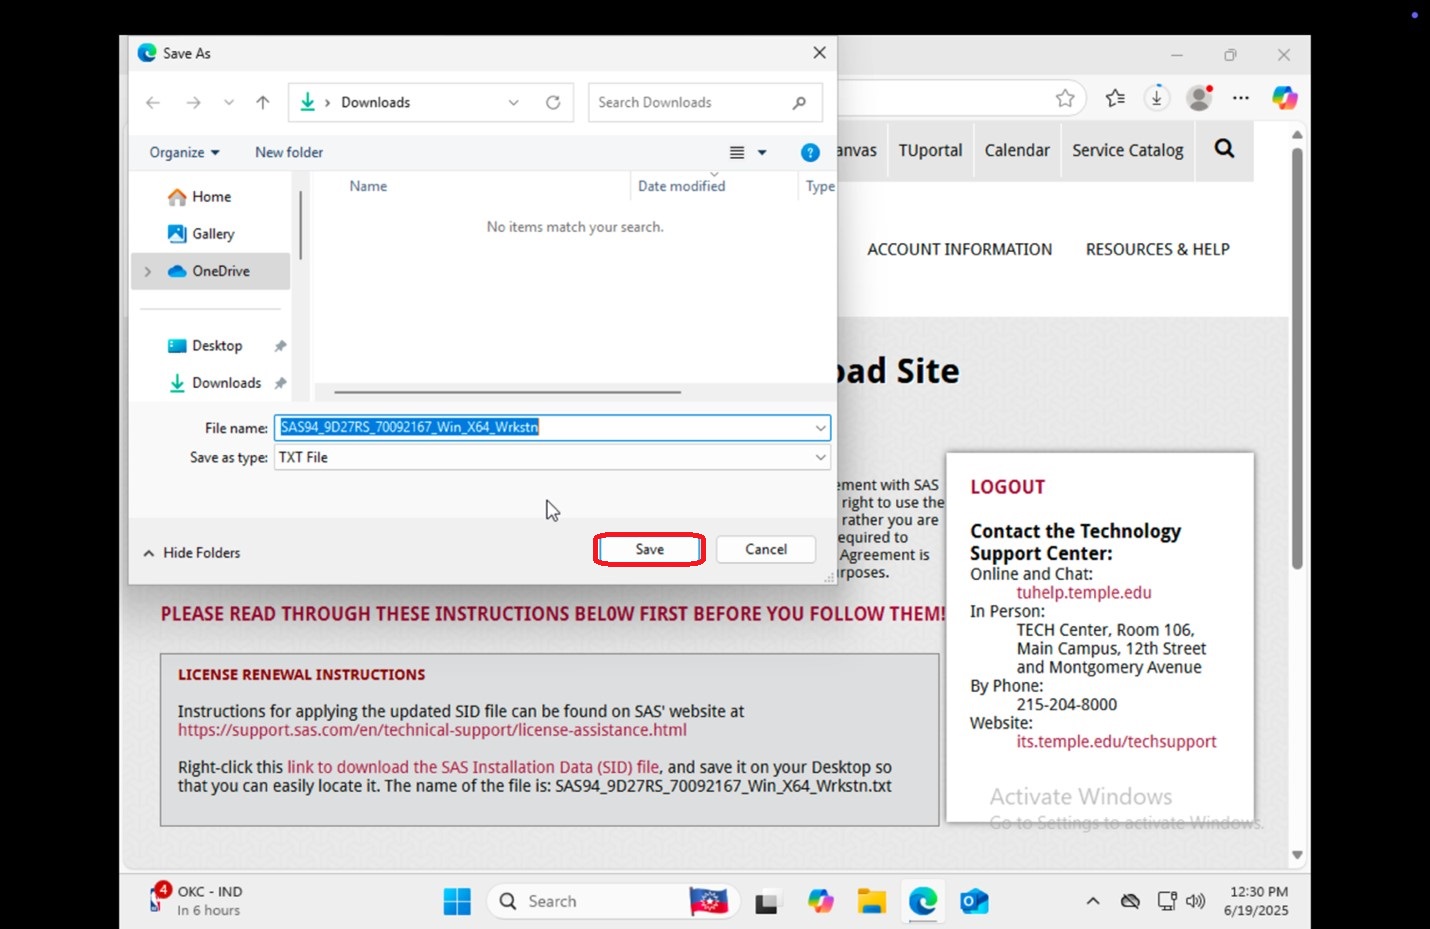
51. Click Save.
|
 |
|
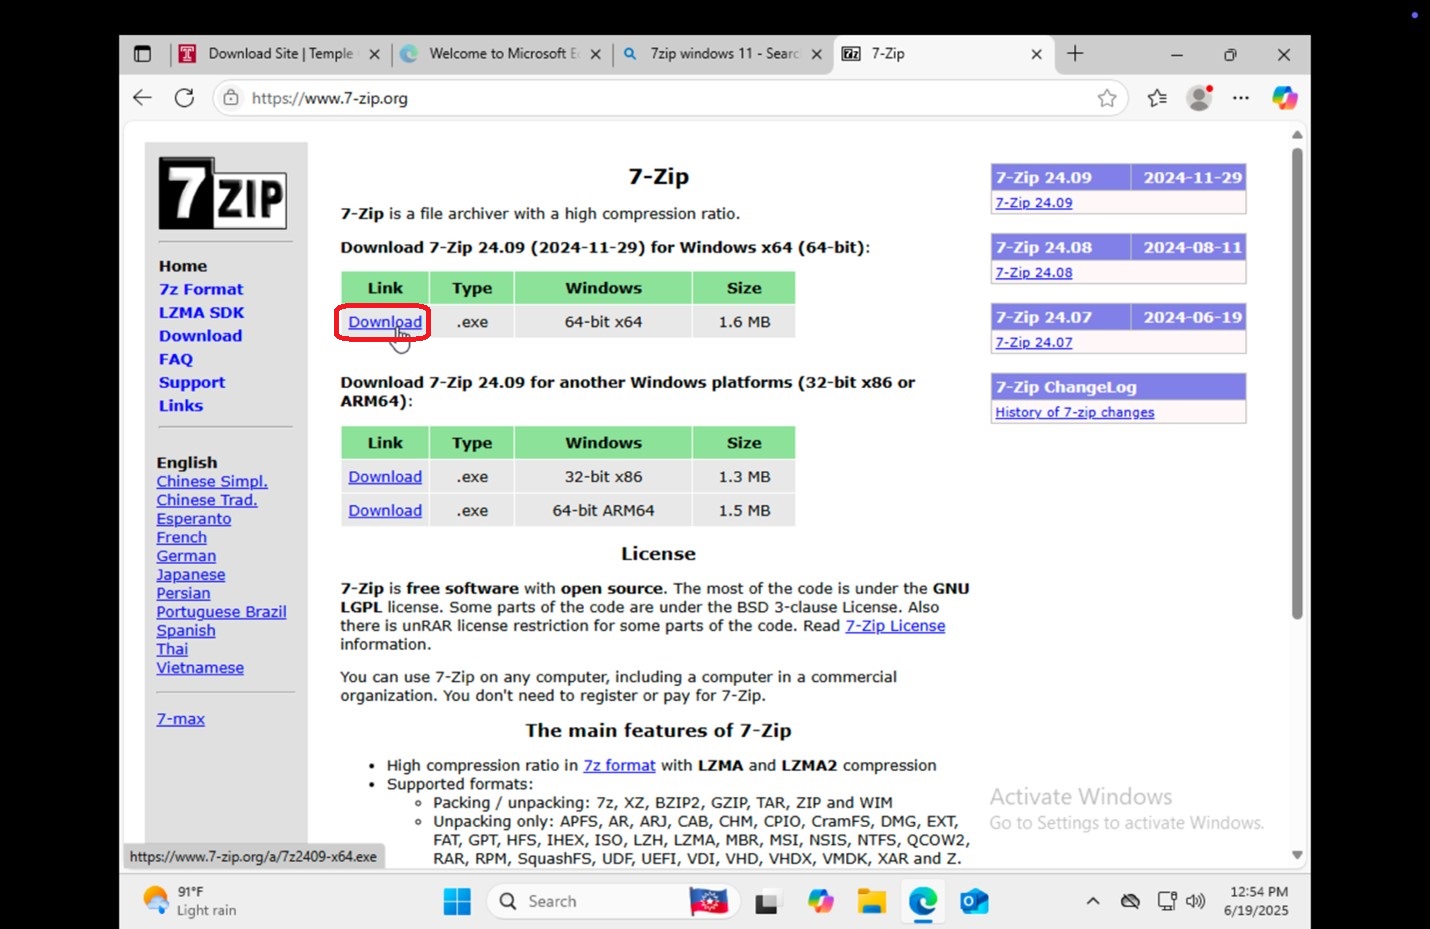
52. Google search 7zip windows 11 within the browser or go to www.7-zip.org.
|
 |
|
53. Select Download for .exe 64-bit x64 Windows.
|
 |
|
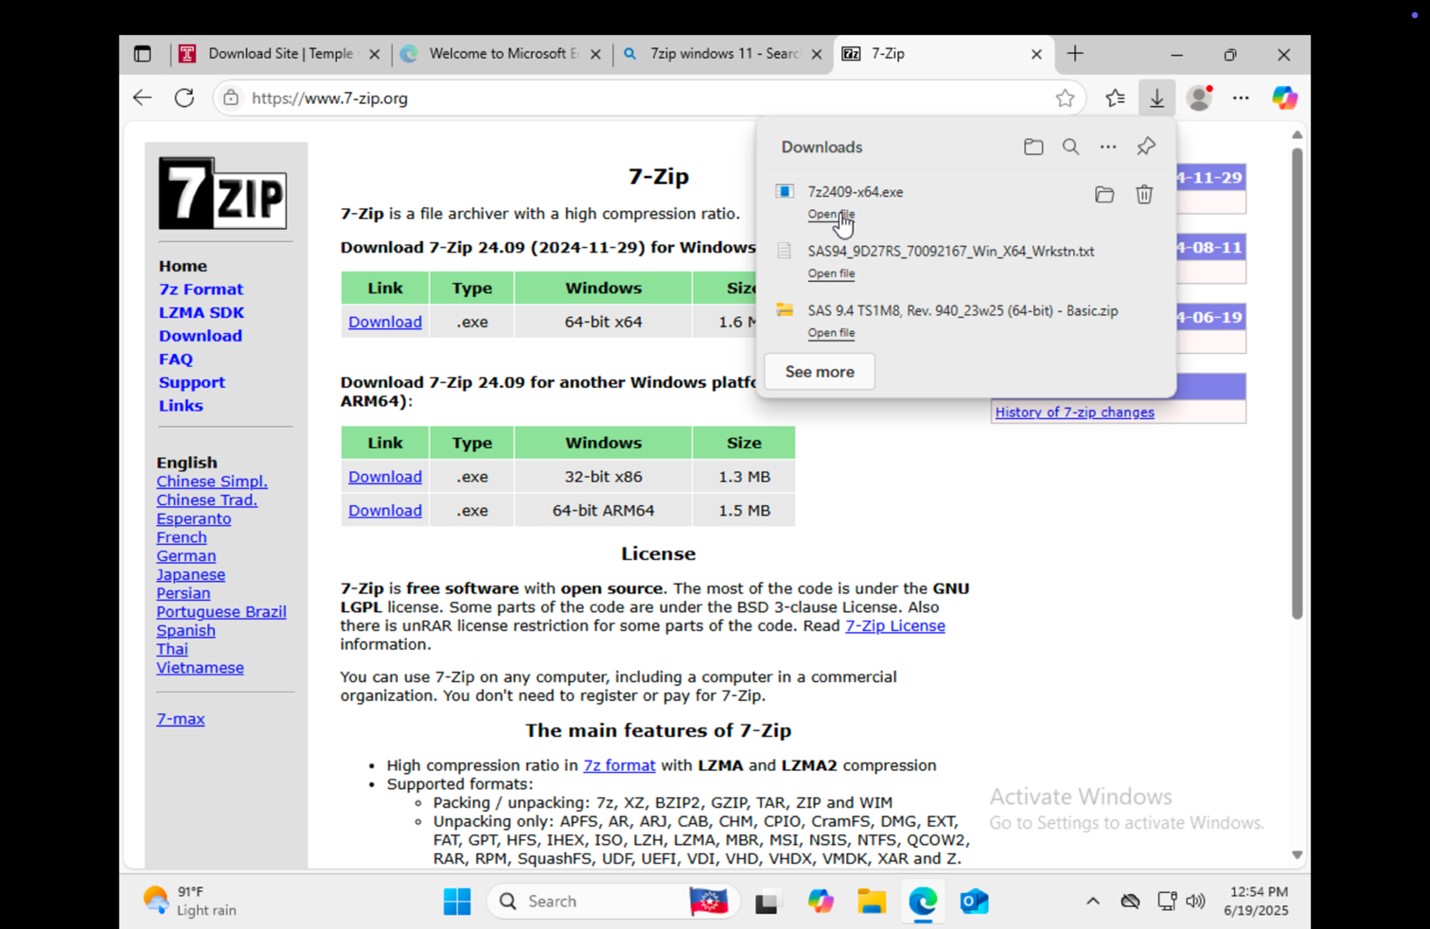
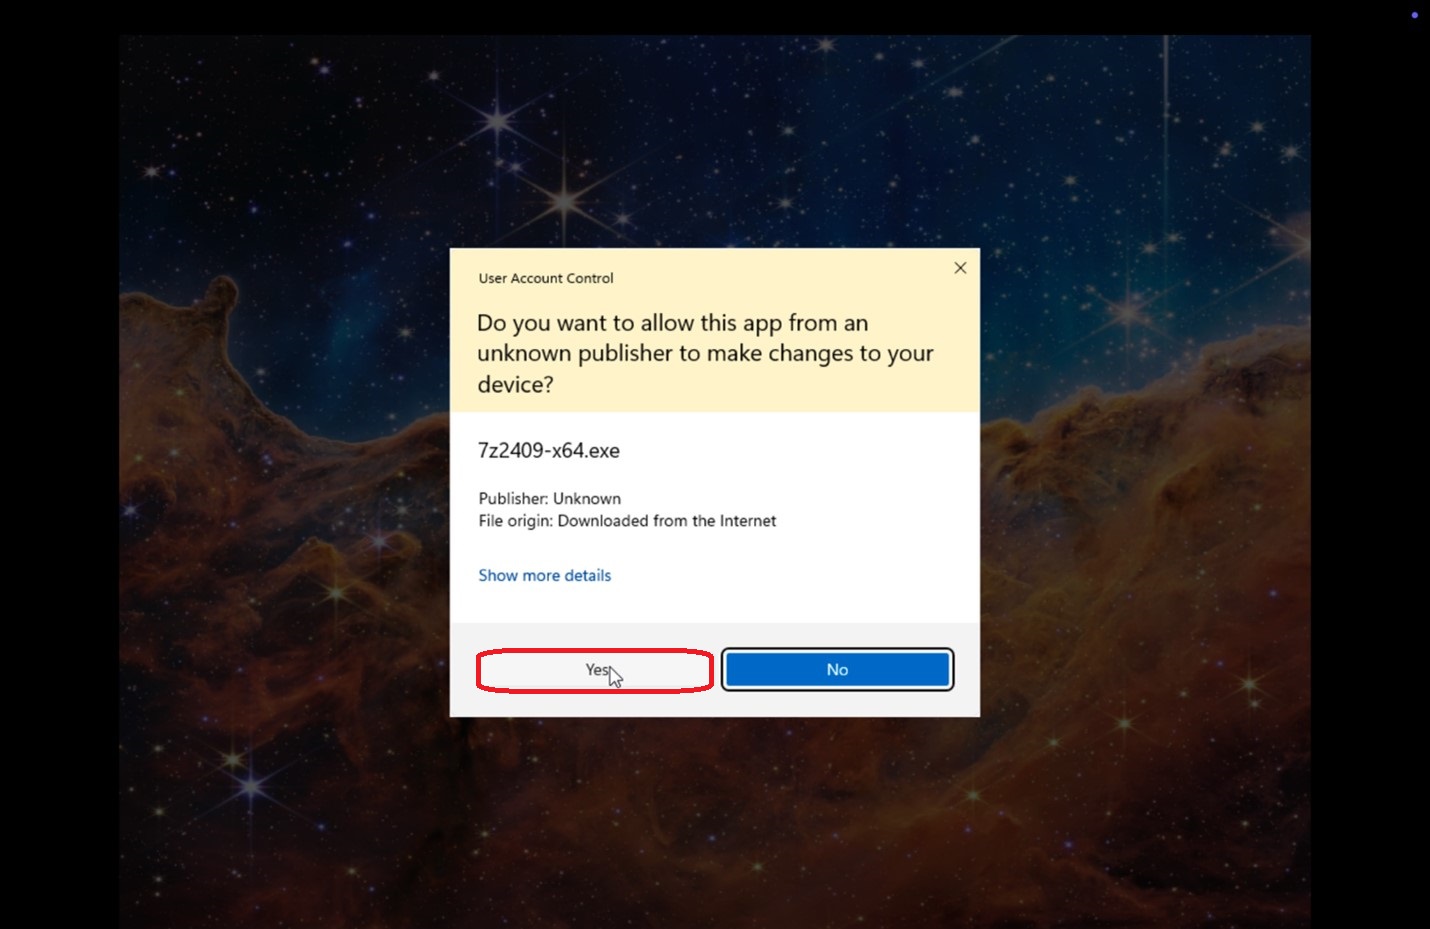
54. Open the newly downloaded file.
|
 |
|
55. Click Yes.
|
 |
|
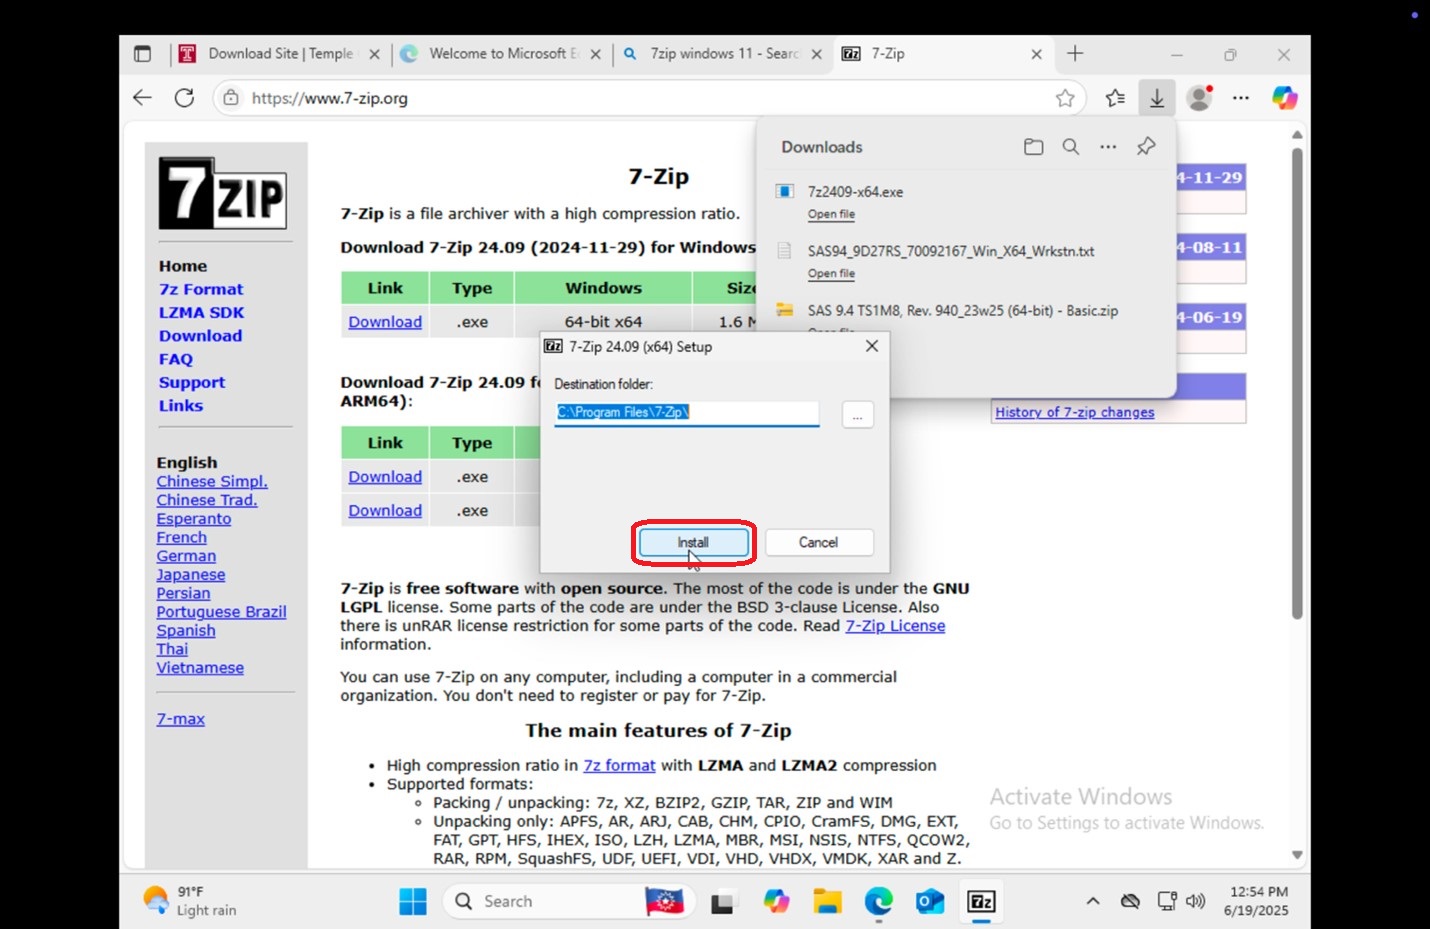
56. Click Install.
|
 |
|
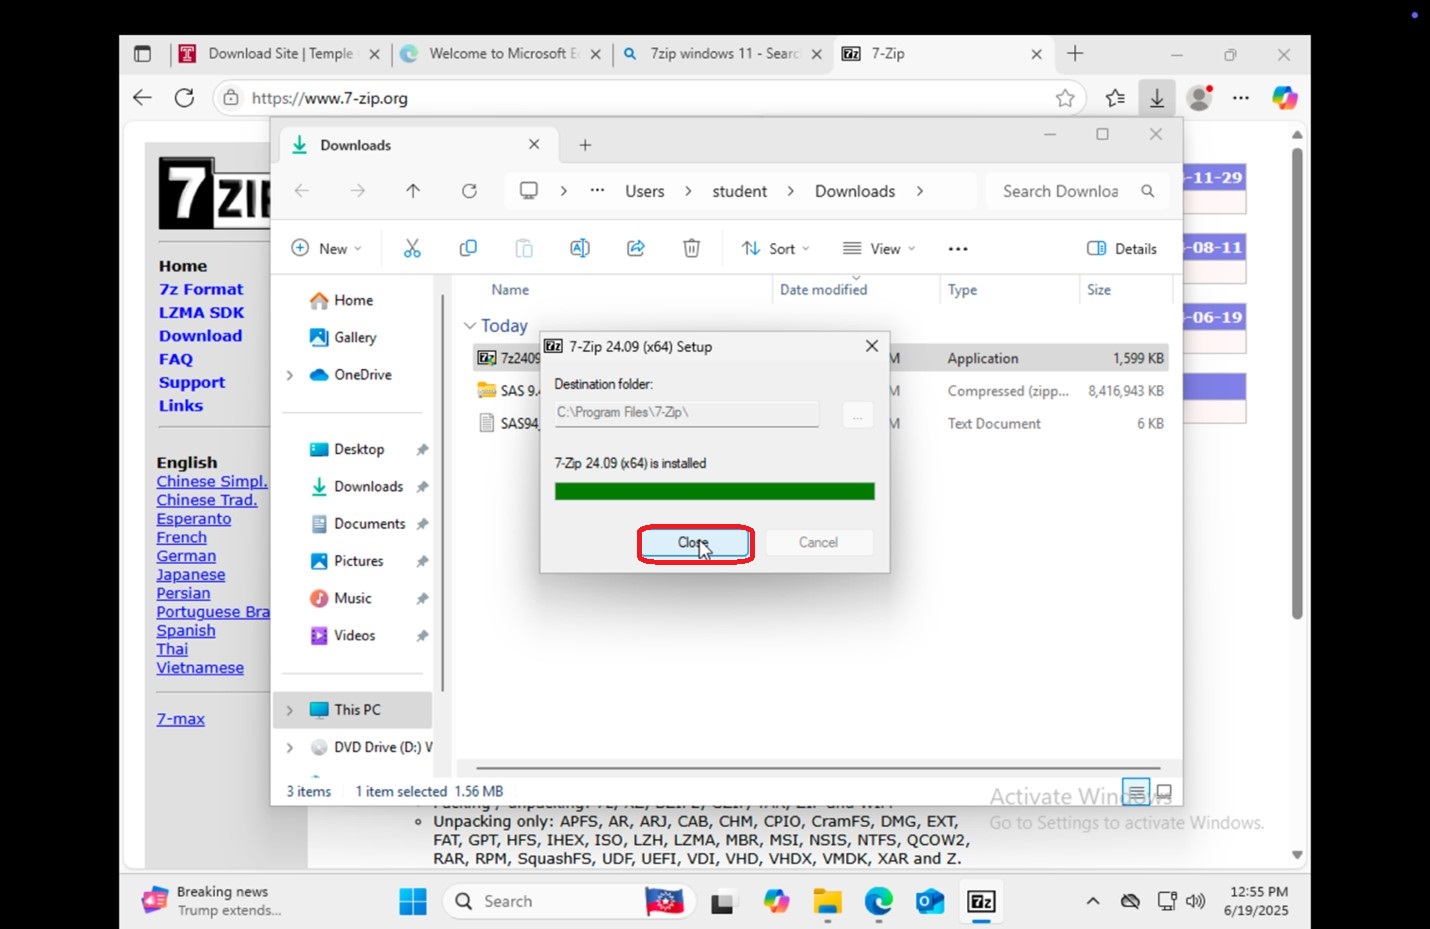
57. Click Close. |
 |
|
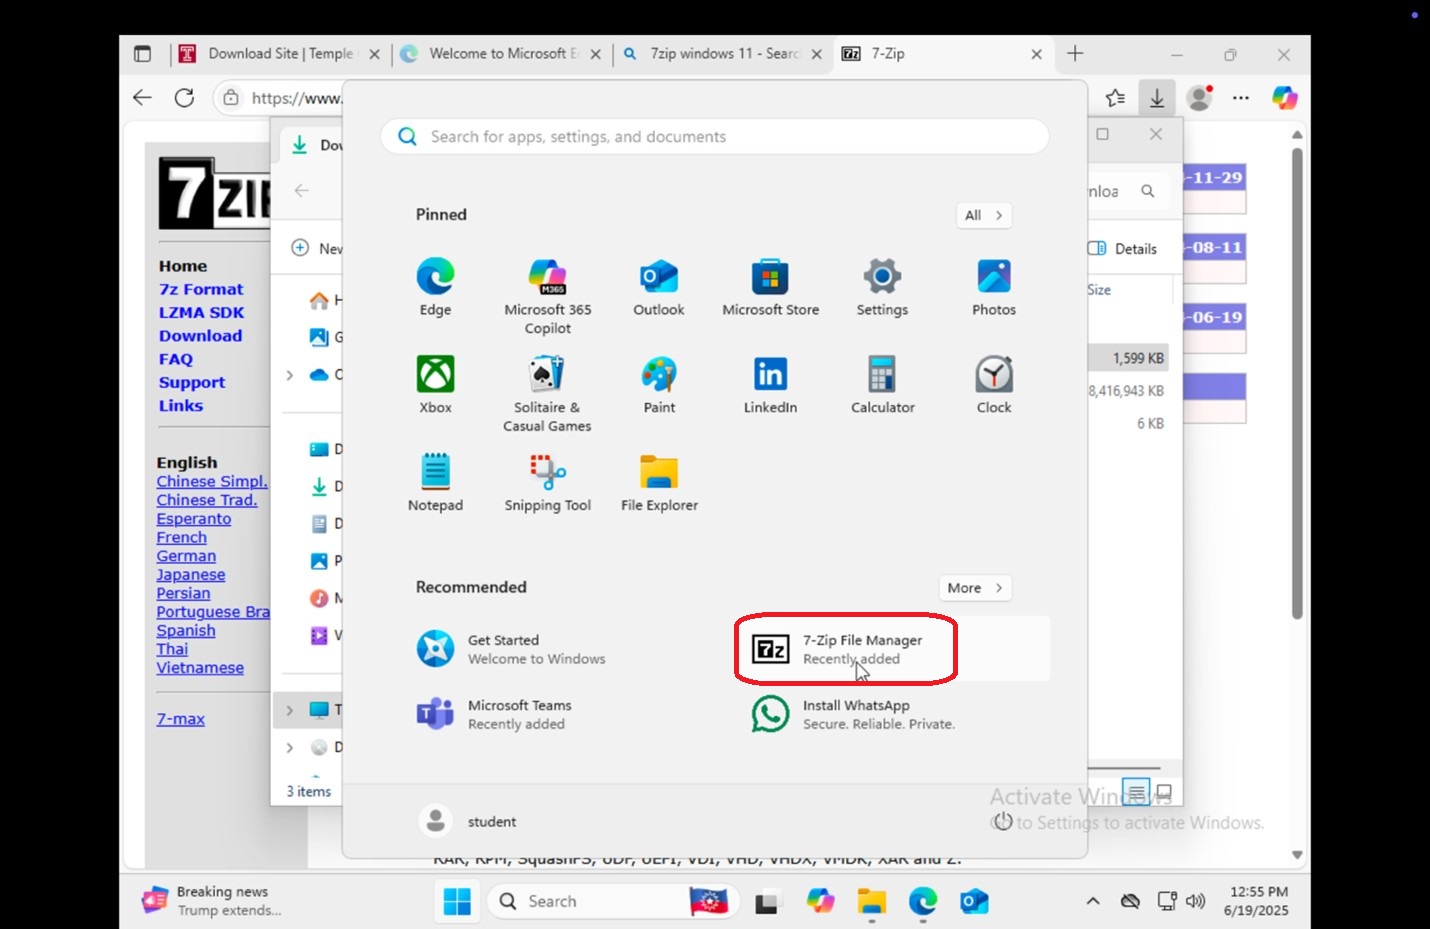
58. Open 7-Zip File Manager. |
 |
|
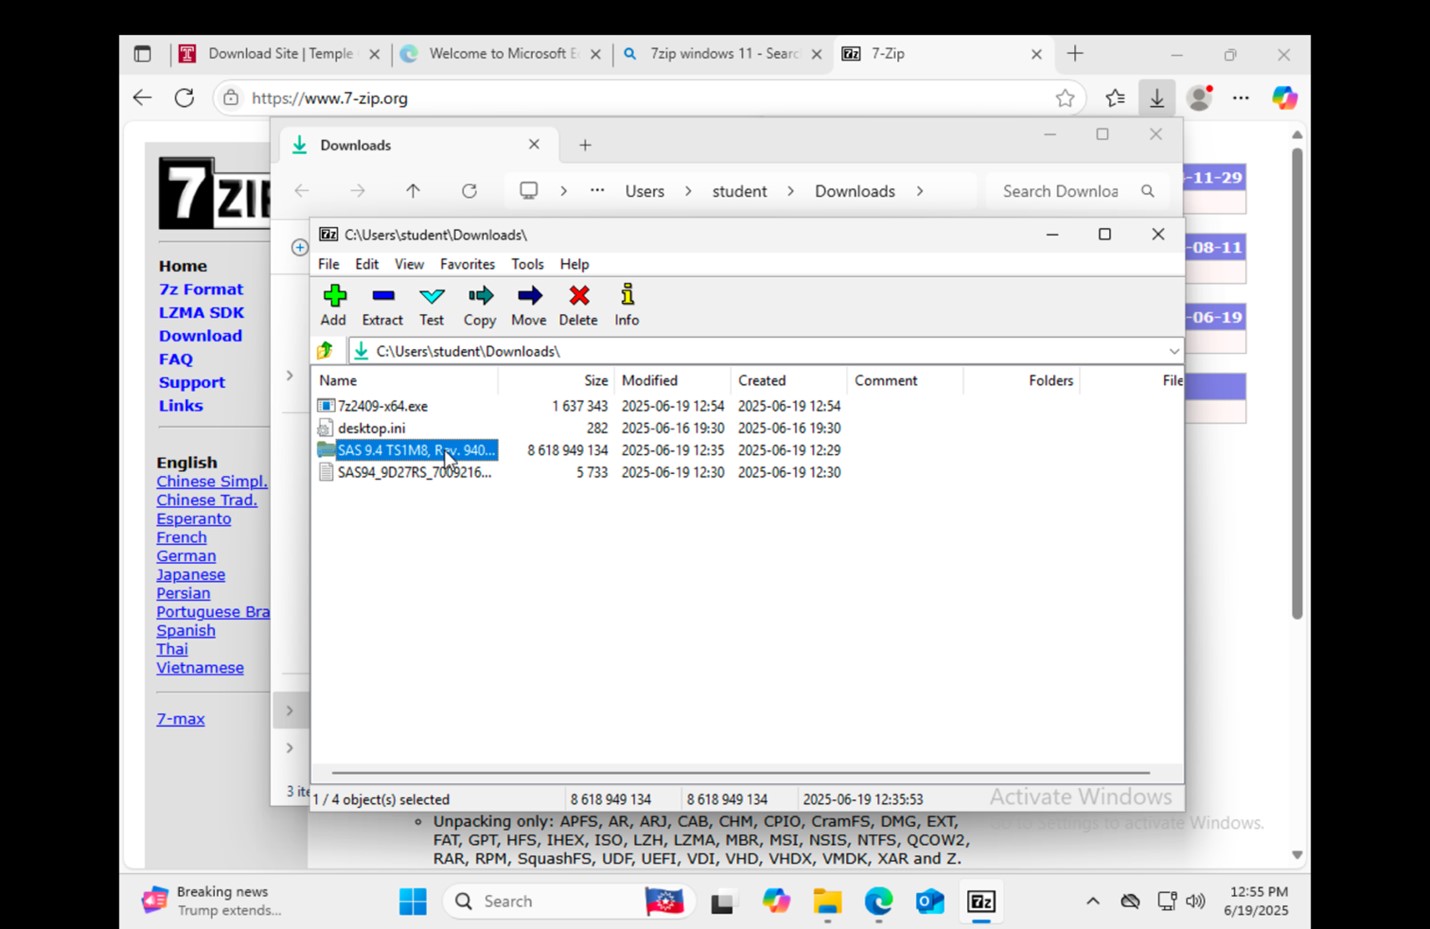
59. Navigate to the Downloads folder. |
 |
|
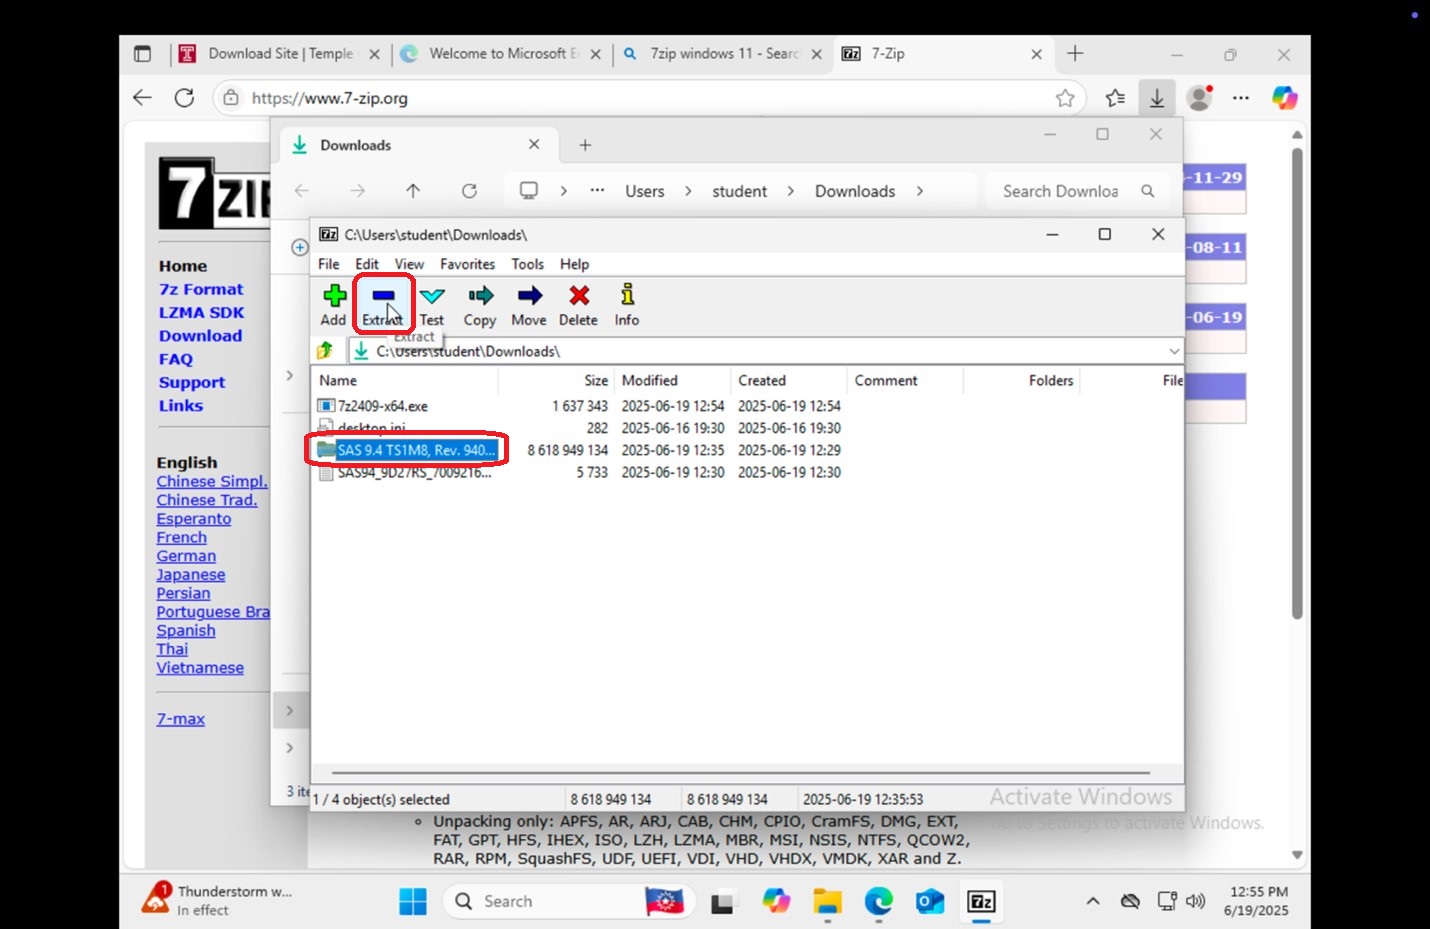
60. Select SAS 9.4 and click Extract. |
 |
|
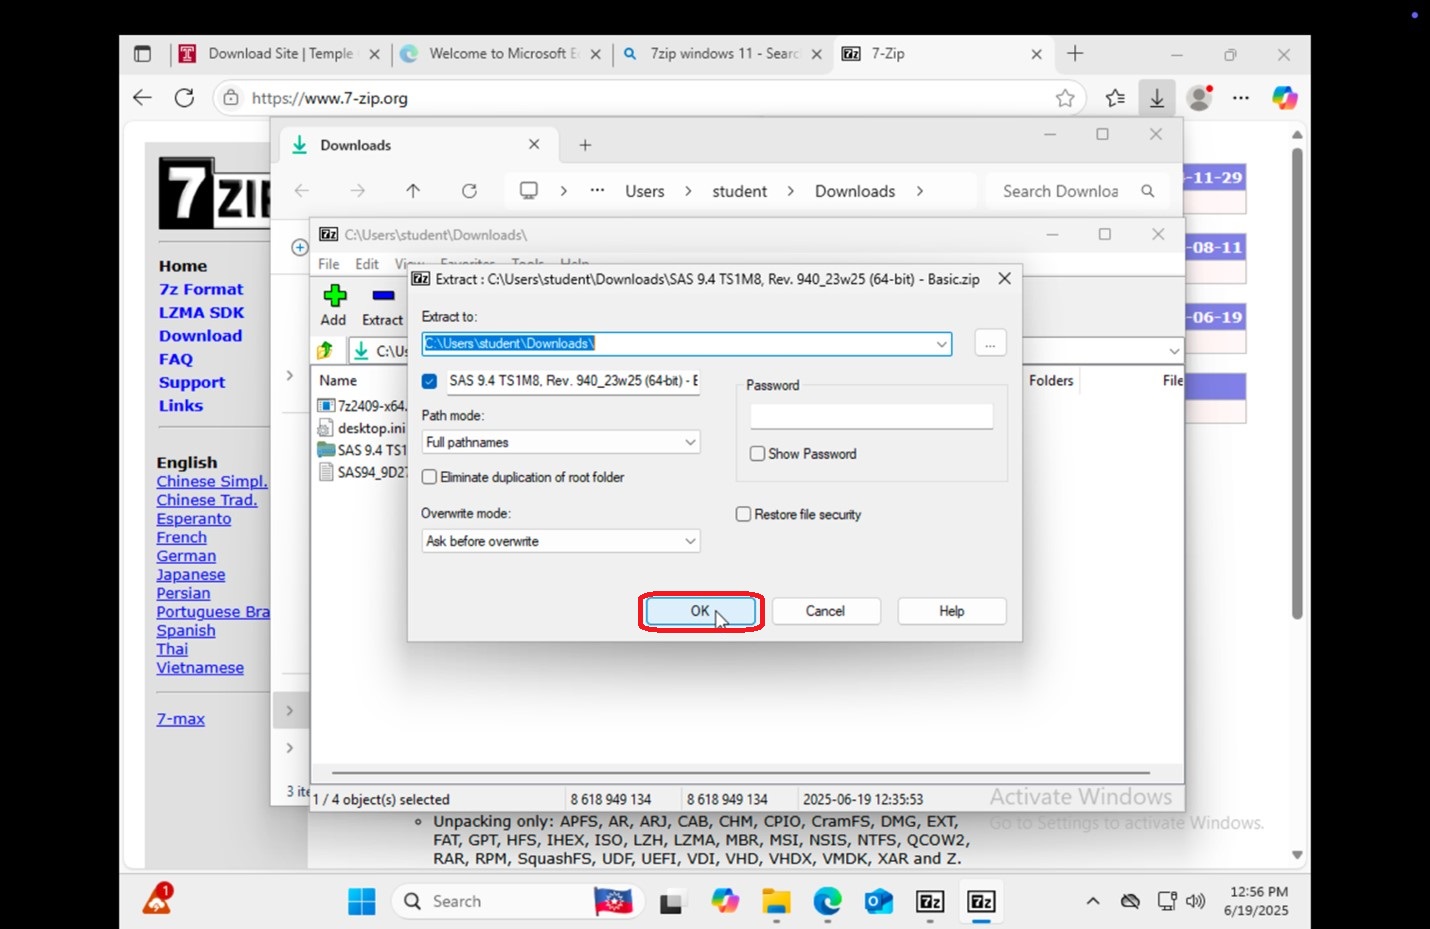
61. Click OK.
|
 |
|
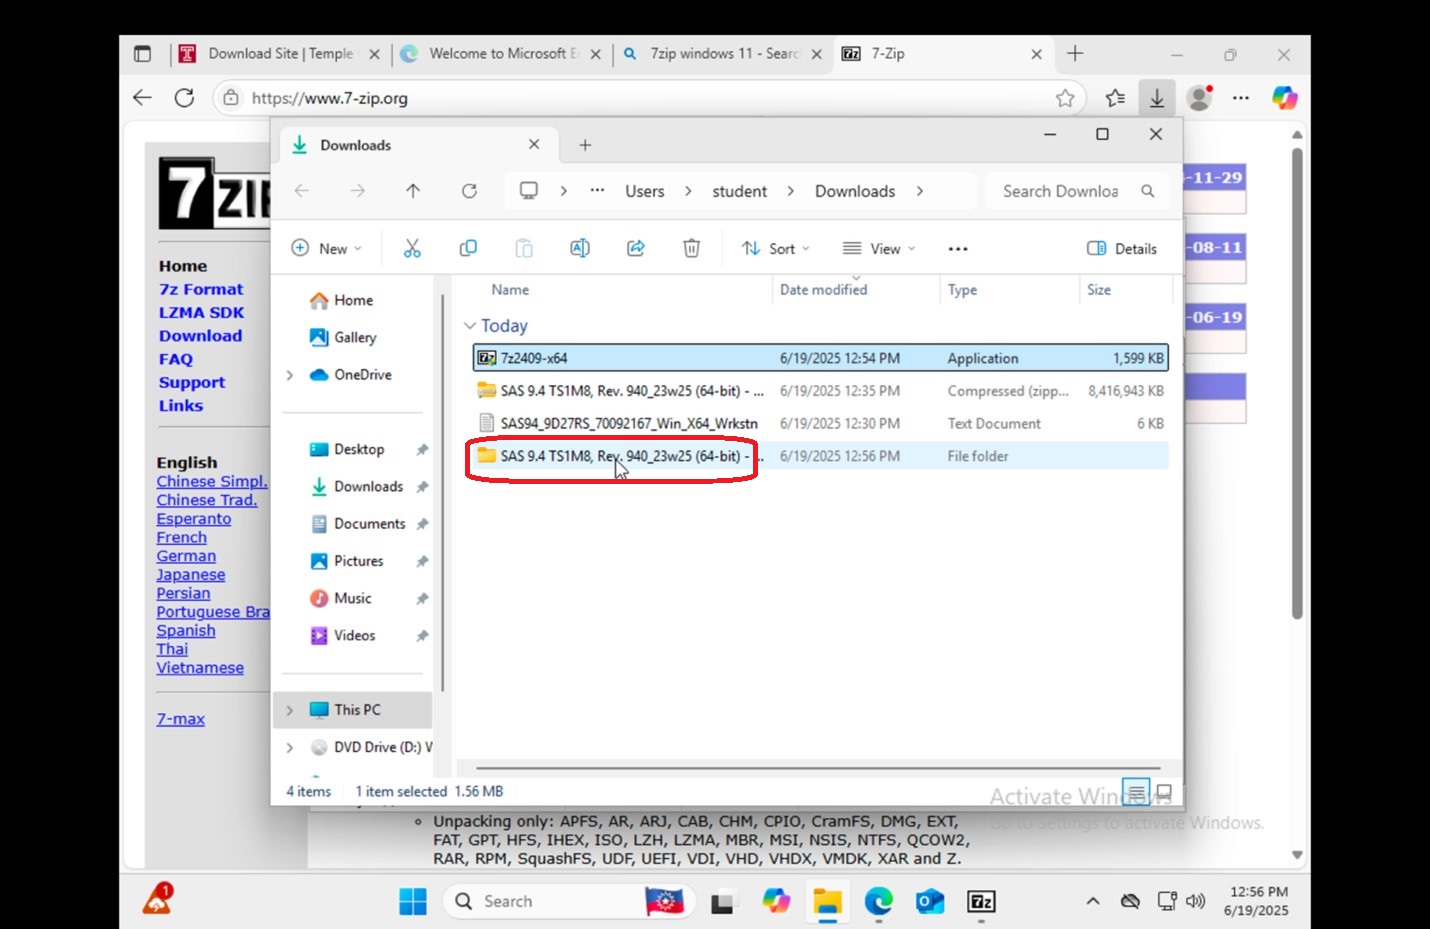
62. Once it is finished extracting, go to the Downloads folder and open the SAS 9.4 folder. |
 |
|
63. Open the SAS 9.4 folder.
|
 |
|
64. Click and open setup.
|
 |
|
65. Click Yes.
|
 |
|
66. Click OK.
|
 |
|
67. Click Next.
|
 |
|
68. Click Next.
|
 |
|
69. Click Next.
|
 |
|
70. Click Next.
|
 |
|
71. Click Next.
|
 |
|
72. Click Next.
|
 |
|
73. Click Browse.
|
 |
|
74. Go to the Downloads folder.
|
 |
|
75. Click on the SAS file and Open.
|
 |
|
76. Click Next.
|
 |
|
77. Click Next.
|
 |
|
78. Click Next.
|
 |
|
79. Allow time to download and click Next.
|
 |
|
80. Click Start.
|
 |
|
81. Click Next.
|
 |
|
82. Click Finish.
|
 |
|
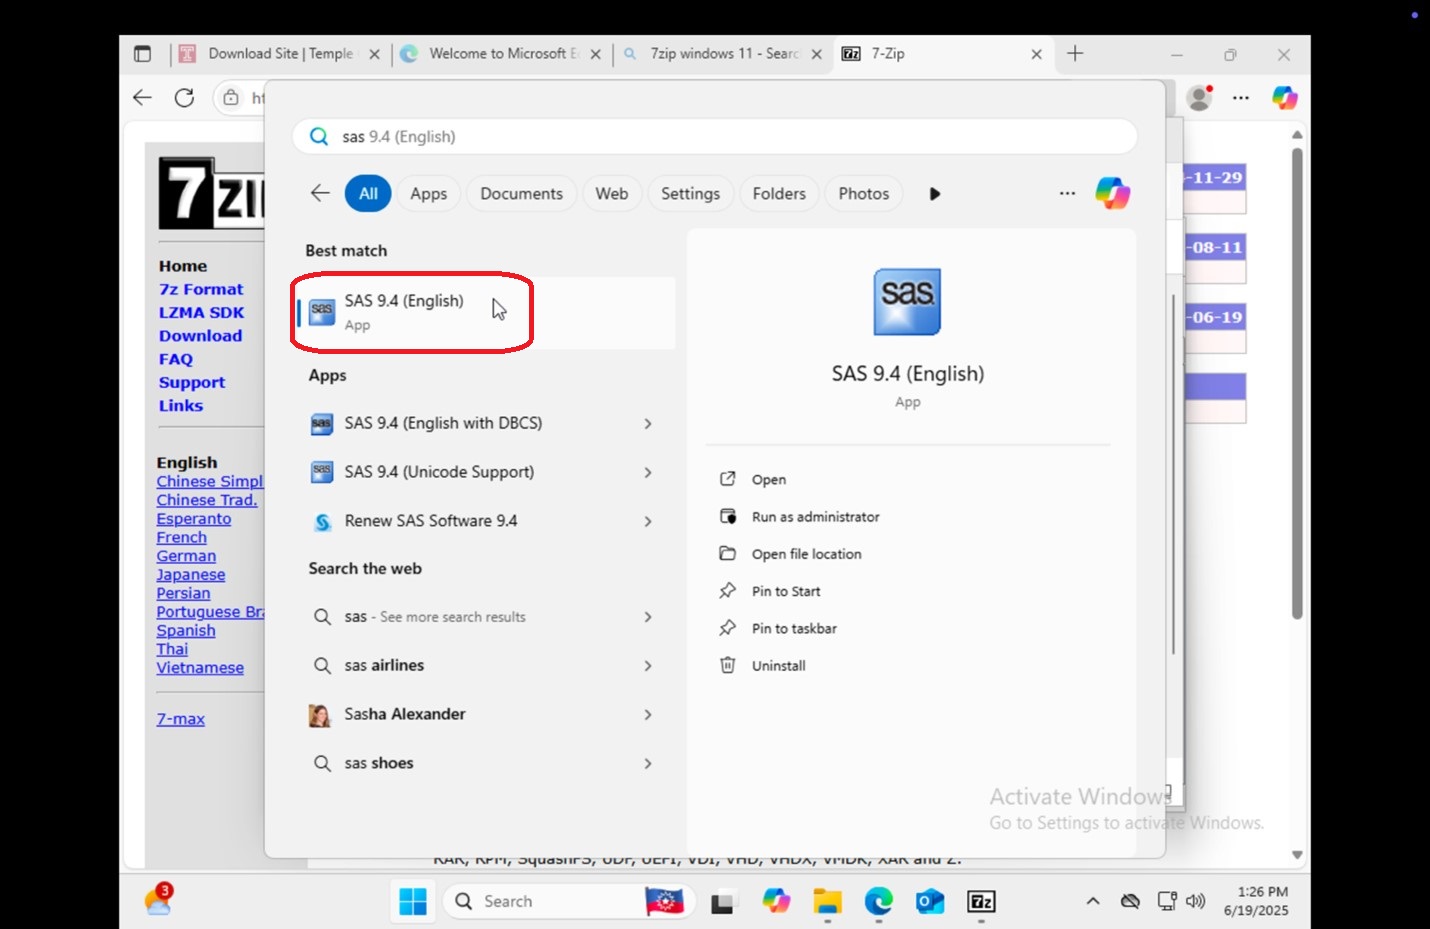
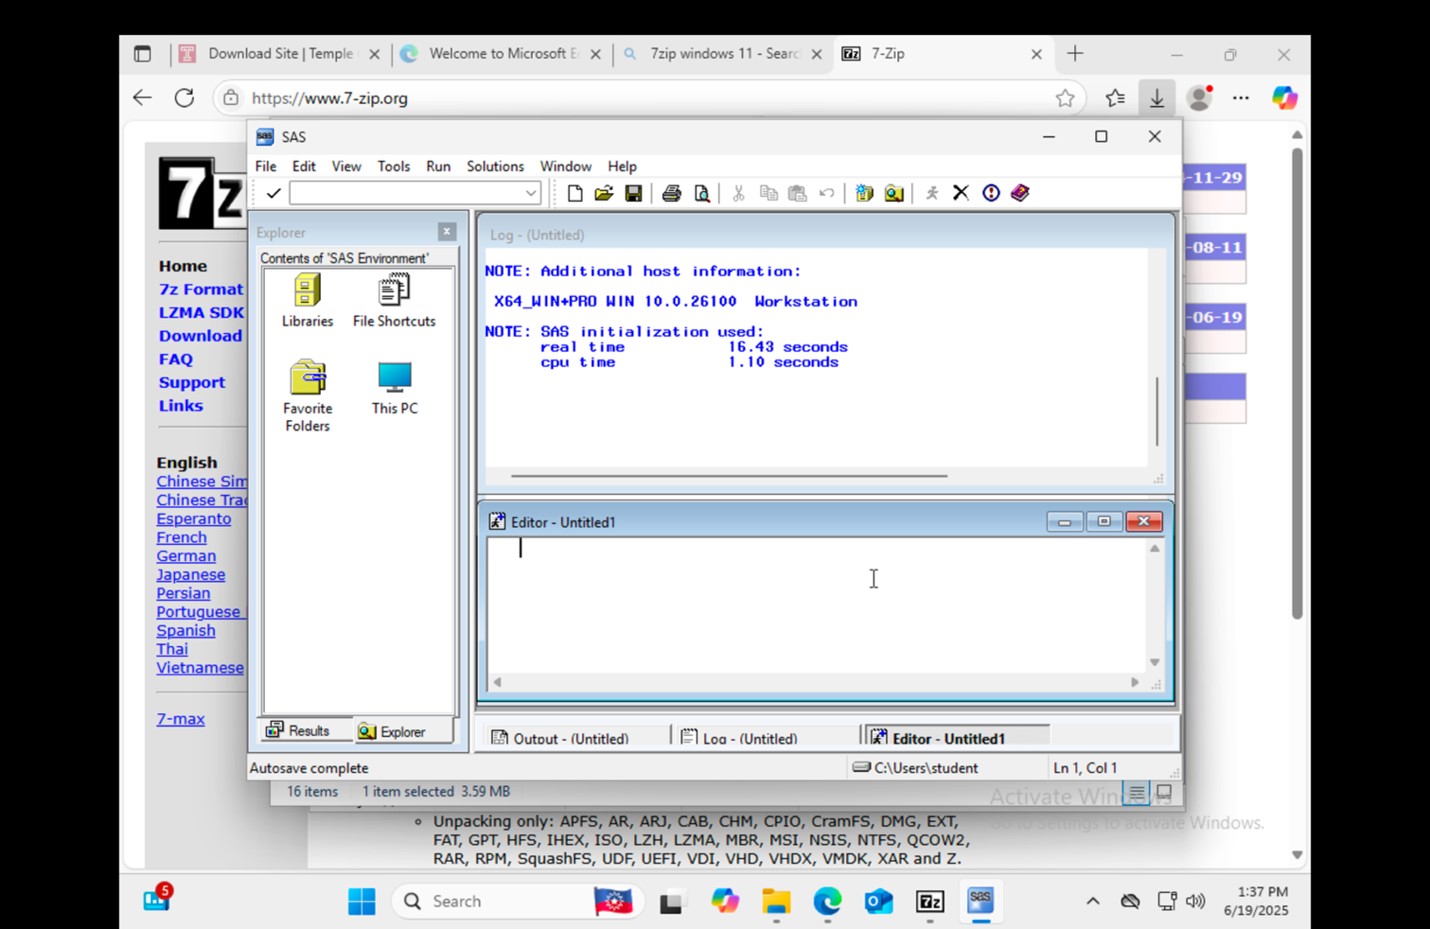
83. Open SAS 9.4.
|
|