SAS Installation
If your class requires you to use SAS, a Windows machine is the required configuration. Please see the documented documented Laptop Requirements.
For Mac users: SAS can only be installed on Windows operating systems. Do not attempt to follow these instructions on a Mac unless you are running Windows through a virtual machine. If you are using a Mac, refer to the instructions below for guidance on installation of SAS for Mac.
Follow the step-by-step instructions exactly as they are presented below. Do not skip any steps in the process.
Note for those who have installed SAS from a previous semester and only need to update the license file: Please complete the first step step Downloading the SAS license file and then skip to to Updating the License File.
Downloading the SAS Installer
VisitVisit https://download.temple.edu and login with your Temple credentials.- Find "SAS" listed among the list of available downloads.
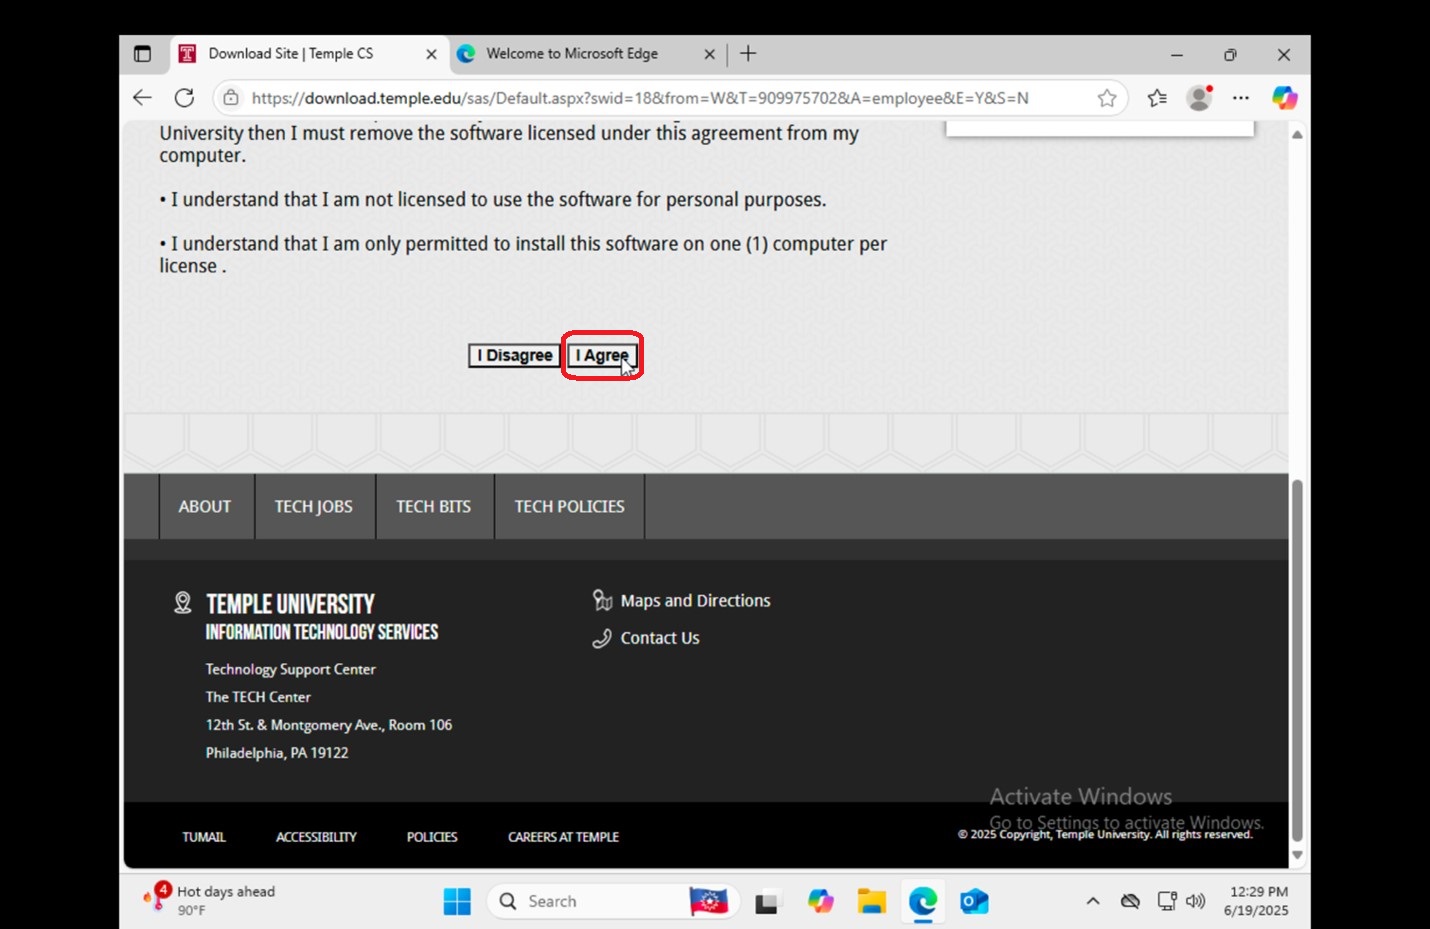
- On the SAS license agreement page, select "I Agree".
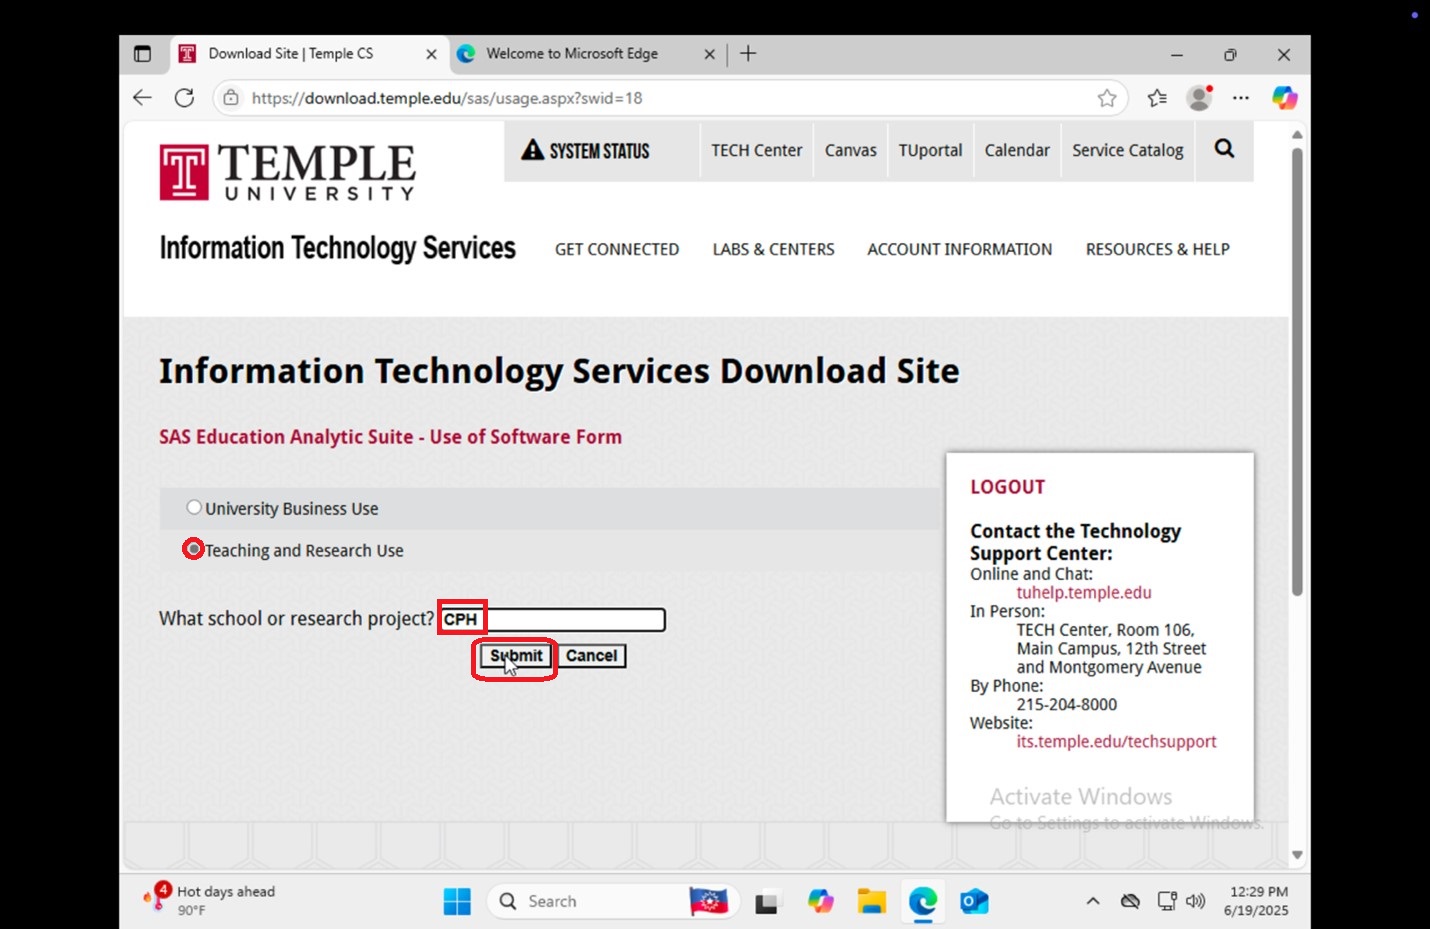
- On the SAS Education Analytic Suite - Use of Software Form, select "Teaching and Research Use". Then enter "CPH".
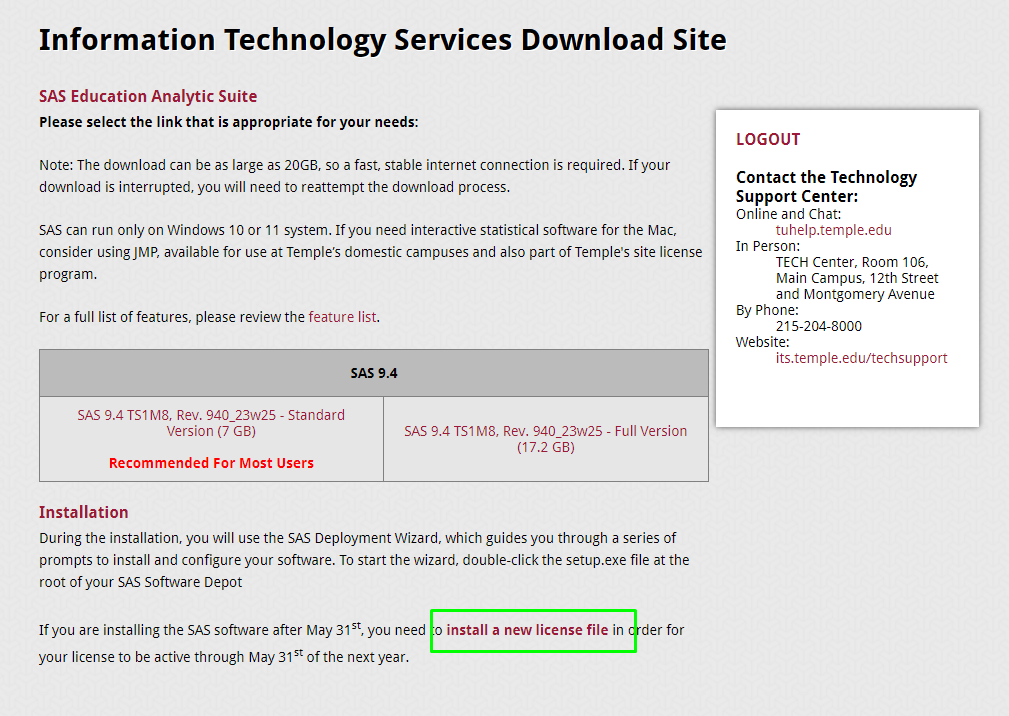
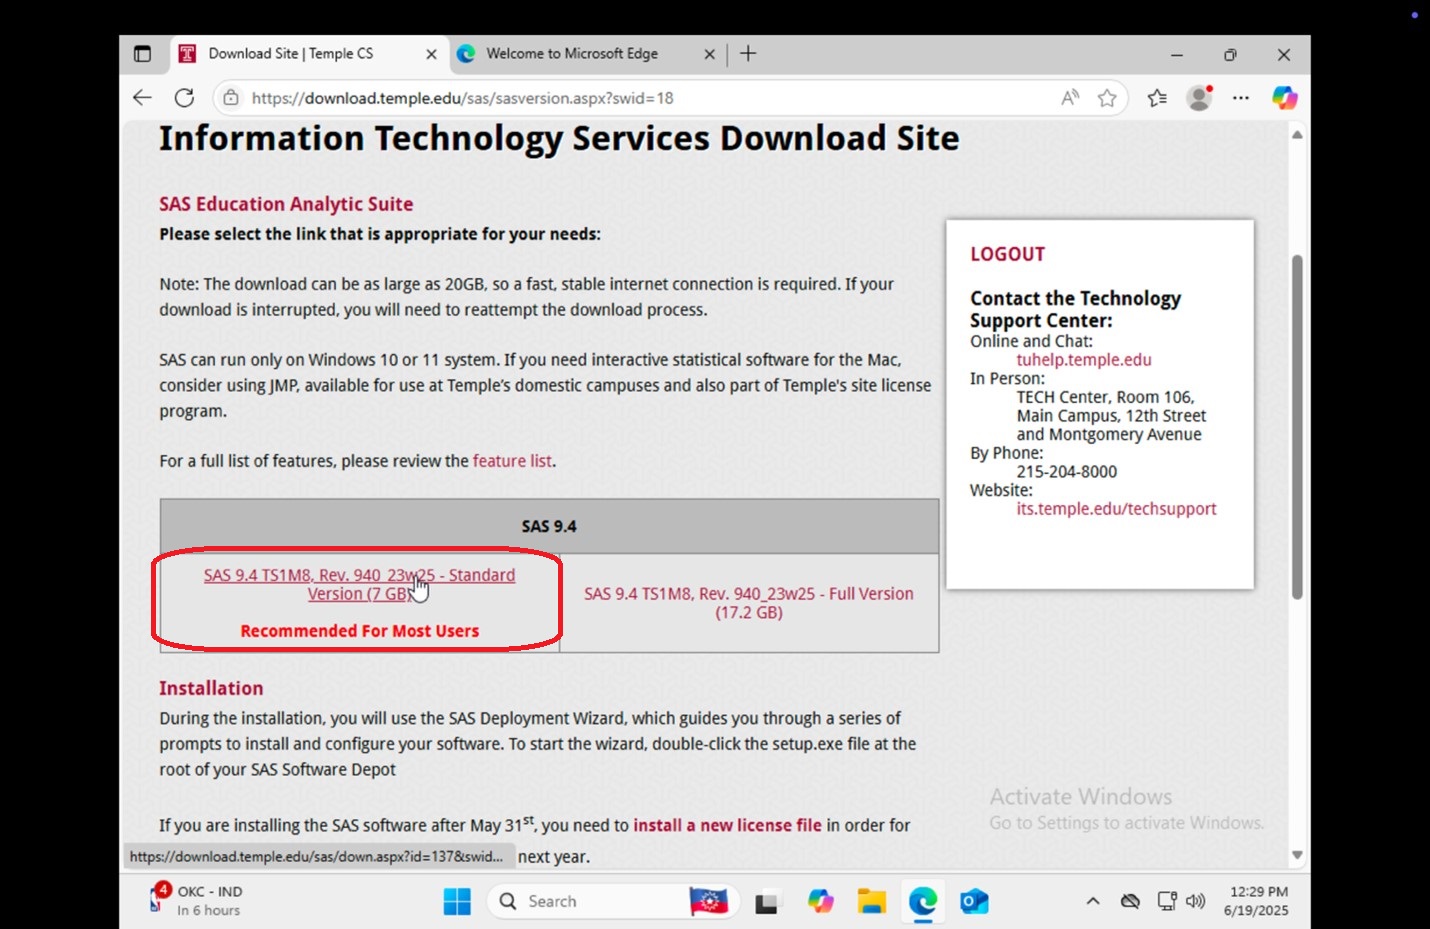
- If you need the SAS installer, on the center of the page, click "SAS 9.4 TS1M8, Rev. 940_23w25 - Standard Version (
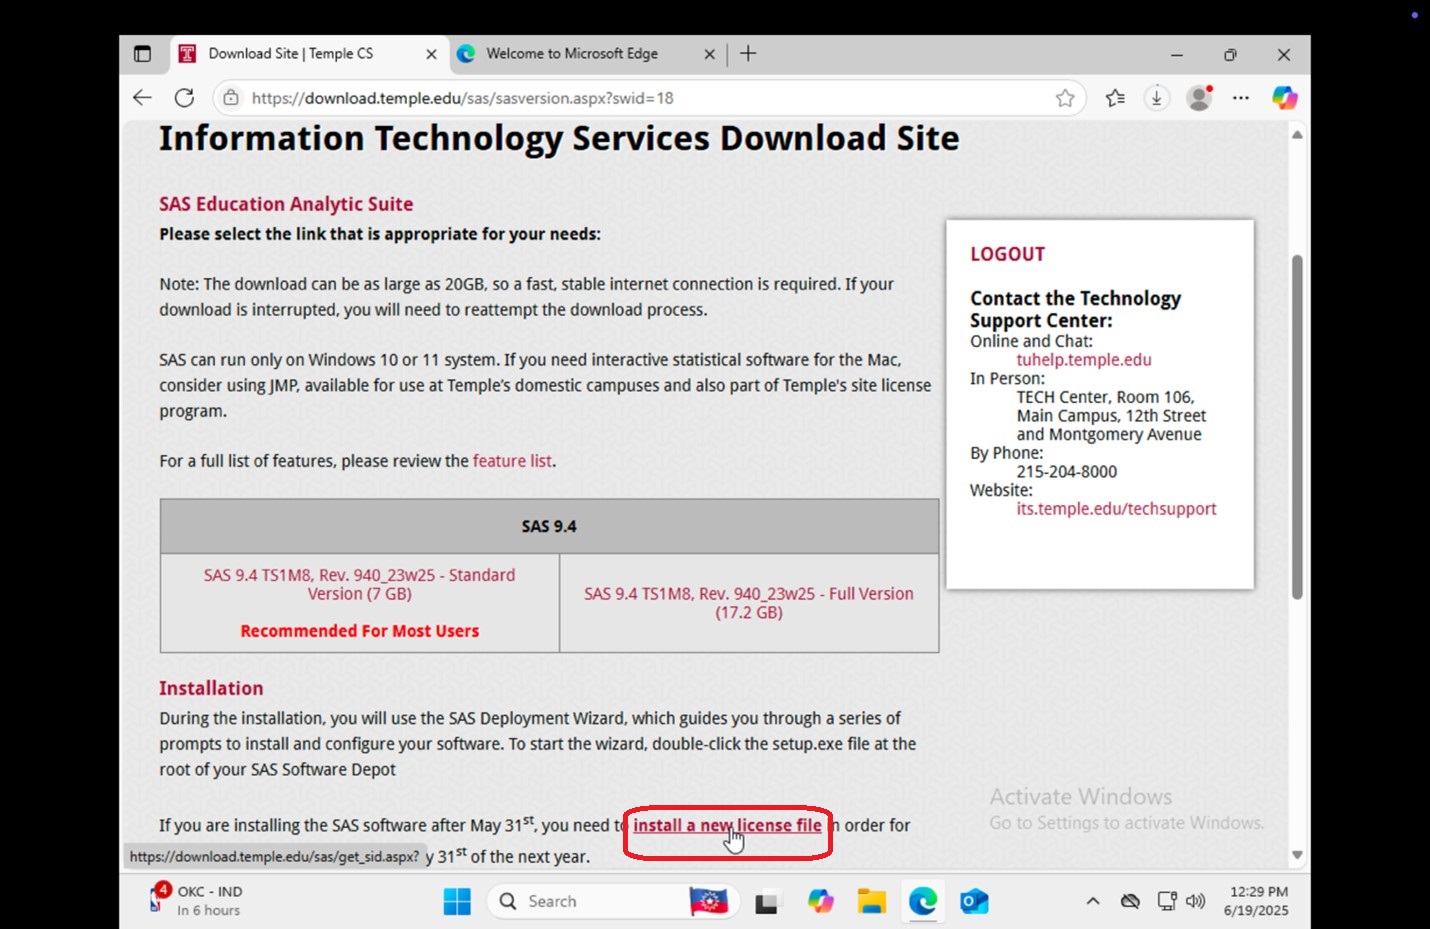
77 GB)" to download the SAS installer. As this is a fairly large download, it may take several minutes to an hour to complete the download. - If you need the SAS license file, follow the link at the bottom of the page that says "install a new license file" and follow the instructions listed on the Download site.
- Congrats! You can now proceed with the instructions for installing.
Downloading the SAS License file
|
1. Log into download.temple.edu and go to the SAS download page.
|
|
|
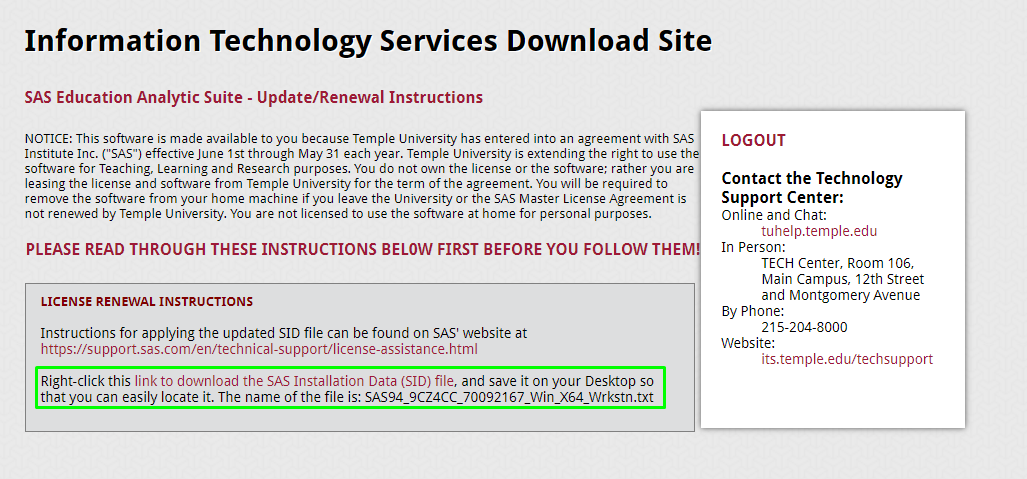
2. Find and click on the link named "install a new license file".
|
 |
|
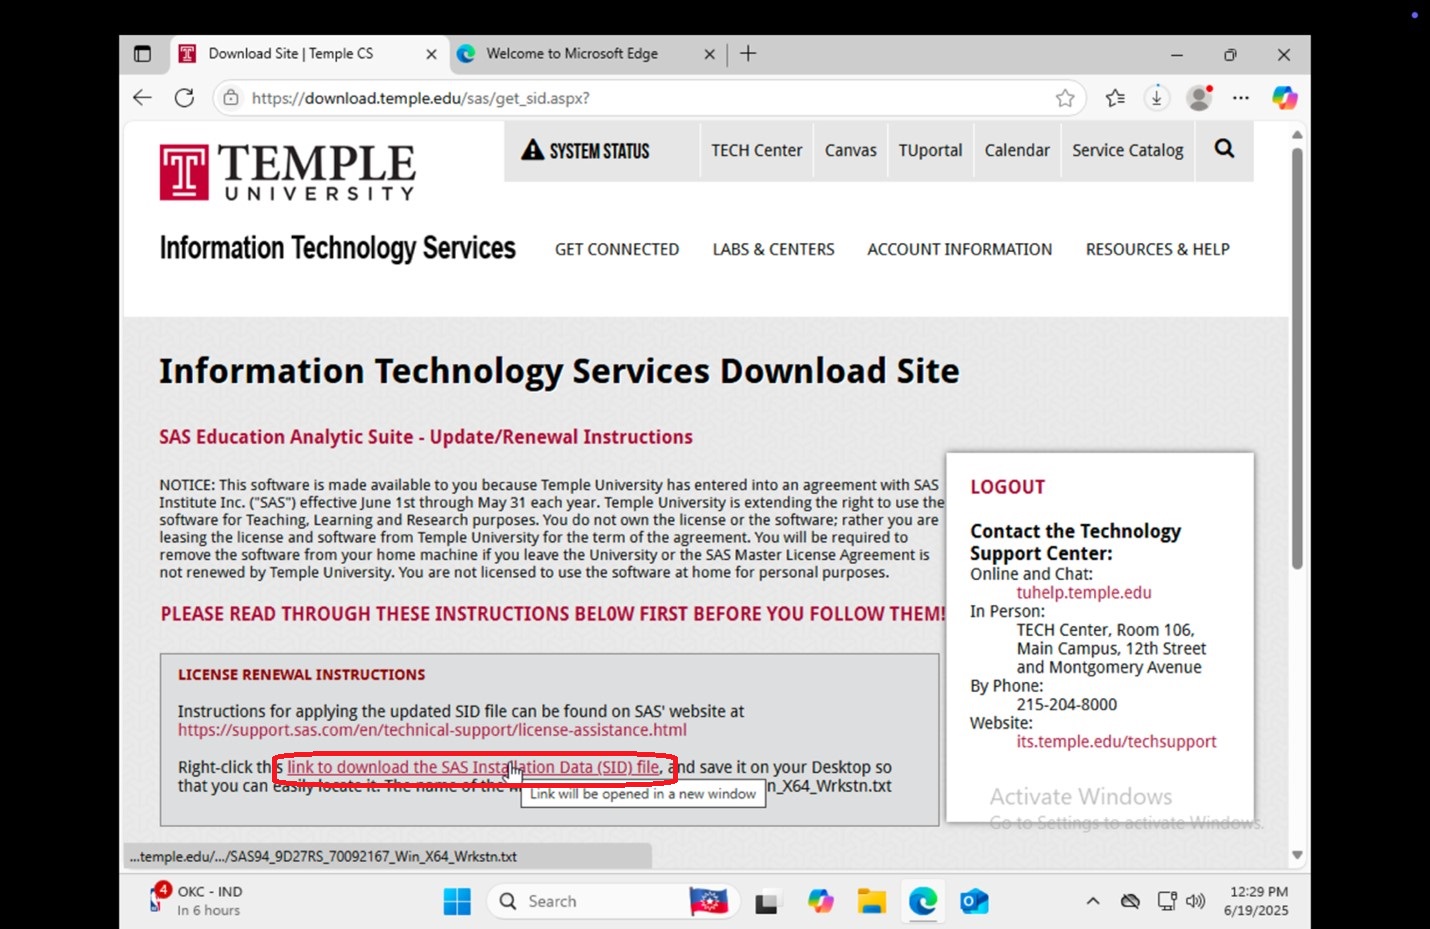
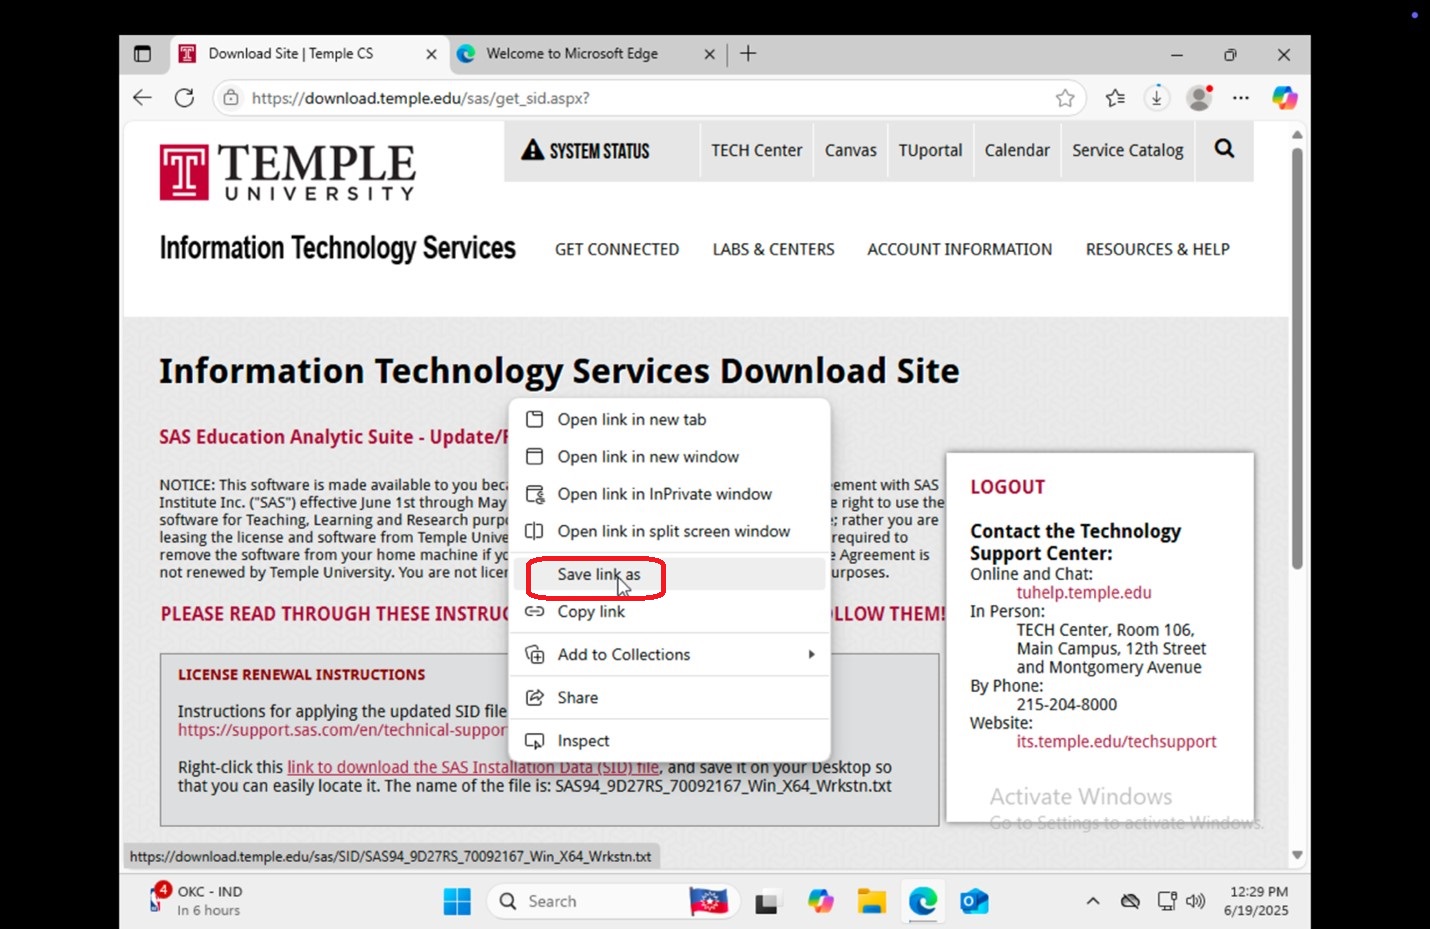
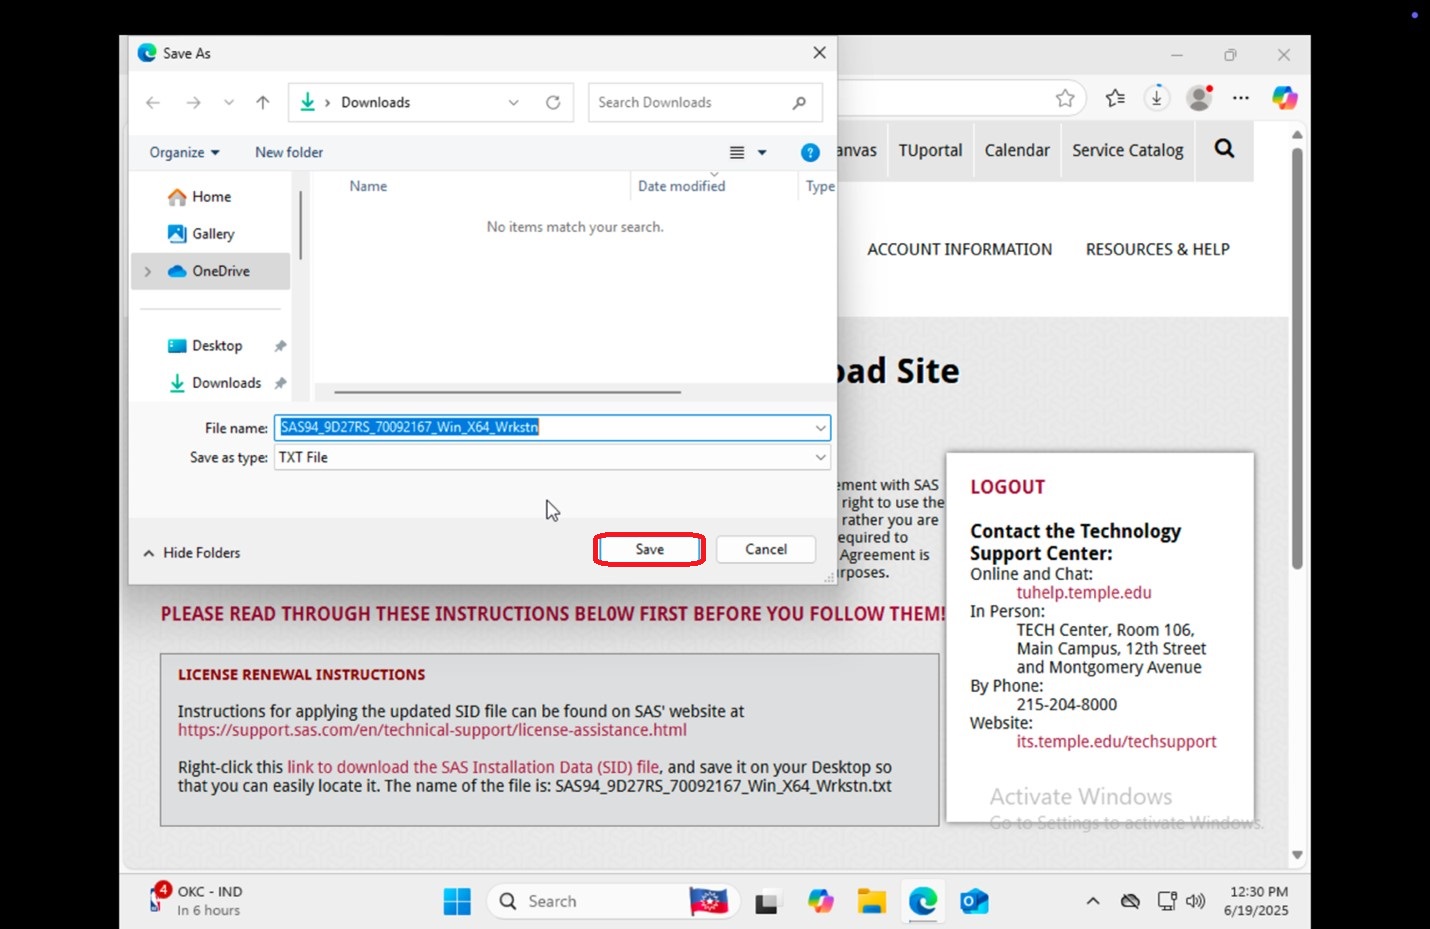
3. Read the instructions and right-click on the "link to download the SAS Installation (SID) file" and select Save link as to a location you choose.
|
 |
|
4. The file will be named something similar to SAS94_9CZ4CC_70092167_Win_X64_Wrkstn.txt
|
|
|
5. If you already have SAS installed, proceed
|
Installing SAS
|
1. If you had any trouble downloading the installer in the previous set of instructions, please contact or visit
|
 |
|
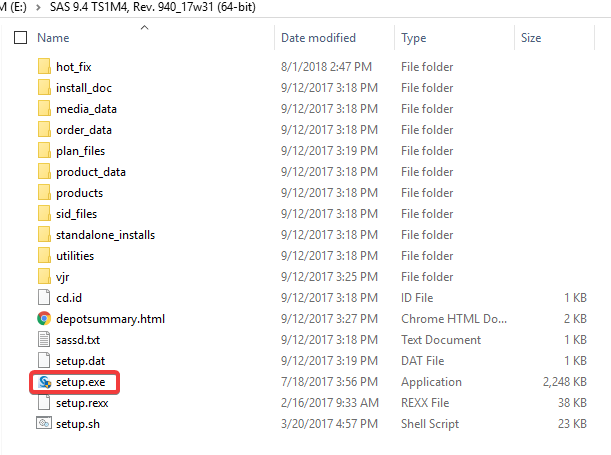
2. Double click on
|
|
|
3. The SAS installer may take a few minutes to launch.
|
 |
|
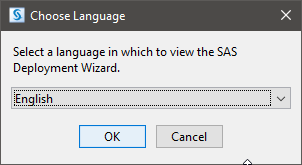
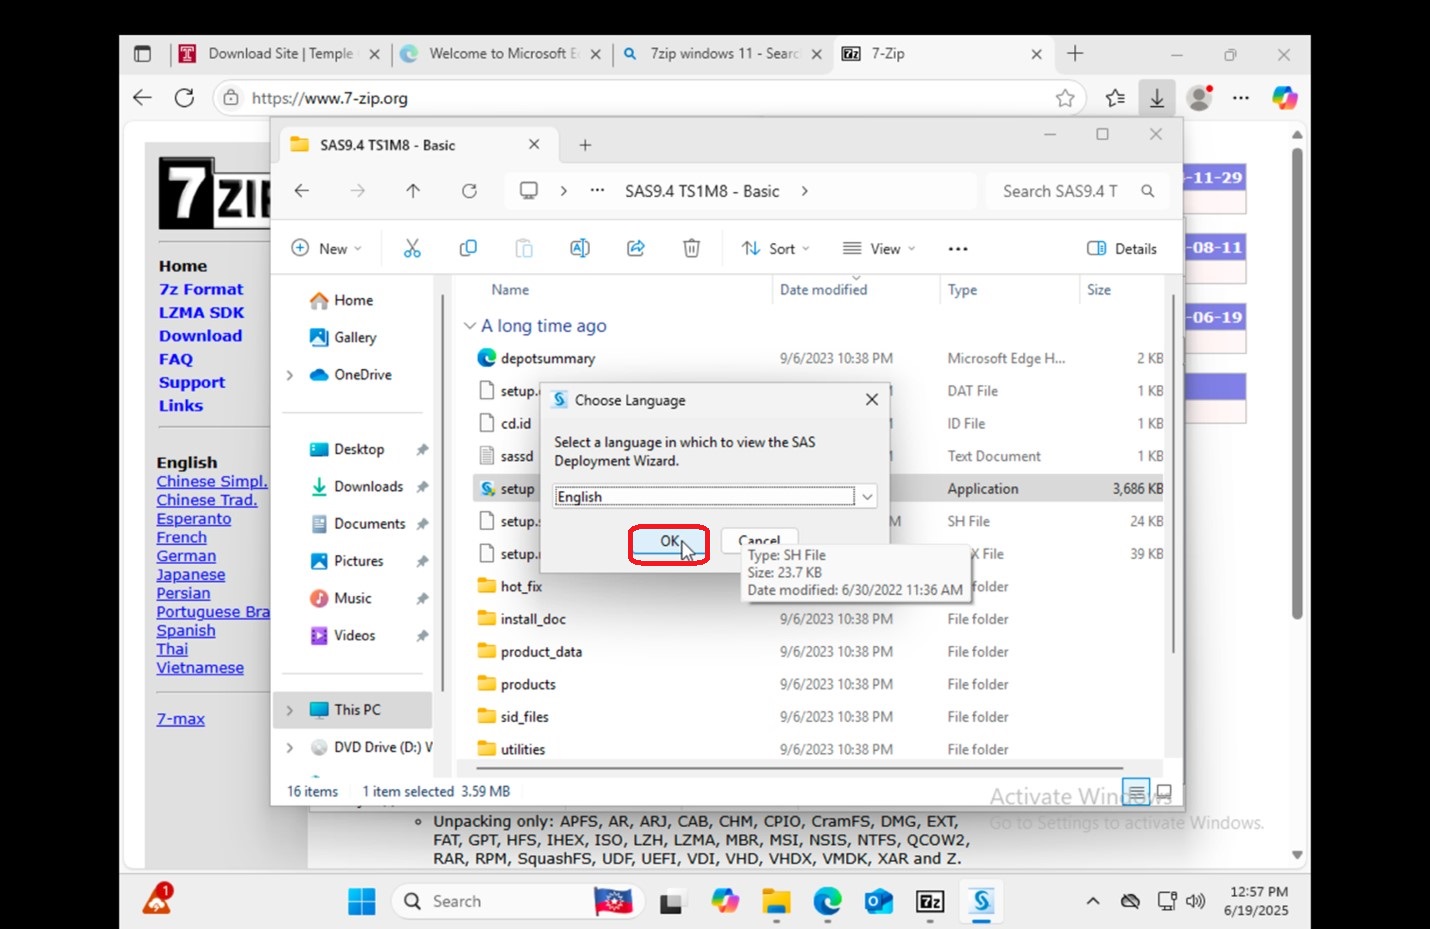
4. Once SAS's installer initialized, you will be asked to choose your language.
|
 |
|
5. It may take a few more moments before you can proceed.
|
 |
|
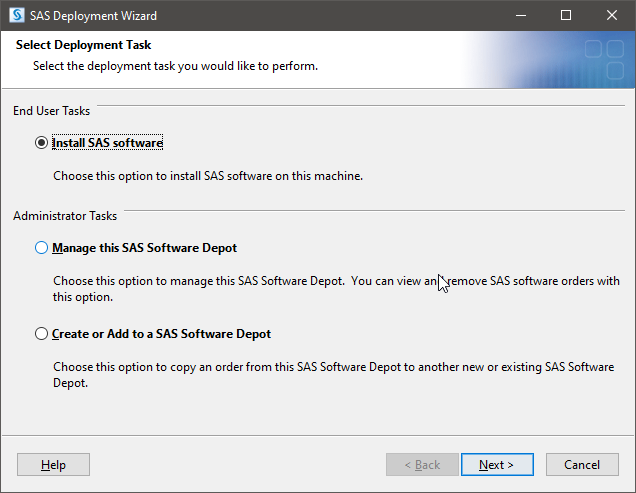
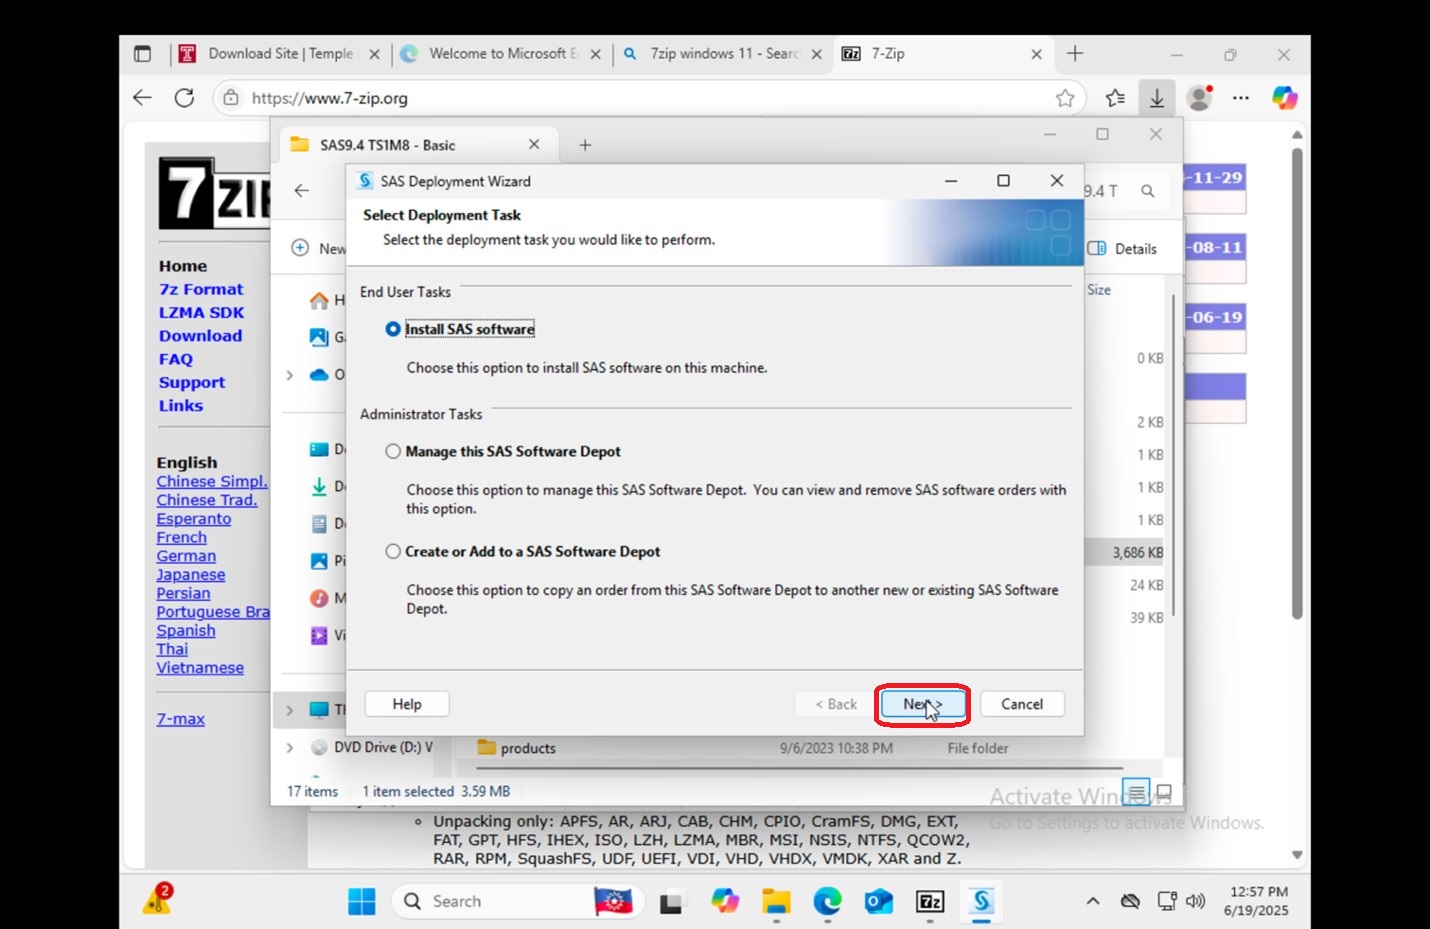
6. When the SAS Deployment Wizard has opened,
|
 |
|
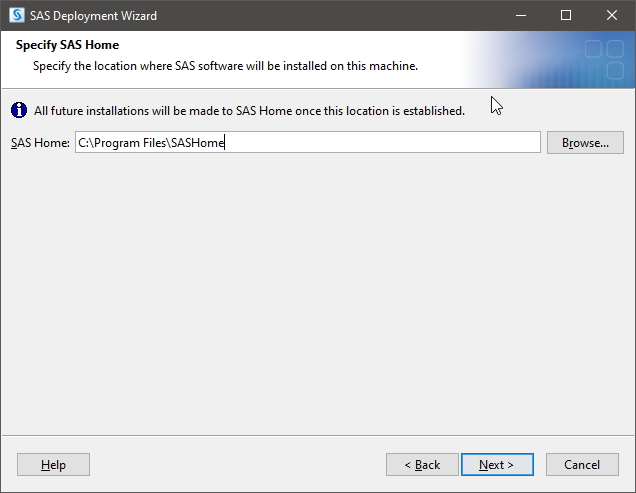
7. You will be prompted to enter
|
 |
|
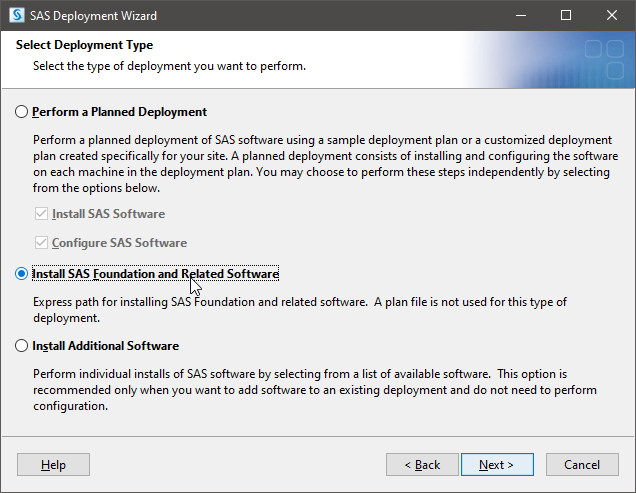
8. If prompted for a Deployment Type, This step may not be applicable to all installations of SAS 9.4
|
 |
|
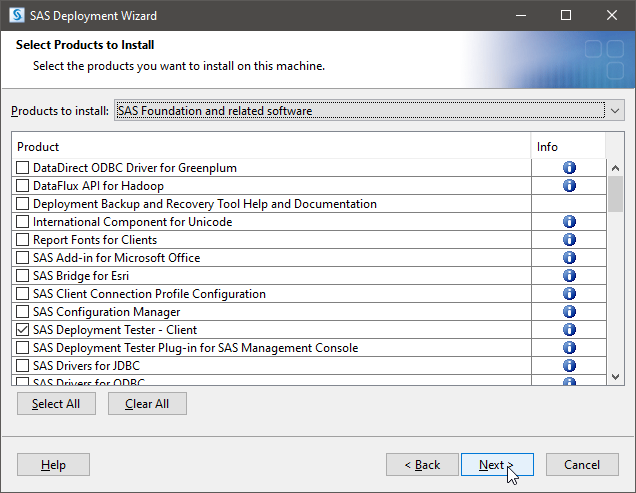
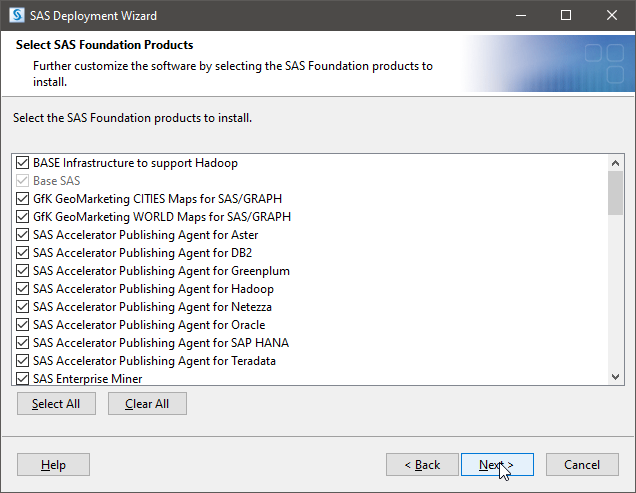
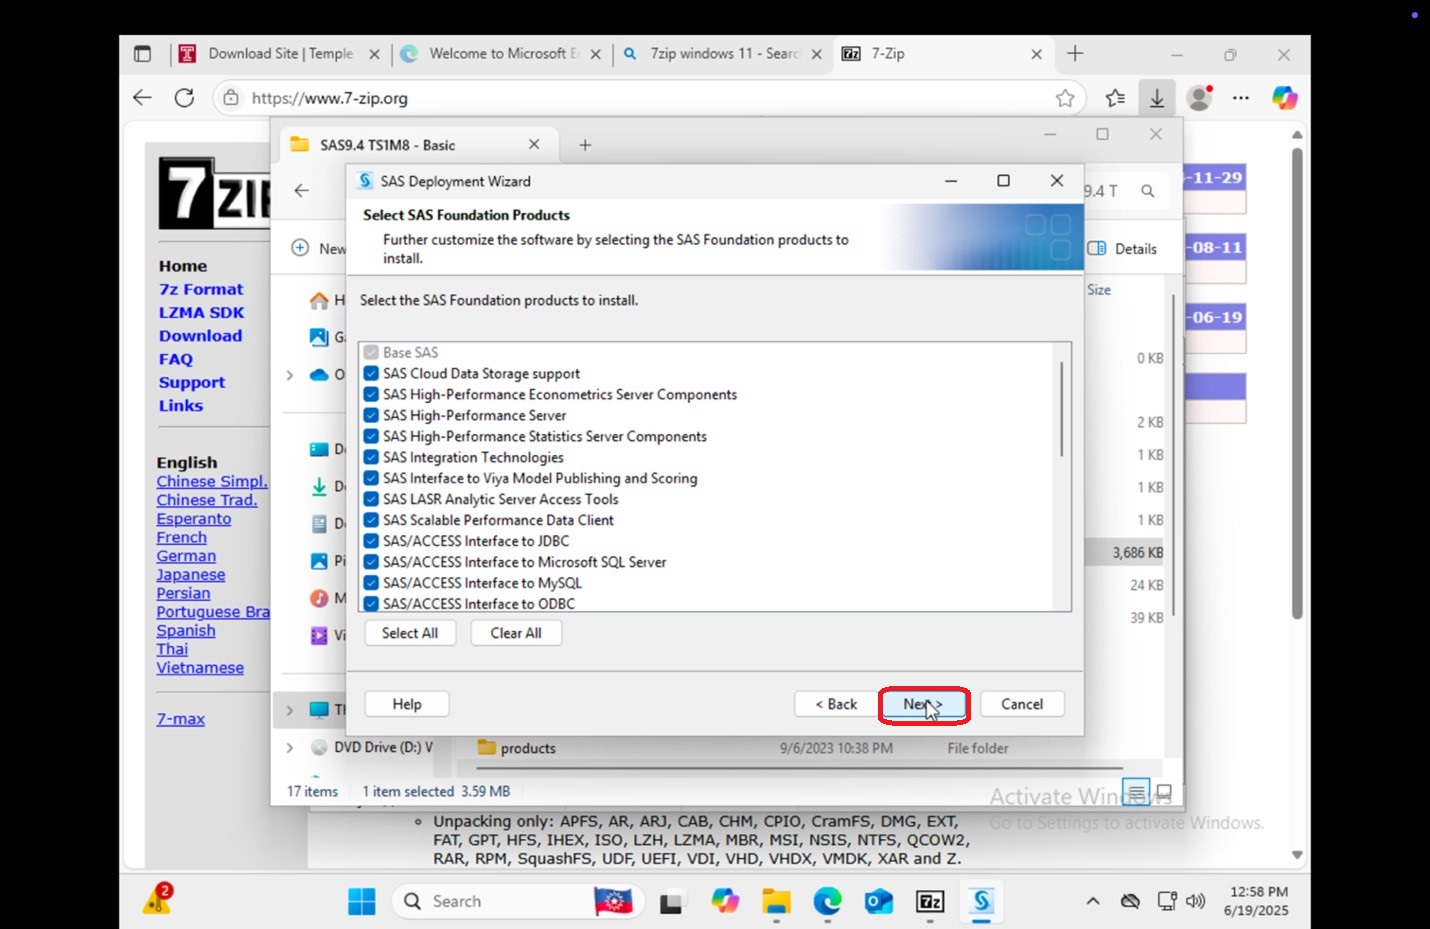
9. You will also be asked to select which products you want to install. You can leave this as the default, and
|
 |
|
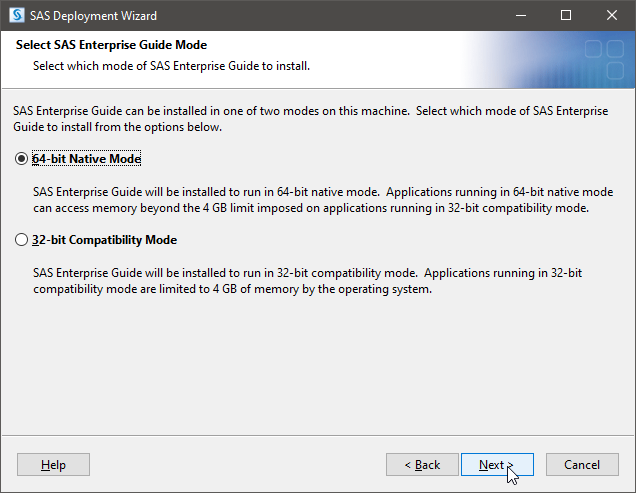
10. If prompted for the Enterprise Guide mode, This step may not be applicable to all installations of SAS 9.4
|
 |
|
11. You will be prompted again to select which products. Leave it as the default, and
|
 |
|
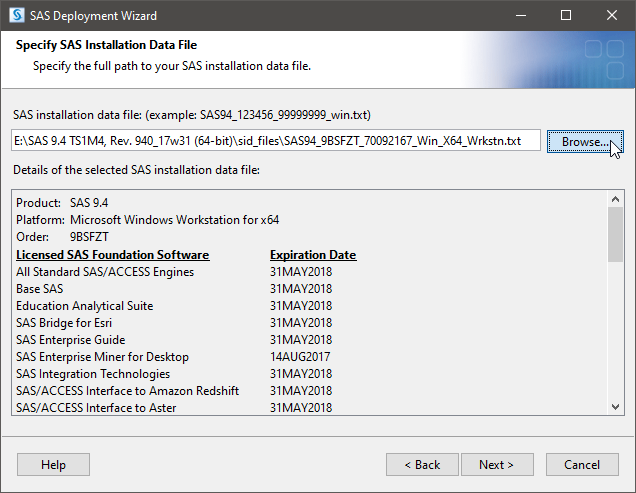
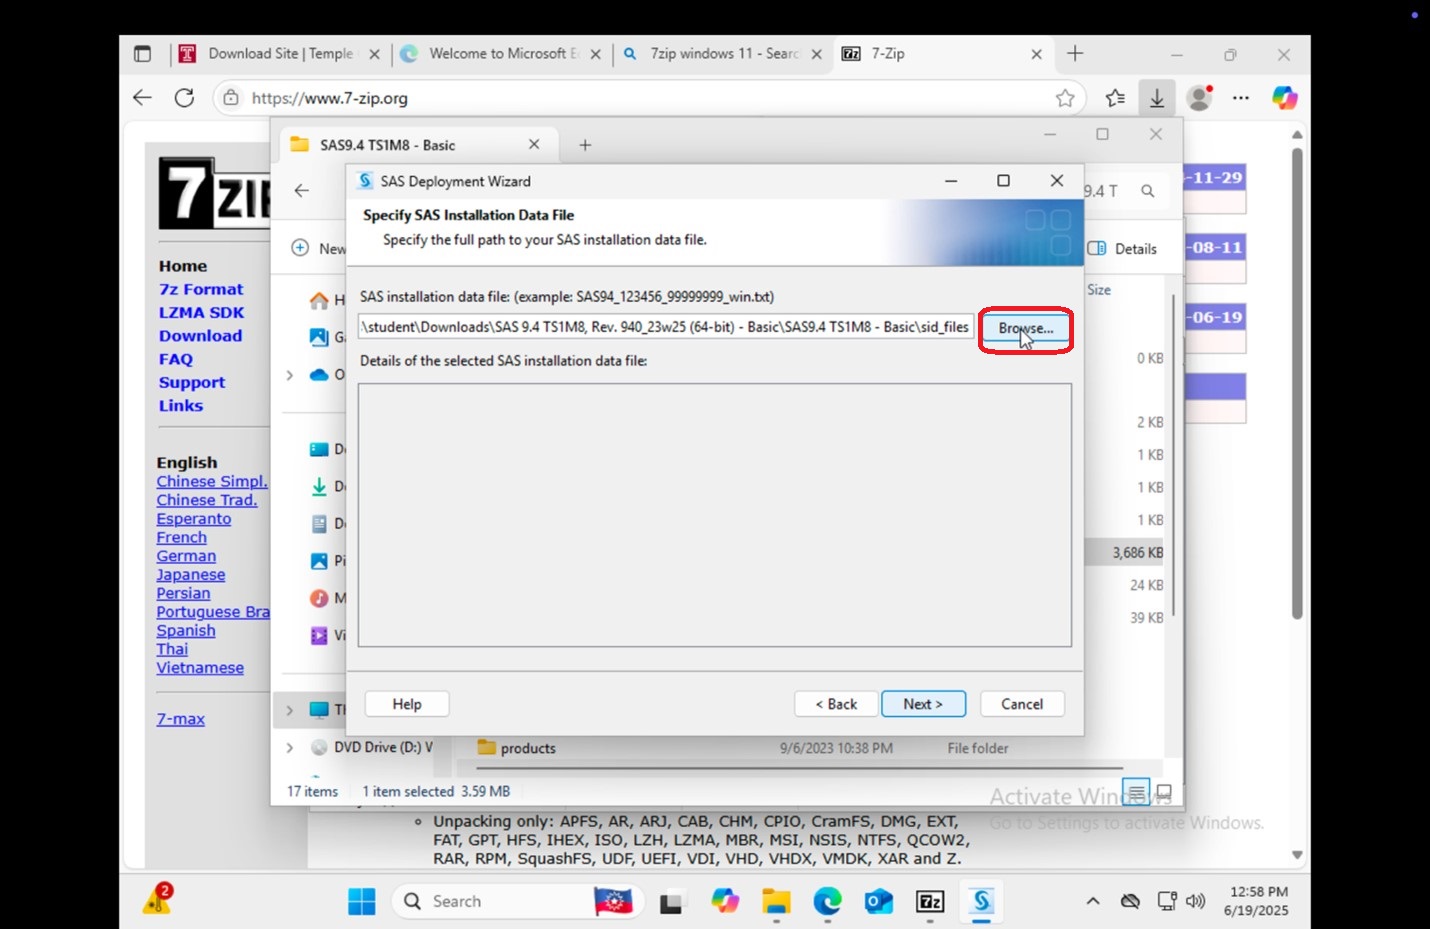
12. DO NOT SKIP THIS STEP!
|
 |
|
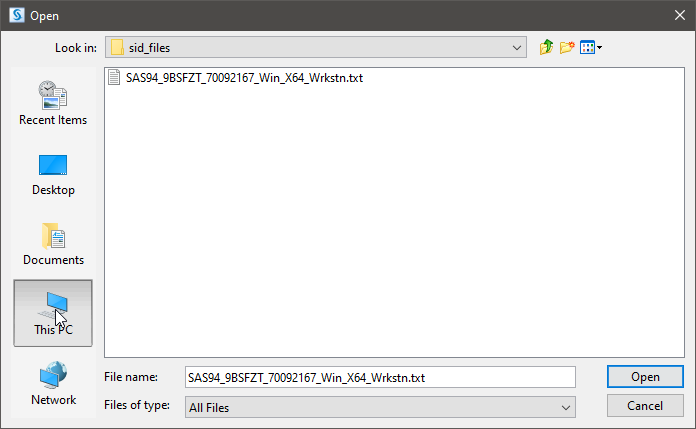
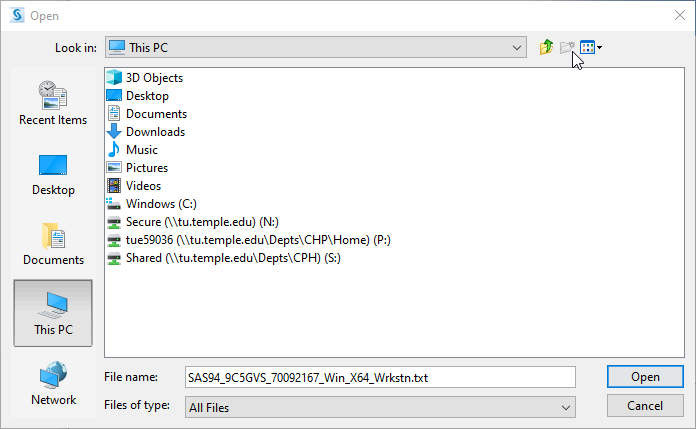
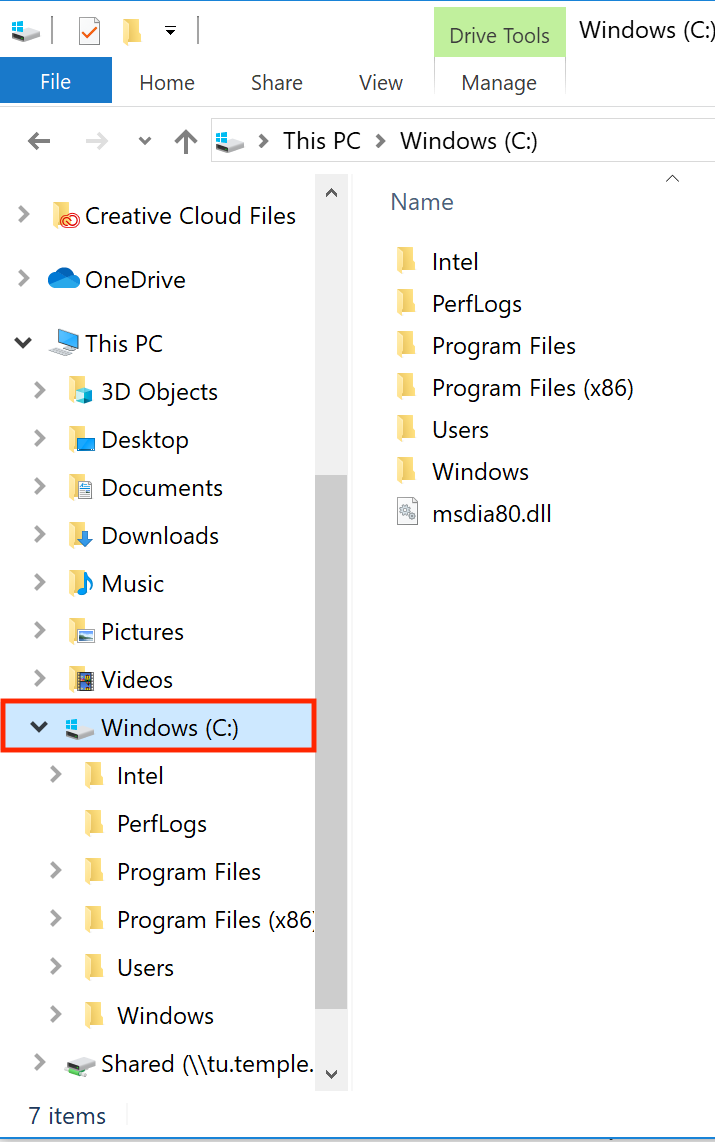
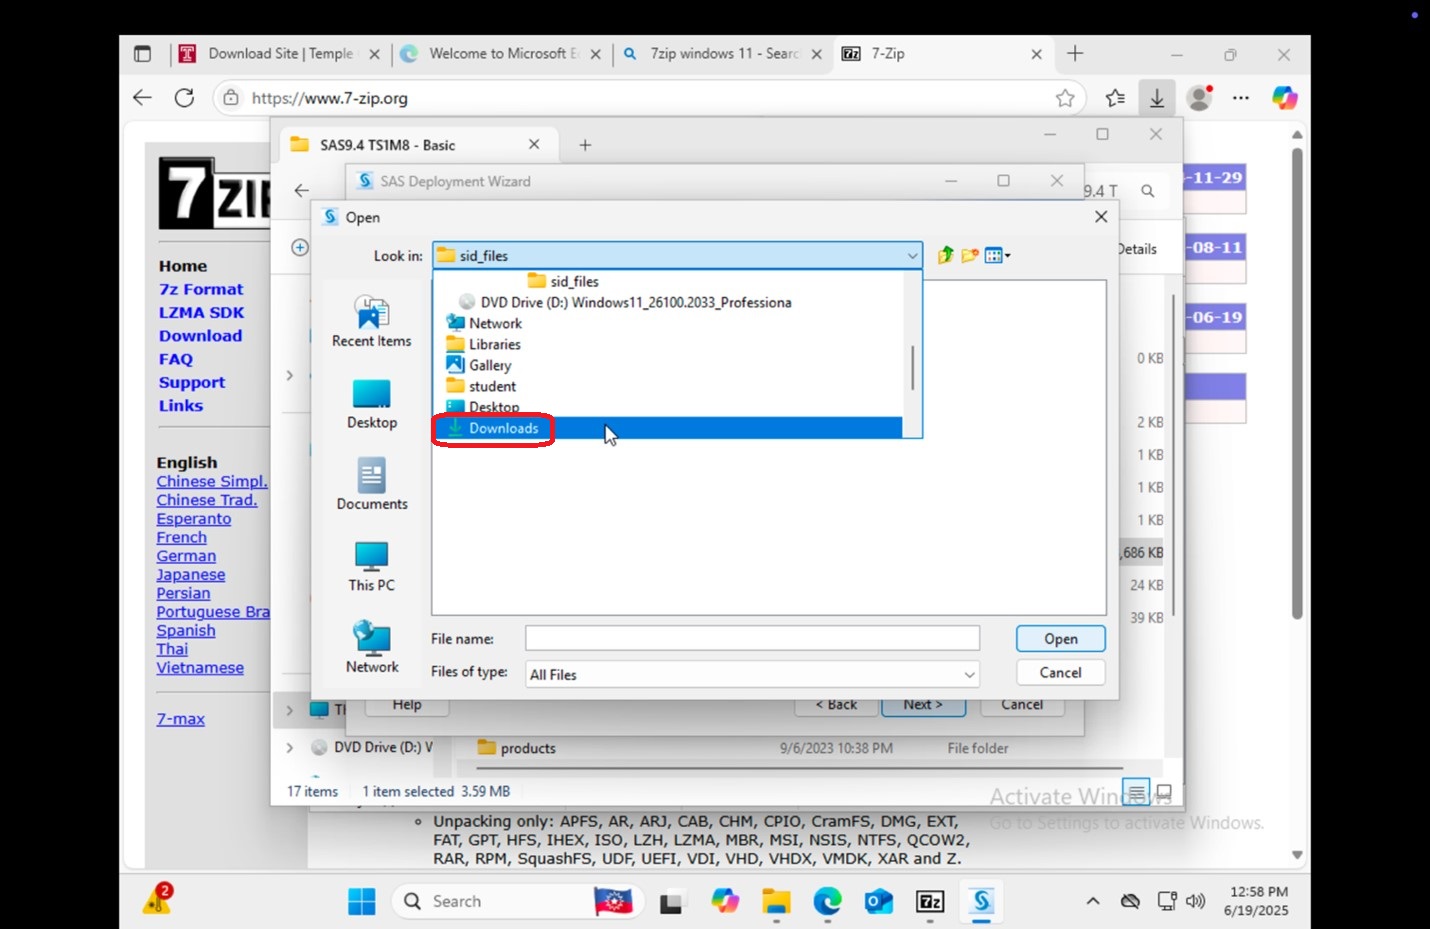
13. On the left side of the file prompt, click "This PC".
|
 |
|
14. You will see various folders, click "Downloads".
|
 |
|
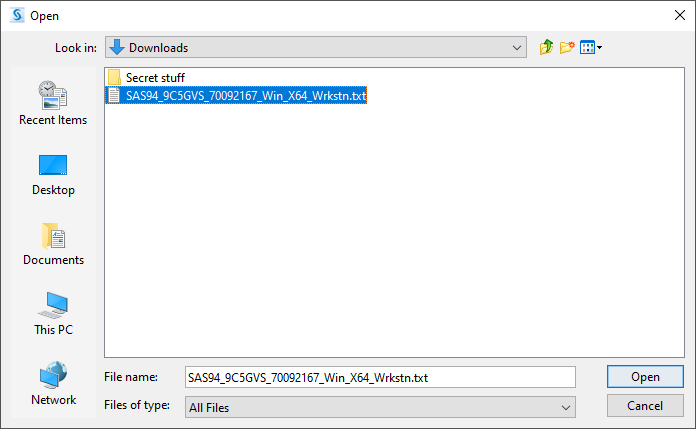
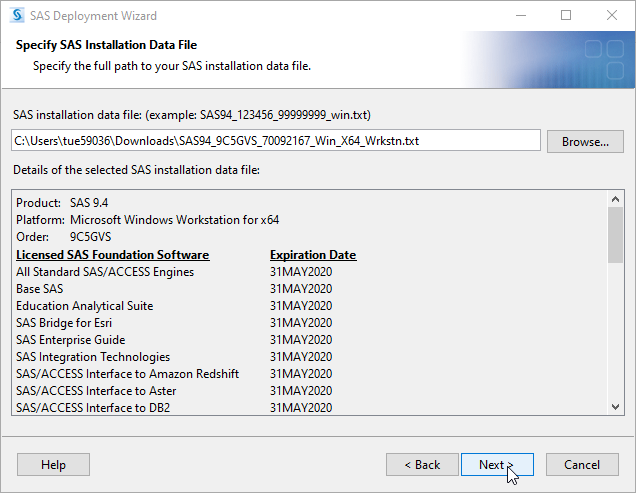
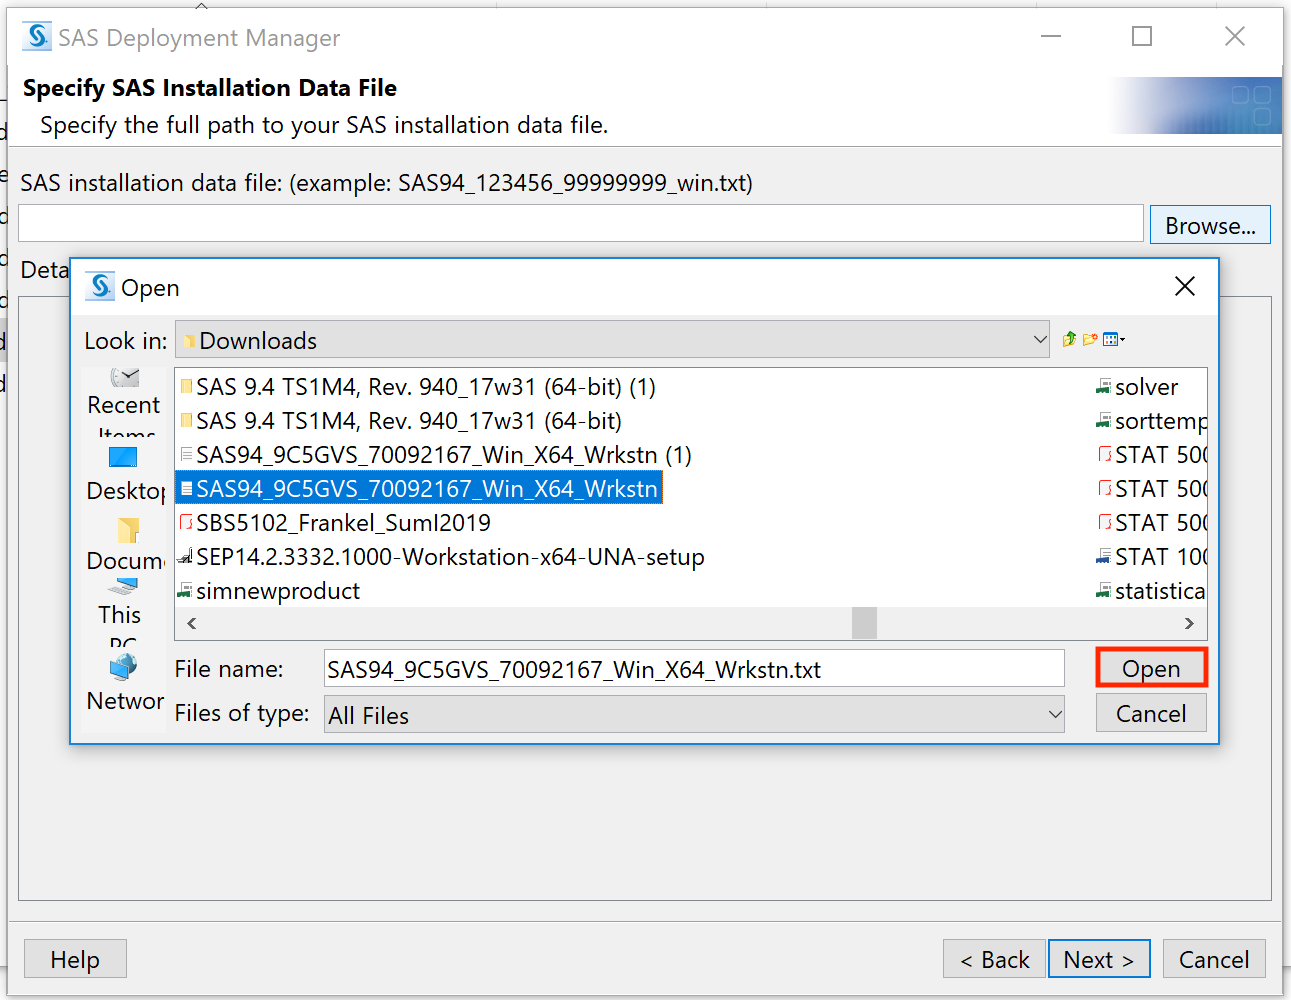
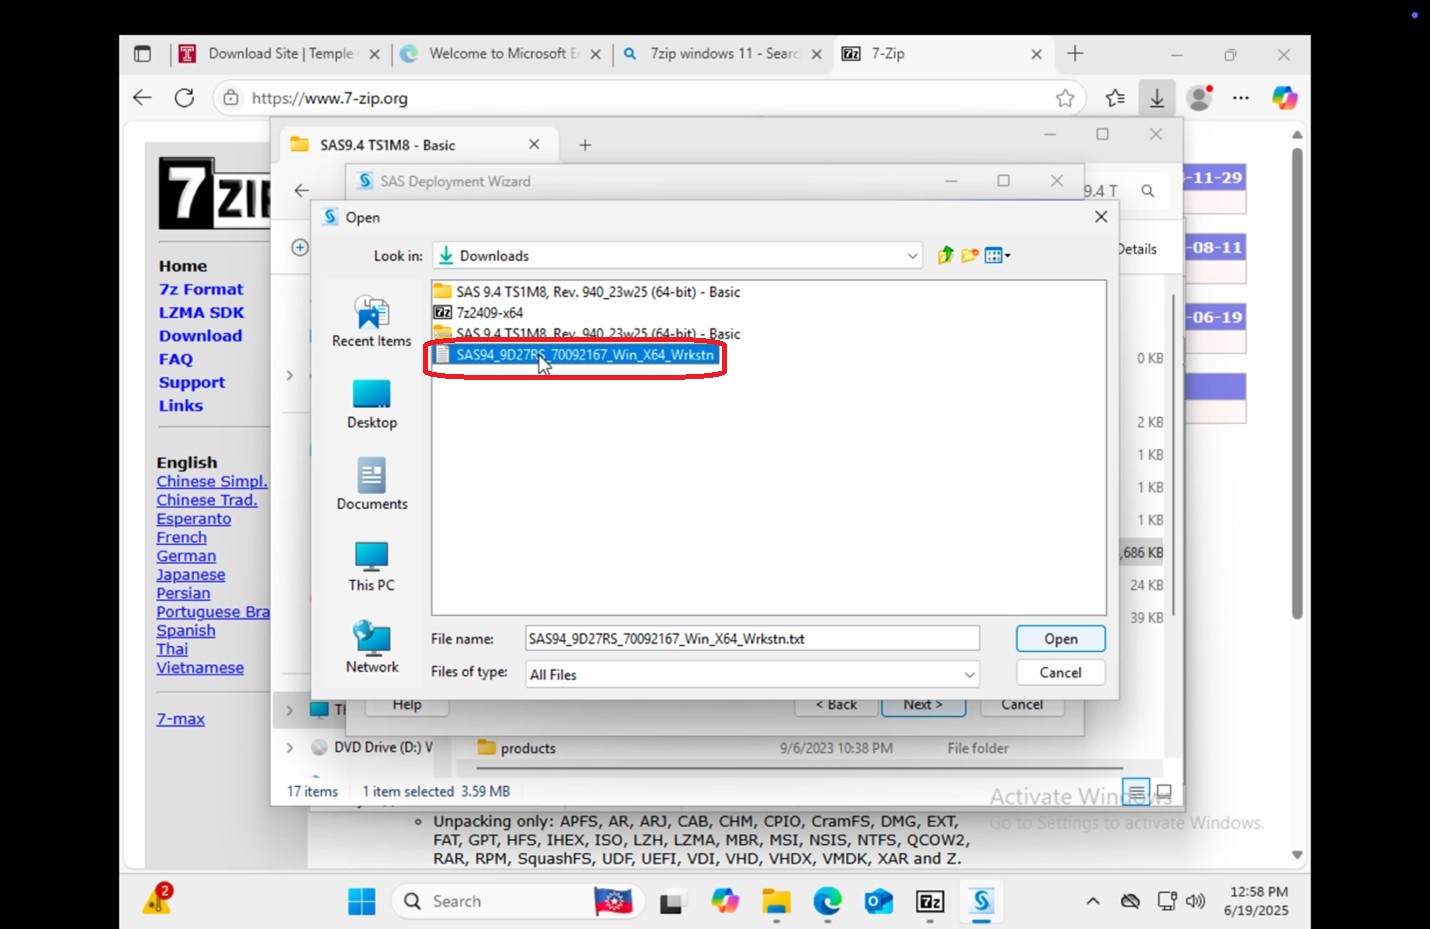
15. In your "Downloads" folder, you should now be able to find the license file you downloaded previously. Find "SAS94_9CWL9Y_70092167_Win_X64_Wrkstn.txt" and click "Open".
|
 |
|
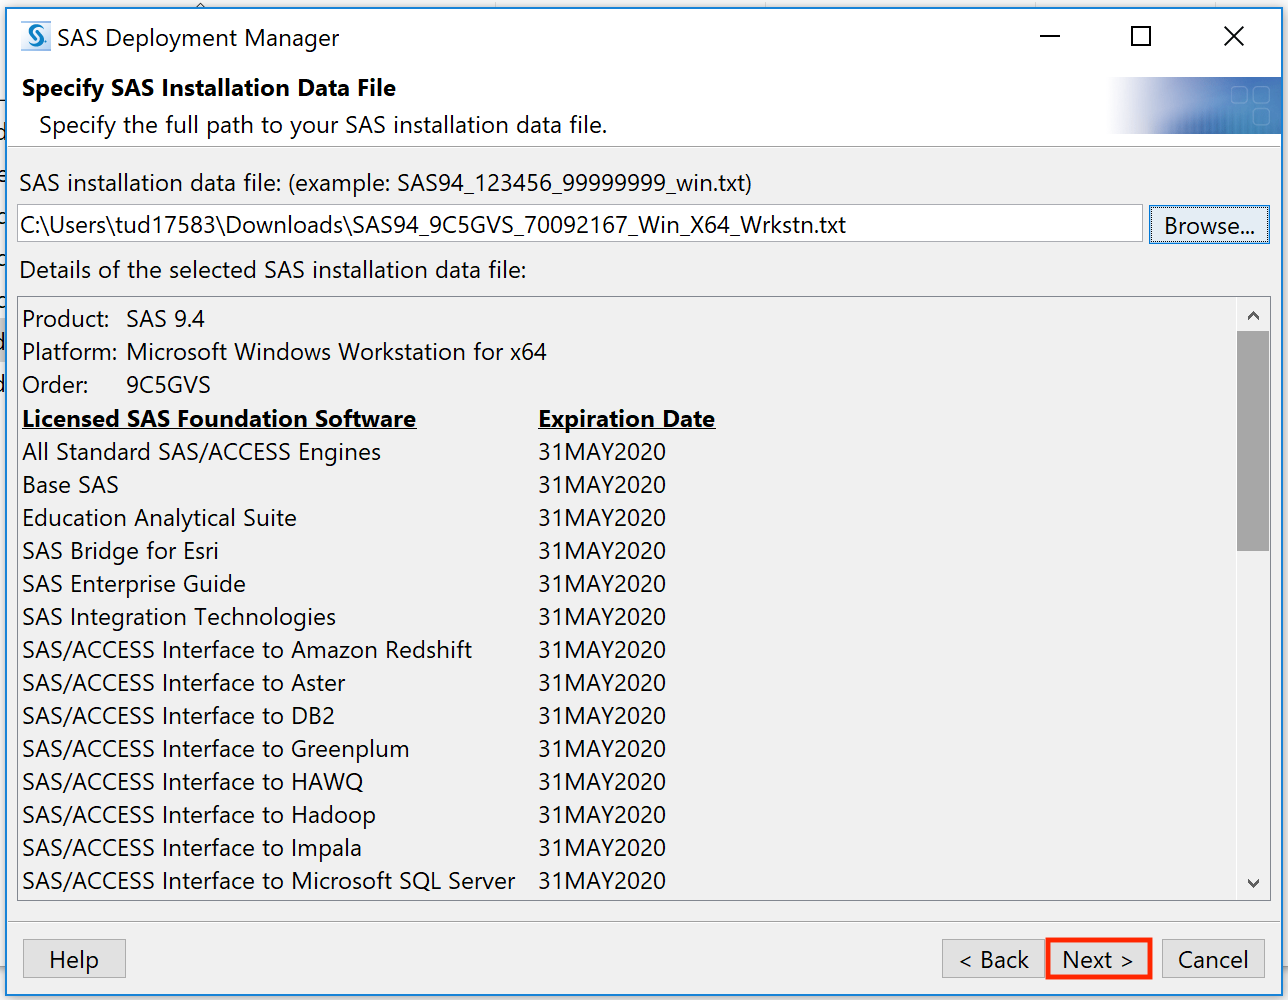
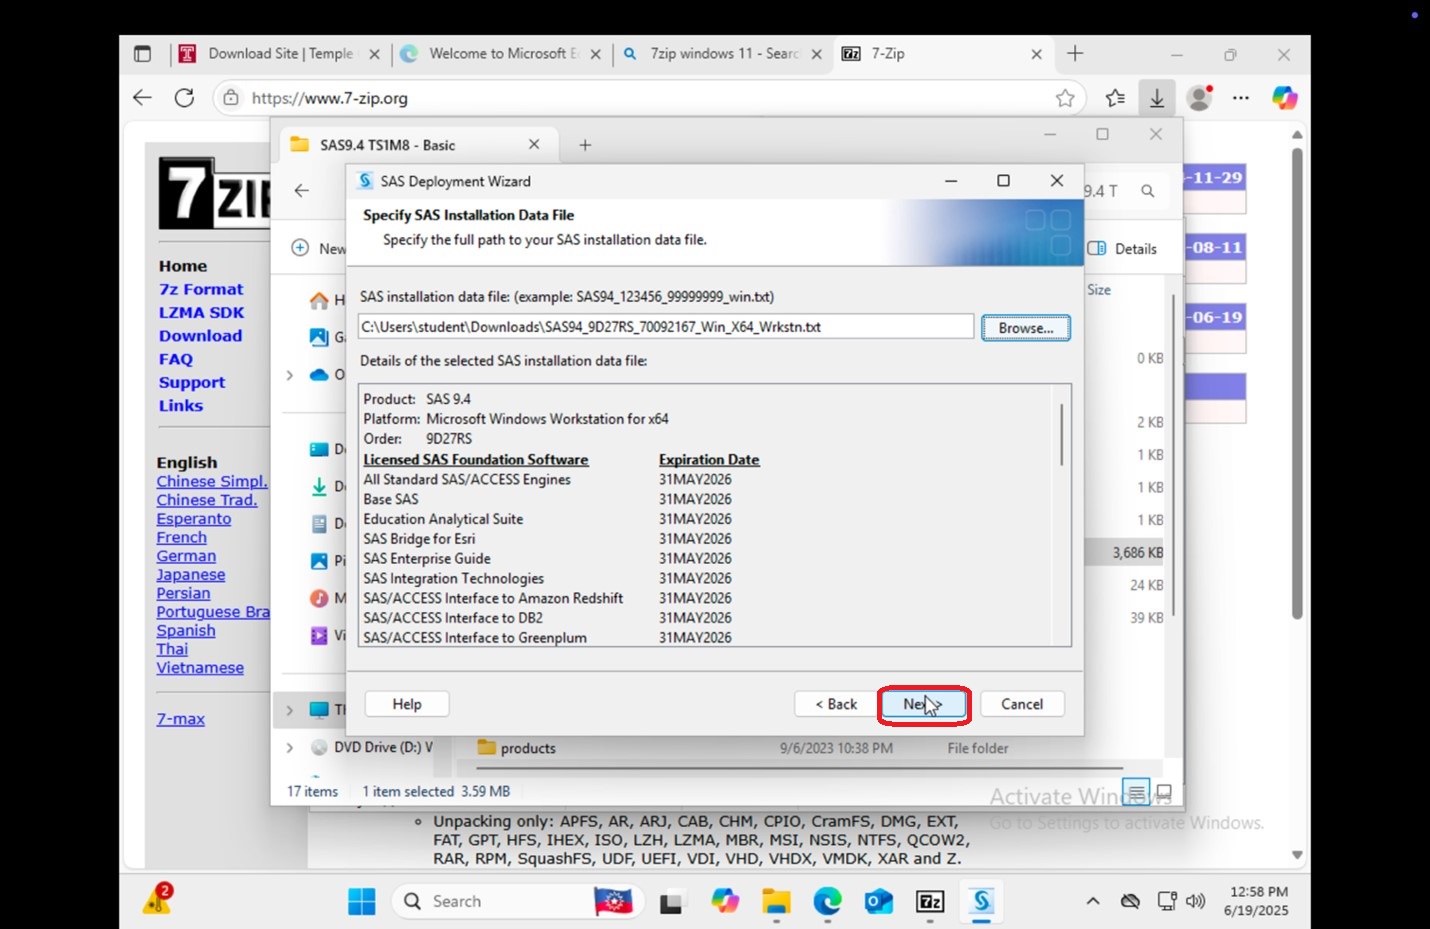
16. Once the file is selected, you can proceed with the installation by clicking "Next".
|
 |
|
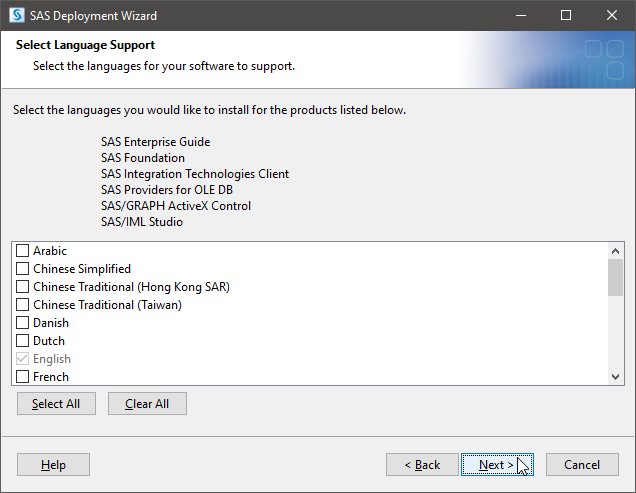
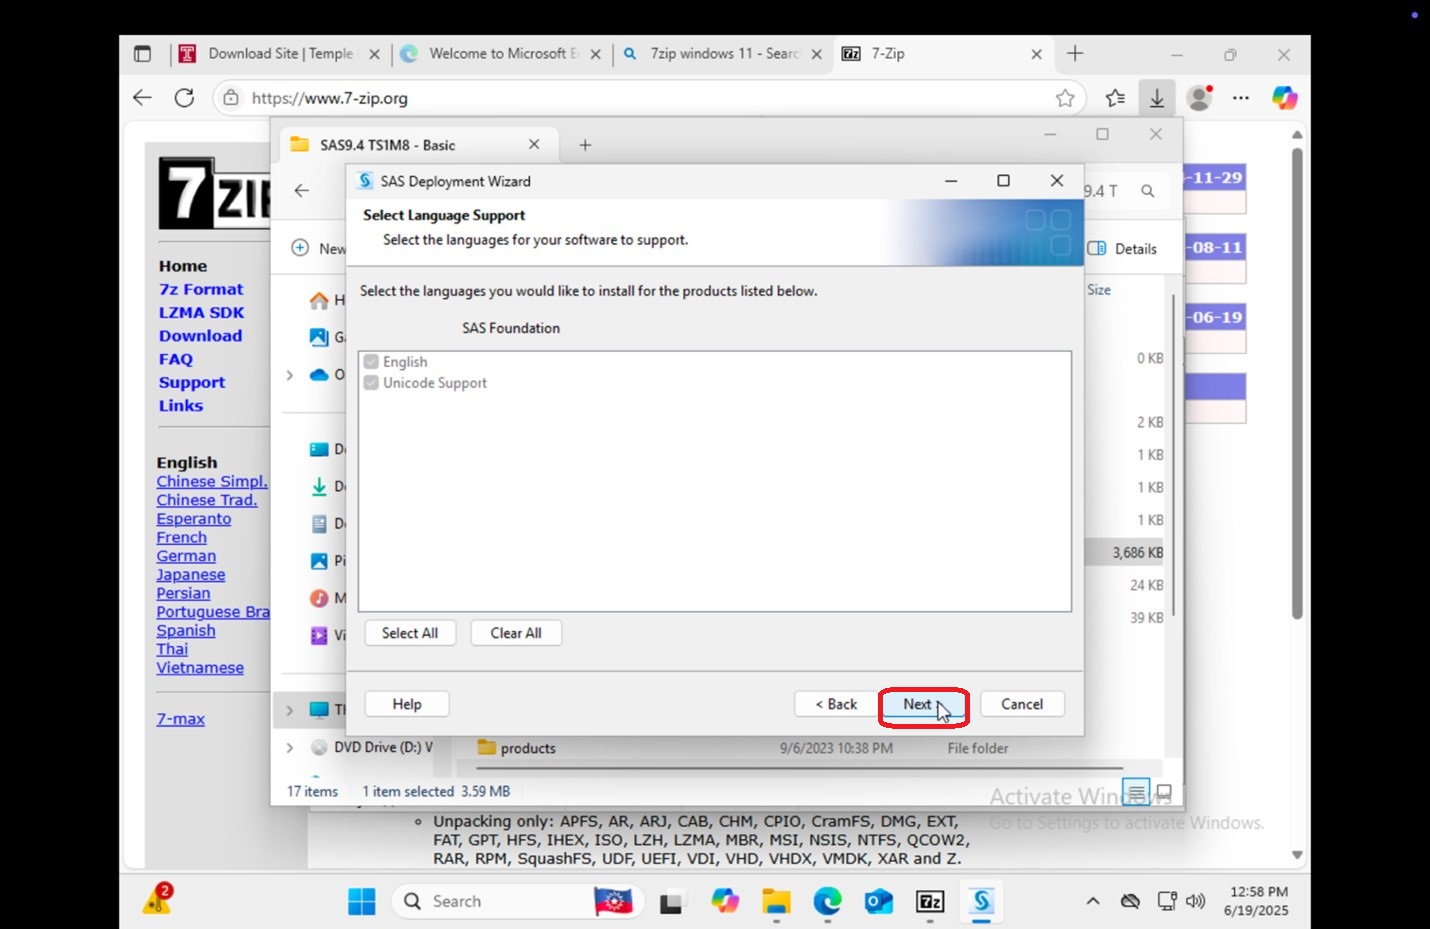
17. Next, it will ask you which languages you want to install. Click "Clear All" and then click "Next".
|
 |
|
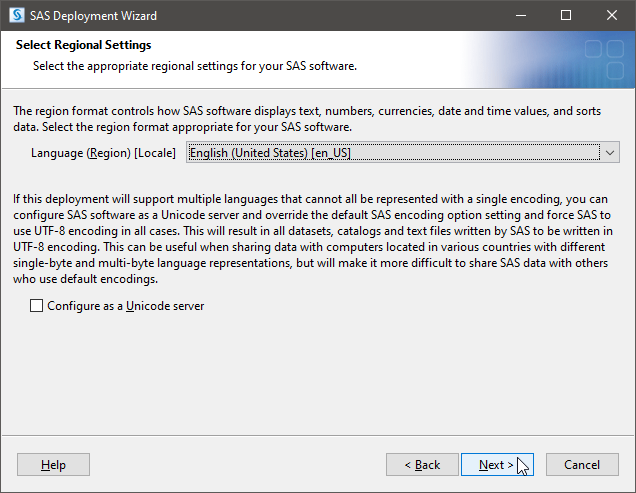
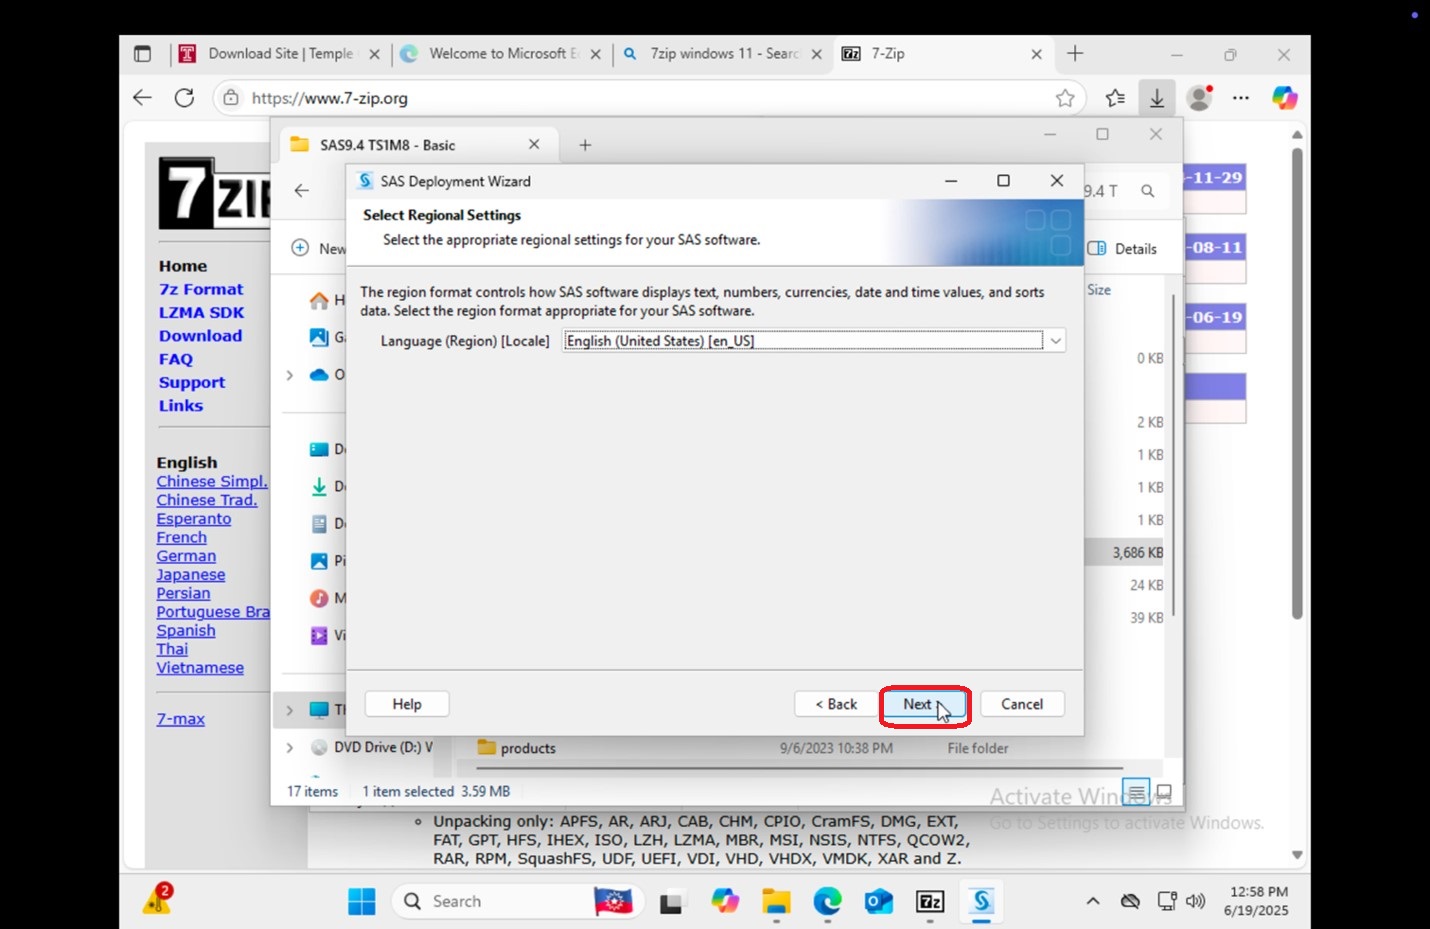
18. Now you'll be asked for Regional Settings.
|
 |
|
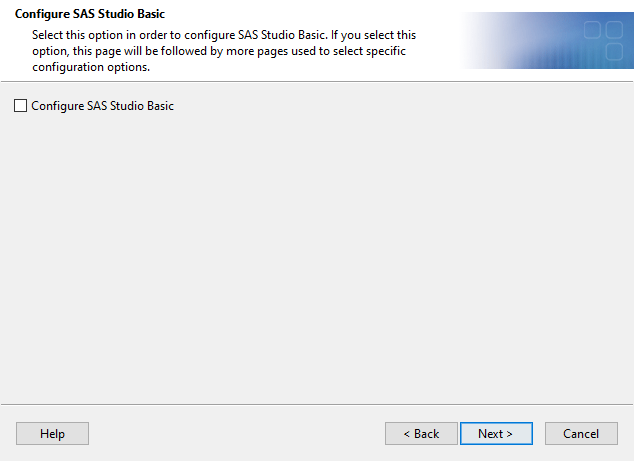
19. You may be prompted to select an option This step may not be applicable to all installations of SAS 9.4
|
 |
|
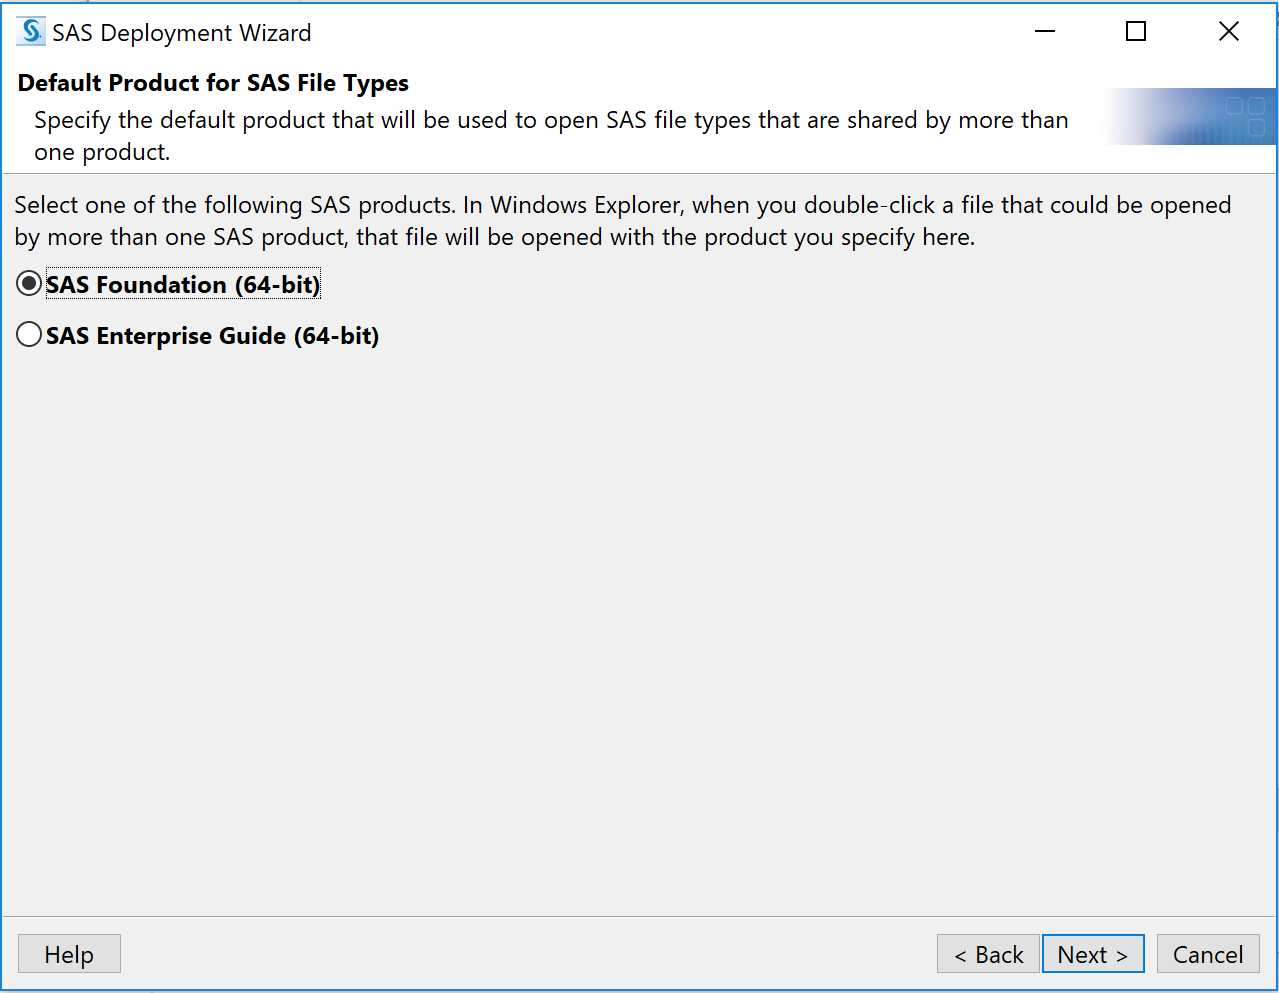
20. Next, you may be prompted to
This step may not be applicable to all installations of SAS 9.4
|
 |
|
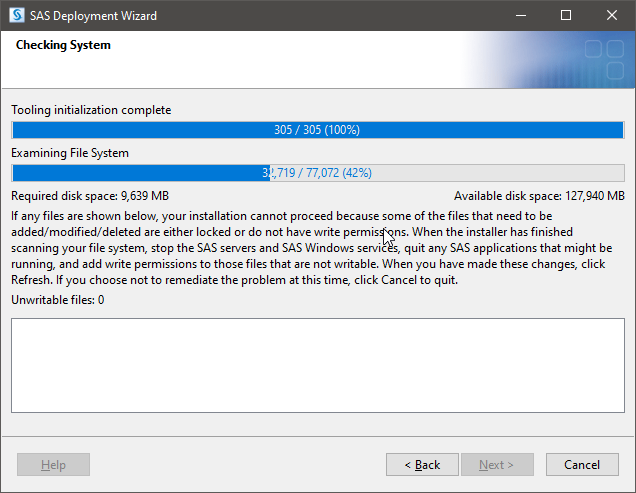
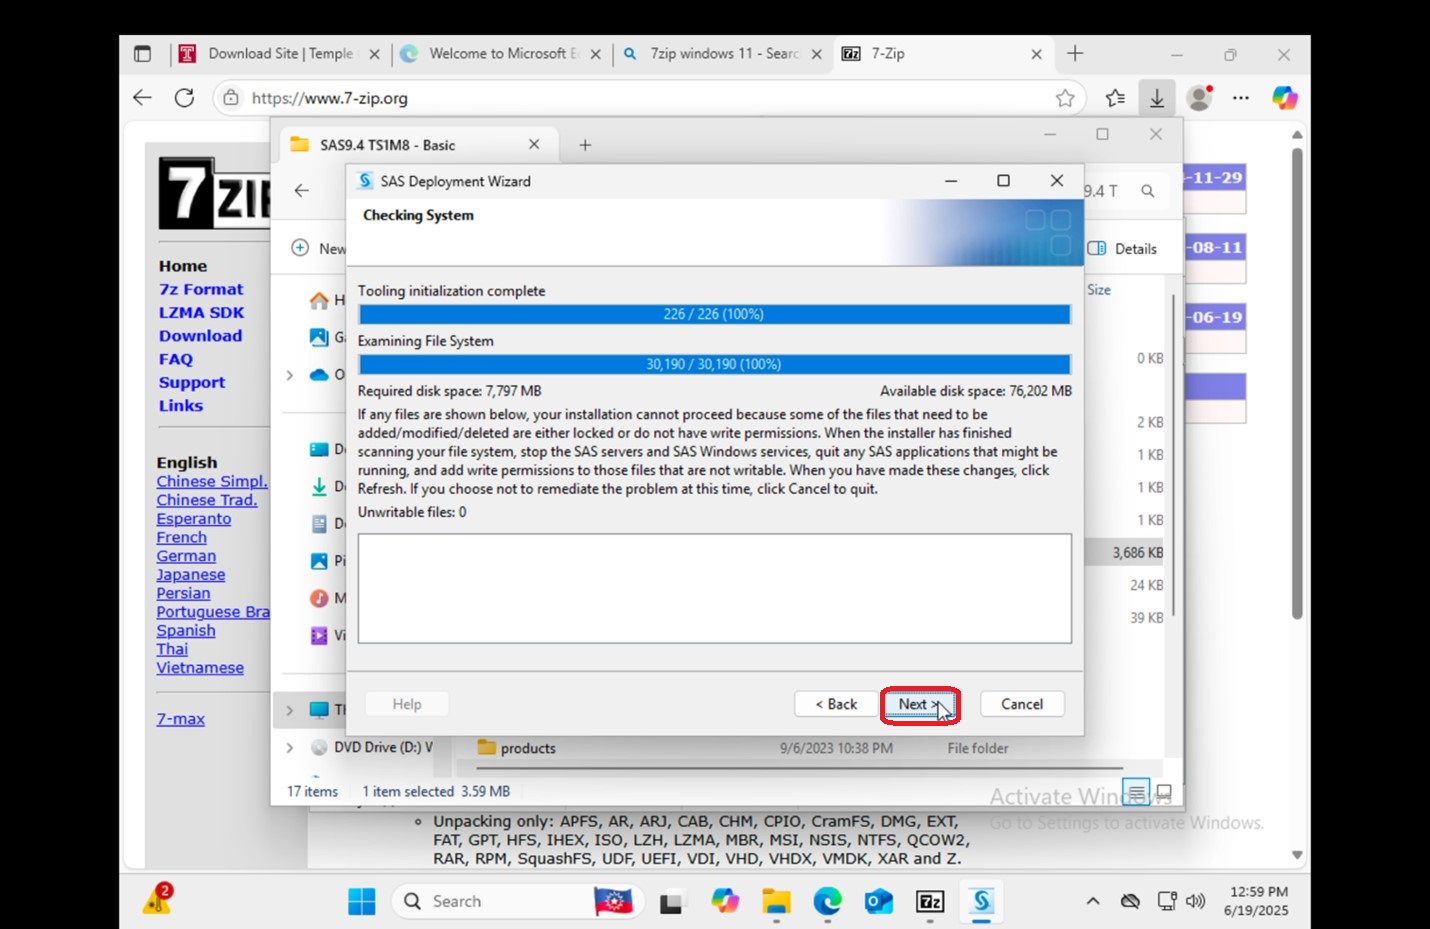
21. SAS will now run a system check.
|
 |
|
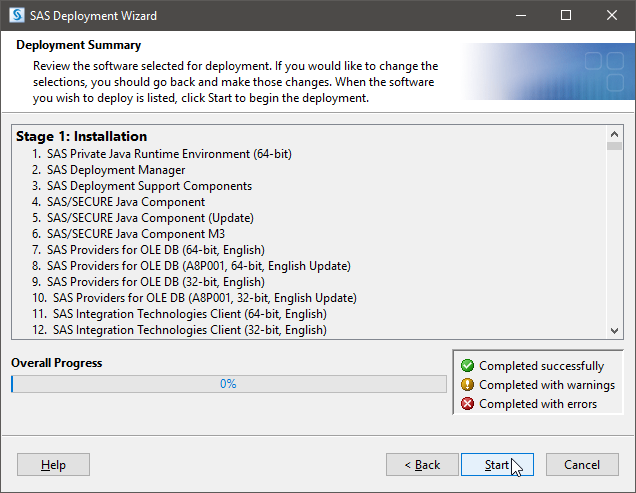
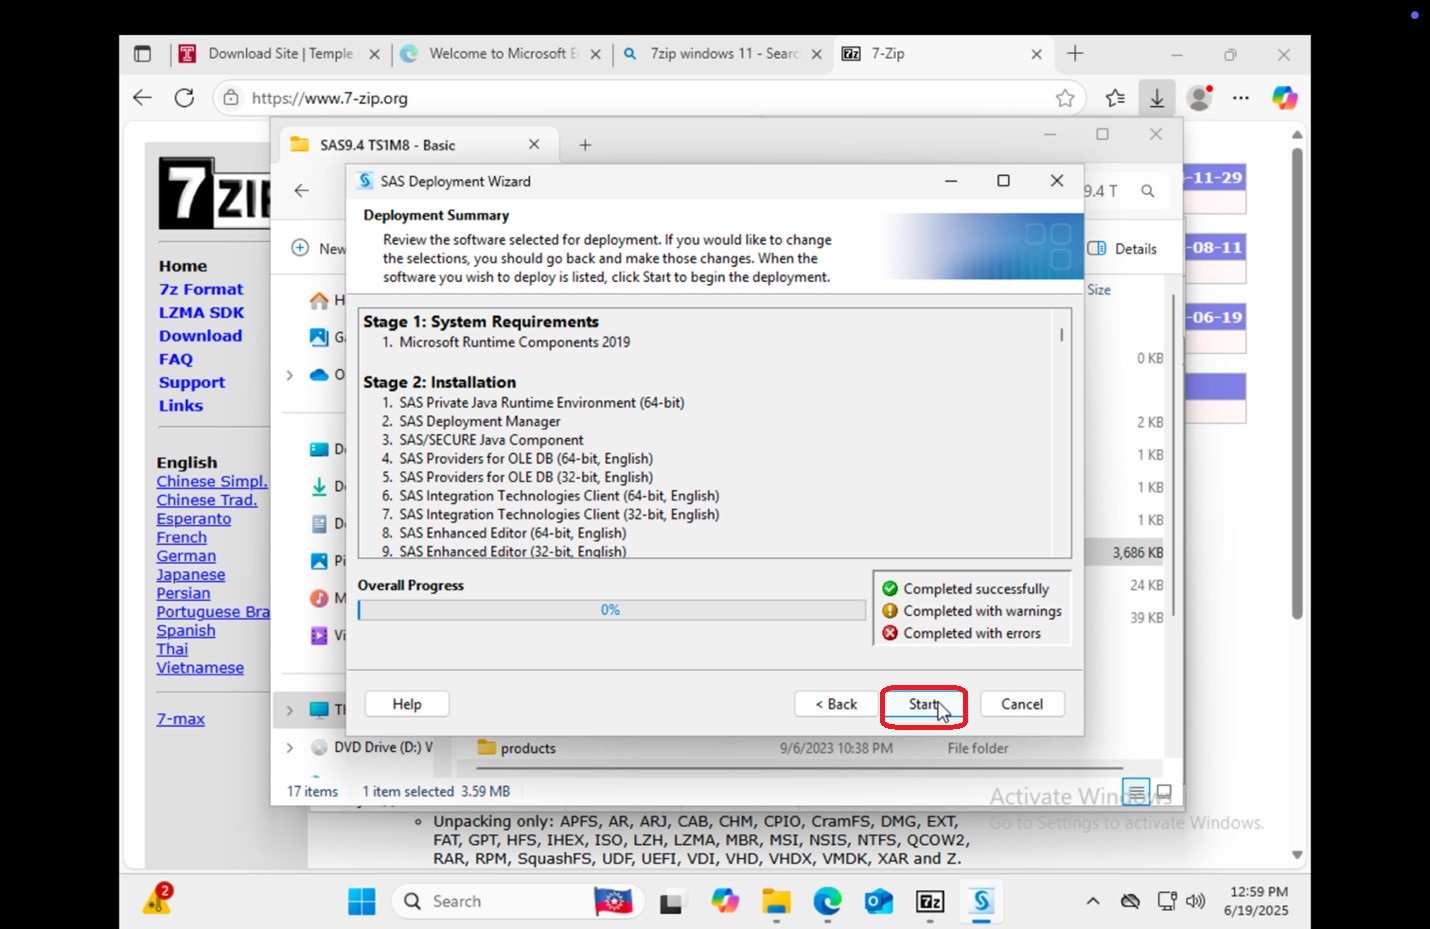
22. Now we're at the actual installation part.
|
 |
|
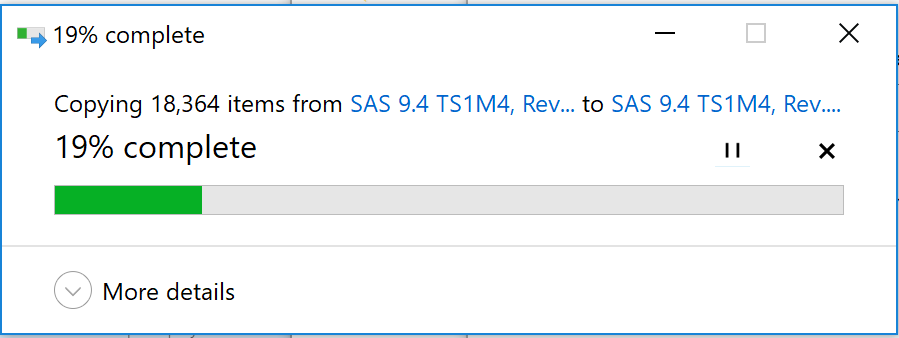
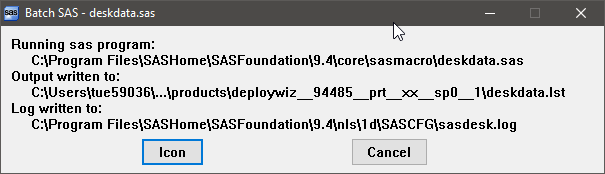
23. While it's installing, you might see popups like these.
|
 |
|
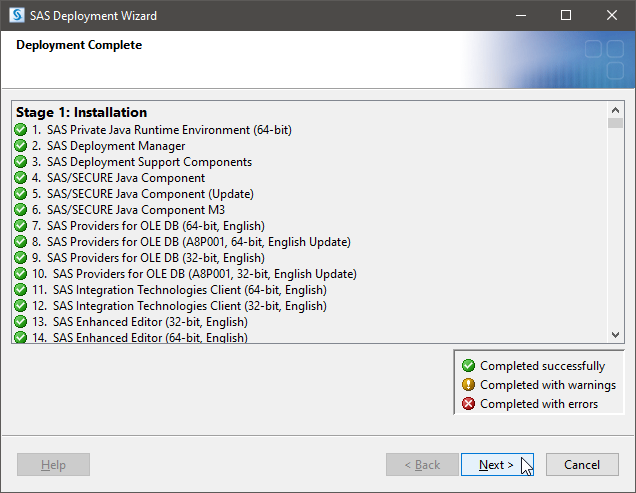
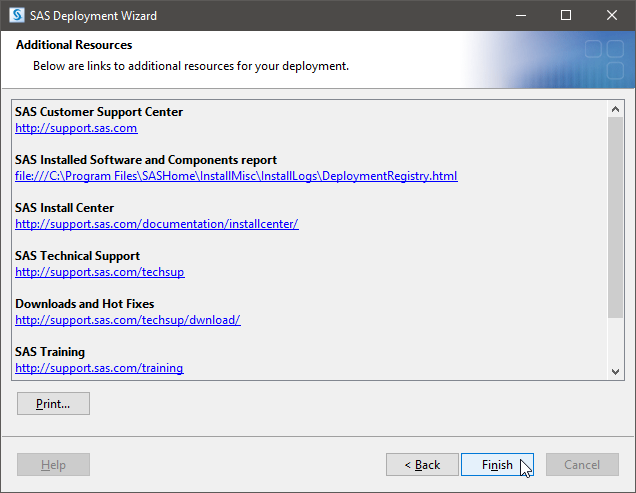
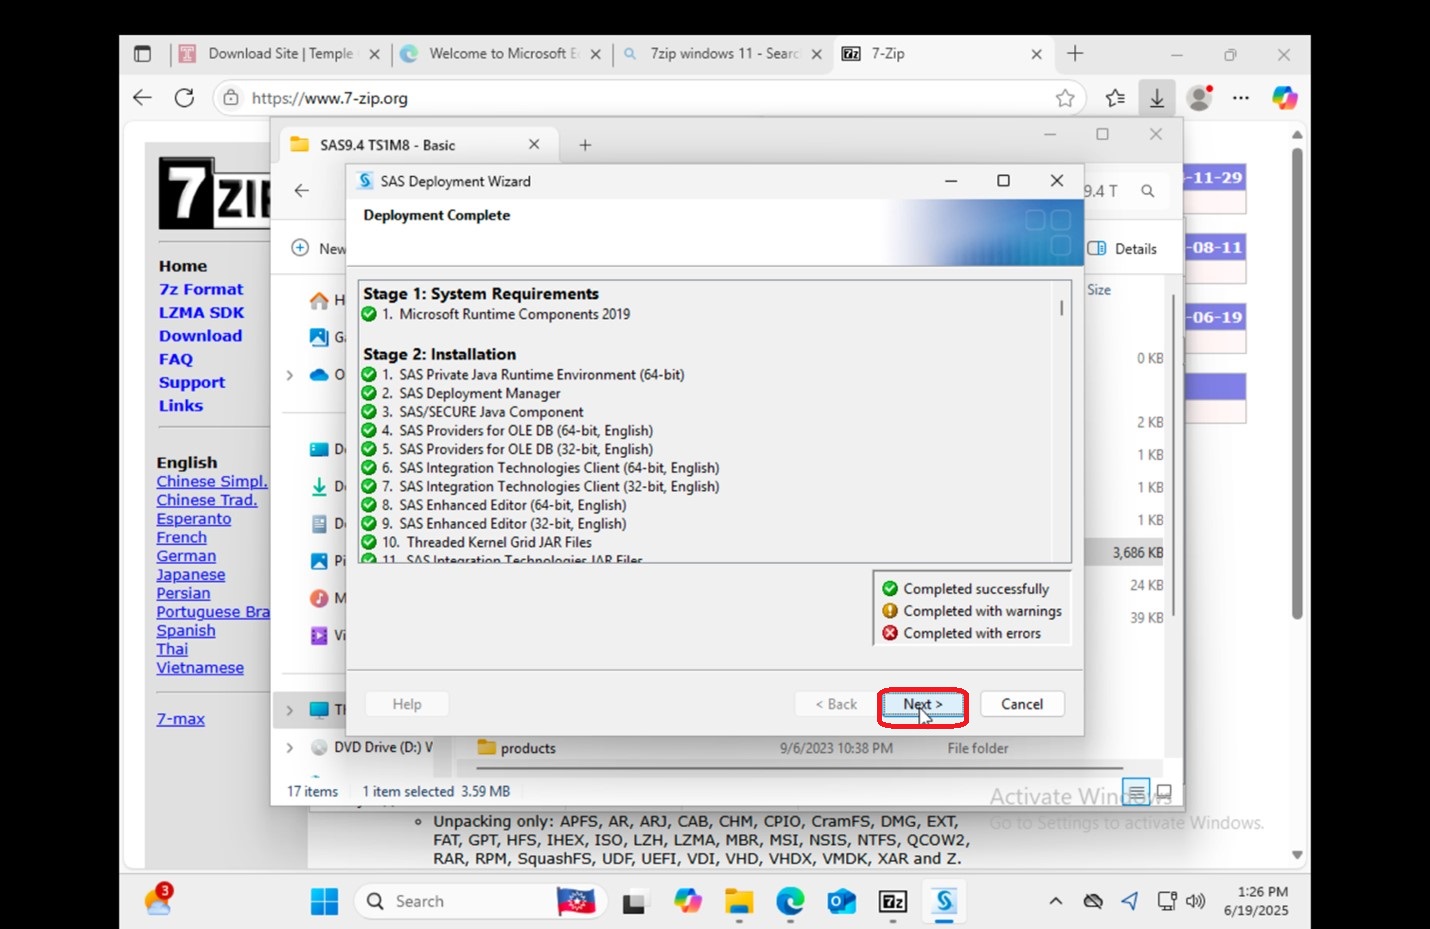
24. Once you wake up from your nap, SAS should be installed. You can confirm that everything completed successfully by scrolling through the list.
|
 |
|
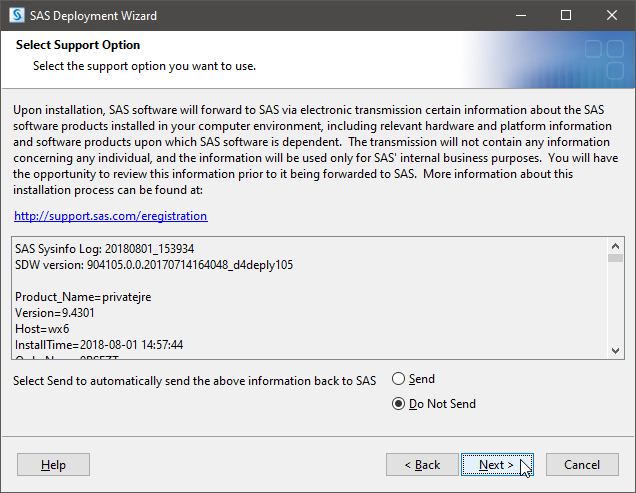
25. You will be asked about support options. Make sure "Do Not Send" is checked and then proceed to
|
 |
|
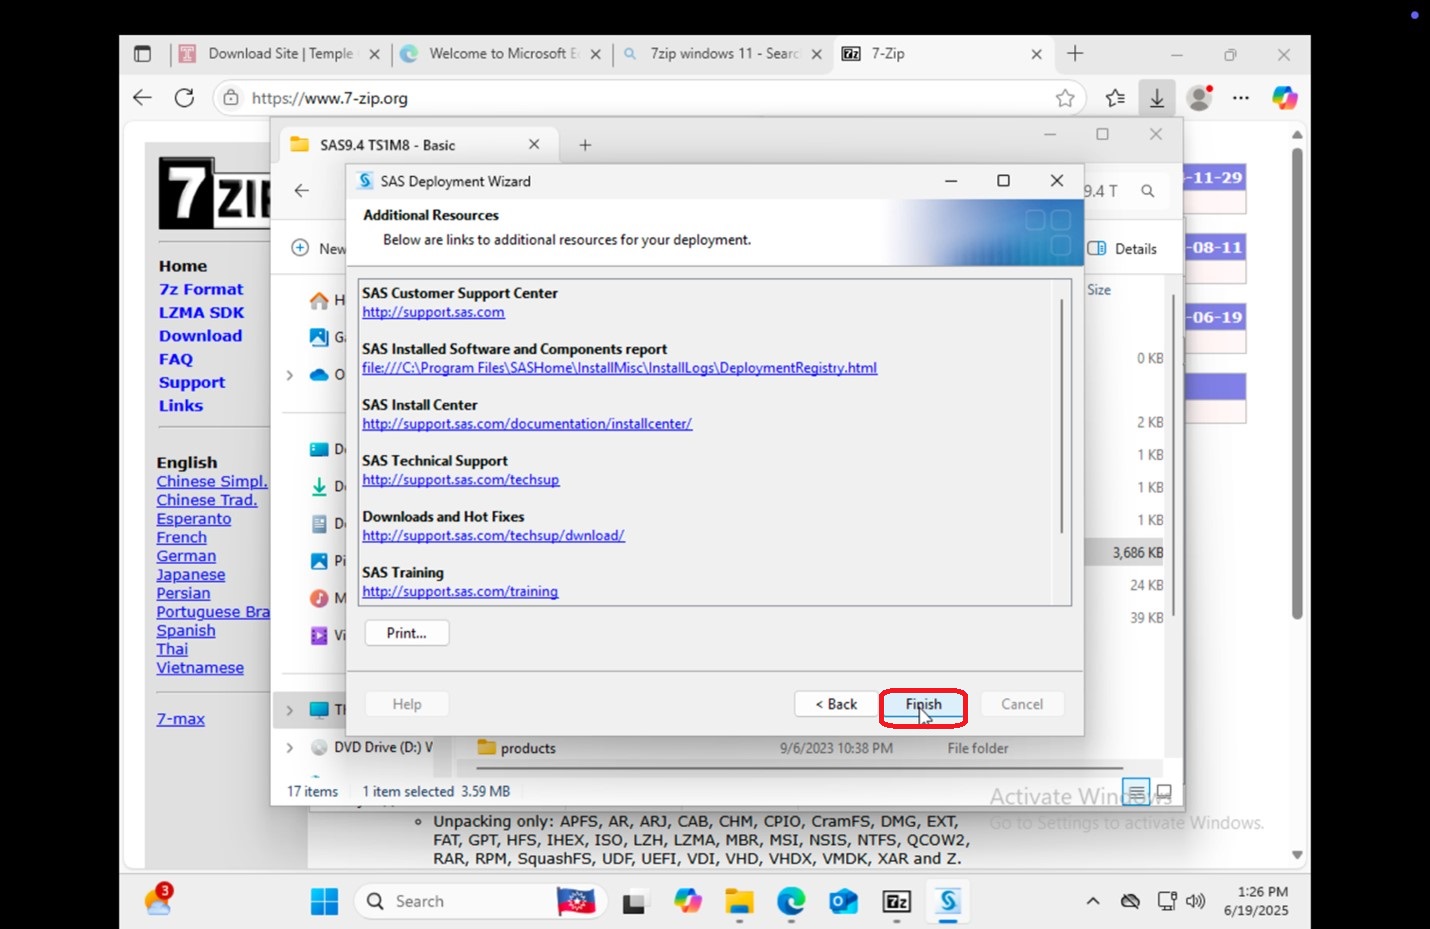
26.
|
 |
Updating the License File (for those who already have SAS 9.4 installed)
|
1. Before you begin, follow the steps in the first section:
|
|
|
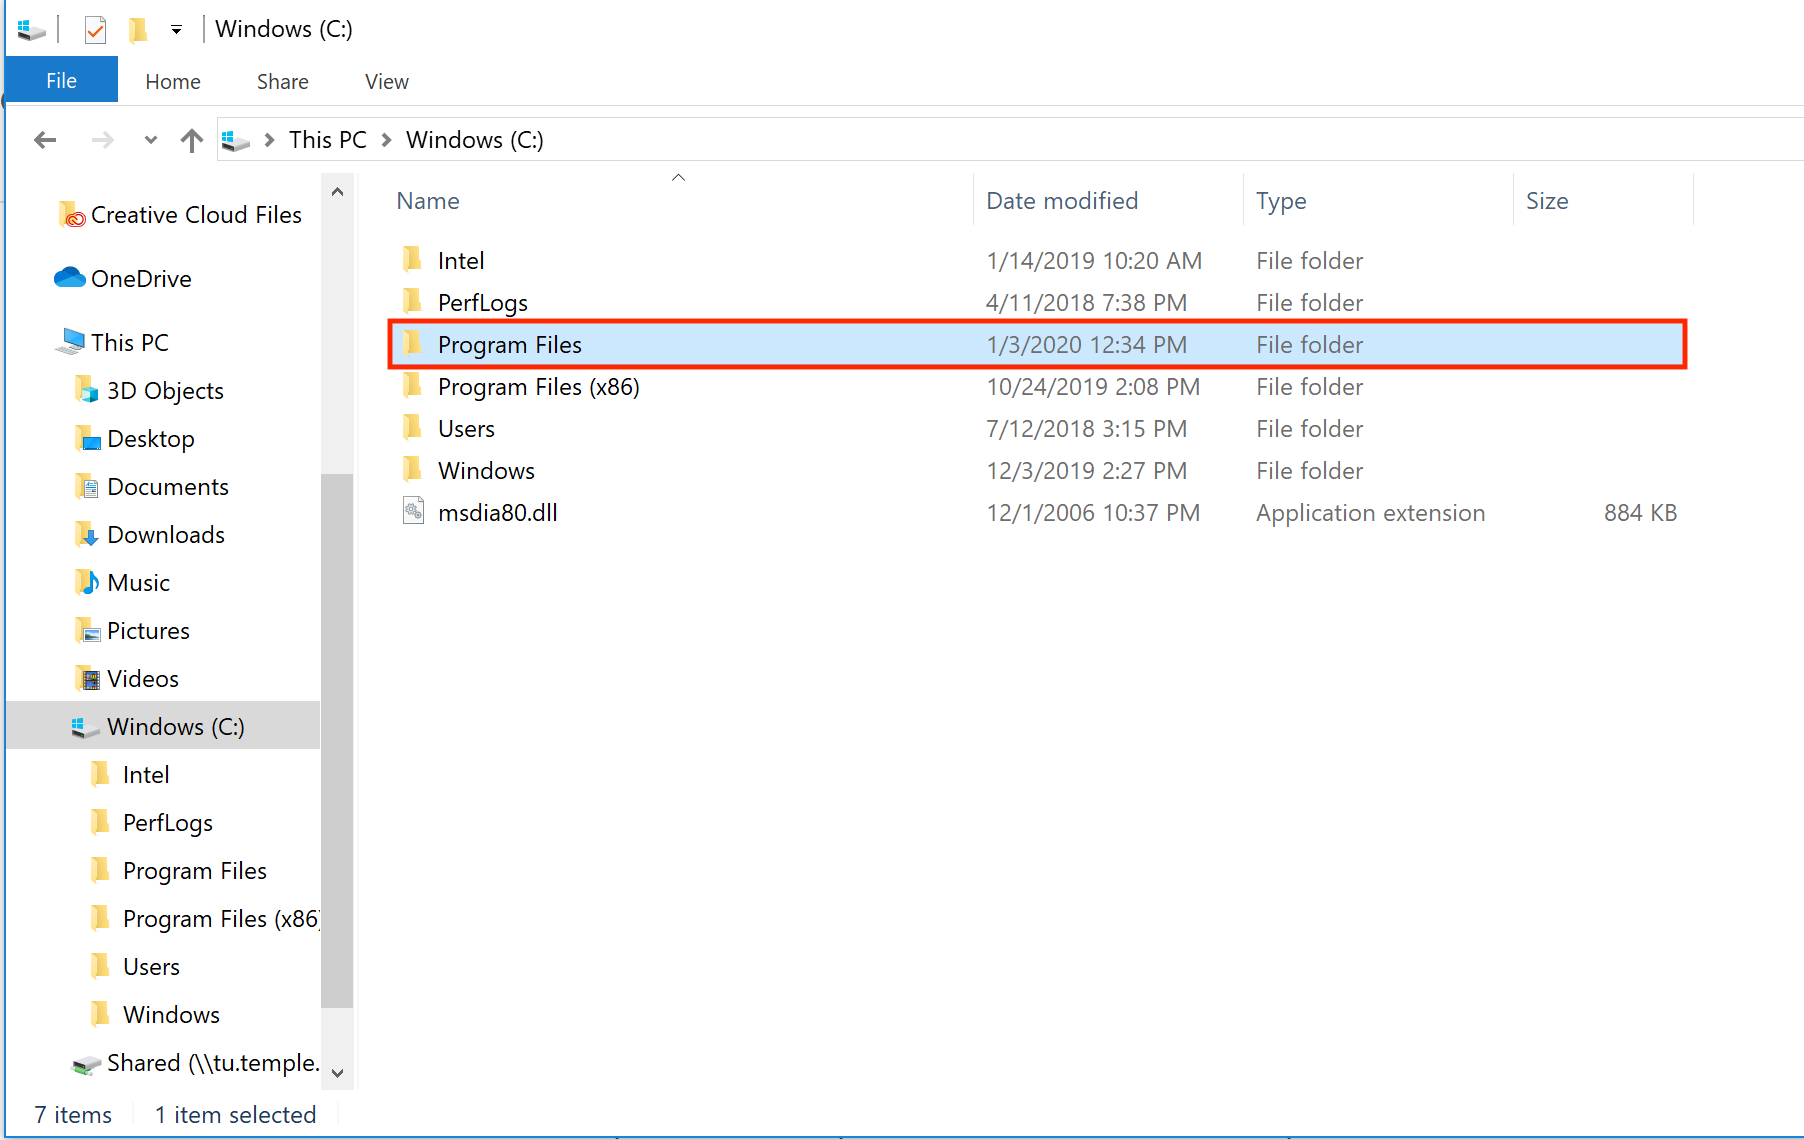
2. Open the file explorer and click
|
 |
|
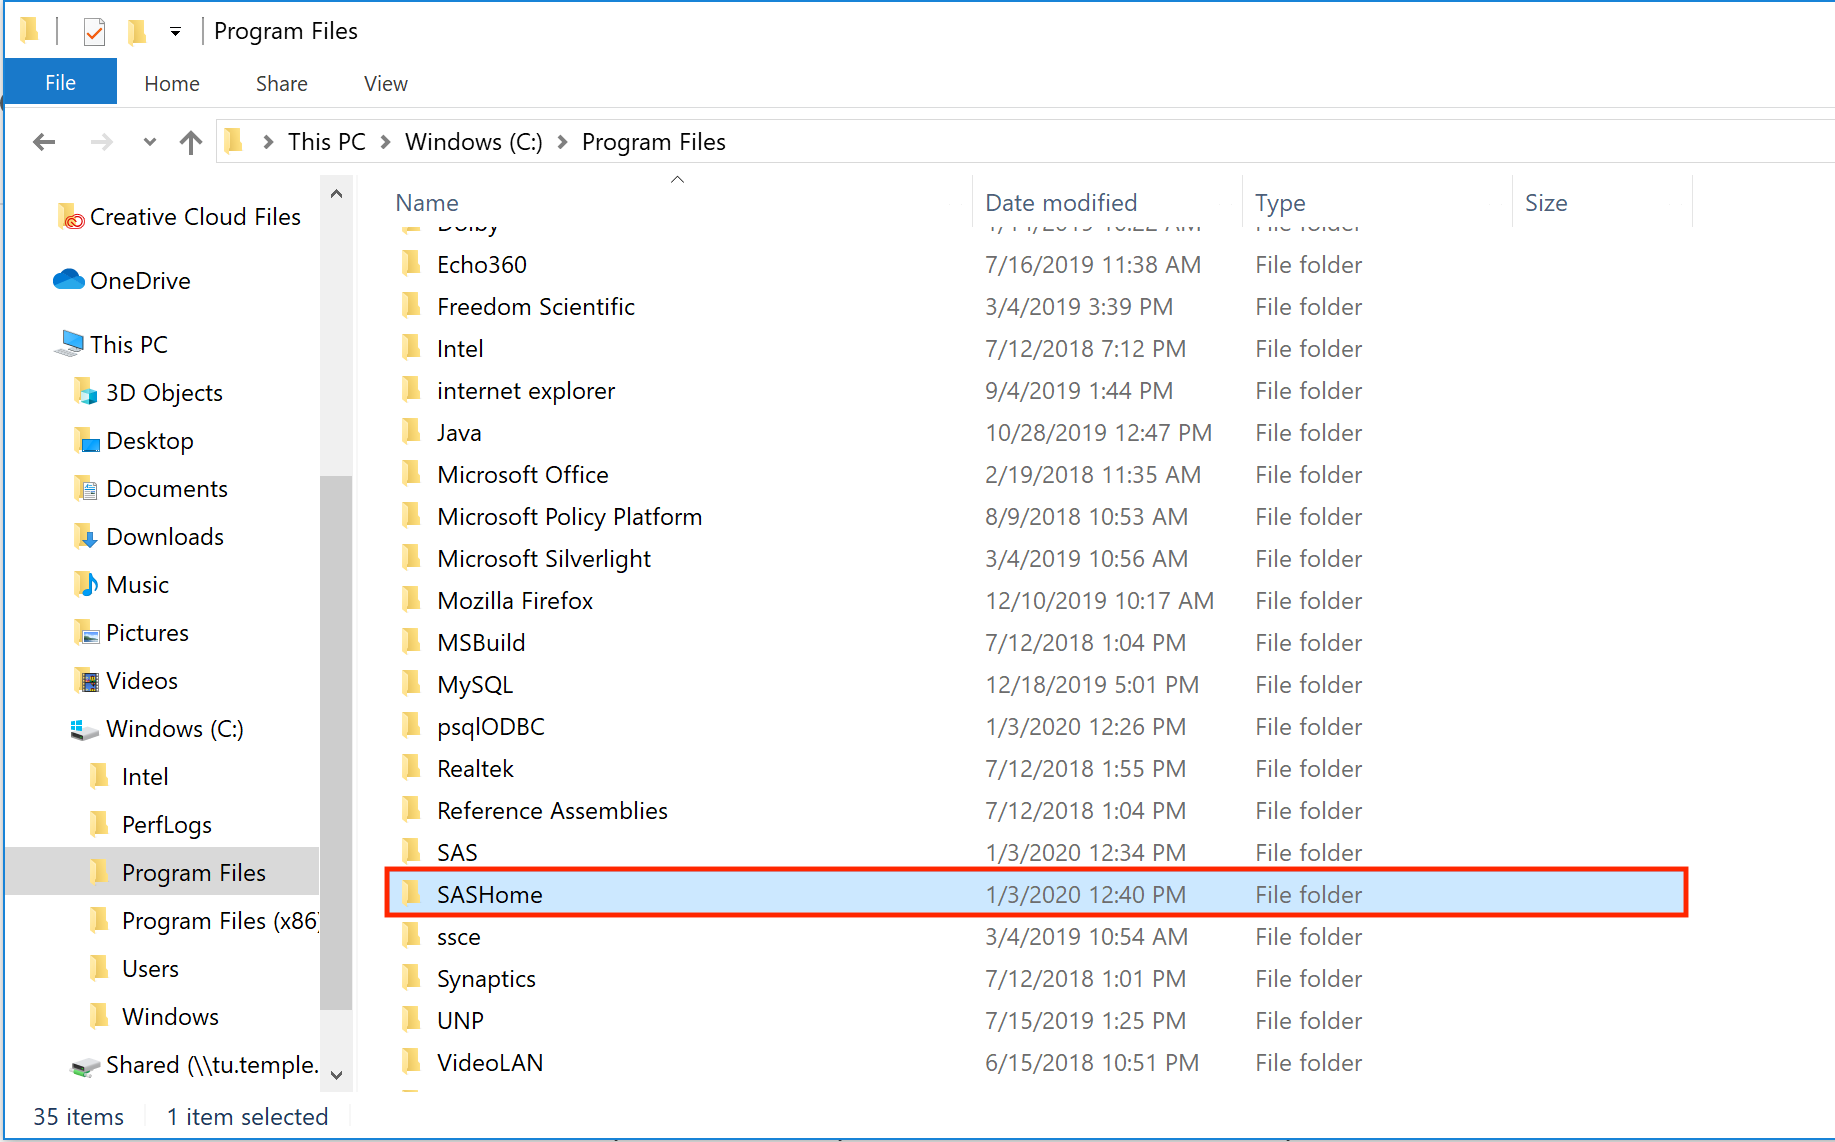
3. Double-click on the folder
|
 |
|
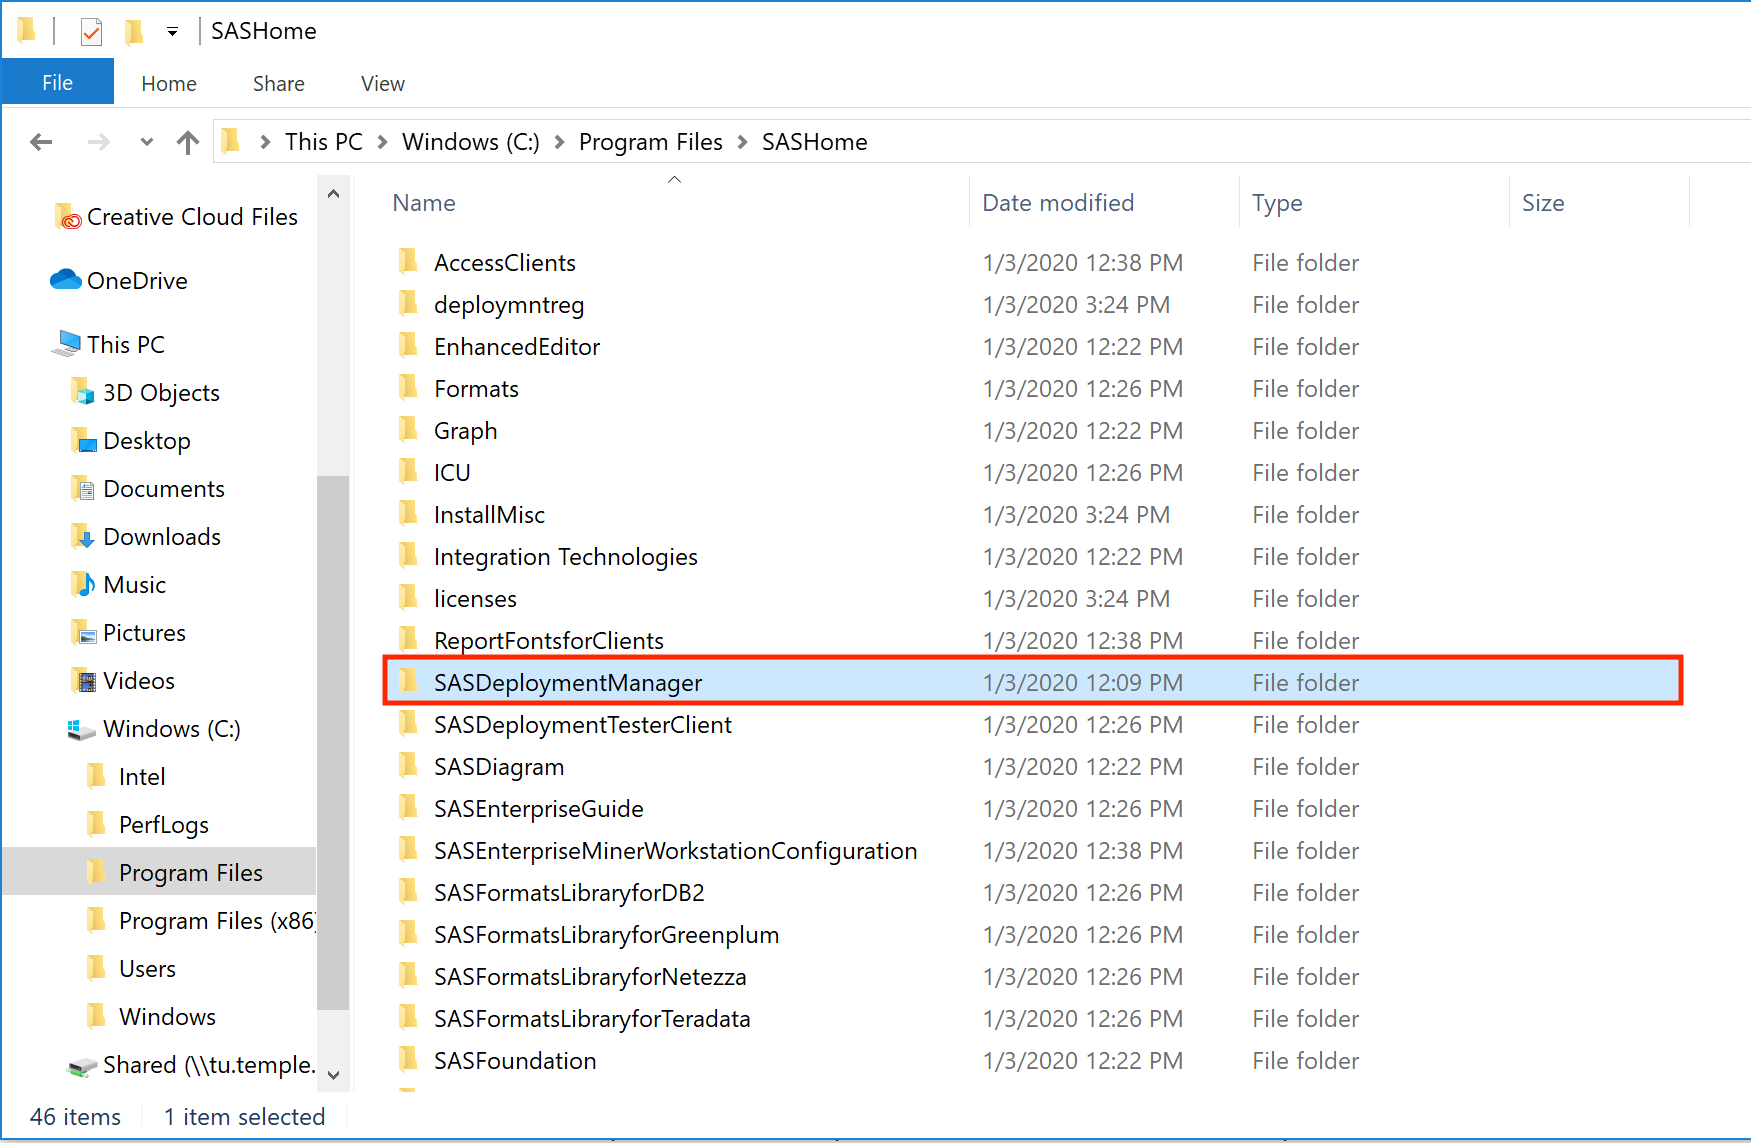
4. Double-click on the folder
|
 |
|
5. Locate the folder
|
 |
|
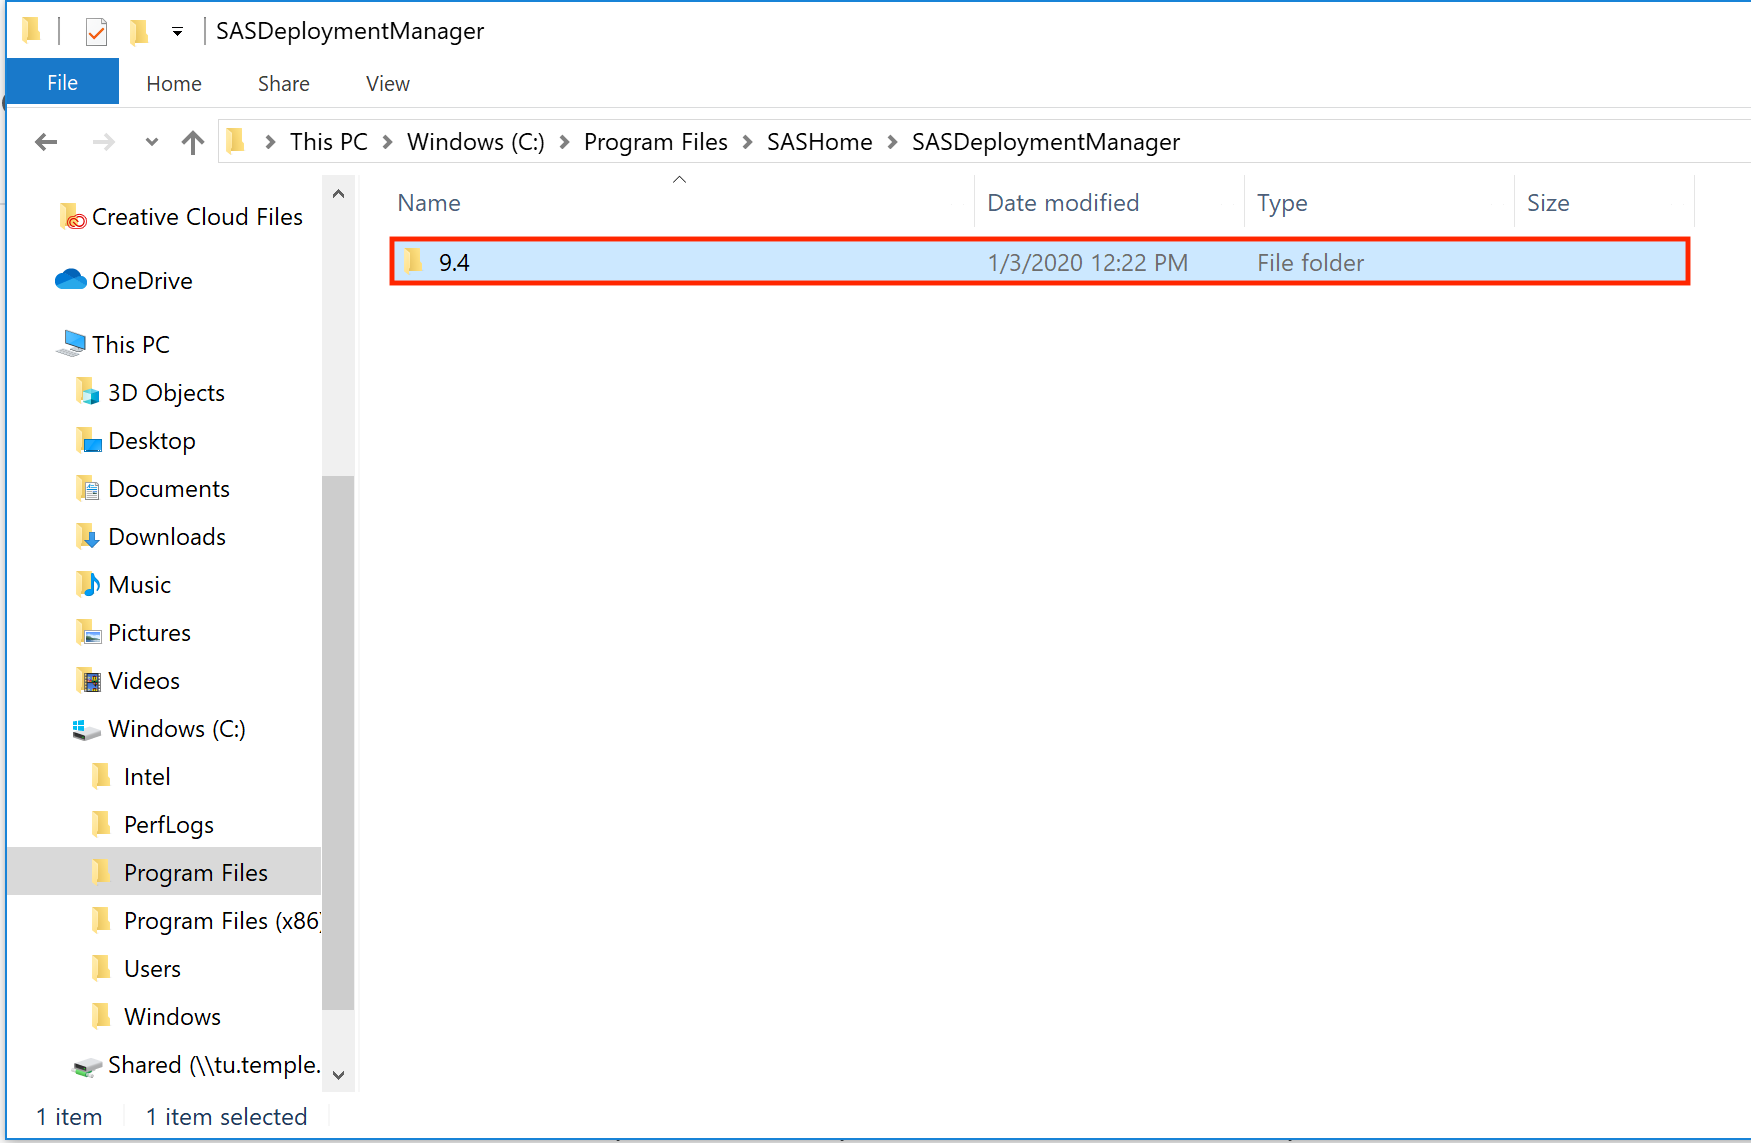
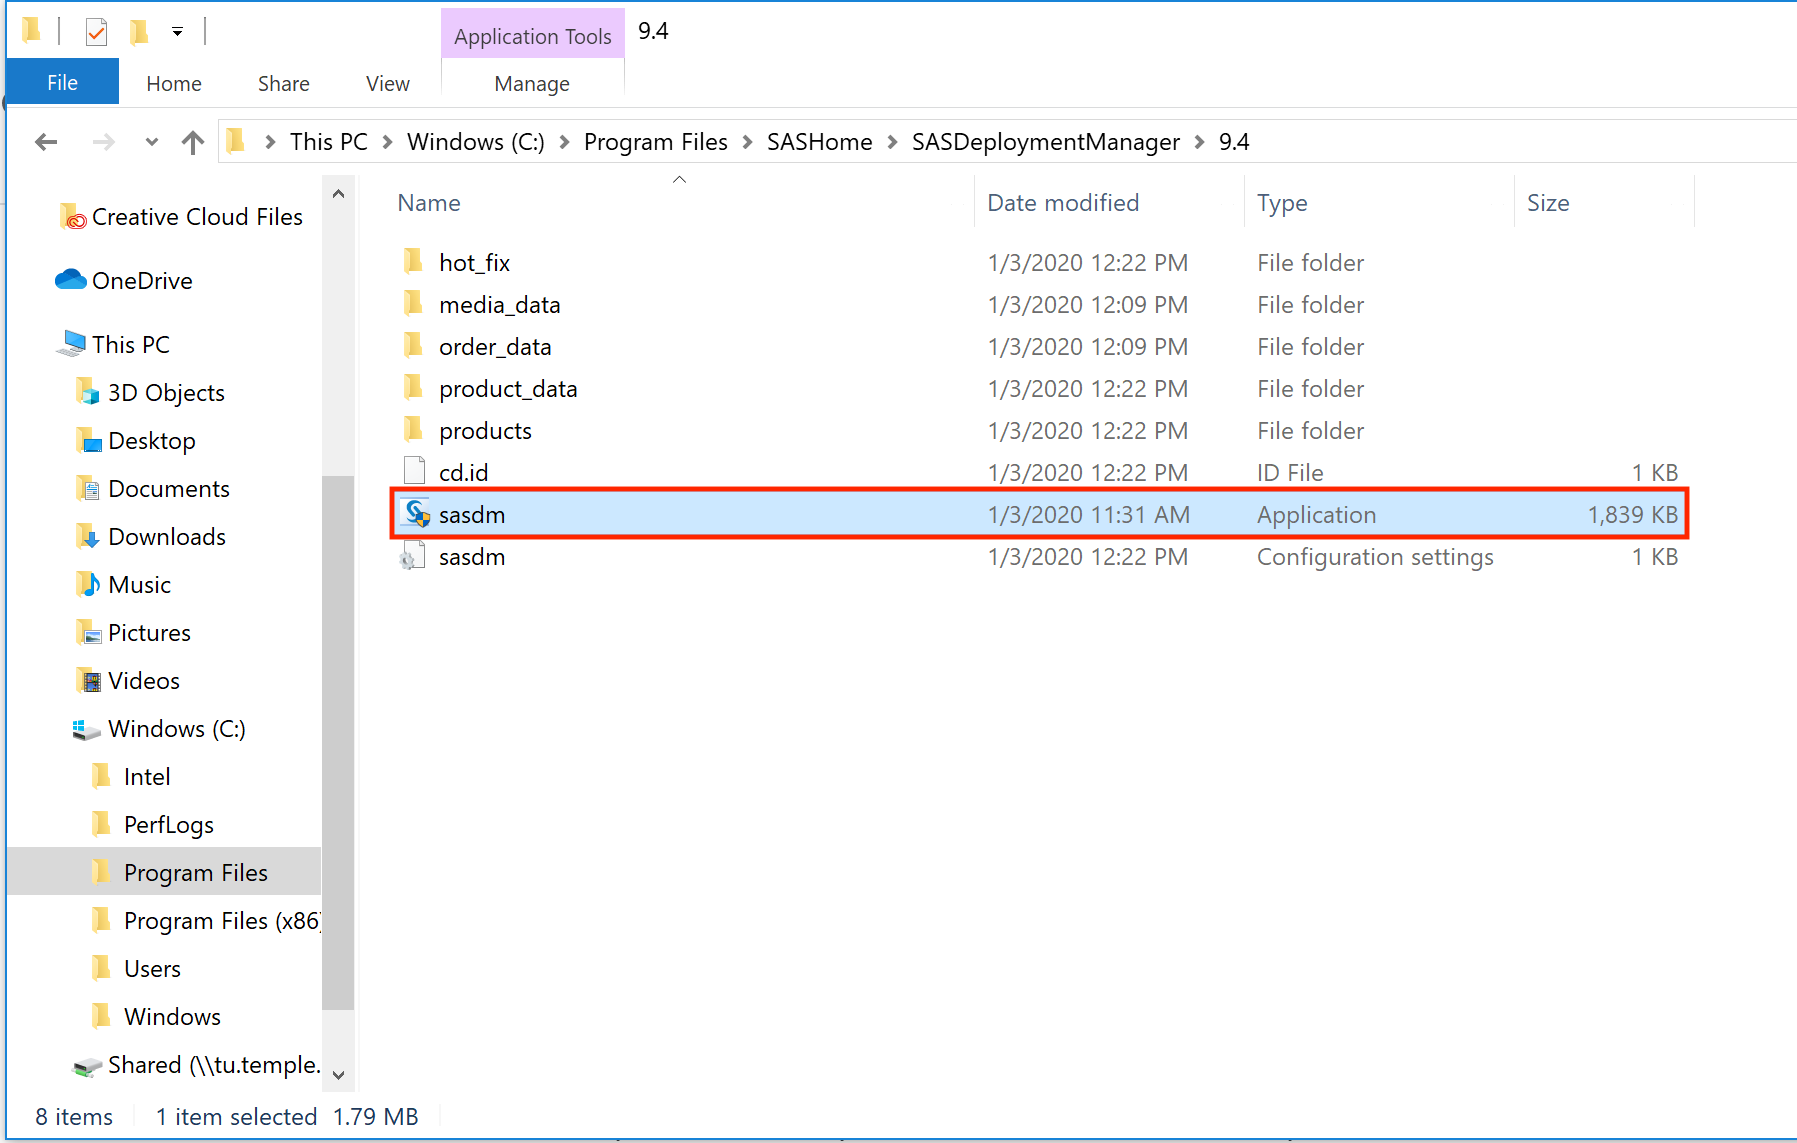
6. Double-click on the folder
|
 |
|
7. Double-click
|
 |
|
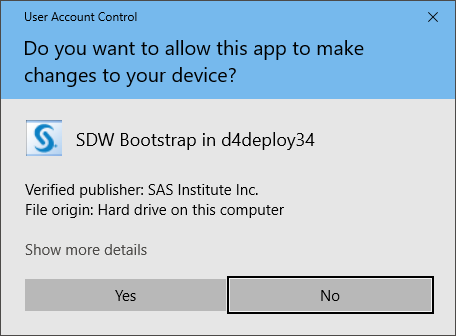
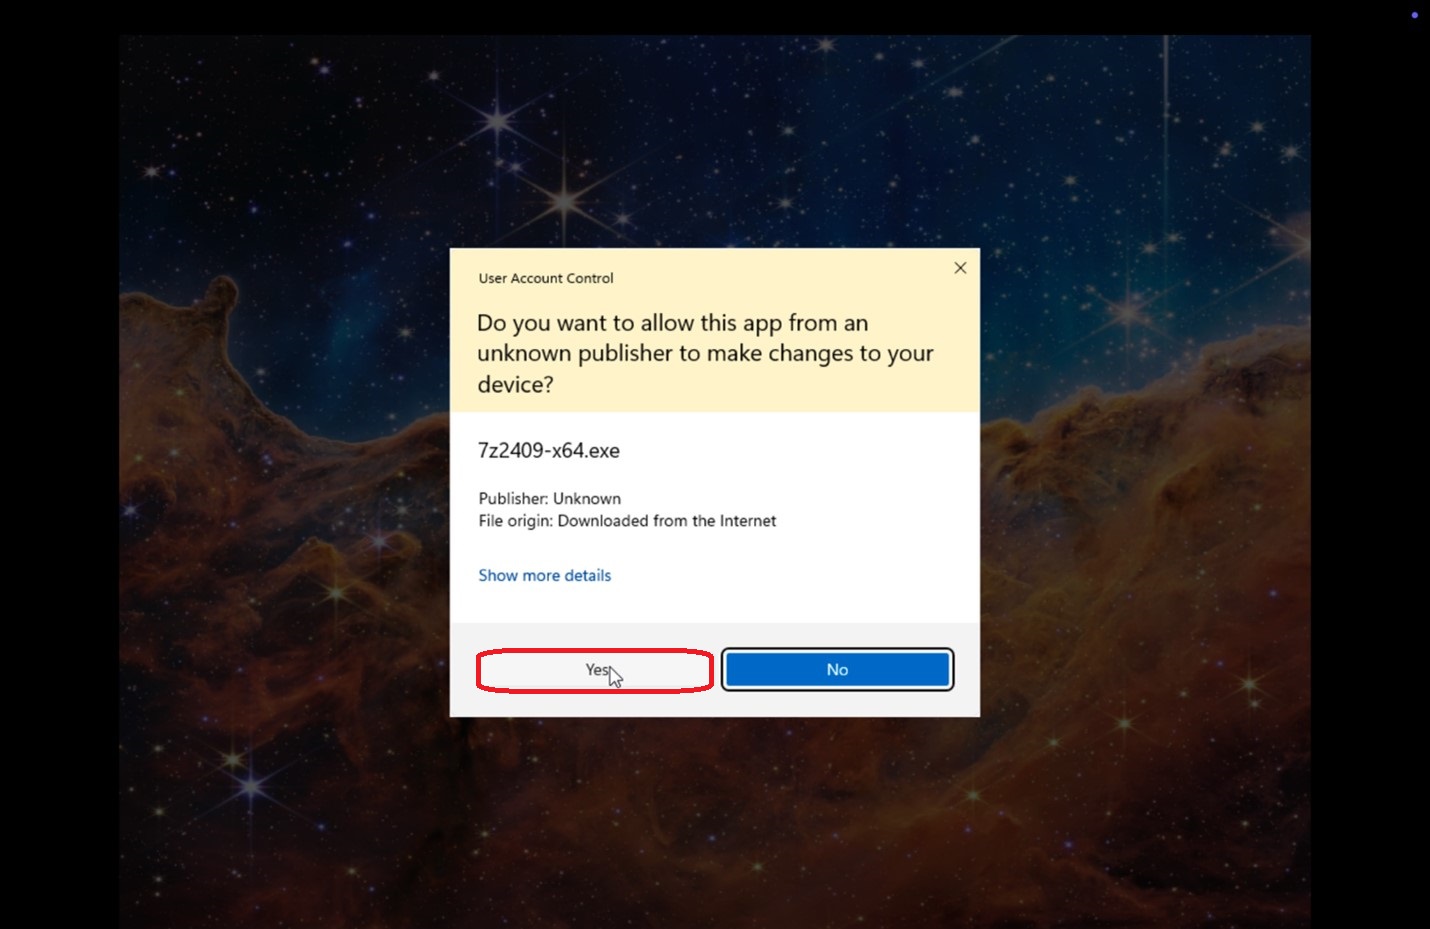
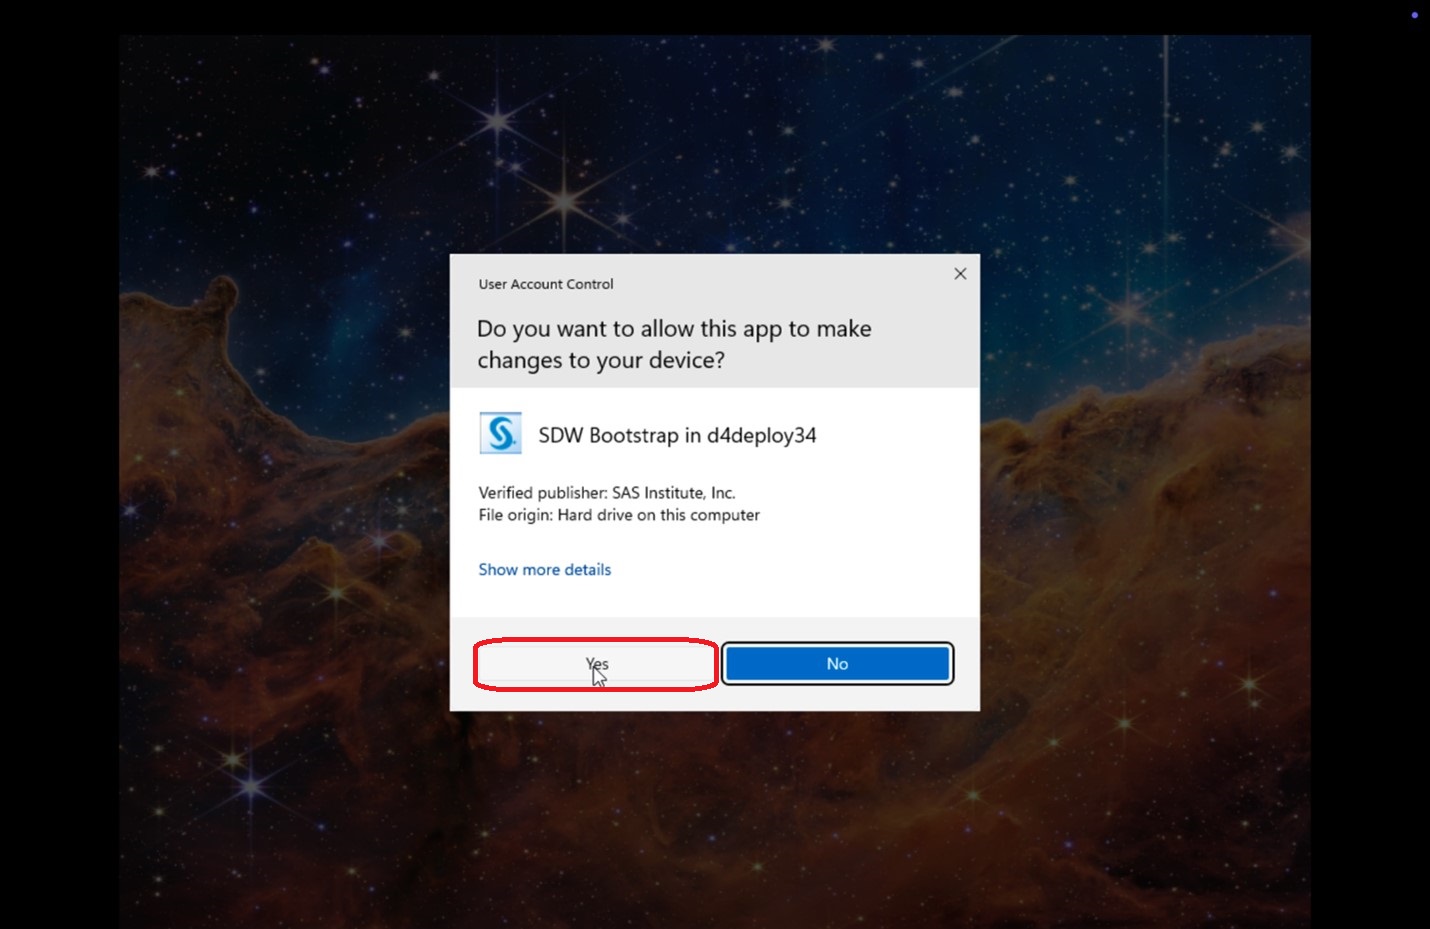
8. When asked "Do you want to allow this app to make changes to your device"?,
|
|
|
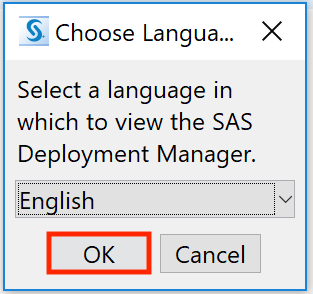
9. Keep English selected for the language and
|
 |
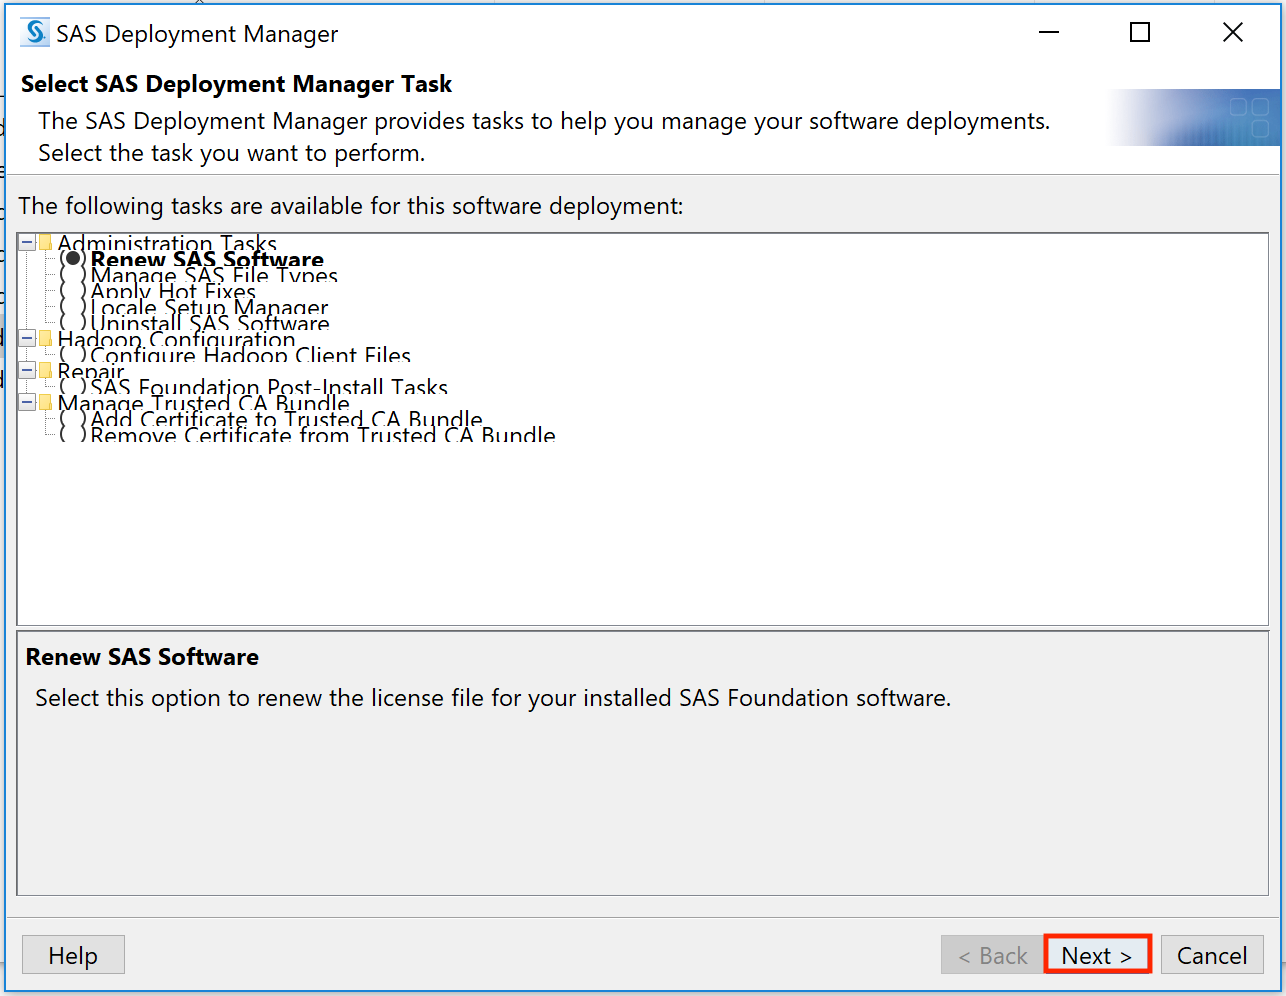
| 10. Keep Renew SAS Software selected and |
 |
|
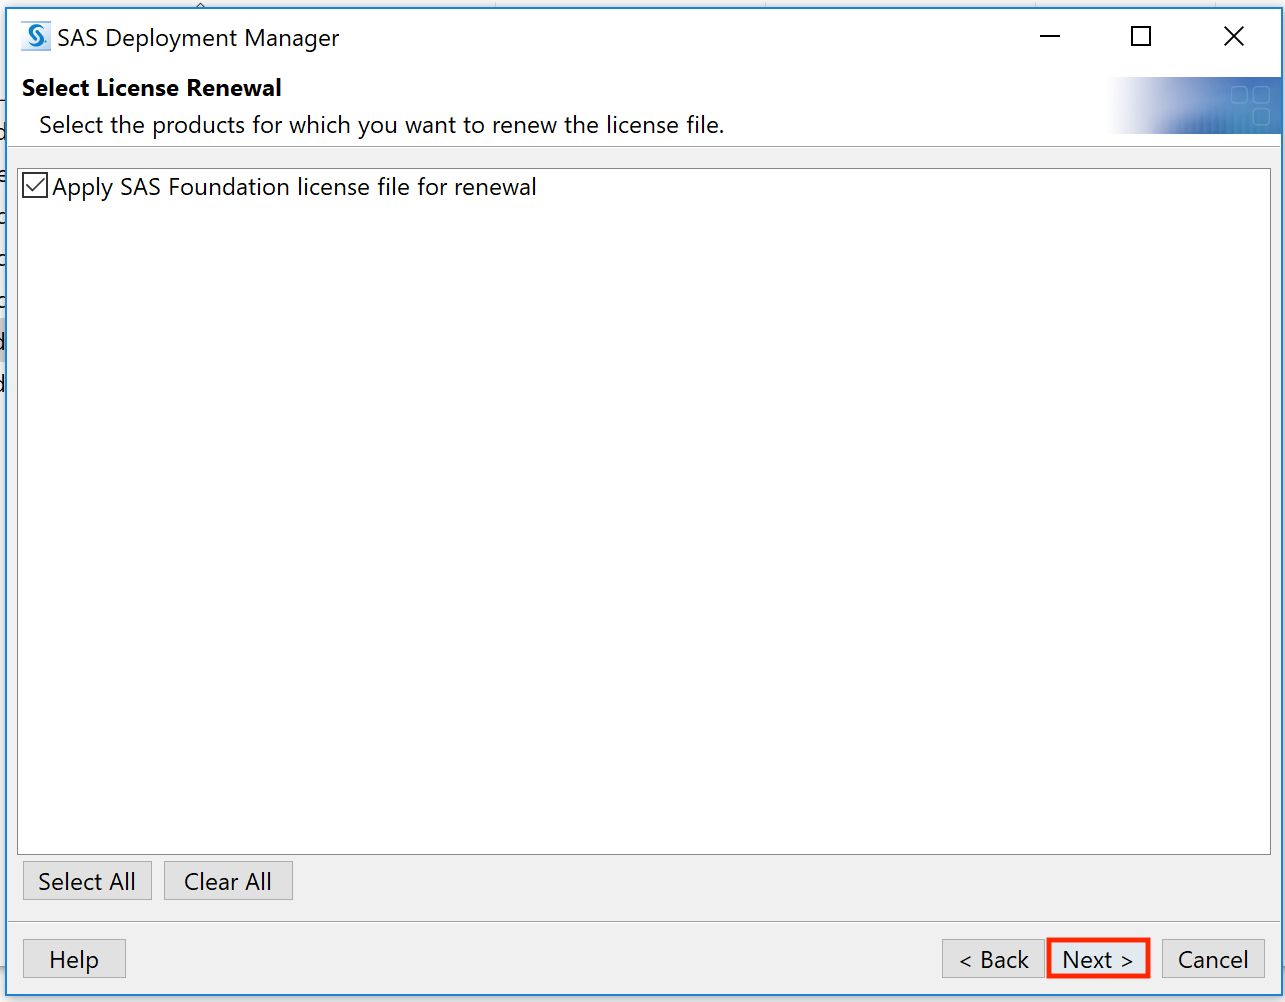
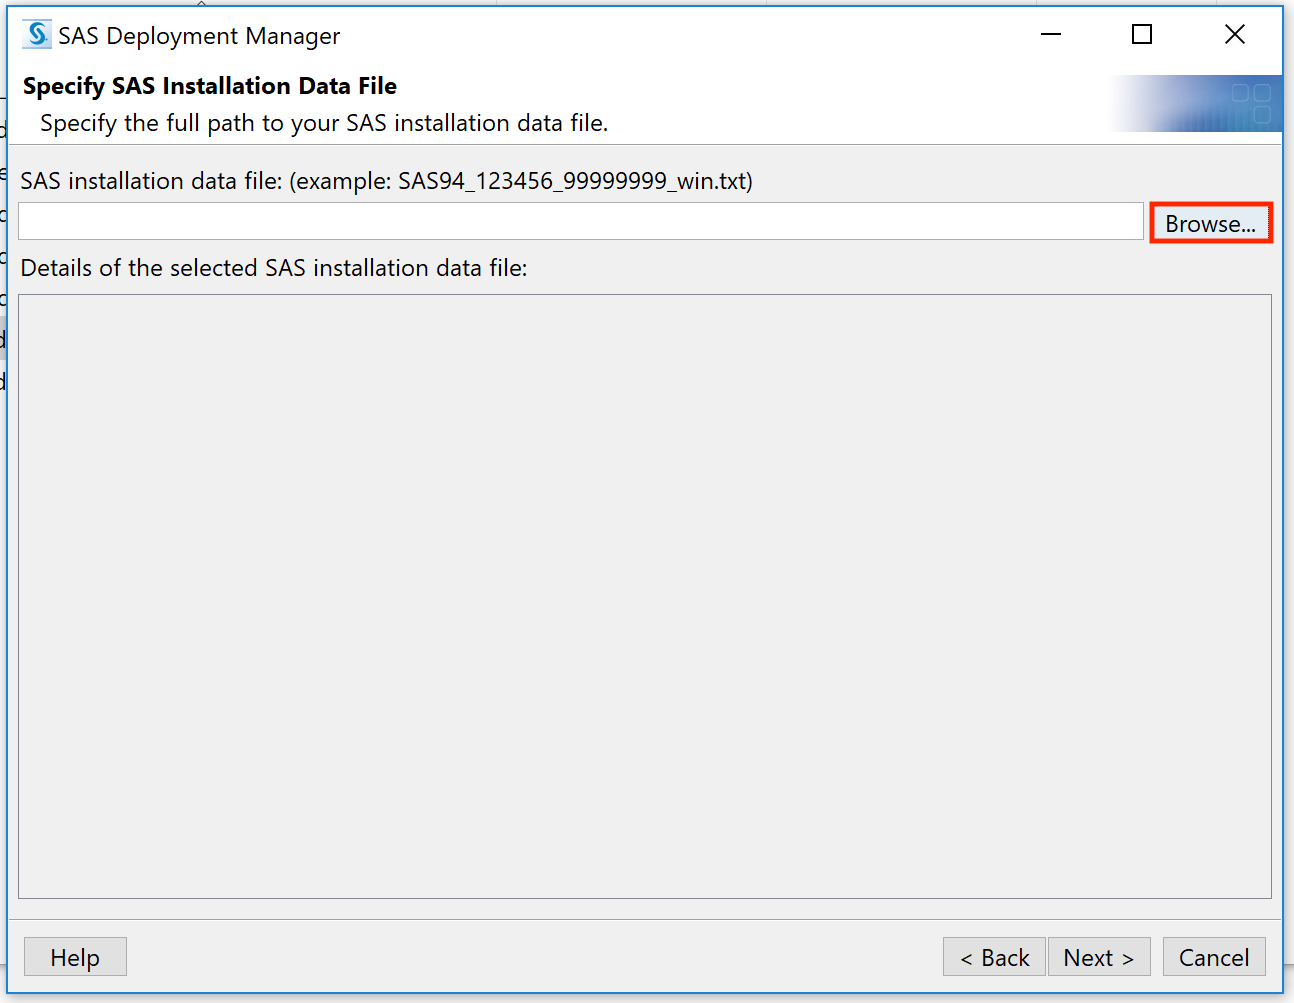
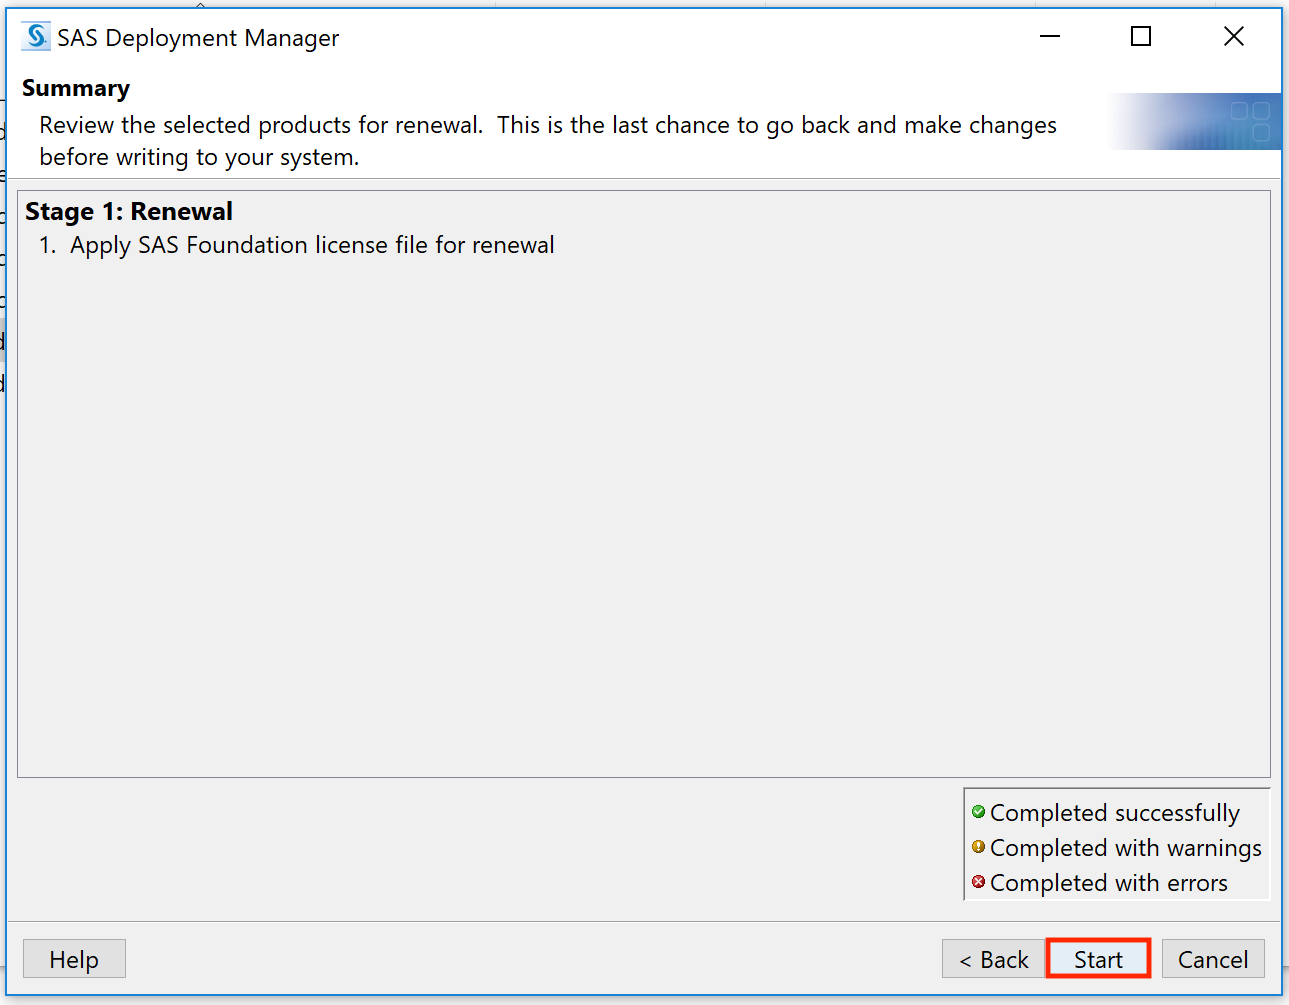
11. Keep Apply SAS Foundation License File for Renewal selected and
|
 |
|
12. Click Browse and locate where you saved the license file from
|
 |
|
13. Select the license file and
|
 |
|
14.
|
 |
|
15.
|
 |
|
16.
|
 |
|
17.
|
 |
SAS on Apple Silcon Macs
The following video is a step-by-step guide for downloading SAS to your Apple Silicon Mac. For any questions or concerns, please email email cphhelp@temple.edu or submit a IT help ticket and we can get your system updated.
Please note you can either watch the video above for the download process after completion of steps 1-3 or you can follow the step by step guides below.
|
1. Go to: https://support.broadcom.com/group/ecx/downloads and register for a free account.
|
|
|
2. Once that’s completed, download VMWare Fusion: https://support.broadcom.com/group/ecx/productdownloads?subfamily=VMware%20Fusion&freeDownloads=true
|
|
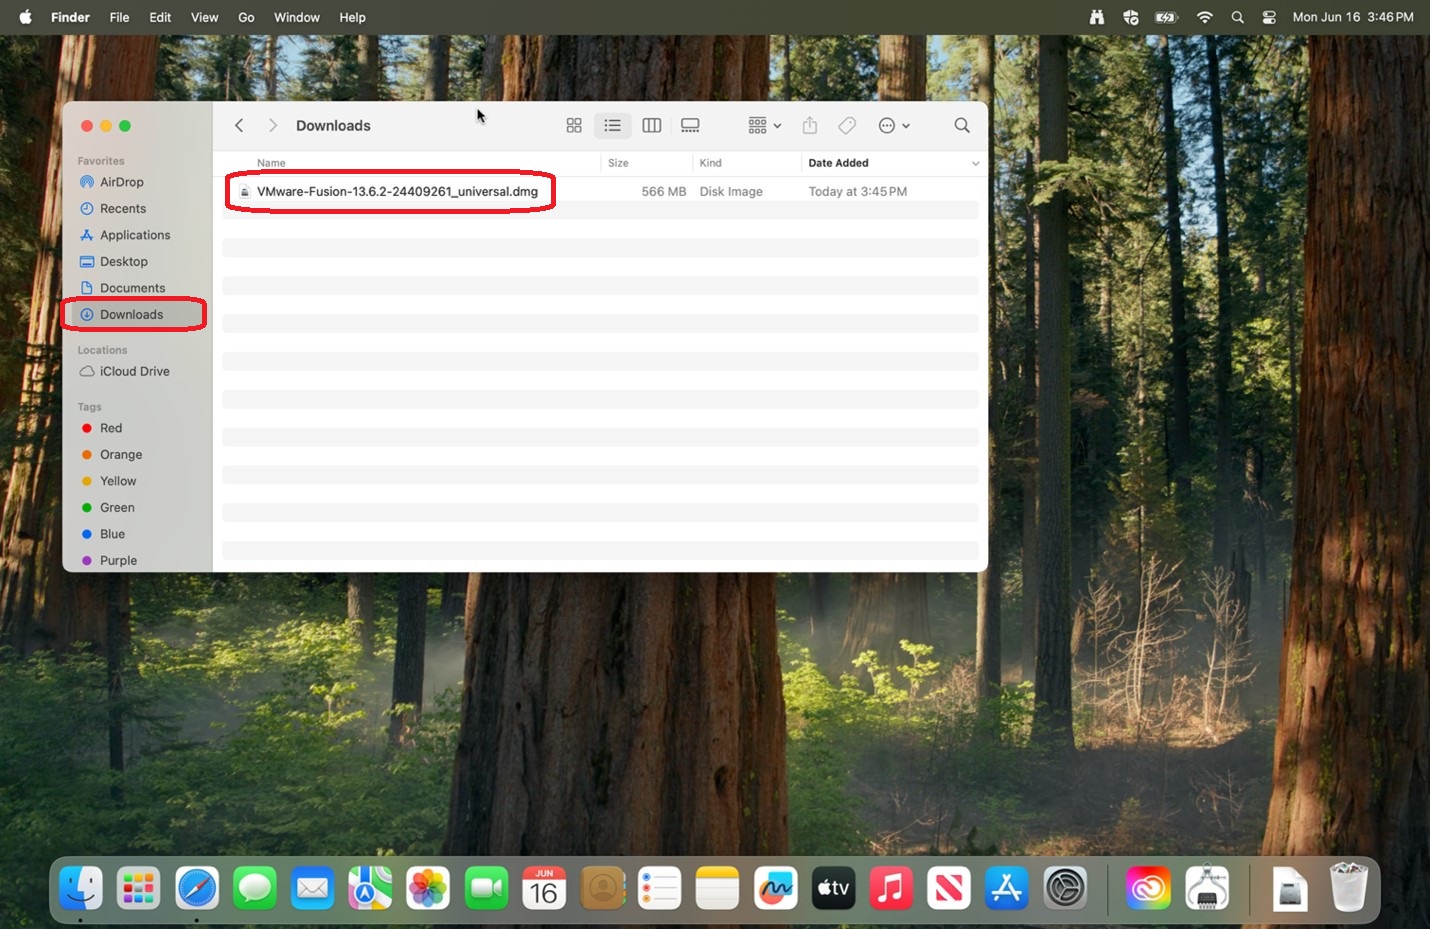
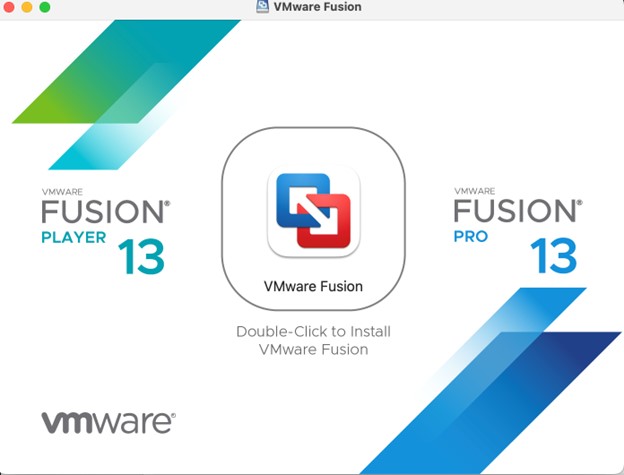
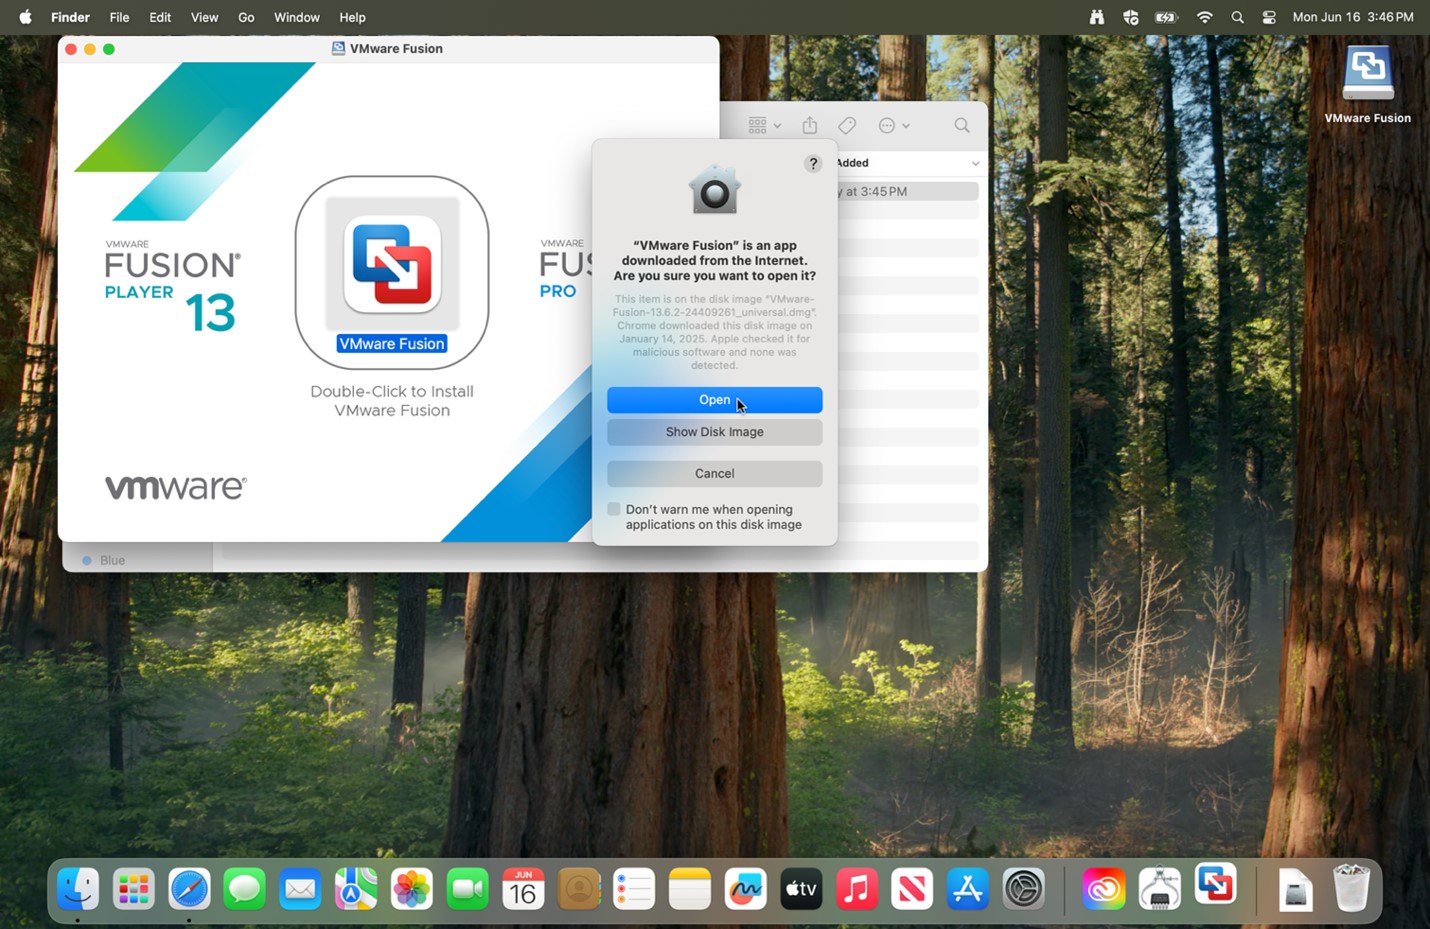
| 3. Open the folder that you downloaded the installer to. Double click the installer from where you downloaded to. |
|
| 4. Select Get Windows from Microsoft. | 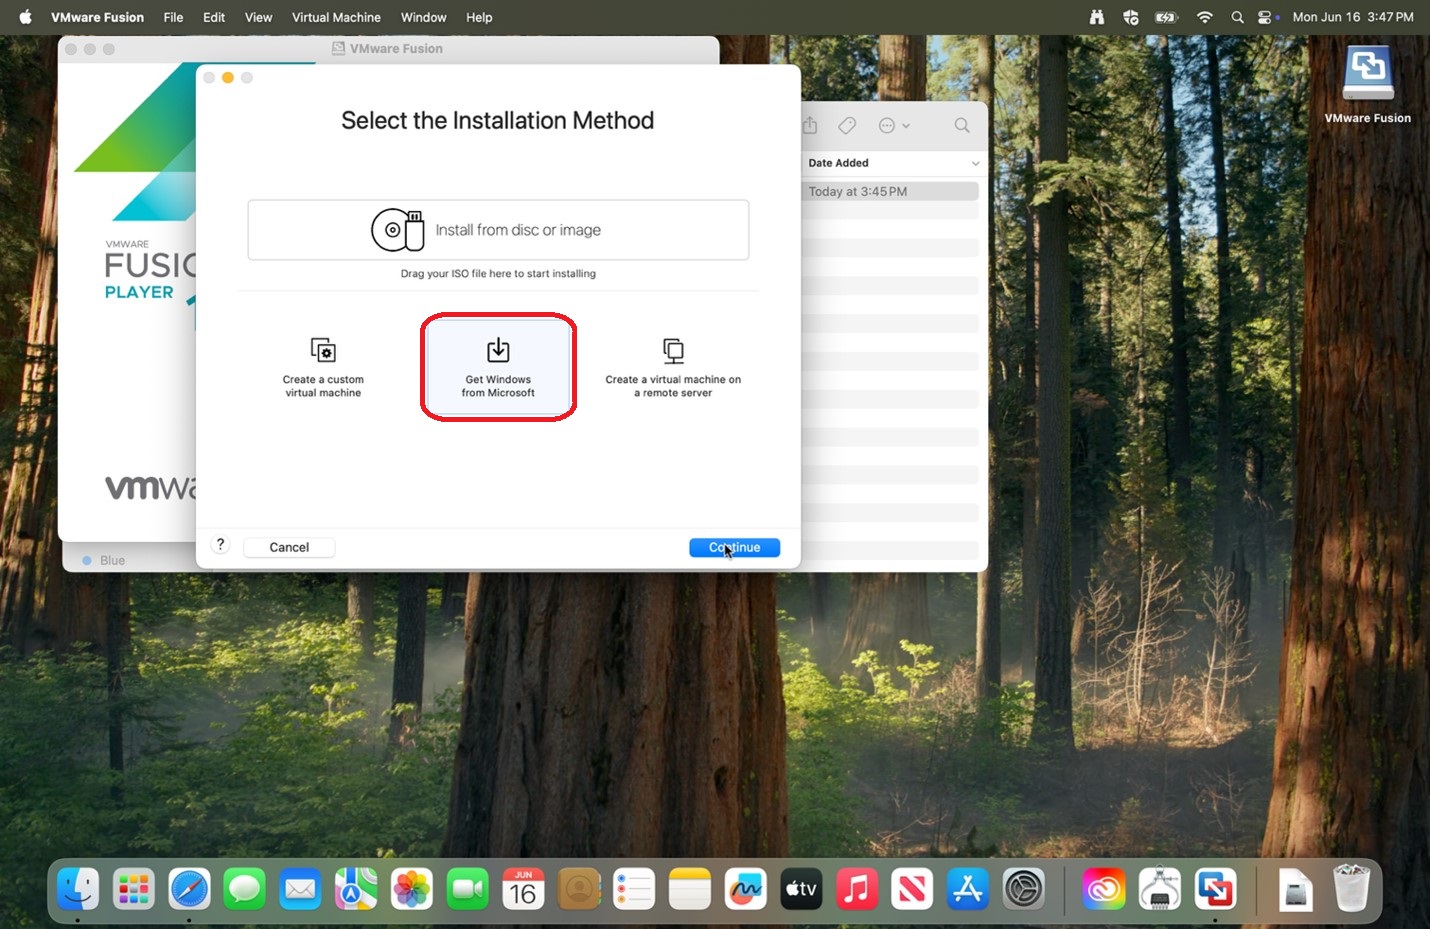 |
|
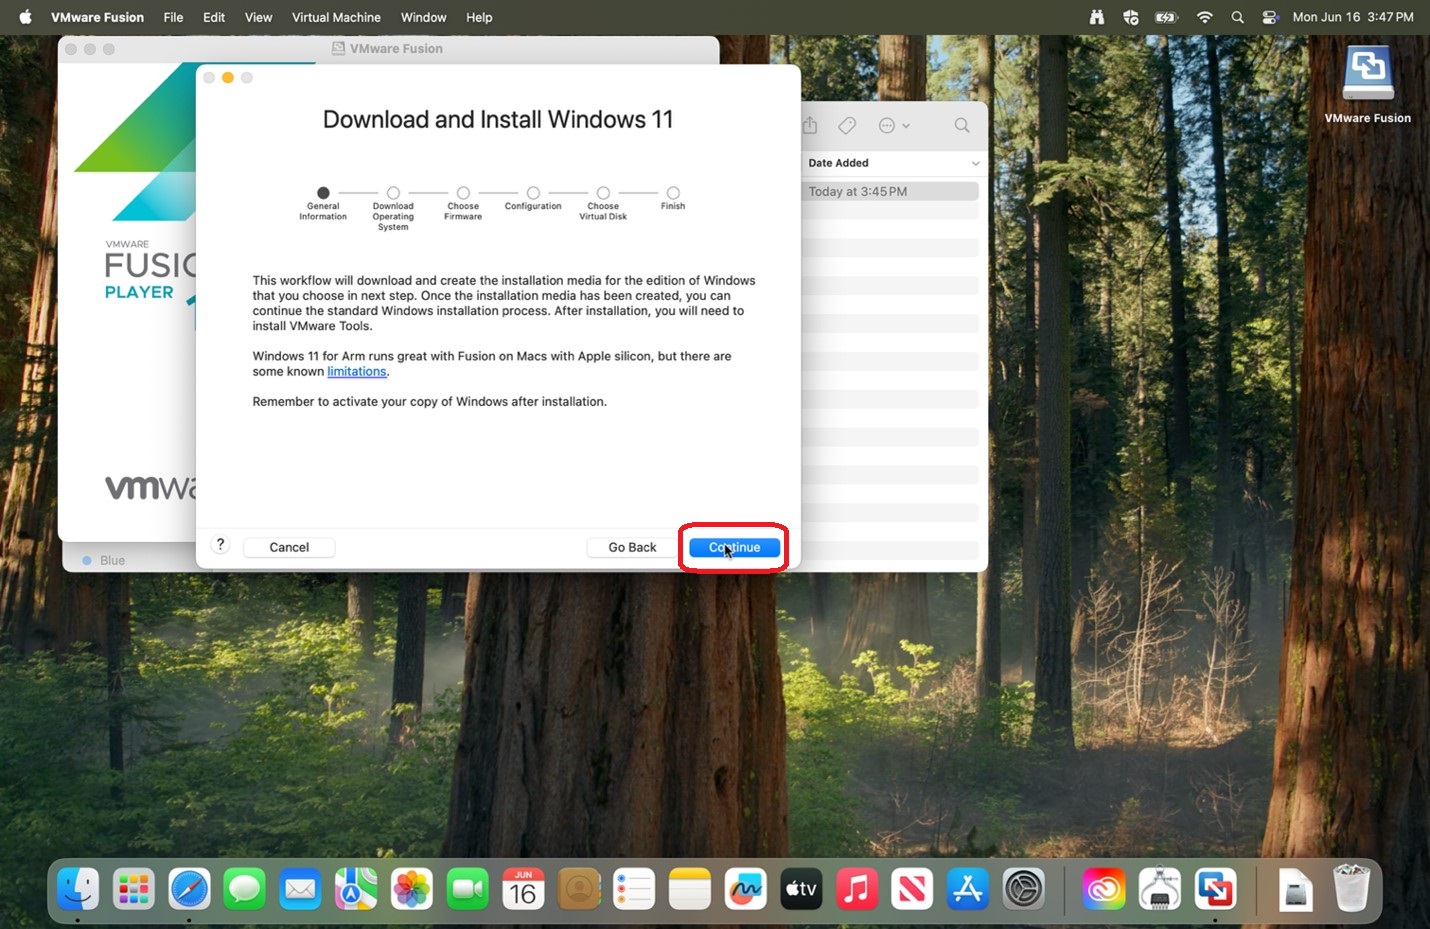
5.
|
 |
|
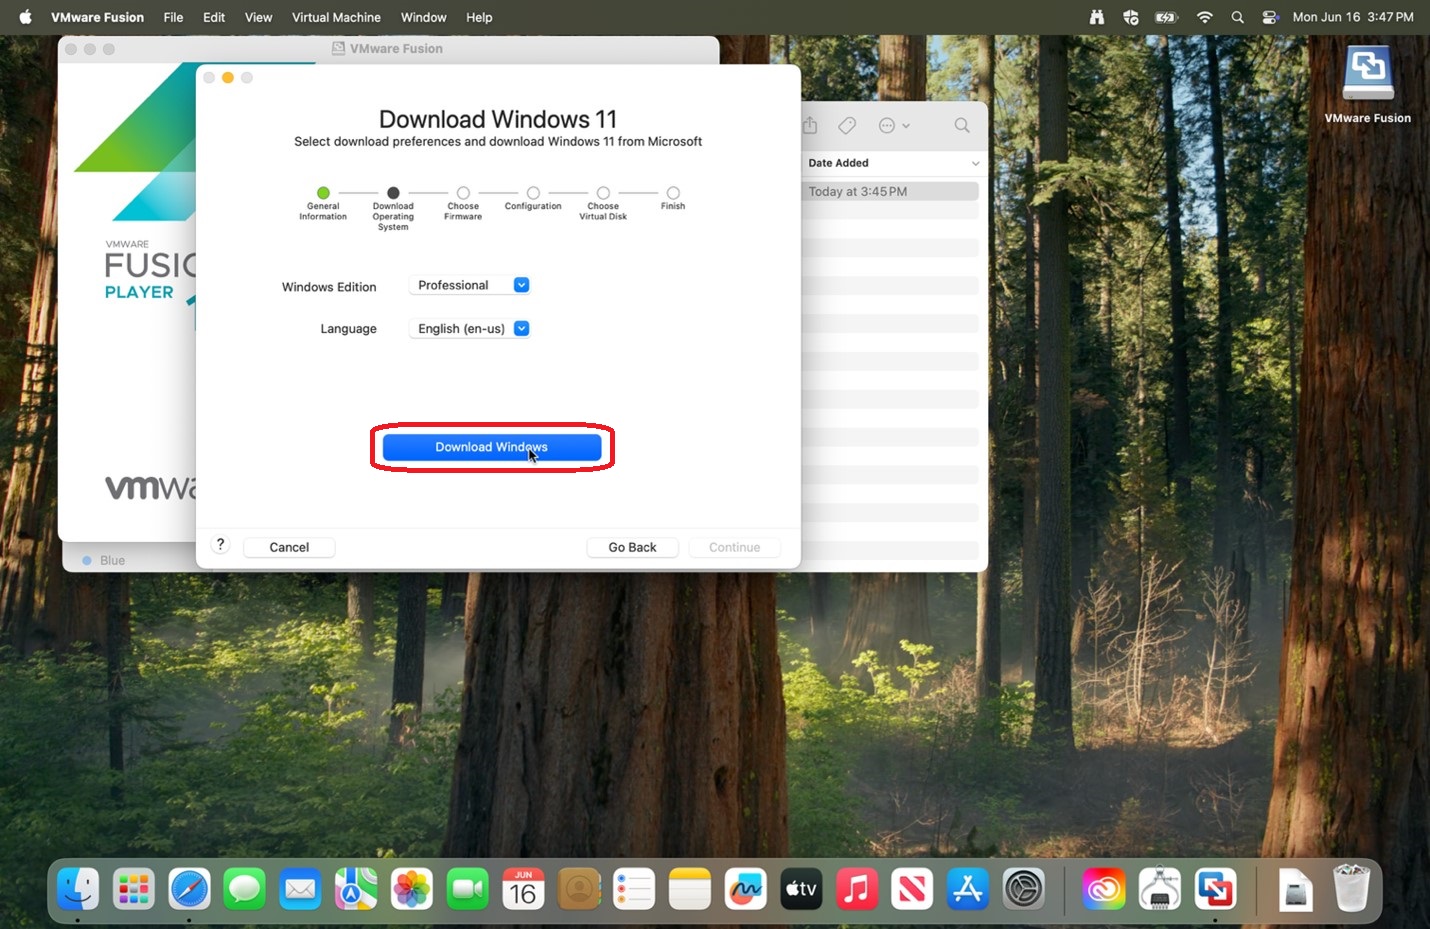
6. Verify Windows Edition: Professional is selected and
|
 |
|
7. After finishing downloading Windows 11,
|
 |
|
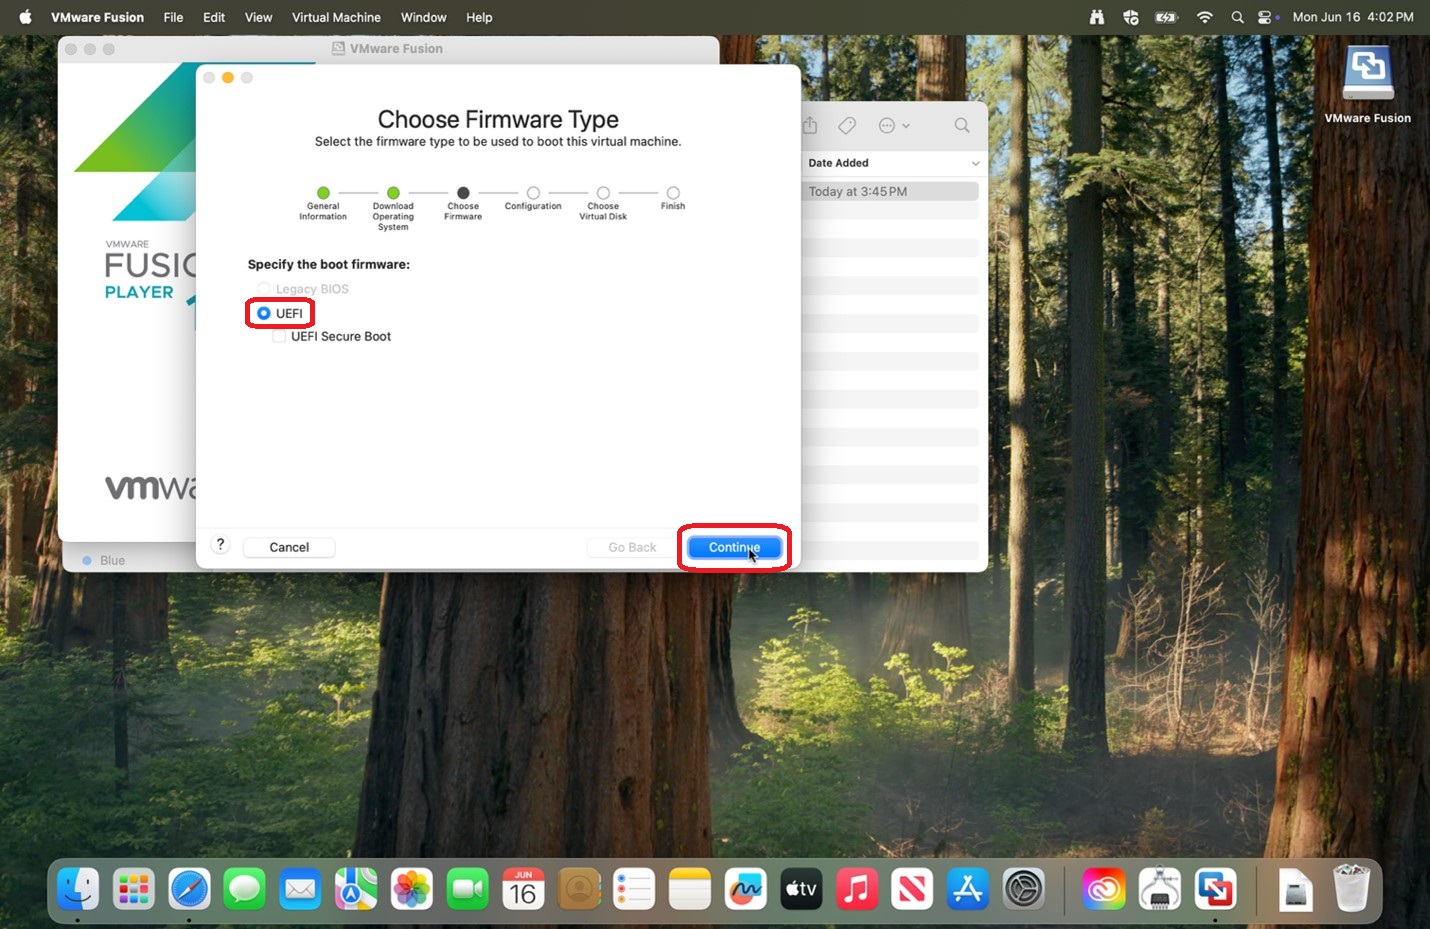
8. Verify UEFI is selected and
|
 |
|
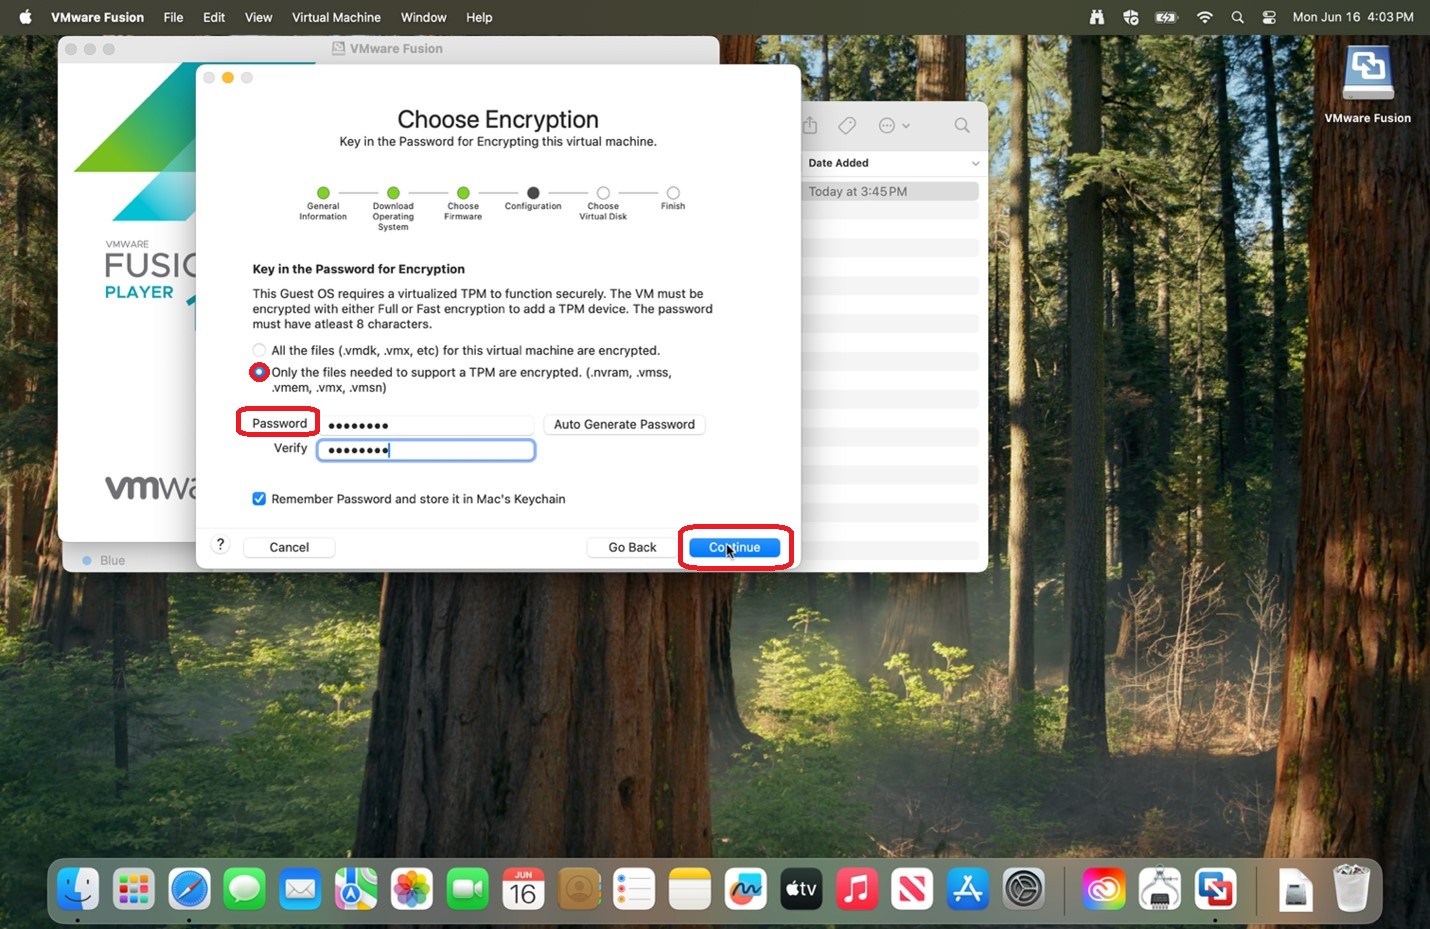
9.
Please save the entered password in a secure location for if you should need it in the future.
|
 |
|
10.
|
 |
|
11.
|
 |
|
12.
|
 |
|
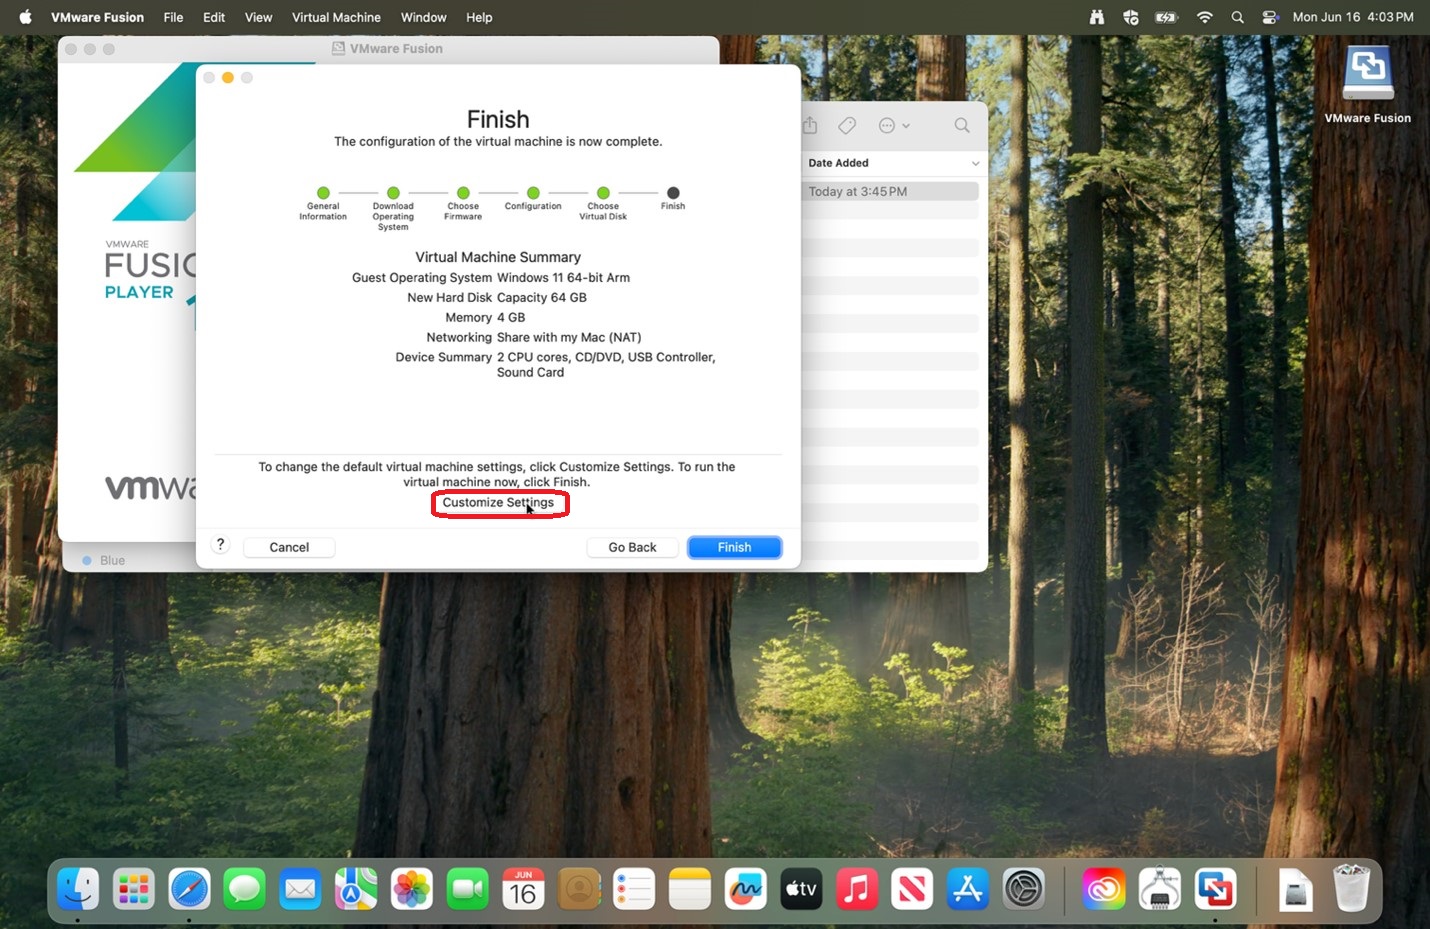
13. Click on
This window may have been placed behind the newly black window.
|
 |
|
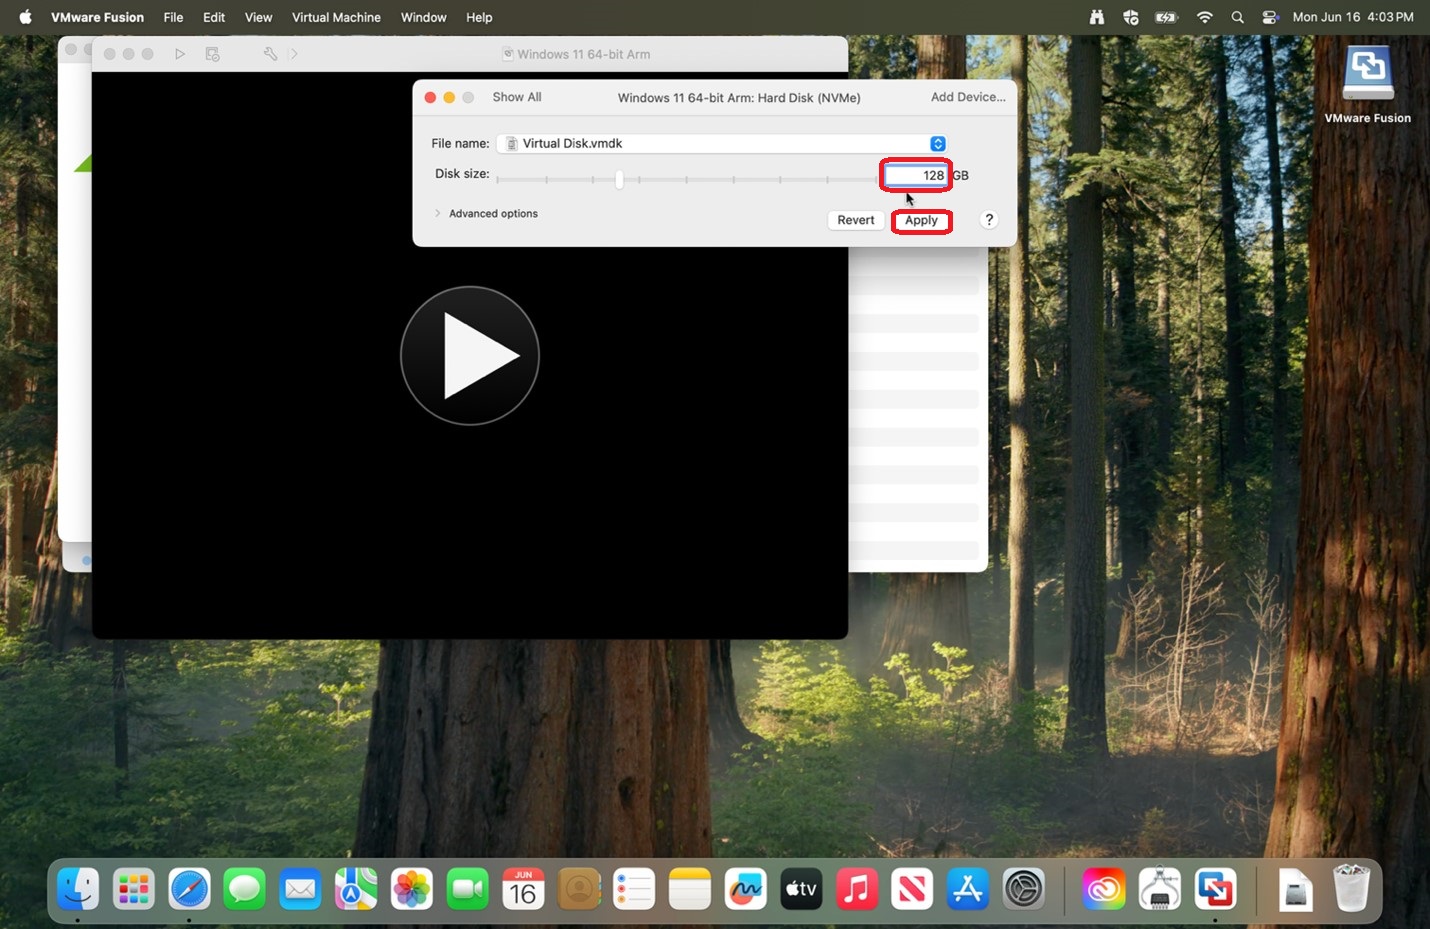
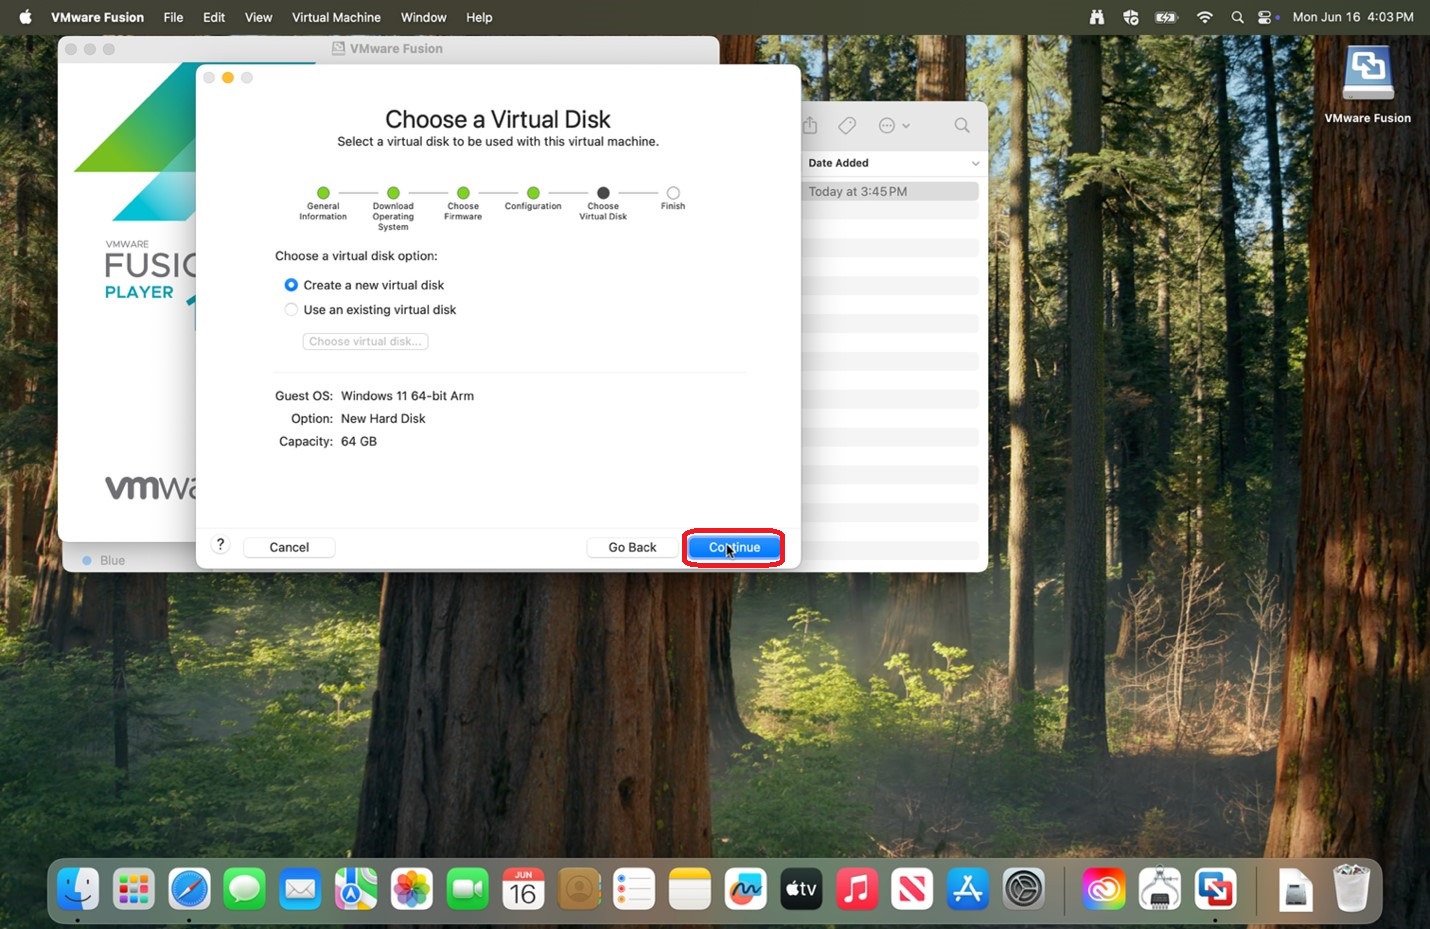
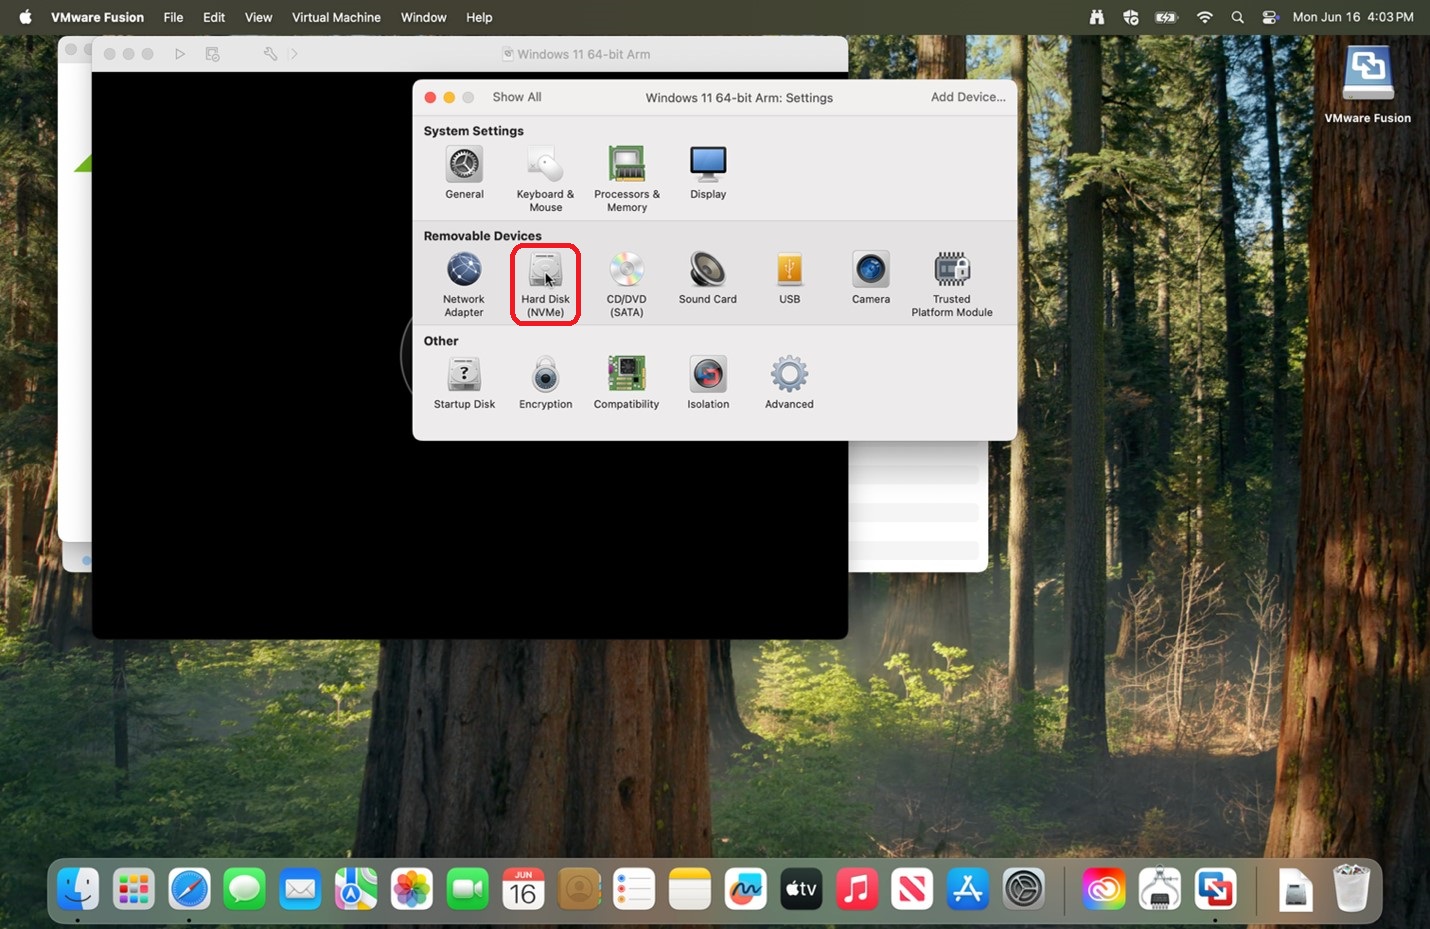
14. Change
Do not worry about not having enough space on your computer as this will not use all that space, but rather makes it available.
|
|
| 15. Go to the black screen and click on the play button, then click on that general area a few times to startup. | 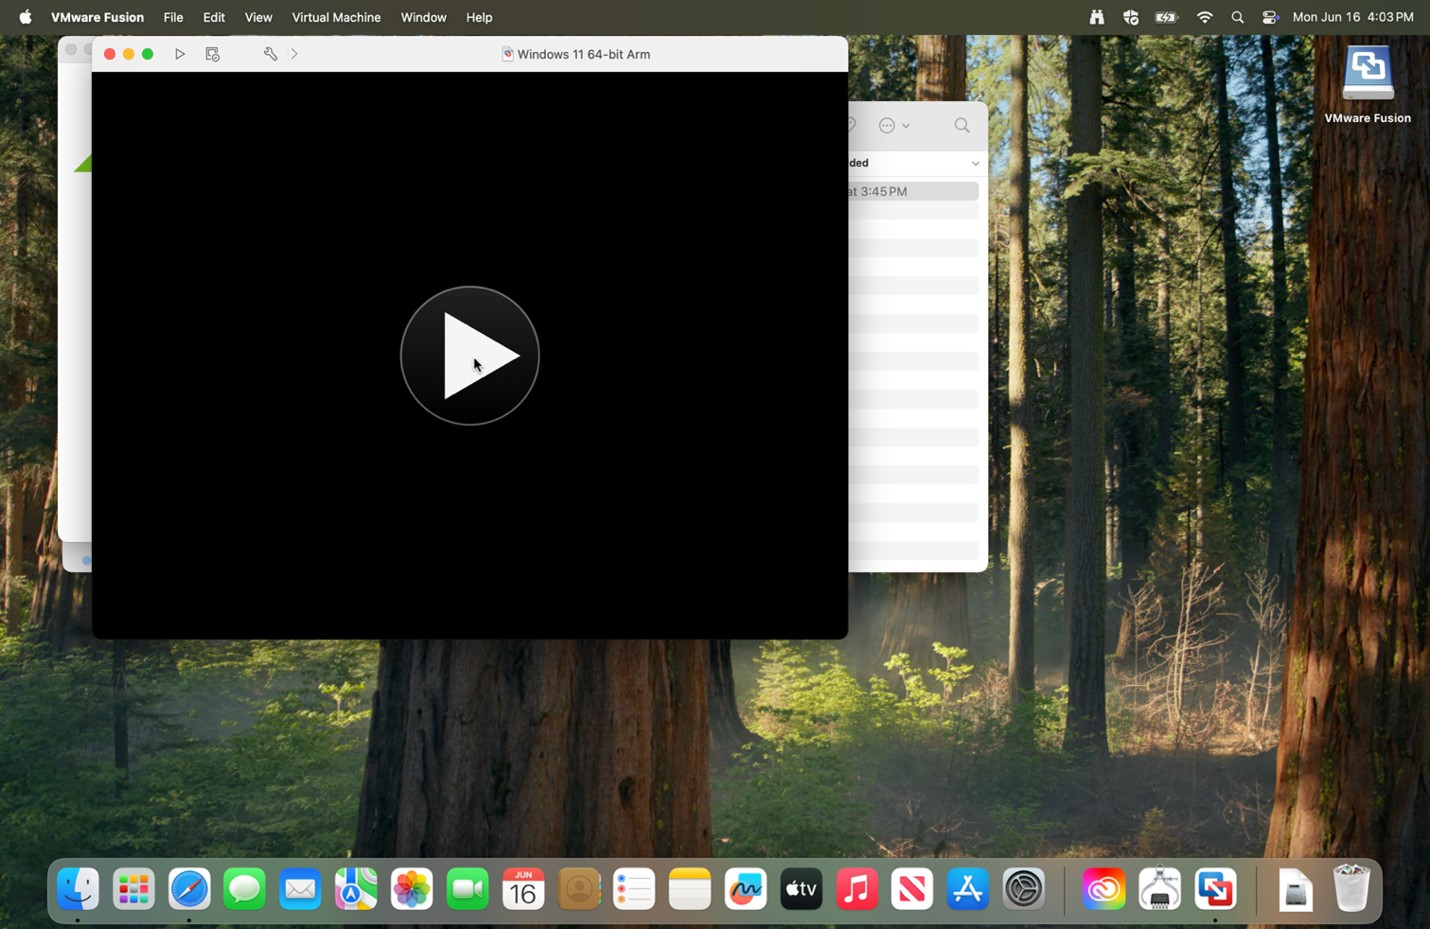 |
|
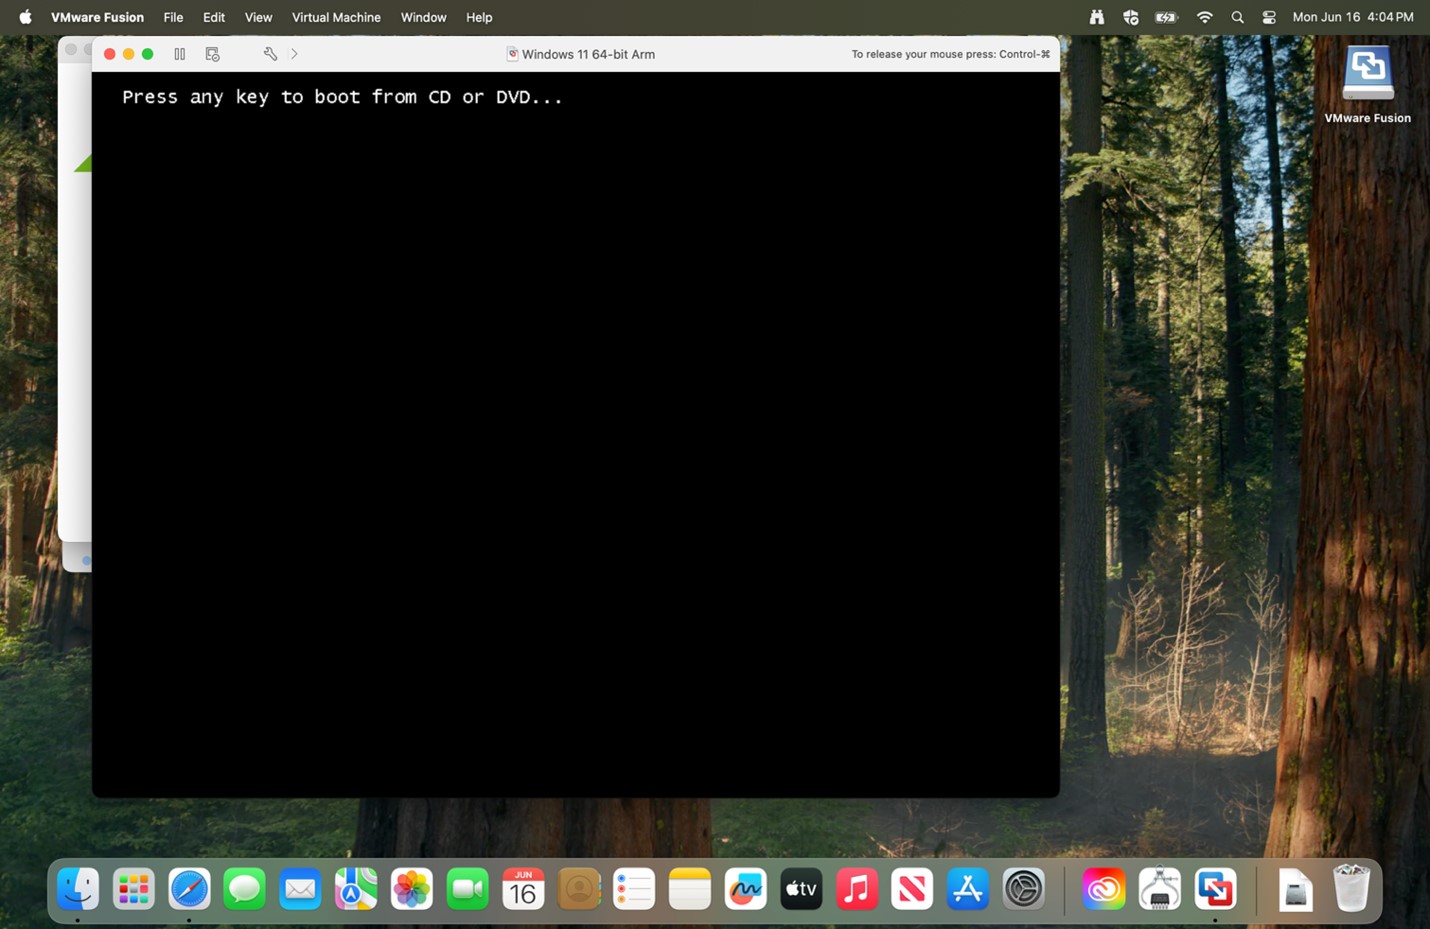
16.
|
 |
|
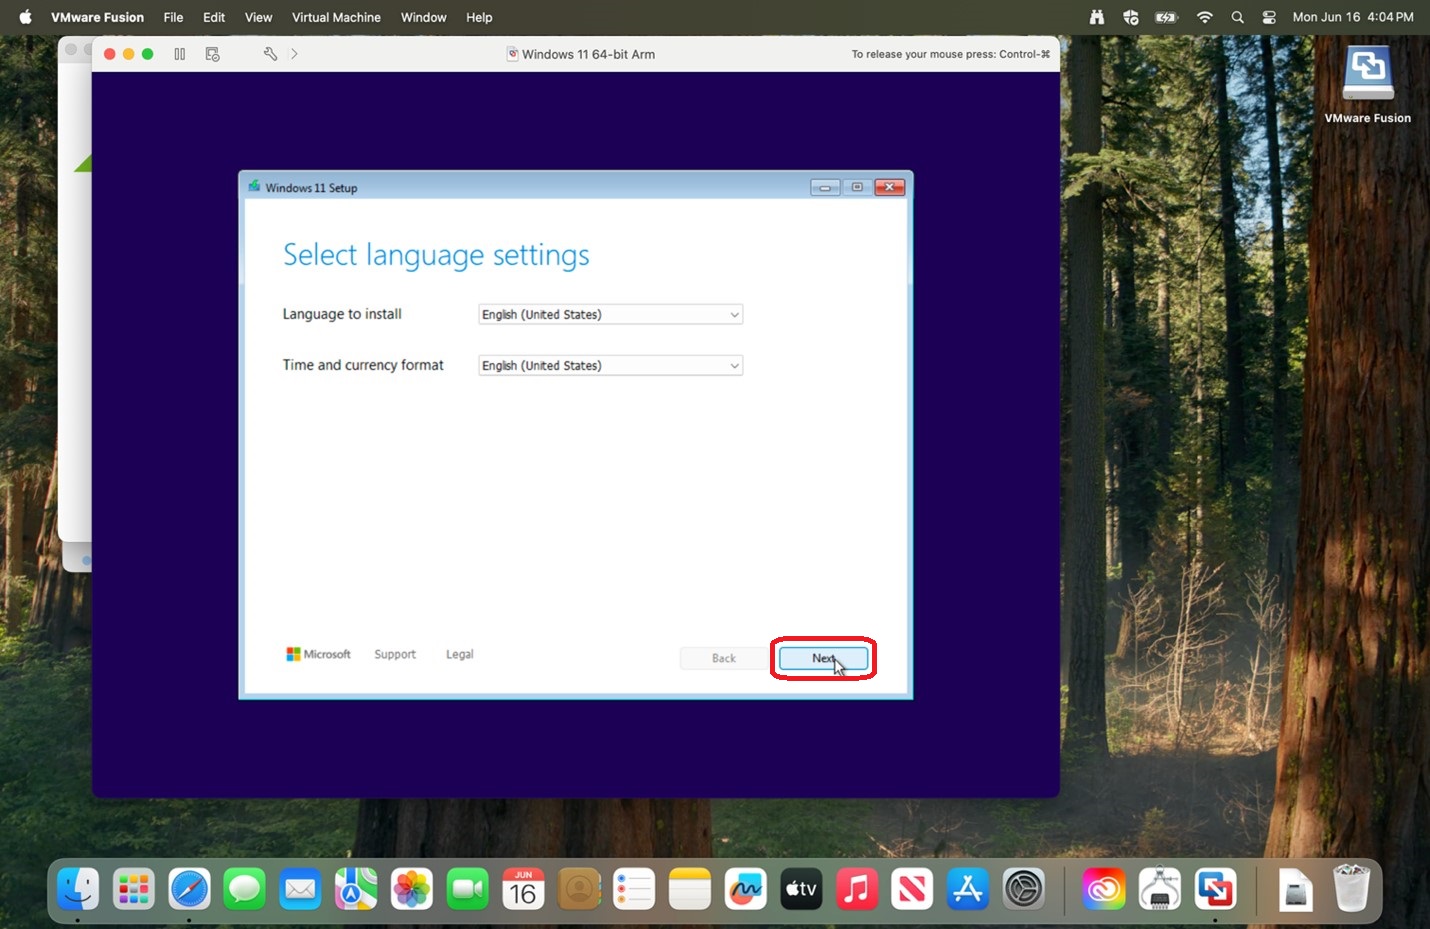
17. After loading,
|
 |
|
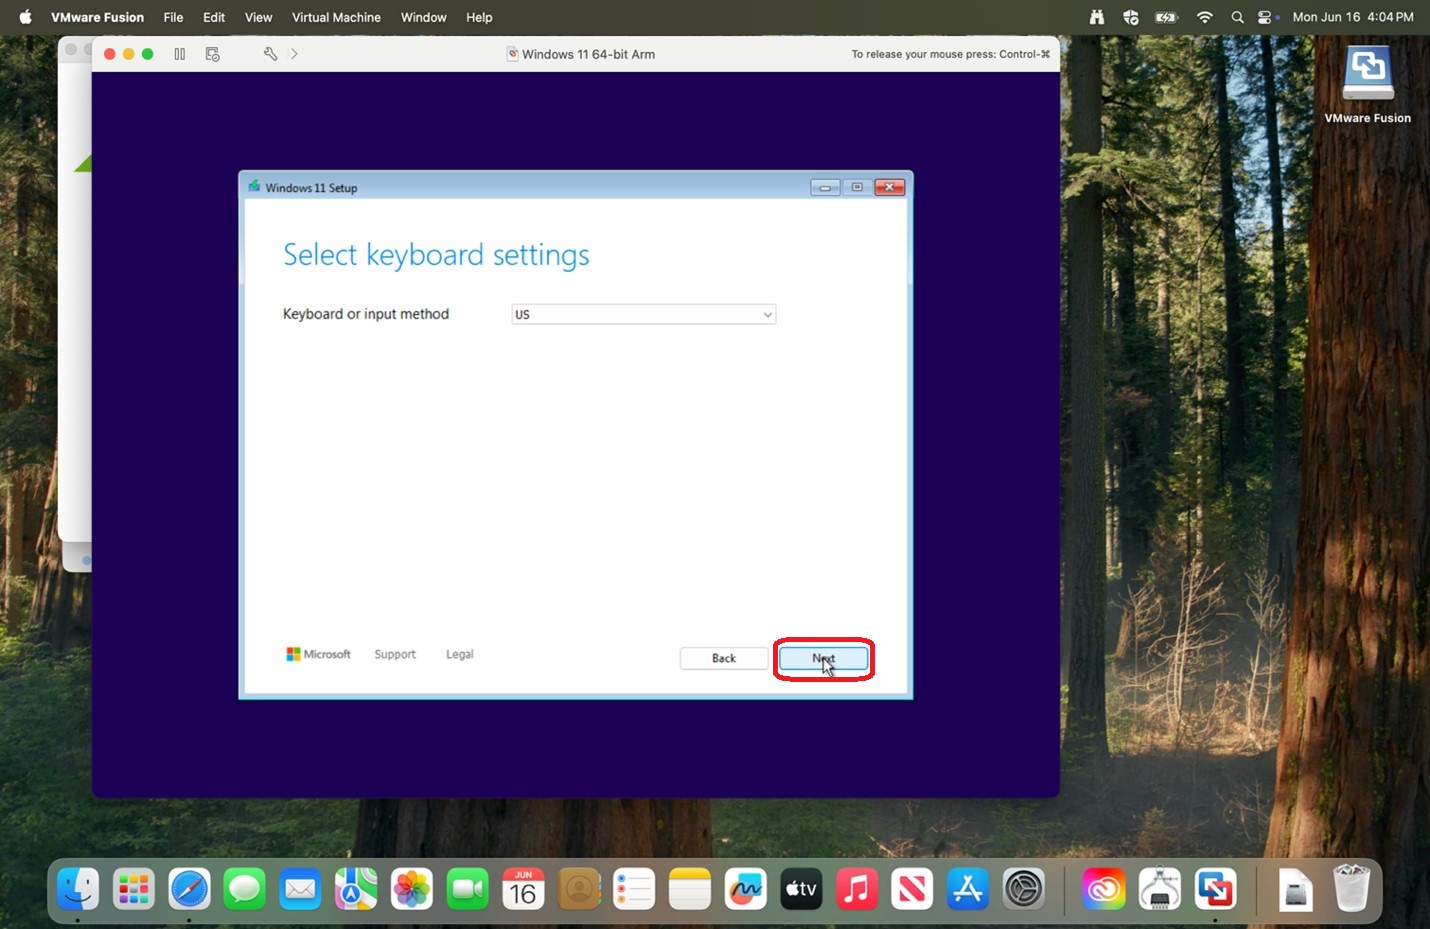
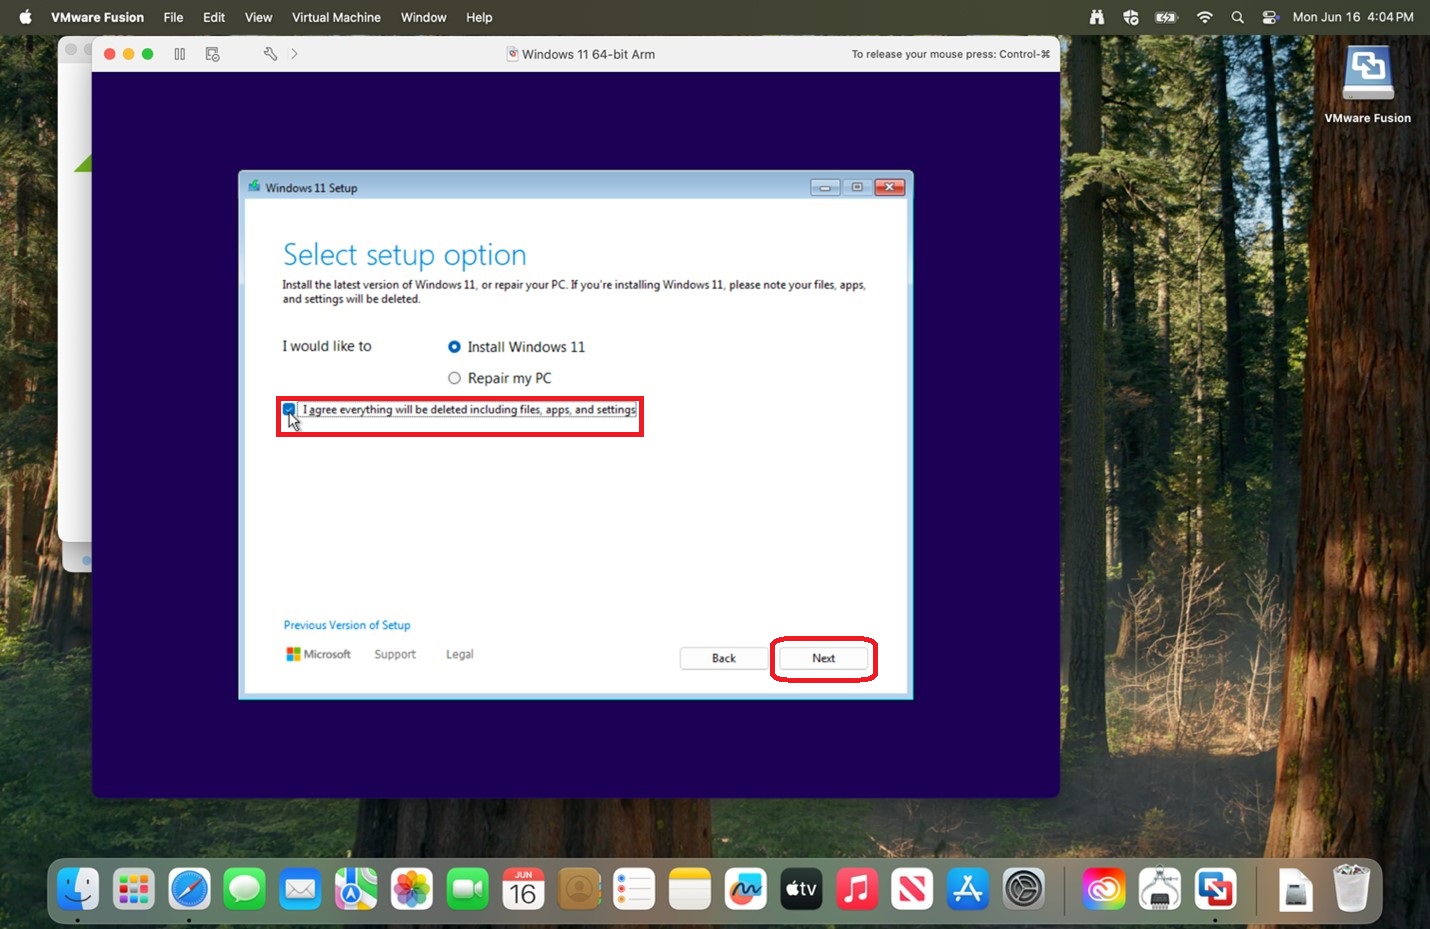
18.
|
 |
|
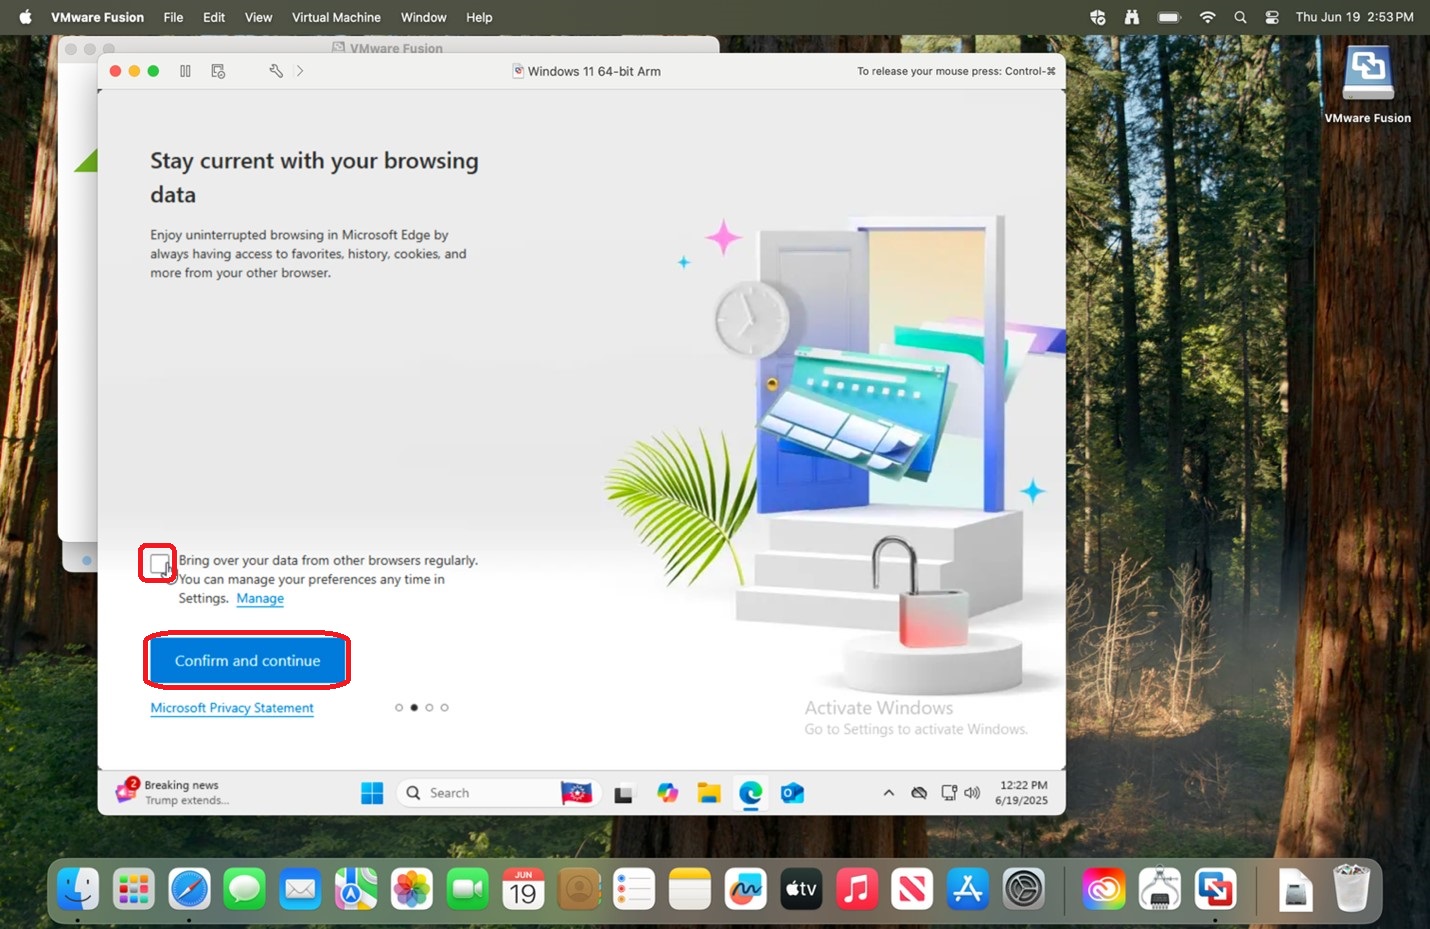
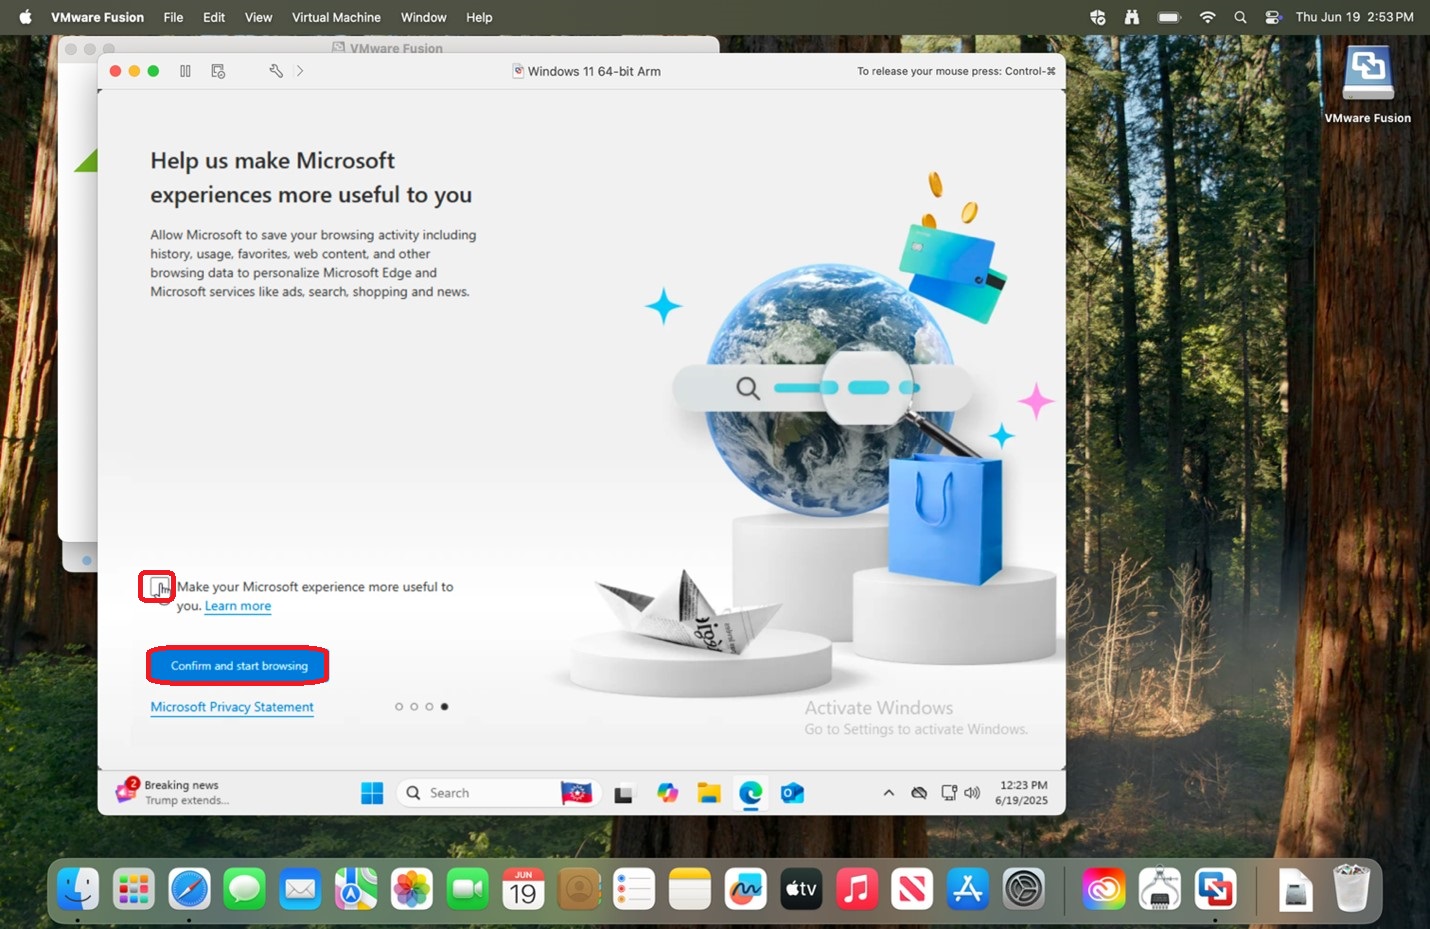
19. Check off the box next
|
 |
|
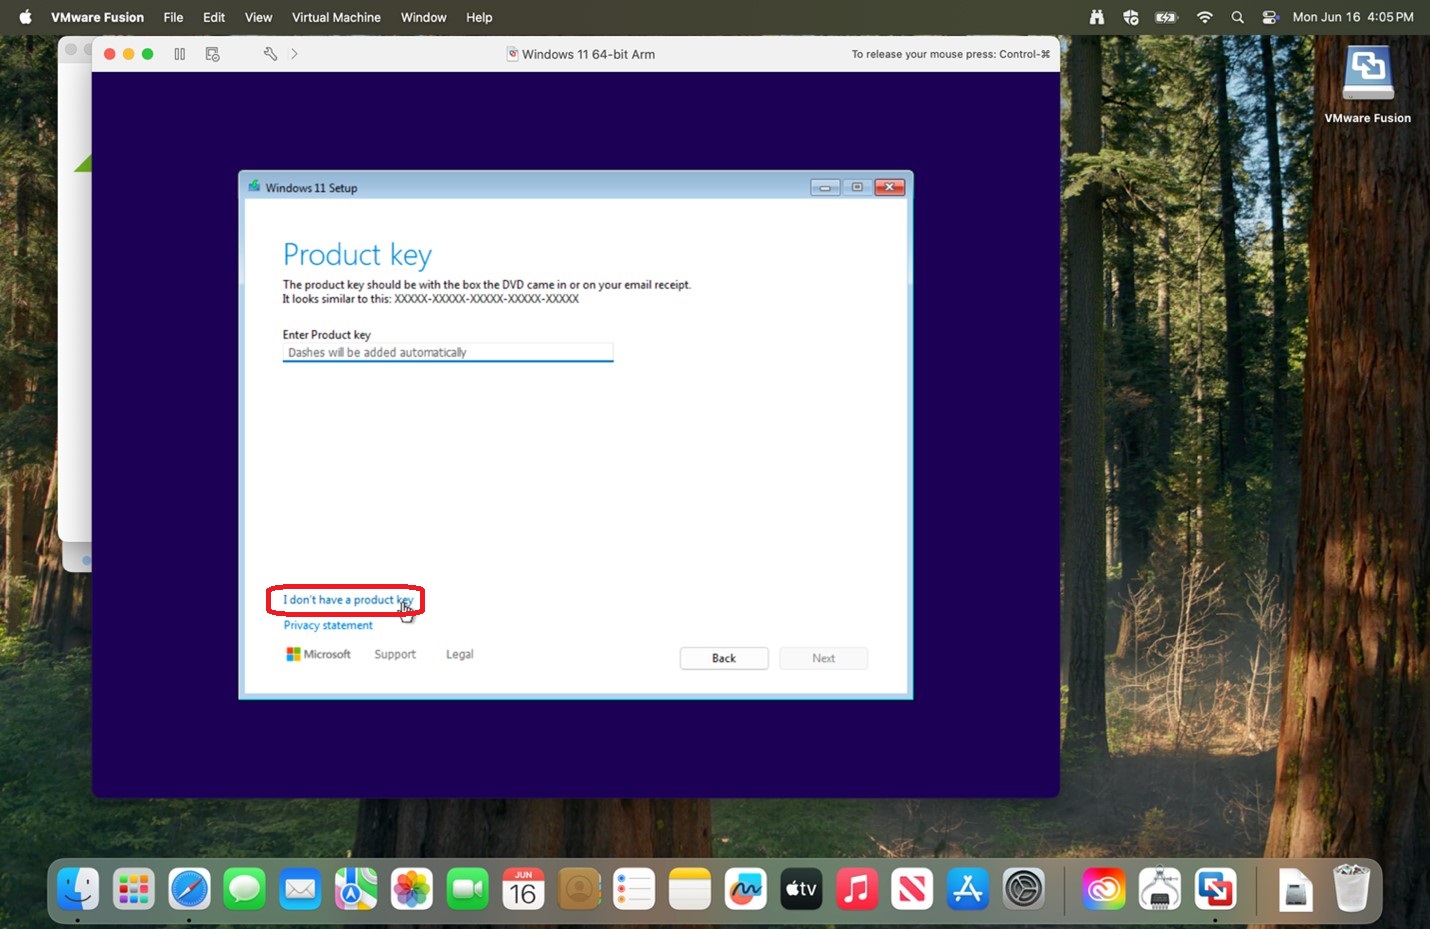
20.
|
 |
|
21.
|
 |
|
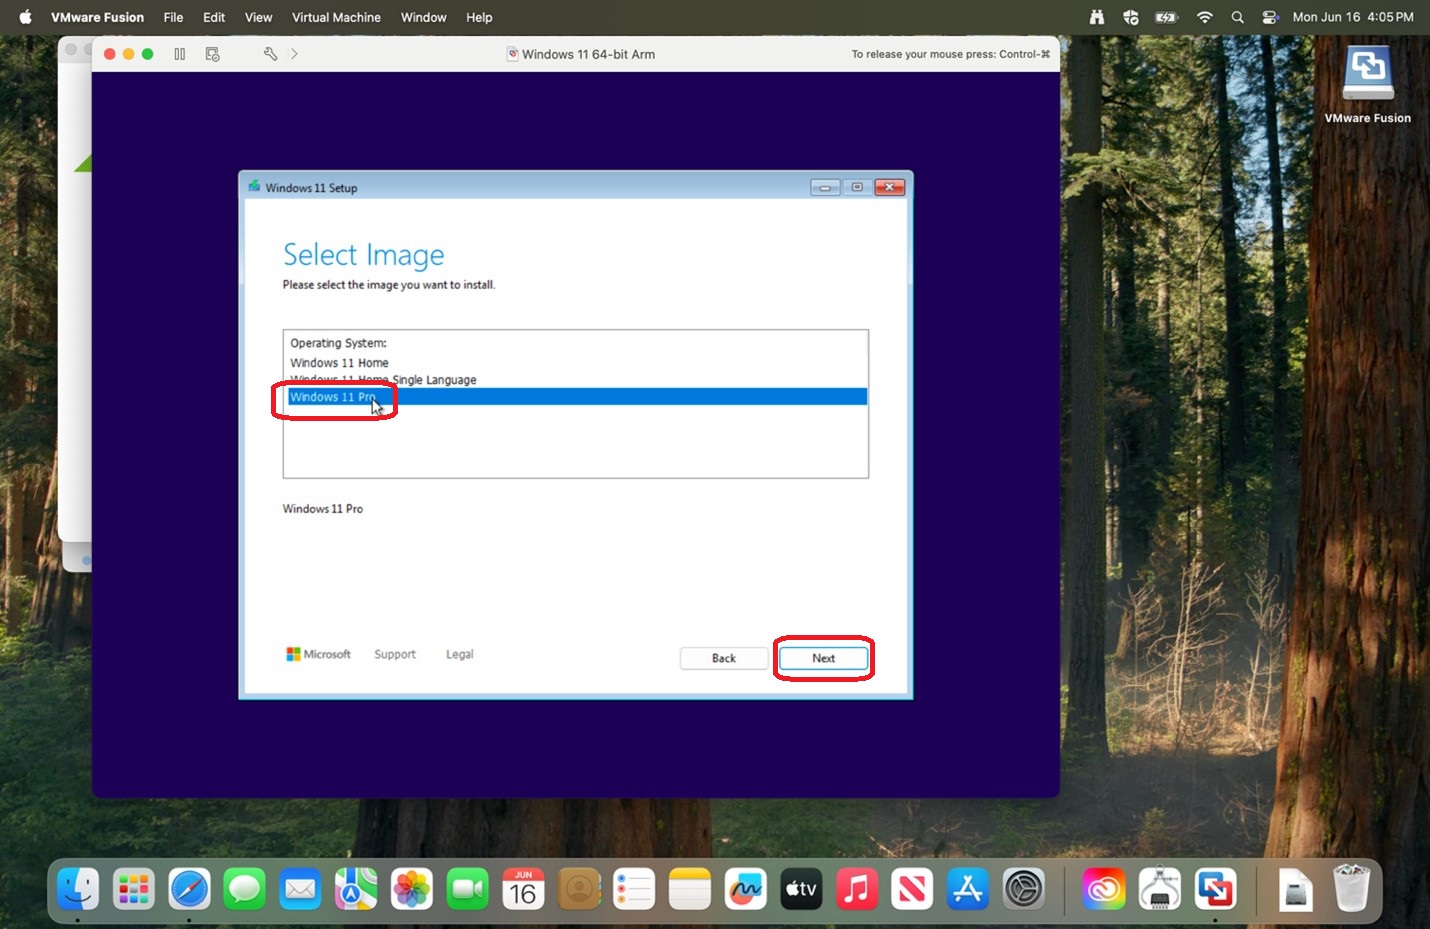
22.
|
 |
|
23.
|
 |
|
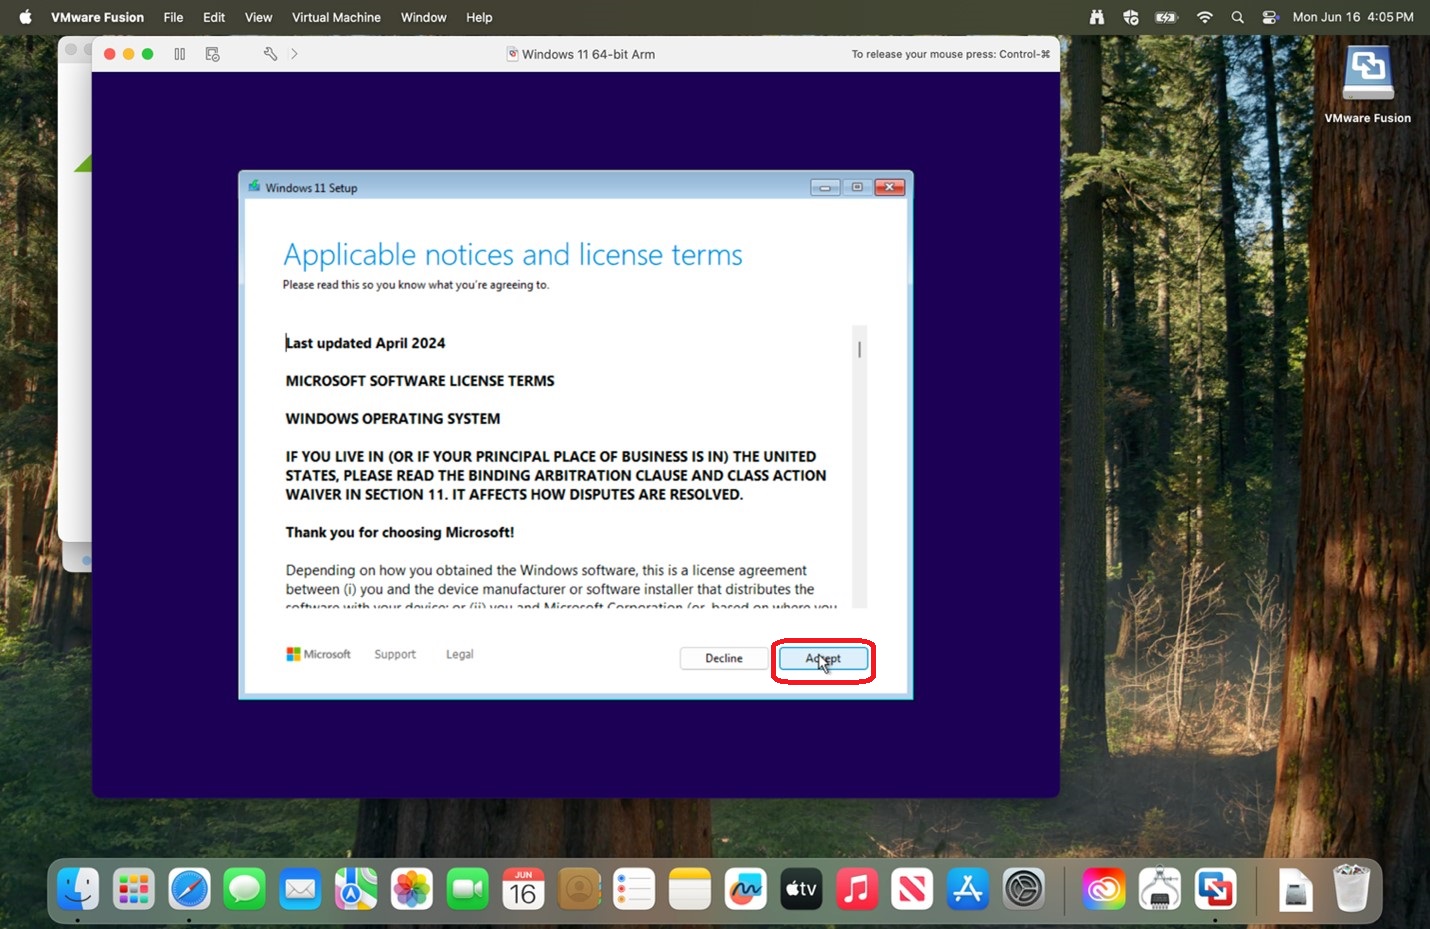
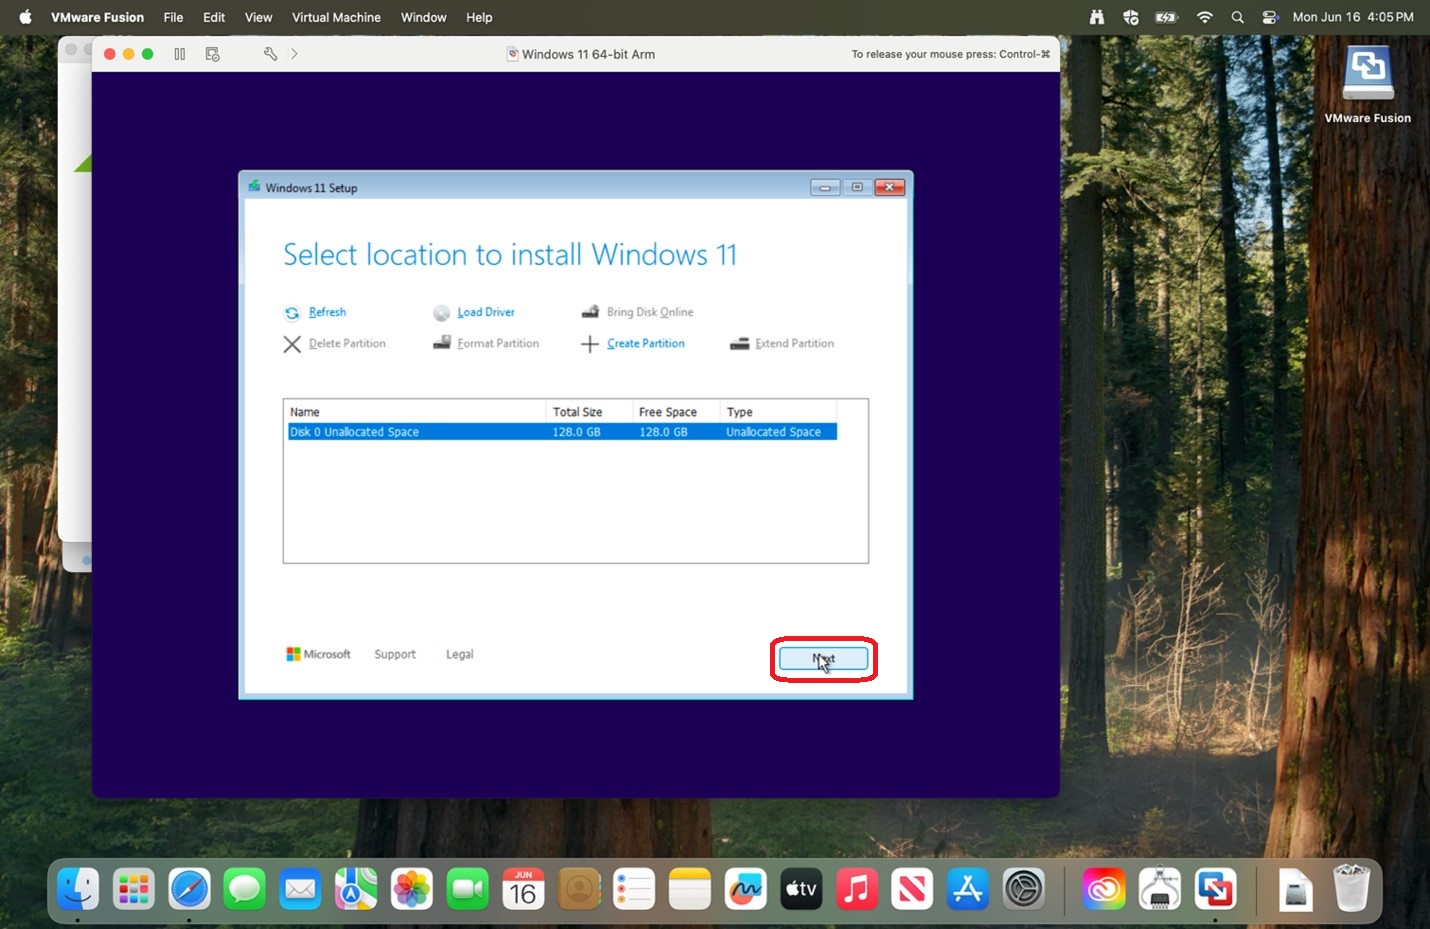
24.
|
 |
|
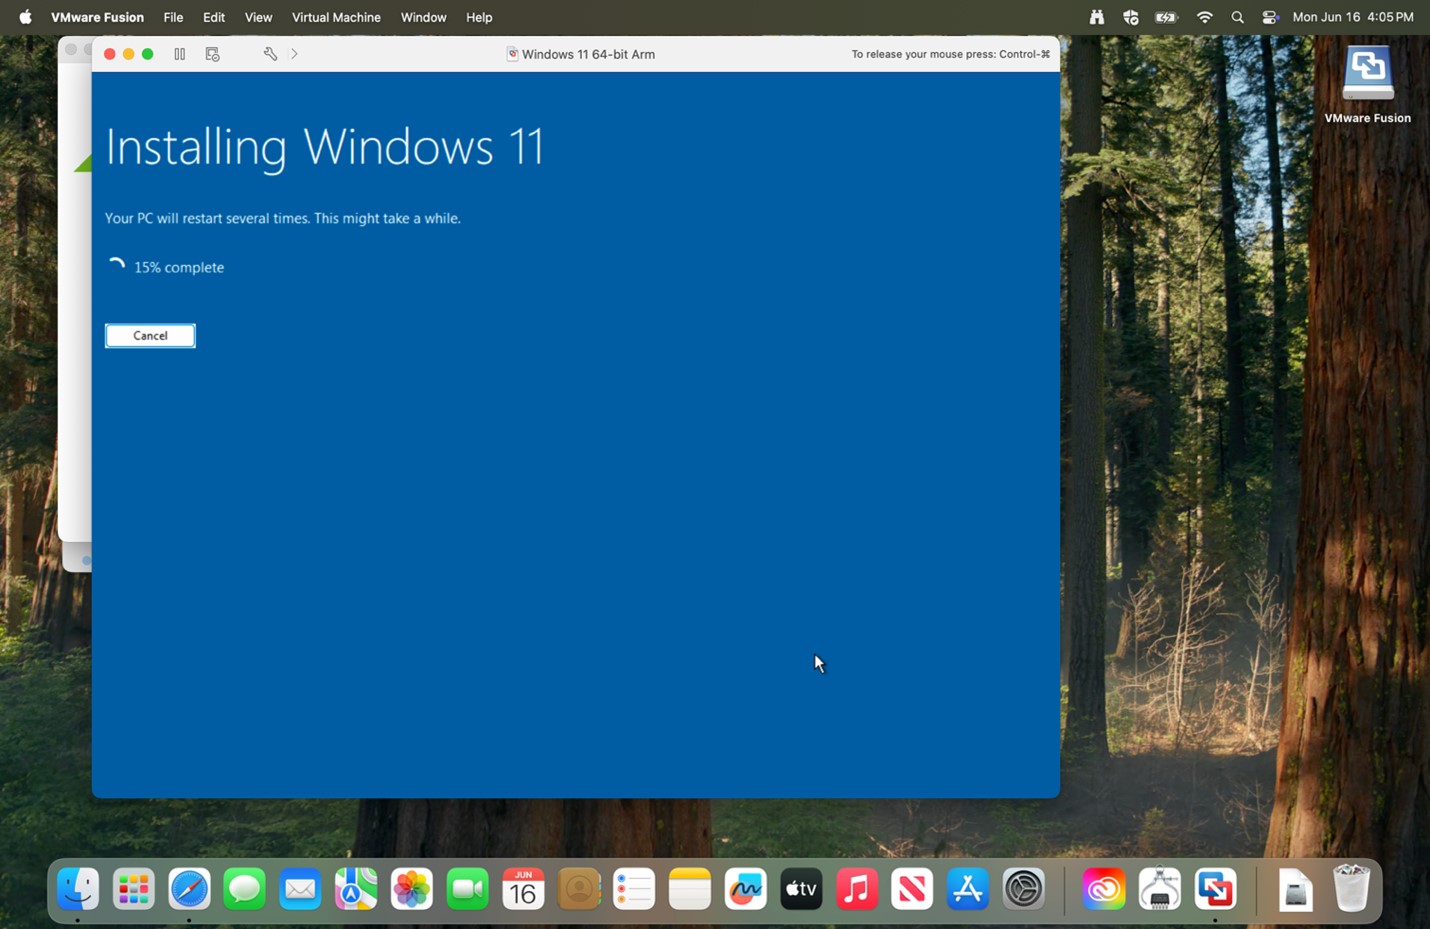
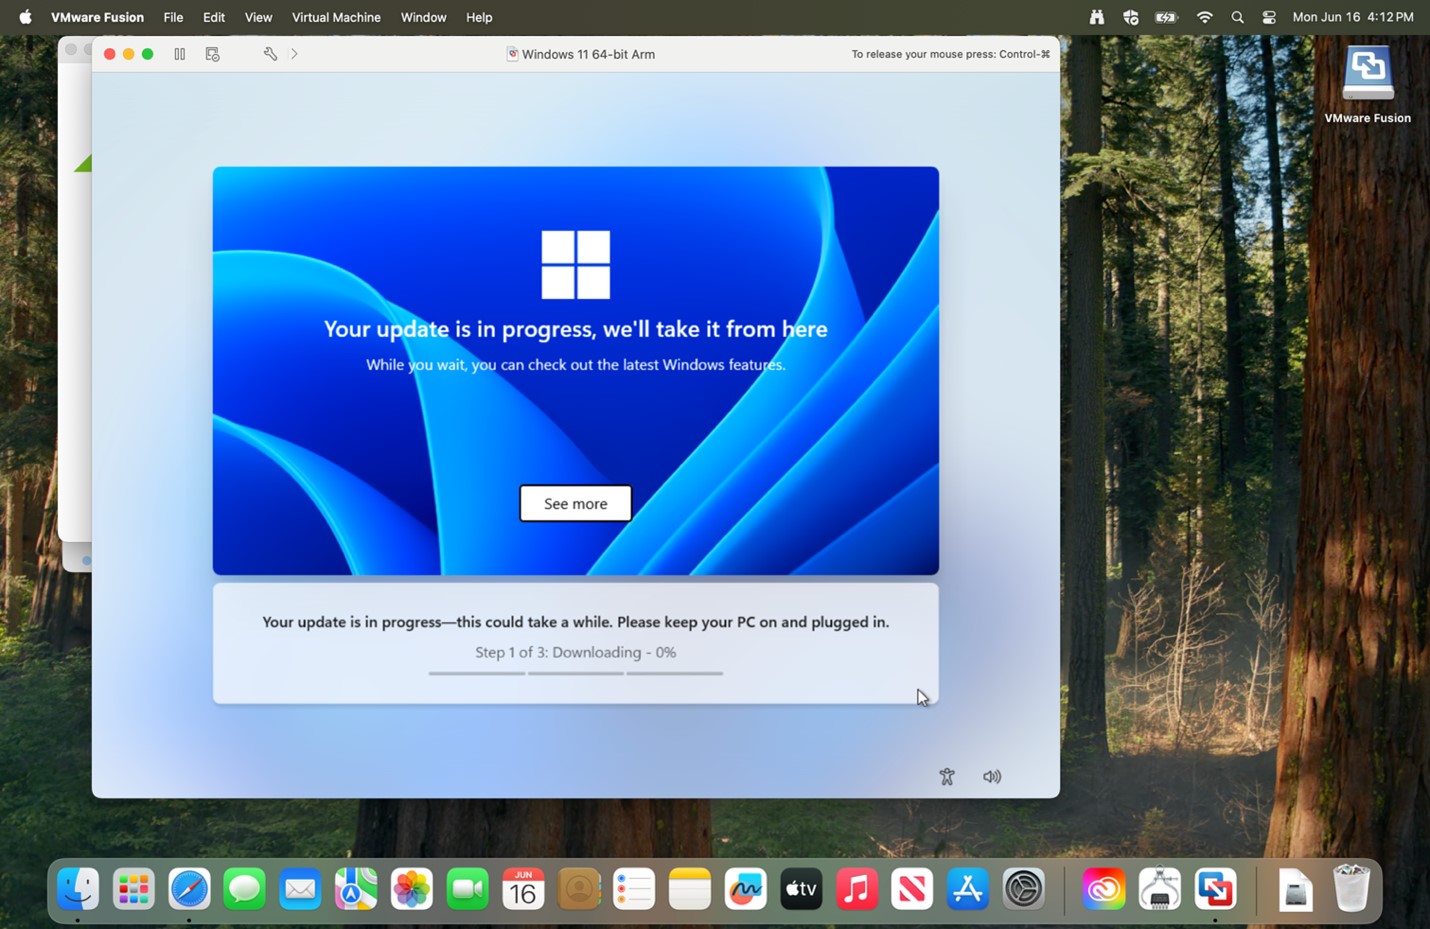
25. Allow time for the install to progress.
|
 |
|
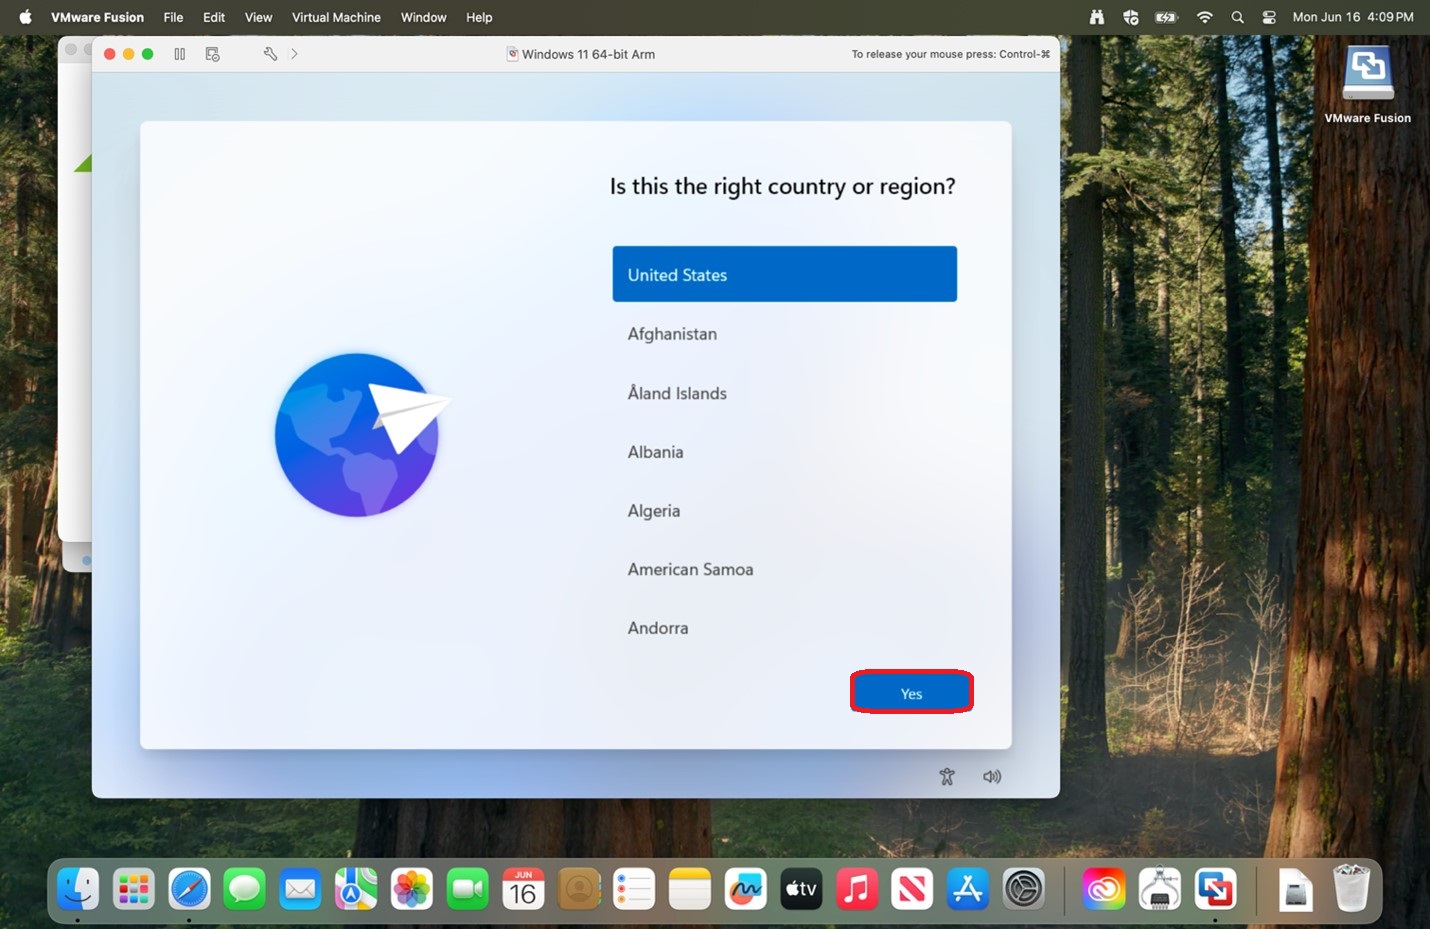
26. Verify the country and
|
 |
|
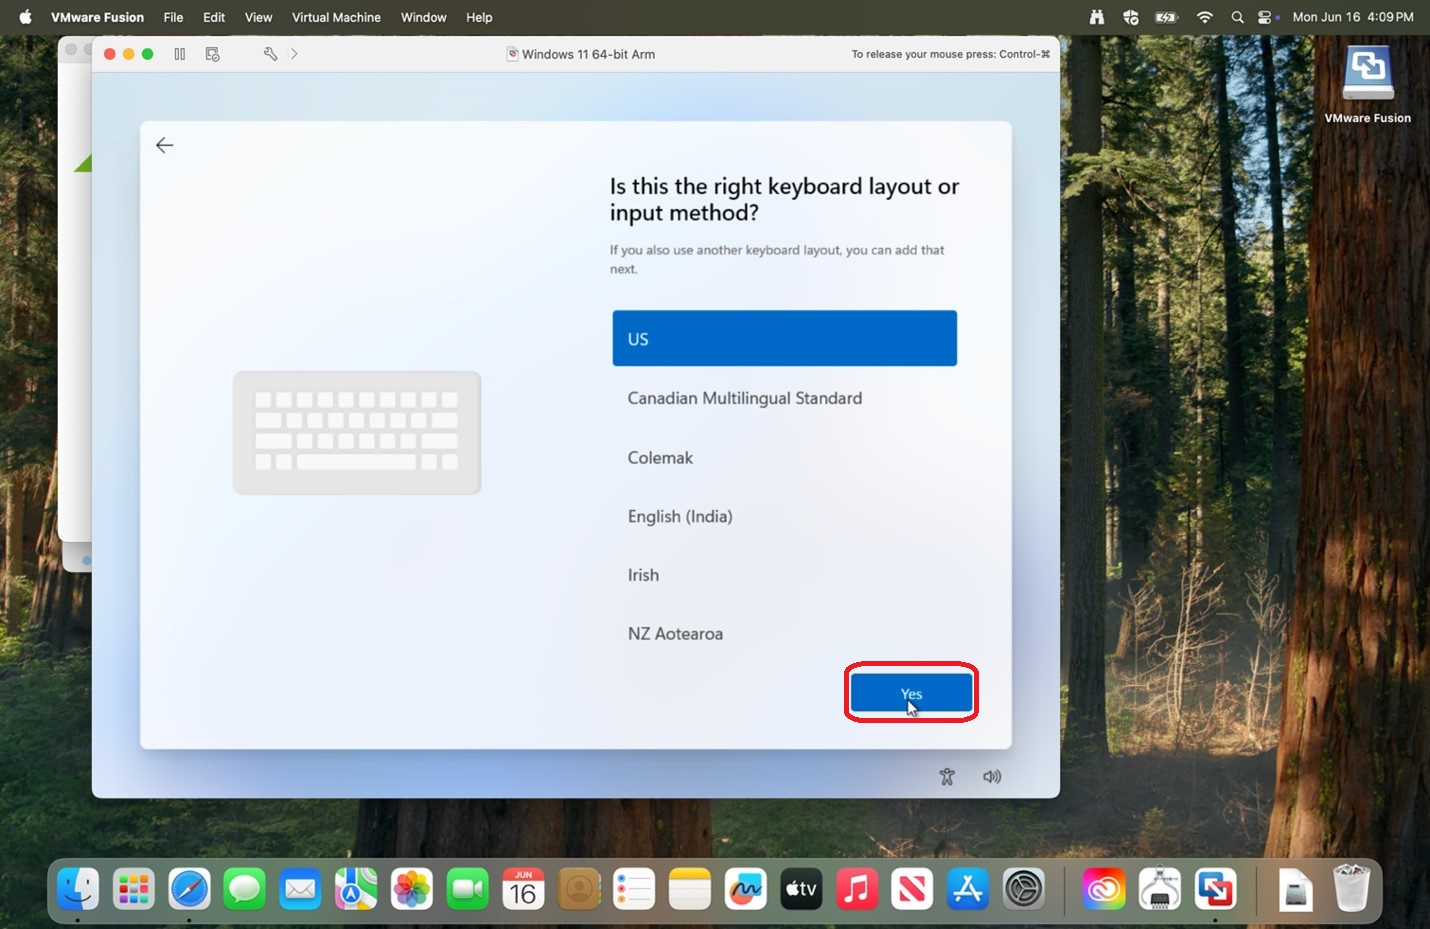
27.
|
 |
|
28.
There may be some loading as there is a check for Windows updates.
|
 |
|
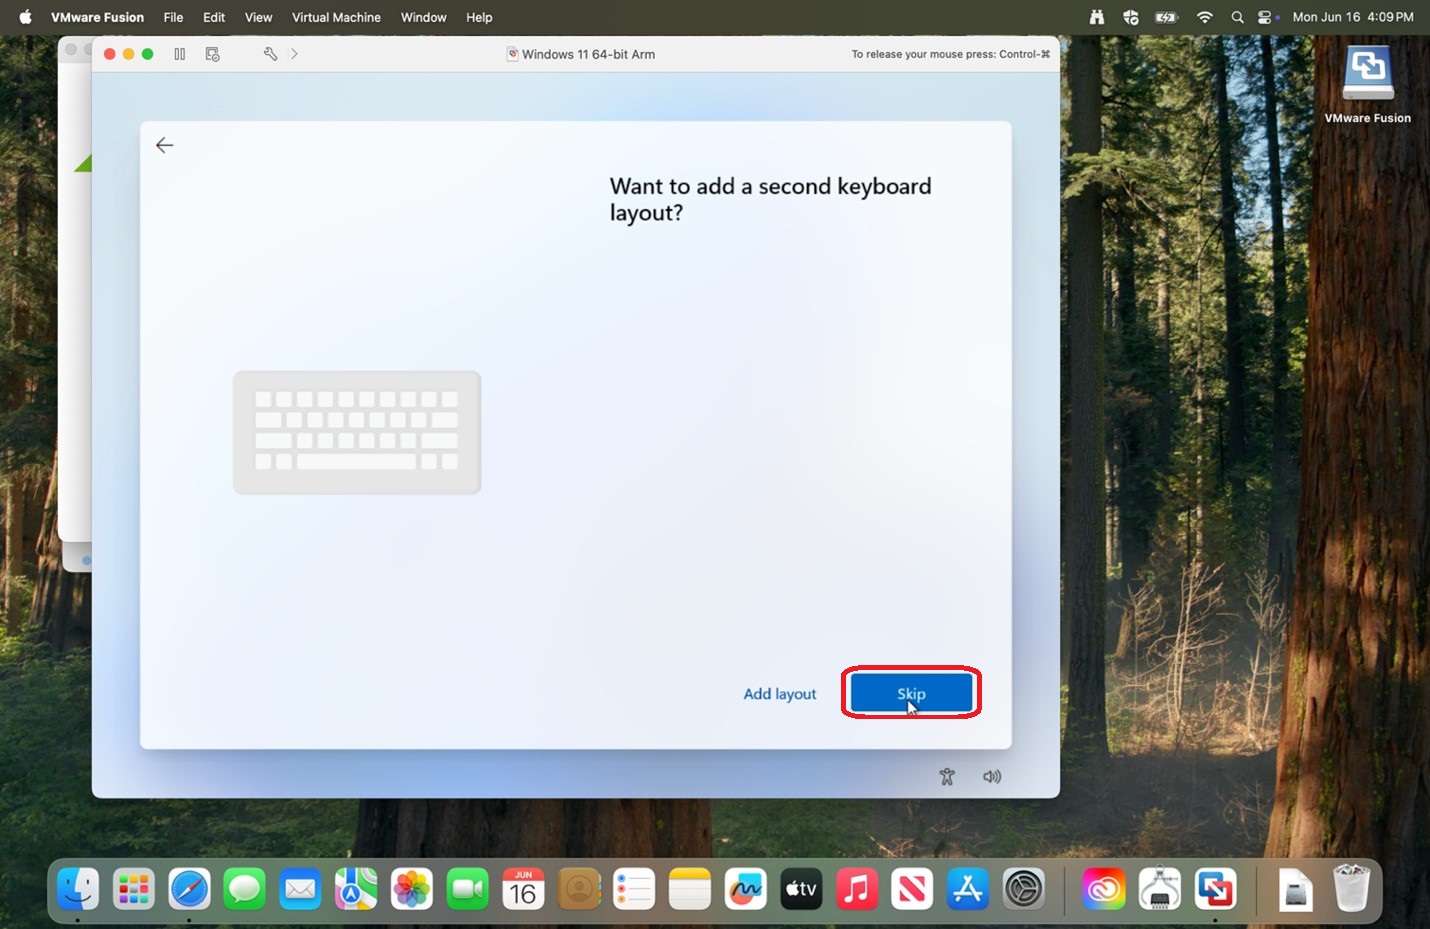
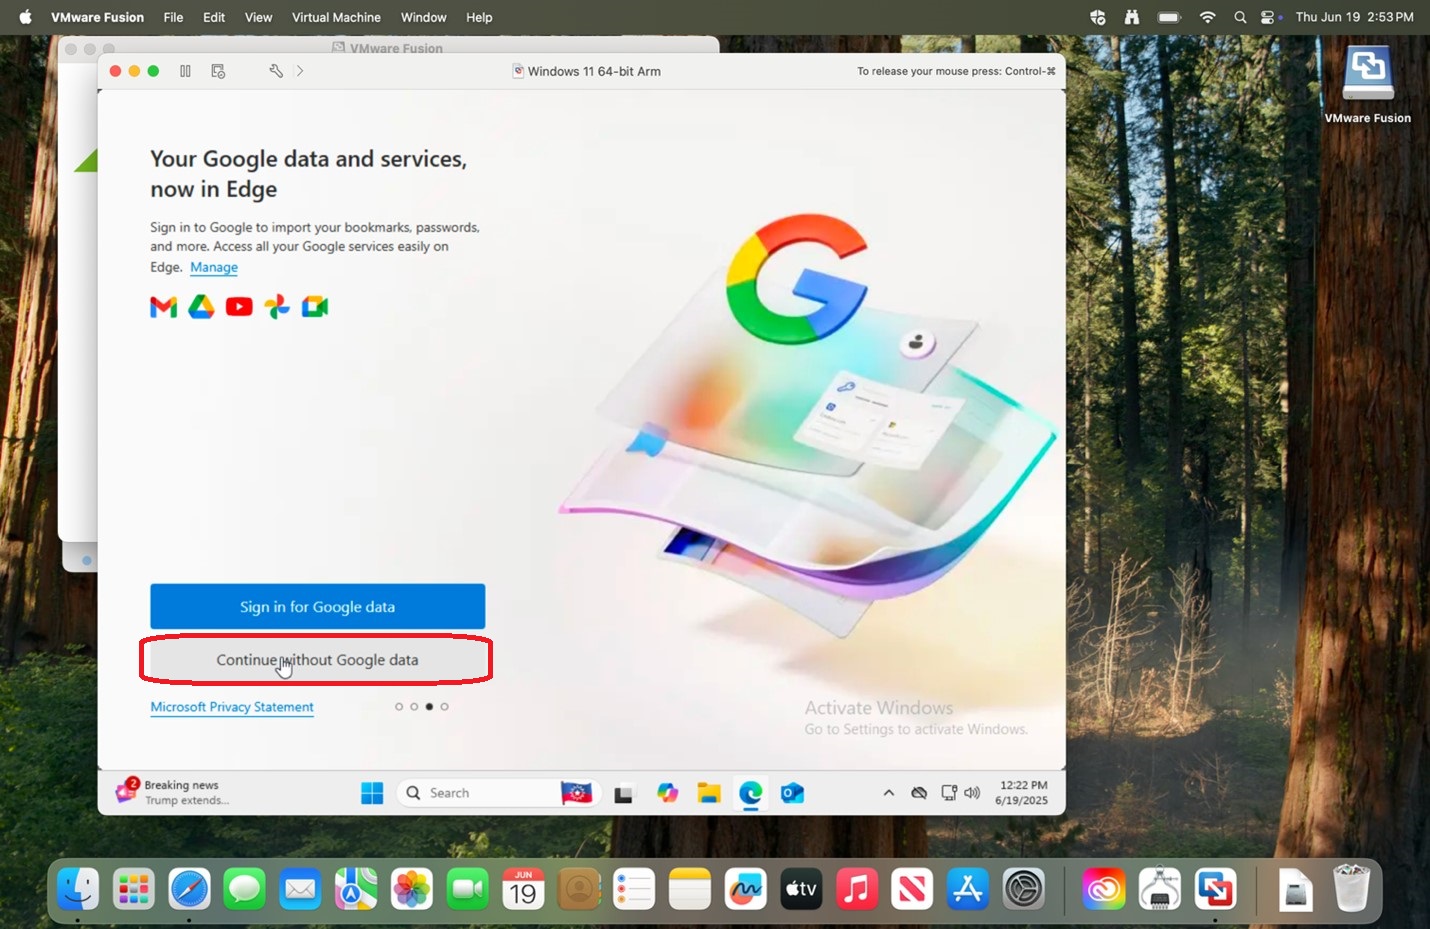
29. Click Skip for now.
|
 |
|
30.
|
 |
|
31.
|
 |
|
32.
|
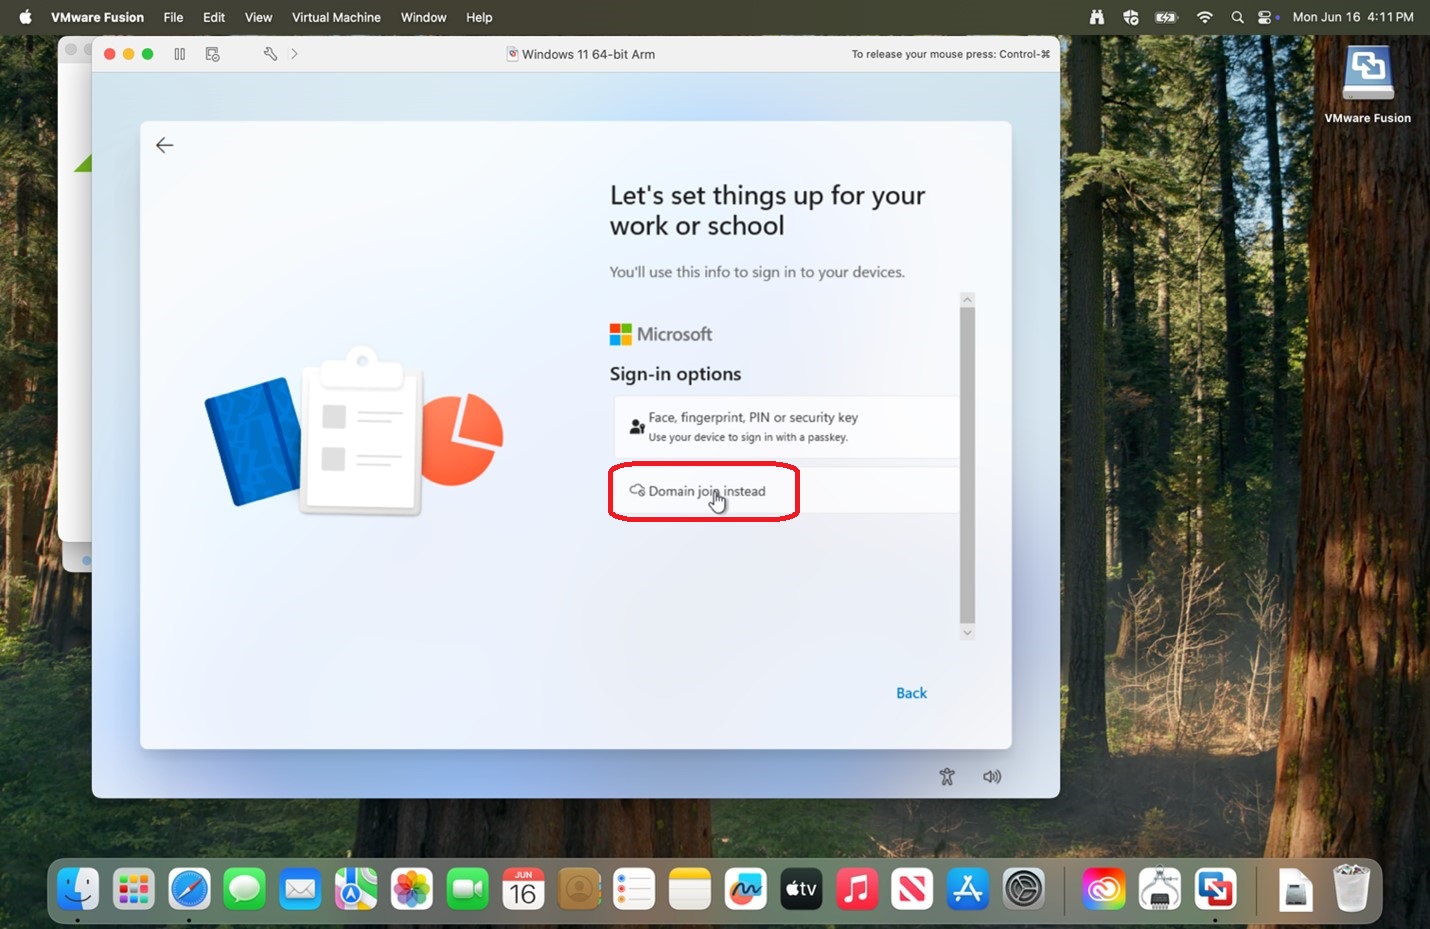 |
|
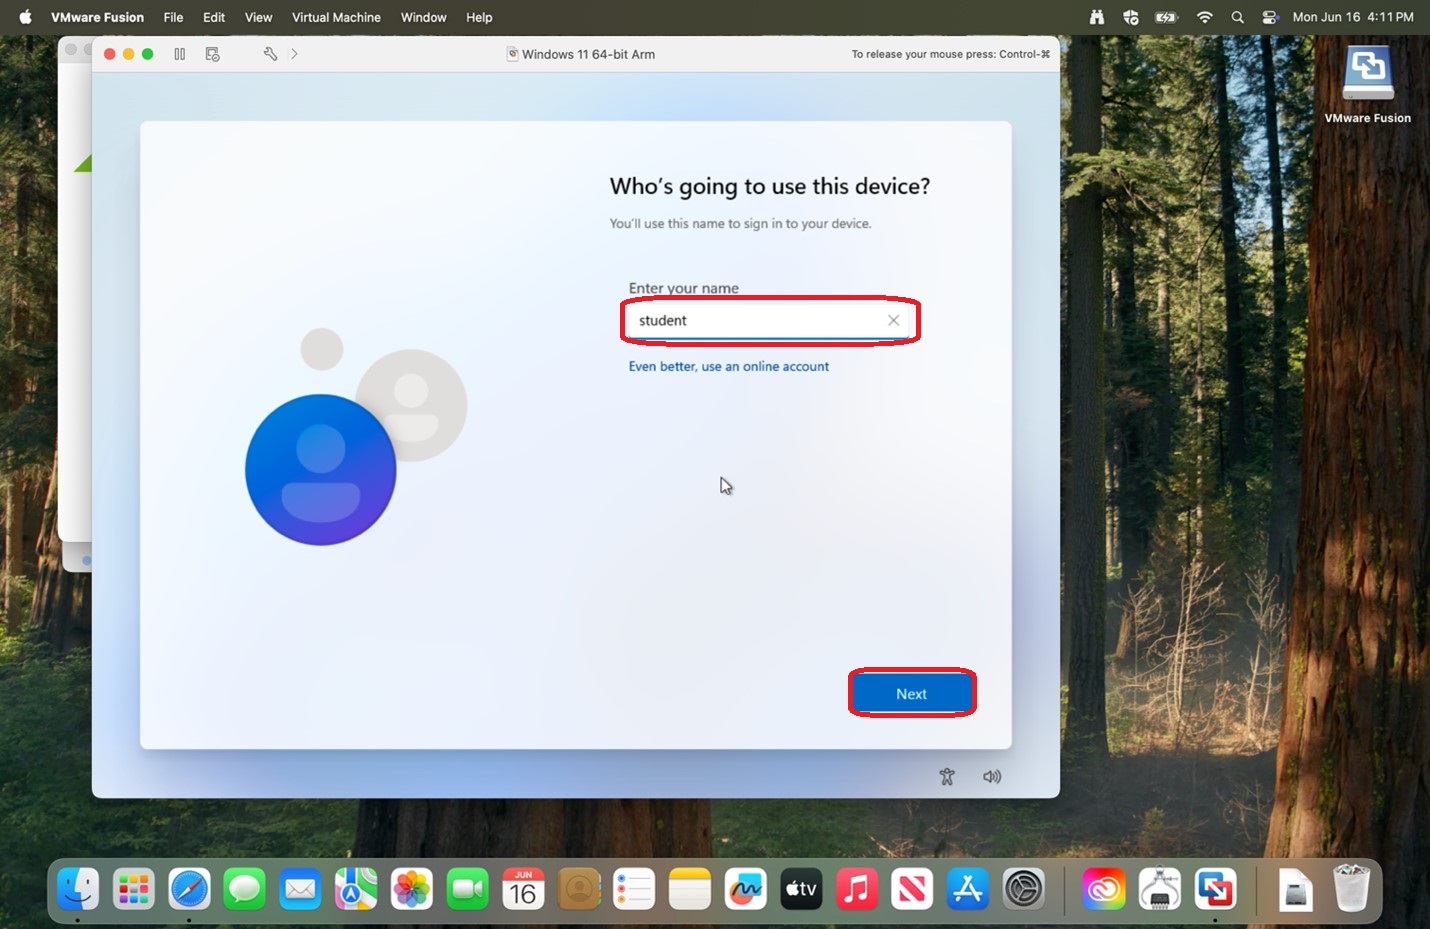
33. Enter your name and
|
 |
|
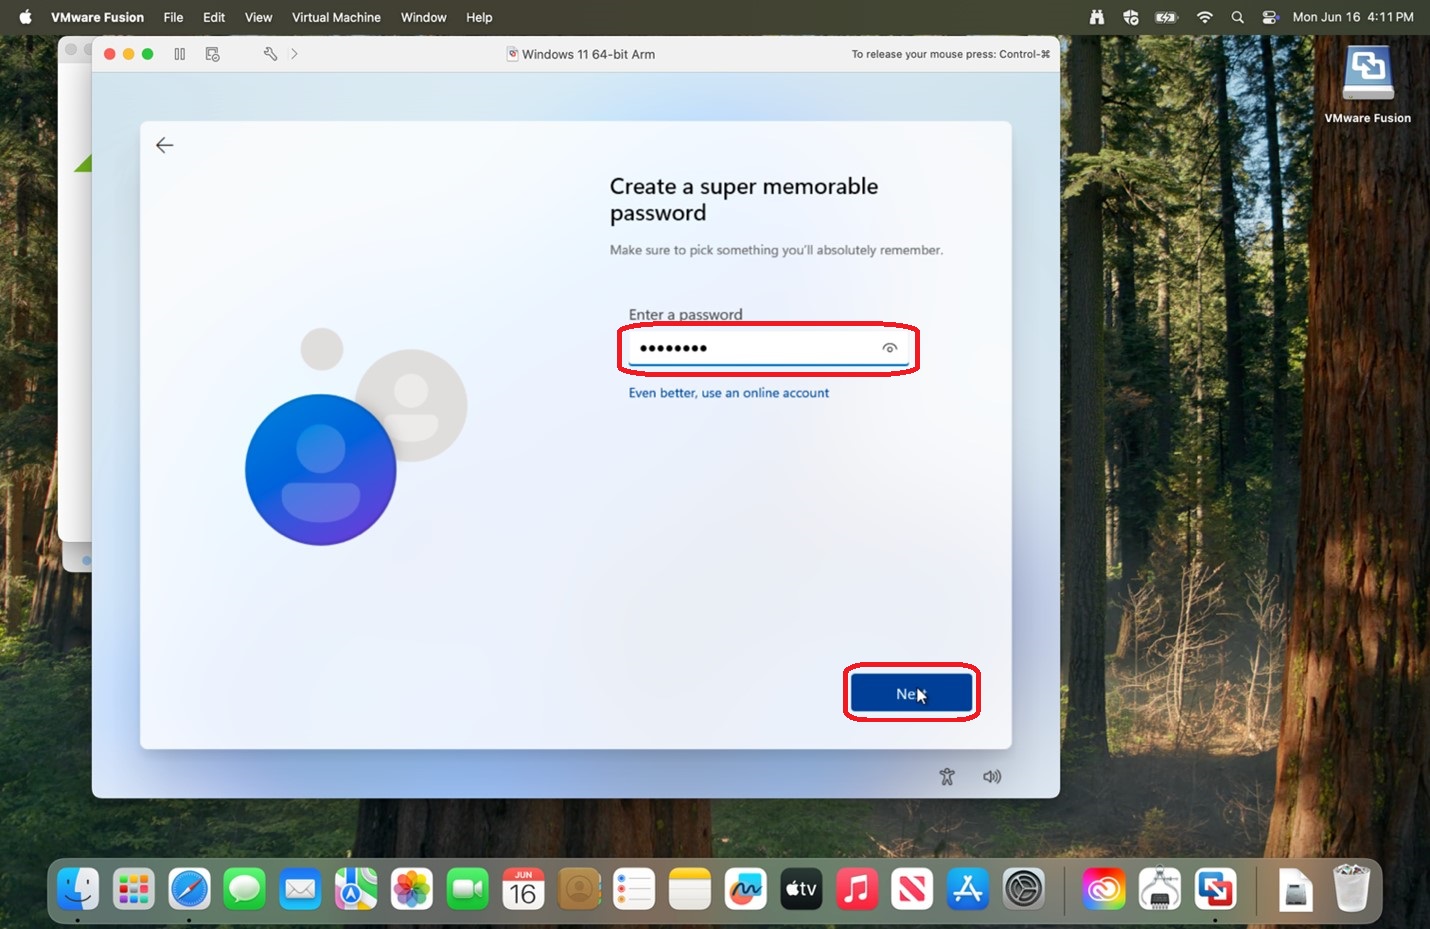
34. Enter a password and
Please save the entered password in a secure location for if you should need it in the future.
|
 |
|
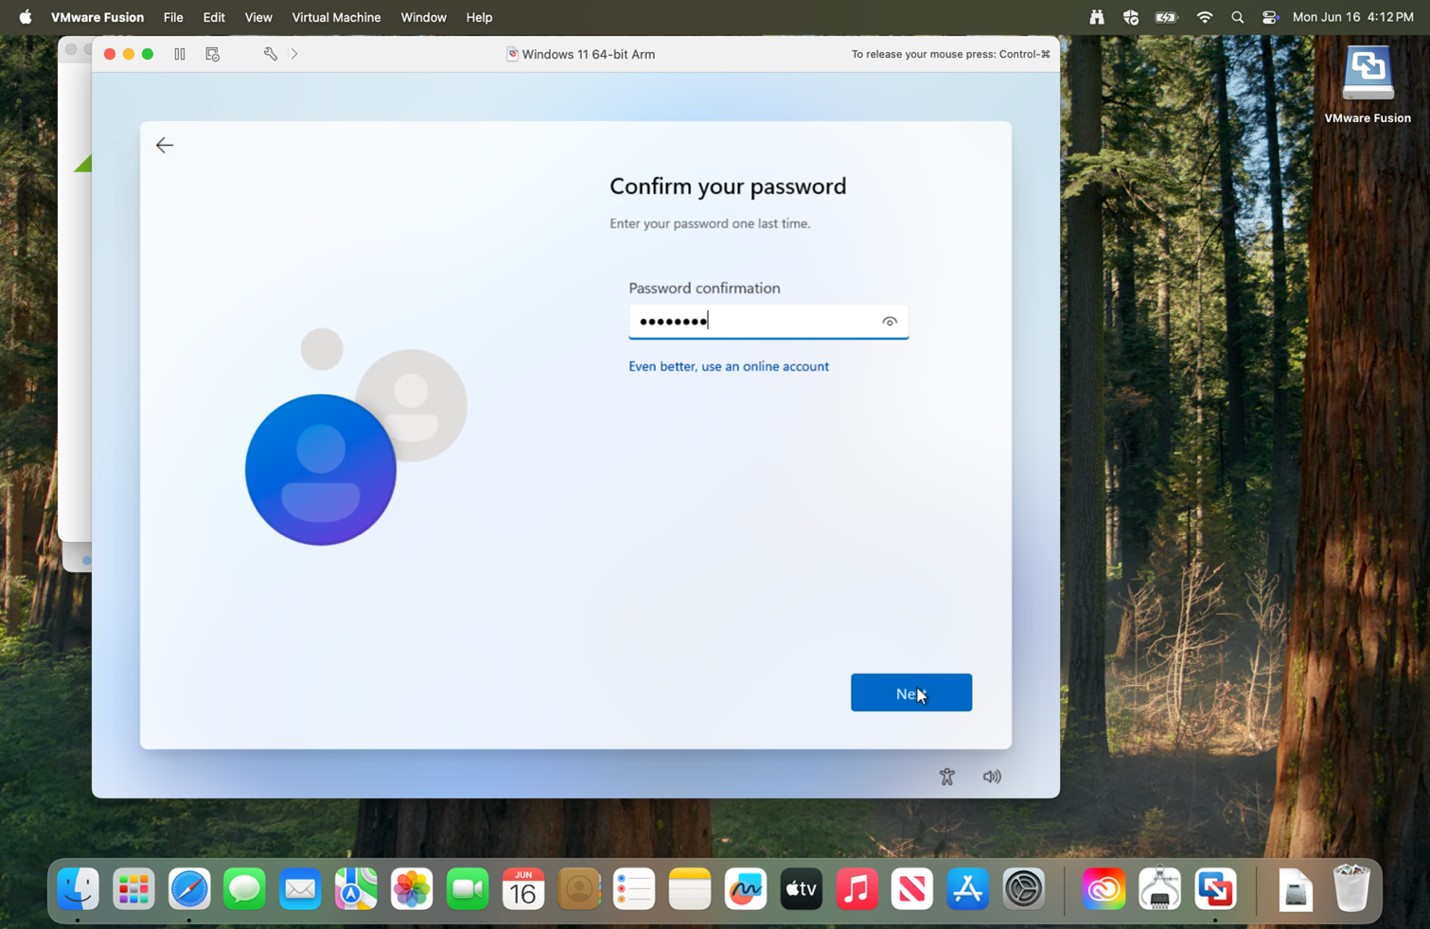
35. Re-enter the password and
|
 |
|
36. Select your 3 security questions and answers for password recovery and
|
|
|
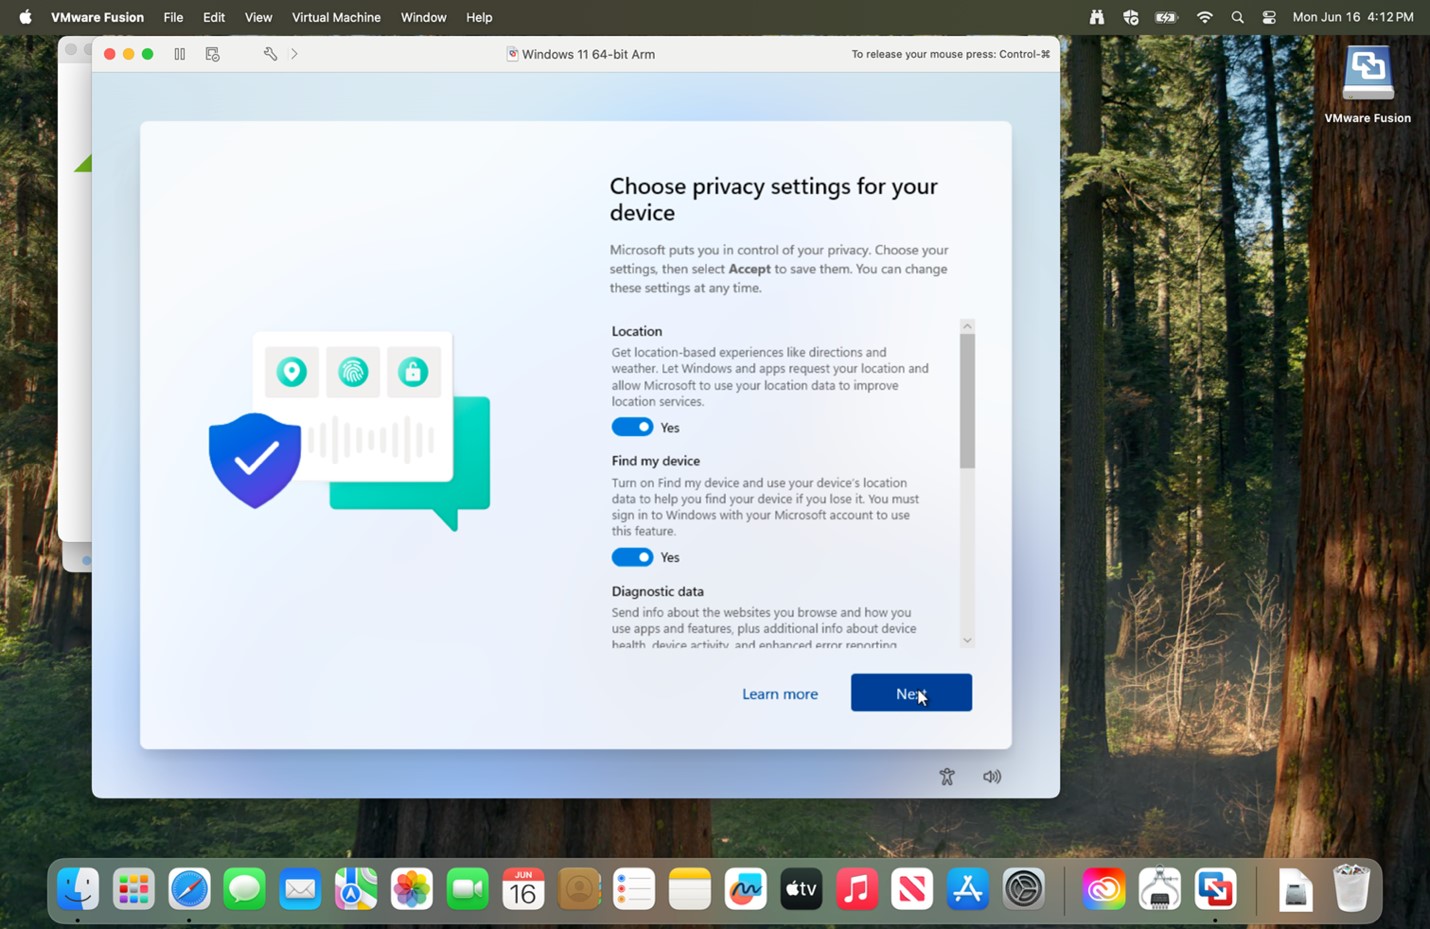
37. Verify the privacy options you would like and
|
|
|
38. Allow time for updates to download.
|
 |
|
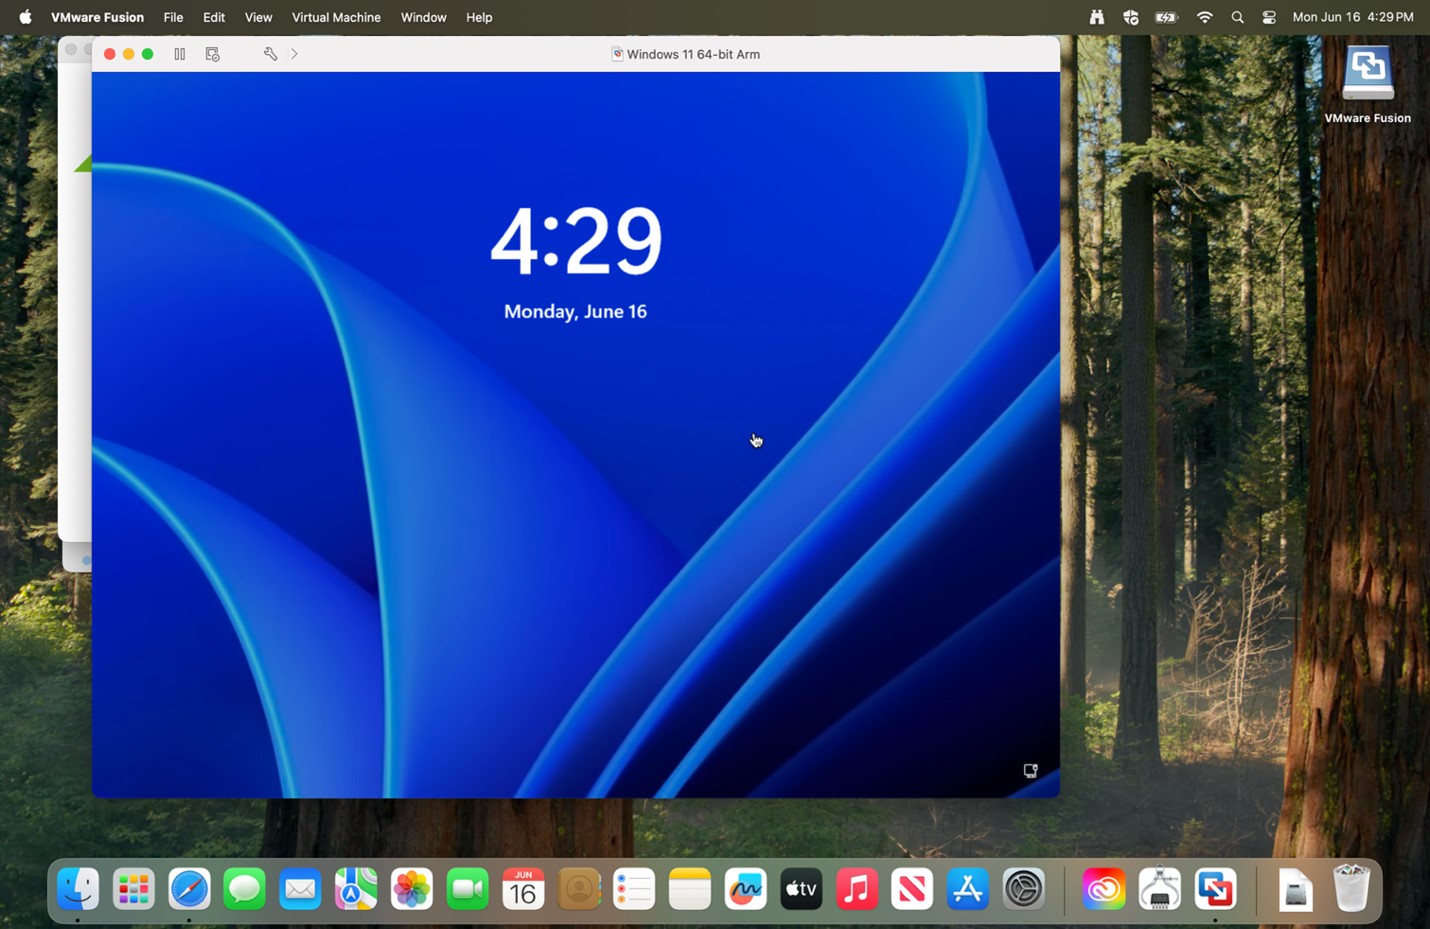
39. Click the screen and enter the password for your login.
|
 |
|
40. Go to your taskbar and select Edge or setting and select Edge.
|
 |
|
41.
|
 |
|
41.
|
 |
|
42.
|
 |
|
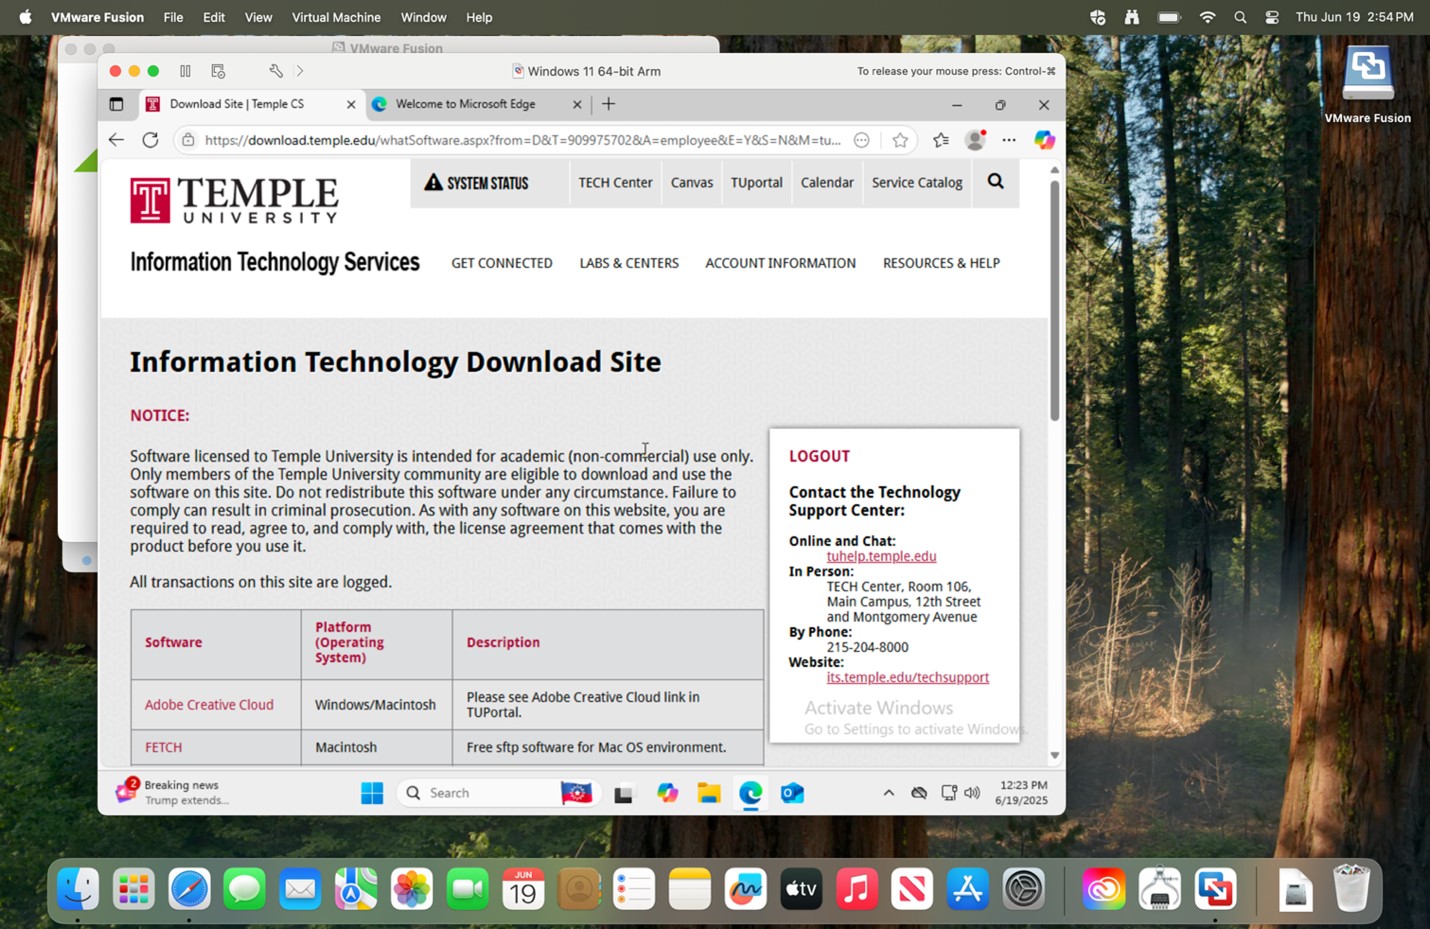
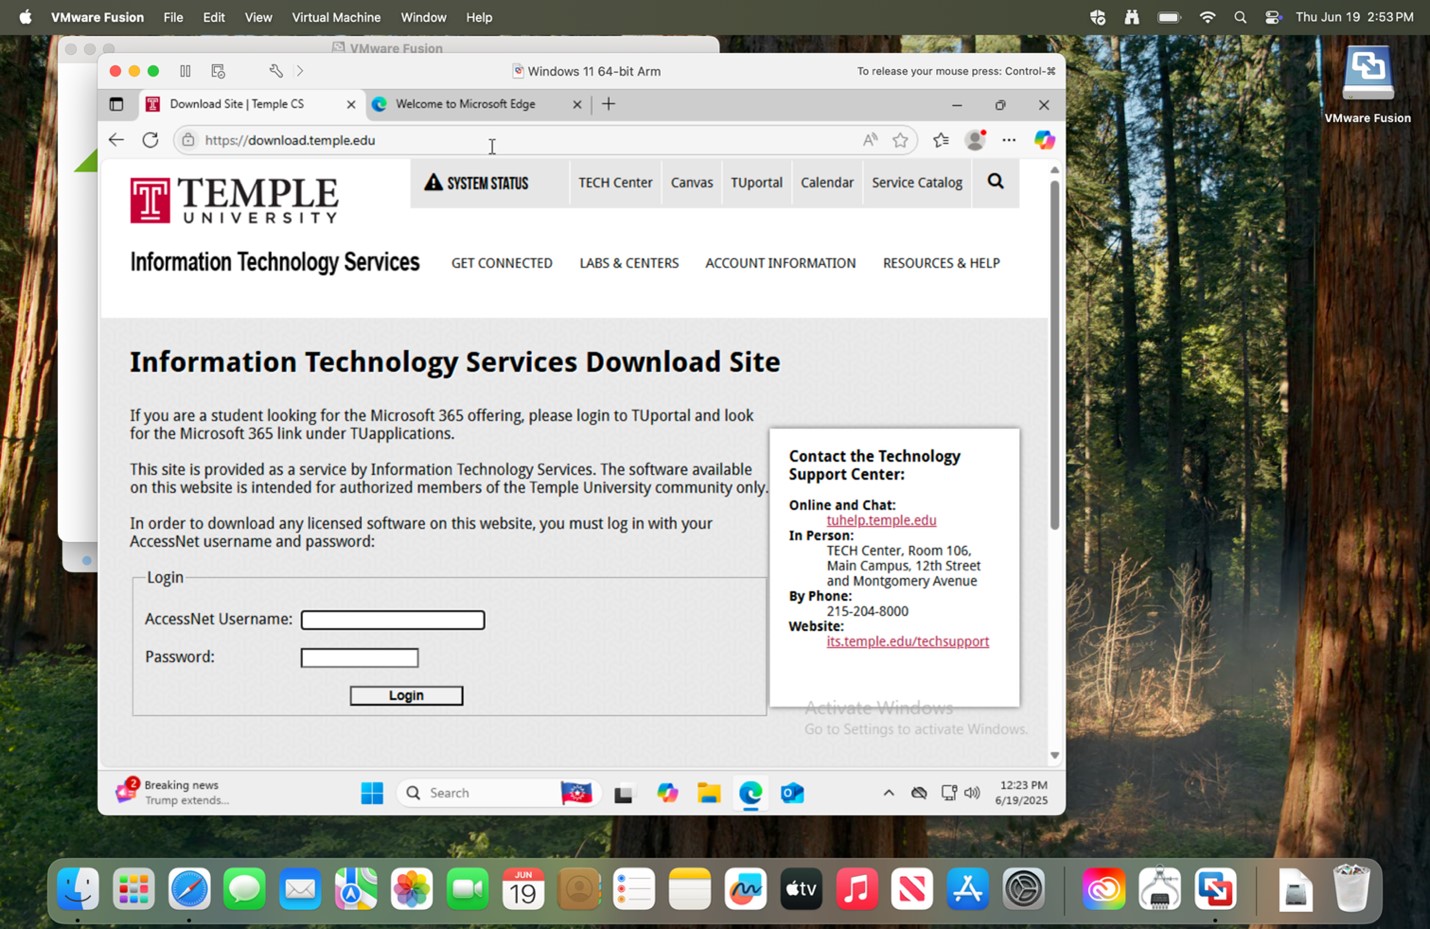
43. Go to download.temple.edu and login using your accessnet username and password.
|
 |
|
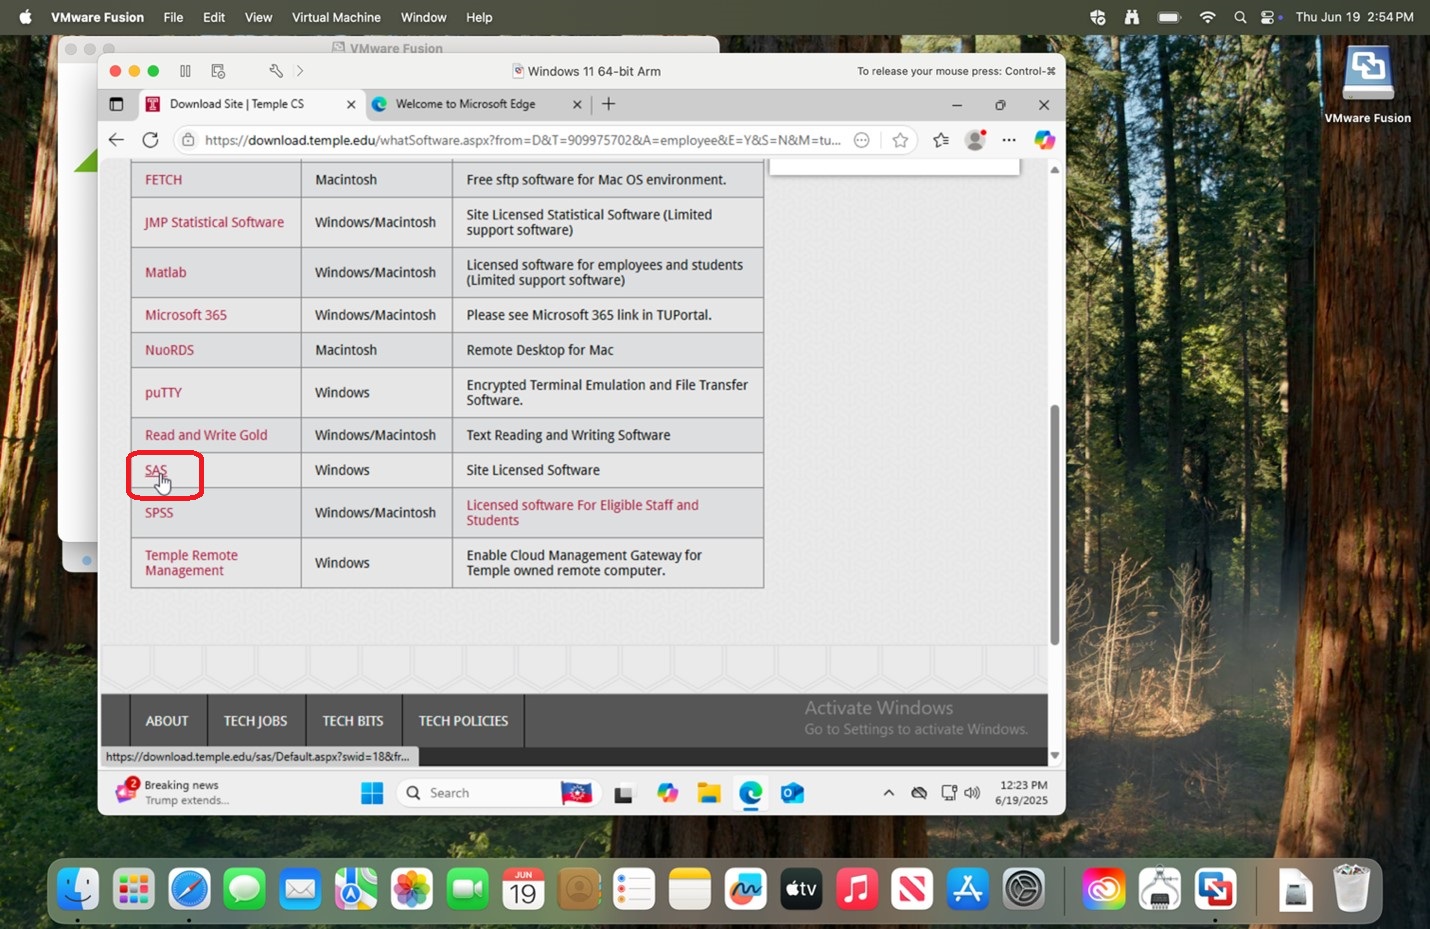
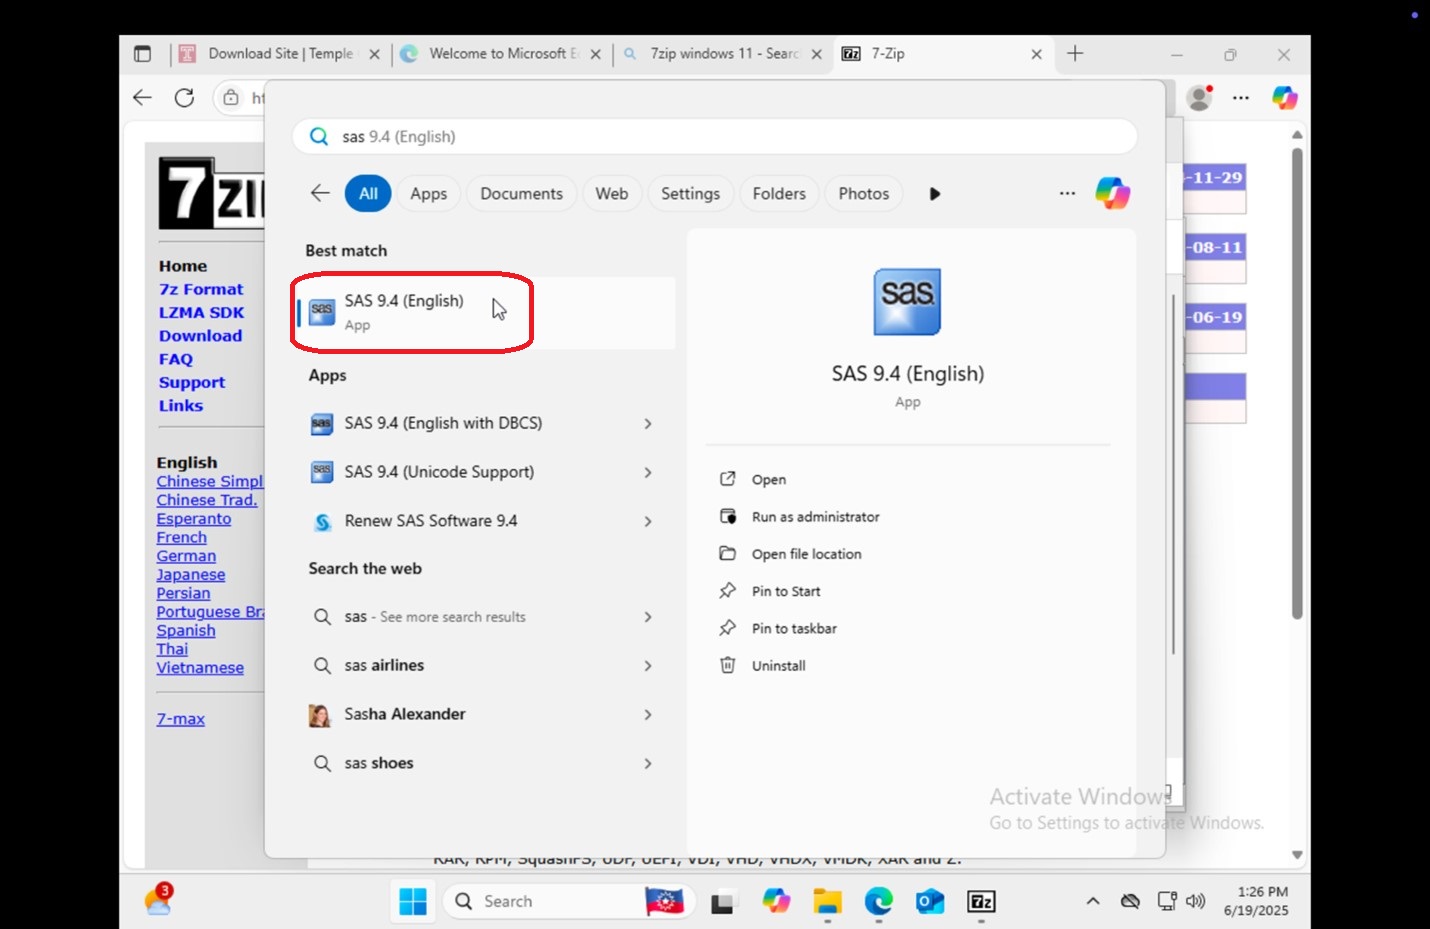
44. Scroll down and select SAS.
|
|
|
45.
|
 |
|
46.
|
 |
|
47.
|
 |
|
48. While it is downloading,
|
 |
|
49. Right click or CTRL
|
|
|
50.
|
 |
|
51.
|
 |
|
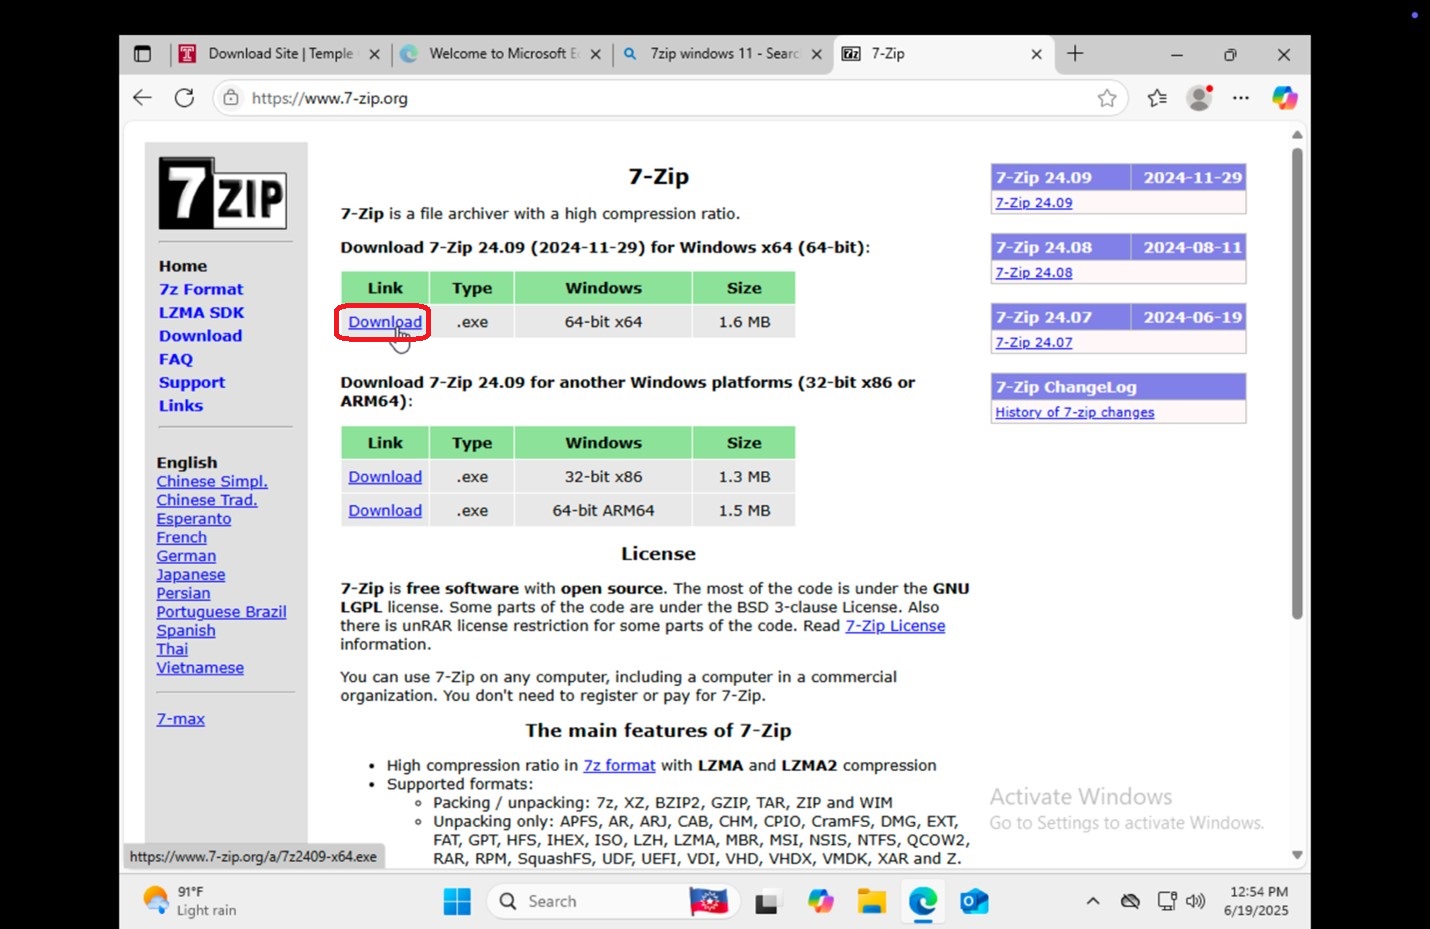
52. Google search 7zip windows 11 within the browser or go to www.7-zip.org.
|
 |
|
53.
|
 |
|
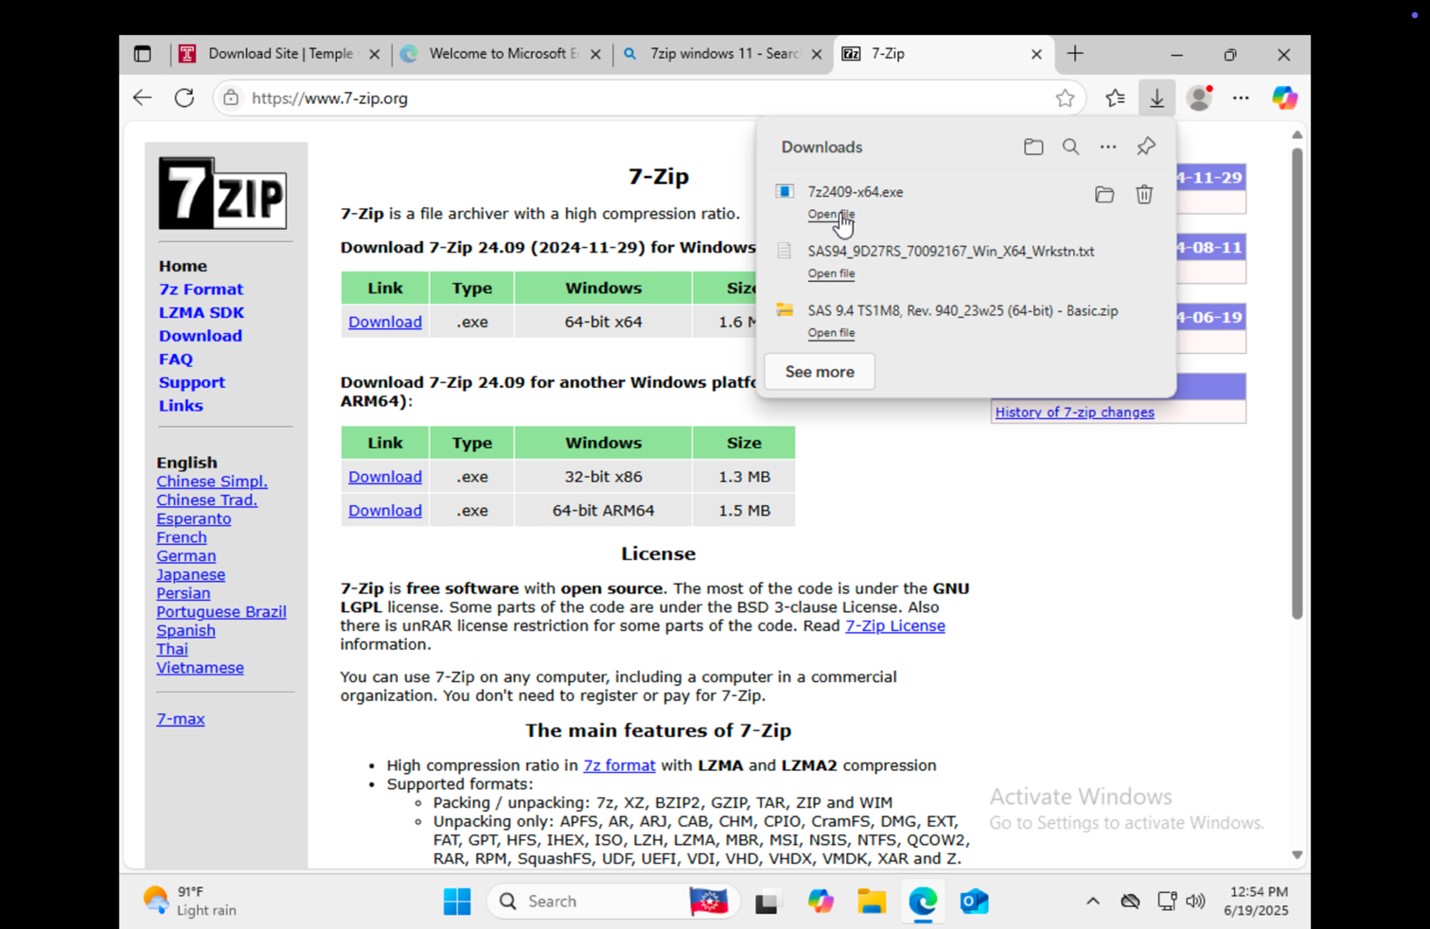
54. Open the newly downloaded file.
|
 |
|
55.
|
 |
|
56.
|
 |
|
57. |
 |
|
58. |
 |
|
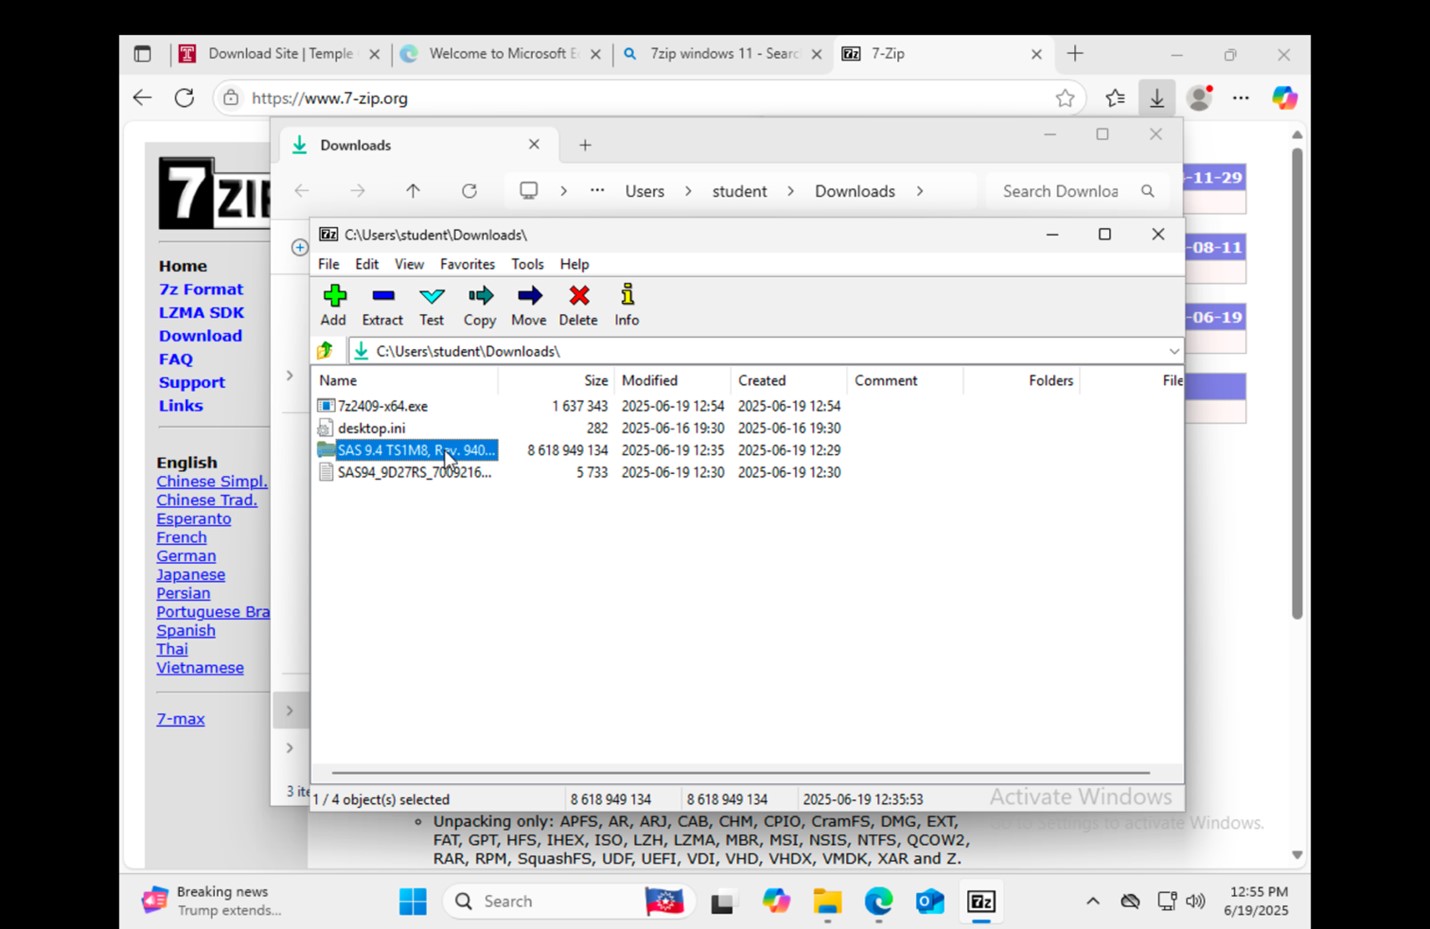
59. Navigate to |
 |
|
60. |
 |
|
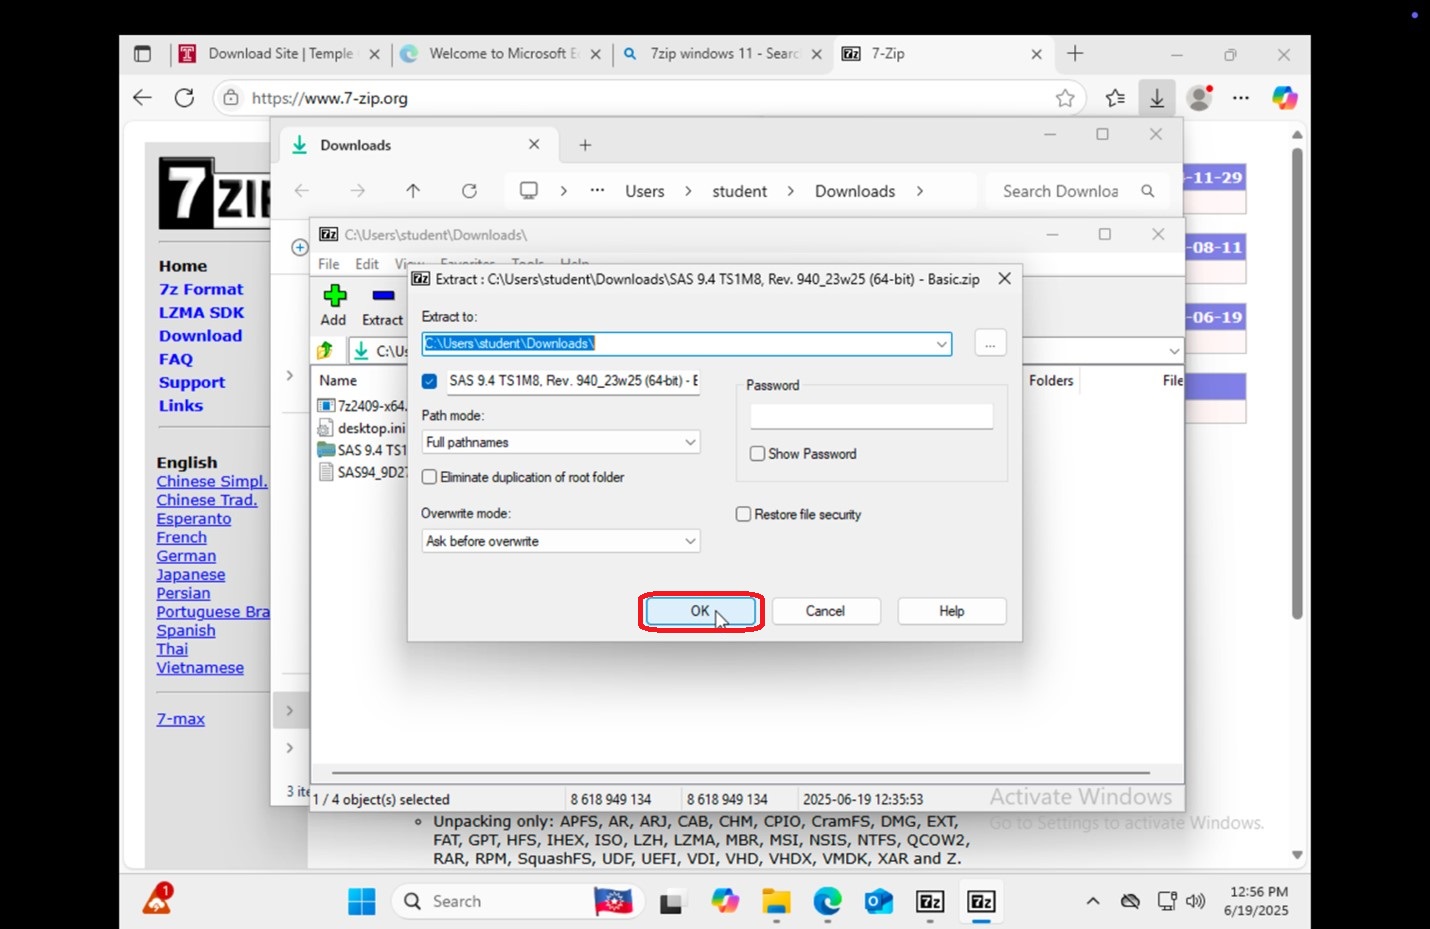
61.
|
 |
|
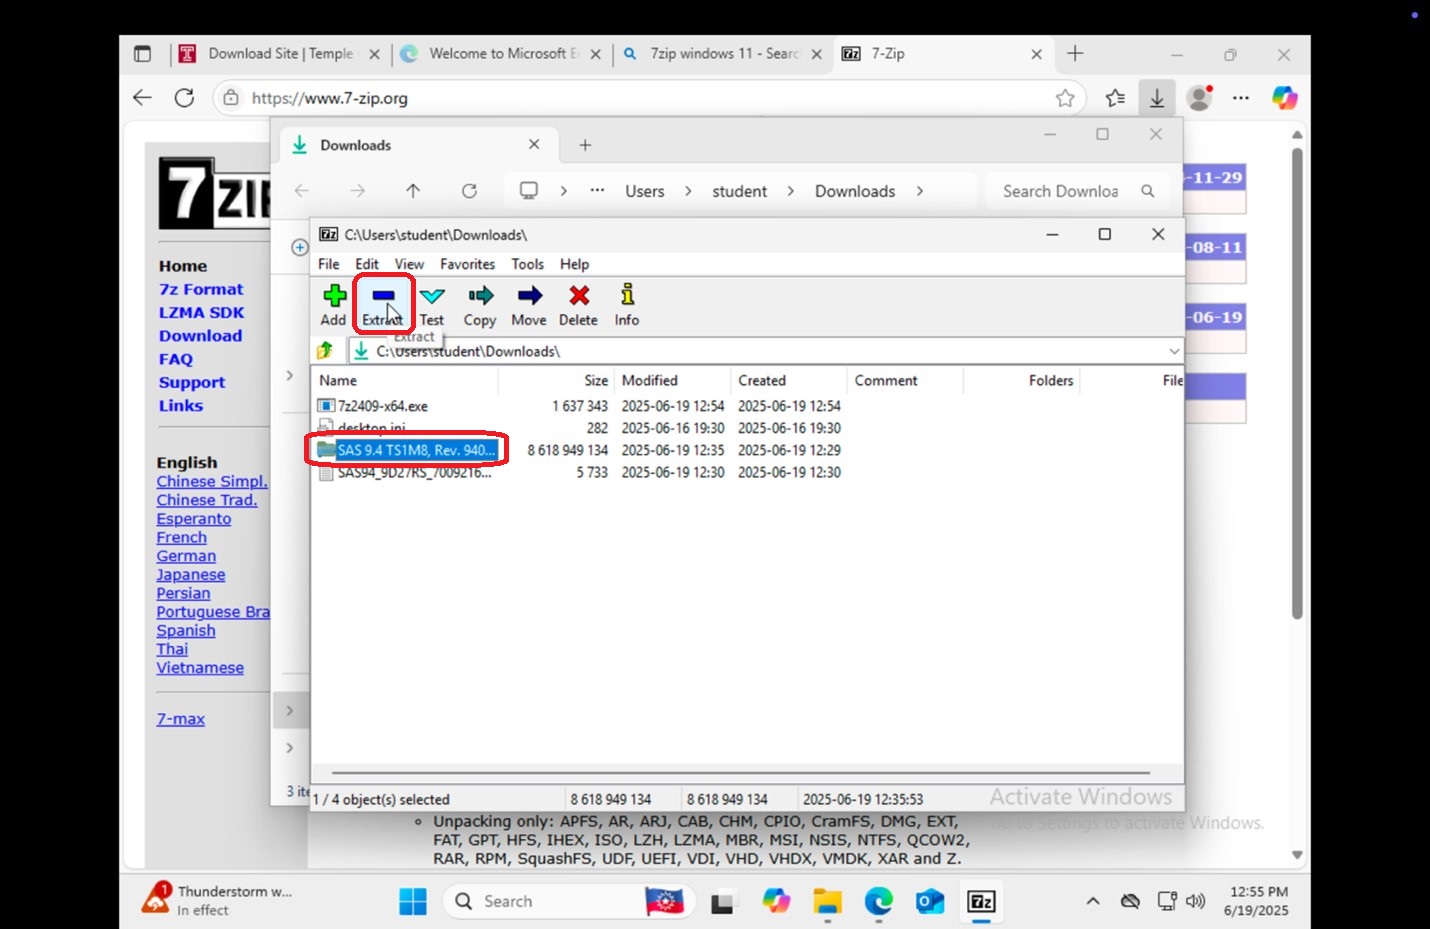
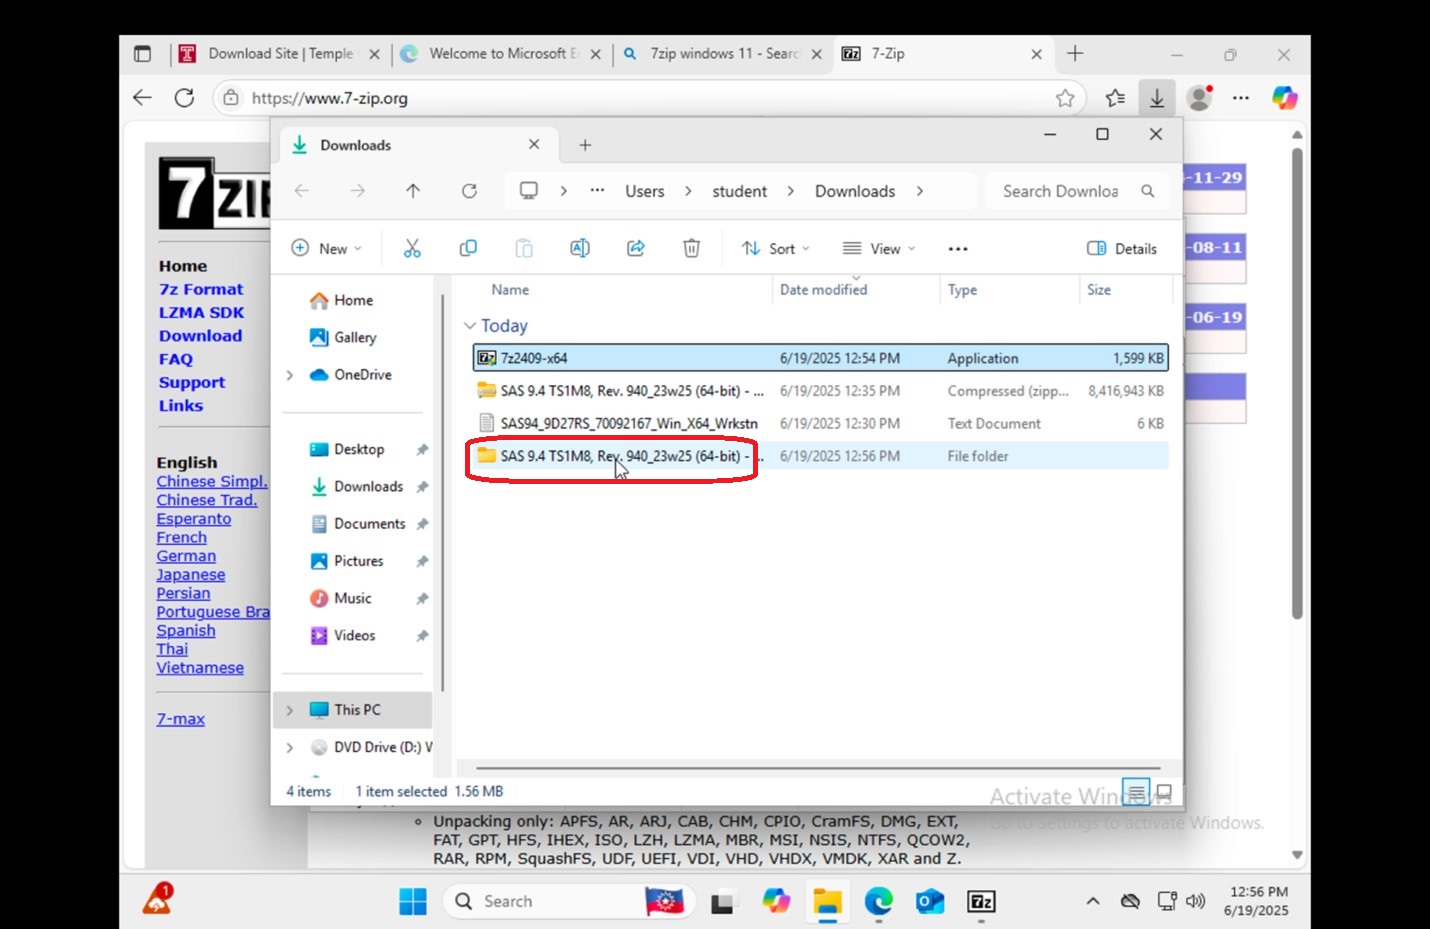
62. Once it is finished extracting, go to |
 |
|
63. Open
|
 |
|
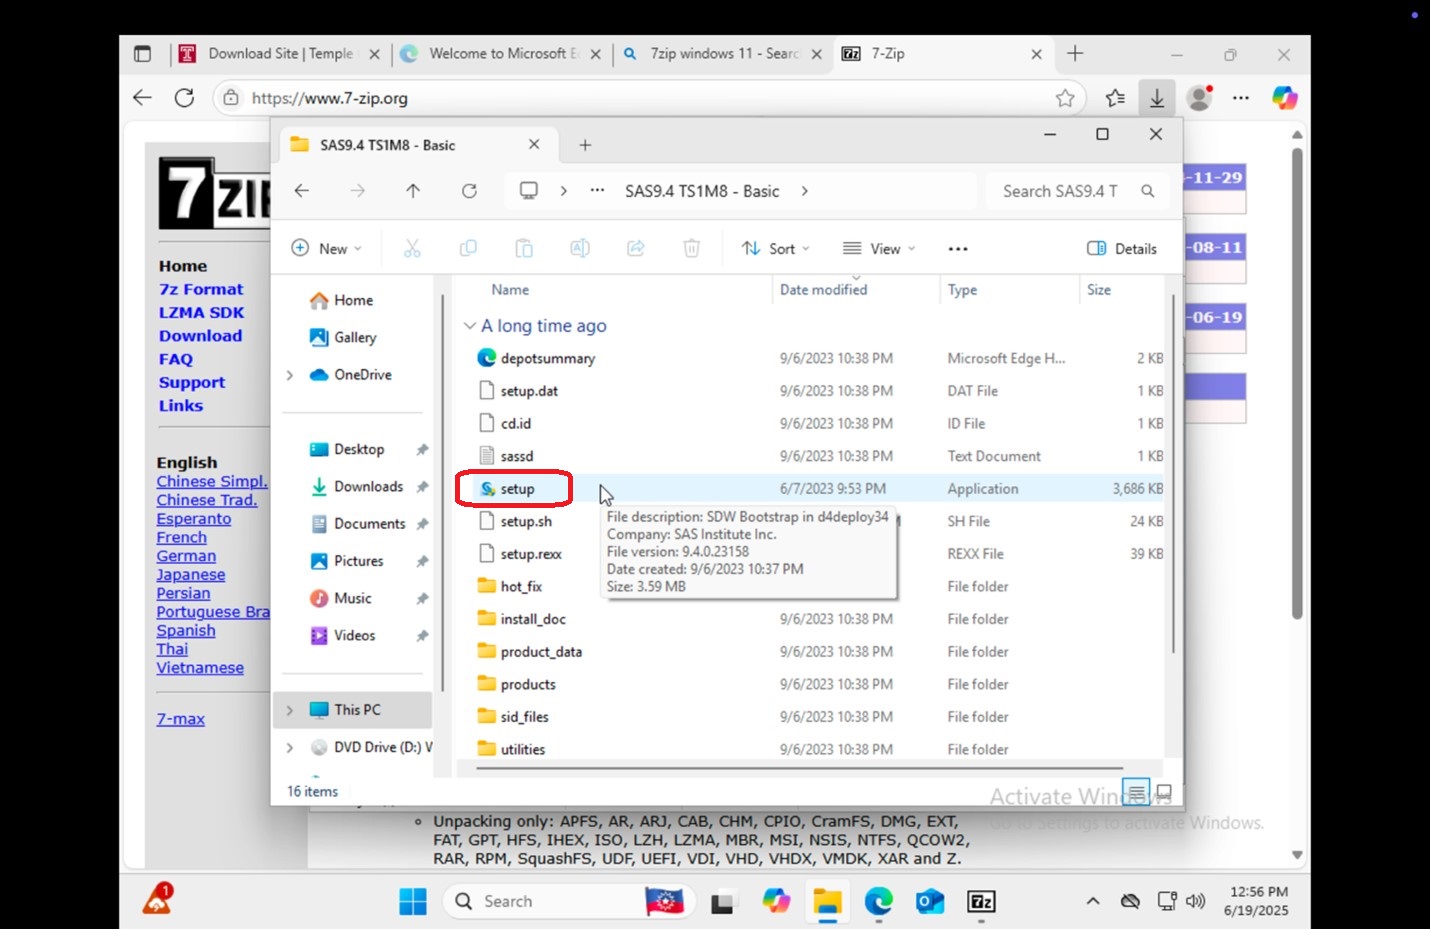
64. Click and open setup.
|
 |
|
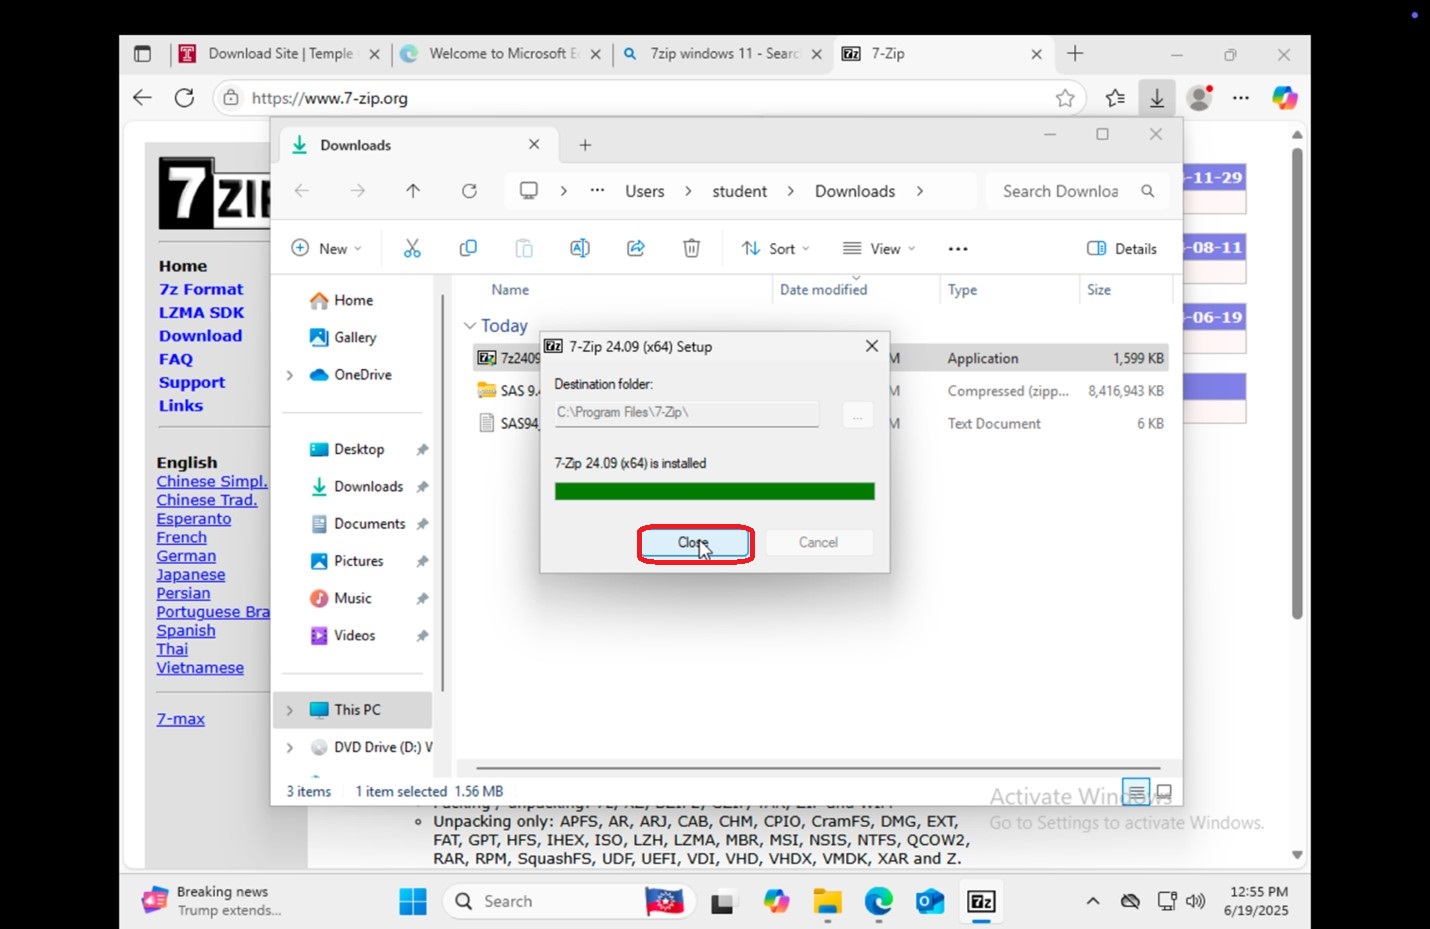
65.
|
 |
|
66.
|
 |
|
67.
|
 |
|
68.
|
 |
|
69.
|
 |
|
70.
|
 |
|
71.
|
 |
|
72.
|
 |
|
73.
|
 |
|
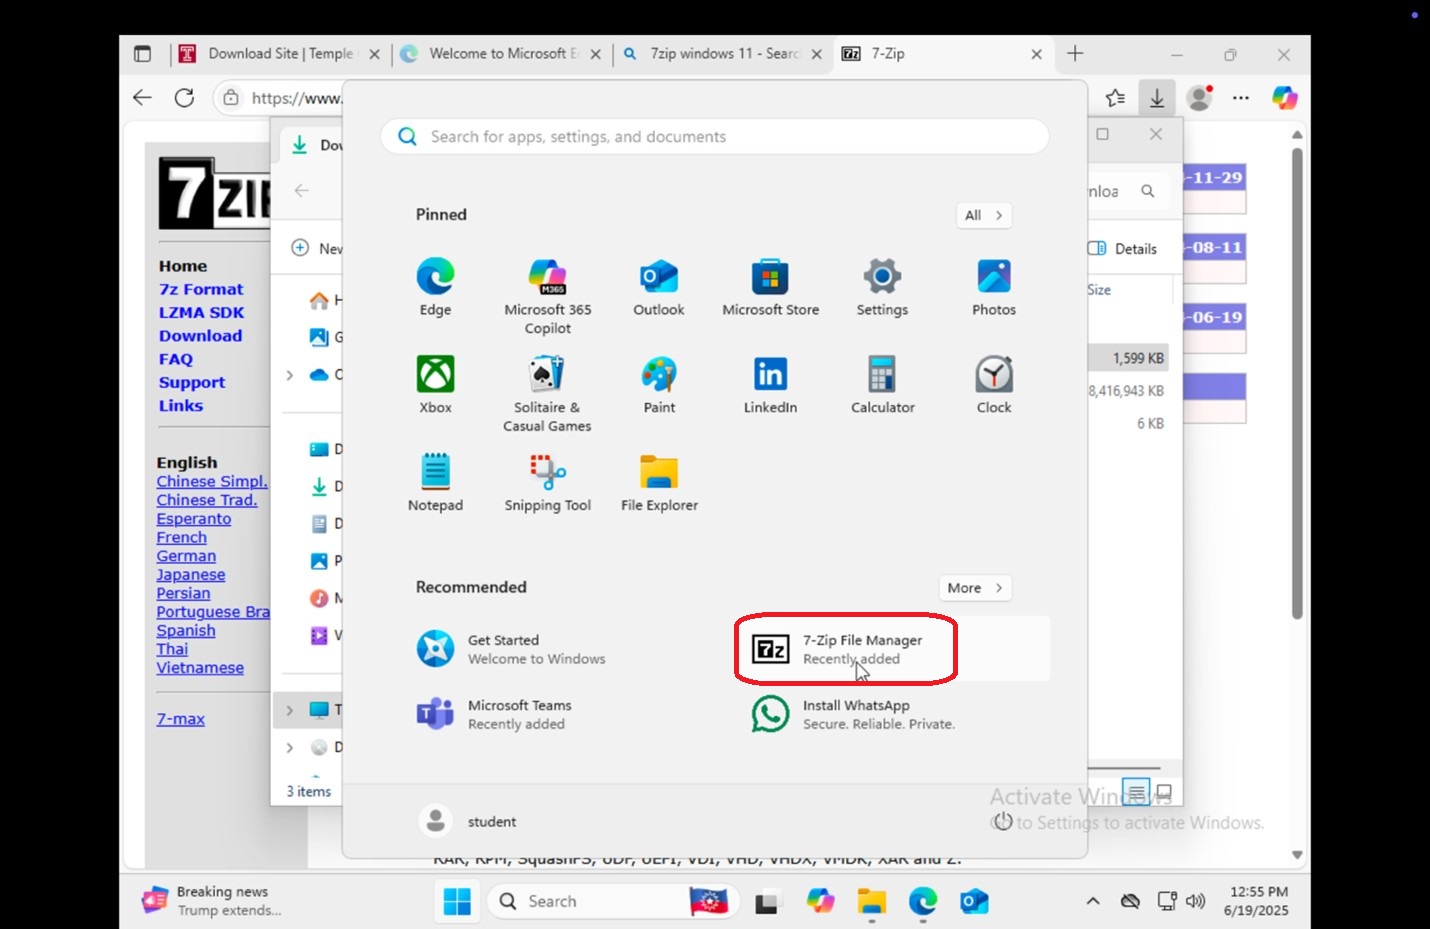
74. Go to
|
 |
|
75. Click on
|
 |
|
76.
|
 |
|
77.
|
 |
|
78.
|
 |
|
79. Allow time to download and click Next.
|
 |
|
80.
|
 |
|
81.
|
 |
|
82.
|
 |
|
83.
|
|