
Working with Files in Teams
Microsoft Teams streamlines file collaboration for research teams by providing a secure and centralized space to store, edit, and share documents—whether working with internal colleagues or external collaborators. Within each Team, the Files tab allows members to upload datasets, grant proposals, manuscripts, protocols, and more, all while managing access and receiving real-time updates on file changes.
Teams integrates seamlessly with SharePoint and OneDrive, ensuring files shared in standard channels are stored in SharePoint for group access, while private chat files are saved in OneDrive for secure, direct sharing. This setup supports version control, simultaneous editing, and secure permissions—critical for managing evolving documents such as IRB applications, data analysis spreadsheets, and co-authored papers. Microsoft Teams is also HIPAA-compliant, making it a suitable platform for handling research data that includes protected health information (PHI).
Files can be accessed and edited from the Teams app, online via SharePoint, or through your local file explorer when synced with OneDrive. Researchers can work offline, download files for fieldwork, and restore deleted items from the Recycle Bin, minimizing the risk of data loss. Leveraging these tools helps research teams stay organized, compliant, and collaborative across any location.
How-To Guides
Upload a File
Please note you can drag and drop any files into the desired channel's files.
|
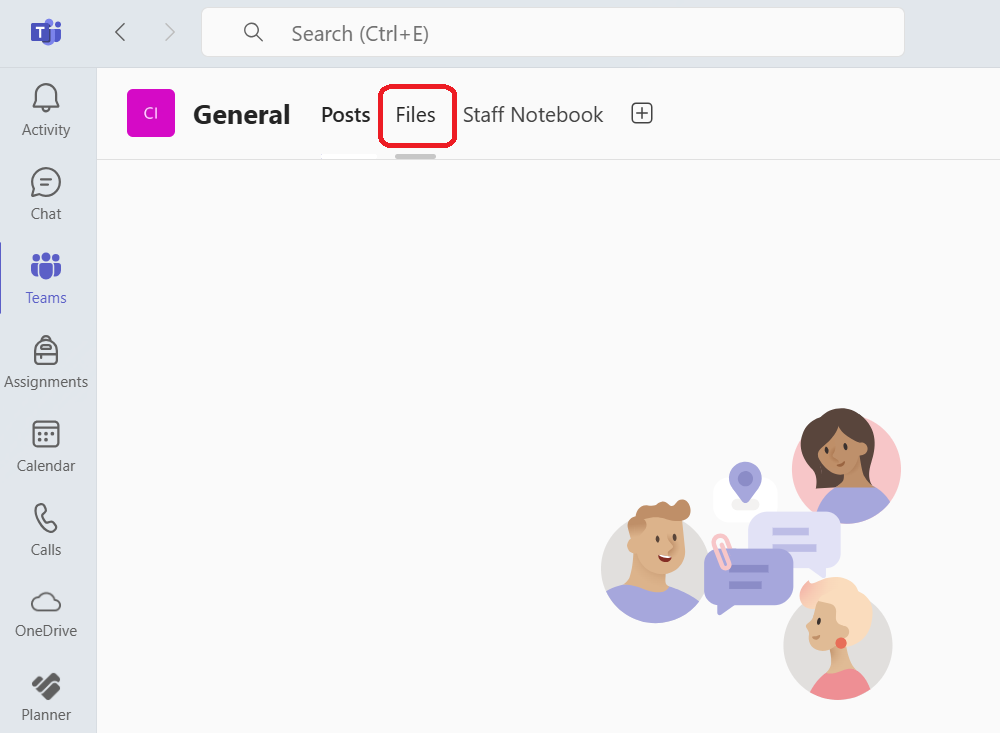
1. In Microsoft Teams go to the desired channel, then click the Files tab.
|
 |
|
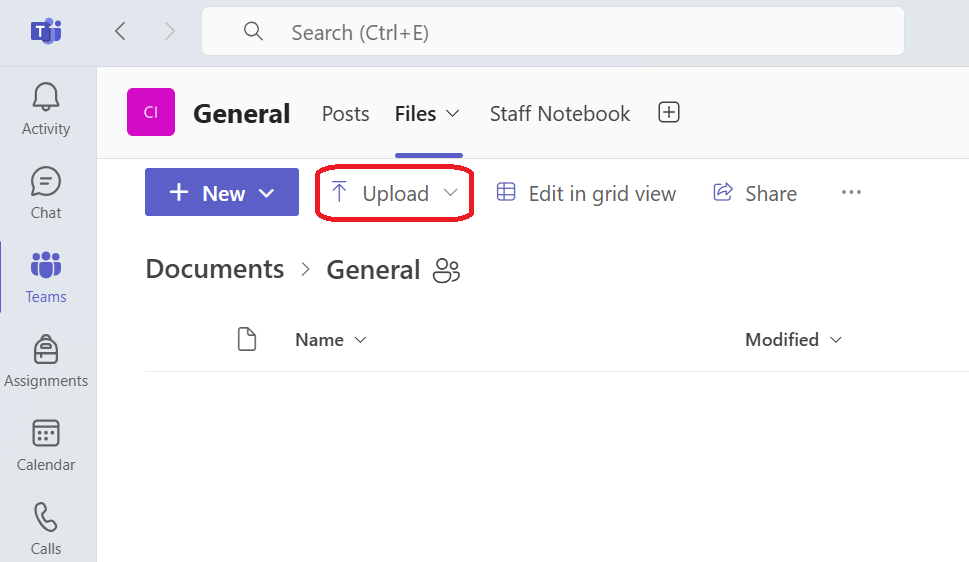
2. Click Upload |
|
|
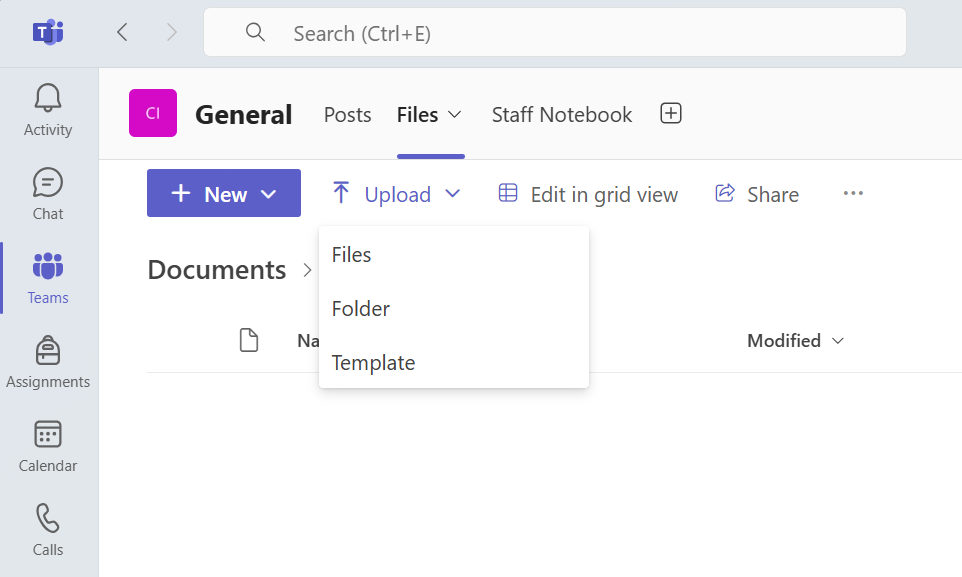
3. From the dropdown menu, select Files or Folder depending on what you would like to upload.
Choose a file from your device. The file will be saved to the team’s SharePoint folder. |
|
Download a File
|
1. In Microsoft Teams go to the desired channel, then click the Files tab.
|
|
|
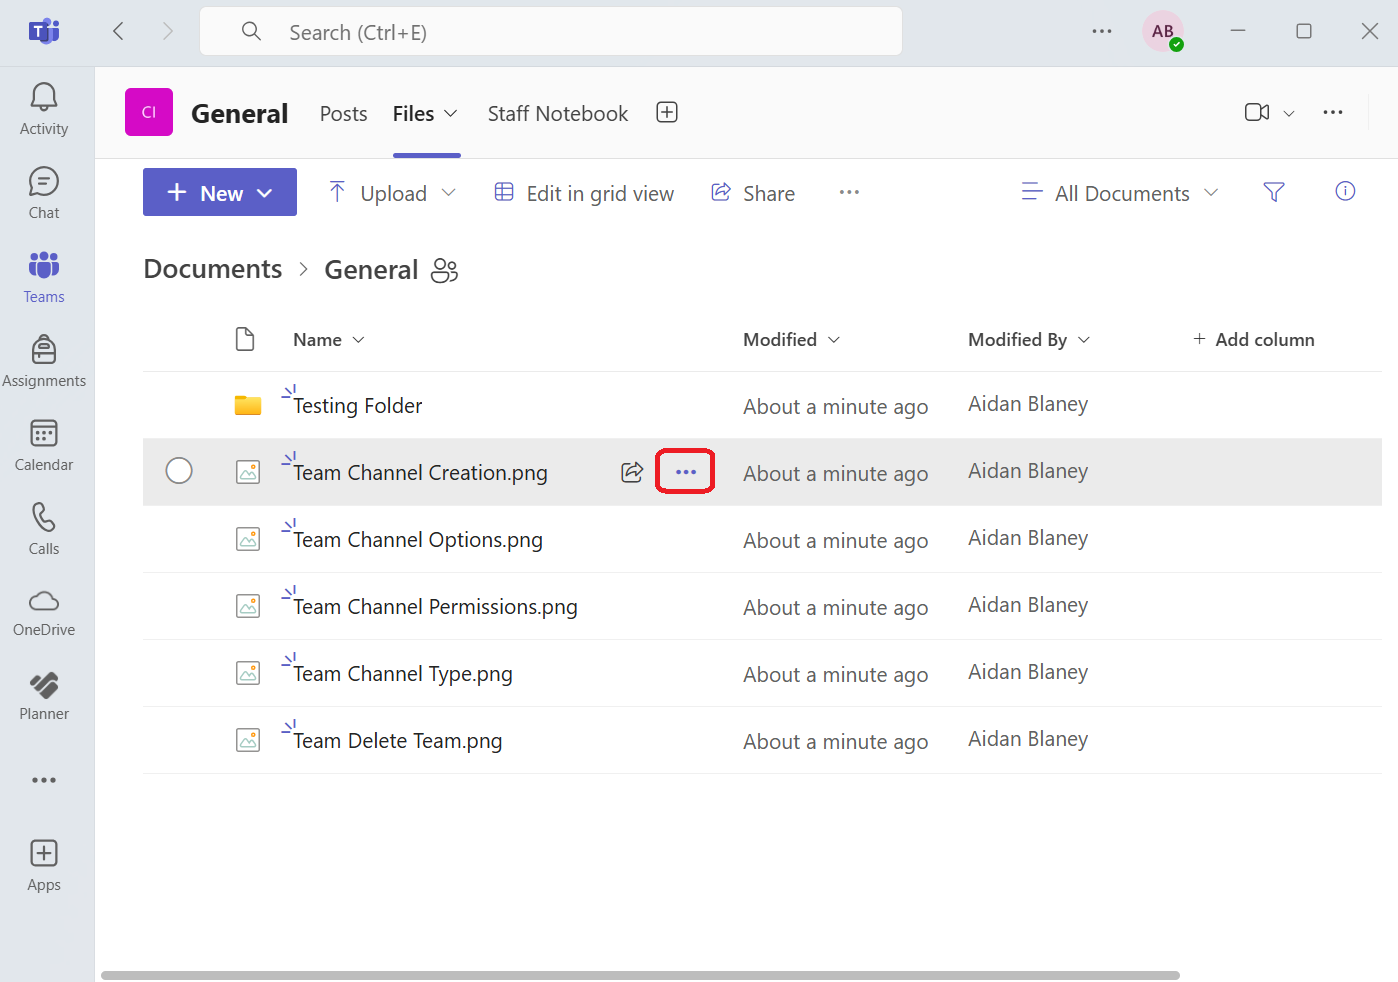
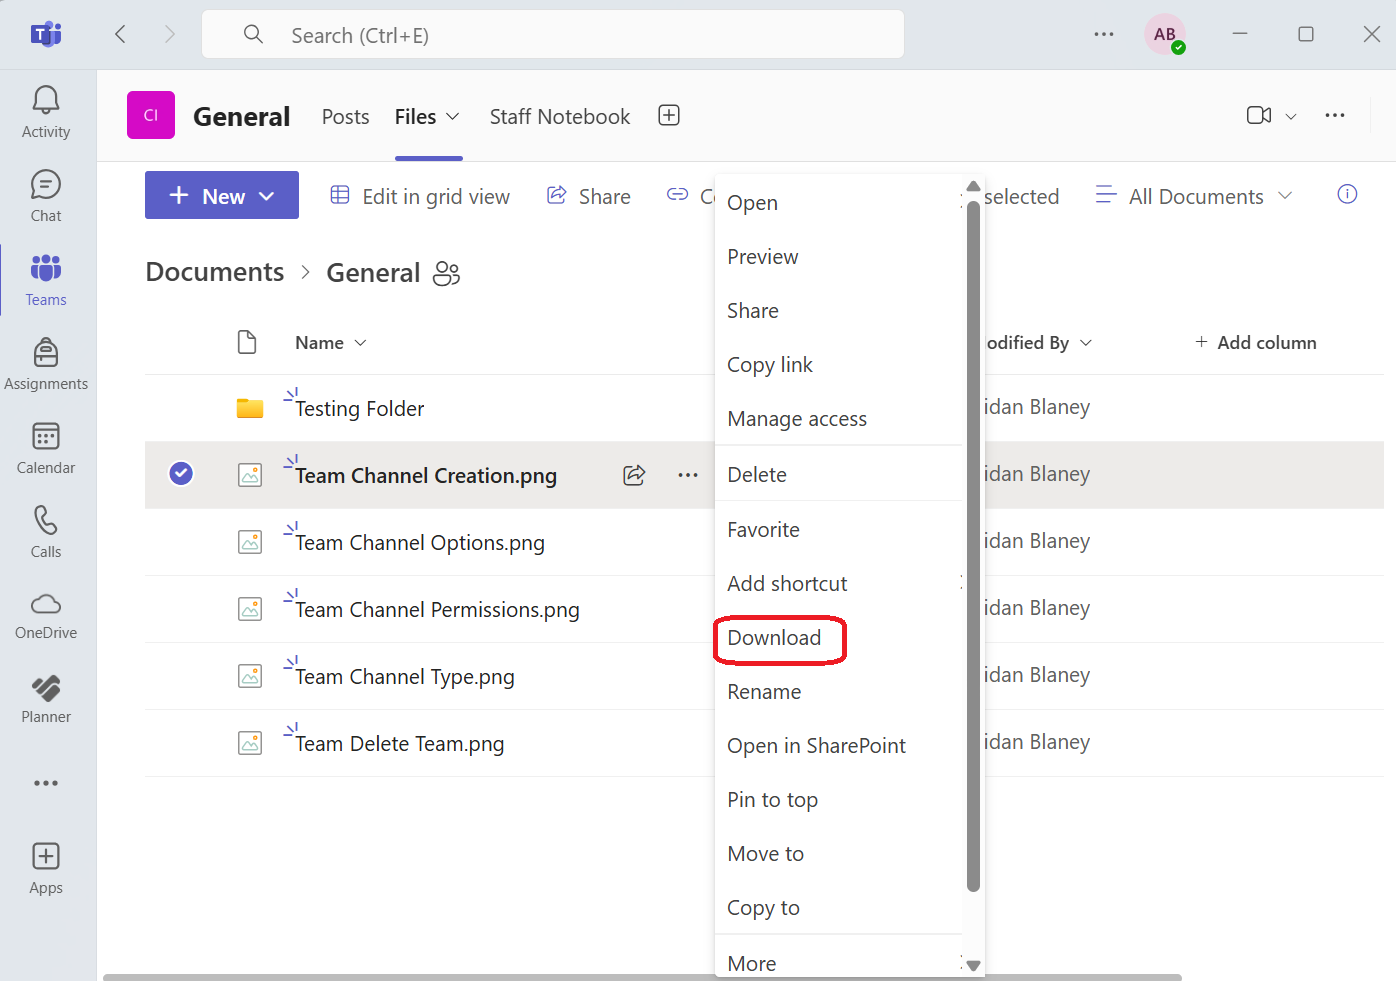
2. Click the three dots (•••) next to the desired file. |
 |
|
3. Select Download.
The file will be saved to your device’s default downloads folder. |
 |
Sync Files for Offline Use
|
1. In Microsoft Teams go to the desired channel, then click the Files tab. Please note that you are in the correct folder before proceeding as syncing will take the contents of that folder into your local OneDrive.
|
|
|
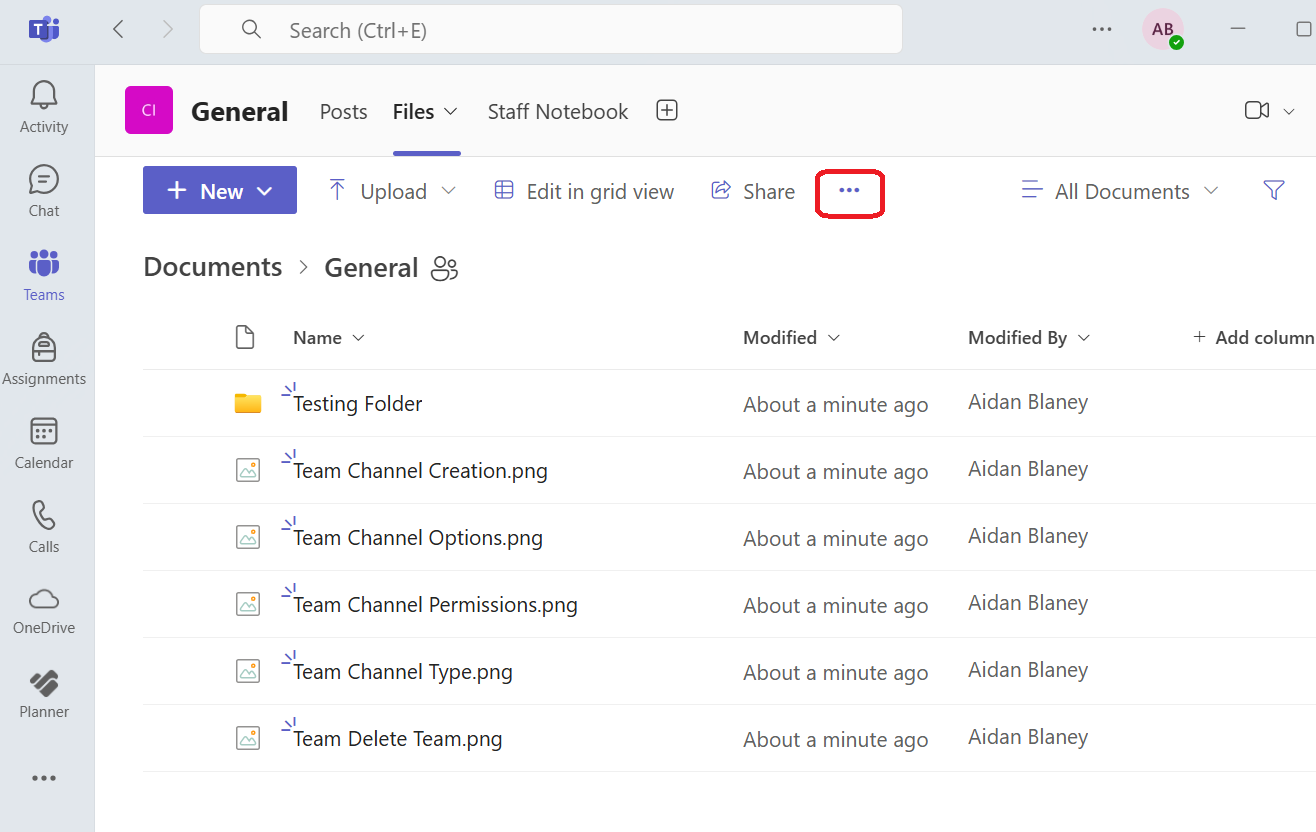
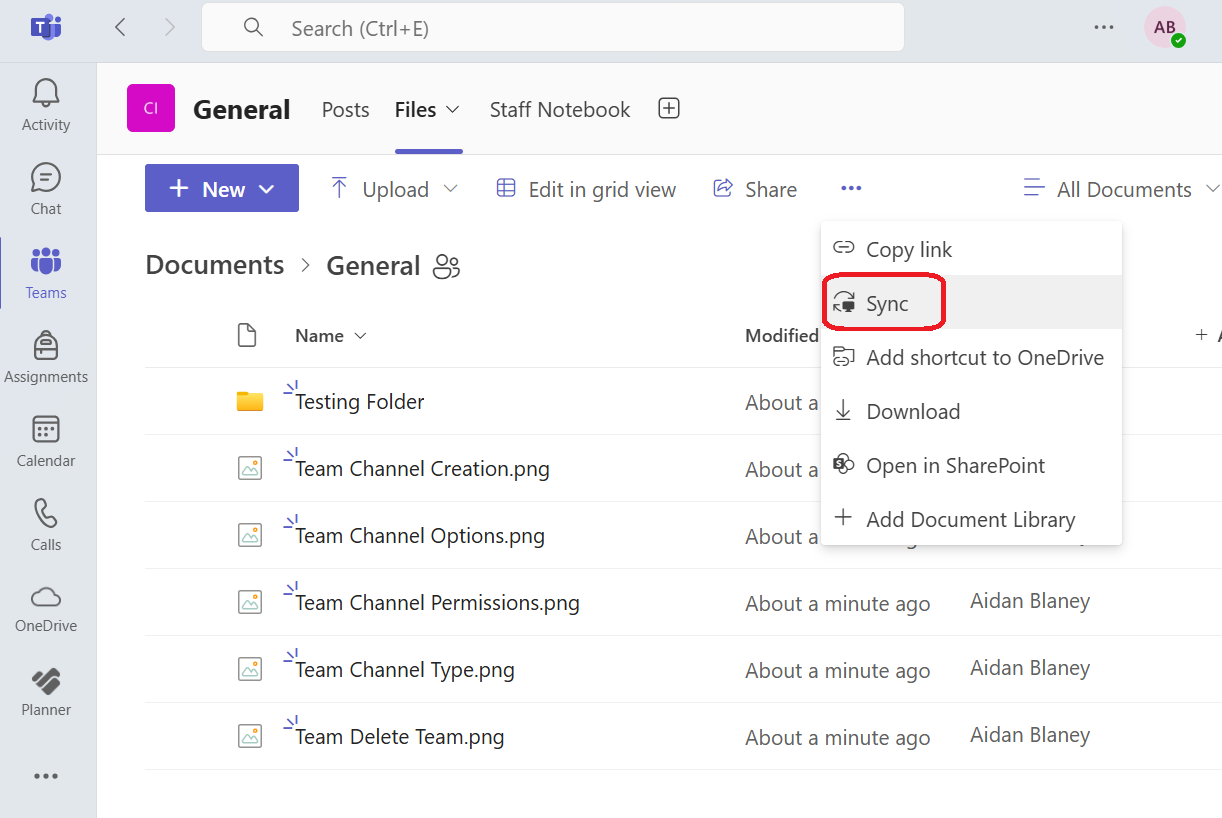
2. Click the three dots (•••) next the ↗️Share icon. |
 |
|
3. Select Sync.
This connects the SharePoint folder to your local OneDrive, allowing you to access and edit files from your file explorer.
|
 |
Delete a File
|
1. In Microsoft Teams go to the desired channel, then click the Files tab.
|
|
|
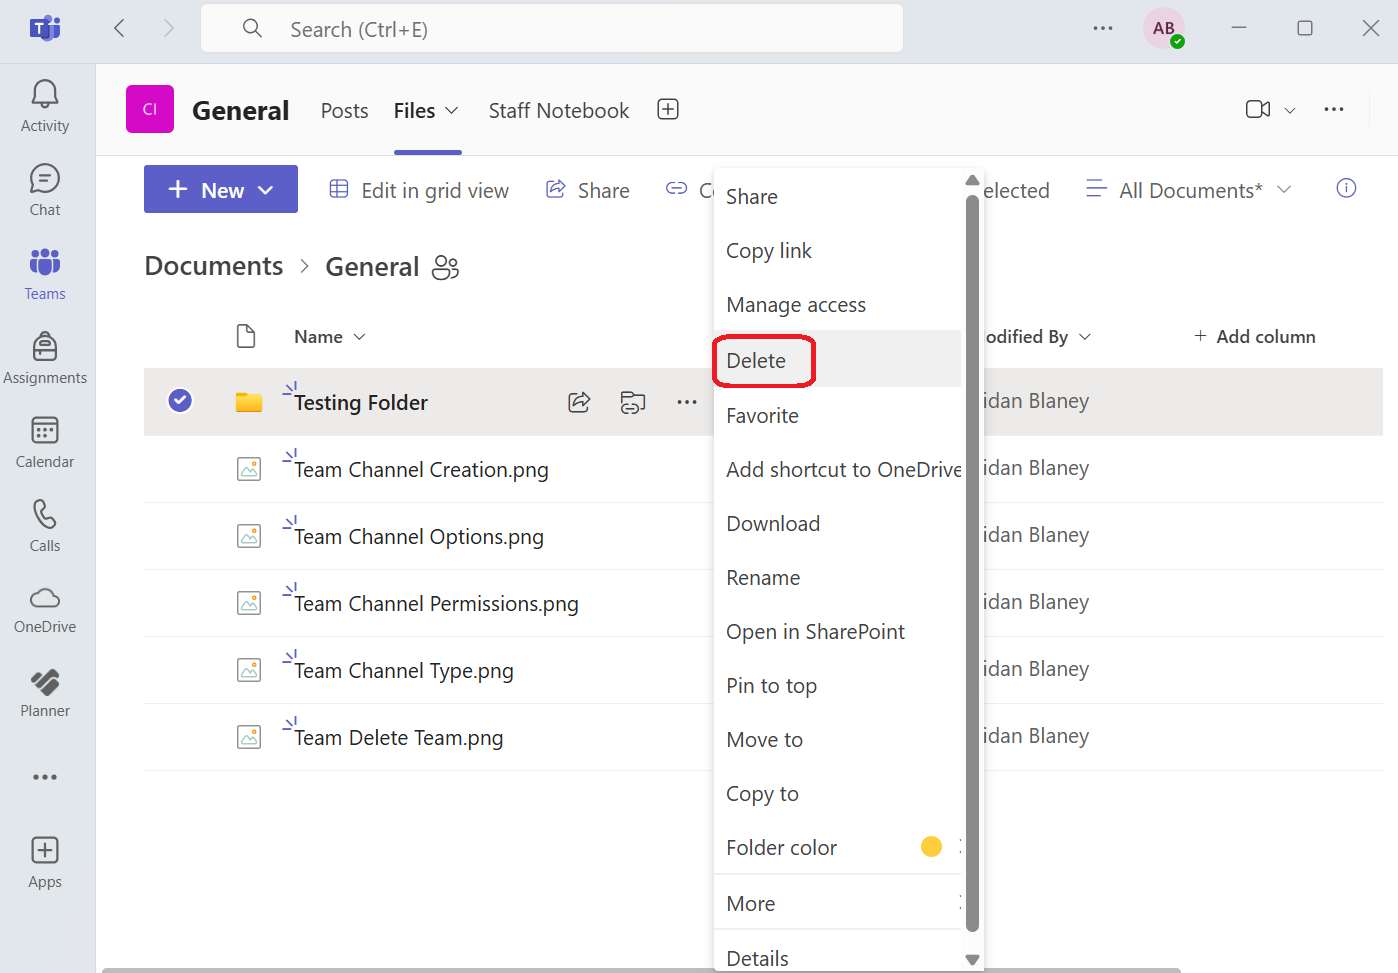
2. Click the three dots (•••) next to the desired file. |
|
|
3. Select Delete.
⚠️Deleted files can be recovered from the SharePoint Recycle Bin if needed. If you need to get back a file that has been deleted click on three dots (•••) next to Share and select SharePoint from the dropdown menu.
|
 |
Share Files
Share a Single File or Folder
|
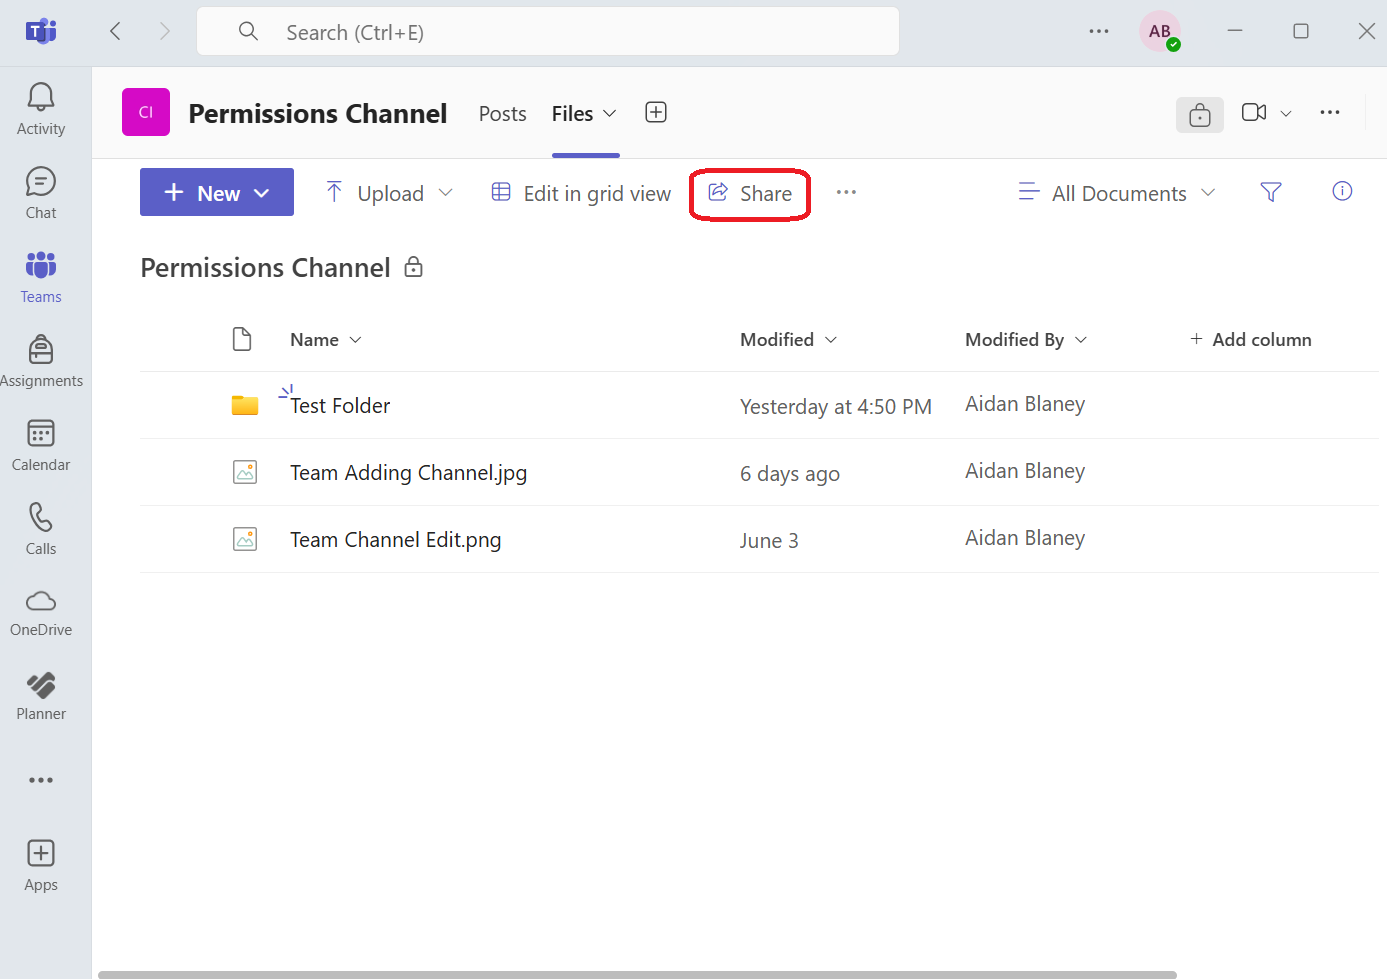
1. In Microsoft Teams go to the desired channel, then click the Files tab.
|
|
|
2. Click the share icon next to the desired file or folder. |
|
|
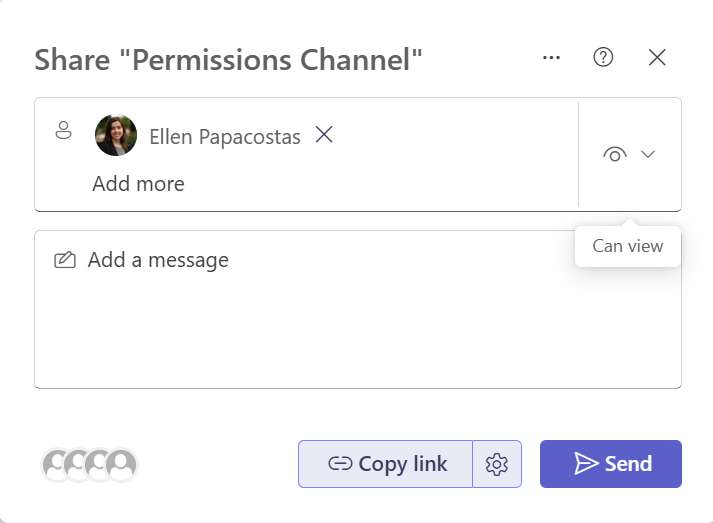
3. Type the name or email of the person you wish to share this file with.
|
 |
|
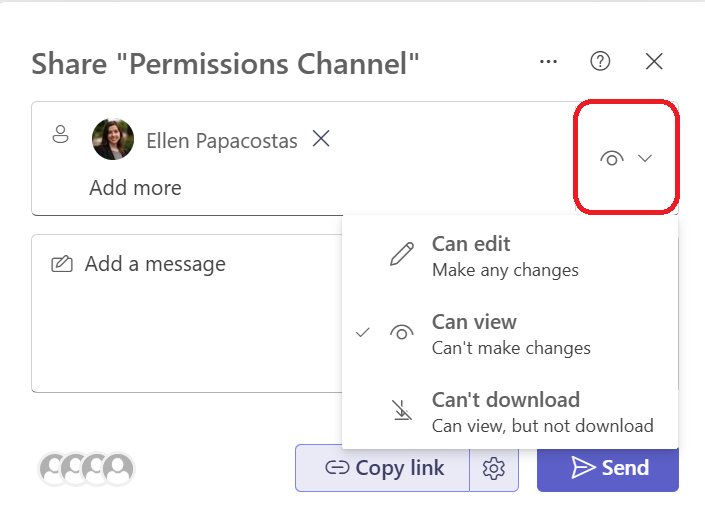
3. Click on the dropdown menu to select how the shared file can be used.
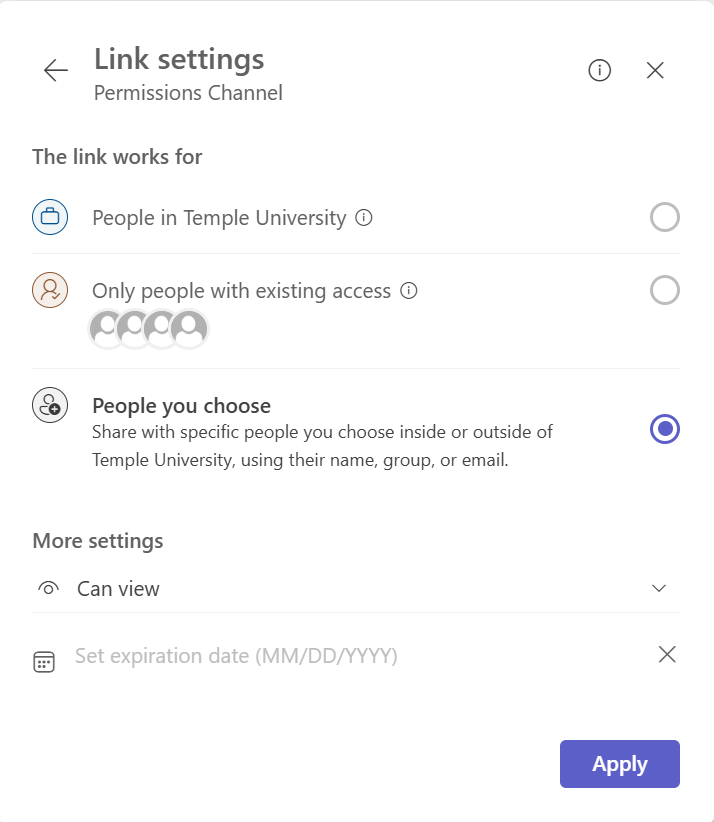
If you would like to add limits to how the file link can be used, select the gear icon next to Copy link. The second image shows what will appear which includes:
|
|
|
4. Click Send.
|
Share the Files Tab
Sharing the Files Tab will give access to all files within that Channel of that Team.
|
1. In Microsoft Teams go to the desired channel, then click the Files tab.
|
|
|
2. Click the share icon. |
 |
|
3. Type the name or email of the person you wish to share.
|
|
|
3. Click on the dropdown menu to select how the shared file can be used.
If you would like to add limits to how the file link can be used, select the gear icon next to Copy link. The second image shows what will appear which includes:
|
|
|
4. Click Send.
|
Video courtesy of the official Microsoft Teams YouTube channel.
Learn how to manage, share, and collaborate on files in Microsoft Teams. This video offers a quick overview of uploading, syncing, and organizing documents for efficient teamwork.