Pre-Recording Checklist
Before Presenter Arrives:
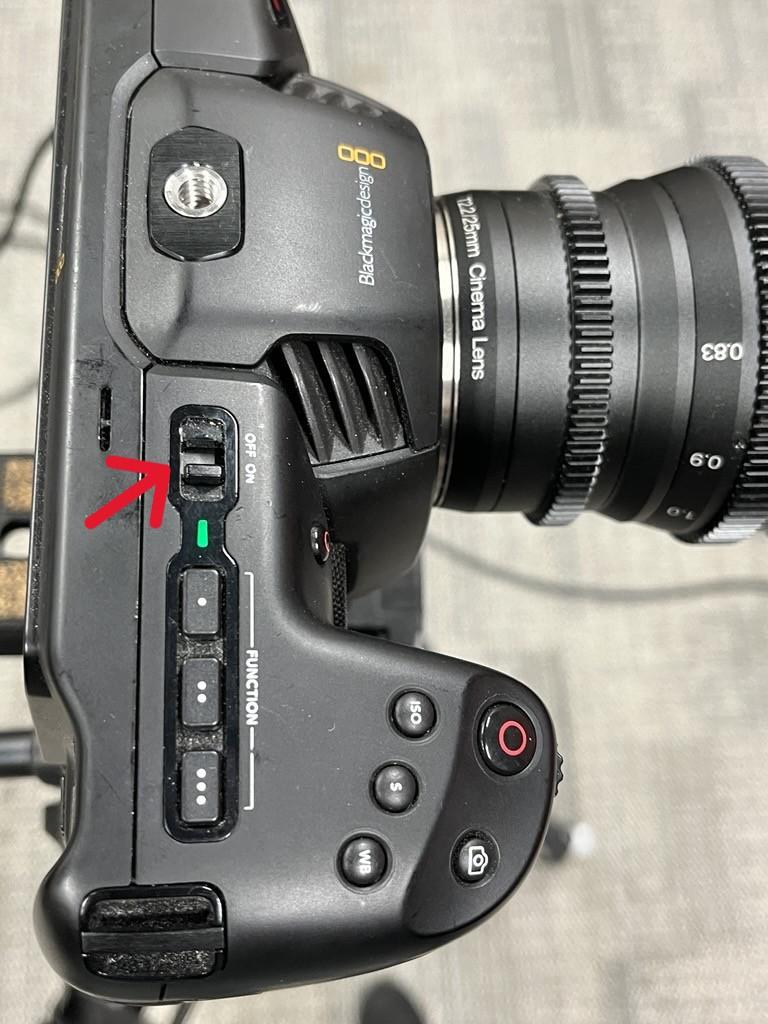
- Power on studio camera (slide the knob on the top of the camera).
- Plug in the large light and power on both lights: use the knob on the back of the right-side standing light and a button on the top of the left-side standing light.
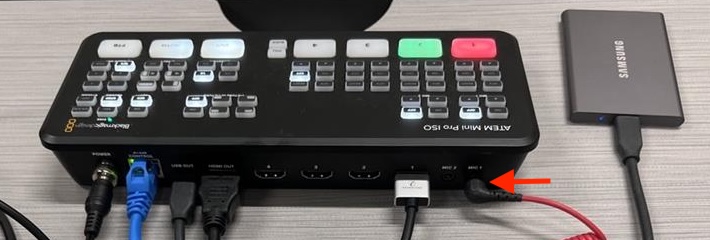
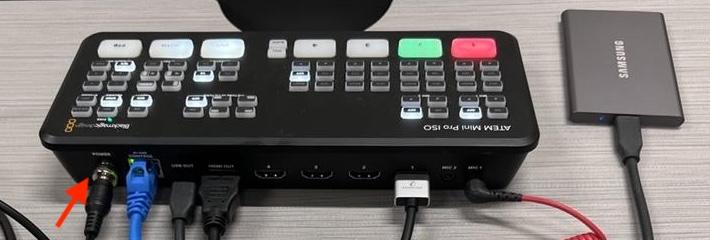
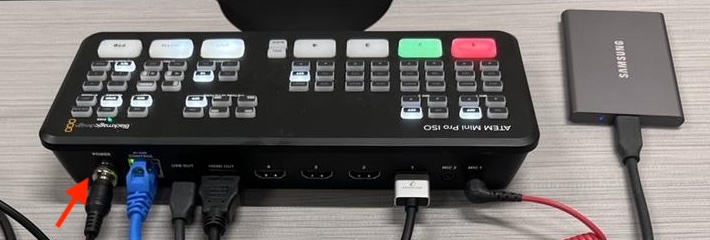
- Plug in the ATEM switcher.
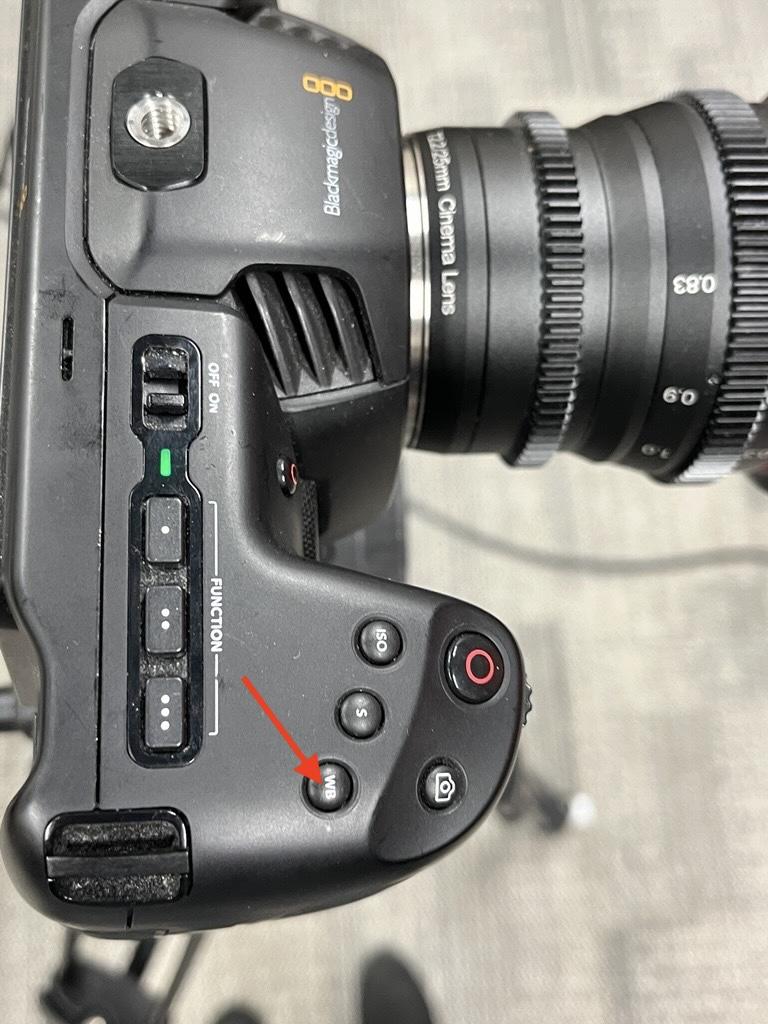
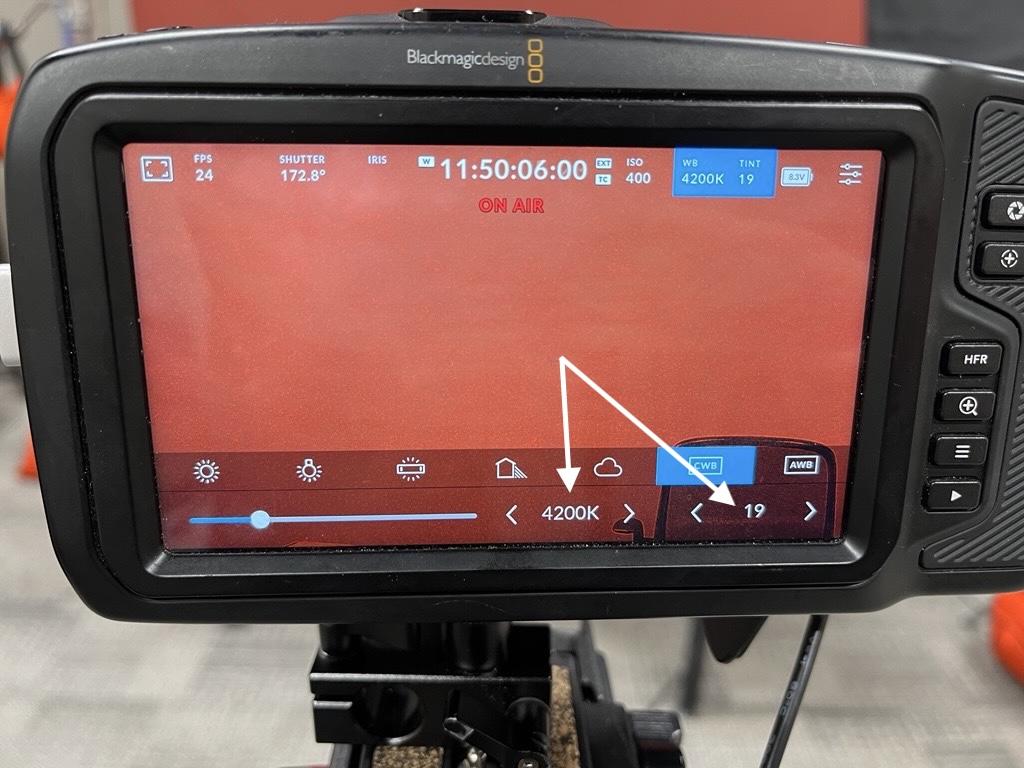
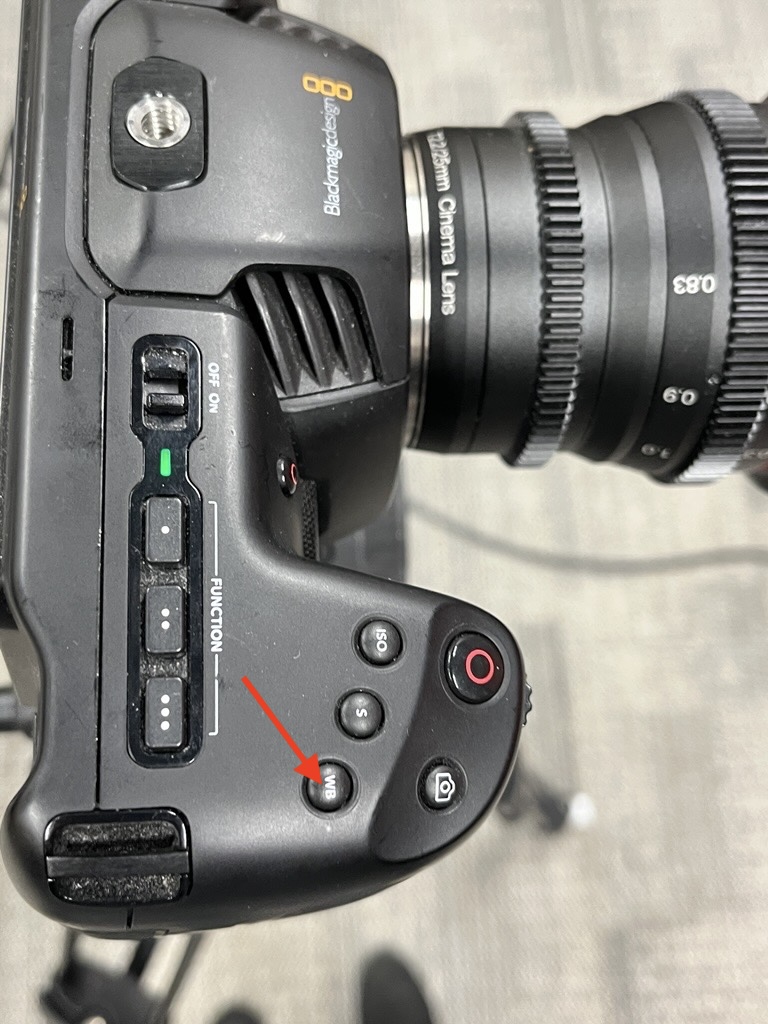
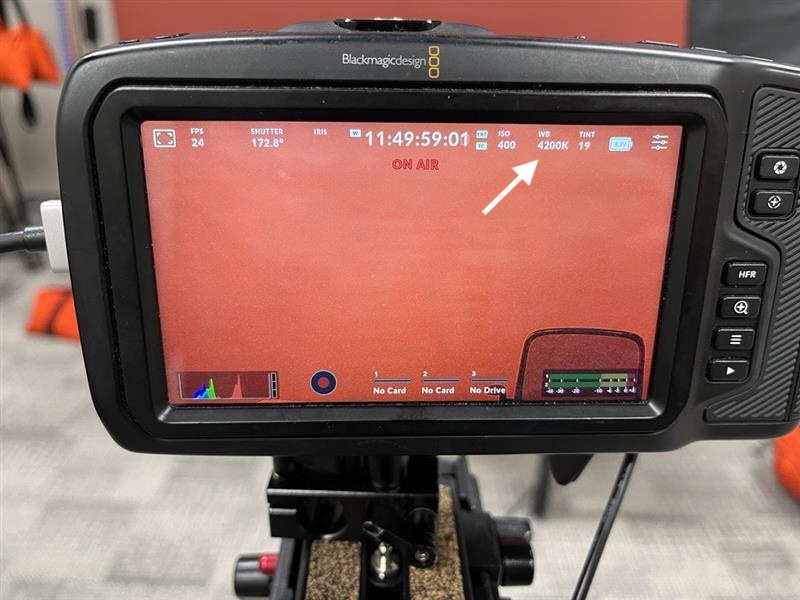
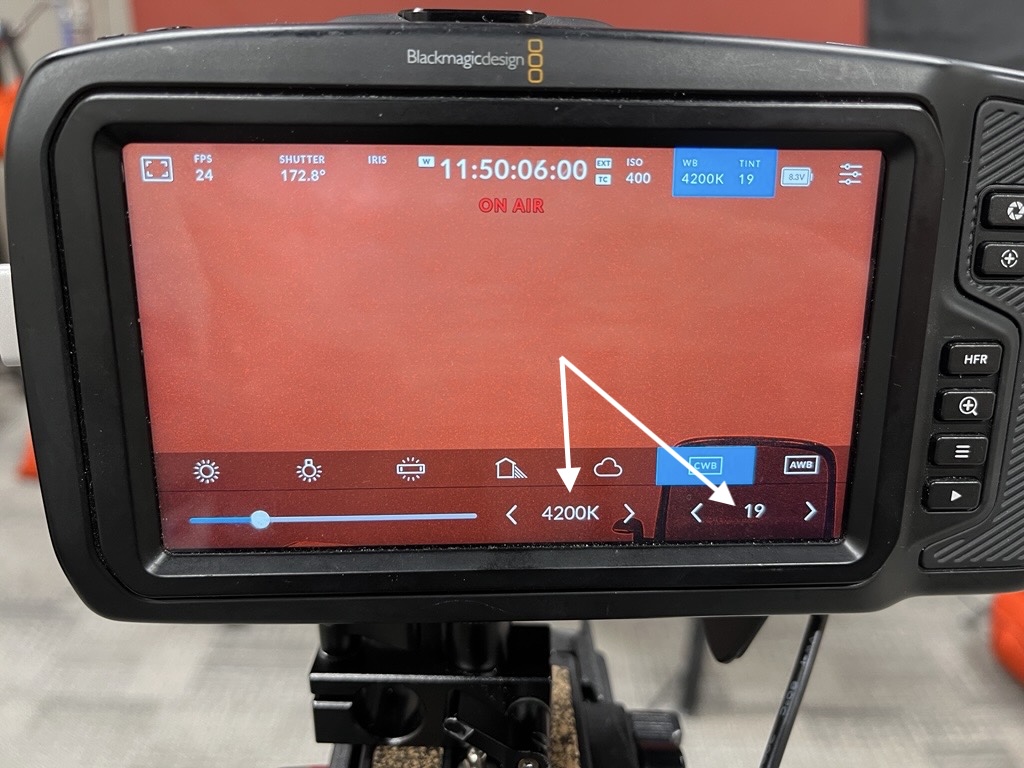
- Check White Balance on the camera: press the WB button on the camera. Set the WB to 4200k and Tint to 19 by using the arrows on the camera screen.

- Log into the laptop. This laptop will be used for opening the presenter’s PowerPoint slides.
- Power on wireless receiver microphone.
- Log into the CPH studio Mac (check with Lorraine, Ellen or Aidan about login info).
- Run a quick test recording with someone sitting at the desk.

After Presenter Arrives:
- Bring the presenter into the studio along the right side of the room.
- Plug in the HDMI cable from the presenter laptop into Input 2 on the switcher.
- The camera should already have the HDMI cable running into Input 1 on the switcher.
- Make sure the wireless mic receiver is charged, powered on and plugged into Mic 1 on the switcher.

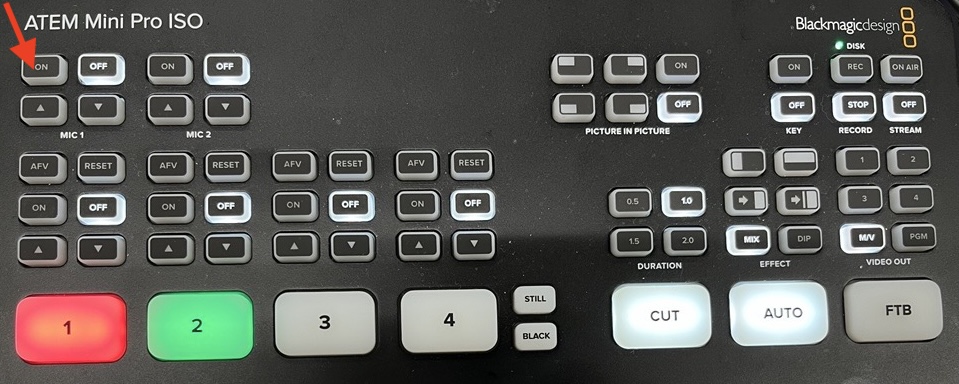
- Press the On button for Mic 1 on the switcher.

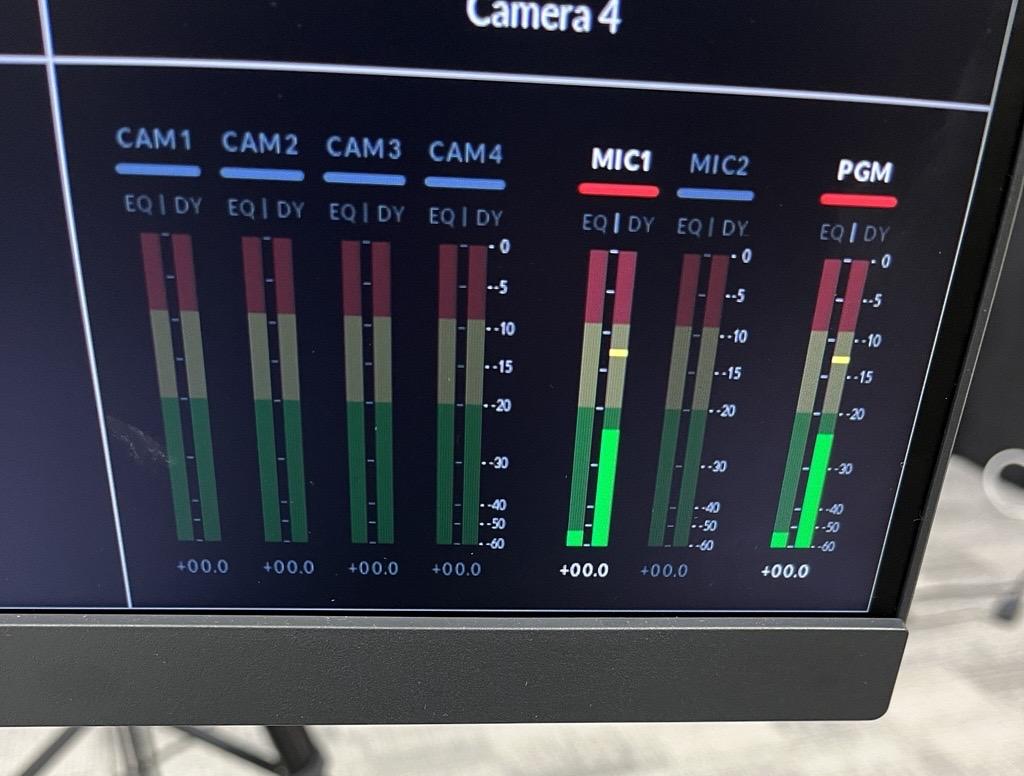
- Make sure that the HDMI Input 1 and 2 are lit up on the switcher (as shown above), and you should also see the feed from the camera and the laptop on the right studio monitor at the desk to confirm the feed is coming in properly. The camera feed will have a red square around it and the laptop feed will have a green square around it.
- Power On one of the wireless lapel transmitter mics and have the presenter clip the mic facing up toward their face, as high on their shirt as possible. It's best if the mic can be tucked away and not seen on the presenter, if possible, but not a deal breaker.
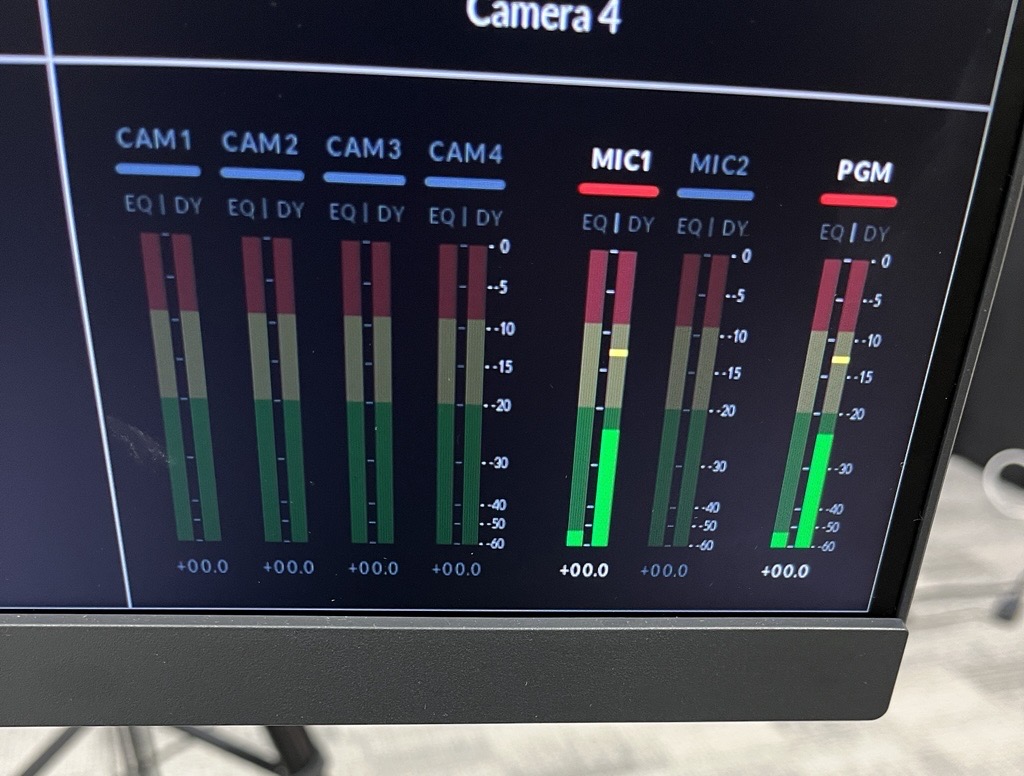
- Do a mic check with the presenter. You should see the Mic 1 feed indicator going up and down on the right studio monitor ATEM control display when speaking.
- Have the presenter log into their email and/or OneDrive and download their slides to the laptop local hard drive.
- Have the presenter open PowerPoint and bring up their slides.
- Since PowerPoint will detect a second monitor, have the presenter go into Presenter Mode. The presenter can read from their PowerPoint presenter notes if they choose, as those notes will not be recorded.
- Double check that just the slides (not the notes) are being received by the switcher by looking at the right studio monitor.
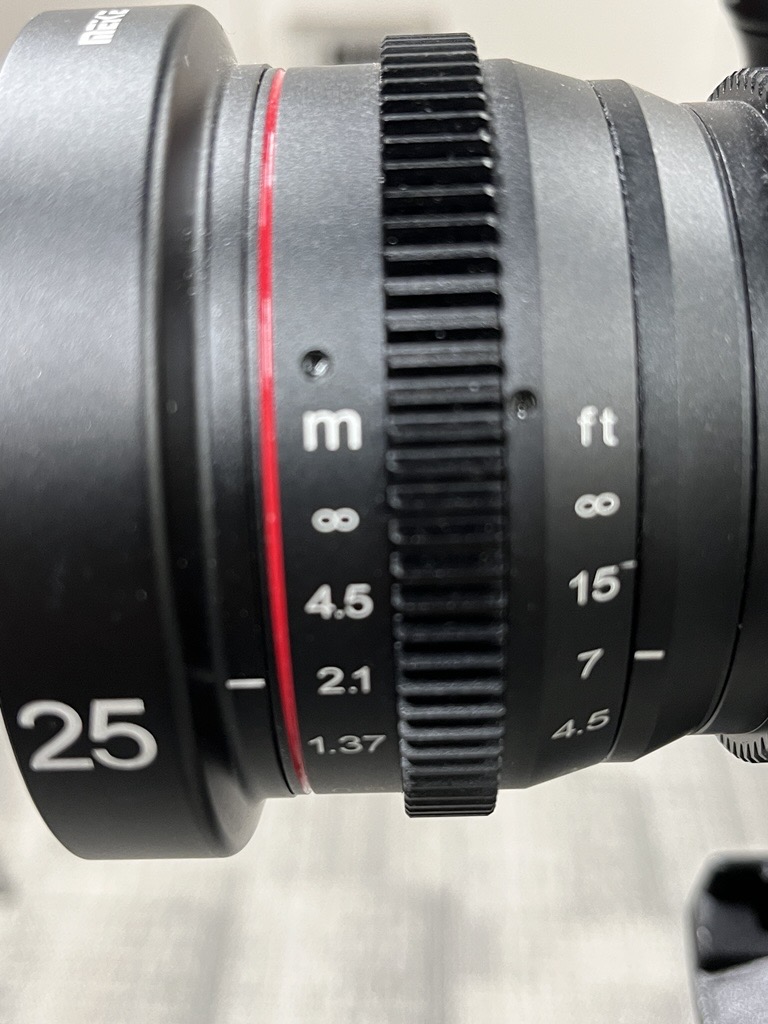
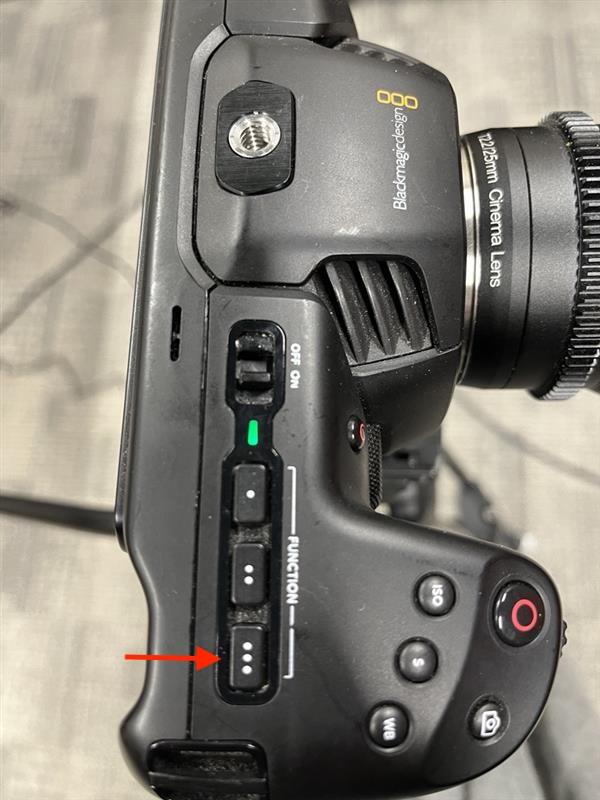
- Check the camera focus: have the presenter look directly into the camera. Press the three dots button on top of the camera. It should highlight the person in red lines on the camera screen. If you need to make focus adjustments, use the first dial in the camera lens (closest dial to presenter) and turn slowly so that the red lines around the person become more red. Generally I've left it set to 2.1 and it has looked good.

- Put a “Recording in Progress” sign on the door then make sure the door to the studio is closed. Alert other staff in the office that a recording is taking place so that conversations do not take place near the studio.
- Silence all alerts on the studio Mac and presenter laptop and remind presenter to silence cell phone.