Still have paper files? Scanner Kits Available
Scanners Available for Checkout
We now have document scanners available to be signed out for scanning projects. These kits include a high-speed scanner and a laptop preloaded with scanning software (NAPS2), making it easy to digitize documents for research, archiving, or personal use. Delivery and set up is included when signing out the scanner kits.
Scanners are available to faculty and staff on a first-come, first-served basis.
To request a scanner kit, please email CPHhelp@temple.edu for assistance.
Scanning with NAPS2
|
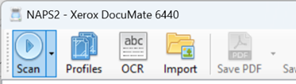
1. Open NAPS2.
|
 |
||||
|
2. Click Profiles in the toolbar. |
 |
||||
|
3. Click New to create a scanner profile. This will open the Profile Settings window. |
 |
||||
|
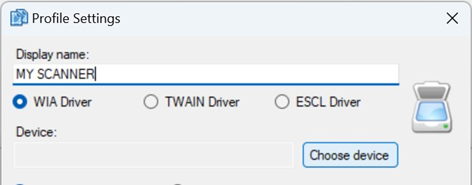
4. In the Display Name field, enter a recognizable name for your scanner. Click Choose device. |
|
||||
|
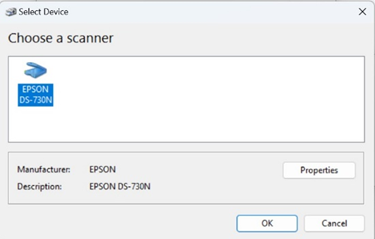
5. Select your scanner from the list. Once selected the scanner will be highlighted. Click OK. |
|
||||
|
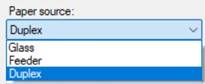
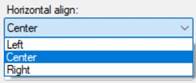
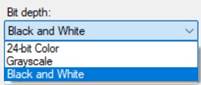
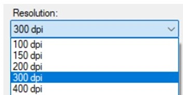
6. Adjust scan settings such as DPI (resolution), color mode (black & white, grayscale, color), and paper size. Set Paper Source to “Duplex.” Set Bit Depth to “Black and White”. Set Horizontal Align to “Center”. Set Resolution to “300”.
|
|
||||
|
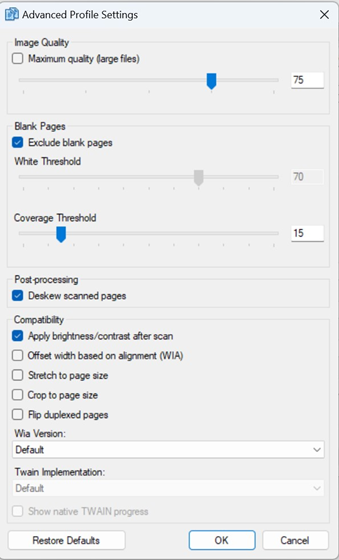
7. Click Advanced to open Advanced Profile Settings.
Click OK to close the Advanced Profile Settings window.
Now that the profile has been created, take a stack of papers and load them into the top of the scanner. Make sure you are collating the papers so that the edges are aligned. The cleaner the stack the better the scan.
|
|
||||
|
8. To begin, click Scan. |
|
||||
|
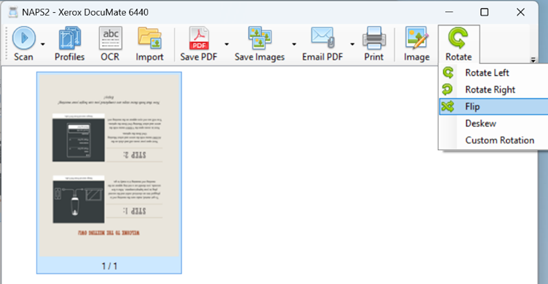
9. After scanning a document you might notice it is flipped. To fix that, select the image and click Rotate (You can also press Ctrl + A to select all images). A dropdown menu will appear, click Flip to adjust the image. |
|
||||
|
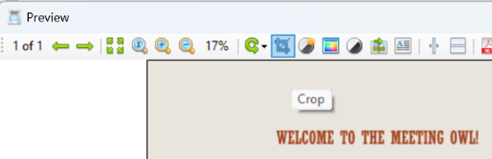
10. Double click the image to open the Preview window for editing. To crop the image, click on the crop icon.
You can flip images within the preview window but only one image at a time. |
|
||||
|
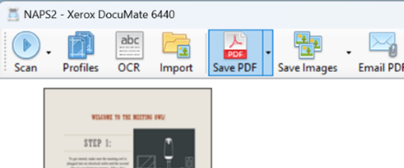
11. Once we have scanned and adjusted all our scanned documents, we are ready to save. Click Save PDF and follow the prompt to save to your choice of location and give a descriptive file name. Click Save. |
|