
Scanning
You can scan documents directly using your office HP printer by selecting either the "Scan to Email" or "Scan to Cloud" option on the touchscreen. "Scan to Email" lets you send the scanned file directly to your Temple email address without needing a computer. For cloud storage, many HP printers support the HP OneDrive for Business app, allowing you to scan directly to your OneDrive or designated Microsoft Teams folders. This is a convenient way to keep digital records organized and accessible from anywhere. Make sure you're signed in with your Temple account to access these features.
Scan to Email
| 1. Place the document face-down on the scanner glass, or place it face-up in the document feeder and adjust the paper guides to fit the size of the document.
|
|
|
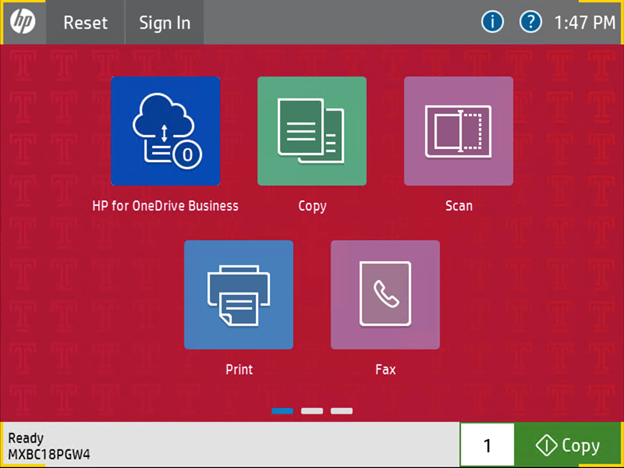
2. From the Home screen on the printer control panel, select Scan.
|
 |
|
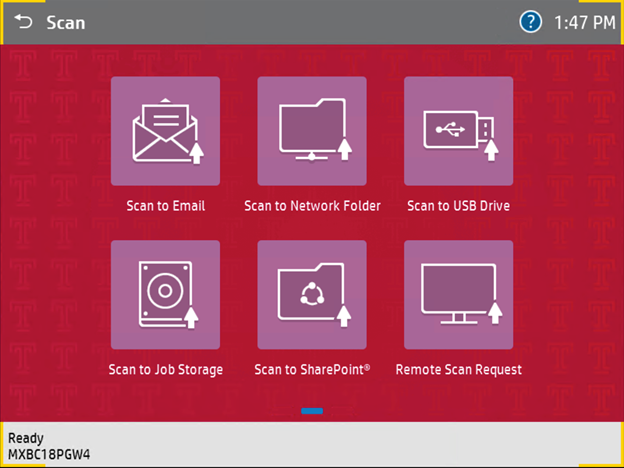
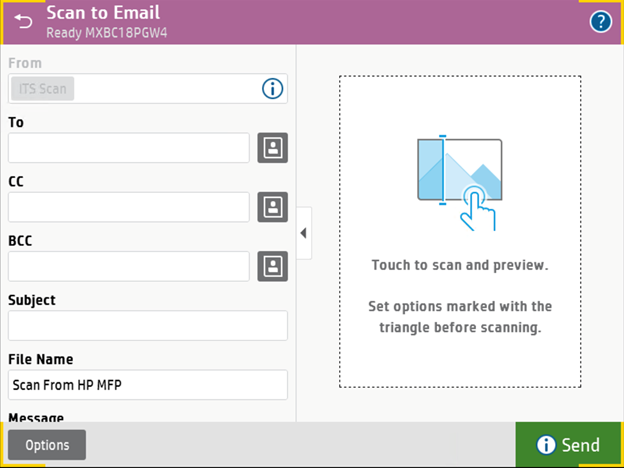
3. Select Scan to Email.
|
 |
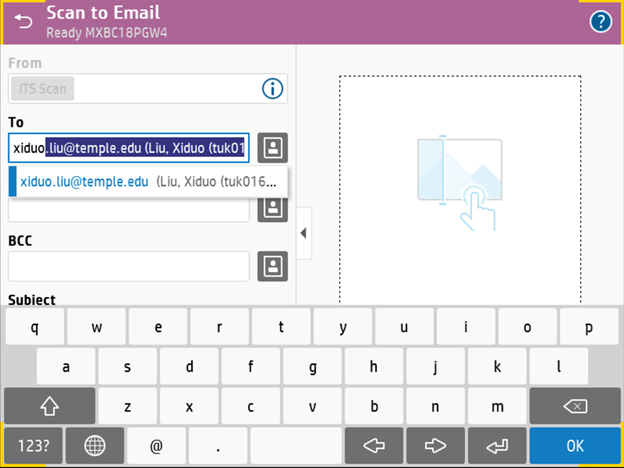
4. Perform one of the following:
|
|
|
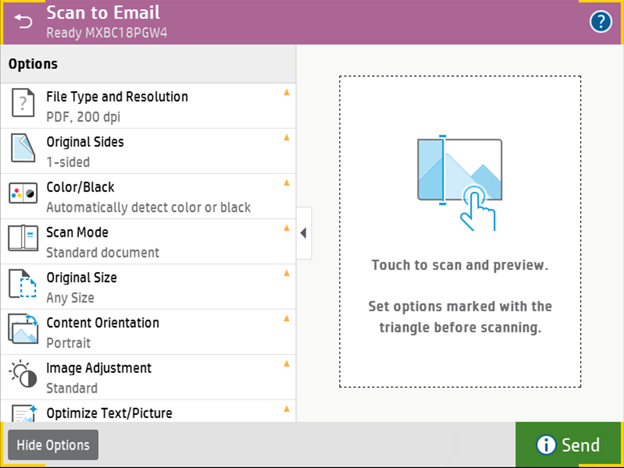
5. Additional scanning options are available in the Options menu.
|
 |
|
6. When ready select Send to scan and send the scanned document as a PDF attachment to the specified recipient(s).
|
|
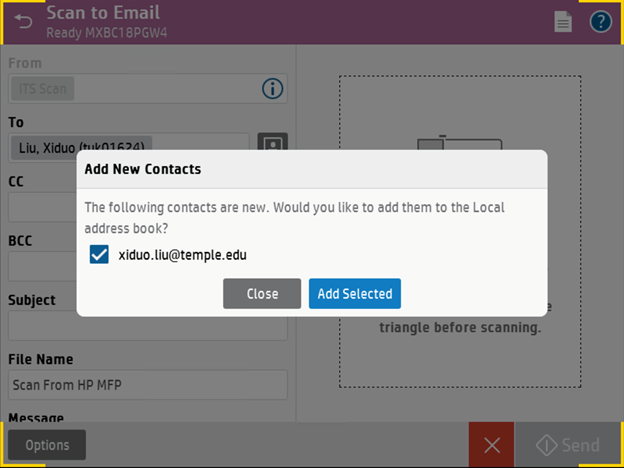
| 7. When finished, if the recipient(s) are not in the local address book, you will be presented with the option to add a local address book entry.
|
 |
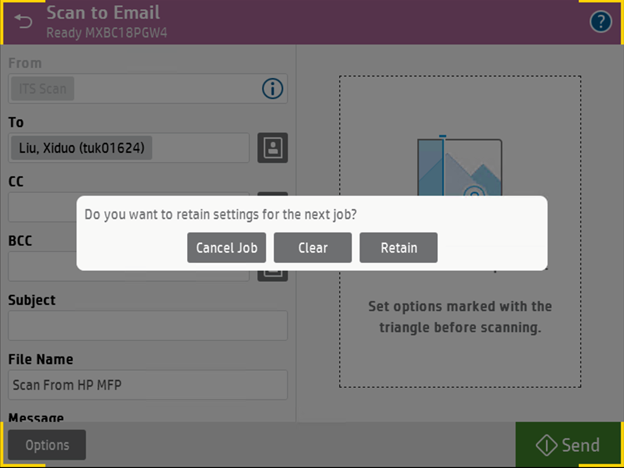
| 8. You will also have the option to retain the specific settings of your scan to email job.
|
 |
Scanning to OneDrive and Teams with HP OneDrive Business
| 1. Place the document face-down on the scanner glass, or place it face-up in the document feeder and adjust the paper guides to fit the size of the document.
|
|
|
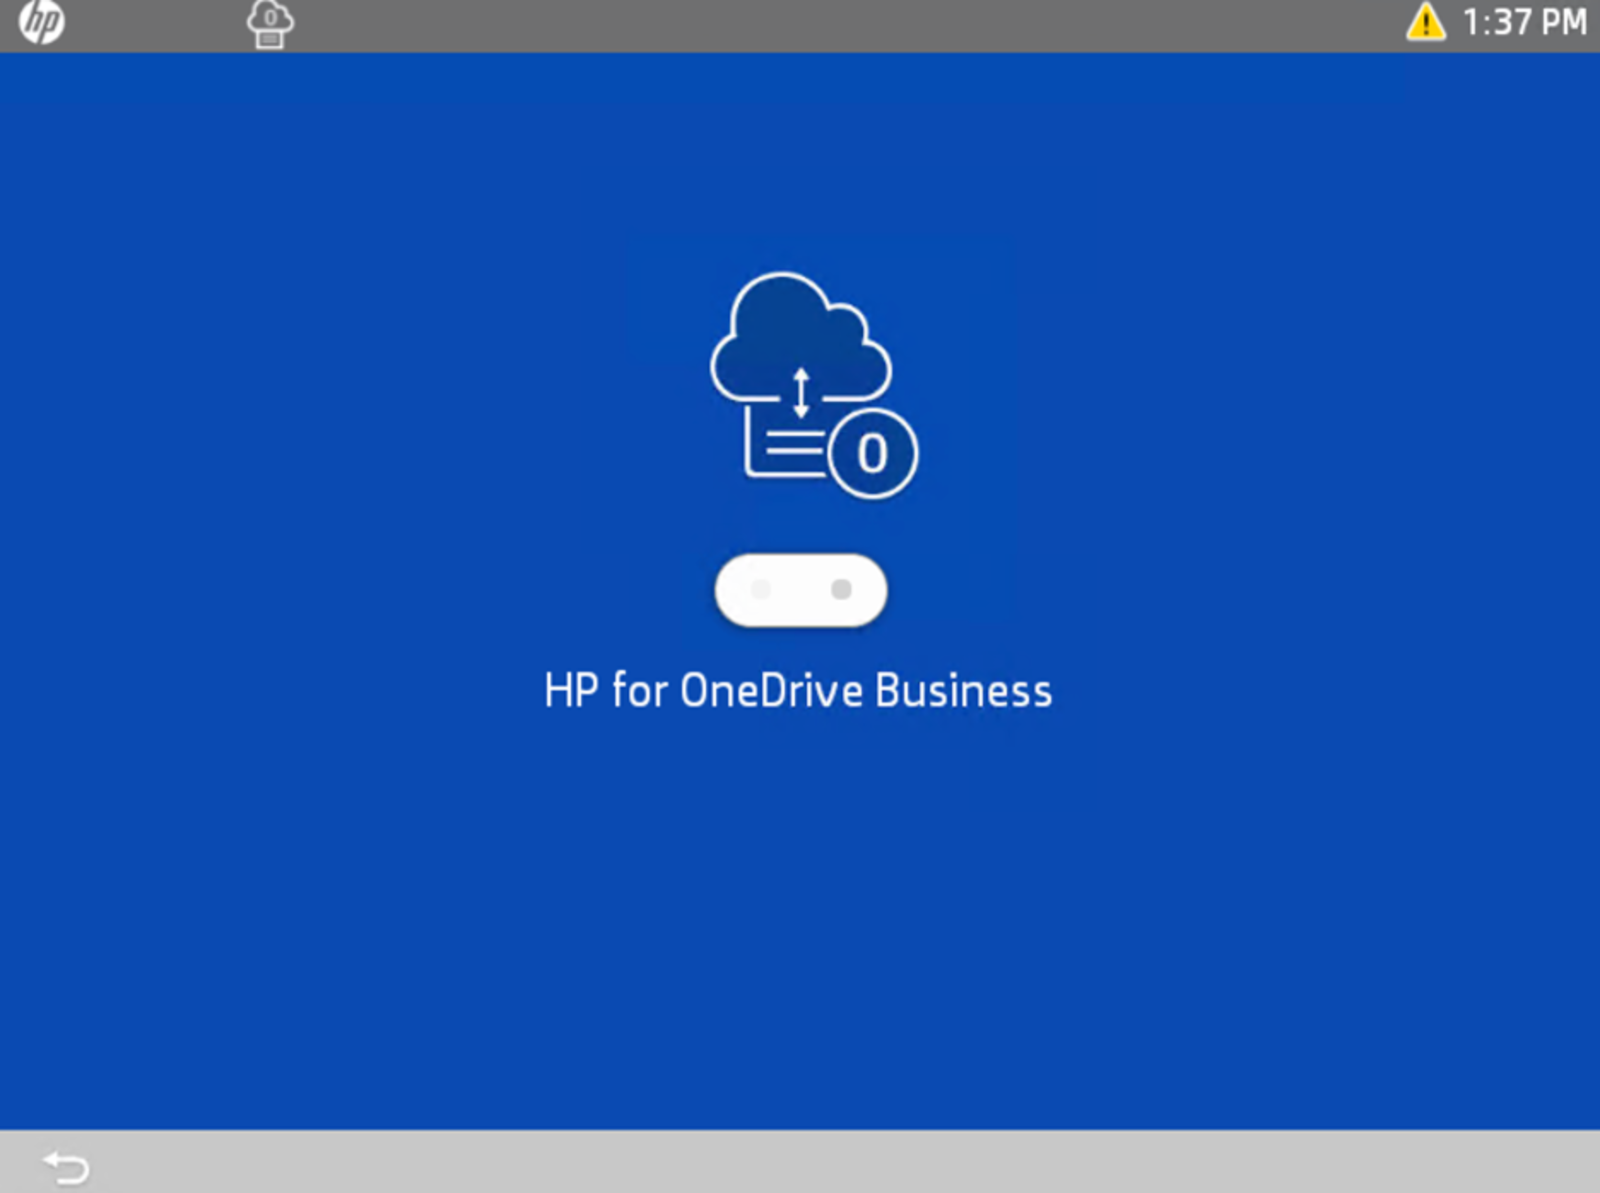
2. From the home screen, select the HP for OneDrive Business app icon.
|
|
|
2. Wait for the app to launch.
|
 |
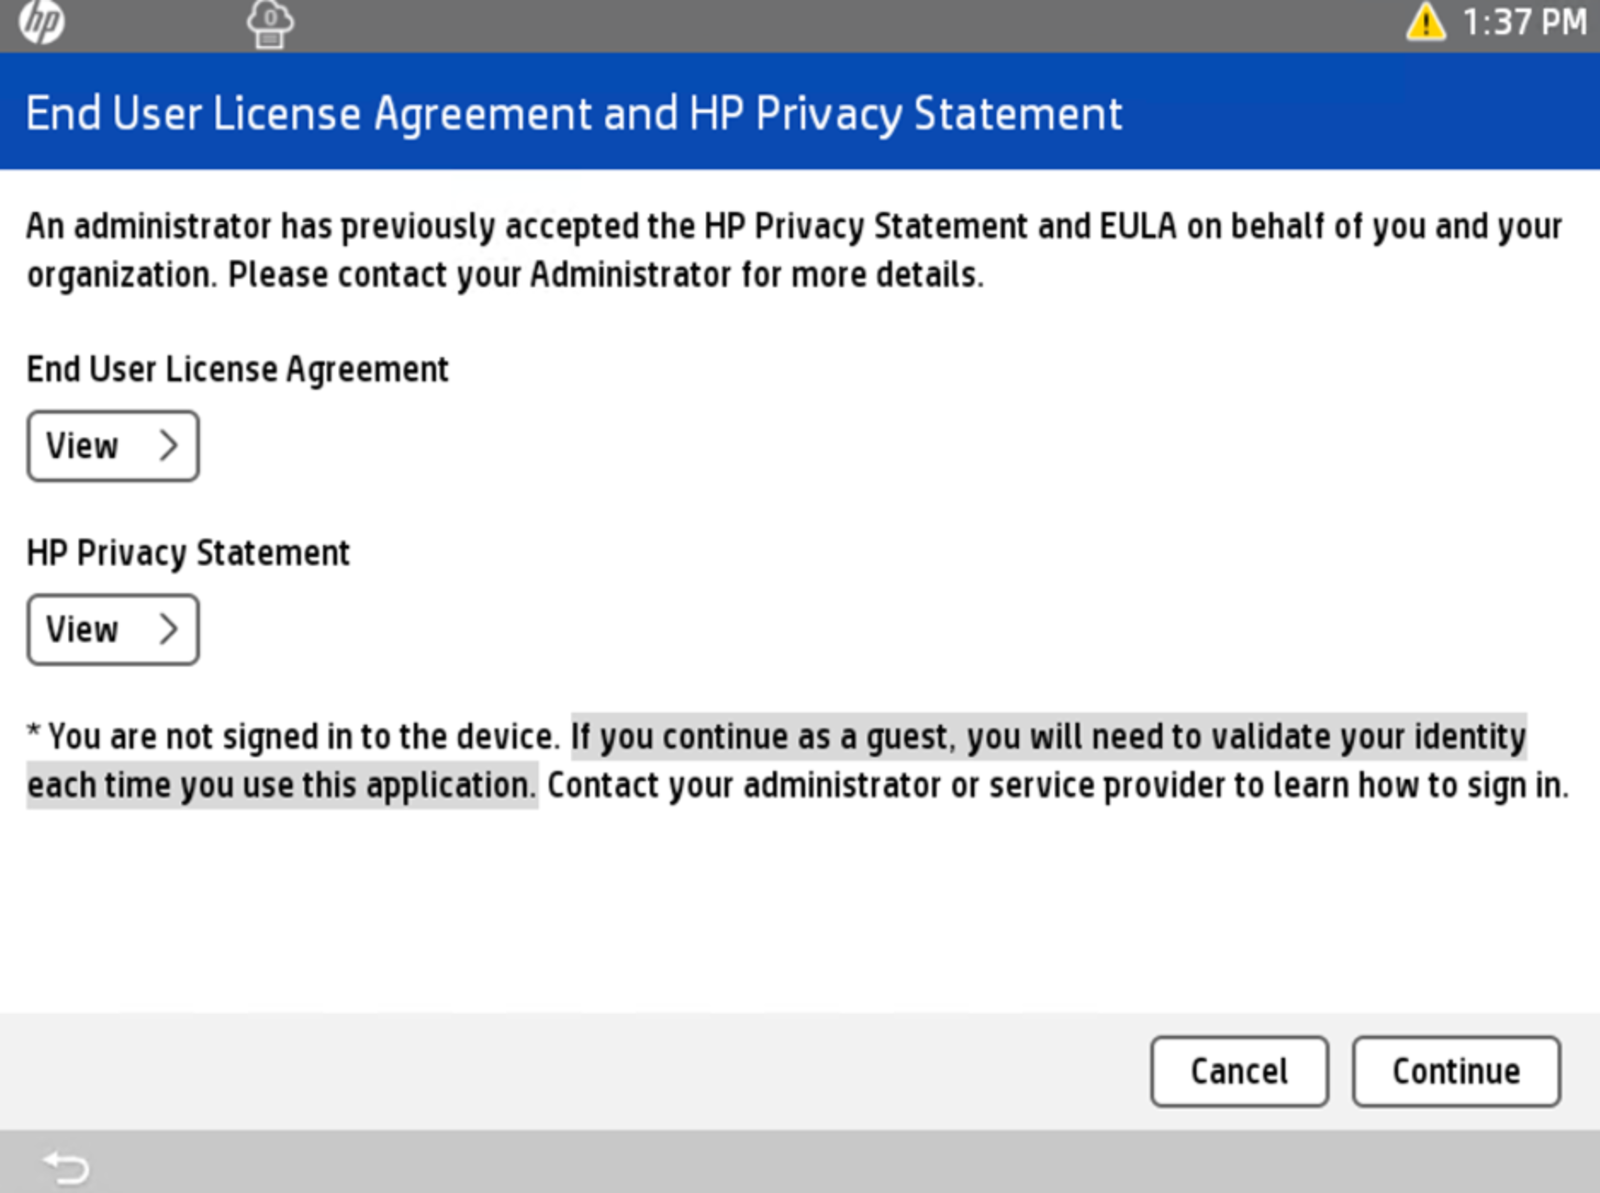
| 3. Select Continue to accept the End User License Agreement and HP Privacy Statement.
|
 |
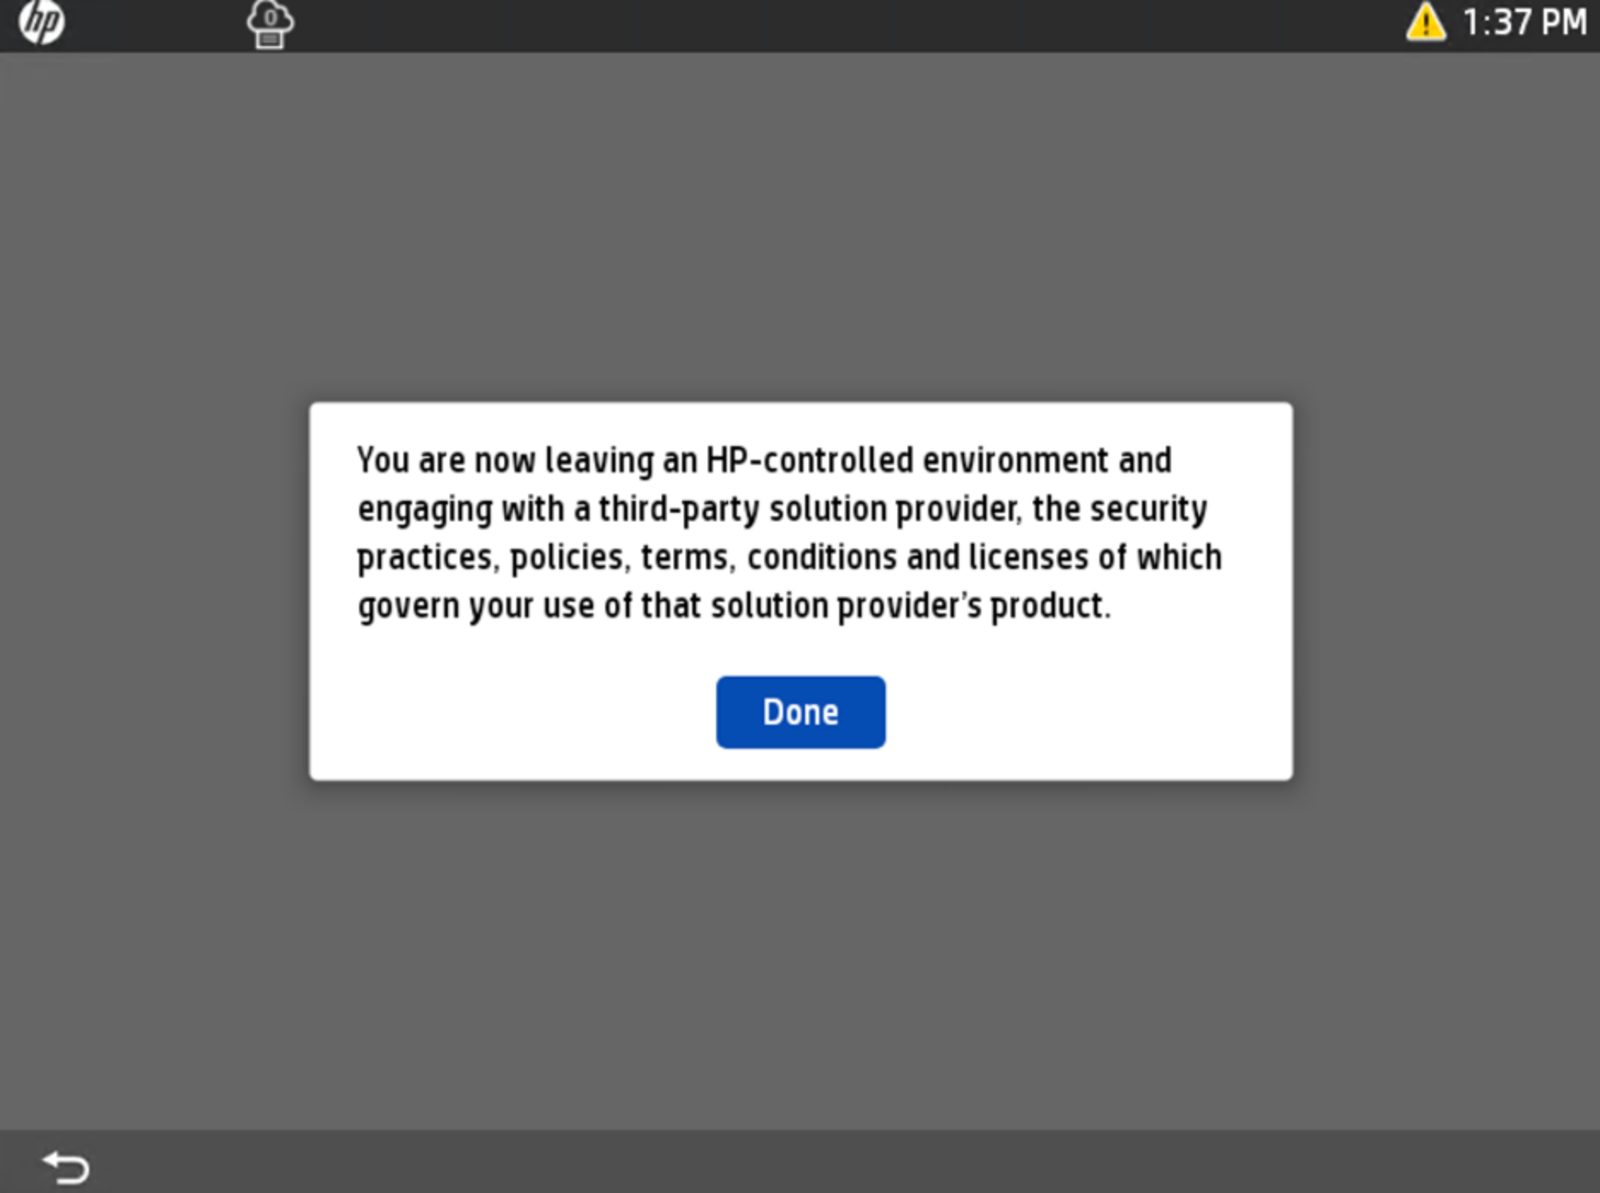
| 4. Click Done.
|
 |
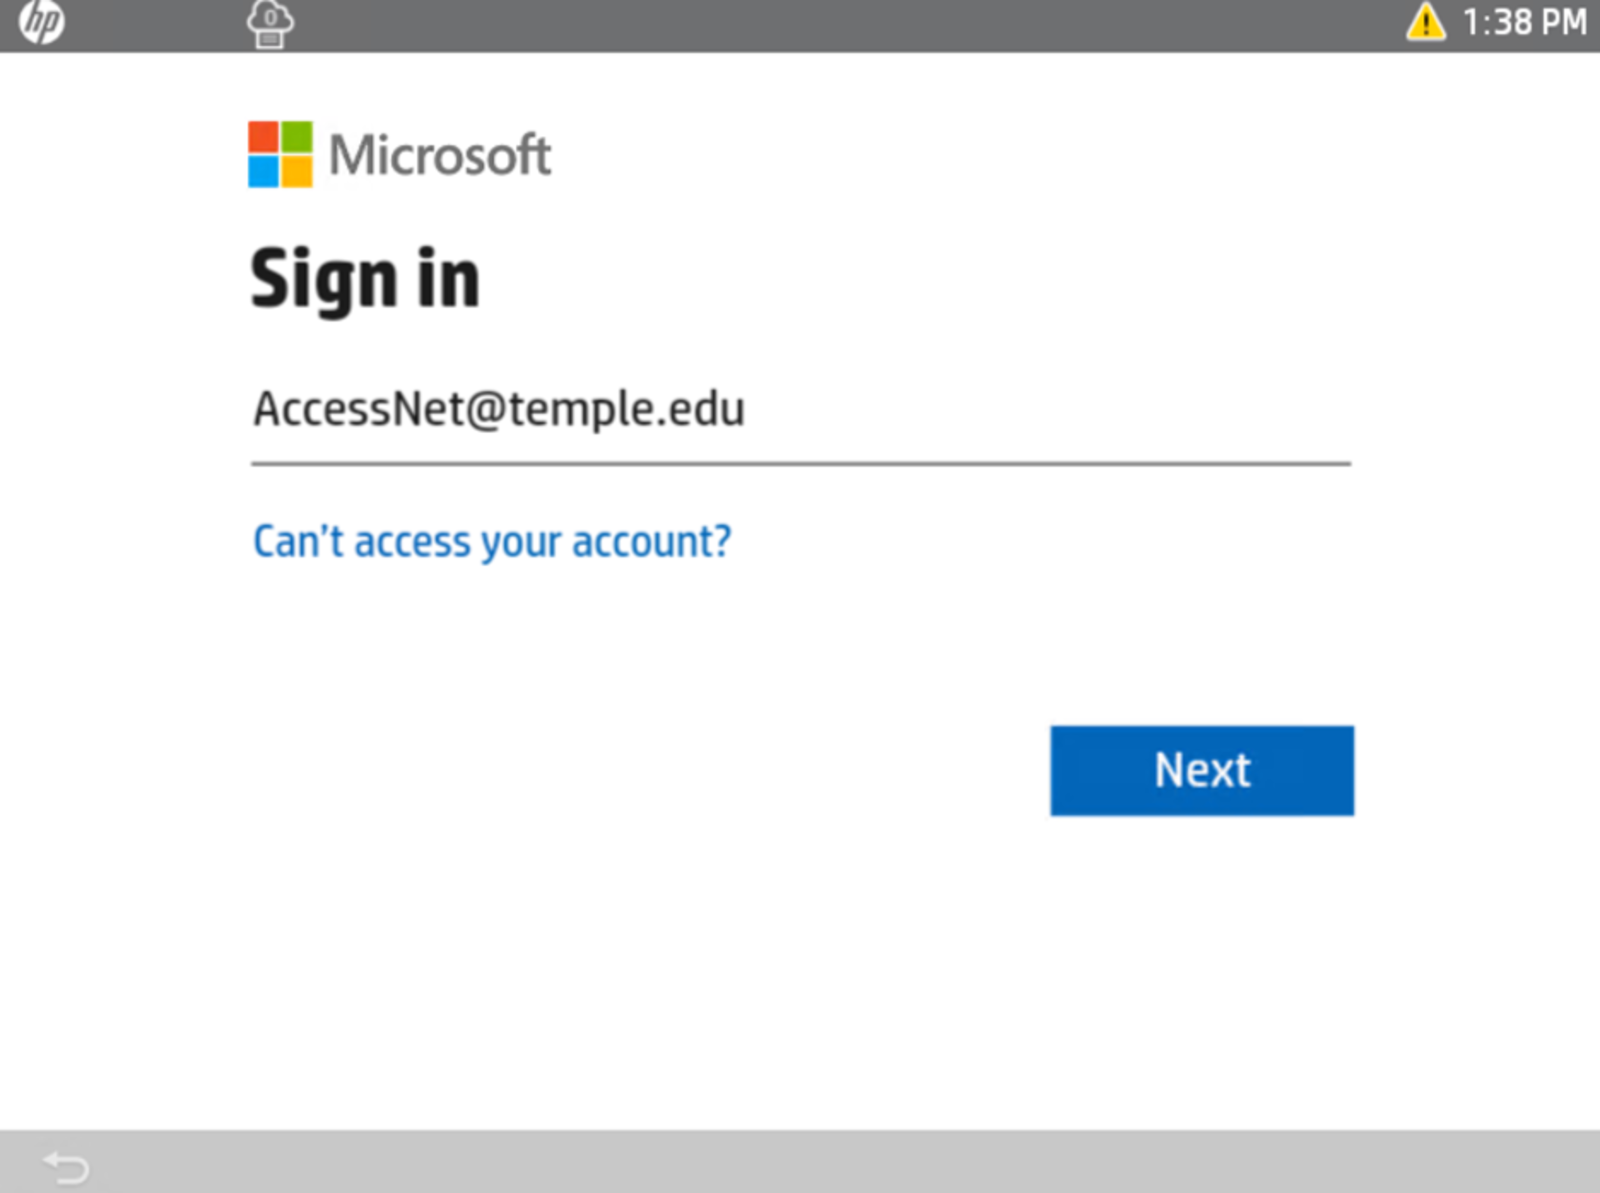
| 5. Enter your AccessNet@temple.edu on the Microsoft sign in page, then select Next.
|
 |
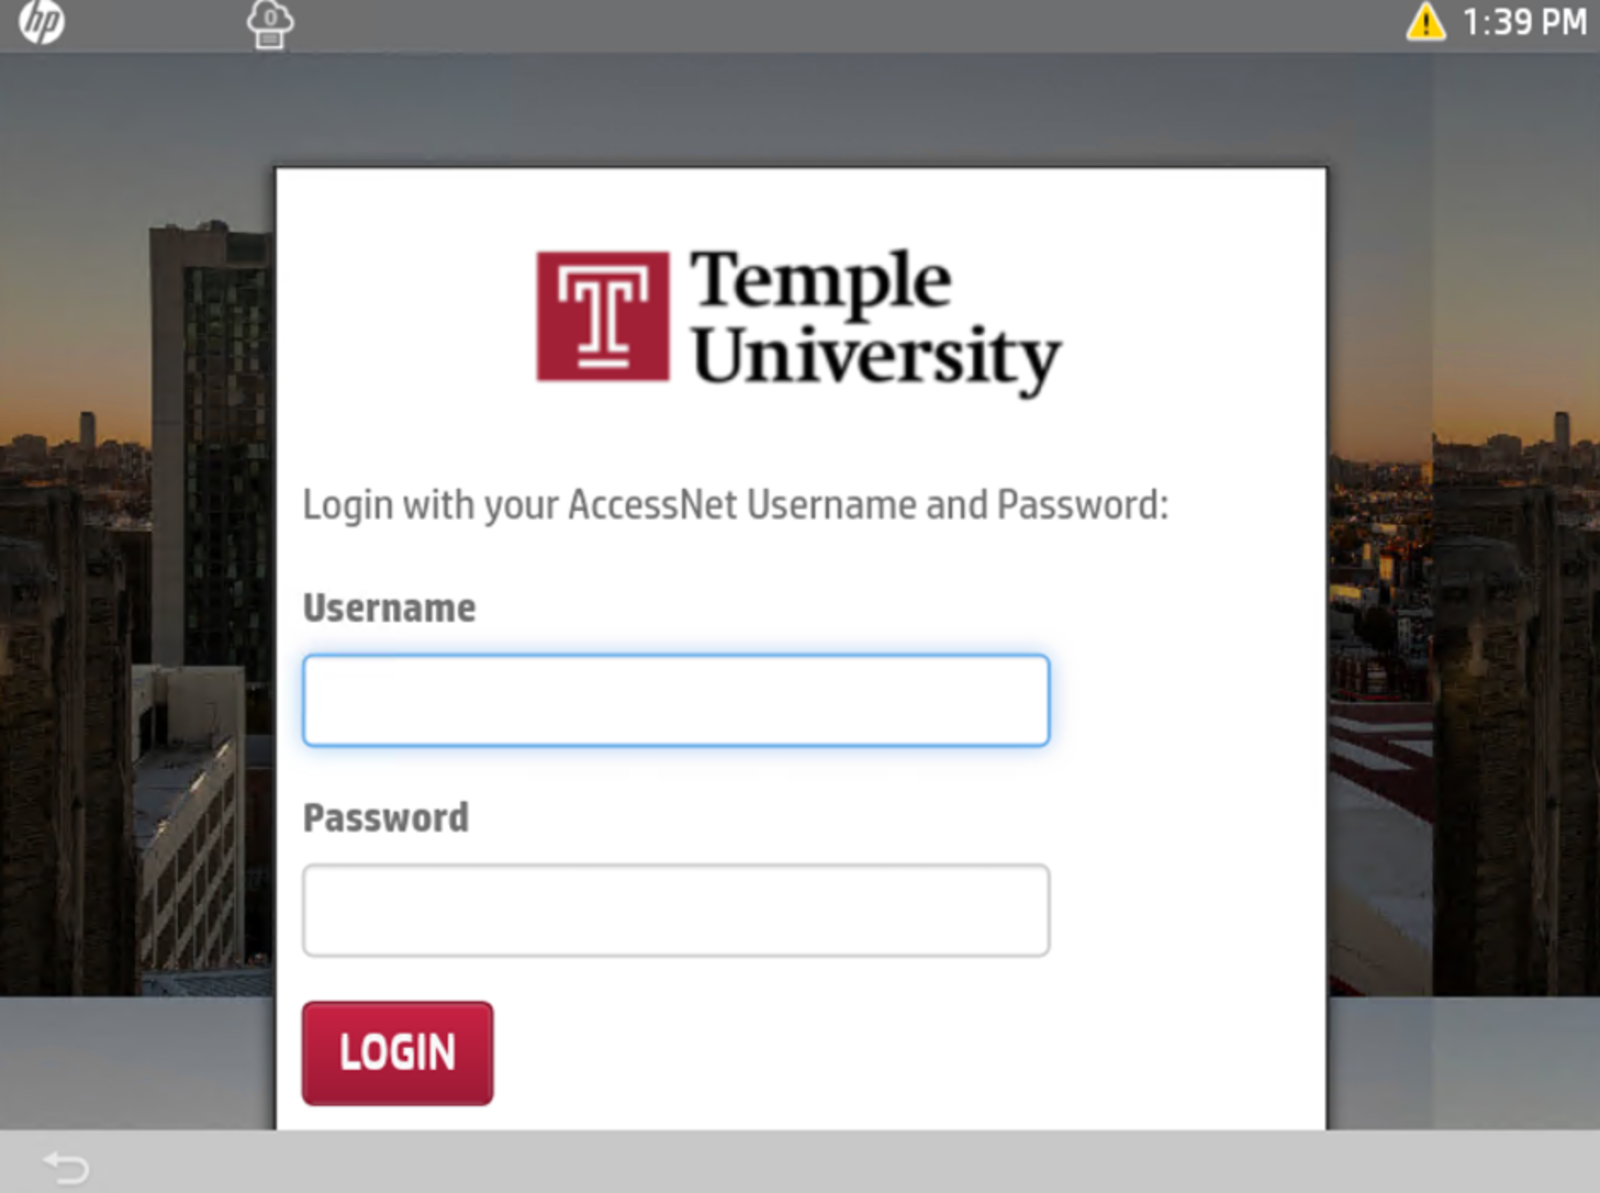
| 6. Sign in with your AccessNet username and password.
|
 |
|
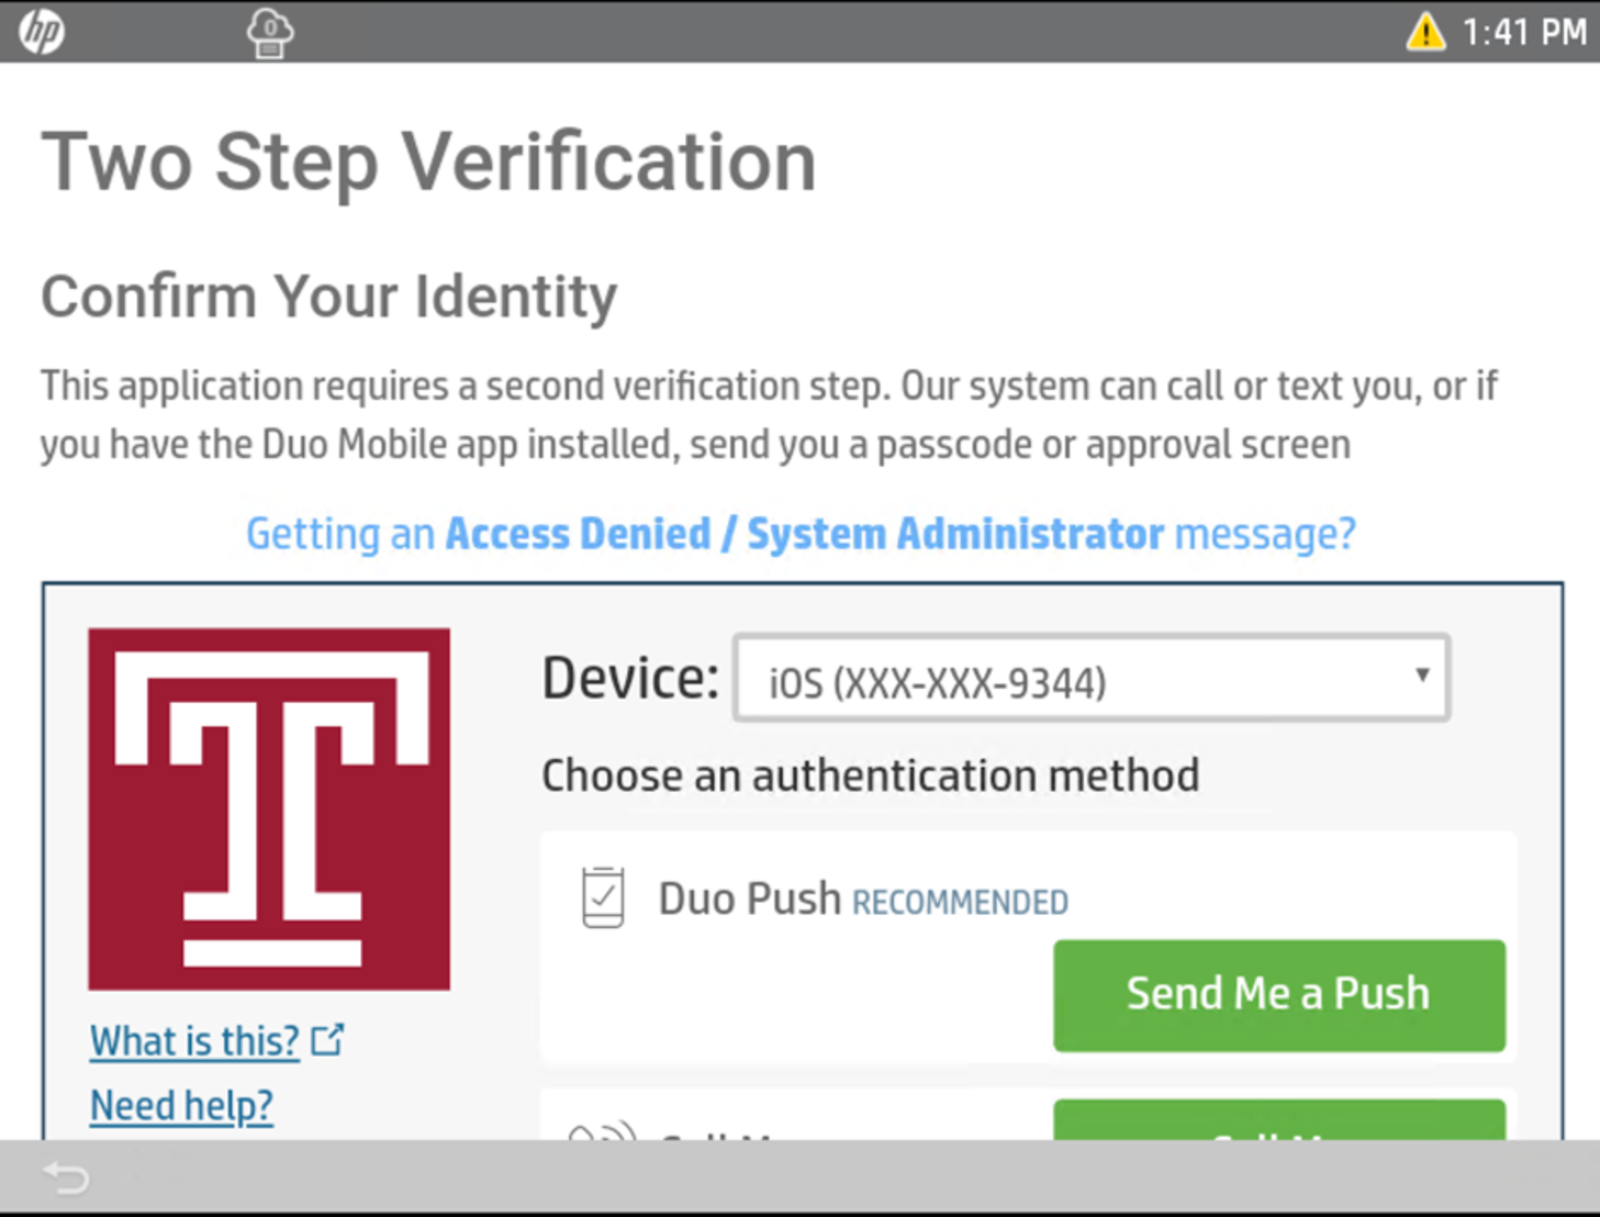
7. Confirm your identity with Multi-Factor Authentication when prompted. |
 |
|
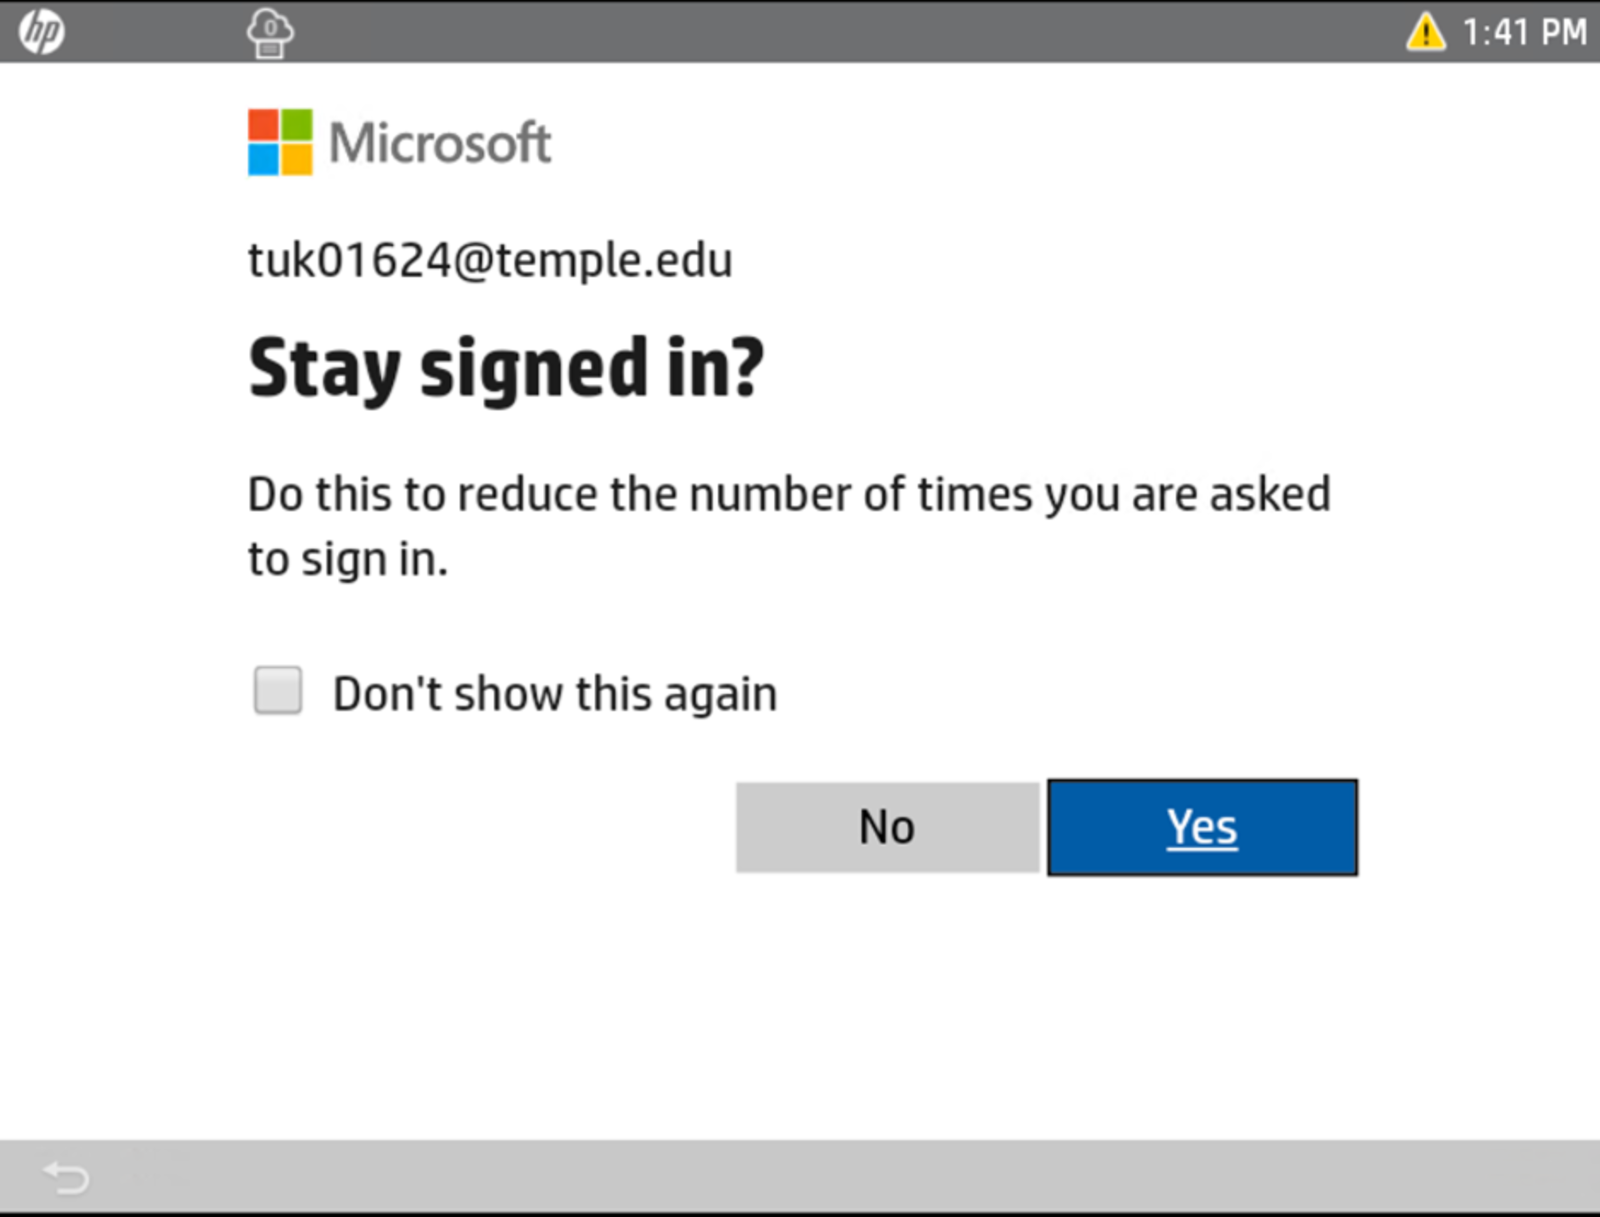
8. Select No when prompted to Stay signed in. |
 |
|
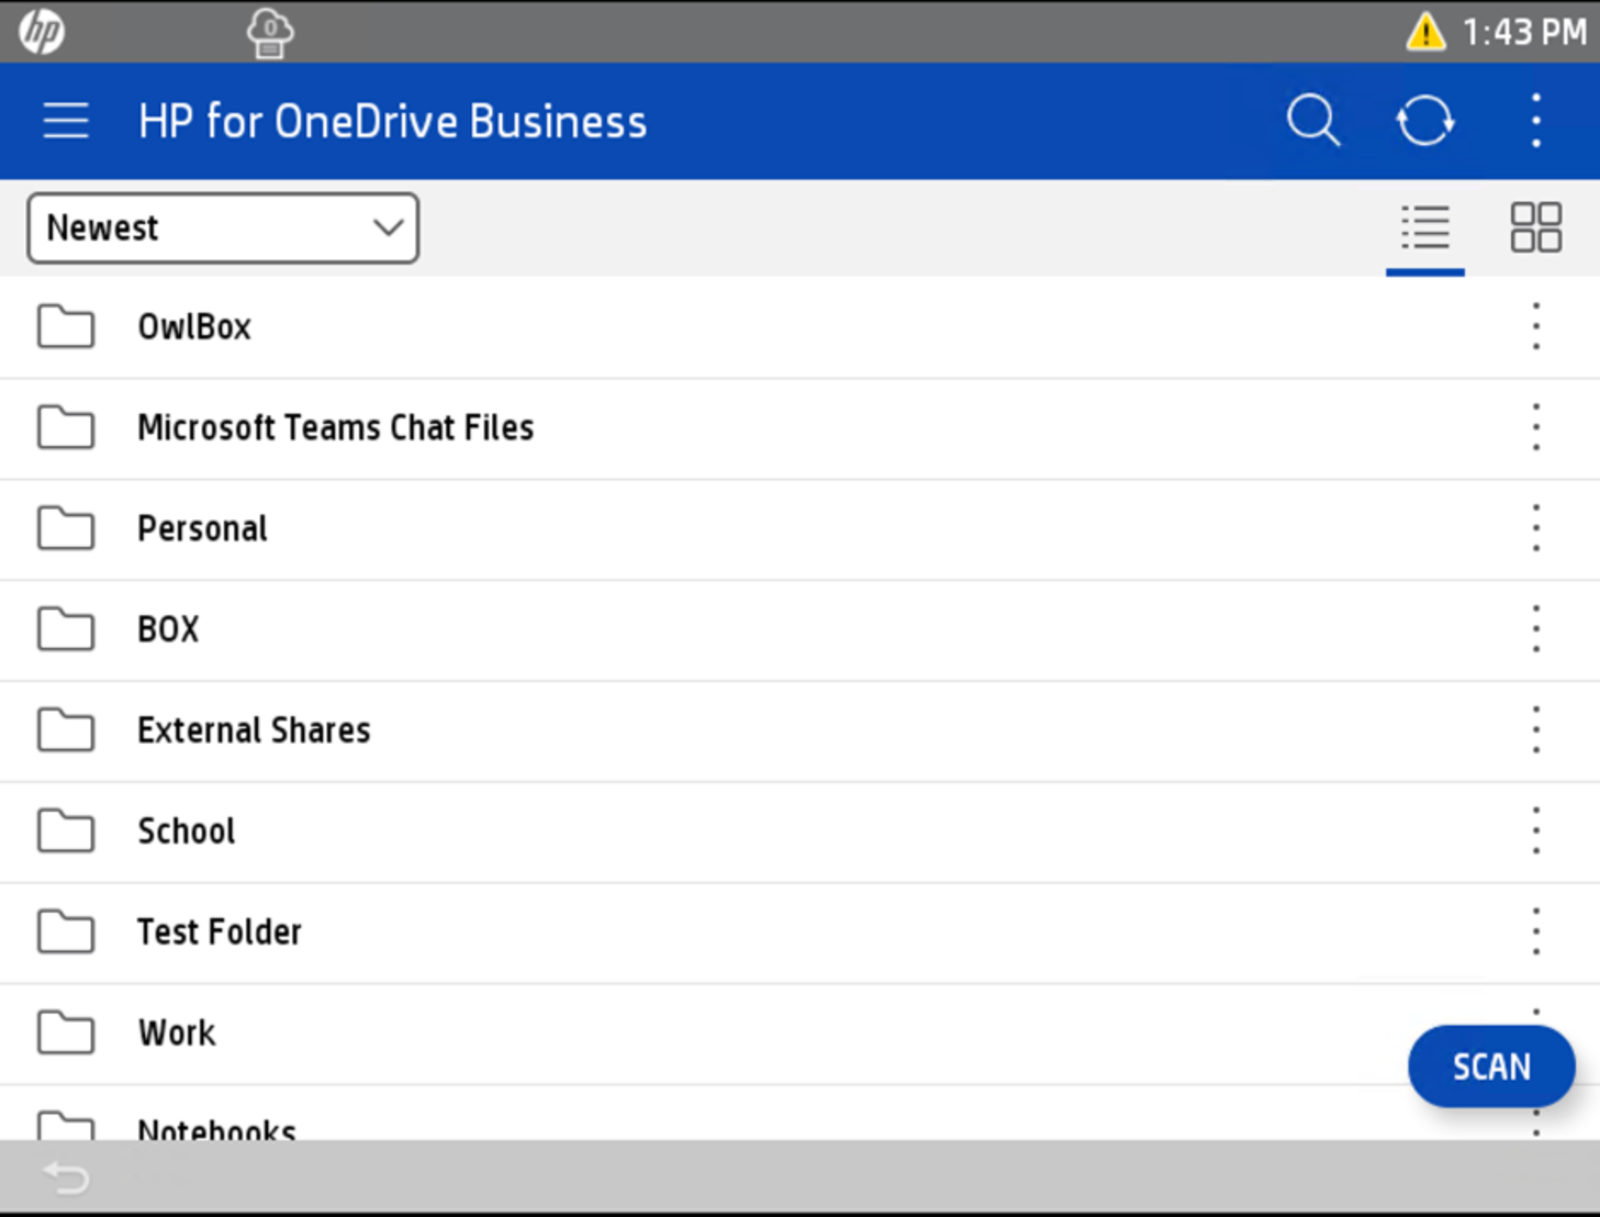
9. Your OneDrive files will be the default directory, you can browse, scan and print from this location. |
 |
|
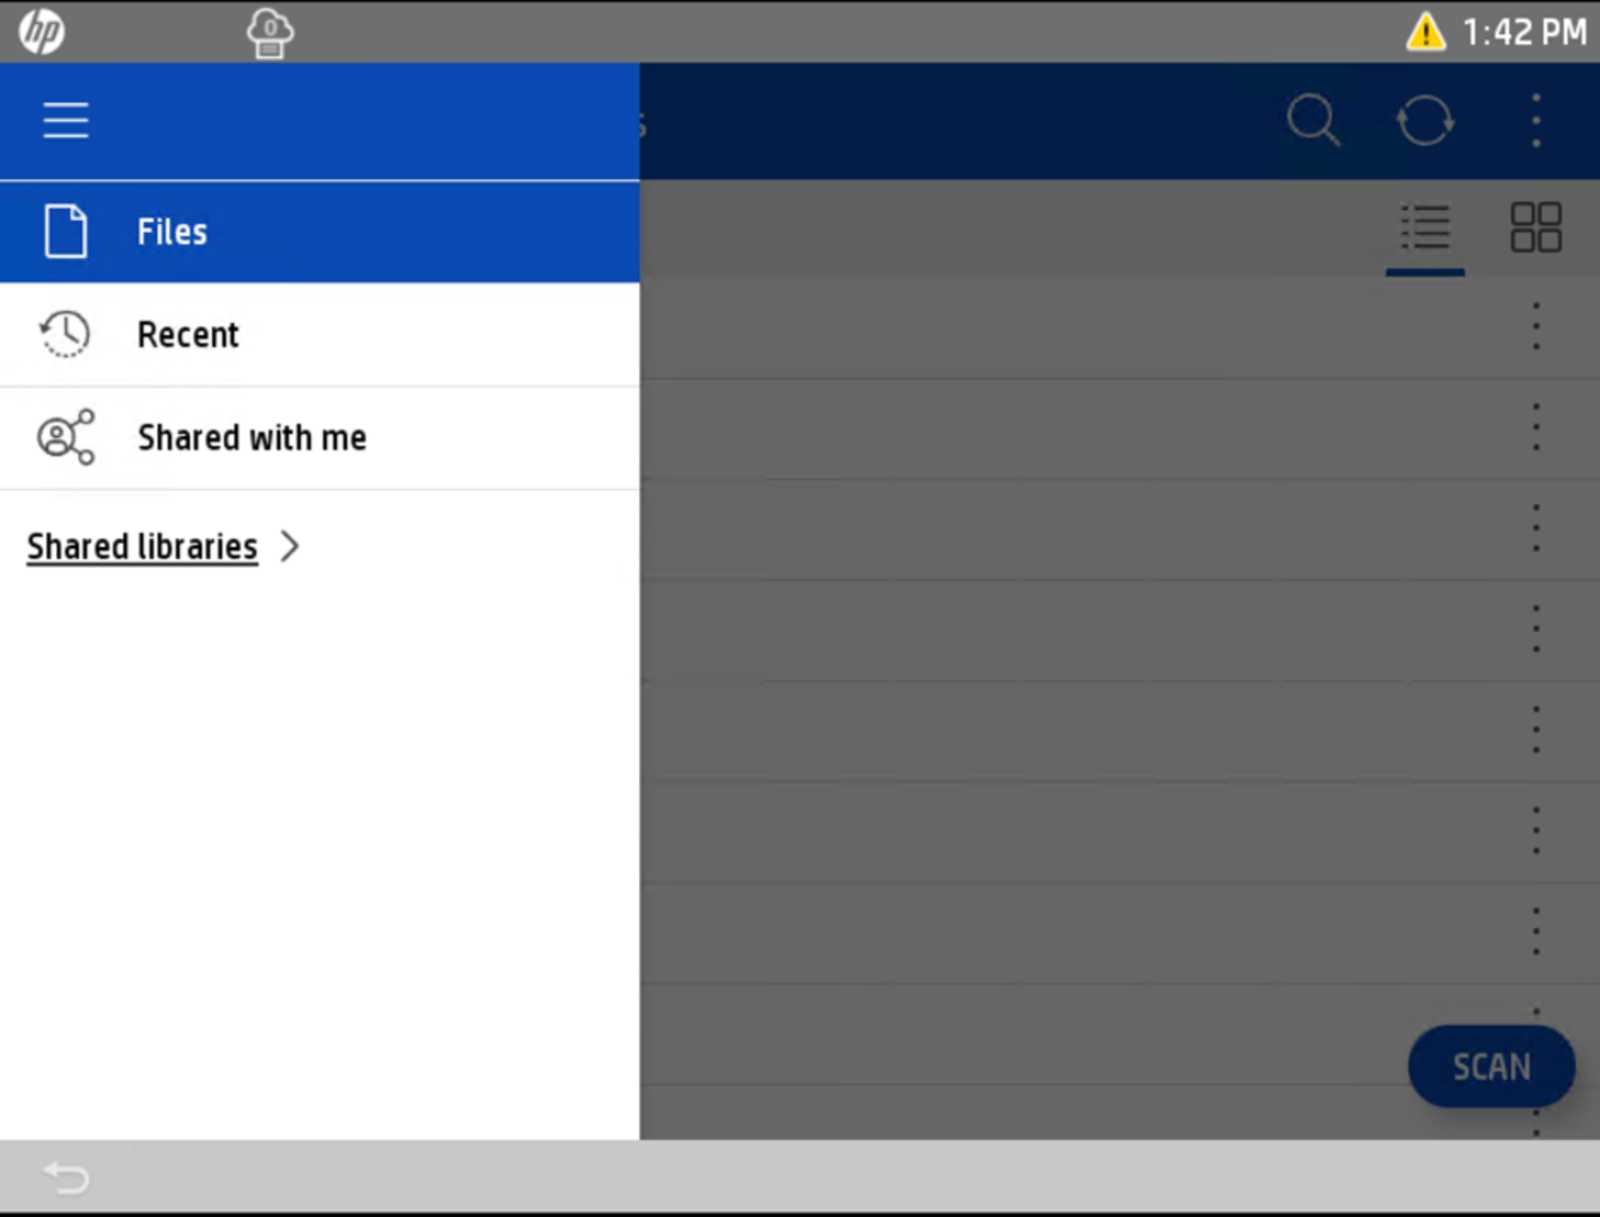
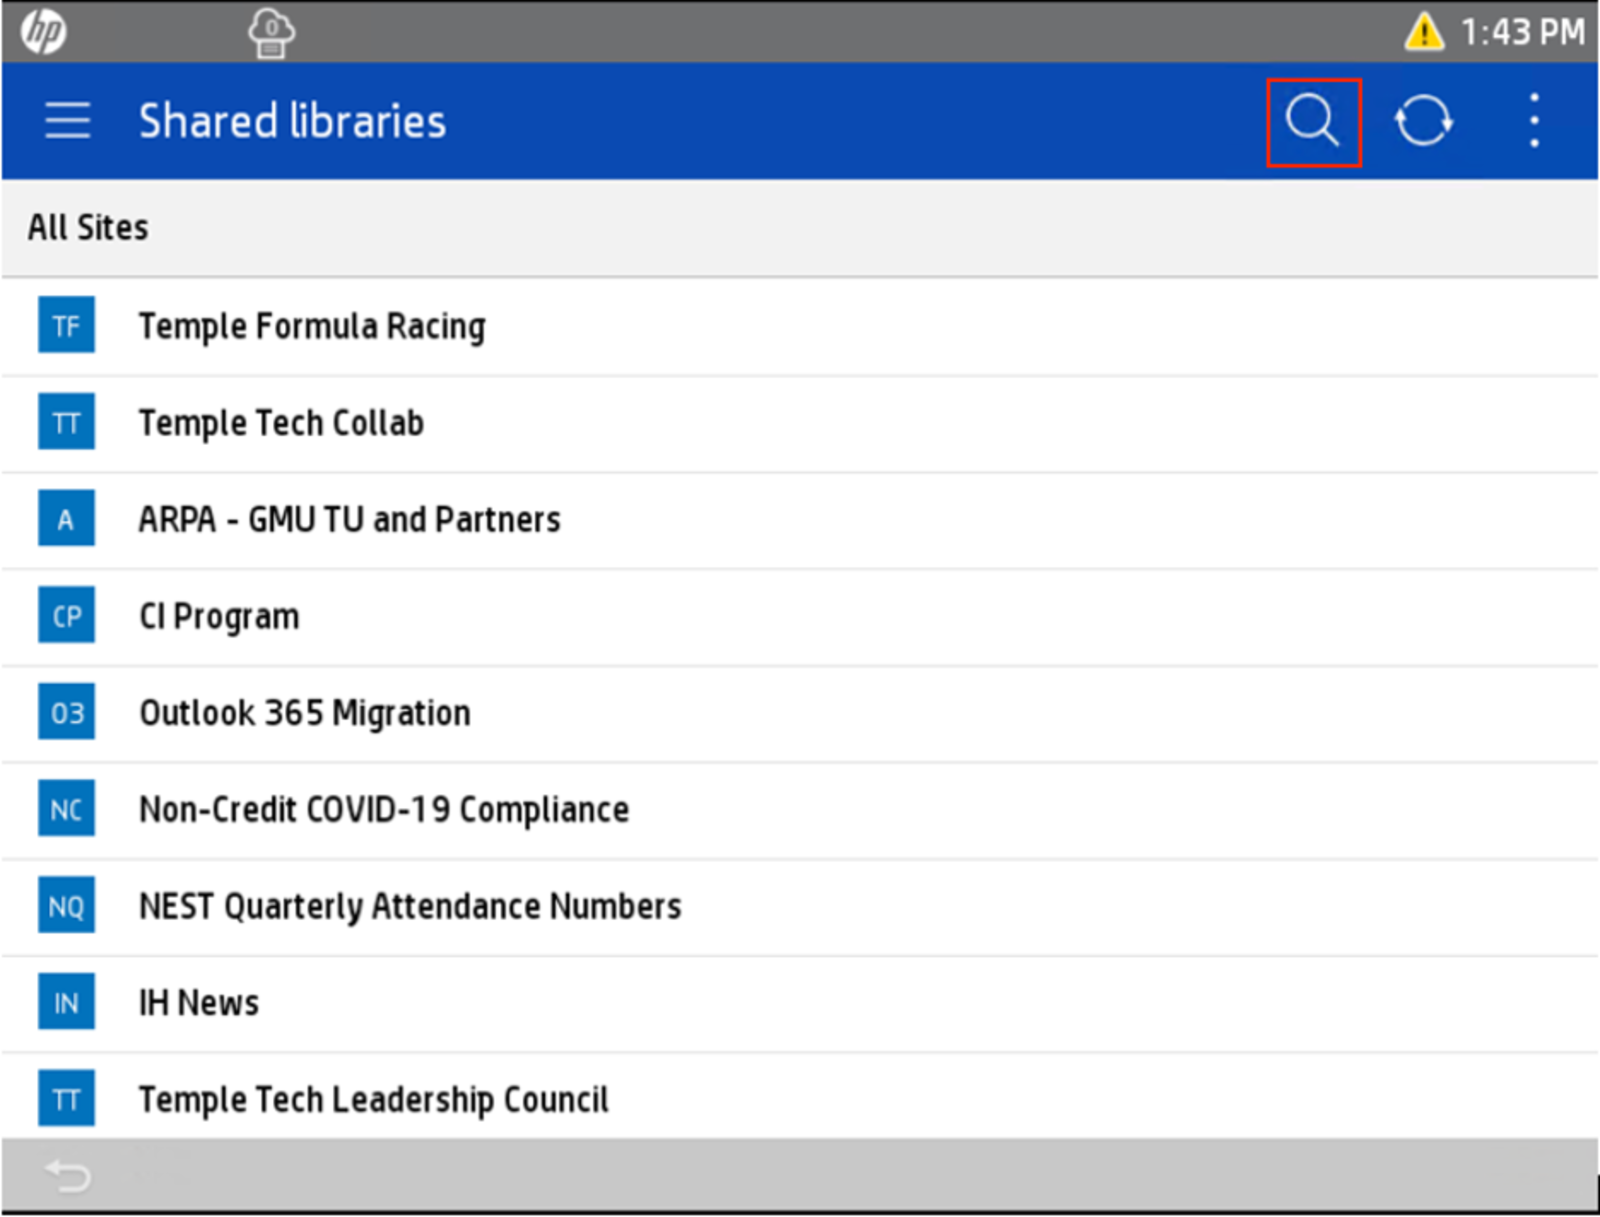
10. To Access the shared Teams locations, click the menu icon, then select Shared libraries. |
 |
|
11. All the Teams locations that you have access to will be listed here. To perform a search, select the search icon in the right corner. |
 |
|
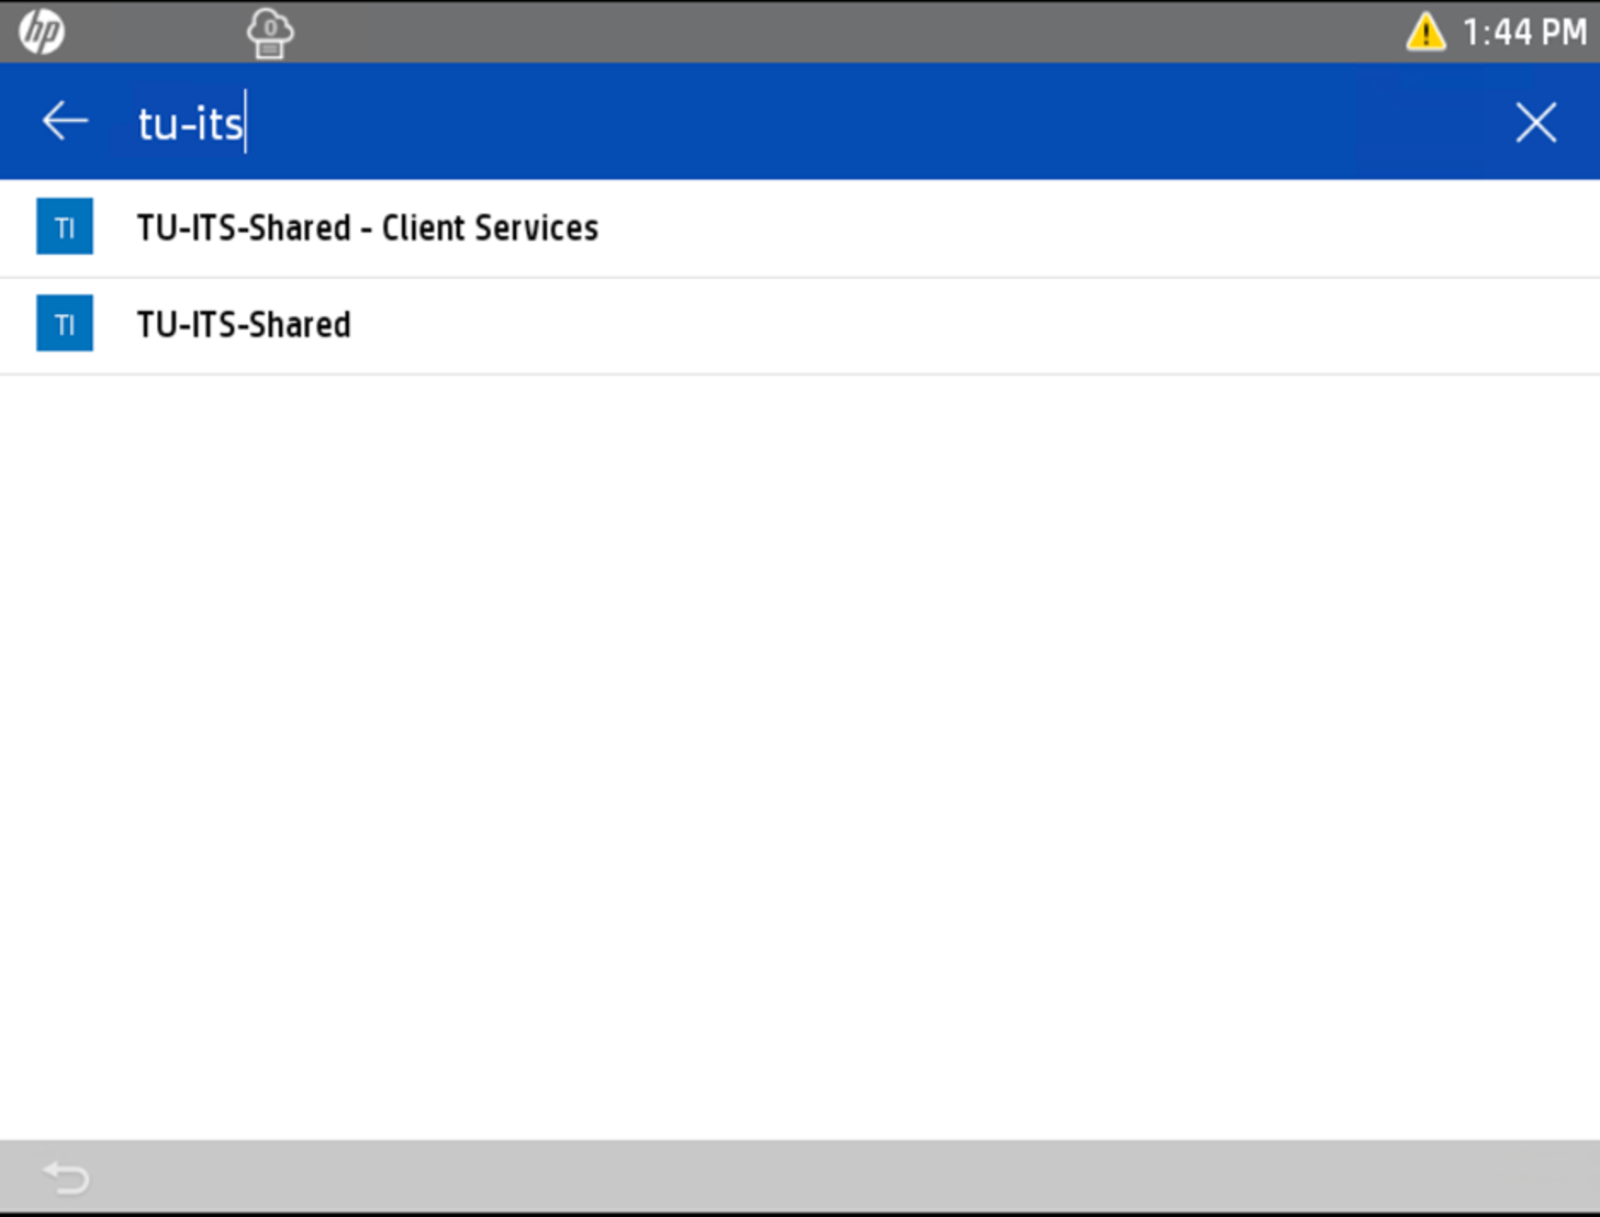
12. The Search function will narrow down the list of teams you are looking for. |
 |
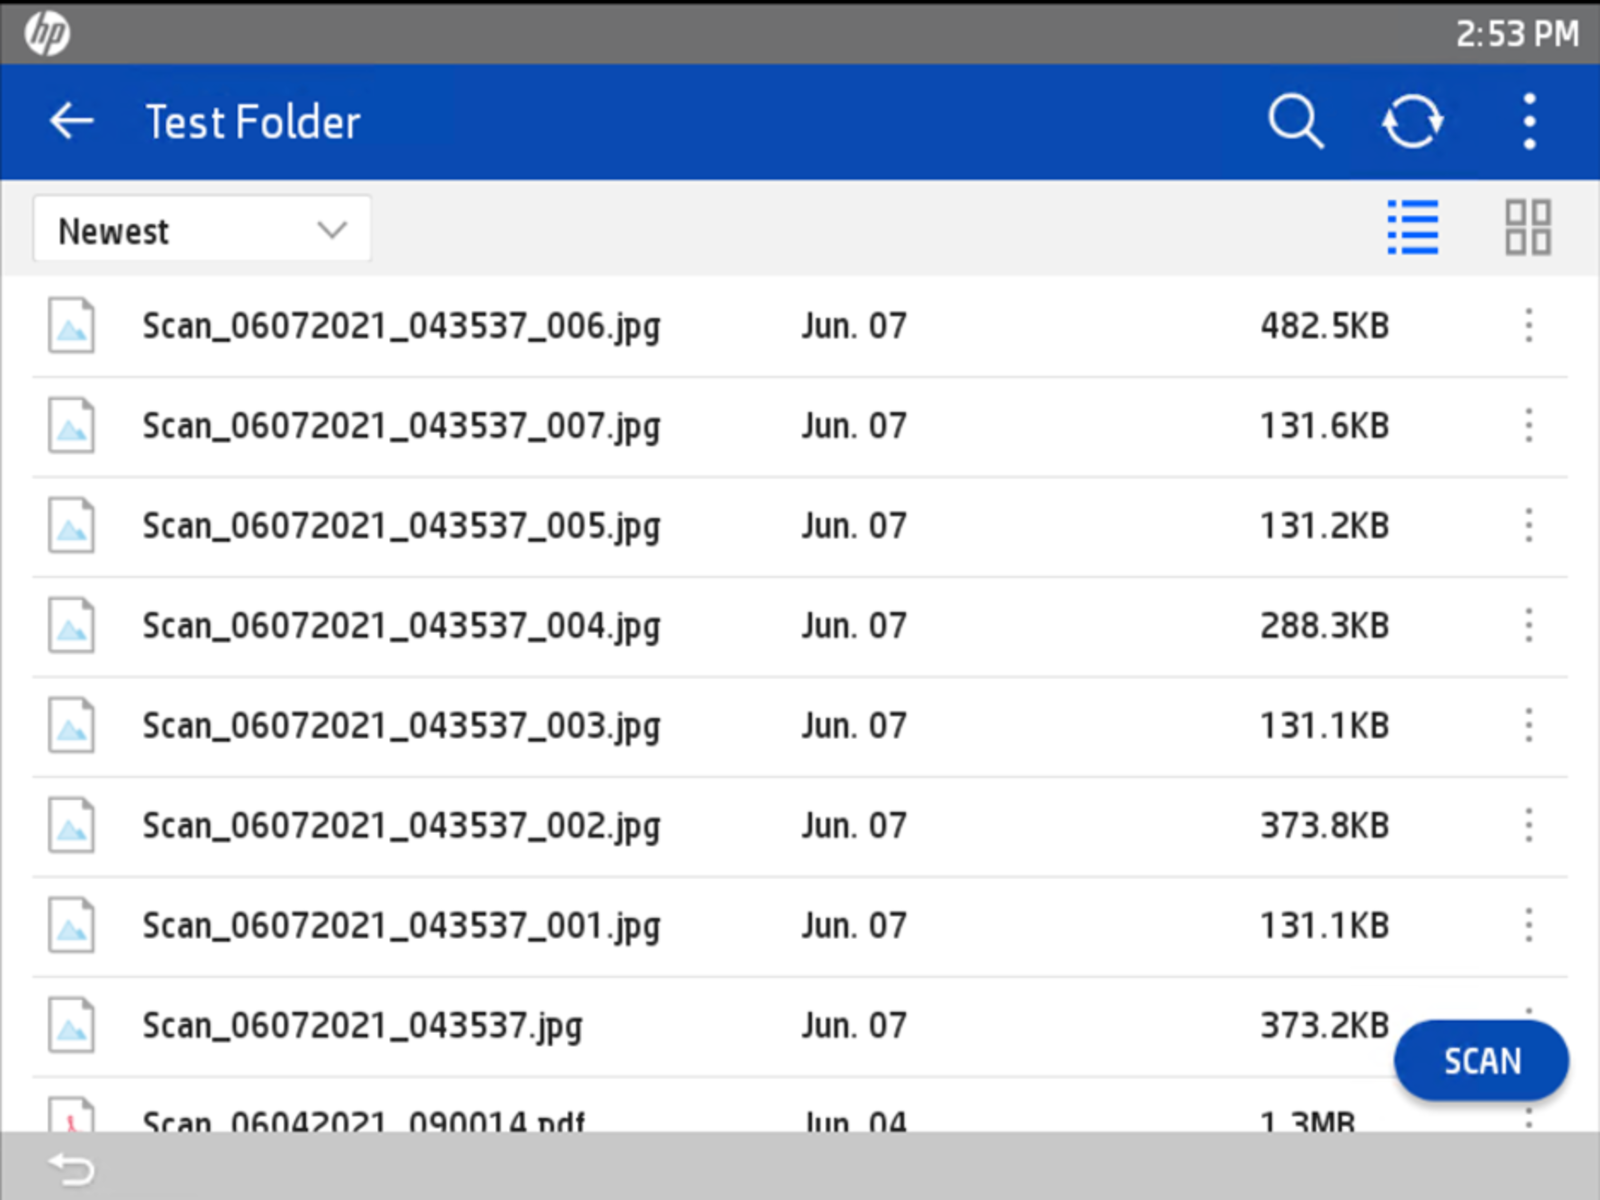
|
13. Browse to the desired directory and select SCAN. |
 |
|
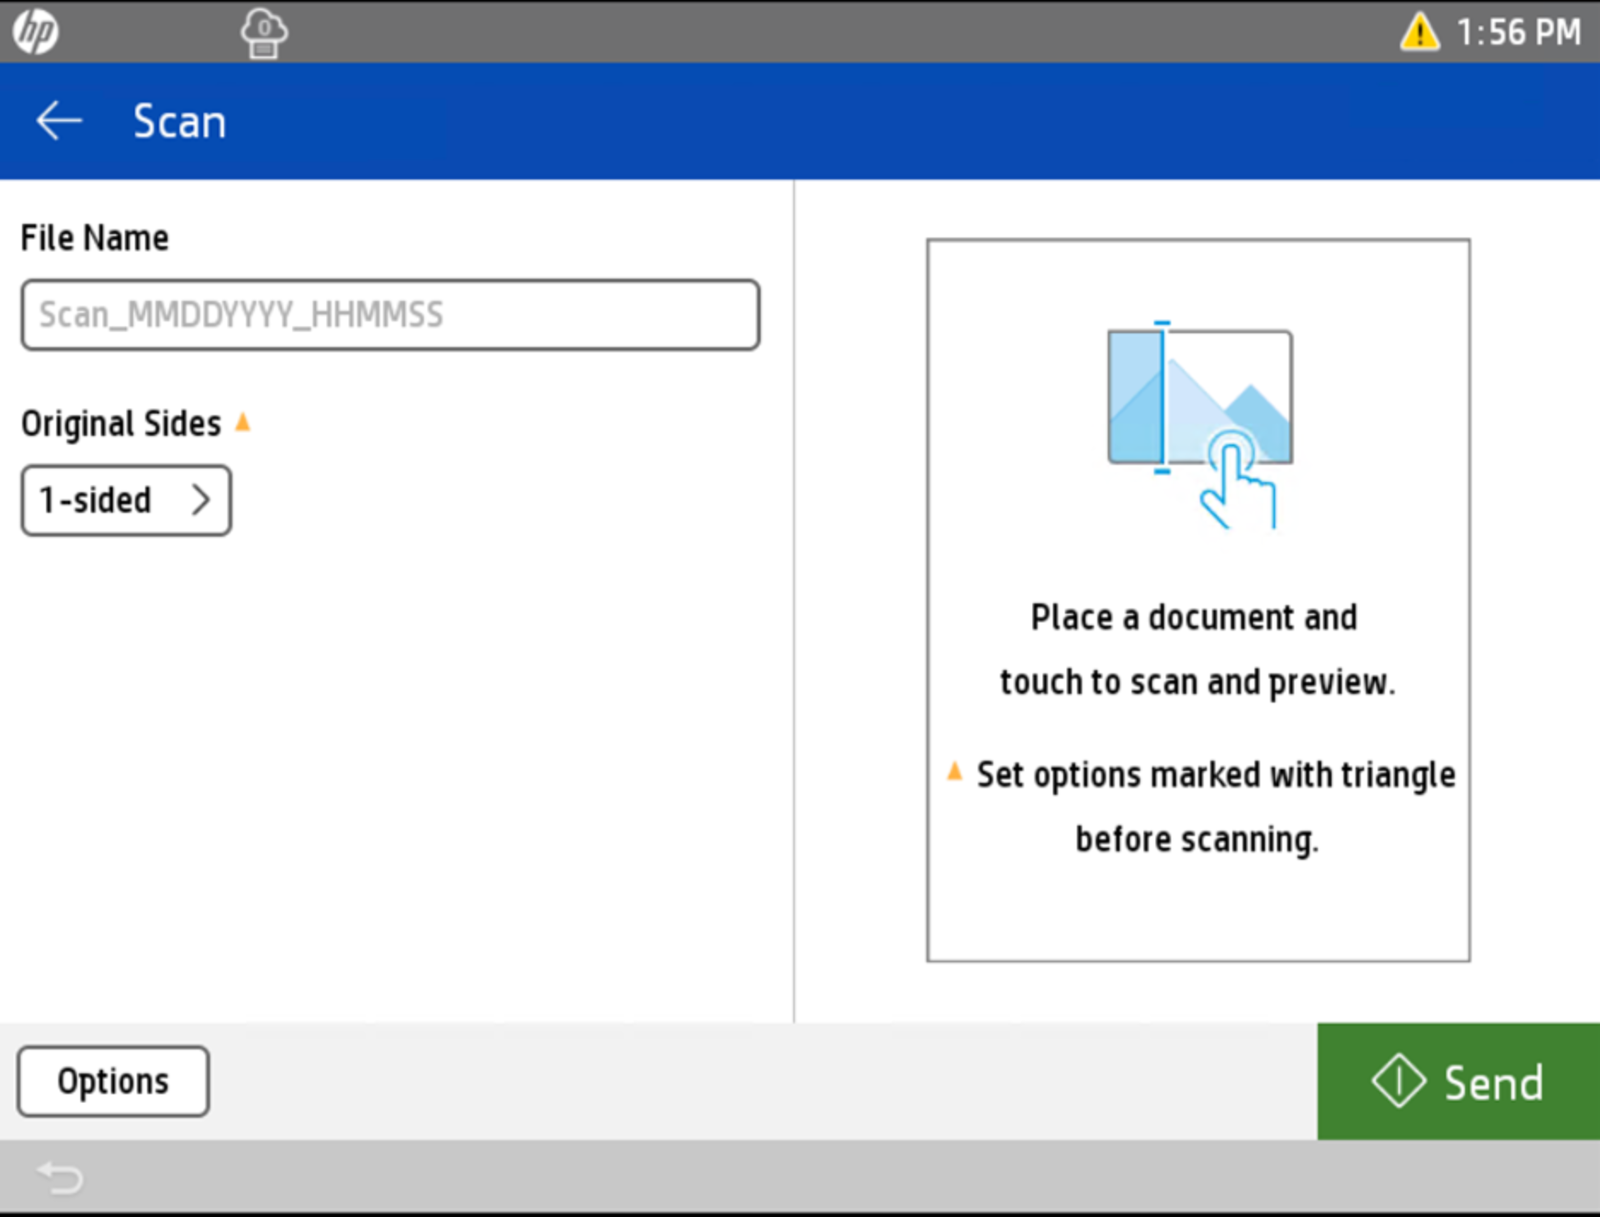
14. Additional scan options are available in the Scan menu. When ready, click Send to scan the paper document and create a PDF file at the current directory. |
 |