
Configure Mac Computer for PIN Printing
For either printing option, please verify you have the printer downloaded:
One-time Printing
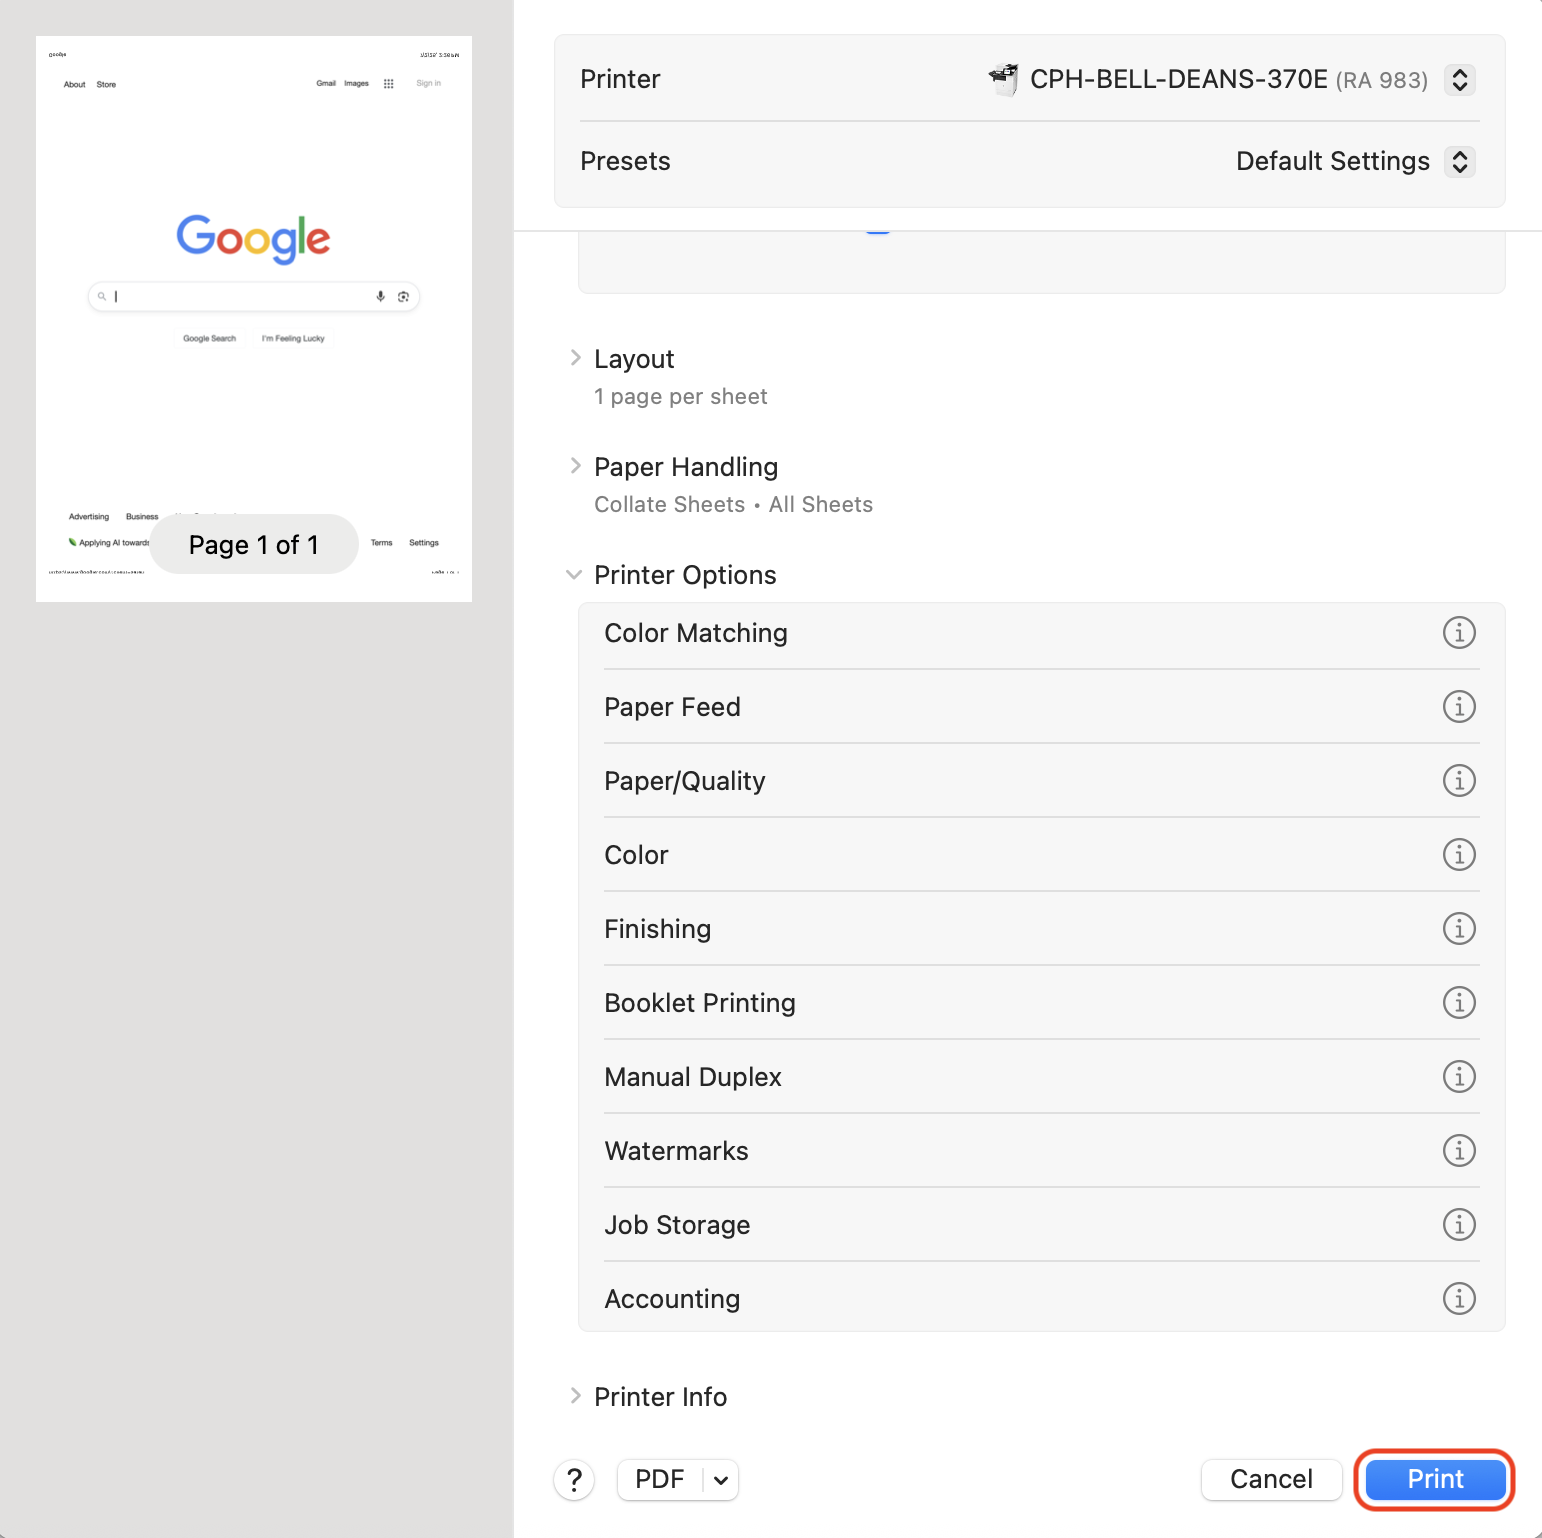
1. Go to the document you wish to print and click Print or ⌘ + P or command + P.
2. Click the printer dropdown menu and select the name of the shared office printer.
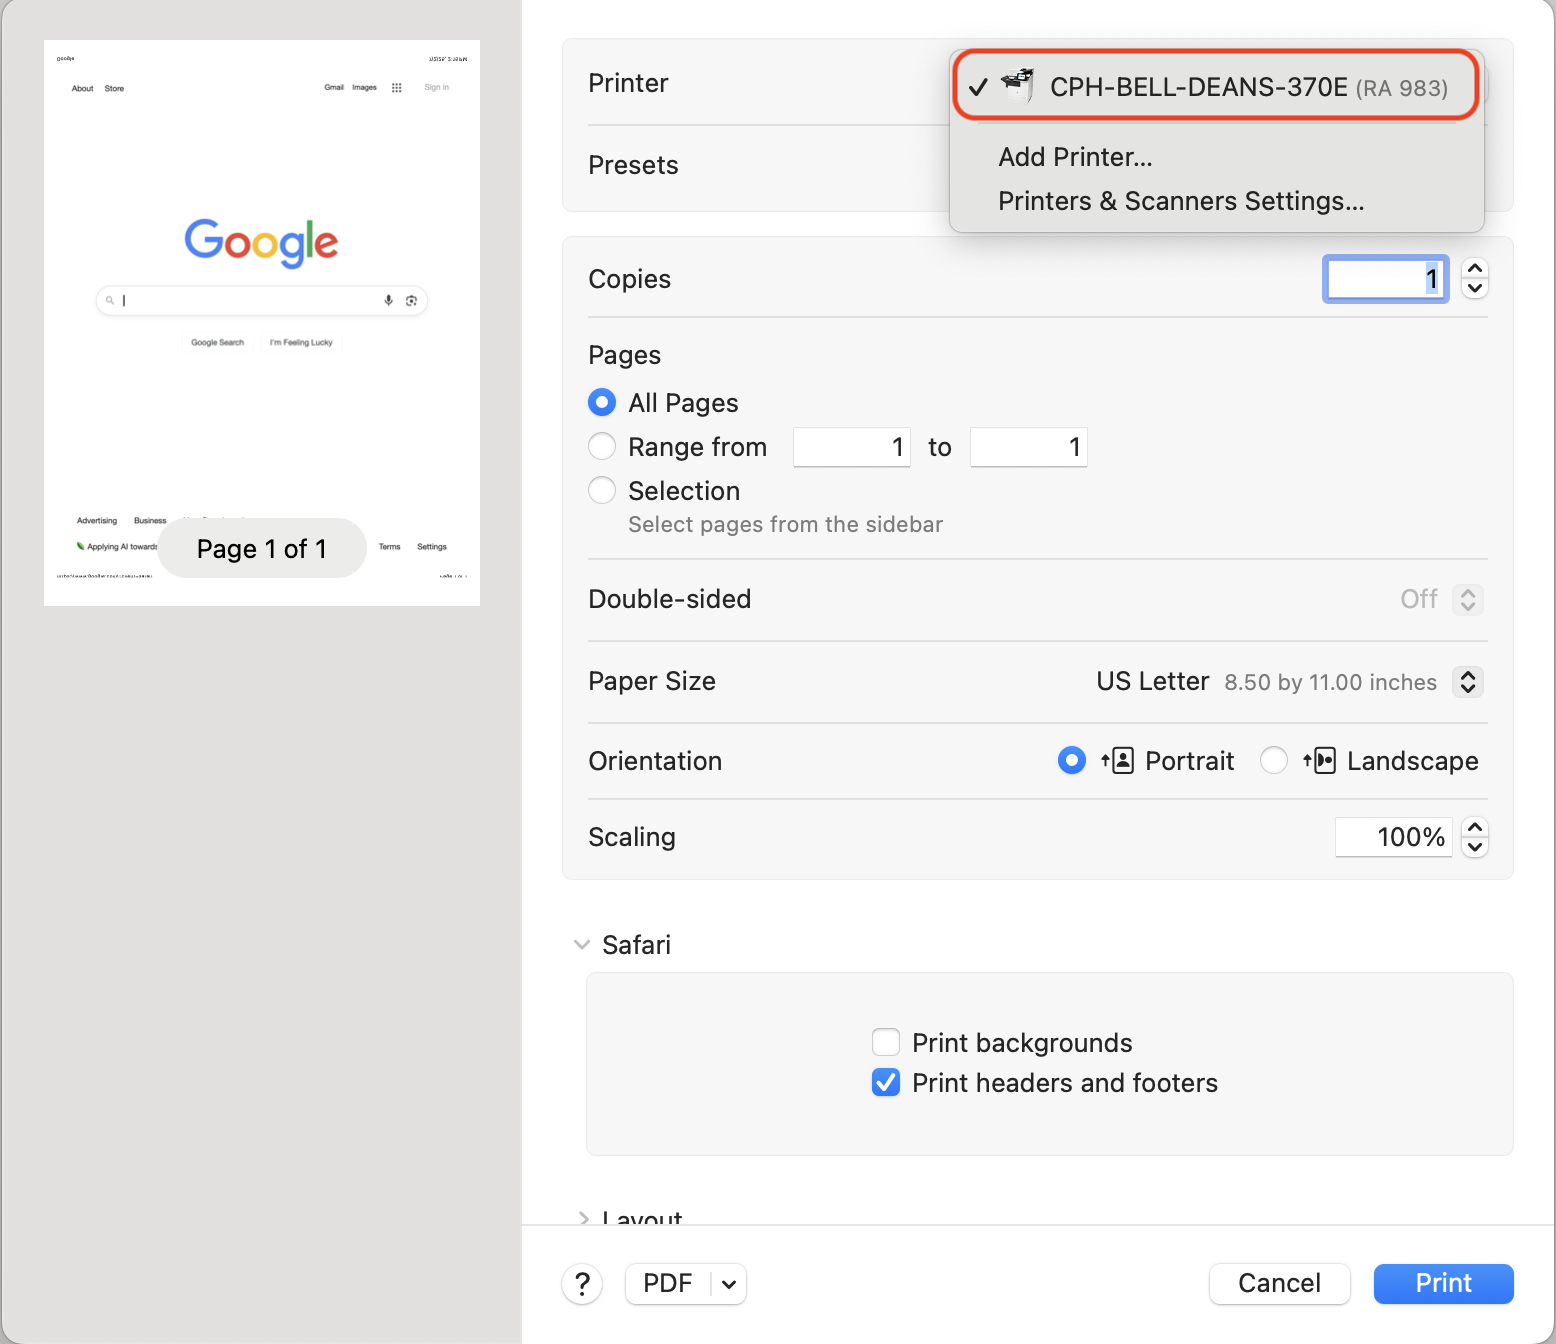
3. Scroll down and open the dropdown menu for Printer Options.
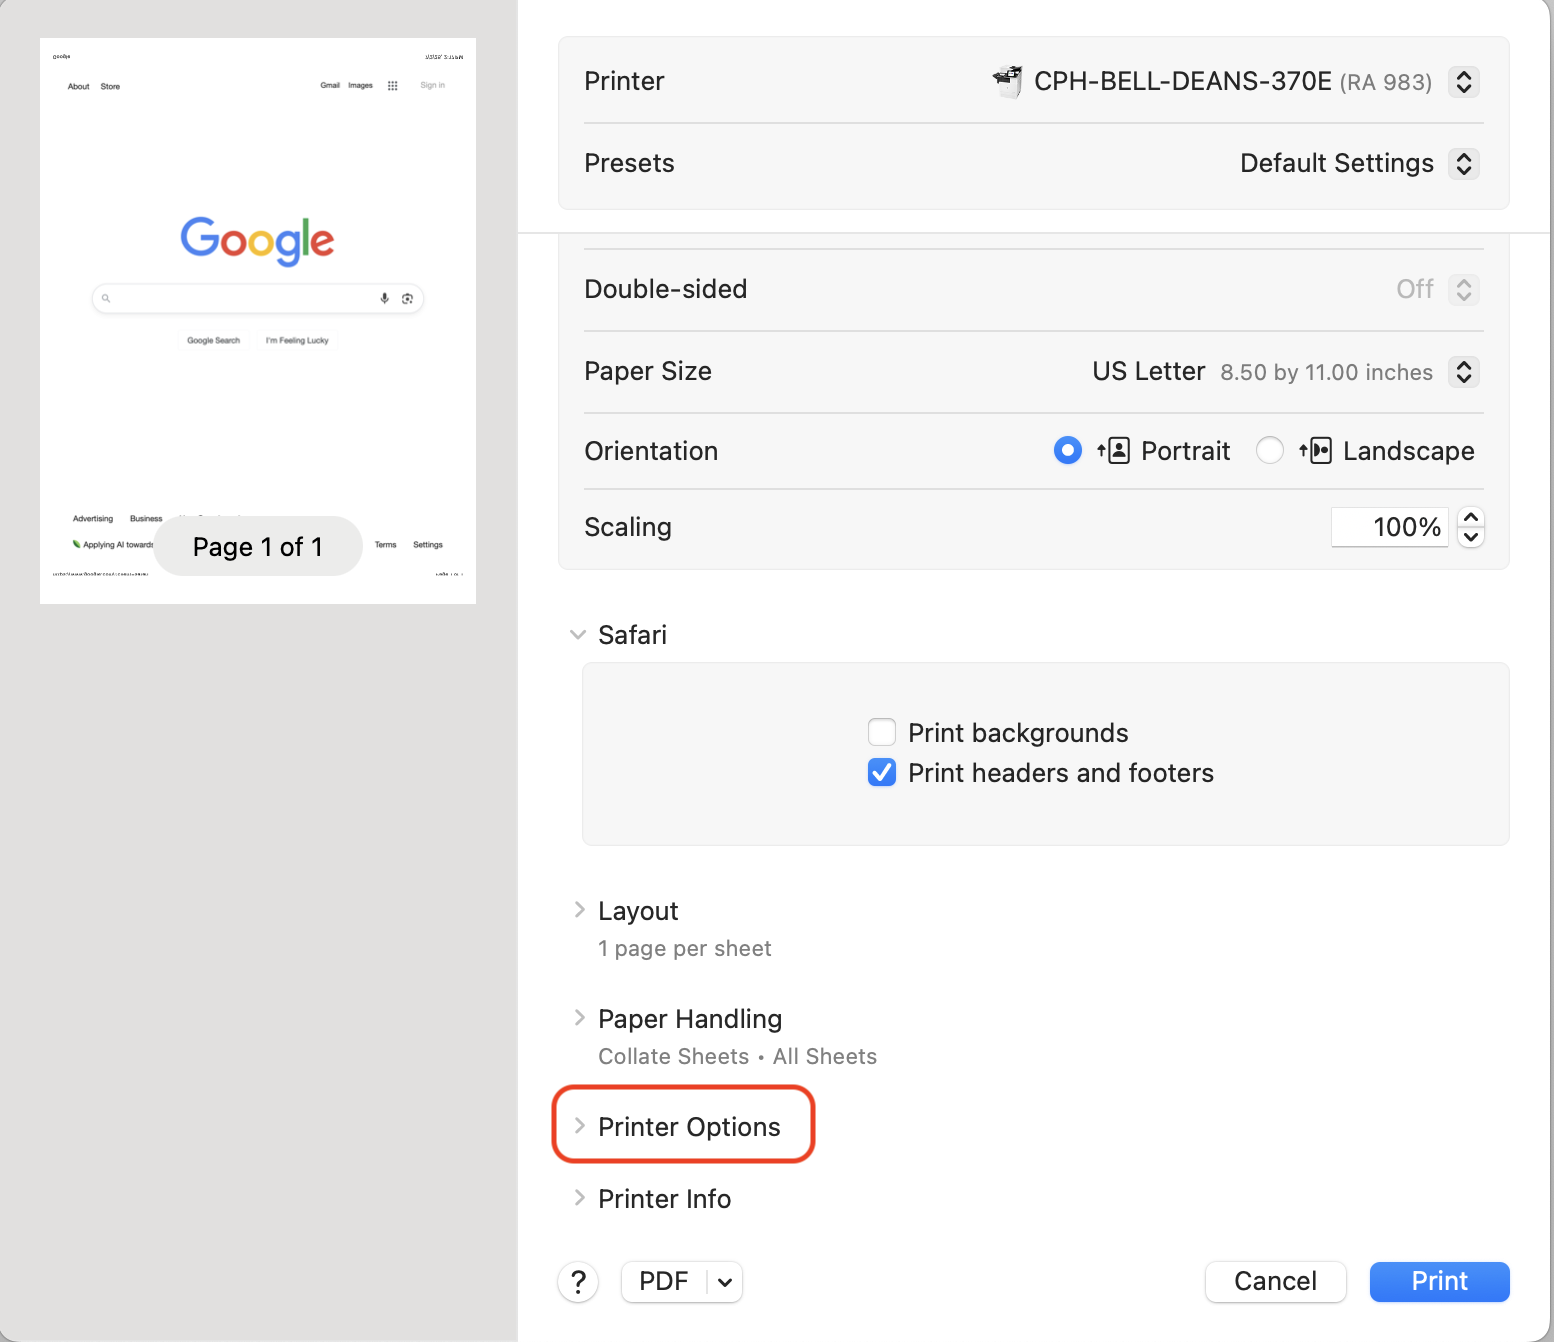
4. Click Job Storage.
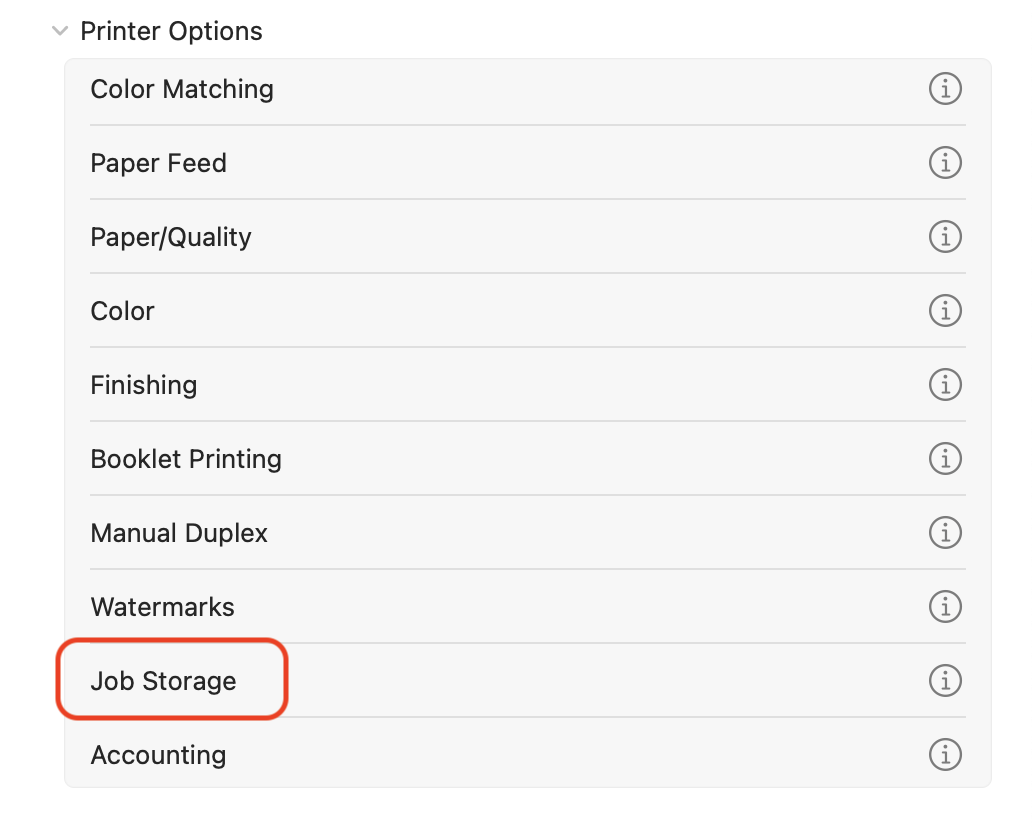
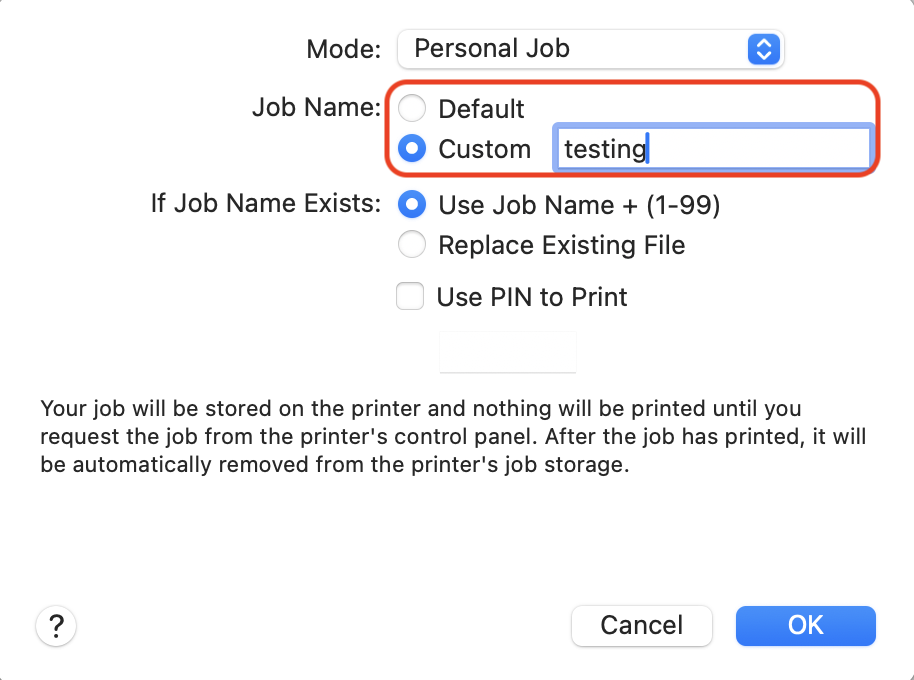
5. Select the Mode dropdown menu and click Personal Job.
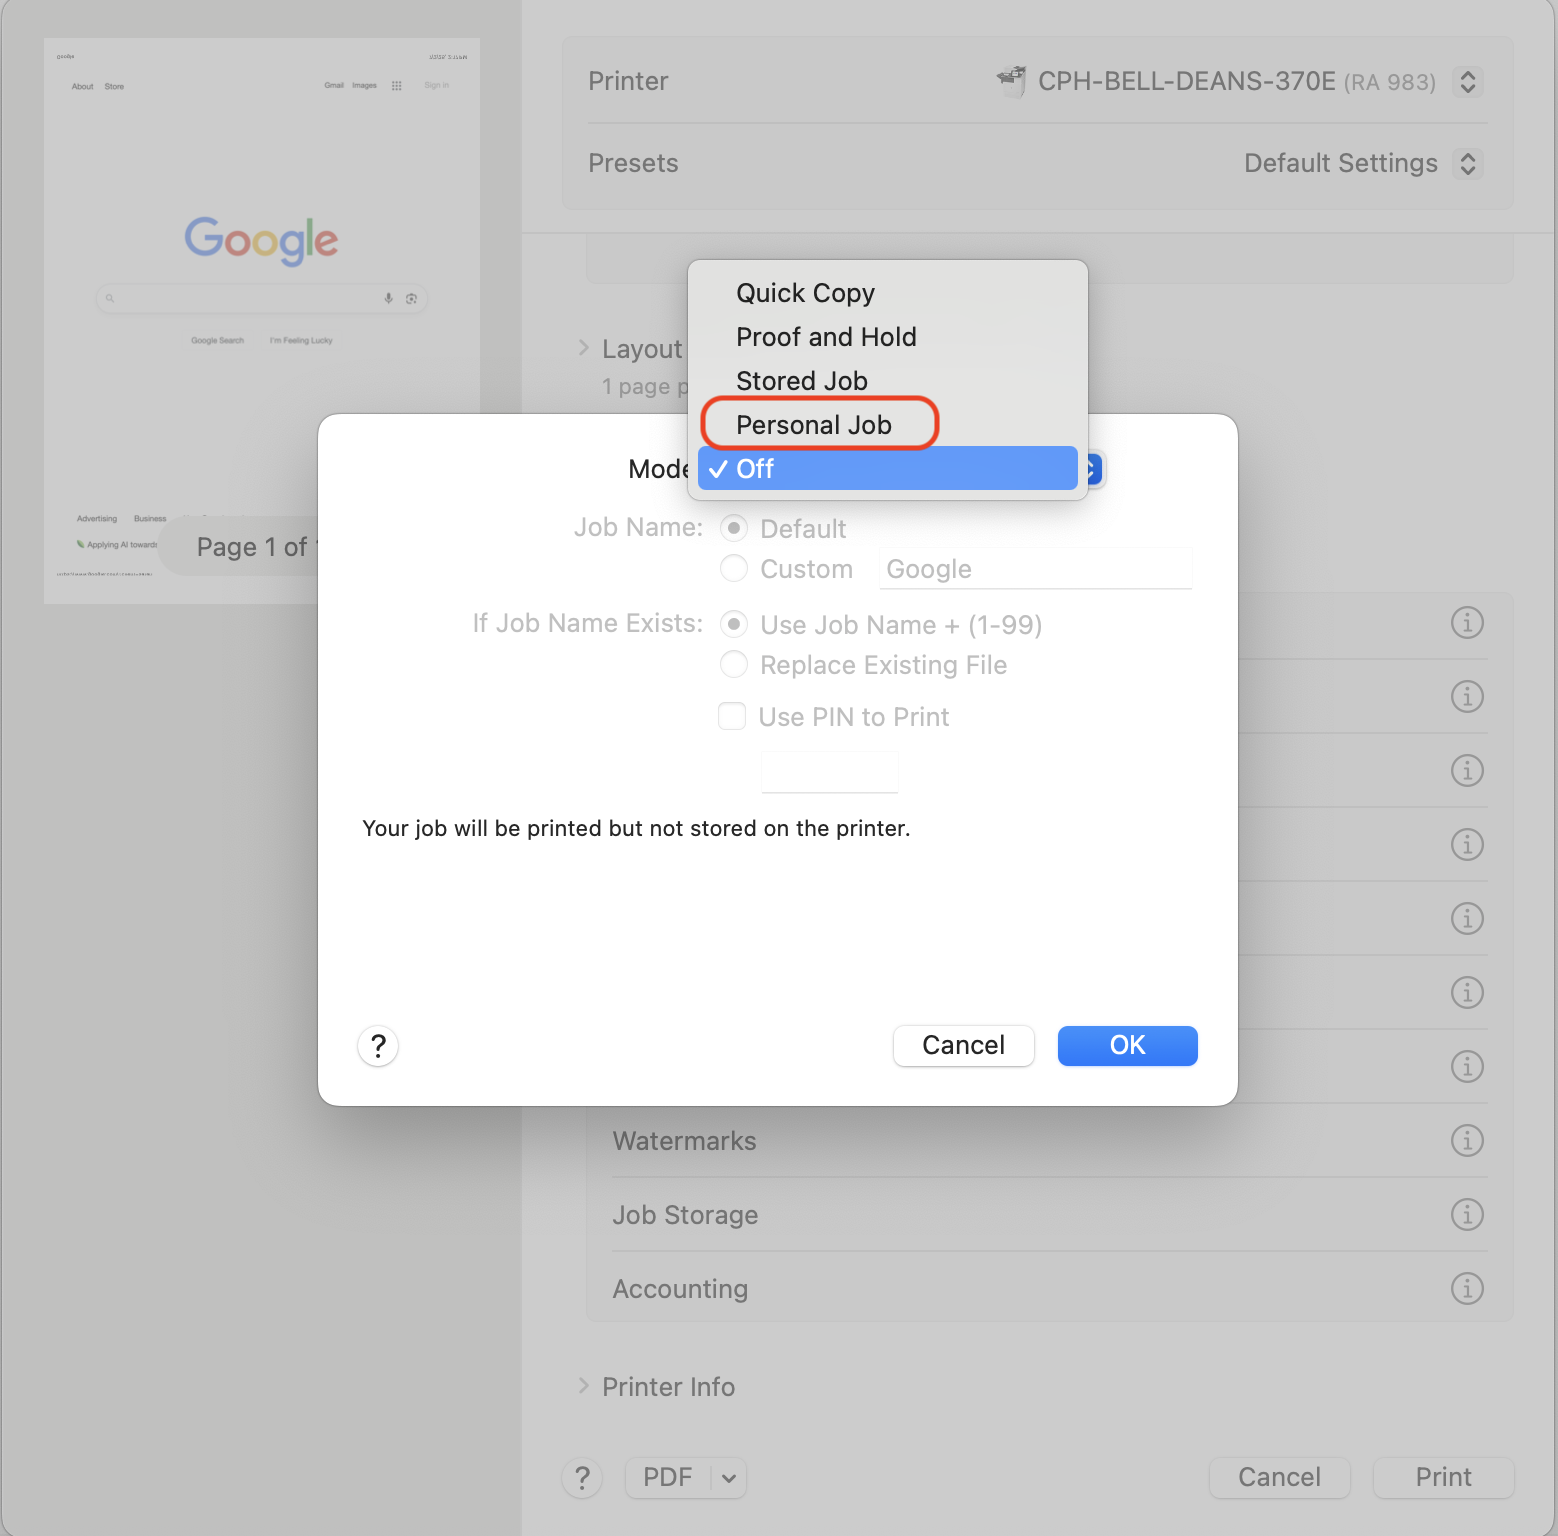
6. Under Job Name, verify the name of the file or update the name by selecting Custom.
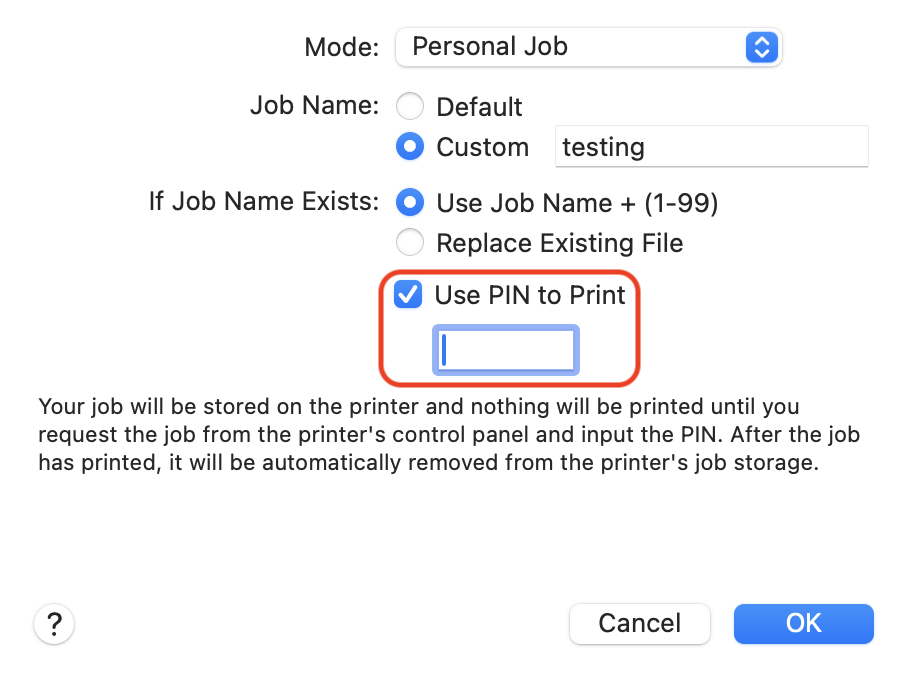
7. Check the box next to Use PIN to print.
Add a pin that is easy for you to remember.
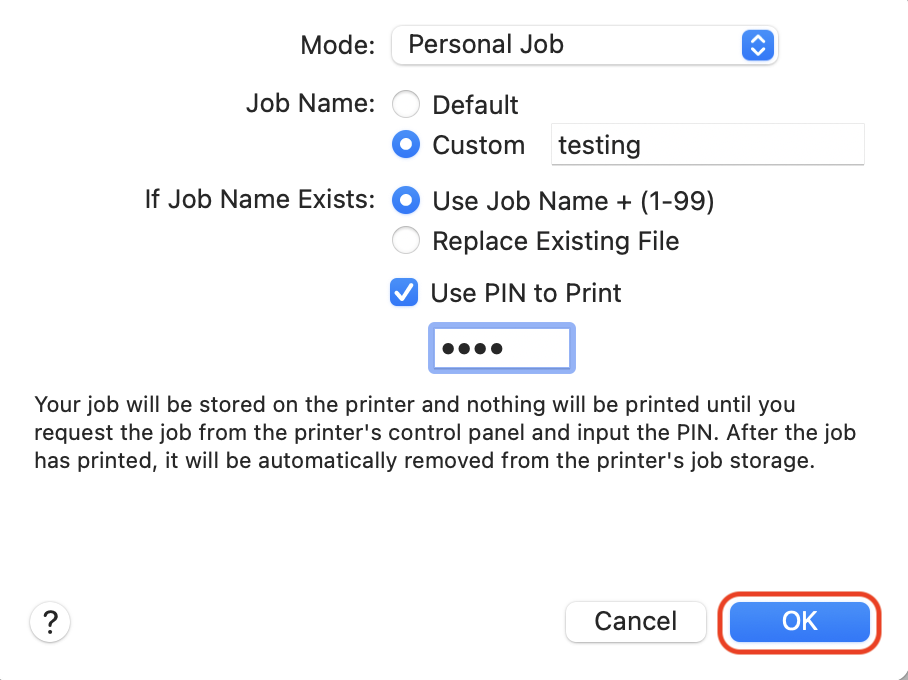
8. Click OK.
9. Click Print.
Please note a window will pop up prompting you to enter your name and password.
10. Enter your accessnet username and password.
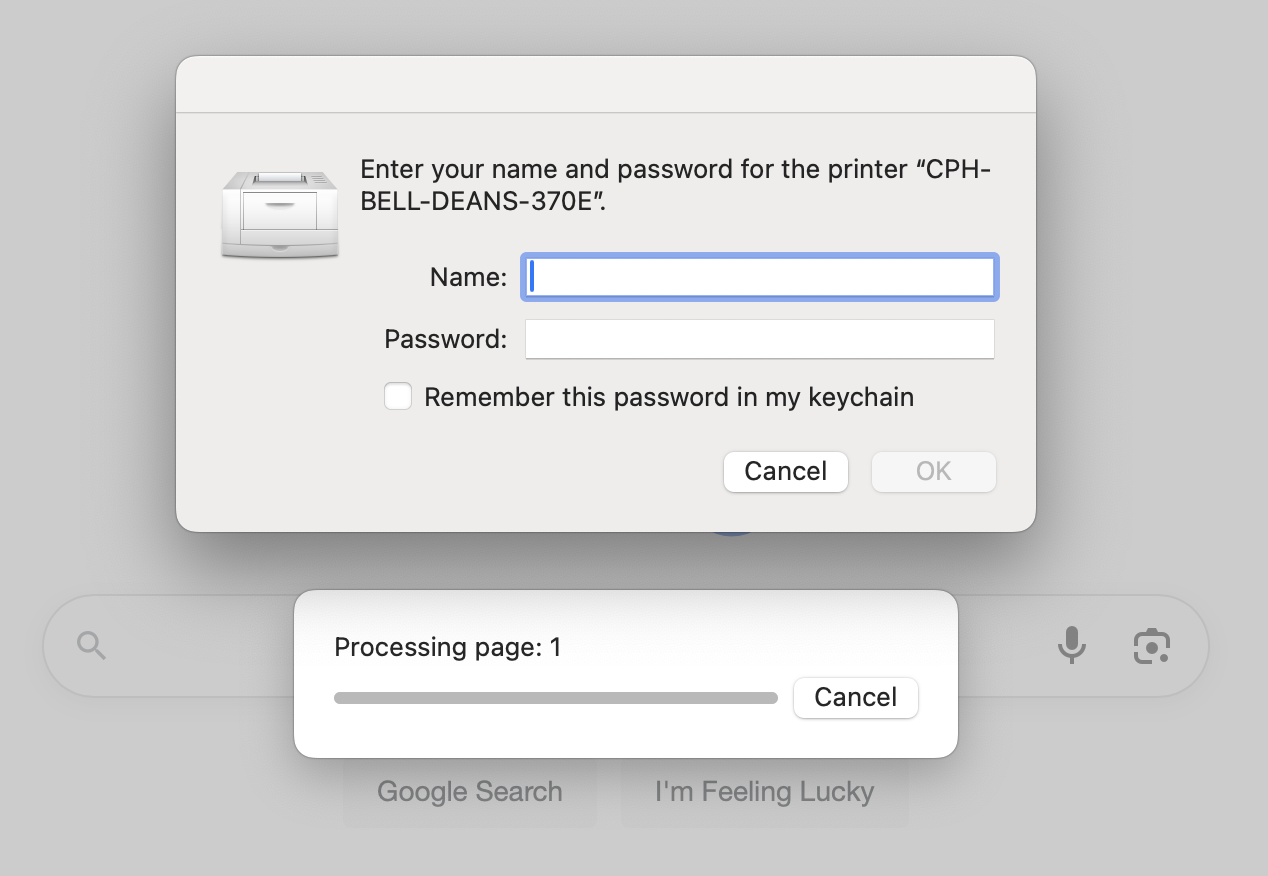
11. Click OK.
Now you can go to your shared office printer.
All Printing Jobs
Please note that this option creates a preset that will have to be selected each time you print. It will not default to that preset.
1. Go to the document you wish to print and click Print or ⌘ + P or command + P.
2. Click the Printer dropdown menu and select the name of shared office printer.
3. Click the Presets dropdown menu and select Save Current Settings as Preset.
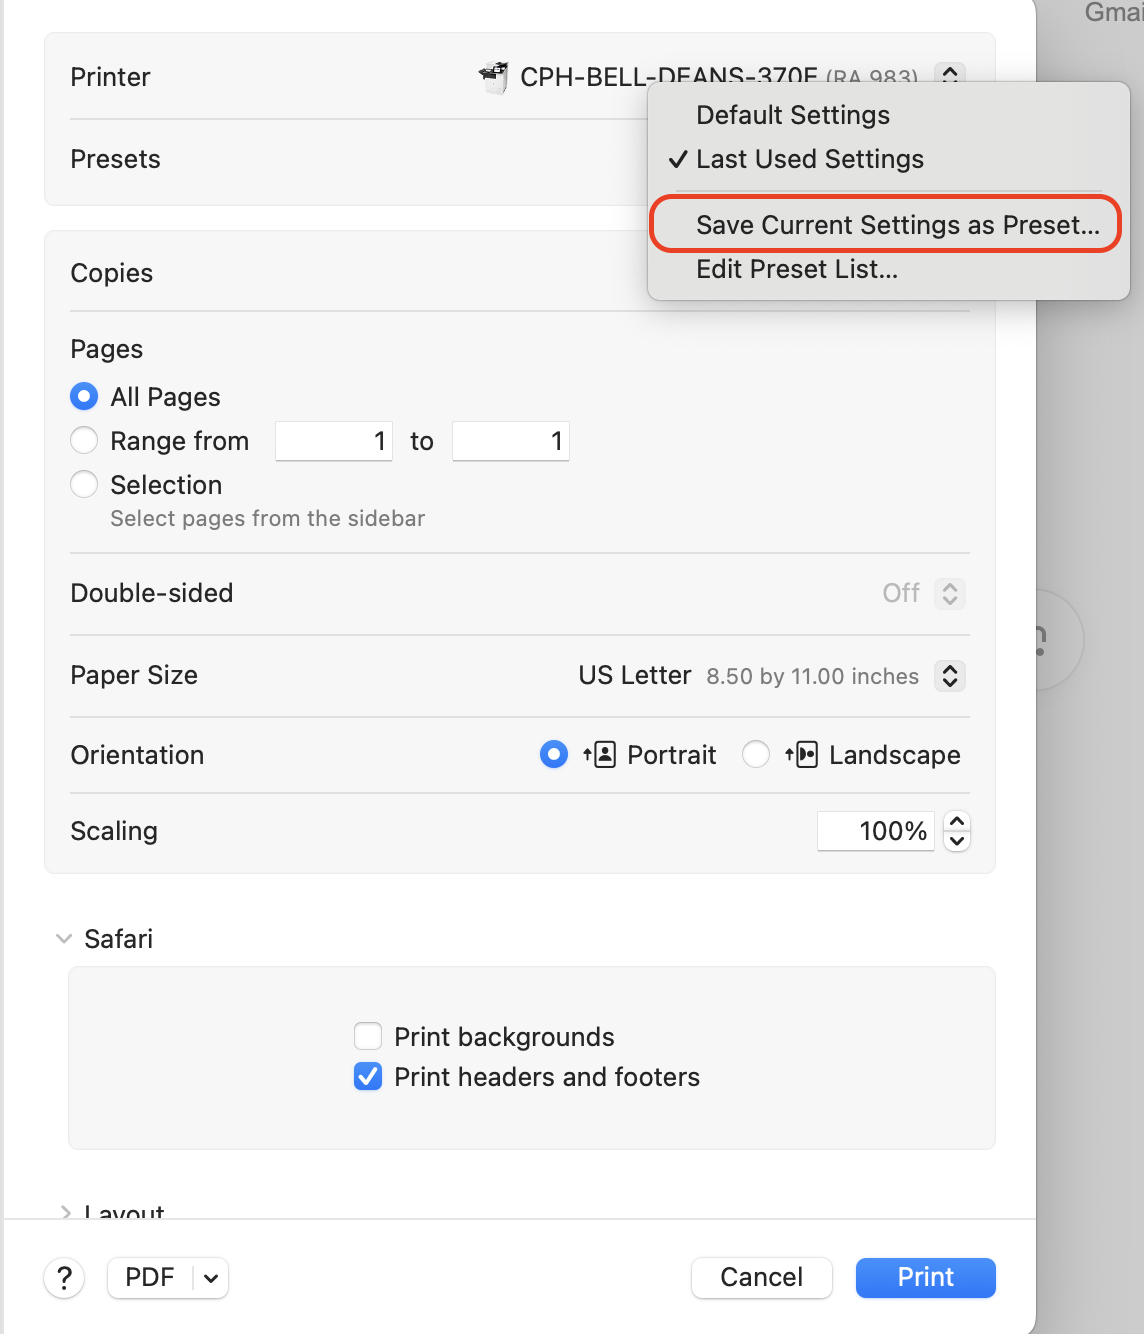
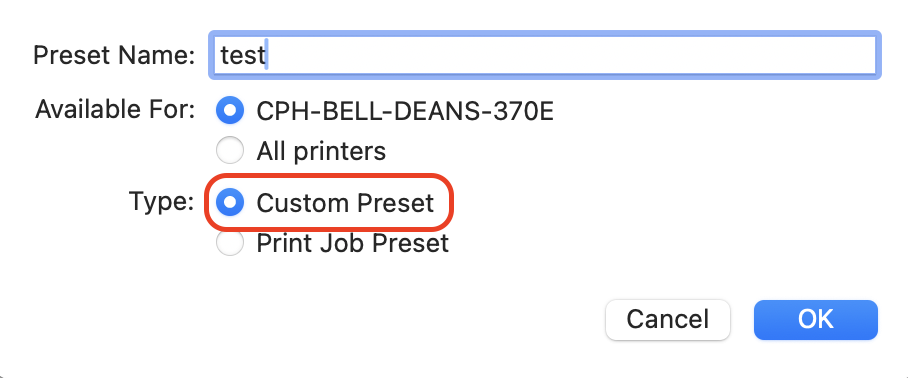
4. Enter a Preset Name.
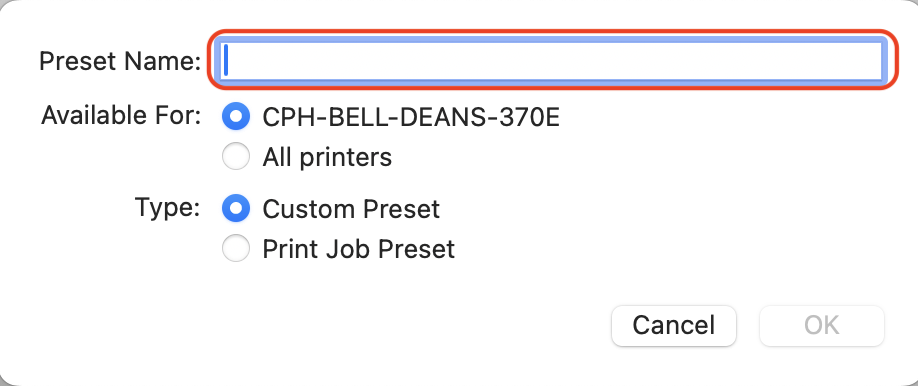
5. Select the printer name or All printers.
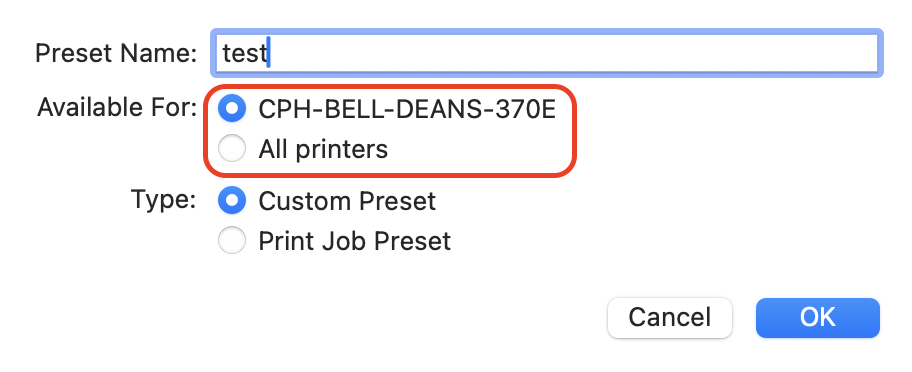
6. Select Custom Preset.
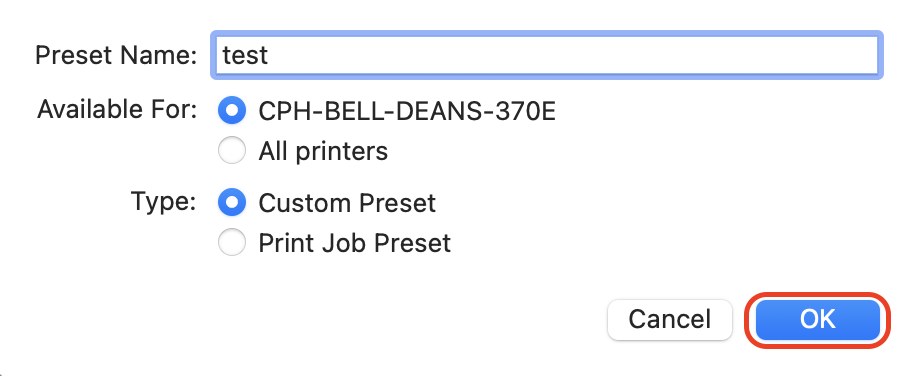
7. Click OK.
8. Scroll down and open the dropdown menu for Printer Options.
9. Click Job Storage.
10. Select the Mode dropdown menu and click Personal Job.
11. Under Job Name, verify the name of the file or update the name by selecting Custom.
12. Check the box next to Use PIN to print.
Add a pin that is easy for you to remember.
13. Click OK.
14. Click Print.
Please note a window will pop up prompting you to enter your name and password.
15. Enter your accessnet username and password.
You can check Remember this password in my keychain for future access.
16. Click OK.
Now you can go to your shared office printer.