
Accessing Conference Room Calendars
There are multiple ways to access this new calendar system.
Web (View-Only)
If you accessed conference room calendars via the website (https://cphapps.temple.edu/conferencerooms) you can continue to do so in a Read-Only manner. The updated calendars will look different, but still be accessible via that website. Alternatively, you may now simply add the calendar to your Outlook application.
|
1. Go to: https://cph.to/conferencerooms
|
|
|
2. Select your location.
|
 |
|
3. Select the conference room you wish to view.
|
 |
|
4. You can View the calendar.
|
 |
Outlook Application
Windows (and Web)
|
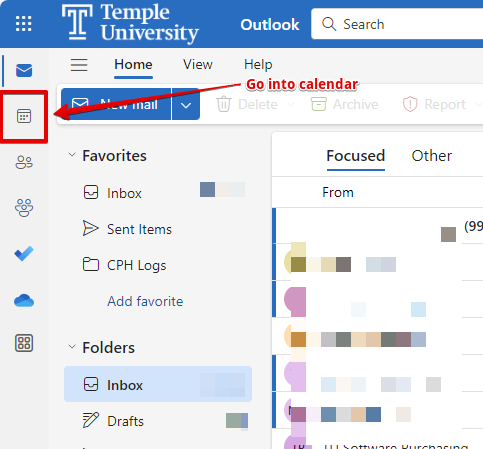
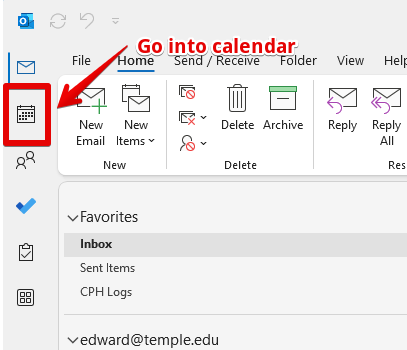
1. Load Outlook and go into the Calendar app.
|
 |
|
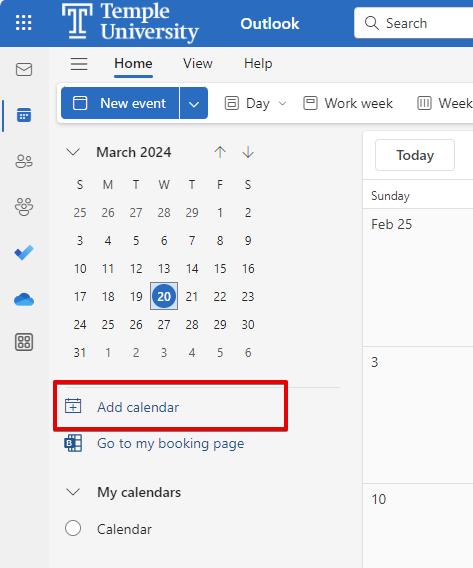
2. Select Add calendar.
|
 |
|
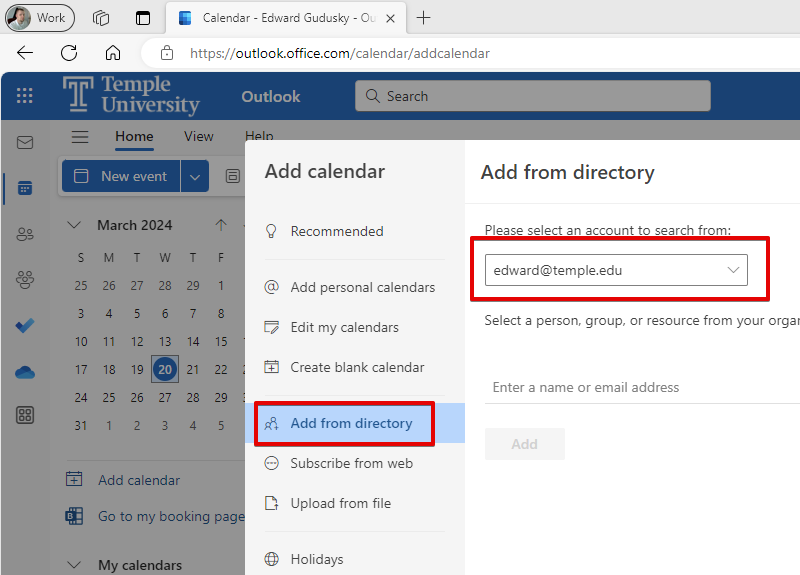
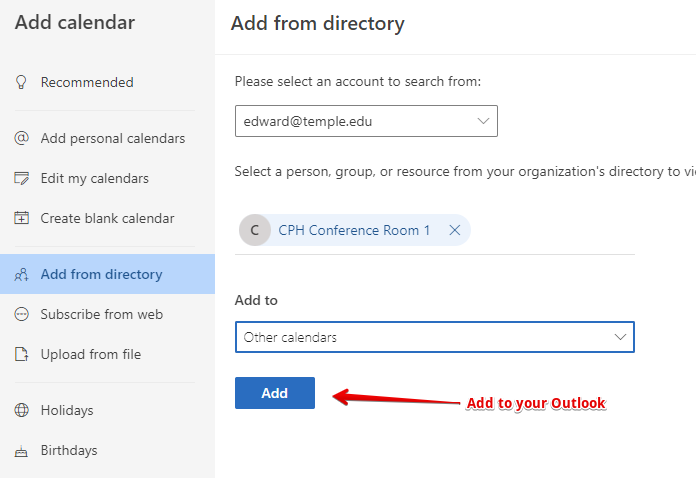
3. Select Add from directory.
|
 |
|
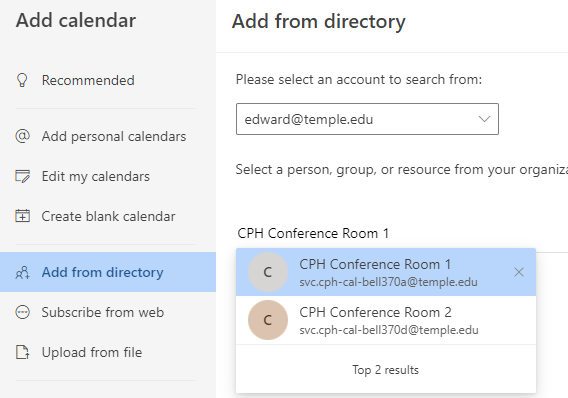
4. Type the name of the conference room (ex. CPH Conference Room 1).
|
 |
|
5. Click Add.
|
 |
|
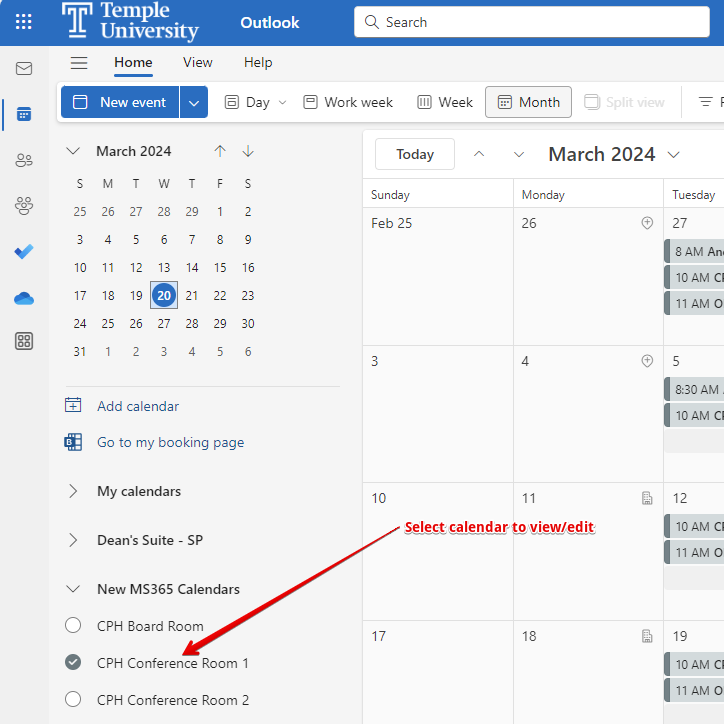
6. Select the calendar from the left hand side to view/manage.
|
 |
Windows (Classic Version)
|
1. Load Outlook and go into the Calendar app.
|
 |
|
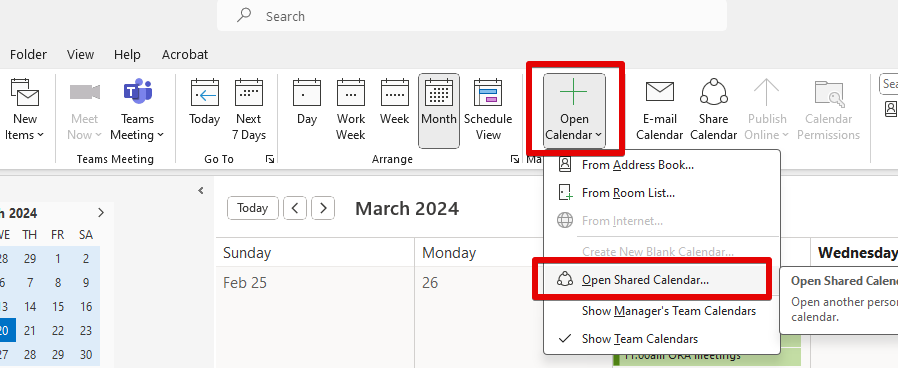
2. Select Open Calendar then Open Shared Calendar.
|
 |
|
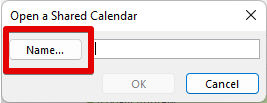
3. Click the Name button.
|
 |
|
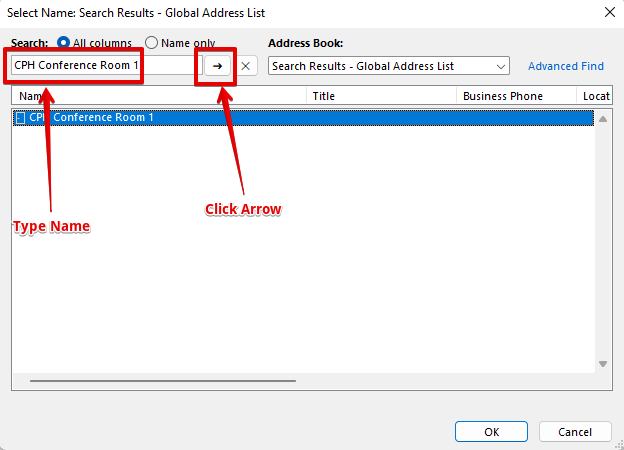
4. Type the name of the conference room (ex. CPH Conference Room 1) and click the arrow.
|
 |
|
5. Highlight the calendar and click OK.
|
|
|
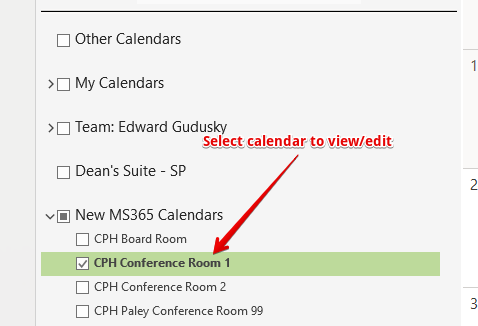
6. Select the calendar from the left hand side to view/manage.
|
 |
Outlook for Mac
-
Load Outlook and go into the Calendar app

-
Select Add calendar then Add Shared Calendar…

-
Type the name of the conference room (ex. CPH Conference Room 1) and click Open

-
Select the calendar from the left hand side to view/manage


Outlook Mobile Application
-
Load Outlook and go into the Calendar app

-
Touch your name icon to open the calendar menu

-
Touch the plus icon

-
Touch Add Shared Calendars

-
Type the calendar name and click the Plus next to the name

-
Make sure the calendar you want to view/edit is checked


