
Pre-Recording Set Up Instructions
Please learn about the use cases below and then follow the instructions to set up the studio for recording.
1. Use Cases
The BCPH Studio uses a switcher which will record three files: combined file (BCPH IT staff member uses the switcher to switch back and forth between the laptop and camera feeds), full laptop feed, full camera feed.
There are three use cases available.
Please ask the presenter how they plan to use the video and this will determine which Use Case instructions to follow.
Use Case #1:
Presenter would like to record audio and camera only (no PowerPoint).
In this use case, it is ok to press record and return to the room when they done. In this case, the beginning and ending of the video will need to be trimmed to remove the start and stop process. If the presenter paused and had to redo any parts of the recording, those will need to be trimmed out as well.
Use Case #2:
Presenter would like to record audio, PowerPoint + camera and have their video uploaded to Panopto (for example, they will use it for class).
For Use Case #2, it isn't necessary to stay in the room while they record. This is because Panopto (video hosting platform used at Temple) allows us to upload both the full laptop feed and camera laptop feed mp4 files into it as one video project, allowing viewers to watch both feeds at once.
In this use case, it is ok to press record and return to the room when they done. In this case, the beginning and ending of the video will need to be trimmed to remove the start and stop process. If the presenter paused and had to redo any parts of the recording, those will need to be trimmed out as well.
Use Case #3:
Presenter would like to record audio, PowerPoint + camera and will use their video somewhere other than Panopto.
For Use Case #3, sit in the room and follow instructions to use the switcher to switch back and forth between the laptop and the camera feeds. In this use case, they will be given one mp4 that is combination switching between the laptop and camera. In this case there may also be trimming needed if the presenter had to redo any parts of the recording before sending the final version to the presenter.
2. Set Up Steps To Do Before Presenter Arrives
| 1. Power on studio camera (slide the knob on the top of the camera) | 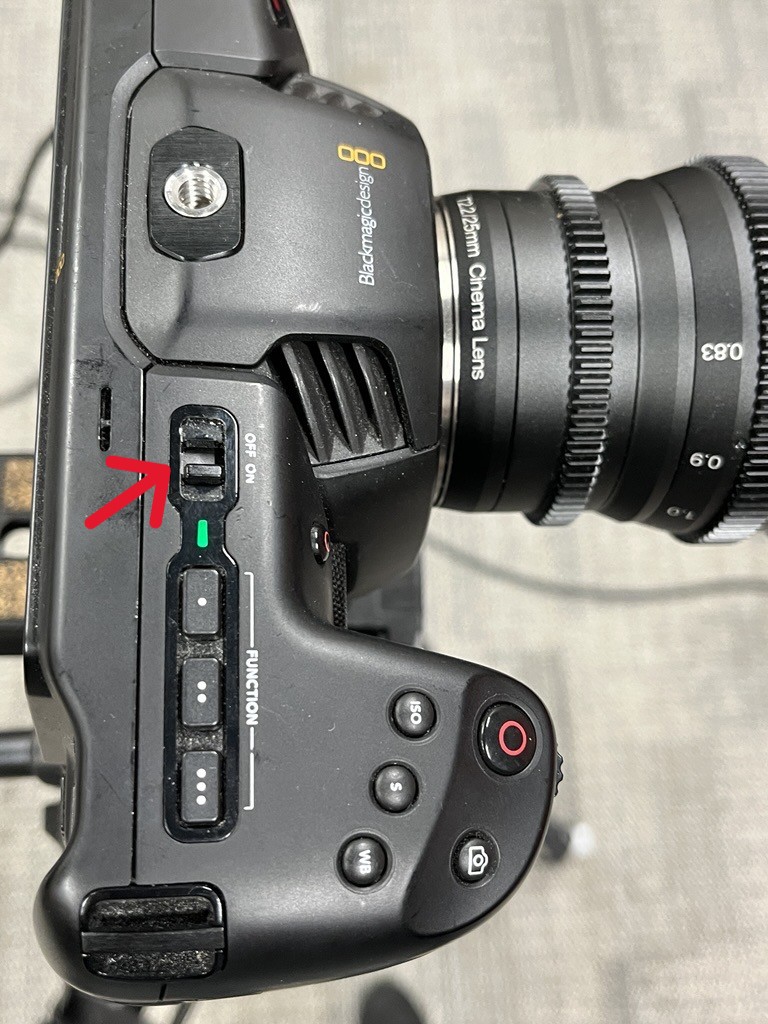 |
| 2. Plug in the large light and power on both lights: use the knob on the back of the right-side standing light and a button on the top of the left-side standing light. |
|
| 3. Plug in the ATEM switcher. | 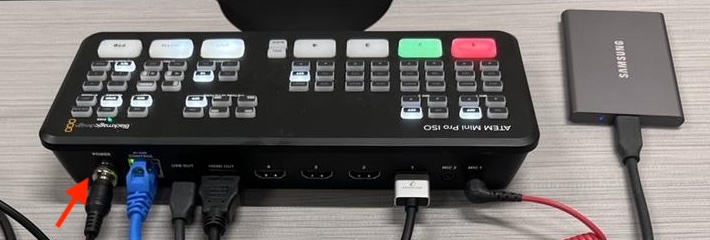 |
| 4. Make sure the wireless mic receiver is charged, powered on and plugged into Mic 1 on the switcher. | 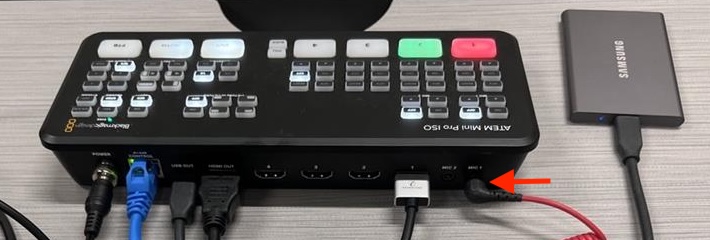 |
| 5. Use Case #2 and #3 only: Plug in the HDMI cable from the presenter laptop into Input 2 on the switcher (if presenter indicated they will record with slides). Power on and make sure laptop is charged. Log into laptop- this laptop will be used for presenter's slides. For Use Case #1, do not plug in the HDMI cable for the laptop. | 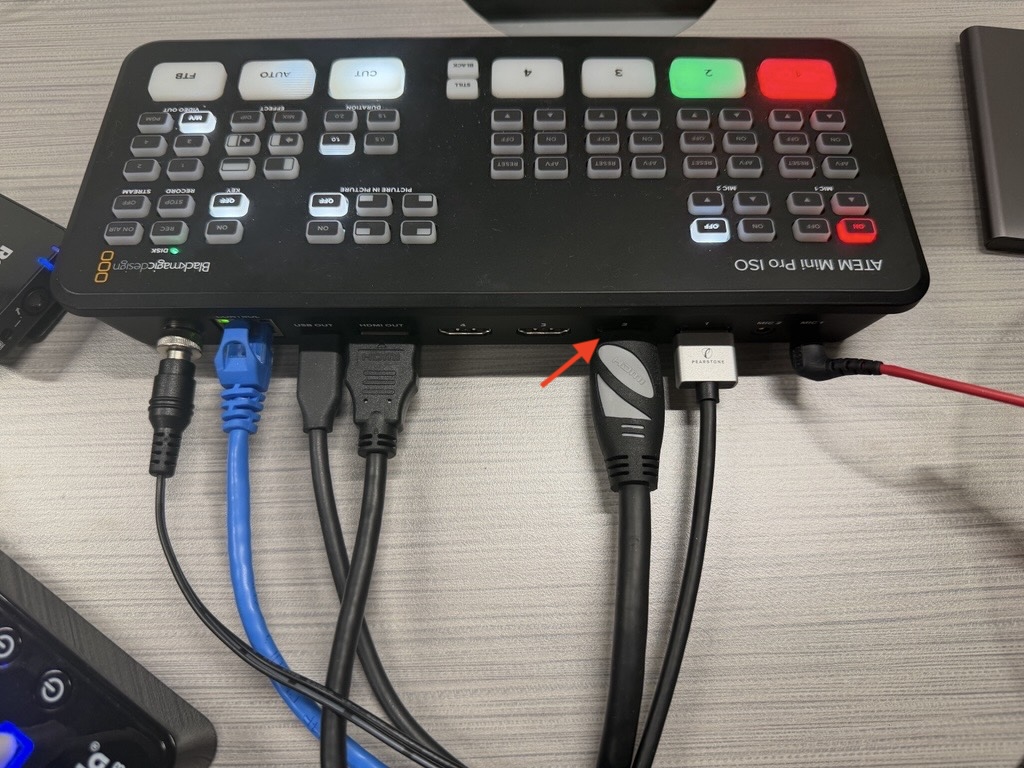 |
|
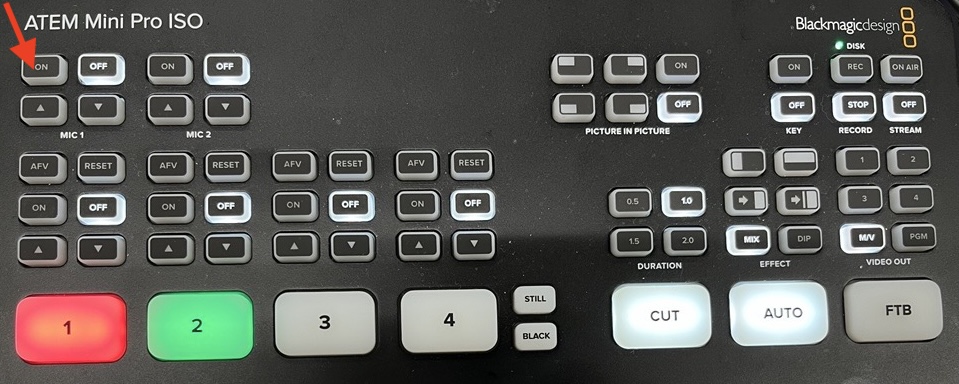
6. On the switcher, press the On button for Mic 1.
|
 |
|
7. Make sure that the HDMI Input 1 and 2 (if using laptop) are lit up red and green on the switcher (as shown in the image in Step 6 above), and you should also see the feed from the camera and the laptop on the right studio monitor at the desk to confirm the feed is coming in properly. The camera feed will have a red square around it and the laptop feed will have a green square around it. |
|
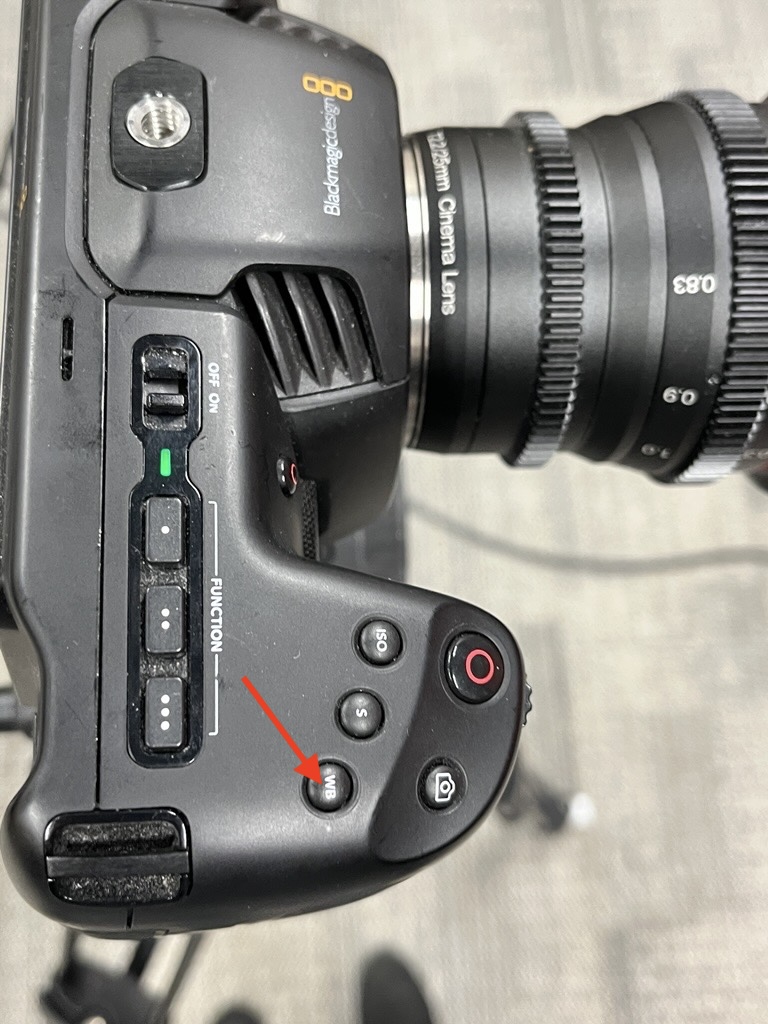
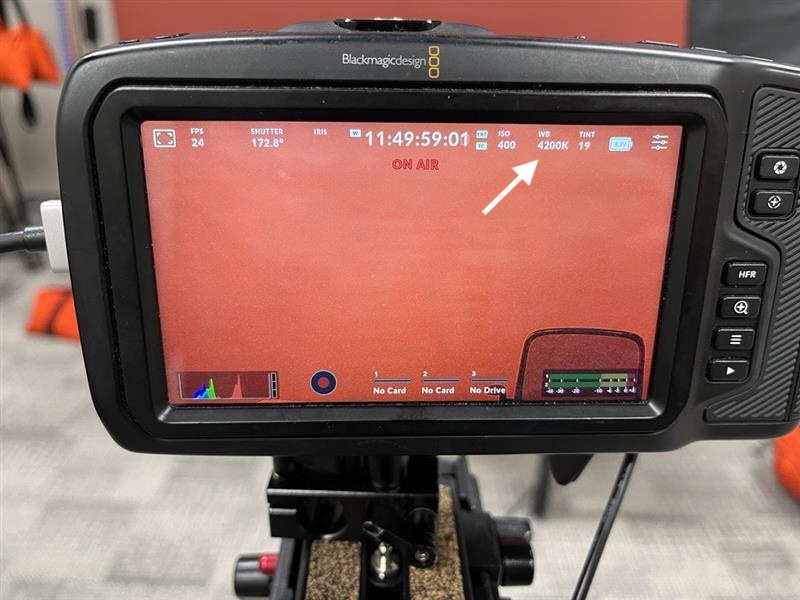
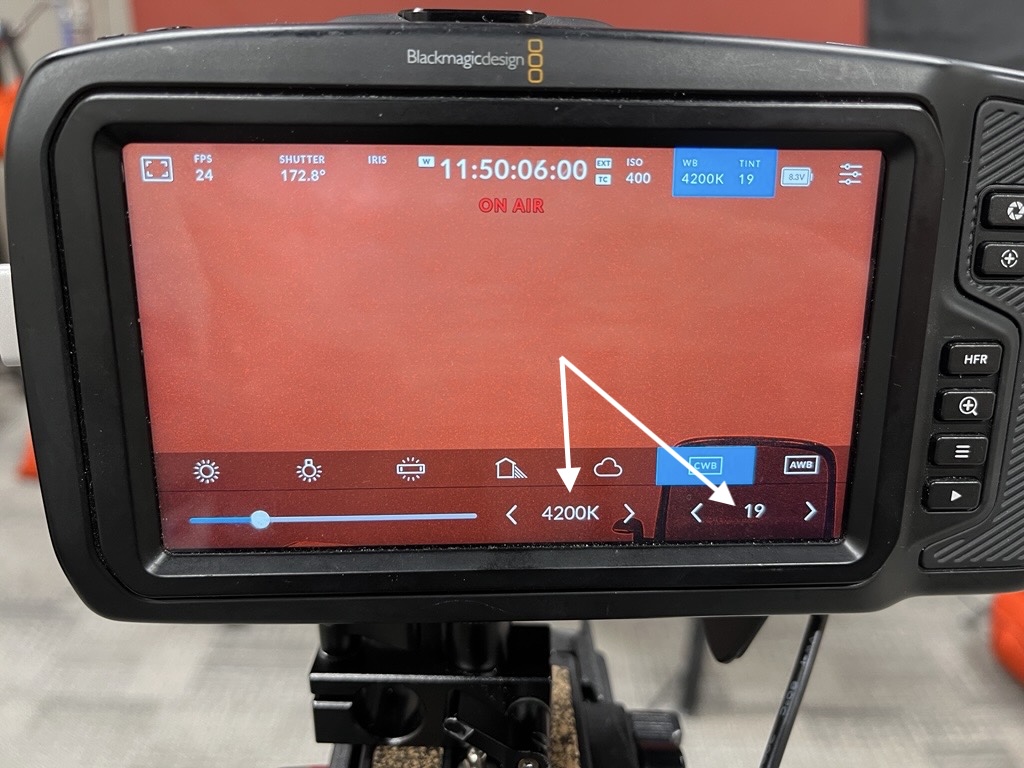
| 8. Check White Balance on the camera: press the WB button on the camera. Set the WB to 4200k and Tint to 19 by using the arrows on the camera screen. |
|
| 9. If presenter requested to use the teleprompter, make sure the iPad is charged and load their script into the teleprompter app following the instructions on the Teleprompter page. | |
| 10. Log into the CPH studio Mac (check with Lorraine, Ellen or Aidan about login info). | |
| 11. Turn Off ceiling lights. | |
| 12. Run a quick test recording with someone sitting at the desk. |
3. Set Up Steps To Do After Presenter Arrives
|
1. Bring the presenter into the studio along the right side of the room. |
|
|
2. Silence all alerts on the studio Mac and presenter laptop and remind presenter to silence cell phone. |
|
| 3. Power On one of the wireless lapel transmitter mics and have the presenter clip the mic facing up toward their face, as high on their shirt as possible. It's best if the mic can be tucked away and not seen on the presenter, if possible, but not a deal breaker. | |
| 4. Do a mic check with the presenter. You should see the Mic 1 feed indicator going up and down on the right studio monitor ATEM control display when speaking. | 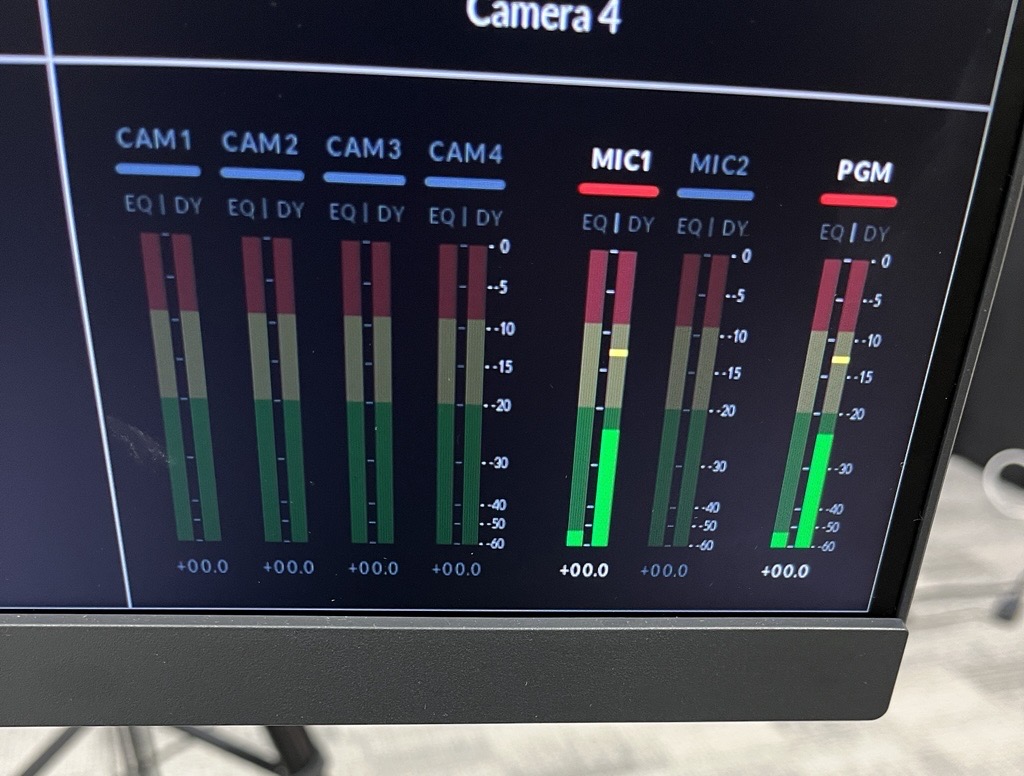 |
| 5. If the Mic is too loud (i.e., going into the red zone), lower the level using the ATEM Software Control. On the Mac, search for "ATEM Software Control" and open it. Click on Audio along the bottom. Use the knob to lower the Mic level. Then have them speak again and check that the sound does not go into the red zone. | 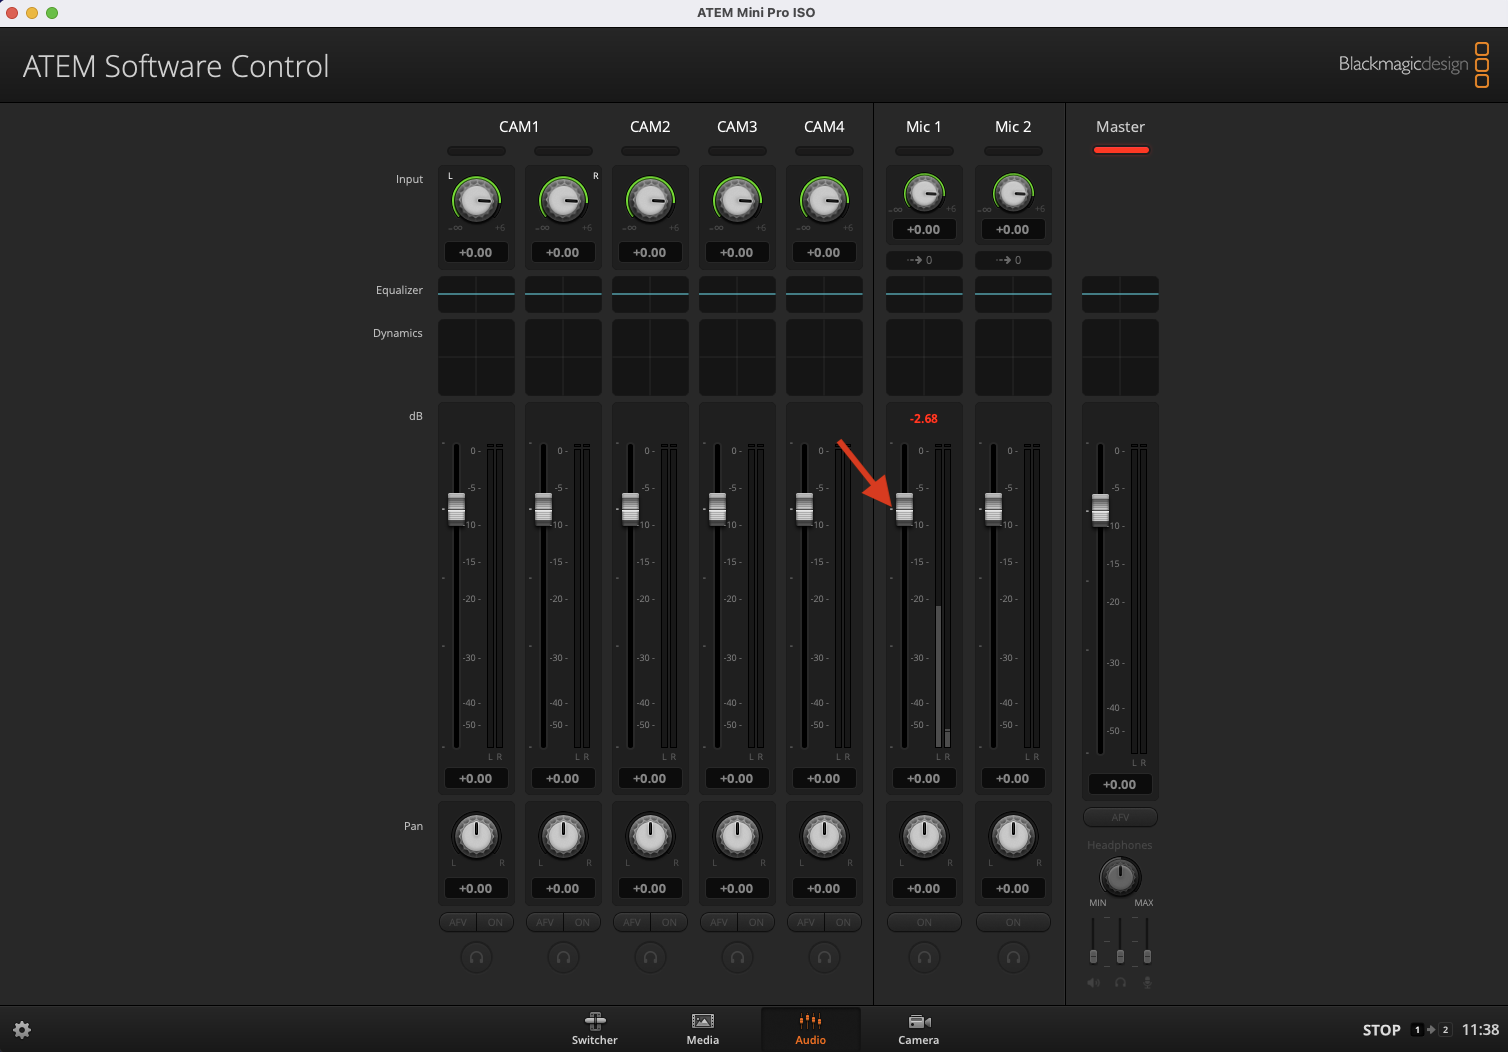 |
|
6. Use Case #2 and #3 only: Have the presenter log into their email and/or OneDrive and download their slides to the laptop local hard drive. |
|
|
7. Use Case #2 and #3 only: Have the presenter open PowerPoint and bring up their slides.
Since PowerPoint will detect a second monitor, have the presenter go into Presenter Mode. The presenter can read from their PowerPoint presenter notes if they choose, as those notes will not be recorded. |
|
|
8. Use Case #2 and #3 only: Double check that just the slides (not the notes) are being received by the switcher by looking at the right studio monitor. |
|
|
9. If you turned the ceiling lights back on at any point, make sure ceiling lights are off. |
|
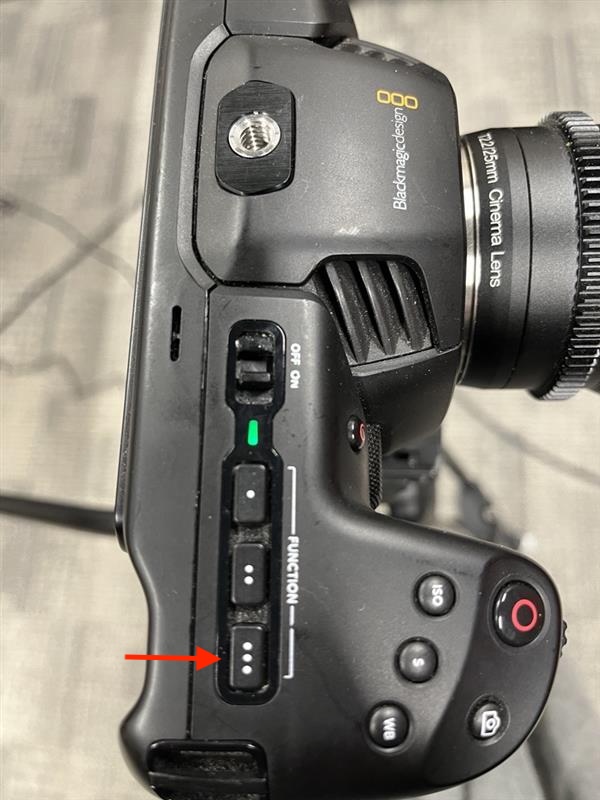
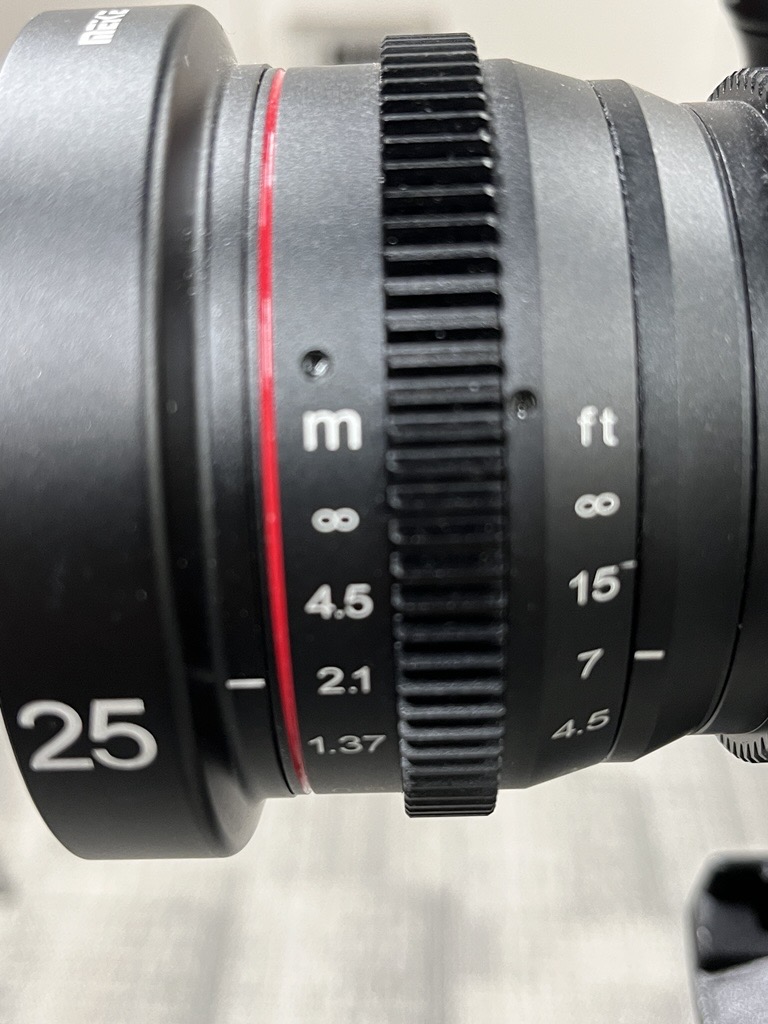
| 10. Check the camera focus: have the presenter look directly into the camera. Press the three dots button on top of the camera. It should highlight the person in red lines on the camera screen. NOTE: the teleprompter device makes it difficult to adjust the focus. Please leave as is if the presenter is very highlighted in red when checking the focus on the camera. The focus should not need to be adjusted if the camera and the table/chair have not been moved from where we have them set. If possible, try to reposition the table and the presenter chair back to the originally set position. We have tape on the floor to mark where the table legs should go. Adjust the chair to the table. This should take care of it. If you still need to make focus adjustments, use the first dial in the camera lens (closest dial to presenter) and turn slowly so that the red lines around the person become more red. Generally I've left it set to 2.1 and it has looked good. This dial can be turned while in the teleprompter but it is in very tightly, so have Ellen or Lorraine show you how to do this while holding on to the camera/teleprompter mount so nothing else turns on the tripod while fine tuning that adjustment. (We don't advise doing this during a session). |
|
|
11. Put a “Recording in Progress” sign on the door. Alert other staff in the office that a recording will be taking place so that conversations should not take place near the studio. |
After completing the sets of instructions above, see the Recording Process page for how to start and stop the recording.