Pre-Recording Checklist
Before Presenter Arrives:
If presenter requested to use the teleprompter, please follow the steps outlined on the Teleprompter page to learn how to get it set up. It is preferred that the presenter send their script in advance due to the time it can take to get the script properly formatted in the application.
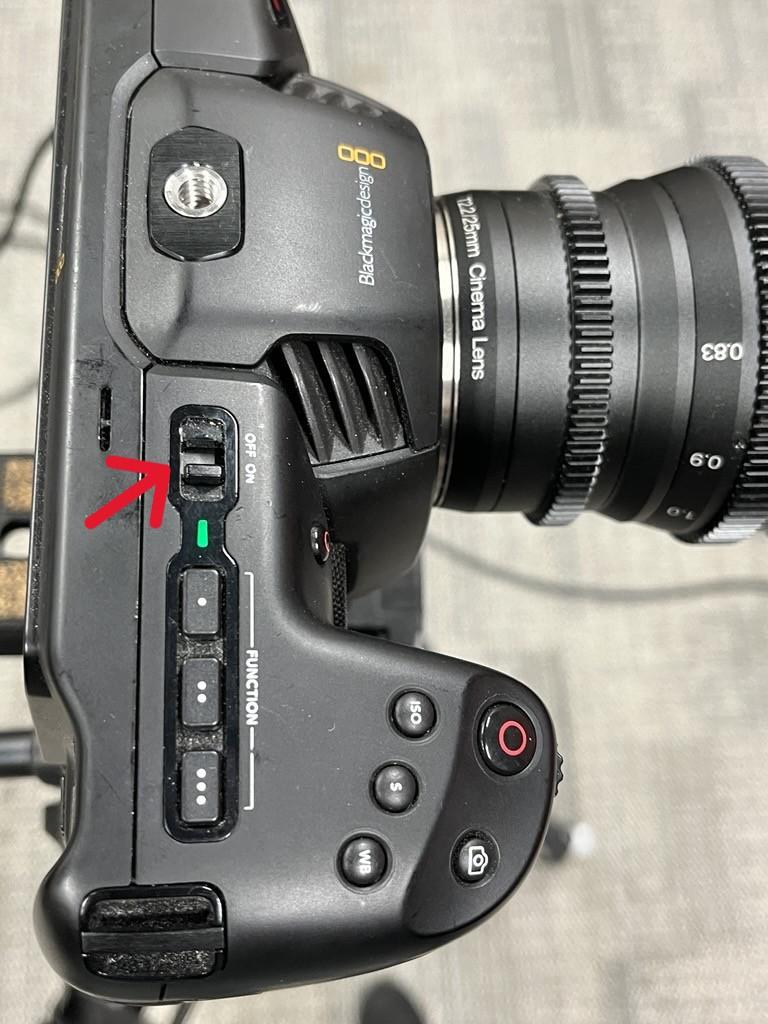
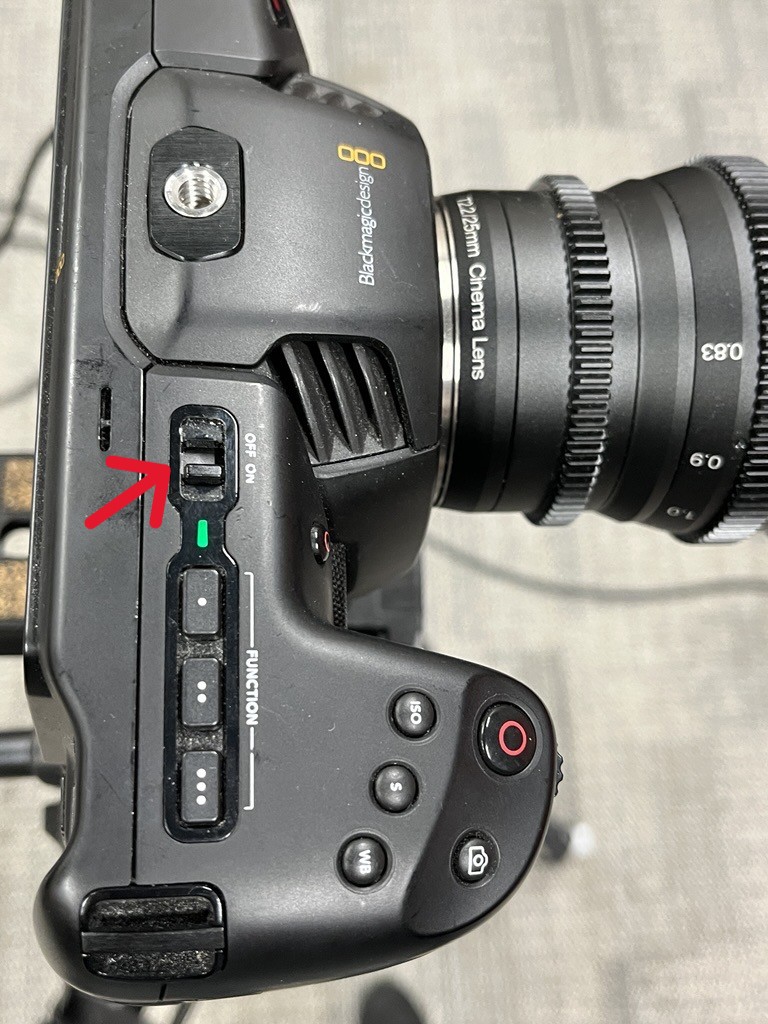
- Power on studio camera (slide the knob on the top of the camera).
- Plug in the large light and power on both lights: use the knob on the back of the right-side standing light and a button on the top of the left-side standing light.
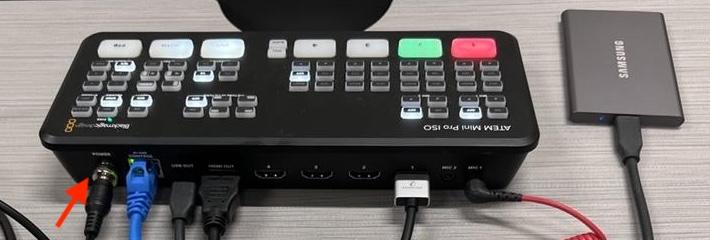
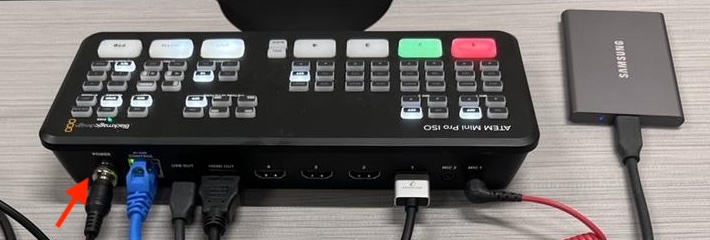
- Plug in the ATEM switcher.
- Plug in the laptop (if instructor indicated they will record with slides)
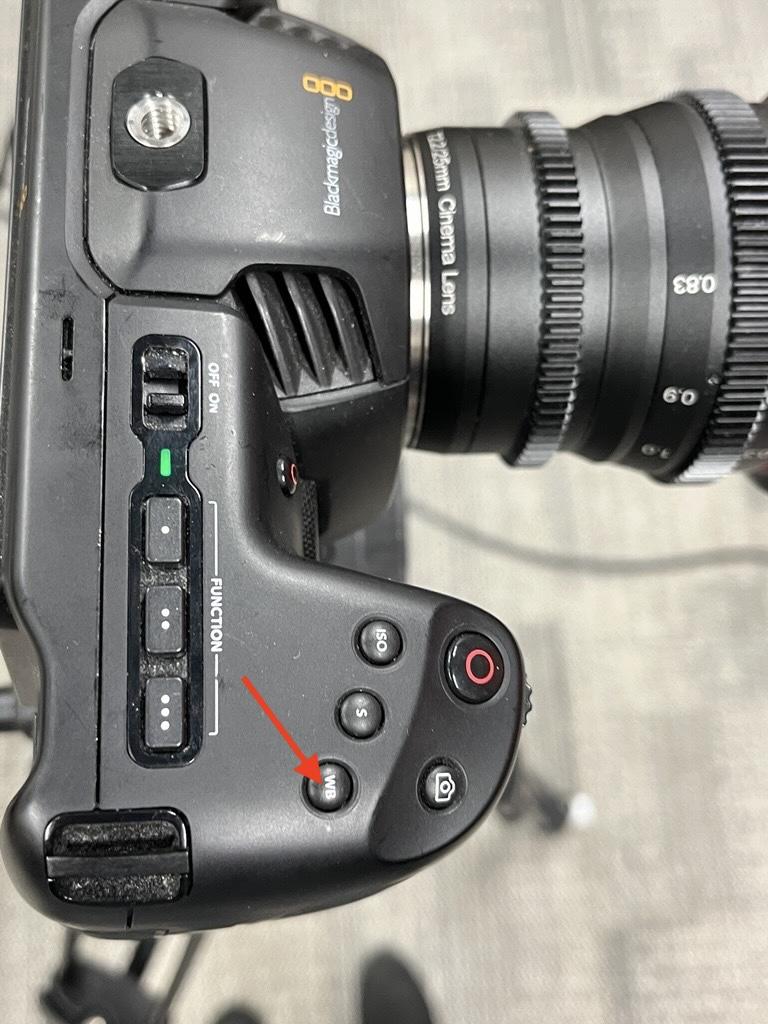
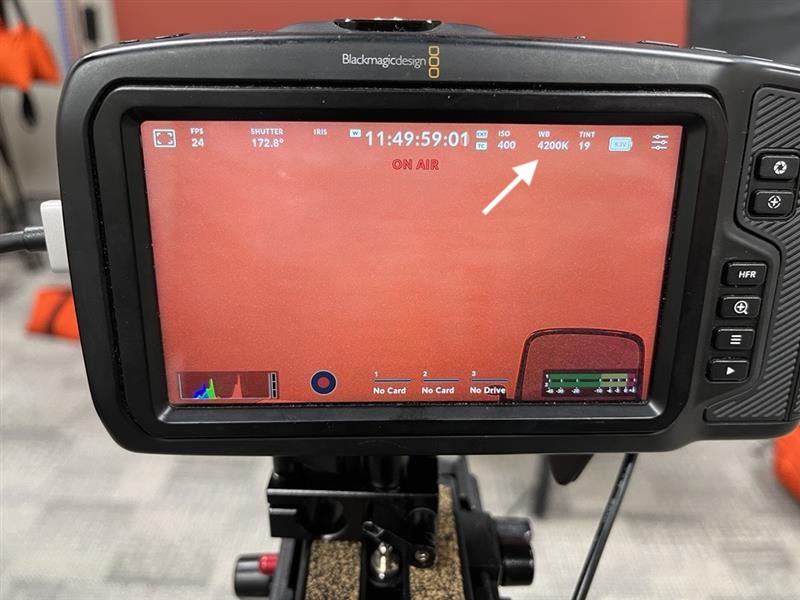
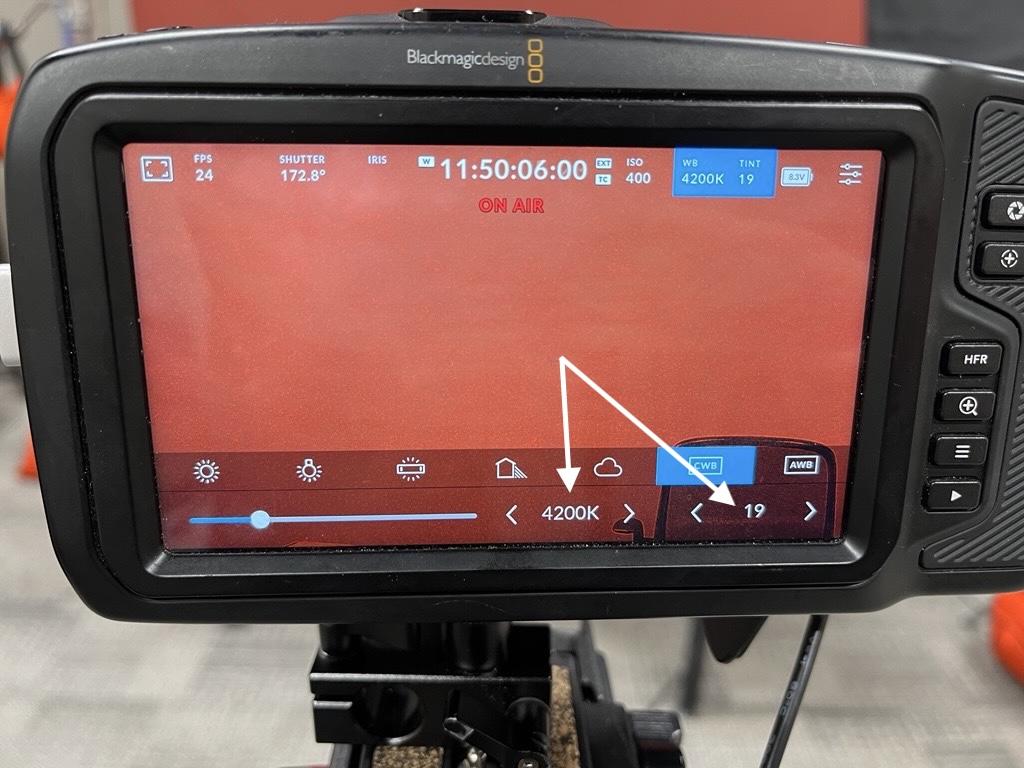
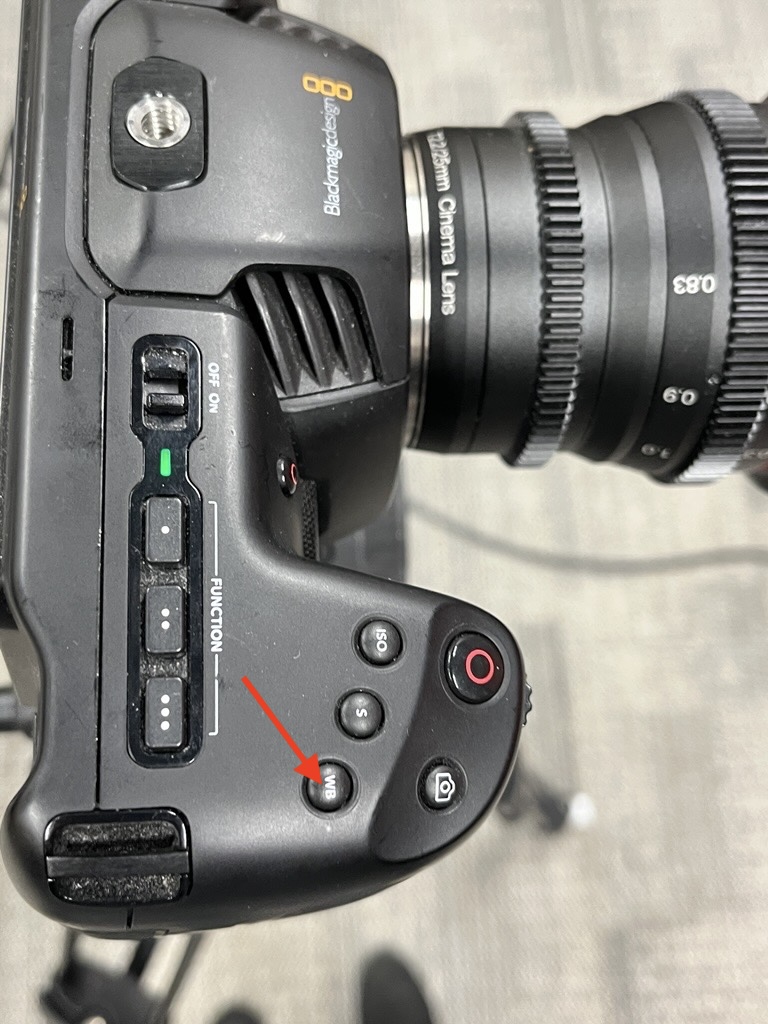
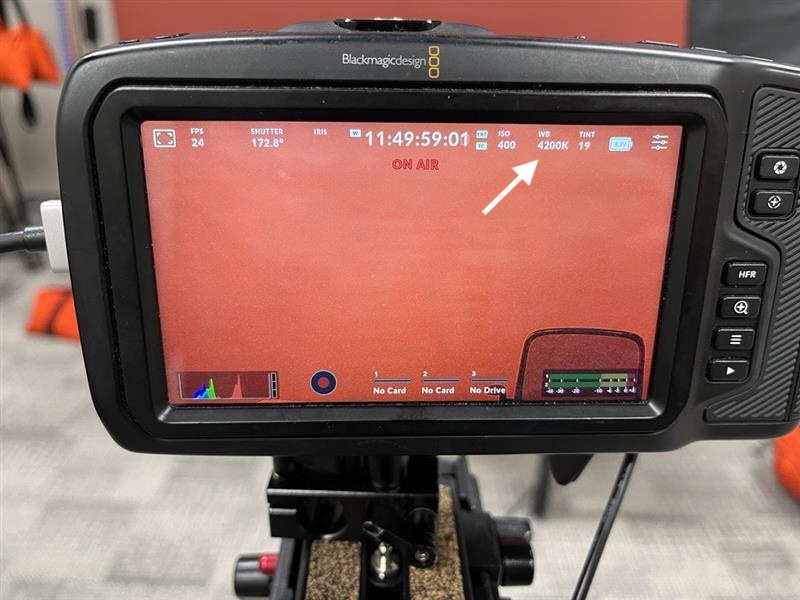
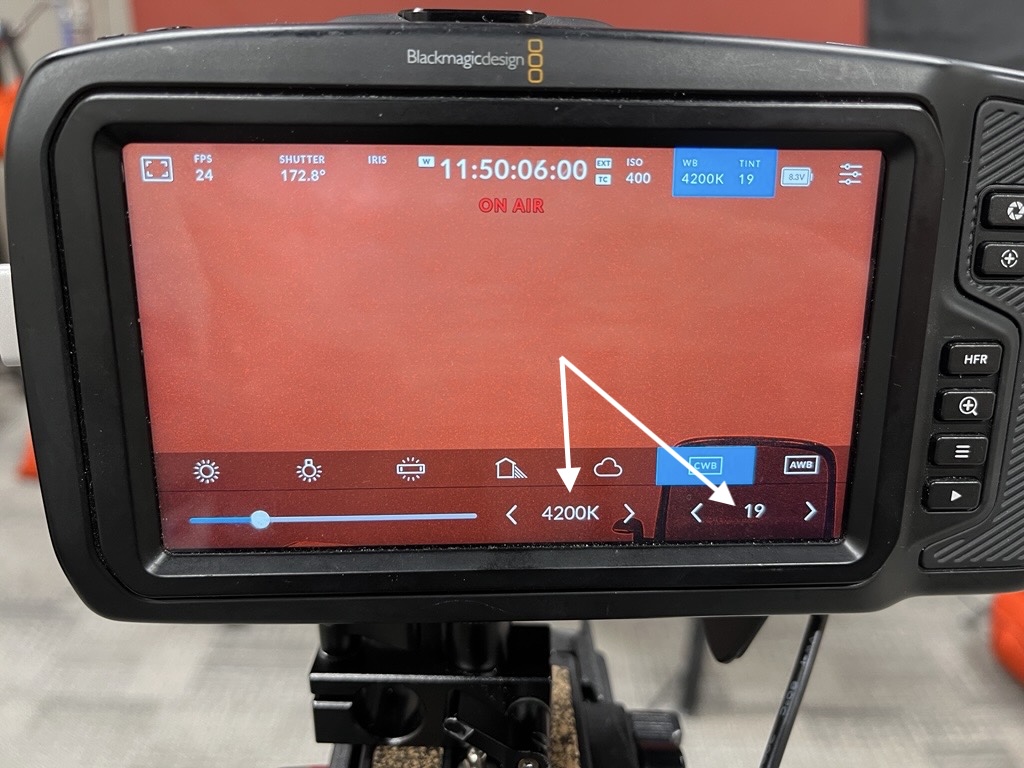
- Check White Balance on the camera: press the WB button on the camera. Set the WB to 4200k and Tint to 19 by using the arrows on the camera screen.
- Log
toto thePowerPointPowerPoint slides. - Power
onon wireless receiver microphone. - Lo
gg into the CPH - Run a quick test recording with someone sitting at the desk.
After Presenter Arrives:
- Bring the
presenterpresenter into thestudiostudio along the right side of the room. - Plug in
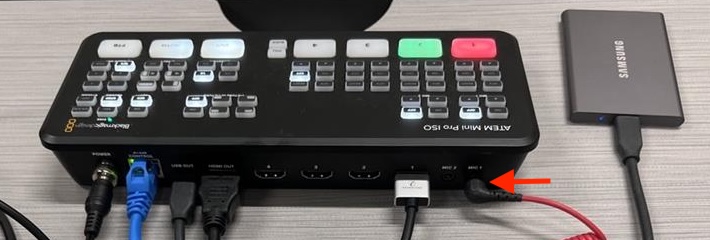
thethe HDMI cableintointo Inputnput 2 - The camera should already have the HDMI cable running
intointo Input 1thethe switcher. - Make sure the wireless mic receiver is charged, powered on
intointo Mic 1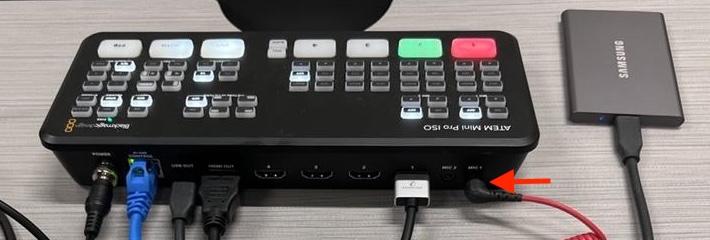
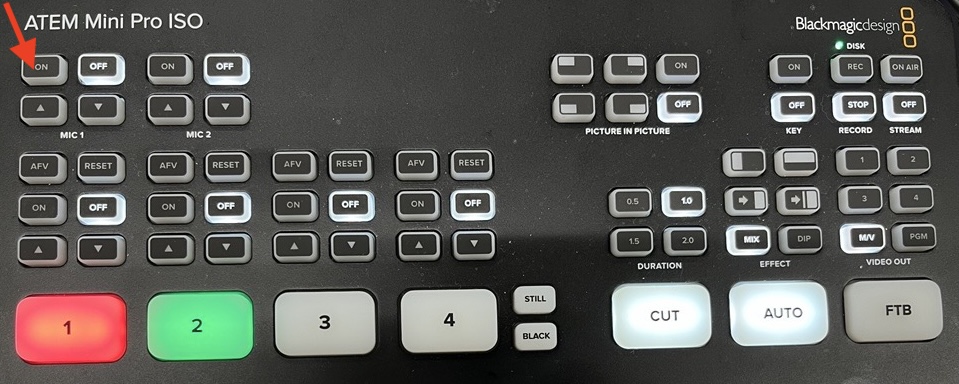
- Press the On
forfor Mic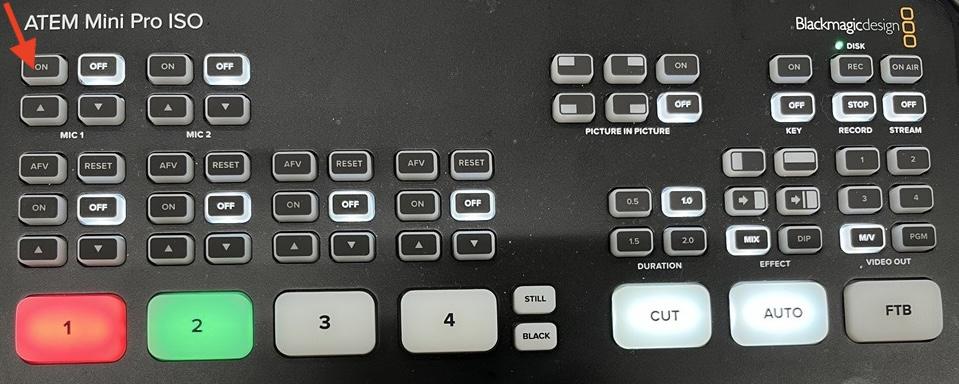
- Make sure
thatthatthetheHDMIHDMI Inputandand22areare lit upthethe switcher (as shown above),shouldshould also seethethe feed from the camera andthethe laptop onthetherightrightstudiostudio monitordeskdesk toconfirmconfirm the feed is coming in properly. The camera feed will have a red square around it and the laptop feed will have a green square around it. - Power On
wirelesswirelesslapellapel transmittermicmic facing up toward their face,asas highaa deal - Do a mic check
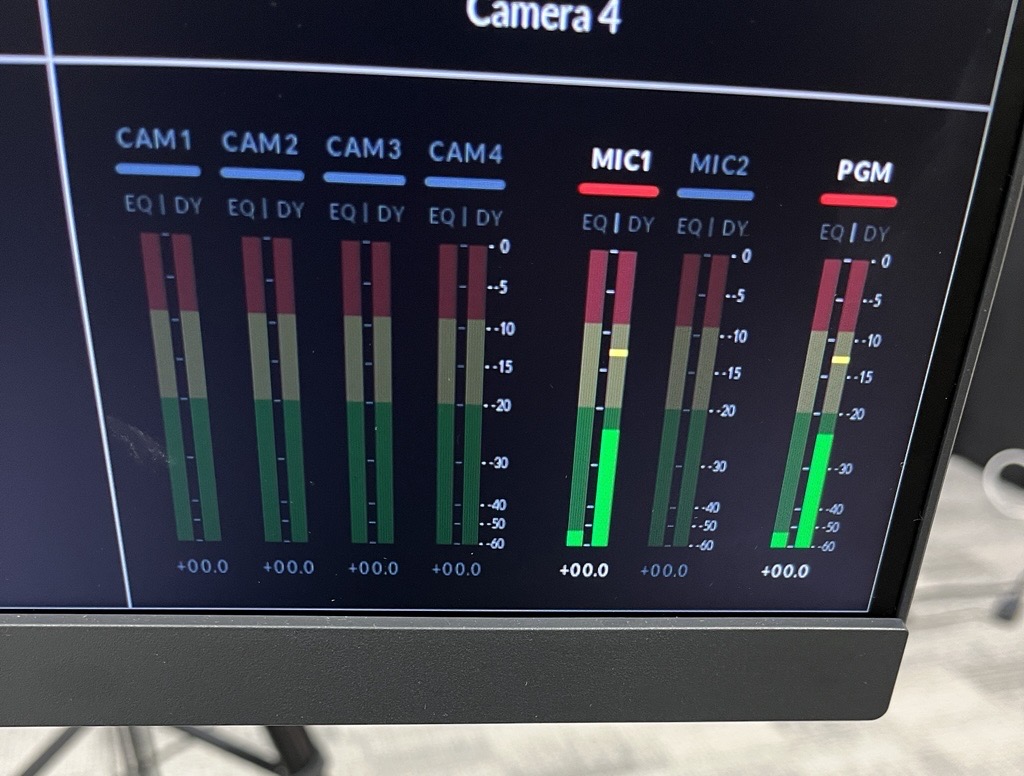
seesee the Mic 1indicatorindicator going up anddowndown on therightrightstudiostudio monitorcontrolcontrol display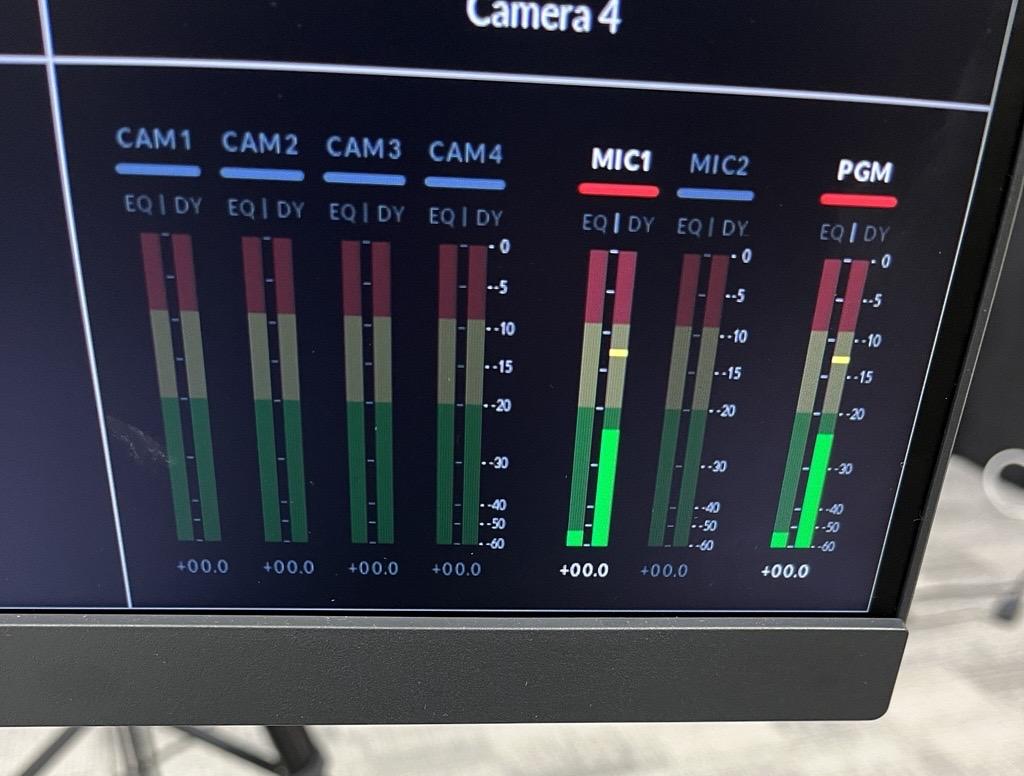
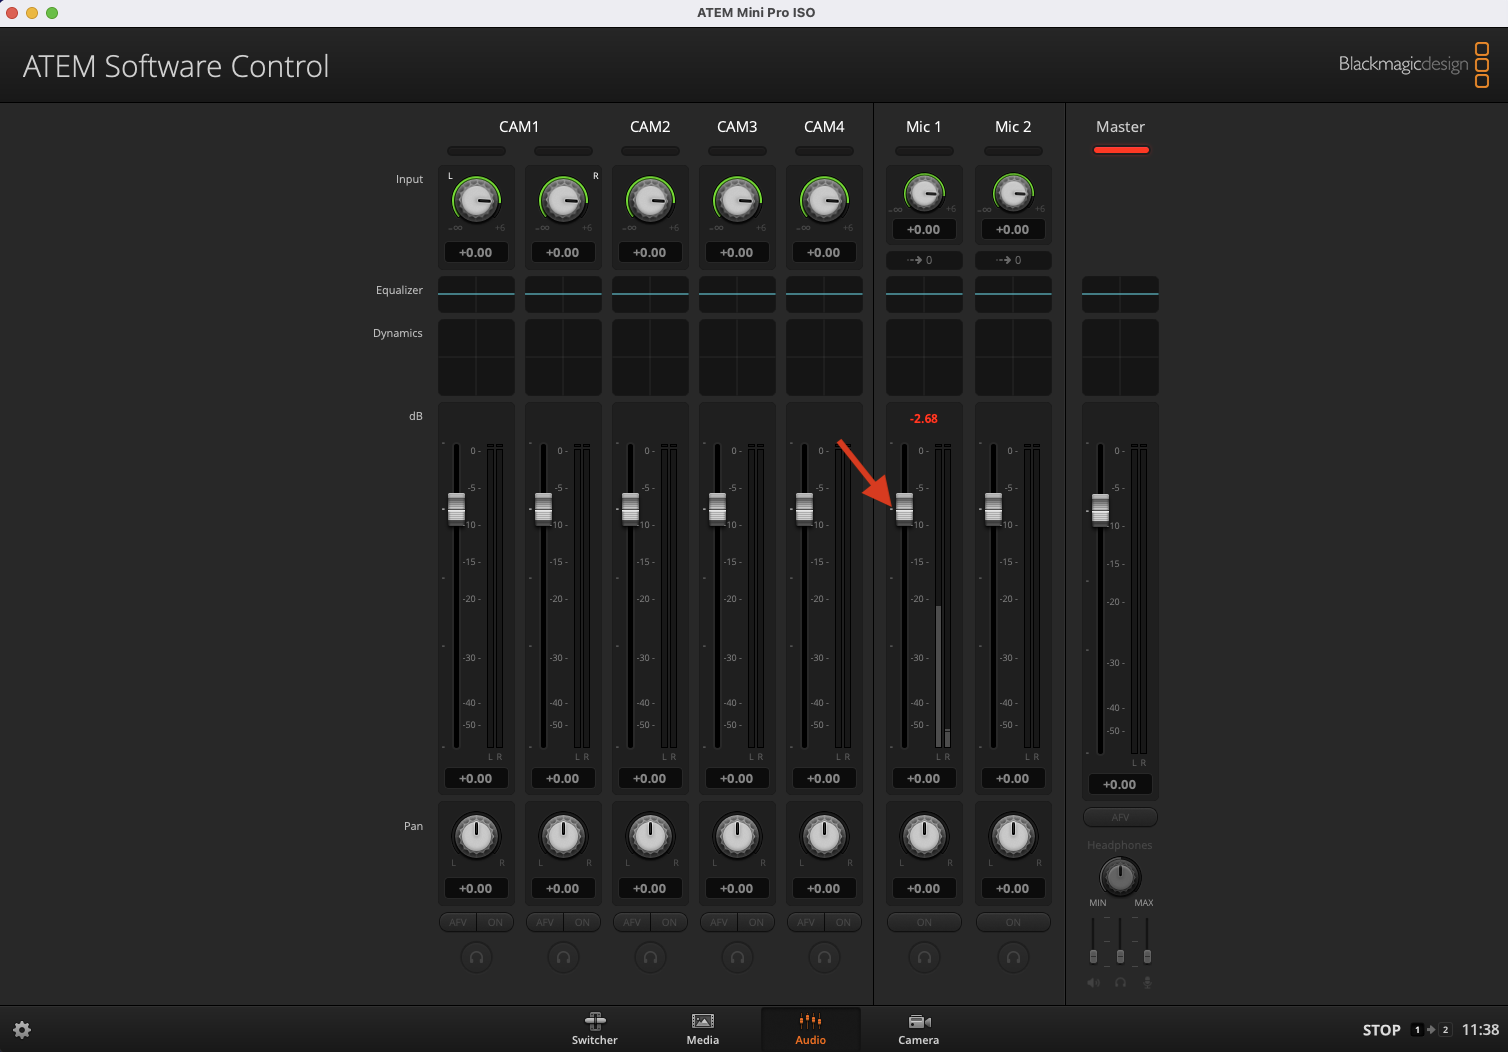
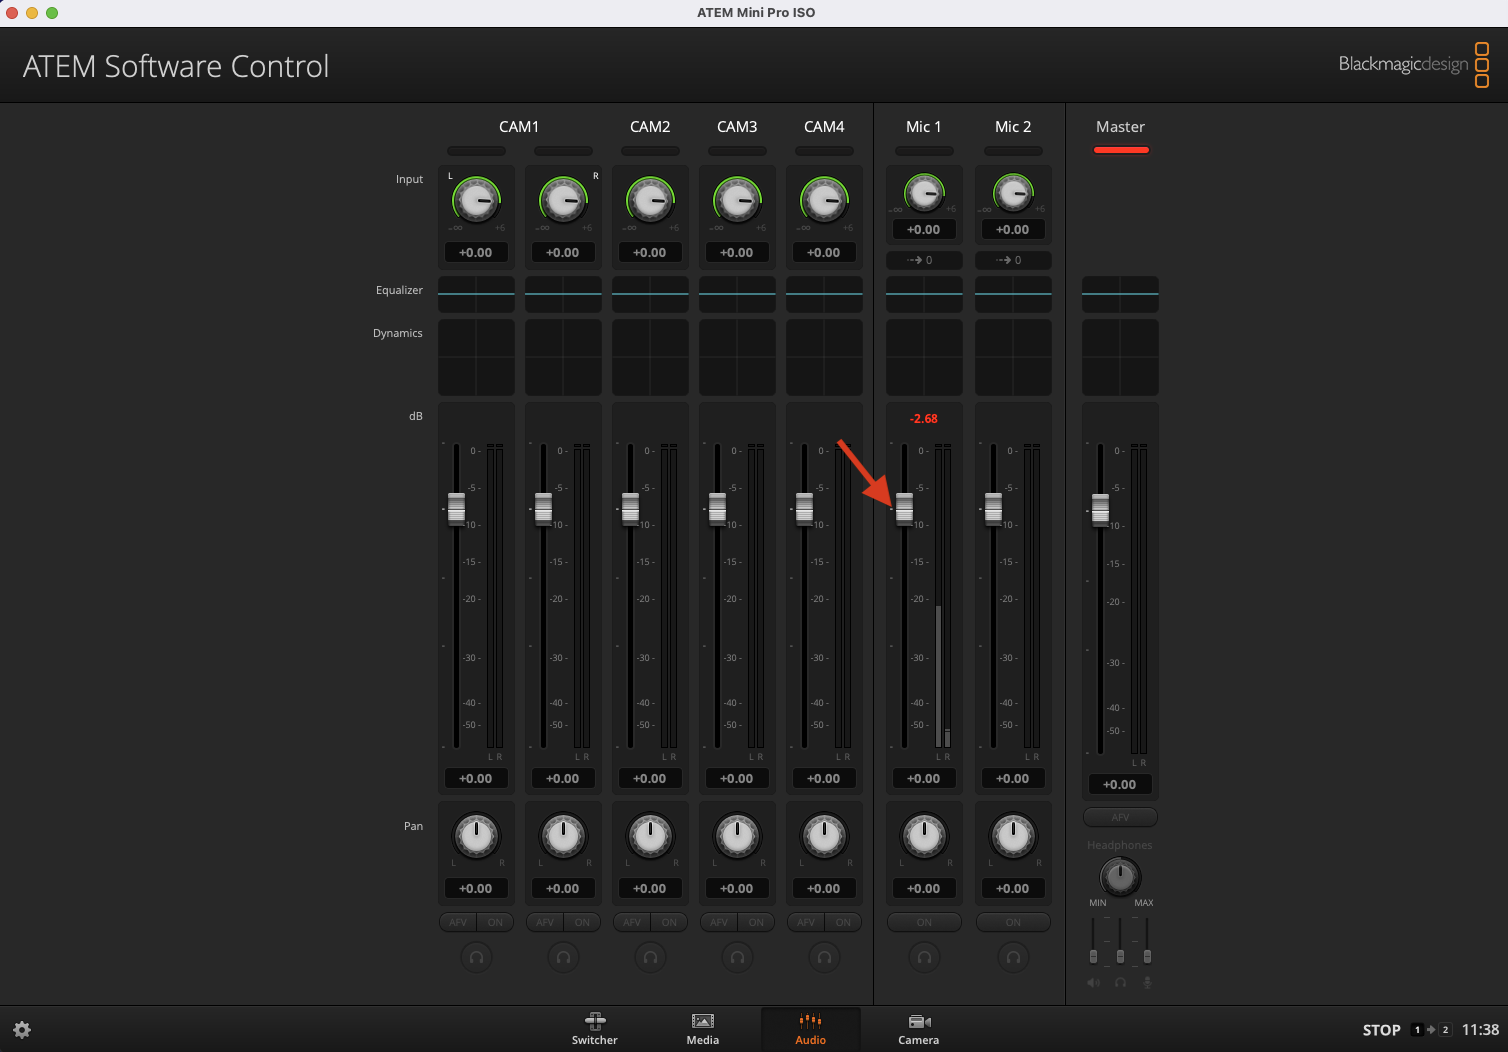
- If the Mic is too loud (i.e., going into the red zone), lower the level using the ATEM Software Control. On the Mac, search for "ATEM Software Control" and open it. Click on Audio along the bottom. Use the knob to lower the Mic level. Then have them speak again and check that the sound does not go into the red zone.
- Have the presenter
loglog into theiremailemail and/oror OneDrivethethe laptop local hard drive. - Have the presenter
- Since PowerPoint will detect
theirtheir PowerPoint presenter notesoseose notess will not be recorded. - Double check that just the slides
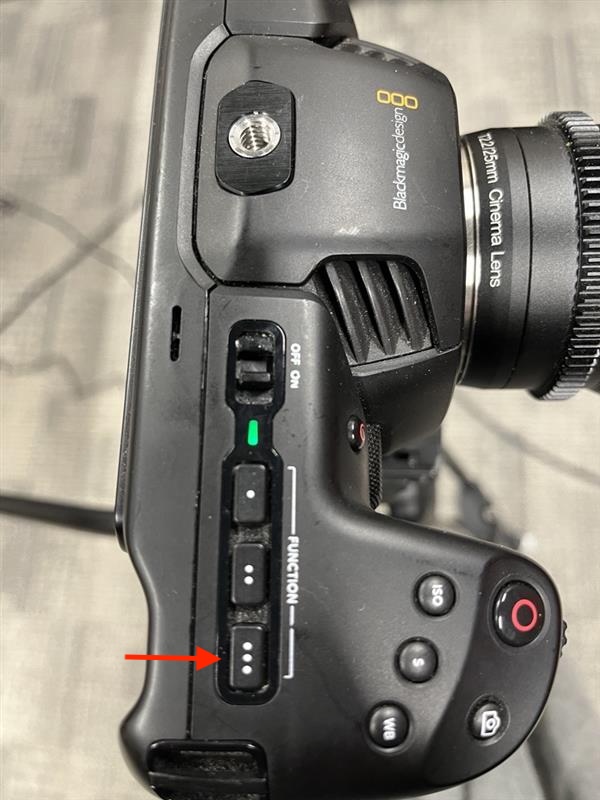
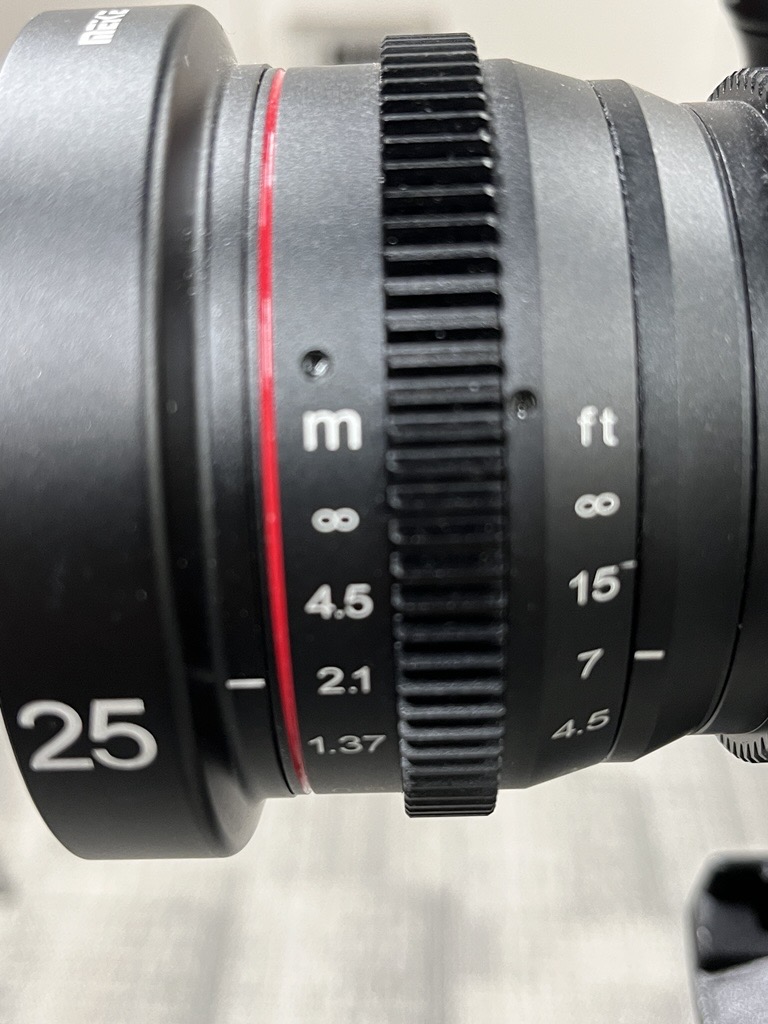
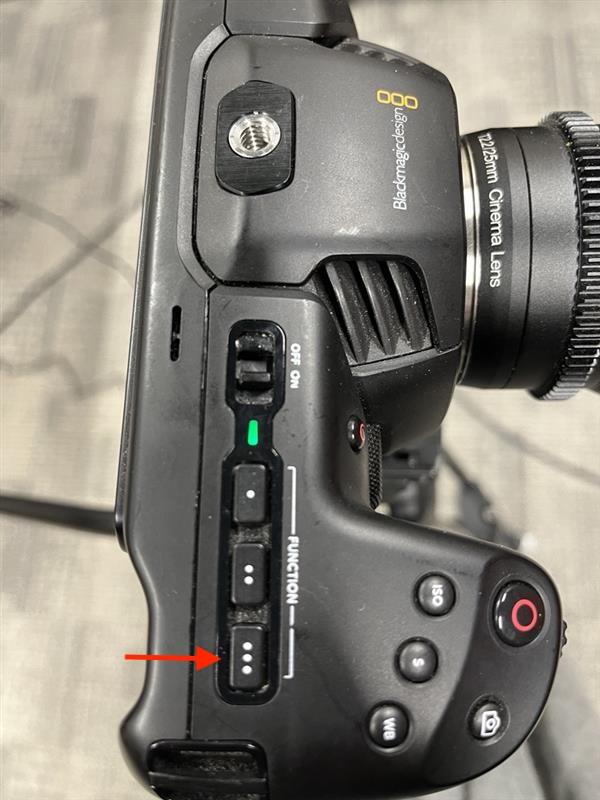
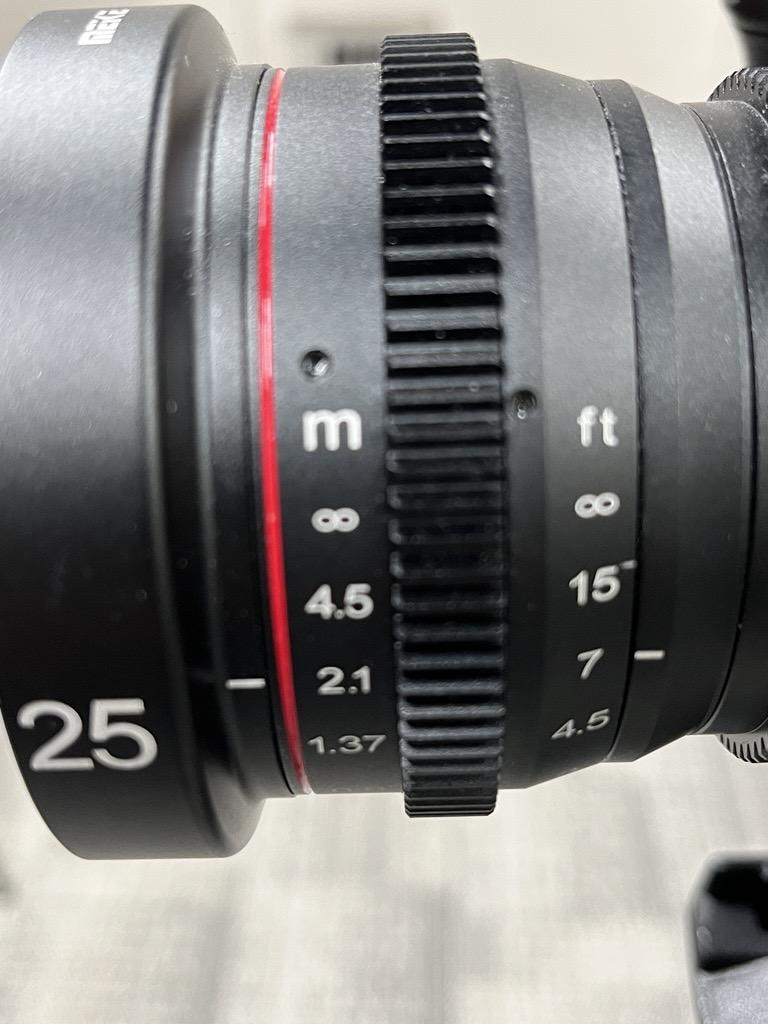
- Check the camera focus: have the presenter look directly into the camera. Press the three dots button on top of the camera. It should highlight the person in red lines on the camera screen. If you need to make focus adjustments, use the first dial in the camera lens (closest dial to presenter) and turn slowly so that the red lines around the person become more red. Generally I've left it set to 2.1 and it has looked good.
- Silence
studiostudioMacMac and presenter laptopremindremind presenter - Put a “Recording in Progress” sign on
thethe doorsuresurethethe door to the studio is closed. Alert other staff in the office that a recording is taking place so that conversations do not take place near the studio.