
Personal OneDrive for Business
All Temple users already have a personal OneDrive for Business account. The main ways to access your OneDrive files are through the Web, through the OneDrive app on your computer, or through the OneDrive app on your mobile device.
It is important to know what you are permitted to store within your OneDrive for Business account. For this, please refer to the Temple University Storage Comparison Chart.
Getting started with OneDrive for Business
Temple University Information Technology Services has put together a Getting Started page for our OneDrive system. This web page will cover topics such as how to download the OneDrive application, upload files, recover deleted files, etc.
For some quick help on common questions we have received in CPH, please see the topics listed below.
Access Files from the Web
| 1. You will need to log into Microsoft Portal from a web browser (https://portal.office.com) and click on the OneDrive icon. |  |
| 2. Look for My Files on the left hand side. These are your OneDrive for Business files. | 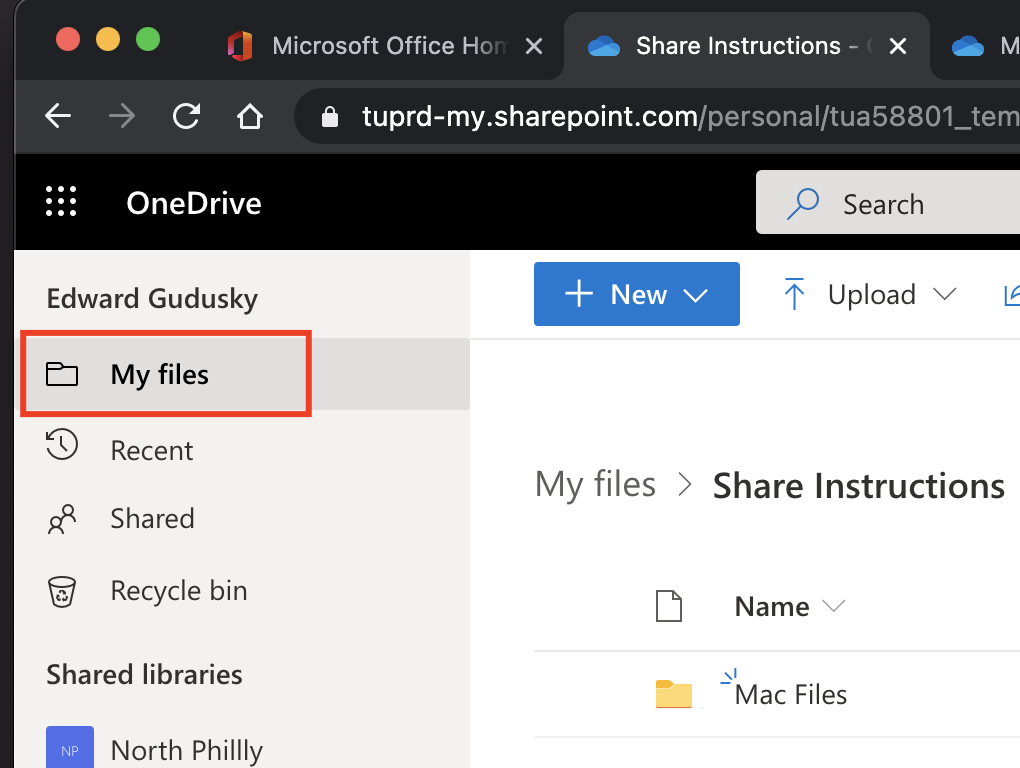 |
| 3. Clicking on Shared will take you to the files shared by you and also shared with you. | 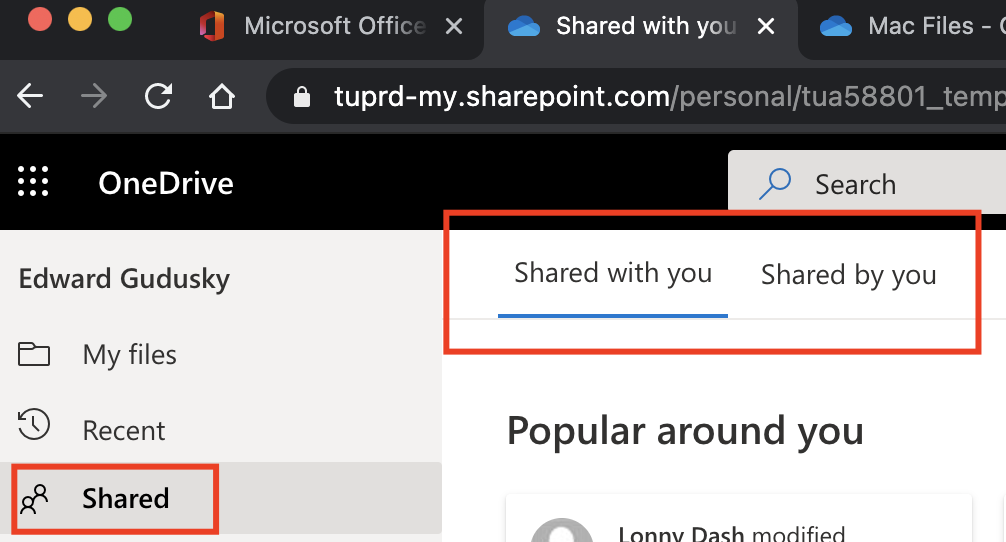 |
Sharing a Folder (Using Direct Access) from the OneDrive Web Portal
| 1. You will need to log into Microsoft Portal from a web browser (https://portal.office.com) and click on the OneDrive icon. | 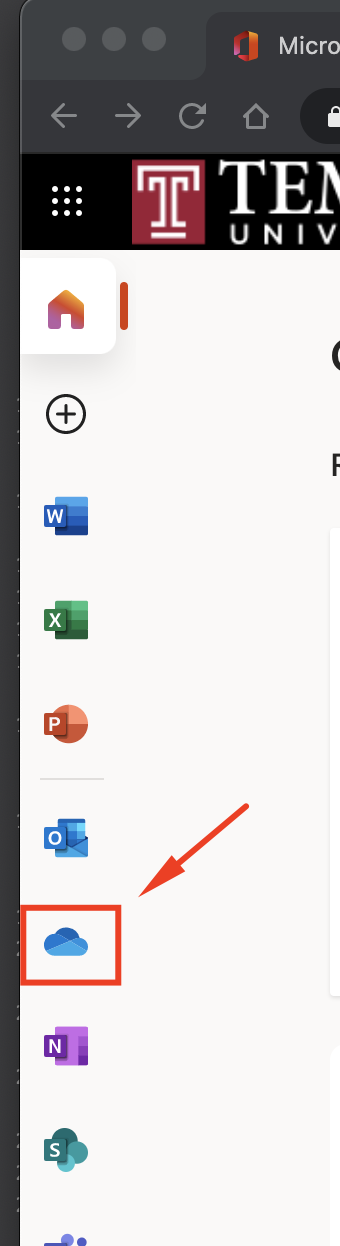 |
| 2. Find the folder you wish to share and click on the three dots to the right of the folder name. | 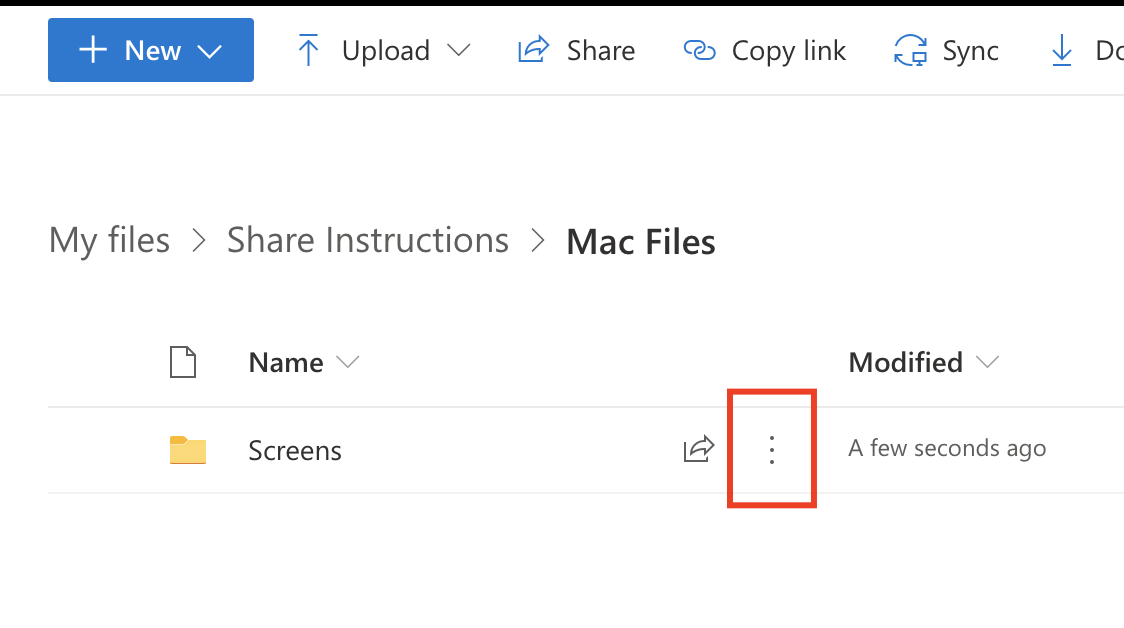 |
| 3. Click the Manage Access menu item. | 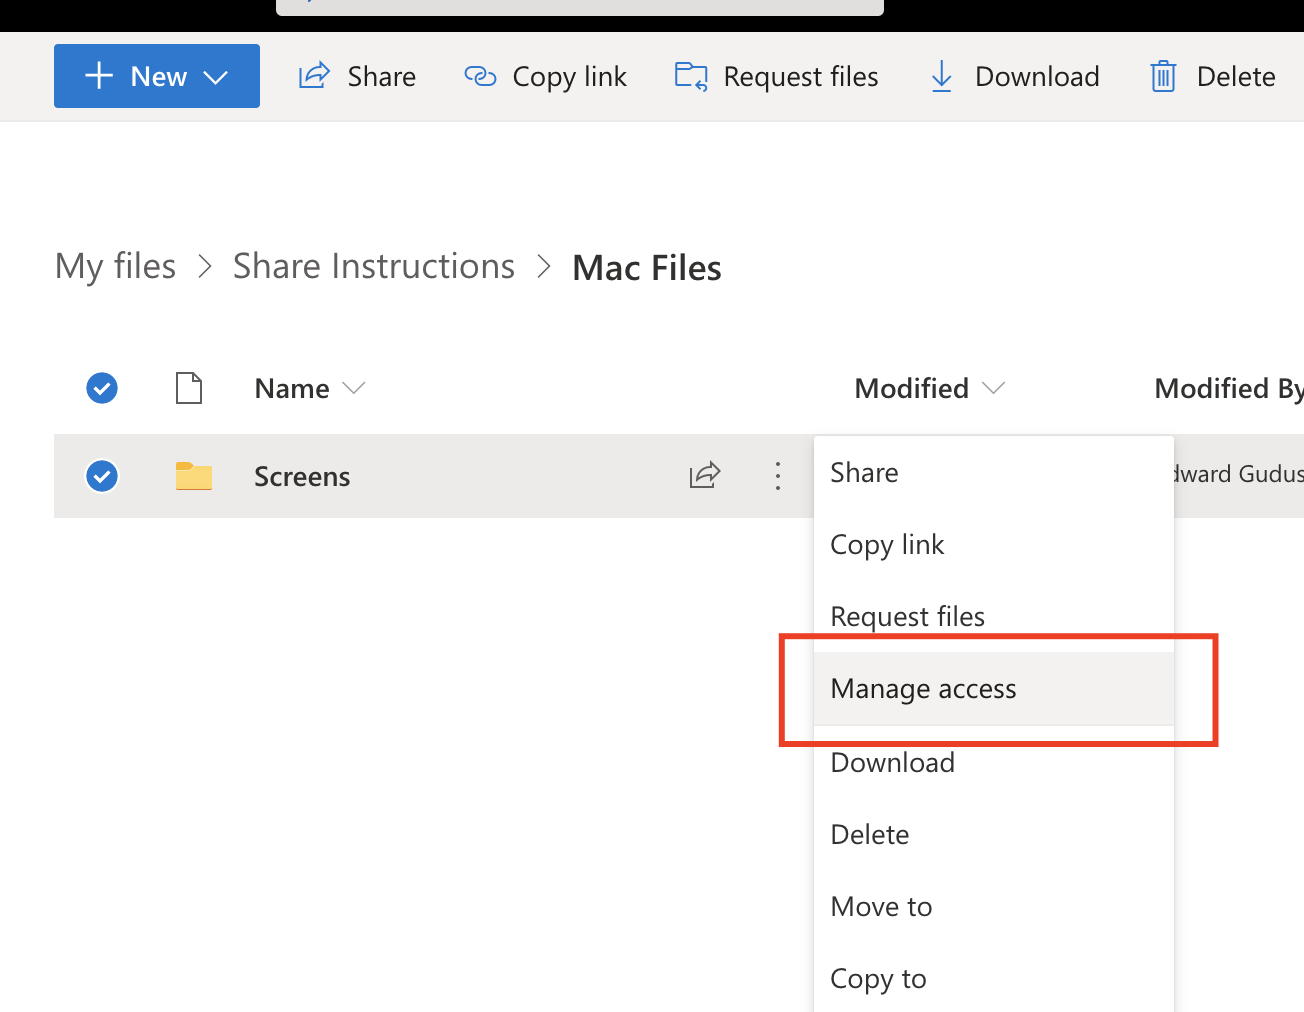 |
| 4. Click on the + next to Direct Access. | 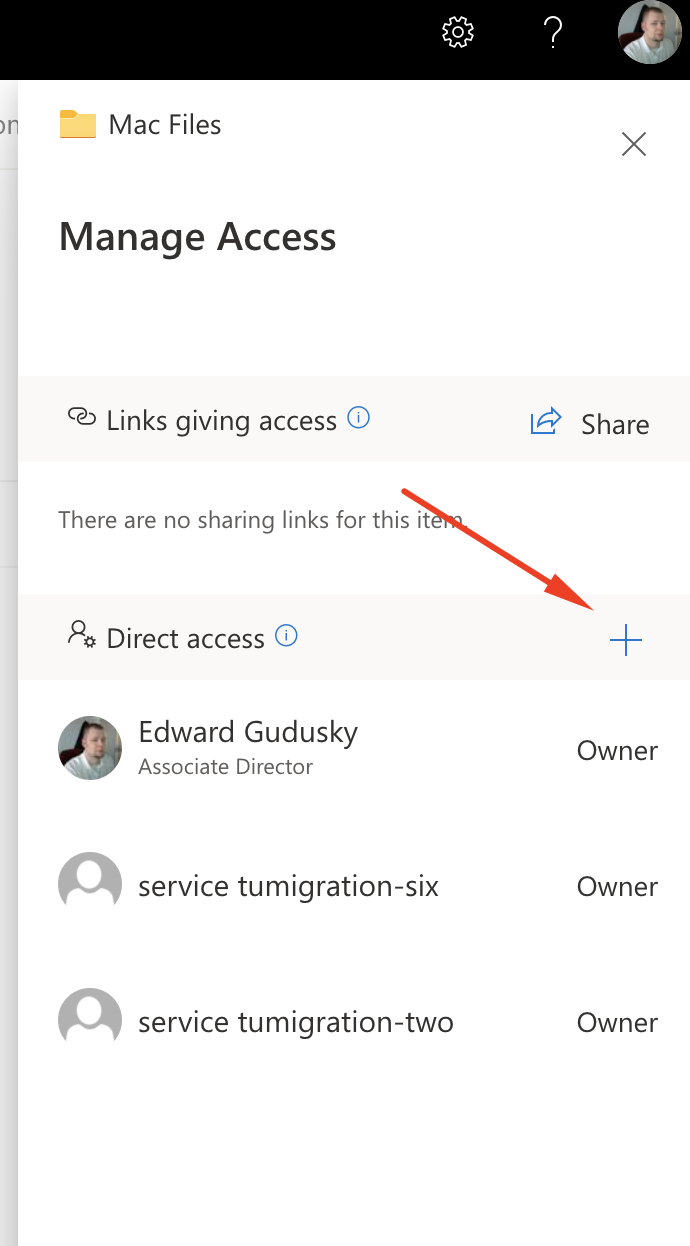 |
| 5. Start typing a persons name and click on their name when it autocompletes. | 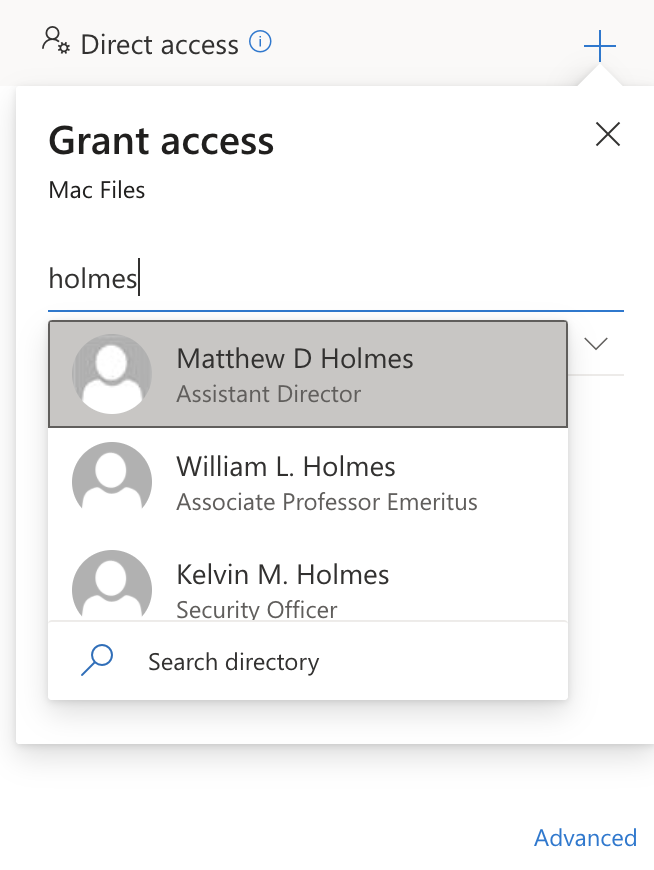 |
| 6. Select either Edit or View access. | 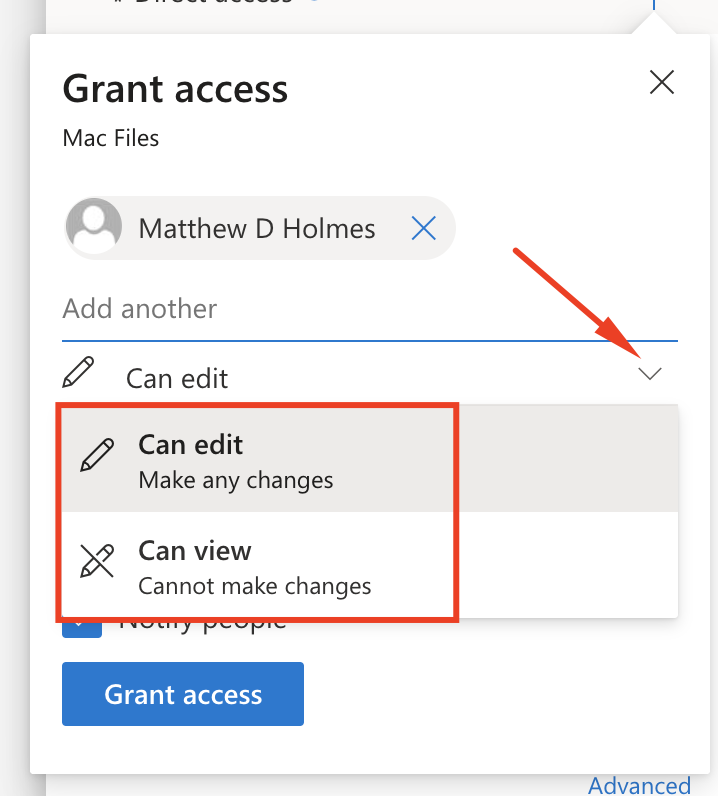 |
| 7. Repeat steps 4-6 if you wish to add more users. | |
| 8. Click the Grant Access button. If the Notify people box is checked, each user will receive an email confirmation stating that they have been granted access to the folder. | 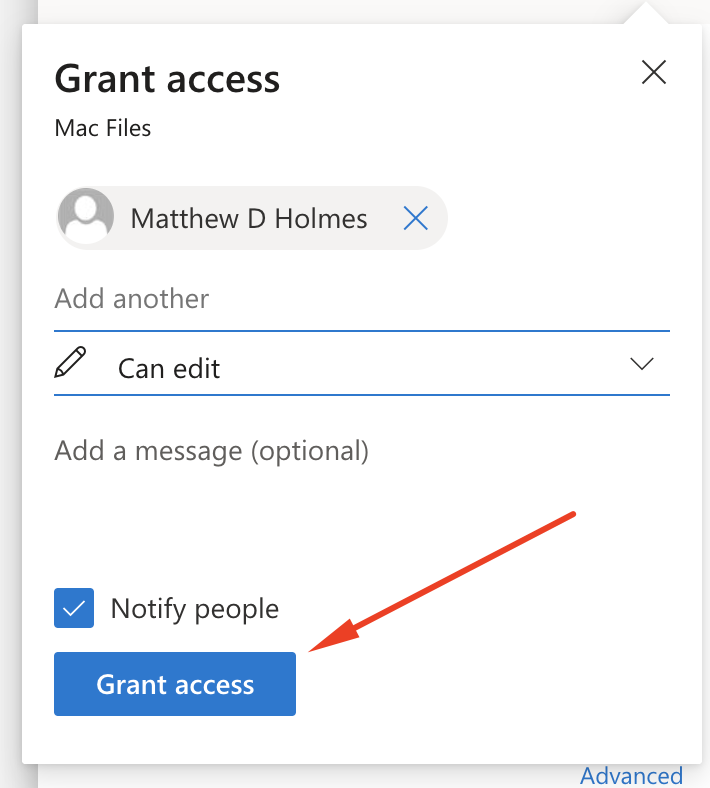 |
Sharing a Folder (Sending a Web Link) from the OneDrive Web Portal
NOTE: Sharing folders using this method will create a shareable web link and may require additional steps for the recipient to access the folder if they do not use a web browser to access the shared folder.
| 1. You will need to log into Microsoft Portal from a web browser (https://portal.office.com) and click on the OneDrive icon. | |
| 2. Find the folder you wish to share and click on the share arrow icon to the right of the folder name. | 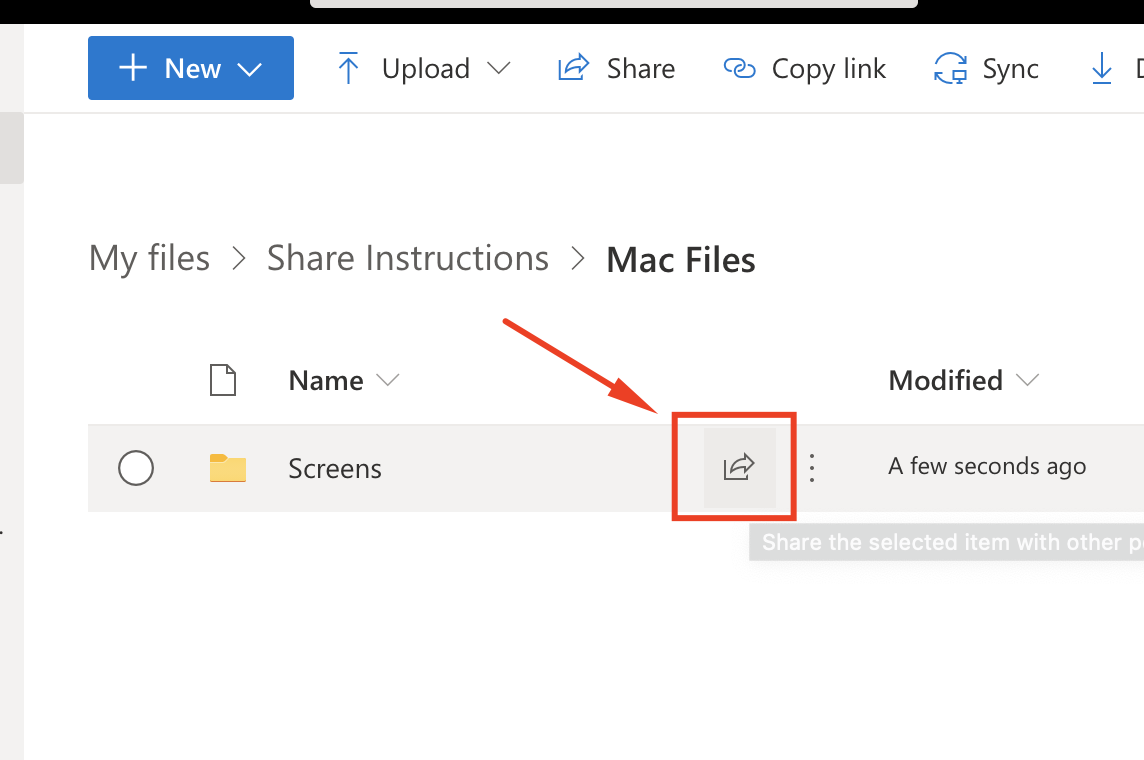 |
| 3. Start typing a persons name and click on their name when it autocompletes. | 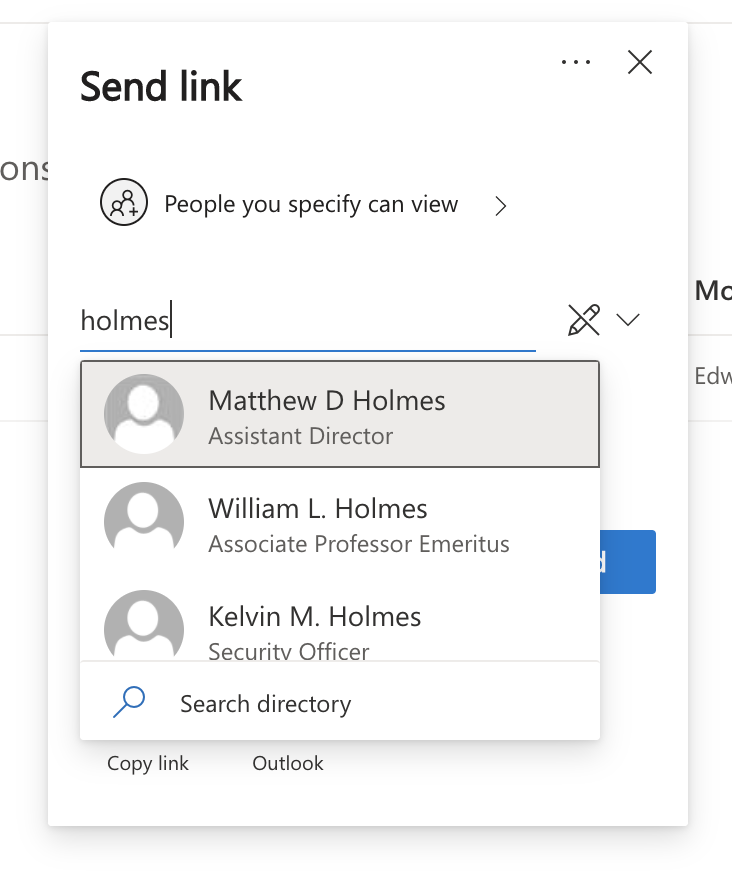 |
| 4. Select either Edit or View access. View only access is the default setting. | 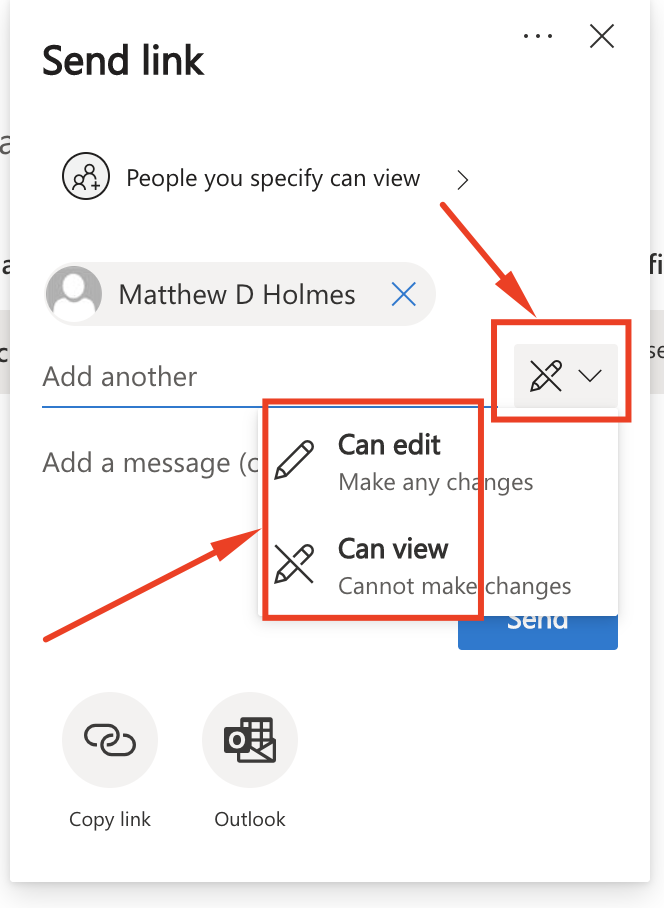 |
| 5. Repeat steps 3 and 4 if you wish to add more users. | |
| 6. Click the Send button. Each user will receive an email confirmation with a link to access the folder. | 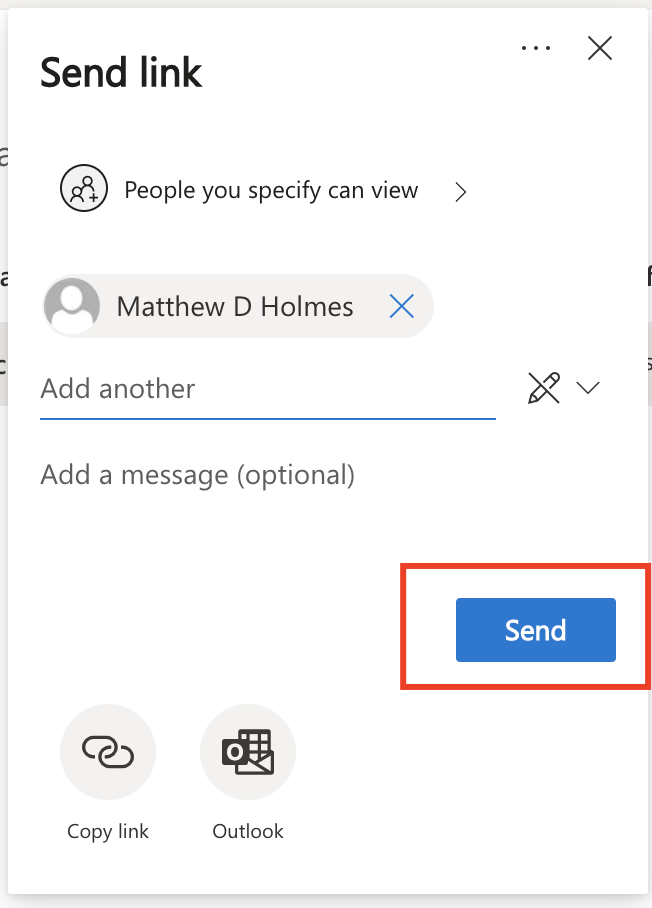 |
Sharing a Folder from Mac OSX Finder (OneDrive Application Already Installed)