
Working with Files in Teams
Microsoft Teams makes it easy to collaborate on files within your team or with people outside of Temple University. You can upload, share, manage permissions, and receive notifications on file changes — all from within the Teams interface. Microsoft Teams integrates seamlessly with SharePoint and OneDrive to provide robust file management capabilities within channels and chats. Each team has a “Files” tab where members can collaborate on documents in real-time. Files shared in standard channels are stored in SharePoint, while those in private chats are saved in the sender's OneDrive. This setup ensures secure access, version history, and simultaneous editing. Users can upload Word documents, PDFs, spreadsheets, images, and more, and they can co-author files directly in Teams using Microsoft 365 apps.
Files in Teams can be easily organized and accessed through multiple methods. Users can open files within the Teams app, online through SharePoint, or on their desktop with the full version of Microsoft Office. Downloading files is straightforward and allows offline access; syncing file libraries through OneDrive ensures users can work with files directly from their file explorer. Files deleted from Teams aren't gone forever—they move to the SharePoint or OneDrive Recycle Bin, where they can be restored within 93 days if needed. Understanding where files are stored and how to navigate these tools helps avoid confusion and lost work.
How-To Guides
Upload a File
Please note you can drag and drop any files into the desired channel.
|
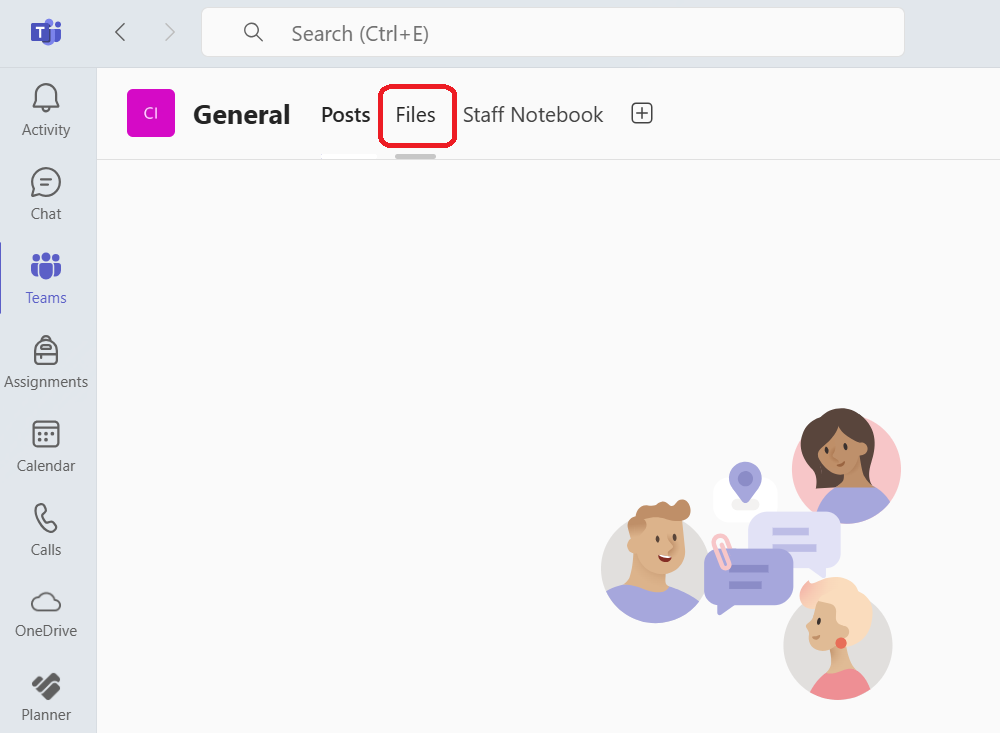
1. In Microsoft Teams go to the desired channel, click the Files tab.
|
 |
|
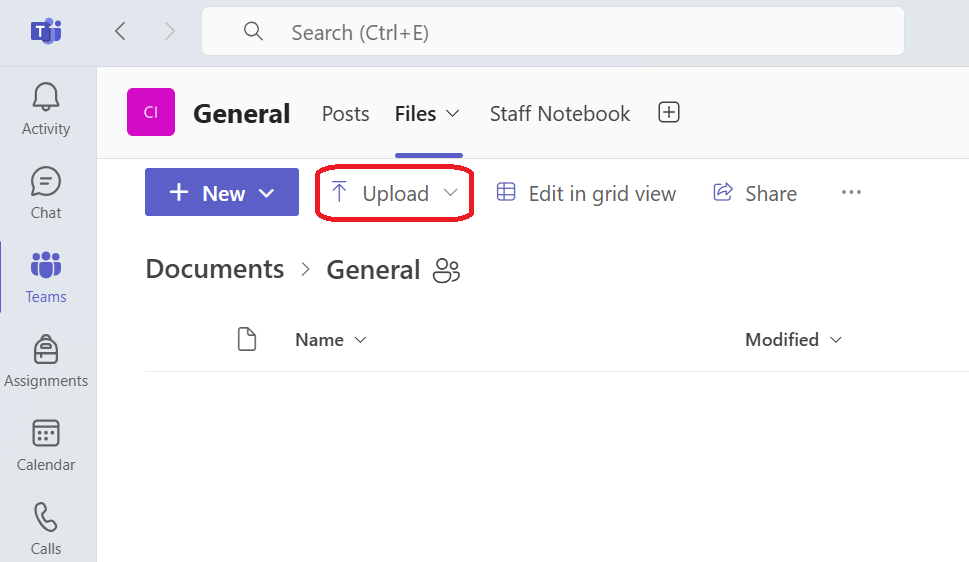
2. Click Upload |
|
|
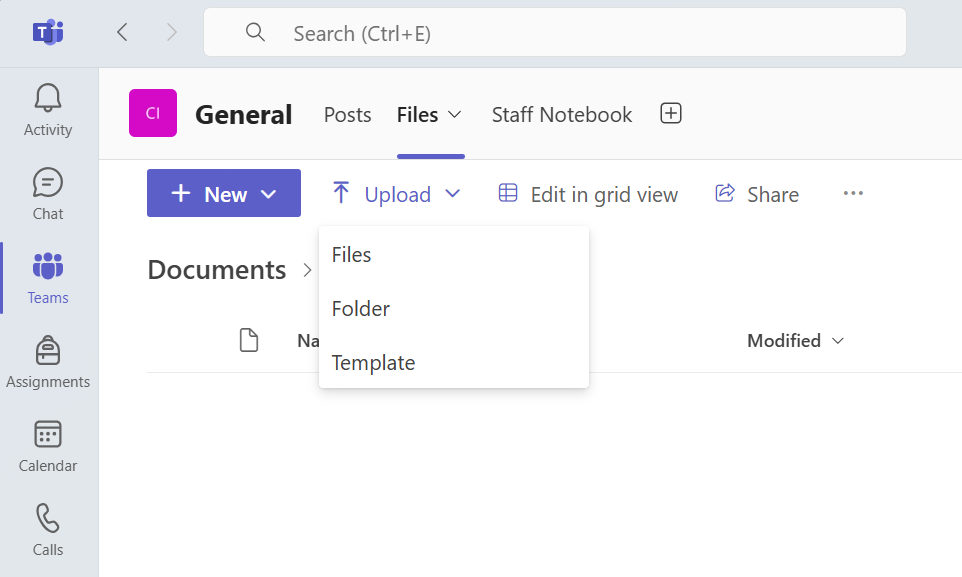
3. From the dropdown menu, select Files or Folder depending on what you would like to upload.
Choose a file from your device. The file will be saved to the team’s SharePoint folder. |
|
Download a File
|
1. In Microsoft Teams go to the desired channel, click the Files tab.
|
|
|
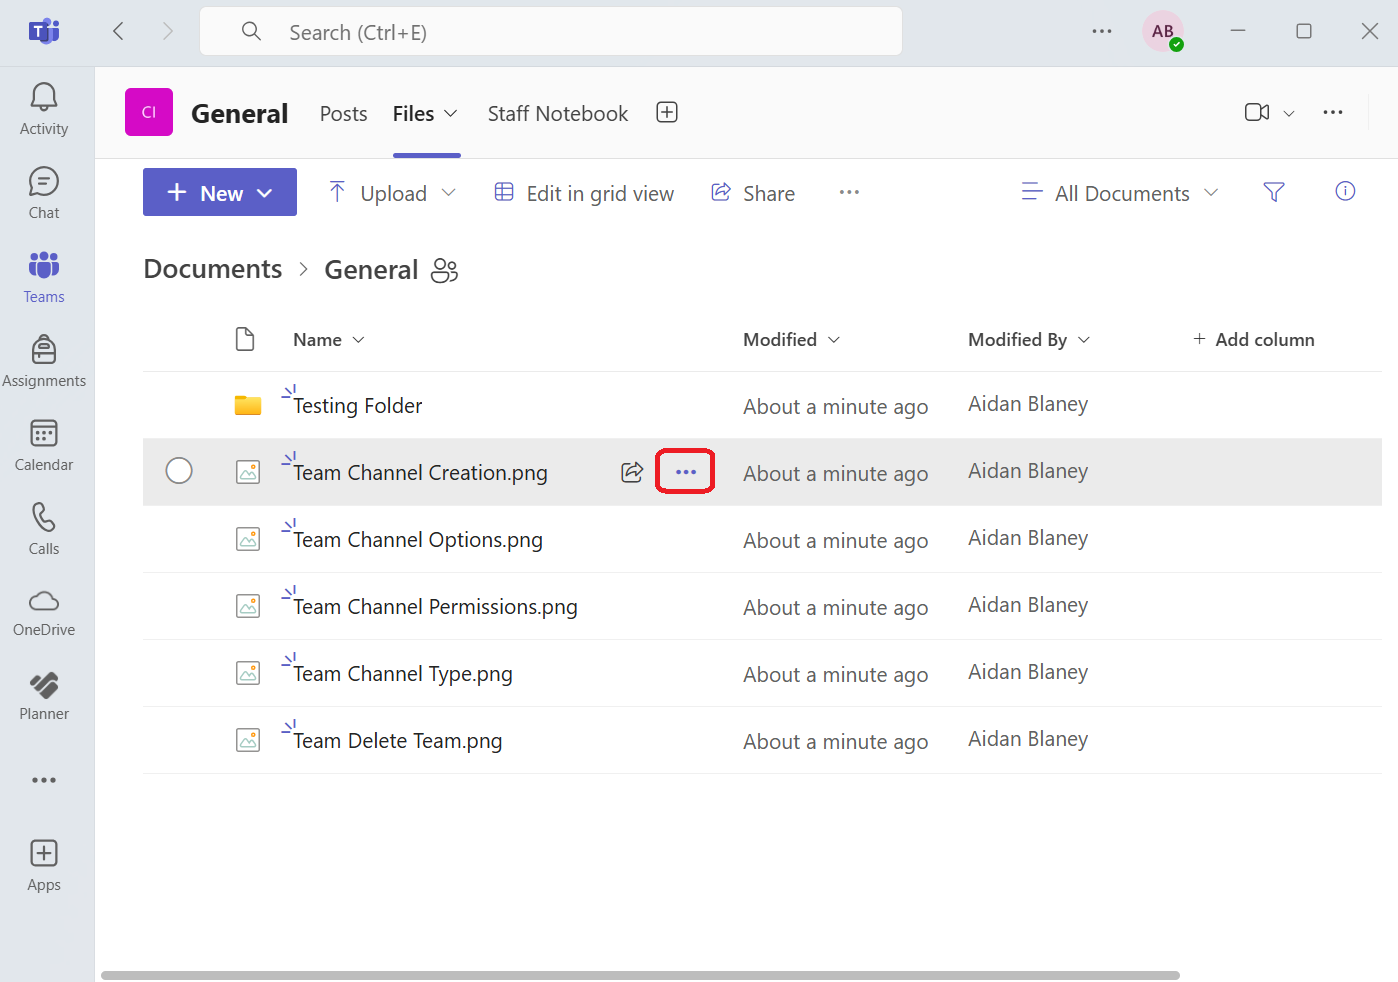
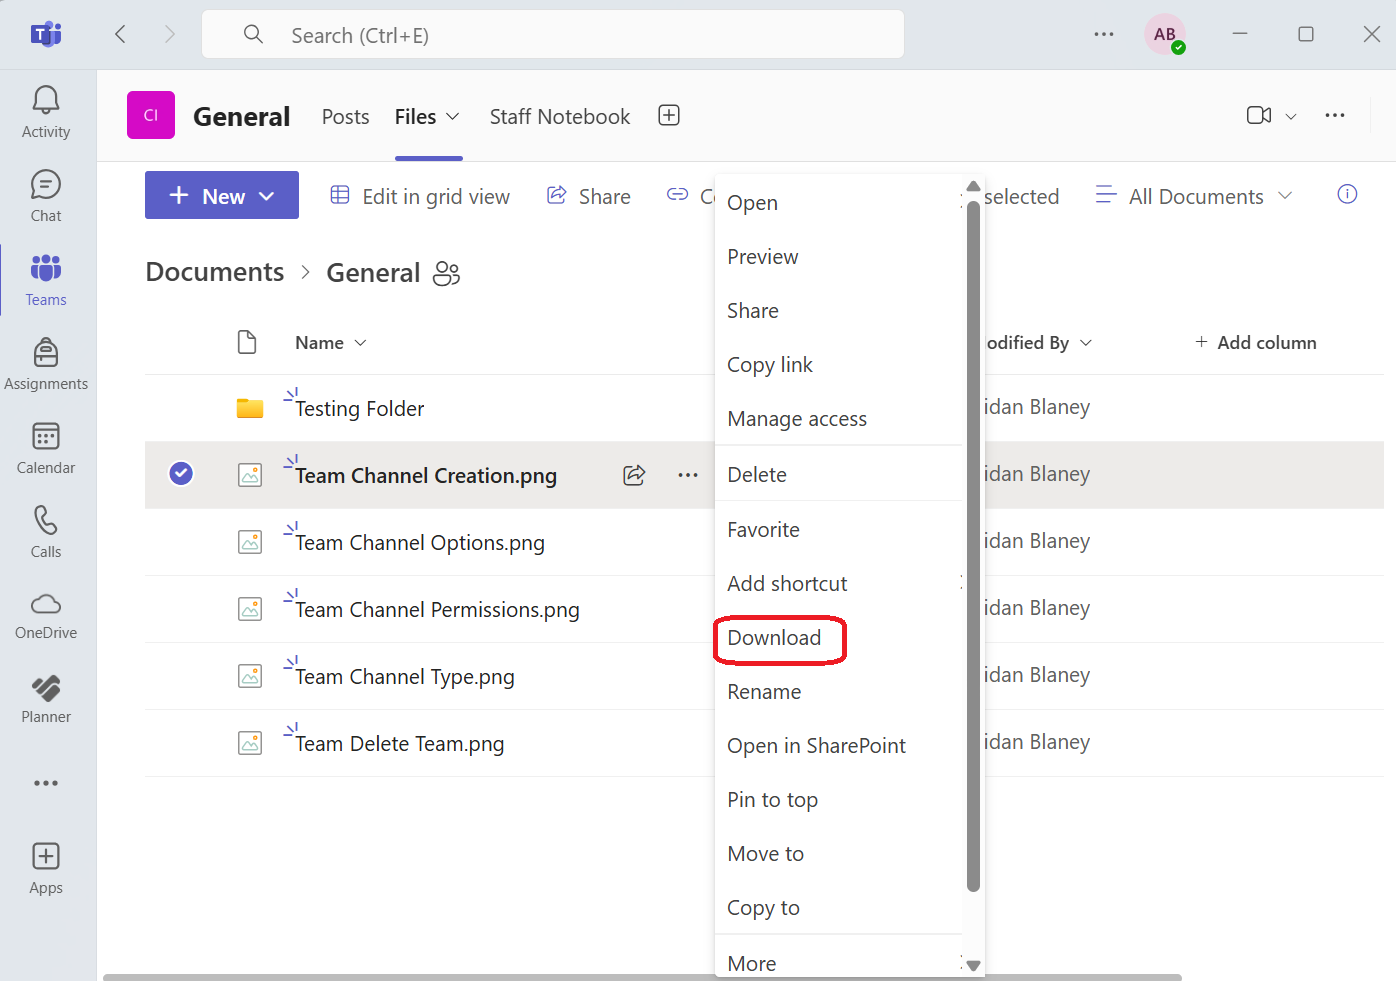
2. Click the three dots (•••) next to the desired file. |
 |
|
3. Select Download.
The file will be saved to your device’s default downloads folder. |
 |
Sync Files for Offline Use
|
1. In Microsoft Teams go to the desired channel, click the Files tab. Please note that you are in the correct folder before proceeding as syncing will take the contents of that folder into your local OneDrive.
|
|
|
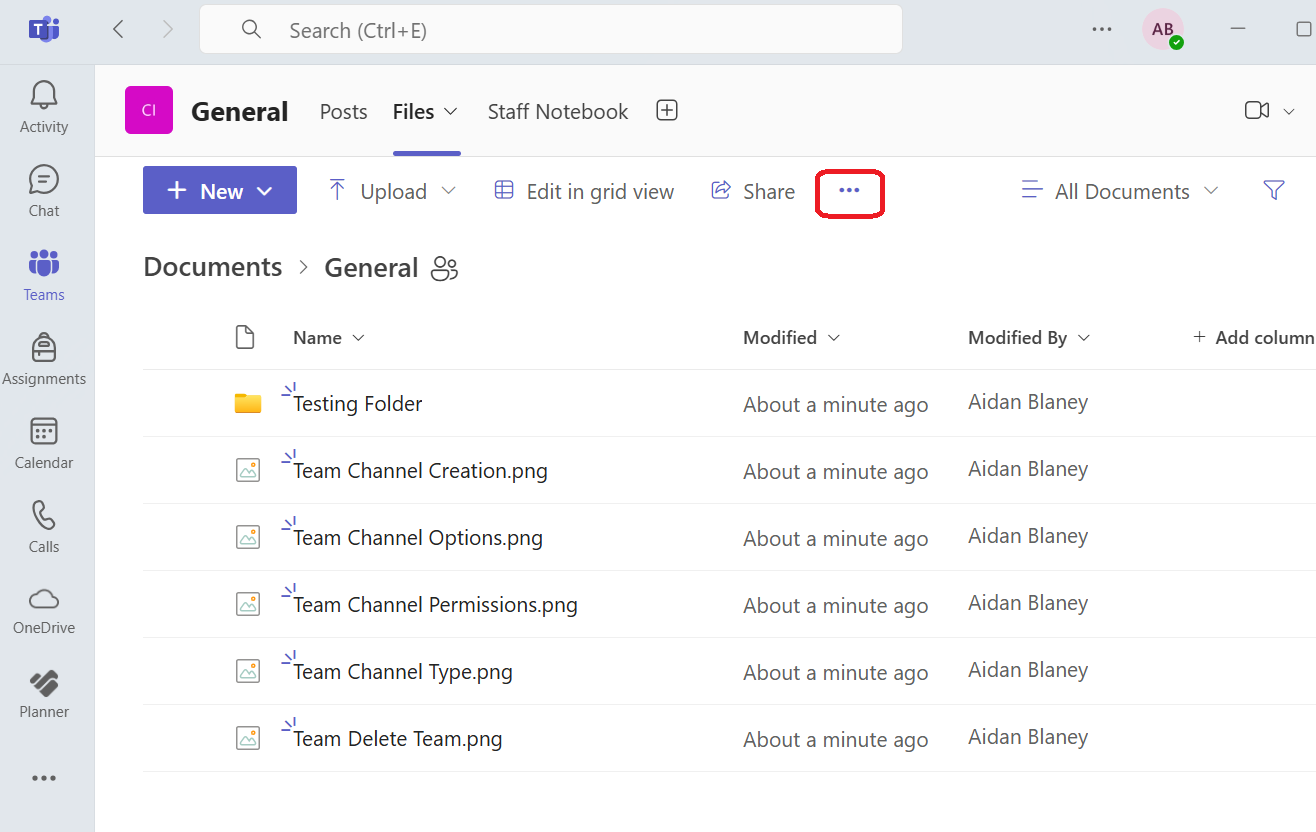
2. Click the three dots (•••) next the ↗️Share icon. |
 |
|
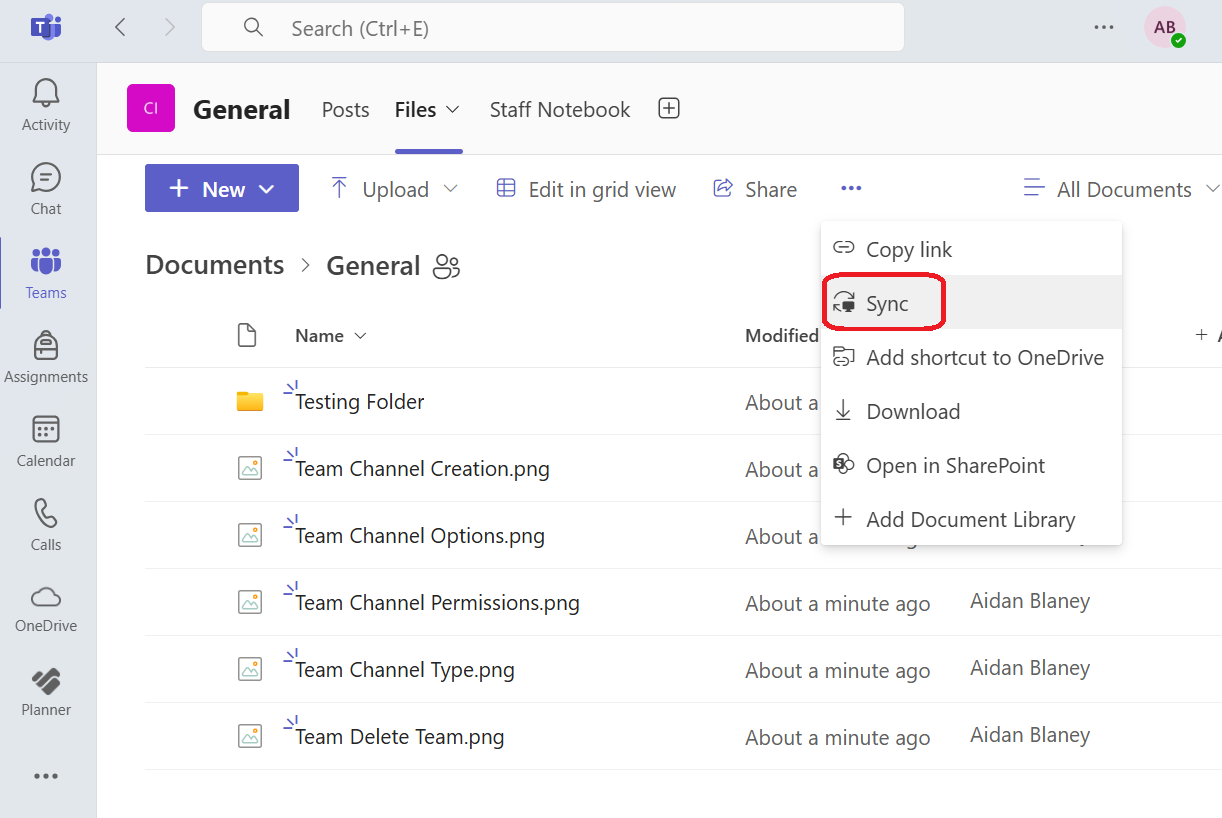
3. Select Sync.
This connects the SharePoint folder to your local OneDrive, allowing you to access and edit files from your file explorer.
|
 |
Delete a File
|
1. In Microsoft Teams go to the desired channel, click the Files tab.
|
|
|
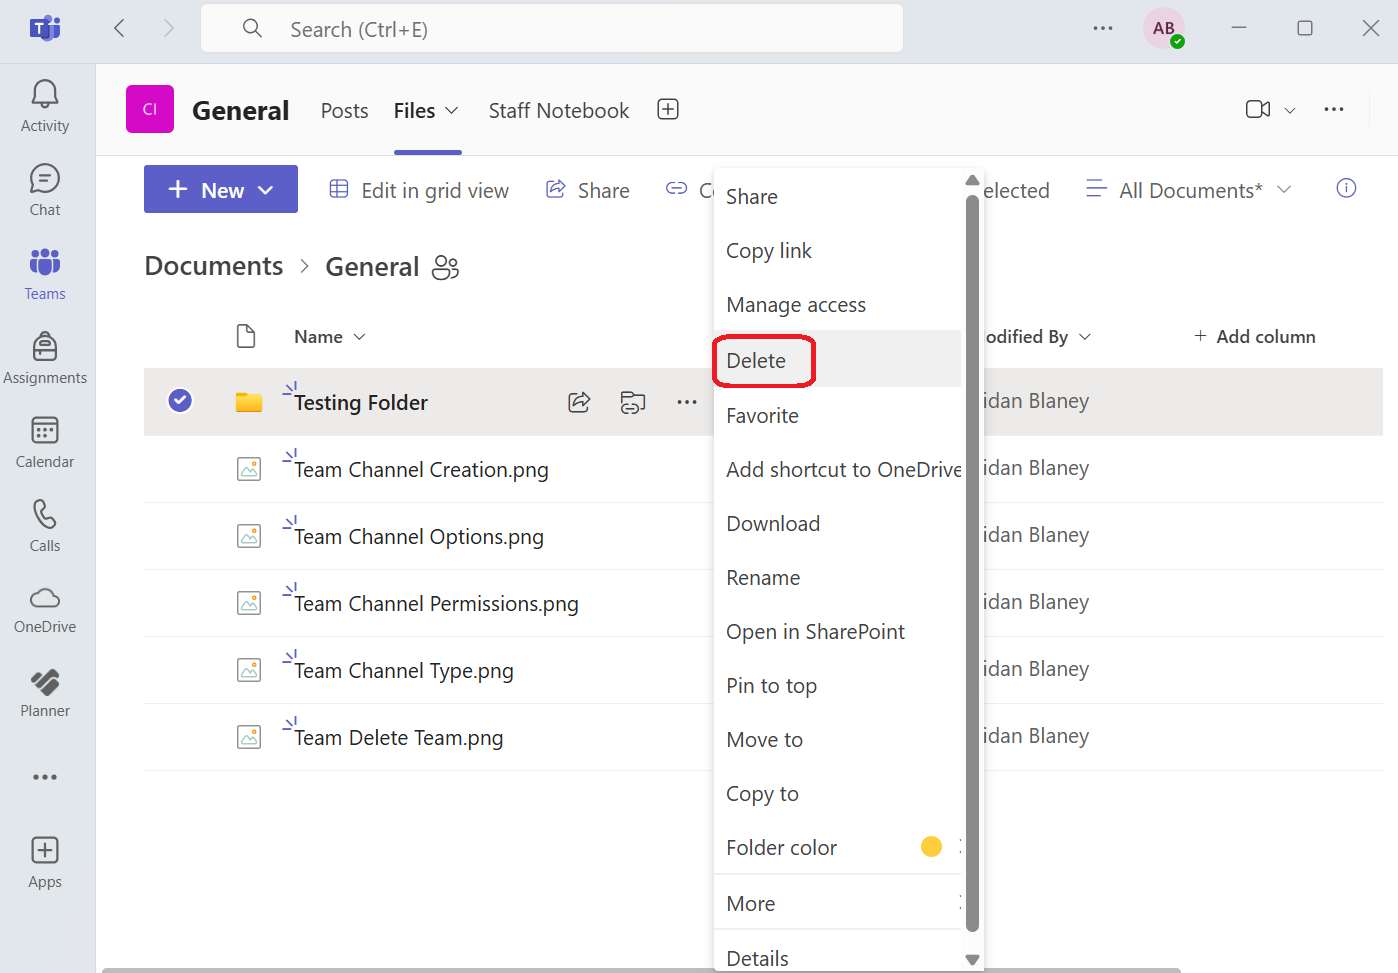
2. Click the three dots (•••) next to the desired file. |
|
|
3. Select Delete.
⚠️Deleted files can be recovered from the SharePoint Recycle Bin if needed. If you need to get back a file that has been deleted click on three dots (•••) next to Share and select SharePoint from the dropdown menu.
|
 |
Video courtesy of the official Microsoft Teams YouTube channel.
Learn how to manage, share, and collaborate on files in Microsoft Teams. This video offers a quick overview of uploading, syncing, and organizing documents for efficient teamwork.