
Schedule & Use Zoom Meetings from a Canvas Course
Schedule online synchronous class sessions using Zoom from within Canvas.
Note: Personal rooms are not recommended for onlineclass courses.sessions. Please
Add Zoom to the steps below to schedule recurring online course sessions through Canvas.
Check that Zoom is Available on the Left Side of Your Course Navigation Menu
Note:(if If younot already see Zoom on the left side, skip to: Schedule Secure Course Meetings
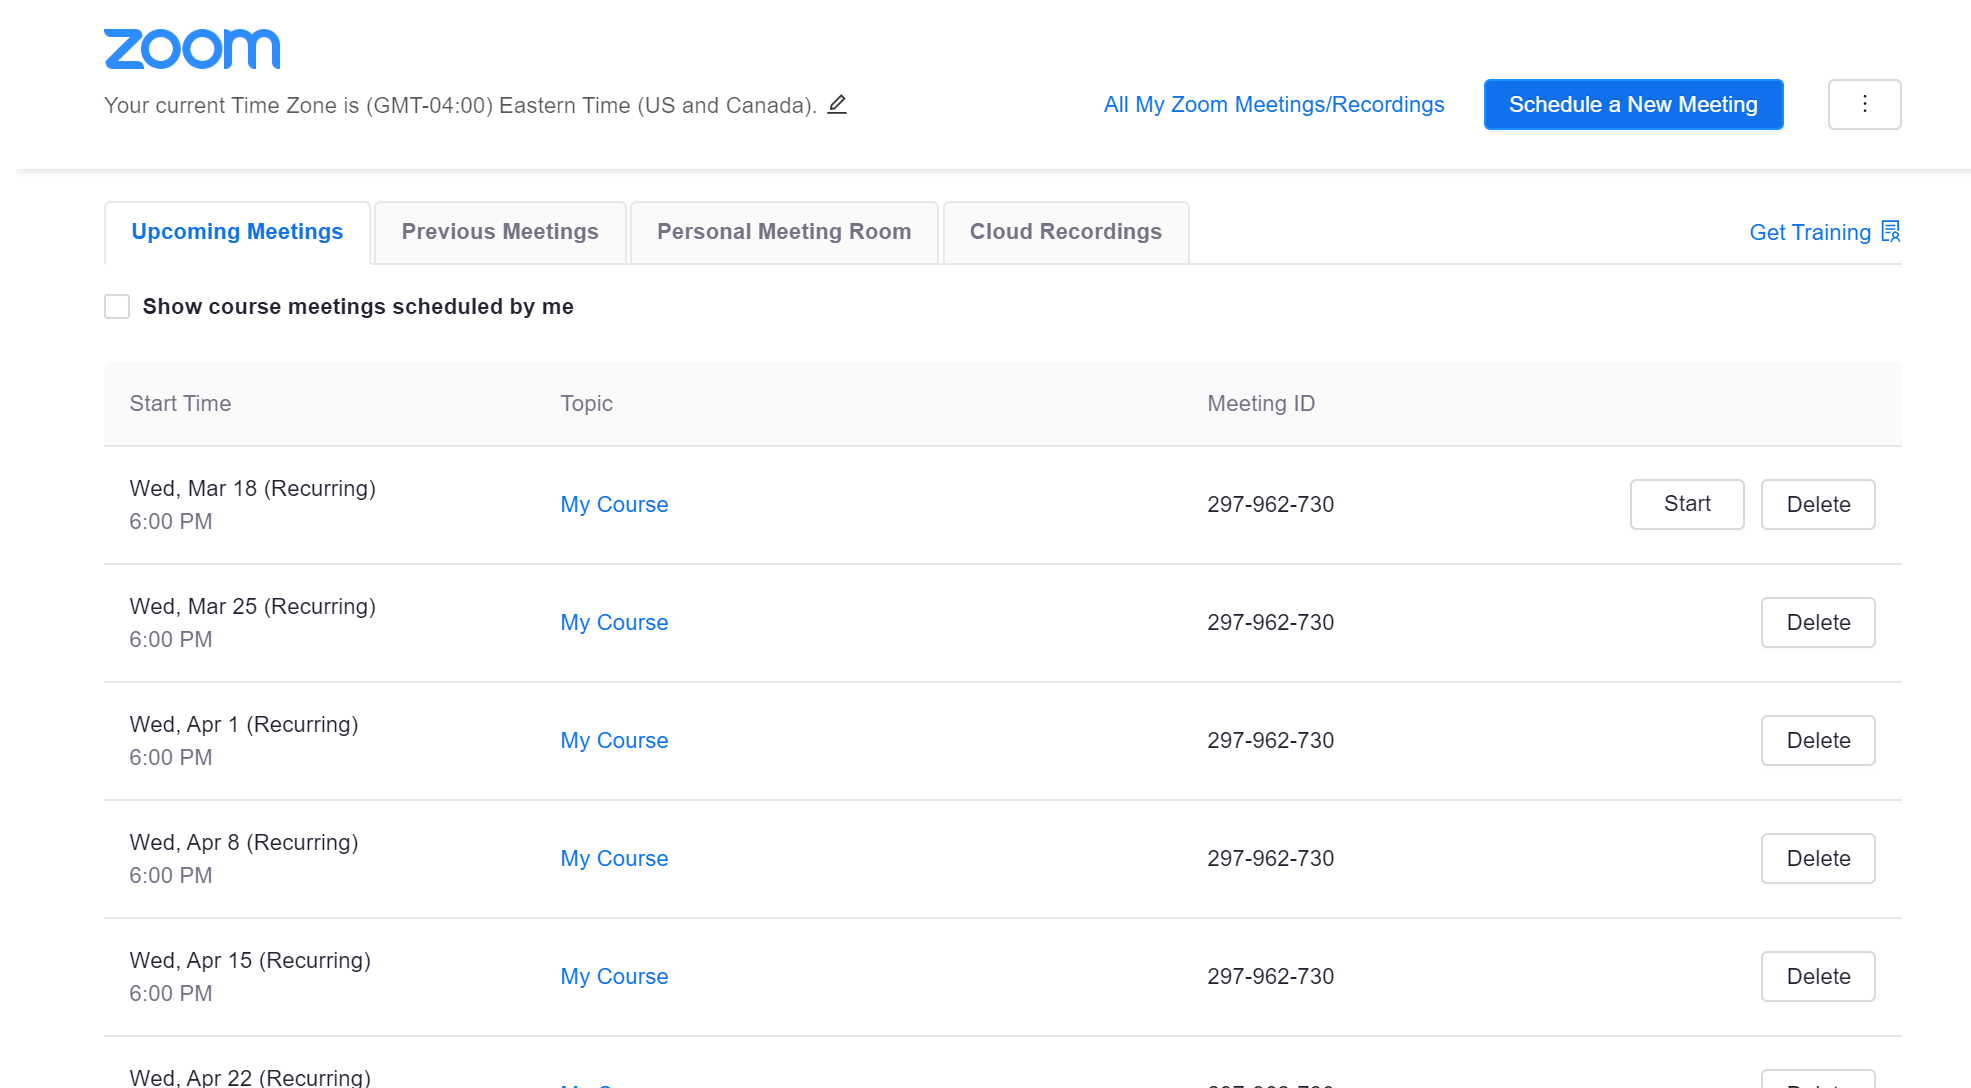
Schedule SecureZoom CourseMeetings:
Meetings
- Click on Zoom
onfromleft-sidethe course navigationmenu in your Canvas course- menu.
- Click on Schedule a New Meeting.
- Fill settings
Selectoutyourthe meetingsettings.- - frequency information.
Ifif this is a recurring meeting,click onselect Recurring Meetingtherecurrencefrequency. - Scroll down to check
thatthe box next to Enable Waiting Roomis selected. - Click Save.
By default, the waiting room is configured so users,users who are not logged in through their Temple account,account will be placed in the waiting room, and they will not be admitted into your meeting until you admit them, if you choose. So, ifIf you have a guest speaker,speaker who is from outside of Temple University, they will be placed into the waiting room and you can allow them to enter the meeting.
Edit Meeting Settings
- Click on Zoom from the course navigation menu.
- Click on the meeting that you scheduled.
- Scroll down and click on Edit Meeting.
- Make any changes and click on Save.
Start a Meeting
- Click on Zoom from the
left-side Canvascourse navigation menu. - Click
theon Startbuttonnext tolaunchthataday'sscheduled meeting.
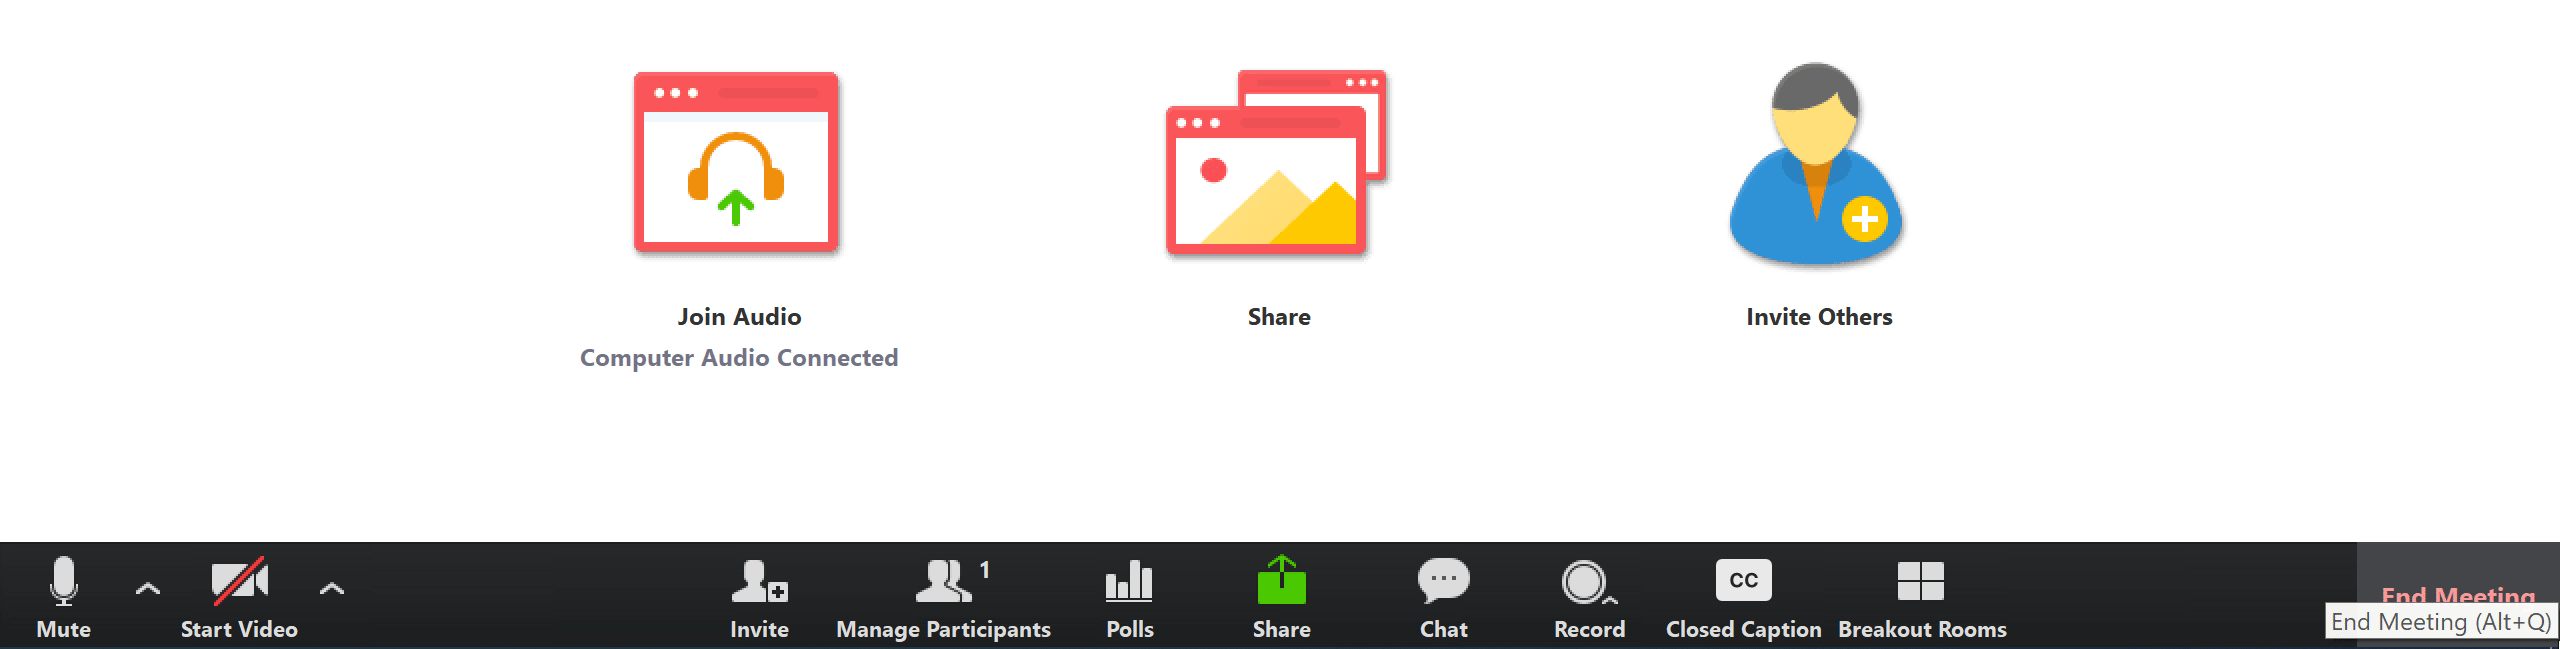
The Security button in Zoom enables easy access to control access to features during your meeting. Click on Security in the meeting control bar to do any of the following:
Enable Waiting RoomChose whether to allow participants to share screen, chat, unmute, and/or rename themselvesRemove ParticipantLock the meeting
Delete a Scheduled Meeting
Only
- Click on Zoom from the
meetingcoursecreatornavigationcan delete a meeting that has been created using the Zoom for Canvas tool. To delete a meeting:- menu.
- Click
On the Upcoming Meeting list, clickon Deletenextfor the session you would like tothedelete.meeting- Then select Delete this event only or Delete all events (if you wish to
be deleted. - Then select Delete this event only or Delete all events (if you wish to
ClickOKindelete thepop-up dialog to confirm that the meeting is to be deleted.
The
Accessing isCloud removedRecordings
View Recordings from Canvas
- Click on Zoom from the
Canvascoursecalendar,navigationandmenu. - Click on Cloud Recordings.
- Click on a
newrecording.conversation
Record Your Meeting to the Cloud
Start a Recording
After you have started your meeting, click
Pause a Recording
To pause a Zoom recording, hover over the bottom of the Zoom window and click on Pause:
To pause a recording when screen-sharing, hover your cursor in the middle of the top of the screen. Then click on More and click Pause Recording.
Stop a Recording
To stop a Zoom recording, hover over the bottom of the Zoom window and click on Stop Recording:
Accessing Recordings
Display Recordings
Download a Recording
- Click
Playfrom athe Recording
course navigation
menu.Delete a Recording or Recover a Deleted Recording
- Click on Zoom from the course navigation menu.
- Click on Cloud Recordings.
- Click on Delete next for the recording you wish to delete.
- A window will open saying "Move All Files to the Trash?" Click on Yes.
Remember to Post Recording Reminders to your Class
At the start of each live Zoom session that you are recording, it is important to remind students that you are recording the class in order for them to review later or for classmates, who can not attend class, to view. Please add the following language to your Canvas page and remind students at the beginning of each recorded sessions:
"In an effort to provide equitable access to all students in this class, I will be recording this class session. If anyone has a concern, please feel free to let me know. If at any point during the session, you would like me to pause the recording, please let me know and I am happy to pause the recording."